How To : Valve Adjustment Pics & Video (GY6 / 139QMB)
Feb 17, 2010 11:43:32 GMT -5
2strokd and jstich like this
Post by 90GTVert on Feb 17, 2010 11:43:32 GMT -5
This information was provided by jmstar50.
Valve Adjustment
You may or may not need to remove some body panels for this job. You might need a flashlight and something soft to kneel down or lay on, as well as a set of sockets and wrenches, a Phillips screwdriver, a set of feeler gauges and a pair of pliers.
NOTE: THIS SHOULD BE DONE ON A COLD ENGINE!!!
1. Place the scooter on the center stand.
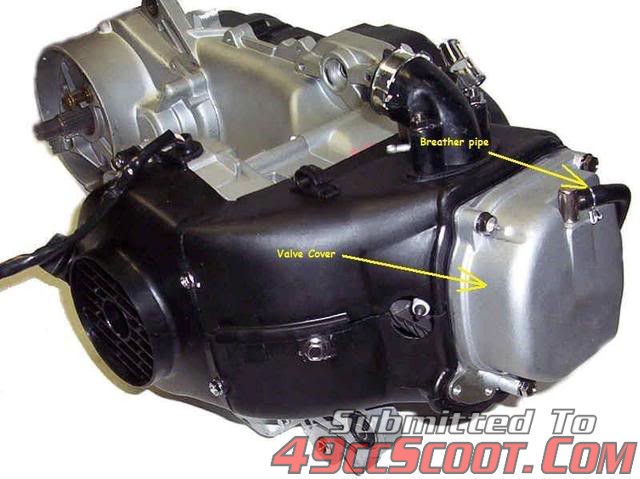
2. Remove the breather pipe from the valve cover.
3. Remove the valve cover from the engine. There is no need to drain the oil. Some engines will have a metal tube that's in the way. Remove the two bolts holding the tube to the head and the valve cover/tube will come off as a unit.
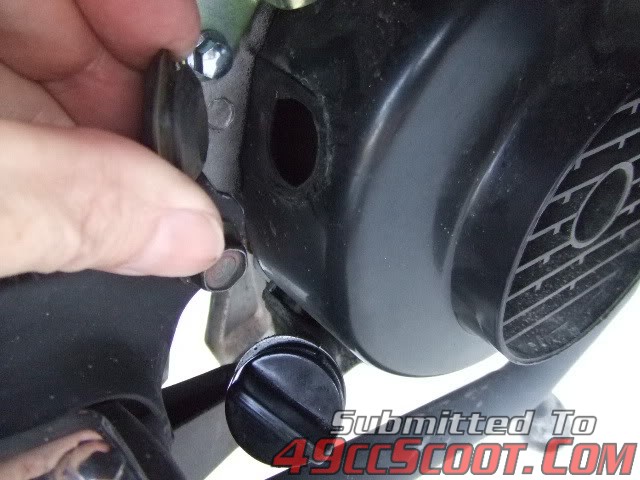
4. Remove the cooling fan shroud from the right side of the engine to expose the flywheel. There is a 1 inch diameter access plug in the fan shroud for timing mark viewing with a flashlight, however it's better to remove the entire cover to familiarize yourself with the marks if it is the first time you are performing this task.

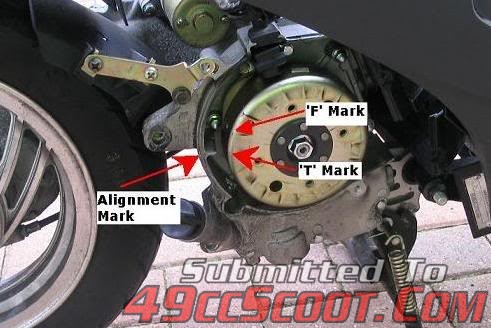
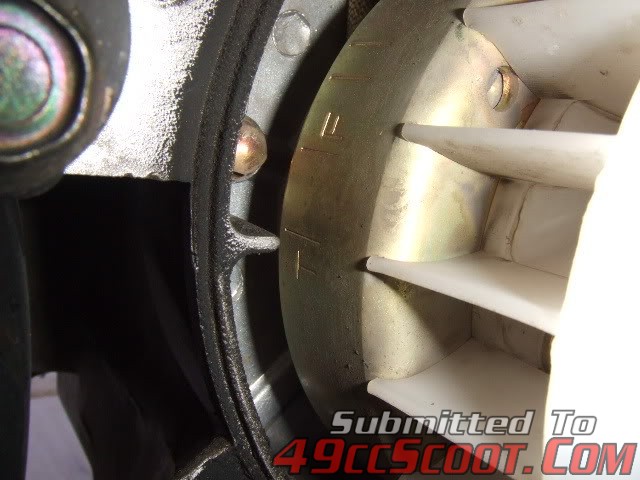
5. Turn the engine to line up the T mark on the flywheel with the alignment mark on the engine case as shown below. This places the piston at the top of it's stroke and assures the valves are closed. Ignore the F mark.
IMPORTANT! At no time during the adjusting process should you allow the flywheel to move!
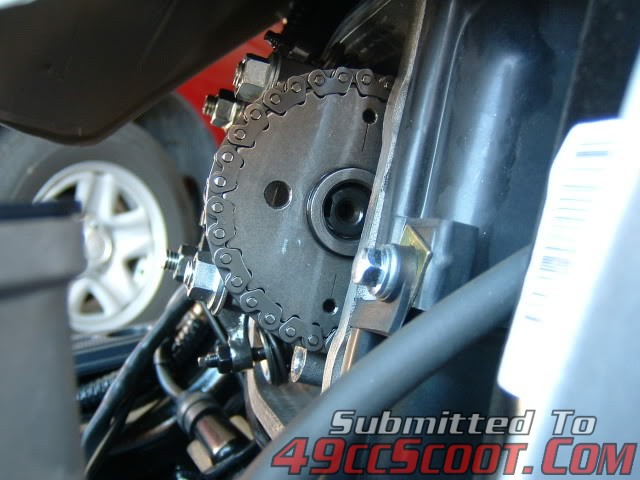
The three cam sprocket holes should be aligned with the larger hole at 12 o'clock and the two smaller holes at 9 and 3 o'clock in relation to the head as shown below. If the T mark is aligned but the holes on the cam sprocket are not, rotate the flywheel 360° (1 full turn) and then it should line up correctly. Both valves are adjusted with the cam in this position.
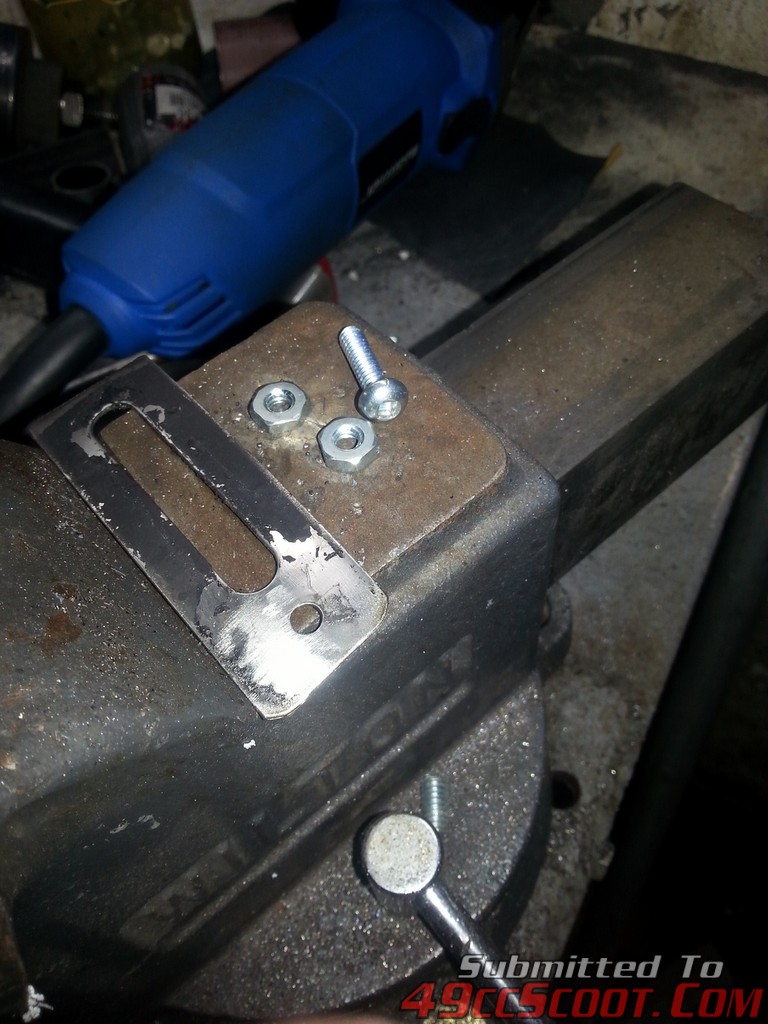
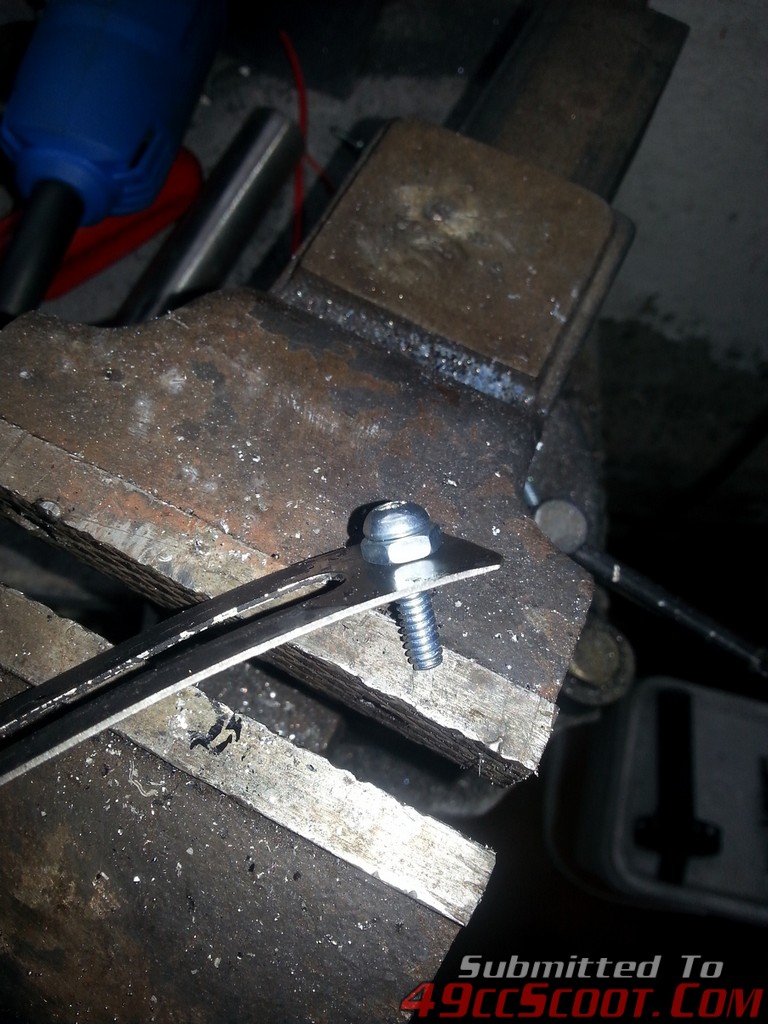
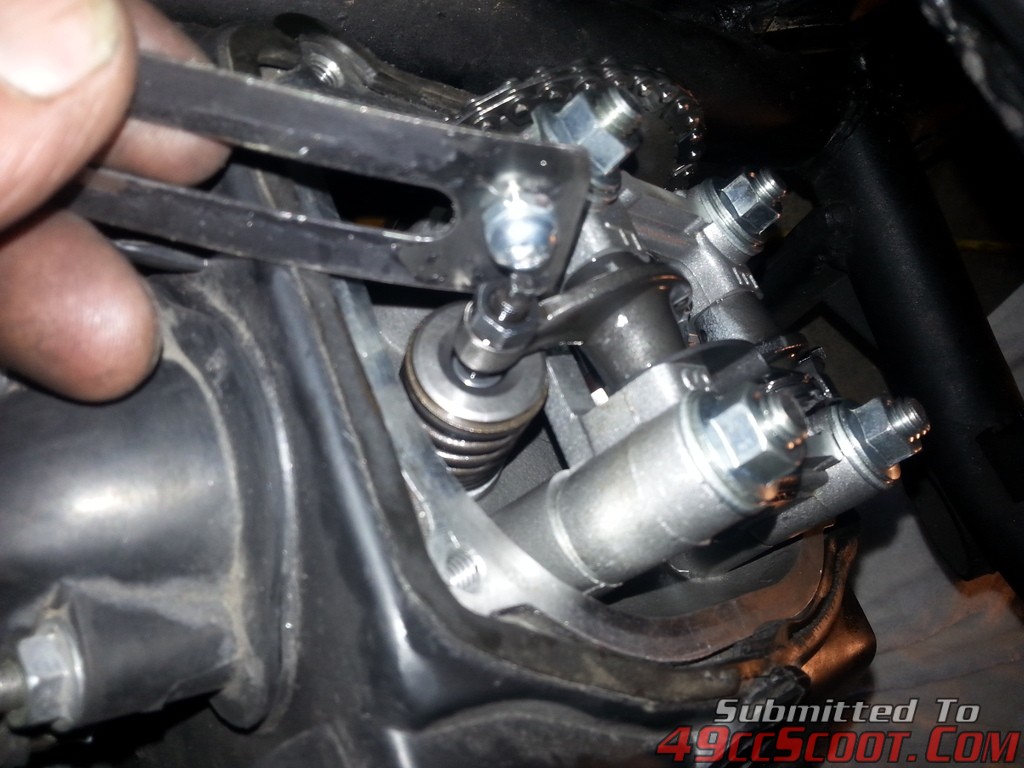
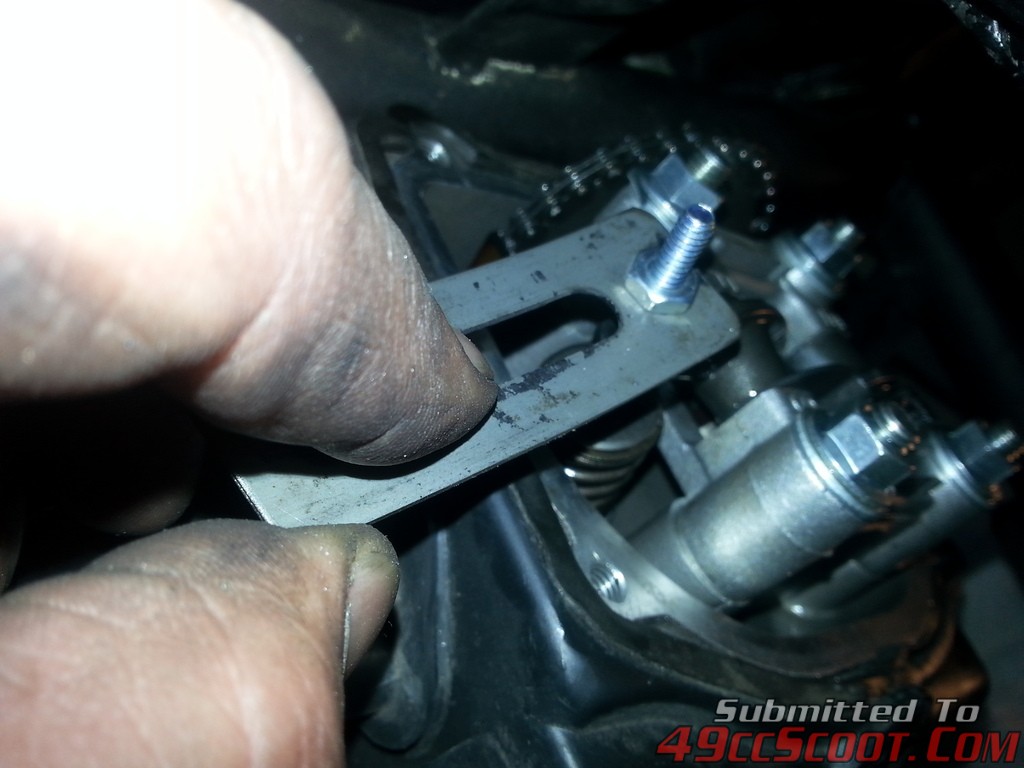
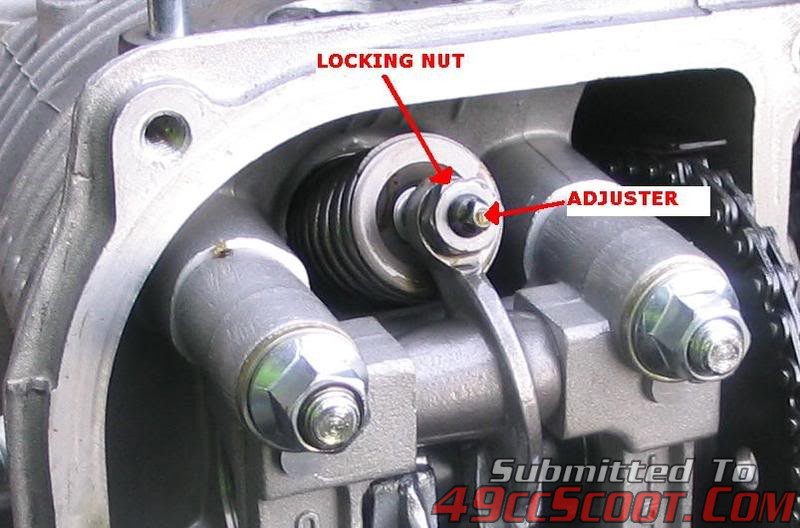
6. Loosen the 9mm lock nut on the adjuster and using a gauge placed in the gap, turn the adjuster screw until the gauge is snug but not tight in the gap as shown in the following pics. The manual says .05mm for both valves. That's about .002 - .003 in. It helps to bend the tip of the gauge to get into tight places.
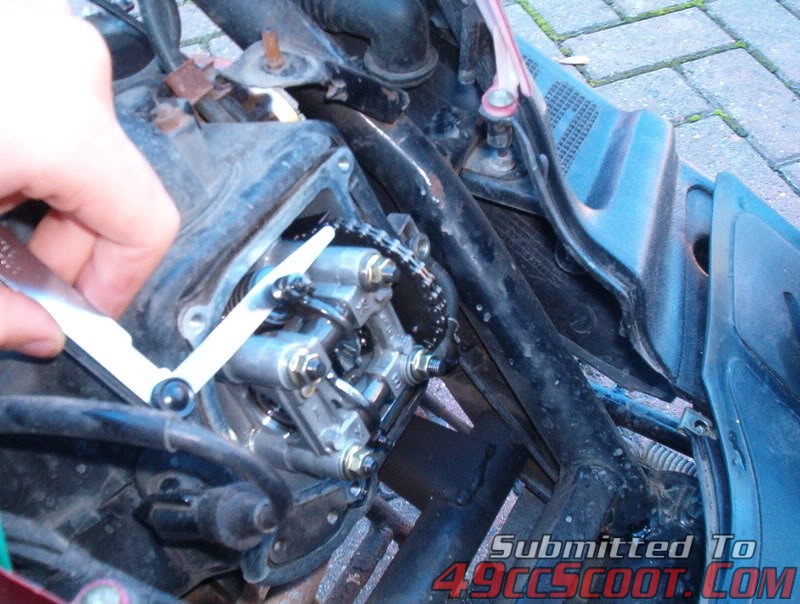
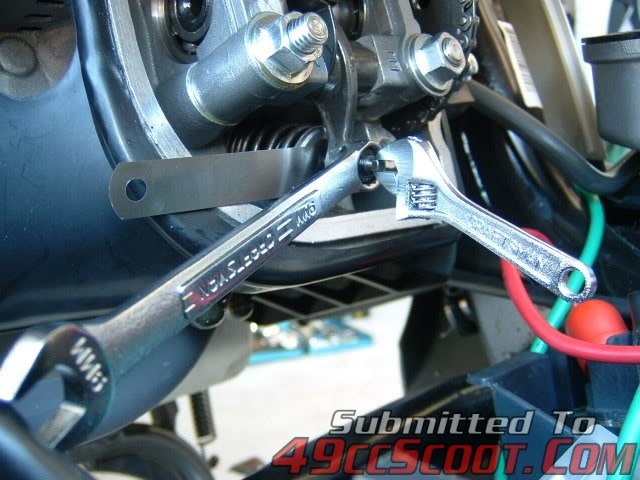
7. Now the tricky part. Tighten the locknut without allowing the adjuster screw to move. This usually requires holding it with a pair of needle nosed pliers or some other tool while tightening the lock nut with a wrench, and may require a couple or more attempts to get it just right. Leaving the gauge in the gap while tightening the locknut is helpful. Again, you want the gauge to be snug but not tight in the gap after the locknut is tightened.
Tighten the locknut very tight. Don't break the rocker arm, but the last thing you want is for it to loosen up on you 35 miles from home.
8. Repeat the process on the other valve.
9. Replace the valve cover and tighten the bolts in a criss-cross pattern.
There is no need for a new gasket.
10. Re-attach the breather pipe to the valve cover.
11. Replace the fan shroud.
12. Re-adjust the idle mixture screw according to this guide:
49ccscoot.proboards.com/index.cgi?board=carb&action=display&thread=429
13. You are done!
Valve Adjustment
You may or may not need to remove some body panels for this job. You might need a flashlight and something soft to kneel down or lay on, as well as a set of sockets and wrenches, a Phillips screwdriver, a set of feeler gauges and a pair of pliers.
NOTE: THIS SHOULD BE DONE ON A COLD ENGINE!!!
1. Place the scooter on the center stand.
2. Remove the breather pipe from the valve cover.
3. Remove the valve cover from the engine. There is no need to drain the oil. Some engines will have a metal tube that's in the way. Remove the two bolts holding the tube to the head and the valve cover/tube will come off as a unit.

4. Remove the cooling fan shroud from the right side of the engine to expose the flywheel. There is a 1 inch diameter access plug in the fan shroud for timing mark viewing with a flashlight, however it's better to remove the entire cover to familiarize yourself with the marks if it is the first time you are performing this task.


5. Turn the engine to line up the T mark on the flywheel with the alignment mark on the engine case as shown below. This places the piston at the top of it's stroke and assures the valves are closed. Ignore the F mark.
IMPORTANT! At no time during the adjusting process should you allow the flywheel to move!


The three cam sprocket holes should be aligned with the larger hole at 12 o'clock and the two smaller holes at 9 and 3 o'clock in relation to the head as shown below. If the T mark is aligned but the holes on the cam sprocket are not, rotate the flywheel 360° (1 full turn) and then it should line up correctly. Both valves are adjusted with the cam in this position.

6. Loosen the 9mm lock nut on the adjuster and using a gauge placed in the gap, turn the adjuster screw until the gauge is snug but not tight in the gap as shown in the following pics. The manual says .05mm for both valves. That's about .002 - .003 in. It helps to bend the tip of the gauge to get into tight places.


7. Now the tricky part. Tighten the locknut without allowing the adjuster screw to move. This usually requires holding it with a pair of needle nosed pliers or some other tool while tightening the lock nut with a wrench, and may require a couple or more attempts to get it just right. Leaving the gauge in the gap while tightening the locknut is helpful. Again, you want the gauge to be snug but not tight in the gap after the locknut is tightened.
Tighten the locknut very tight. Don't break the rocker arm, but the last thing you want is for it to loosen up on you 35 miles from home.

8. Repeat the process on the other valve.
9. Replace the valve cover and tighten the bolts in a criss-cross pattern.
There is no need for a new gasket.
10. Re-attach the breather pipe to the valve cover.
11. Replace the fan shroud.
12. Re-adjust the idle mixture screw according to this guide:
49ccscoot.proboards.com/index.cgi?board=carb&action=display&thread=429
13. You are done!


