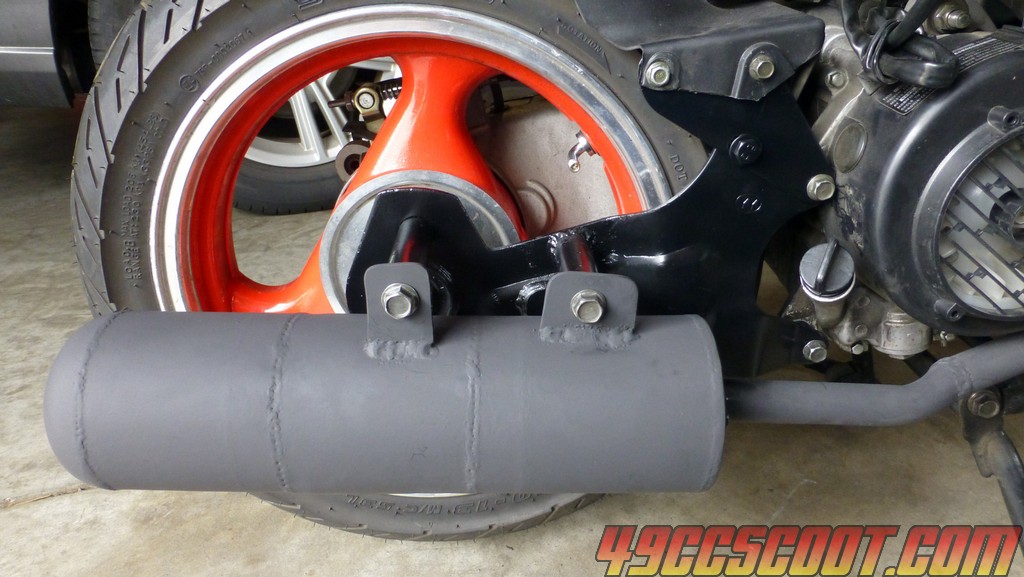
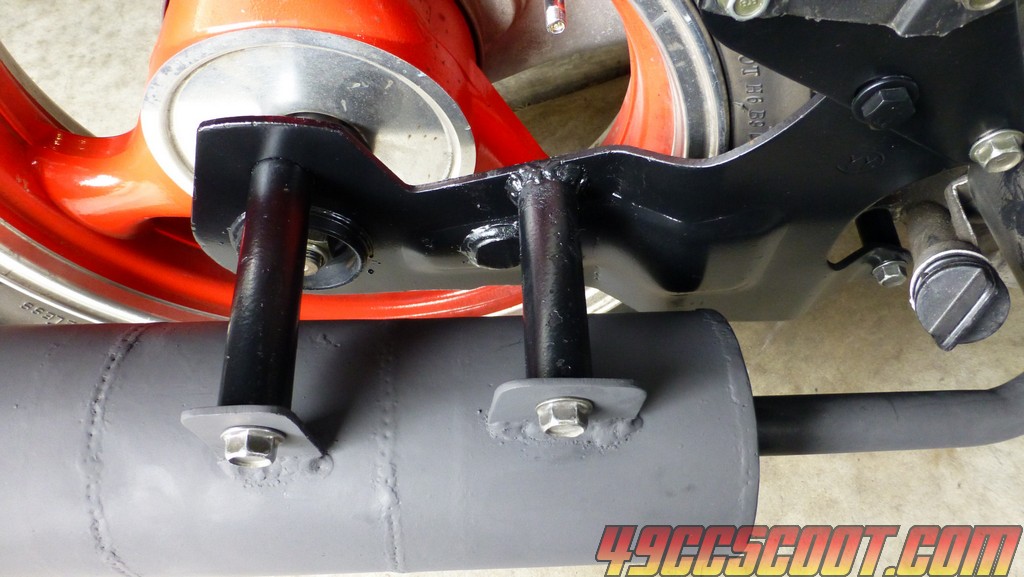
Here's a better looking version of the chambered muffler with build info below. I don't think it has quite the deep thud of the box style, but it's much less conspicuous.
www.youtube.com/watch?v=udq3ZwbLTJ8
I was going to leave the stock exhaust, but I thought with a cam, more compression, porting, and pod filter; maybe I should try a different pipe. I started by picking up a header. I didn't want to spend a lot so I went with a $30 (+ shipping) header from gy6store2015 on eBay.

It's a little larger than stock. Not huge like some GY6 headers on the market (that carry matching price tags). The stock header is 19mm ID at the inlet and outlet. The new header is 21mm at the inlet and 22.5mm at the outlet.


Unfortunately the bends are low quality and pinch down, but they're still a little larger than stock.


Now I need a muffler. Ah, my muffler kit arrived!
*Some assembly required.
I didn't want the perforated tube/glasspack muffler that pretty much every other four-stroke scooter uses. Years ago, I built a chambered muffler for this scooter's previous owner. It was a small version of a chambered muffler like you could find on modified cars and trucks. The boxy design was not very appealing, but I loved the sound. It was more deep and mellow than other small engine pipes I've heard. I used to turn around thinking some car or truck was coming up behind me at red lights when we rode together because of the low rumble. I don't think the video did it justice, but this is it :
There were 2 issues with it. I already mentioned the appearance. The other problem was that it developed some nasty rattles over time because I struggled to get it all welded with the way I assembled it. The goal here is to have a cylindrical version that I could construct in a way allowing me to weld each piece so it won't rattle apart later. This is the design I used.

I also didn't want to spend forever fabricating it. This stuff always takes time, but I'm not going to build domes so I needed to source those. I used 16 gauge 4" OD exhaust pipe for the casing. The domes were 4" OD post caps that are 0.100" thick. I planned to buy a sheet of 16ga steel to cut the other baffles and use a piece of 1/8" I had for the flange end, but while searching for domes I found an ebay seller offering 4" OD discs in 1/16" and 1/8" thick at a low price. I ordered some of those and a couple of 6" discs in case I had some use for them and the cost wasn't that much worse than if I just bought a big sheet of steel, but it saved a ton of time for me. The ebay seller for the discs was lumberjack1983. The pipe caps came from 114pressman on eBay. Altogether, I spent about $60 for the metal and have spare metal.
I traced the header's outlet flange onto the 1/8" steel disc and drilled the bolt holes and a small hole in the center. I matched the flange to the header. Then I made the flange slightly larger than the header so if there's a little mismatch it will open up rather than hitting a lip. I welded nuts to one side of the disc to make bolting it up easy.


The first dome had to be cut down so it could fit inside of the 4" pipe. The rear baffle is a 1/16" disc cut to fit the pipe. Both have just over 1 1/8" holes in their centers. The end piece is a dome with a hole matching the size of the inlet of the muffler. The < baffles are 4" discs that I bent and took a little off to make them fit in the 4" pipe.

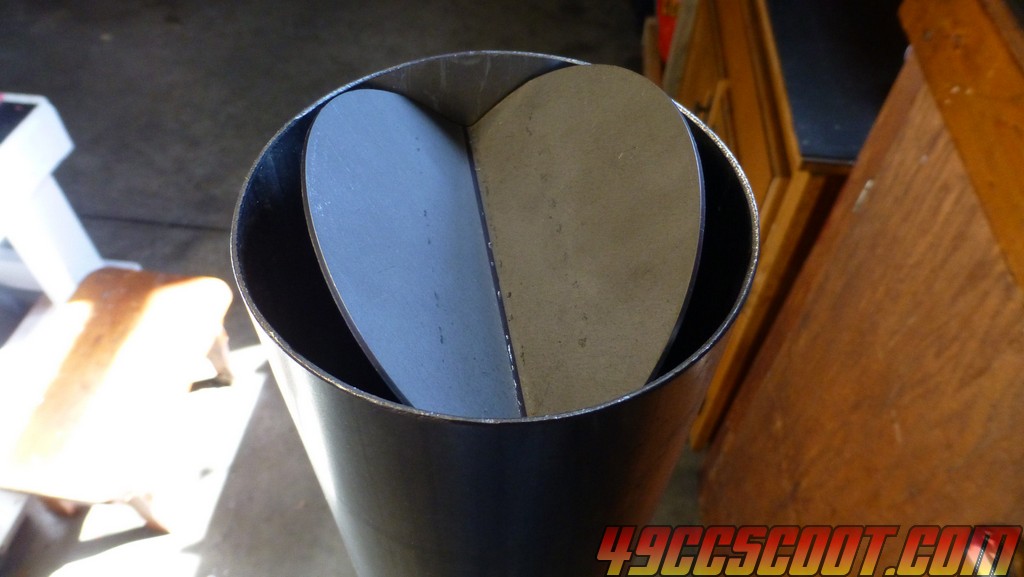

Then I cut the 4" pipe into pieces so I could weld 2 things into each, making it possible to weld each thoroughly. Here are the parts laid out in order.

I assembled each section. I welded around each baffle as much as I could to help avoid rattles.

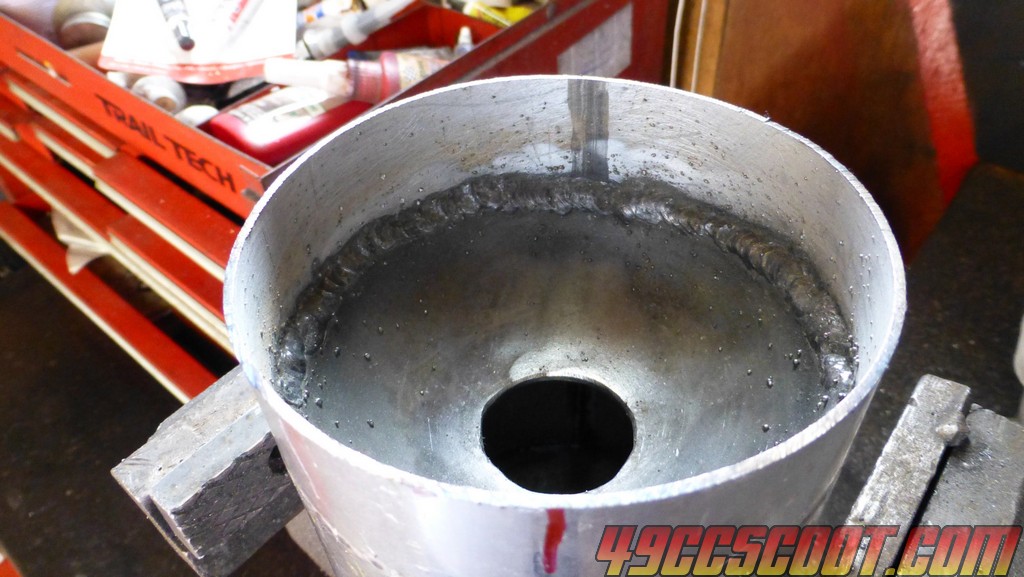
Then I welded all sections together.
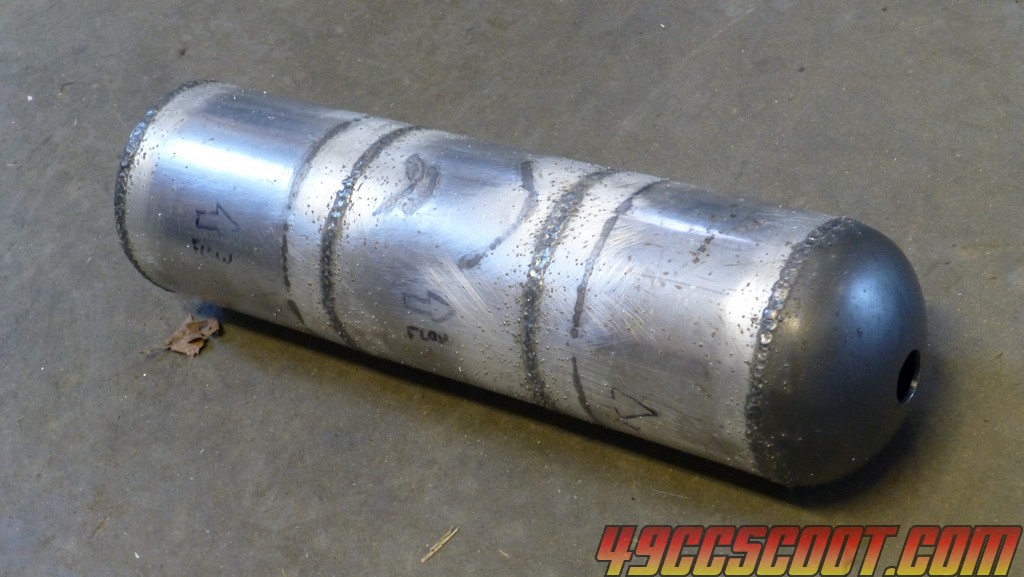
Lighter and smaller than stock, even with the thick steel domes and flange.

With the header.

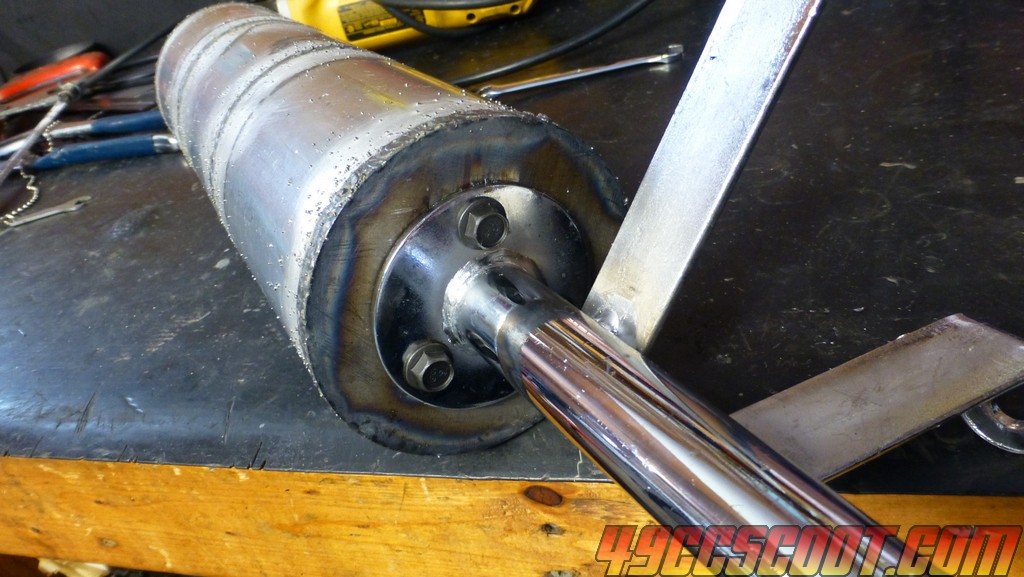
I thought I would go out today and check the fit of the header and muffler and get tabs welded to the muffler to support it using the stock bracket. I should have known it wouldn't be simple.
Here's the header as close as it gets with the axle/muffler support bracket in place. Pretty far off.


I thought it must be meant for engines without the bracket, so I took the bracket off just to see. I wouldn't want to leave it off anyway, because of the long axle. Still not close to fitting properly.


Then I figured if I cut the brackets off, it should fit. While I was working on it, I sanded down the chrome a bit or at least roughed it up and I smoothed out the entry at the flange.


Then it fit, but not at all how I'd need it to. It sat very close to the bracket and it aimed directly at the muffler supports on the bracket.


I needed some extra pipe and I didn't have anything lying around that would work, so I cut the stock header apart. The stock pipe is actually 2 pipes. It stays 19mm all the way through, and just looks like it steps up because there's another pipe welded over it.


The center pipe is smaller than my aftermarket header and the outer pipe is larger. If the pipe right at the head were replaced and the flange was modified, you could make a header larger than this aftermarket one out of the stock piece. Kinda wish I knew that before I got into this and bought a different header that I made the muffler fit.
I cut the newer header in 2 places. In one spot I added a little over an inch from the stock header to make it come out enough that it wouldn't sit so close to the engine. The rear cut was done so I could rotate the pipe and get it to fit. I left my welder set the same way that worked well for the 16GA steel I had been working with and that was a mistake. The header seemed to be the same thickness or close, but I burned through and made a nasty mess on the first weld (I mean nastier than my normal mess lol), then woke up and turned it down. It wasn't going to work out to sit above the 2 supports like the stock muffler did, short of pretty much building a new header out of the 2 headers. I cut one support mount off of the bracket and set it up to hang under the other. It's lower than I would have liked, but hopefully I won't grind the muffler away on the first sharp right turn. Still needs cleanup and some finishing, and I'm not exactly thrilled with it, but at least it does fit now.


I made an adapter for a pressure tester for the exhaust with a piece of aluminum and a hose barb.

I didn't have any kind of rubber plug that would fit the muffler outlet, but I had 1/2" NPT plugs. The hole was a bit large, but I managed to get about 1 thread into it partially. Then I wrapped the plug in tape and sealed around it with silicone and was able to get it to seal.


I found about 8 pinhole leaks, mostly the header. It wasn't that bad, but I had one that I ground and welded and whatnot about 6-7 times and it would always have a pinhole somewhere around it. I tried welding a distance around it, just on it, heavy, light... didn't matter. I could get the tiniest little pinhole that made a fine foam at 5psi, but that's the best I could do. I finally gave up and tried this stuff I bought years ago for securing a brass fitting into an aluminum transmission. Some sort of special solder. That did finally cover it. I never got it to seal and hold pressure because it was leaking from the bolts that go into the muffler. I never worried about it because I could still get 5psi and see leaks. I guess I'll coat them with RTV on install, though I don't know that they'll be a noticeable leak in regular use. EDIT : I did use RTV on the threads and had no issues.
I cleaned up the exhaust today so it doesn't feel like a novel written in braille from the welding BBs.

3 coats of BBQ black and it's finally done. Looks pretty much like a stock exhaust.

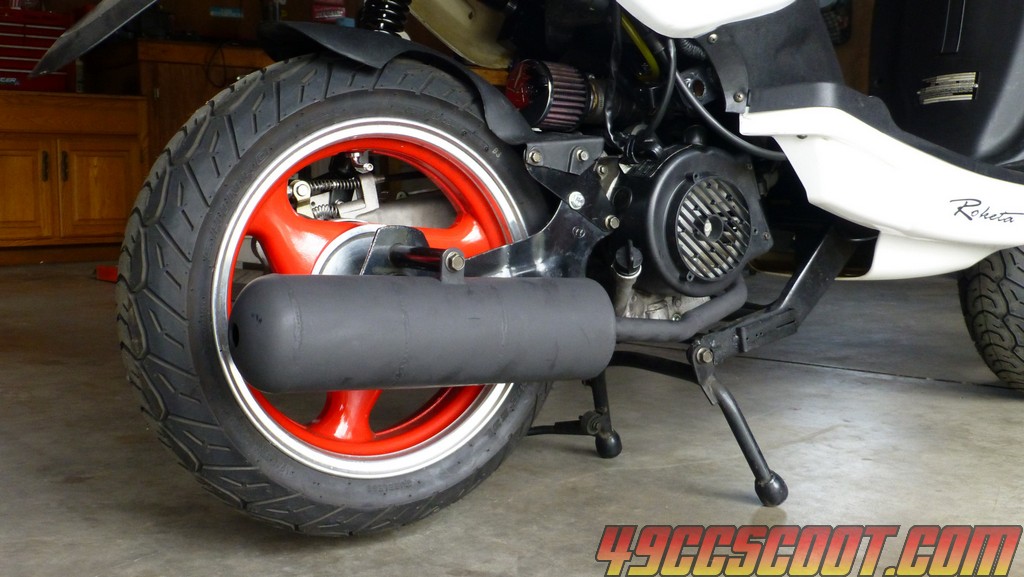
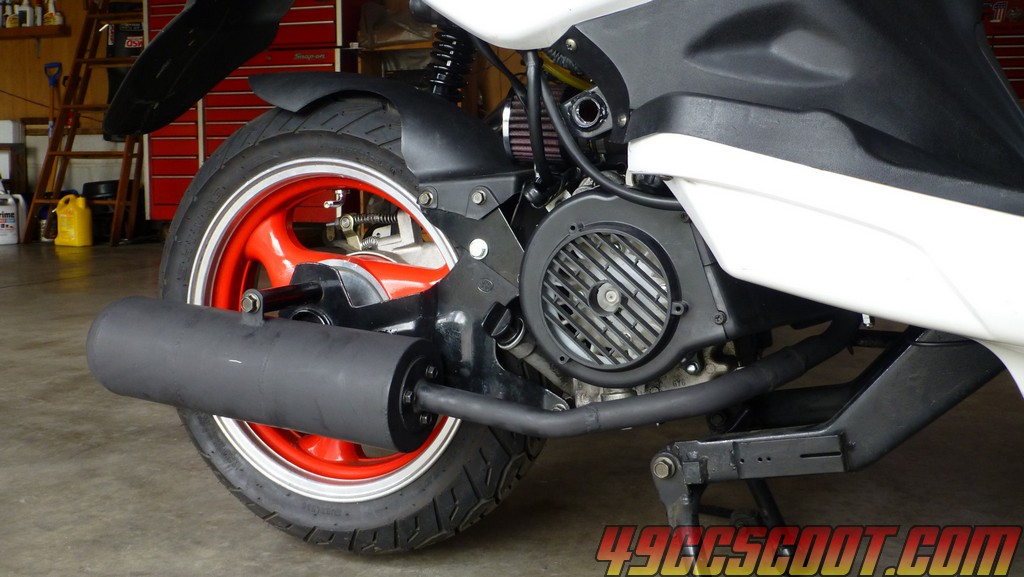
It's me, so you know something had to break. I noticed a rattle when braking and realized the bracket for the muffler support had broke in half. On closer inspection, it looks like the header makes the muffler want to sit farther in, toward the wheel, so I suppose it broke from the stress of that. It wasn't tough to install and I didn't have to force anything, but then I did just use the bolt to tighten the bracket. I may have clocked the header wrong on install. It will swivel quite a bit, so I tightened it down all the way inward and I don't know that I had it like that when I welded everything up. I'll have to redo it and probably need to swivel the header out a little when installed, because it's pushing the muffler all the way up against the bracket for the rear wheel.
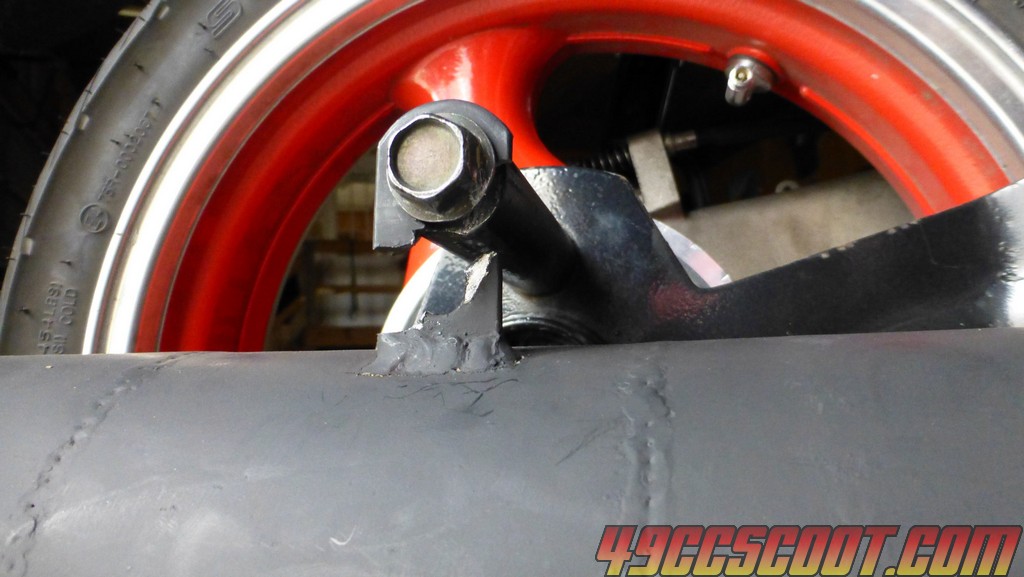
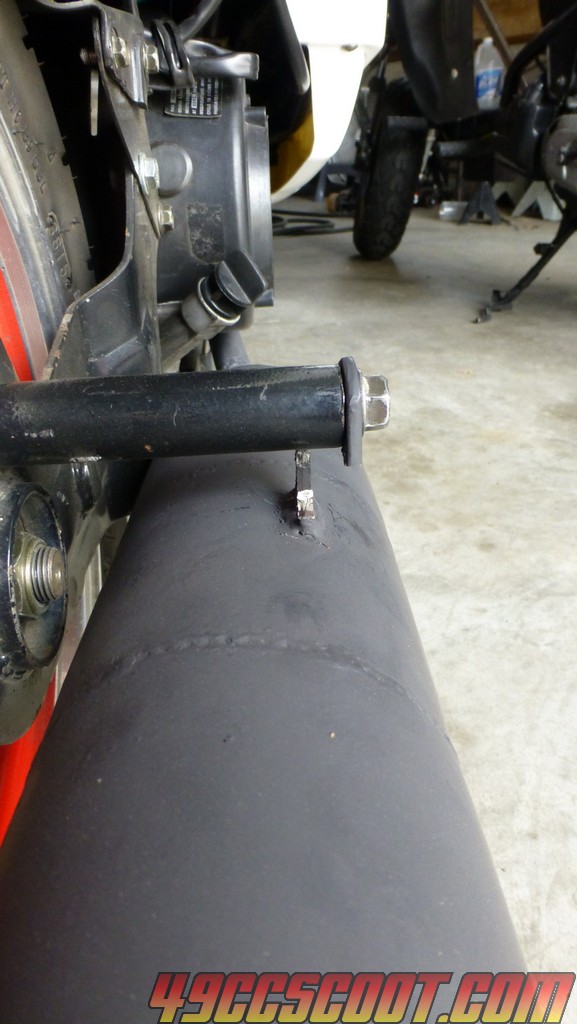
The heat in the header may have caused the muffler to move inward.A wider triangular bracket may be needed as well as a second support elsewhere to make it reliable..As you well know Ive had mounting problems more than once with my pipe builds...

I swiveled the header out a little, so the muffler would sit 3/16"-1/4" away from the bracket that connects to the axle instead of touching it. I kept the 2nd support that I cut off of the bracket initially, so I welded it back on where it's useful. I cut the old mounting tab off of the muffler and made 2 new mounting tabs. The tabs don't look the same because I just used 1/8" steel leftovers for them.
Everything goes together without any pressure and can be hand tightened, so there should be no stress on it from the mounting setup.
