|
|
Post by hypocycle on Mar 29, 2013 21:52:08 GMT -5
These are SolidWorks digital mock ups and images of the GY6 "SideWinder" supercharger. This SolidWorks digital mockup is for the GY6 50cc / 139QMB. Because of the stock 10.5:1 CR of the base engine, boost is limited to 3.5-4PSI boost. It is best used in conjunction with a BBK to acheive the best performance. Unlike the GY6 150, the GY6 50 is rather easy to upgrade without having to open the engine case. Power increases of 20% can be expected. This setup requires a fuel pump, fuel pressure regulator, an air filter, a flywheel puller and tubing (to connect the pitot tube to the carb bowl vent). 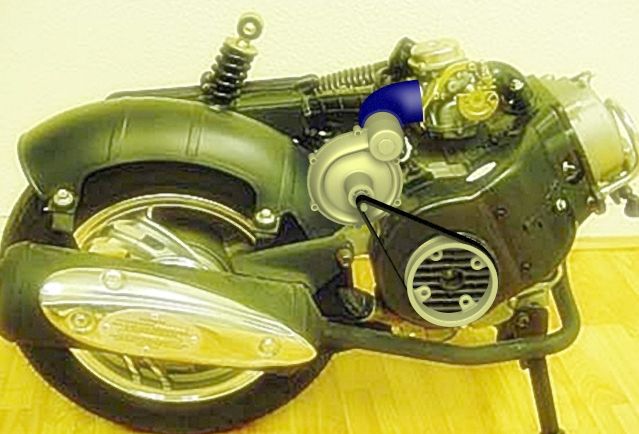 This is a digital mockup of the "SideWinder" on a GY6 150. Many scooters, ATVs and karts/buggies can attain a 20% increase in power with is simple bolt-on power adder. This means that at 5PSI boost you can have a 180cc upgrade without having to; remove your engine, tear down your engine, machine the case, install a larger cylinder, head and carb or due extensive tuning. You can use the same stock setup (cylinder, head, carb etc.) with this blower. The BB 180cc will still have superior low end torque by comparison, but the trade-off is much better fuel economy. Additional items needed for this setup would be a flywheel puller, a standard range of main jets (for fine tuning), a fuel pressure regulator, an air filter and tubing (to connect the pitot tube to your carb bowl vent). 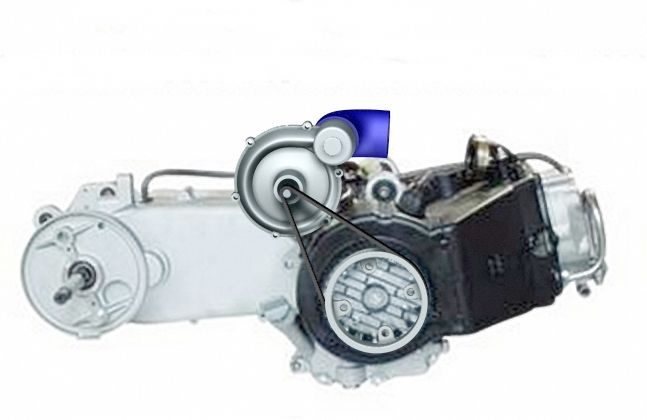 The intake and exhaust ODs of the blower are matched to the stock carb connection so after market air filters and common silicon 90 degree elbows can be used. 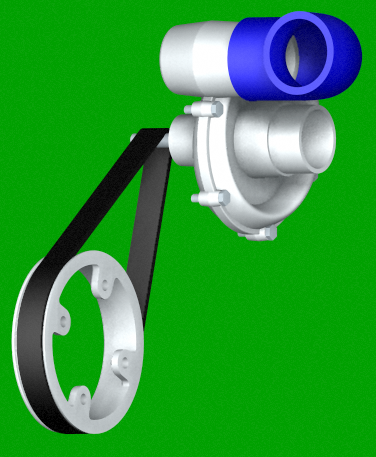 www.facebook.com/GY6.SideWinder?ref=ts&fref=ts www.facebook.com/GY6.SideWinder?ref=ts&fref=ts |
|
|
|
Post by hypocycle on Mar 30, 2013 11:13:23 GMT -5
To get an idea of what this might look like on scooter, I swiped this image off the ScootDawg site and "Shopped" a SideWinder on it. 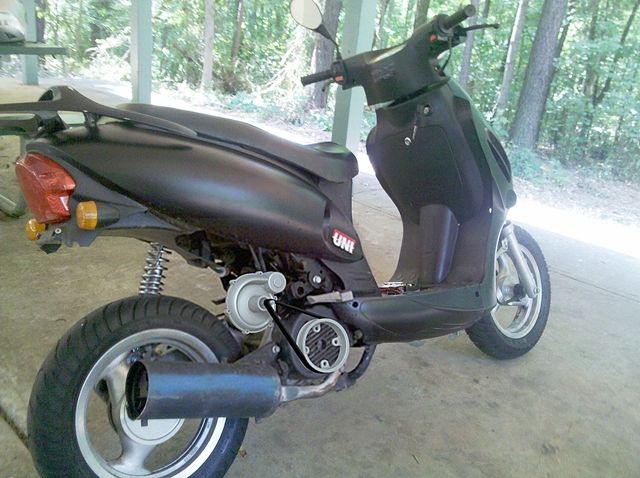 Drive pulley and belt 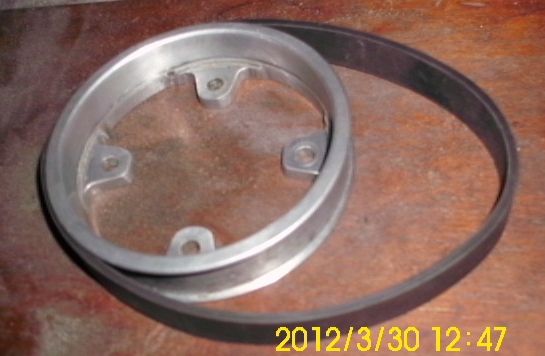 Drive pulley built up to be used as a pattern for more castings 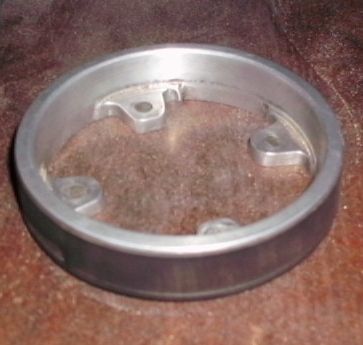 Here is a MT4 split collet used for holding the impeller in the lathe headstock while finish machining the casting. 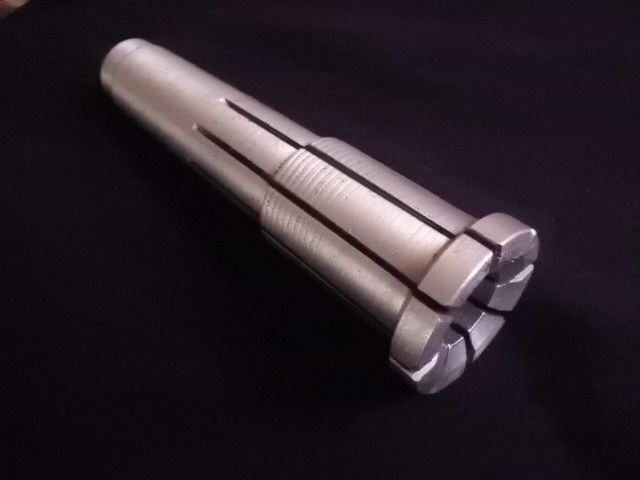 This was the first impeller design. After doing some research it was determined that it would have to reach 120,000 RPM to achieve 7 PSI boost. It did however come in handy to "prove" the MT4 split collet and the foundry pattern. The vanes are from a weed eater cylinder because they already have the desired draft for mold removal. 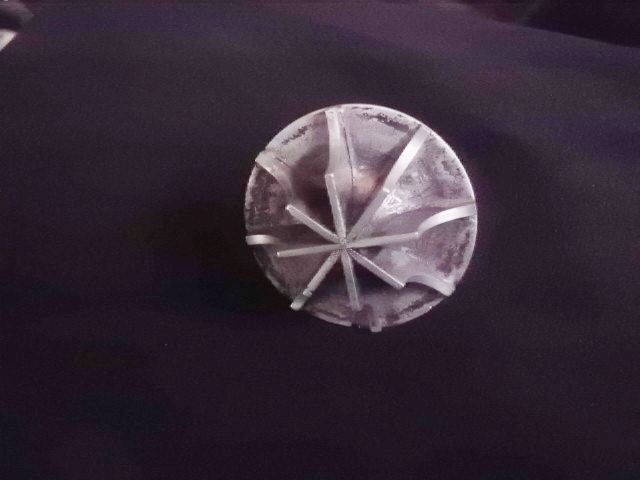 This tool is required for machining the drive pulley casting and accurately drilling the mounting holes in the pulley to match the flywheel. The prototype was machined by truing it a 4 jaw chuck and the holes were located with a transfer punch. This work holder/drilling jig will produce parts much faster and accurately. 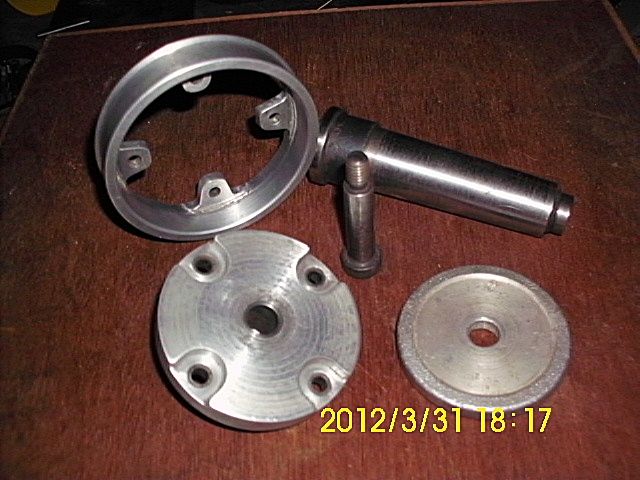 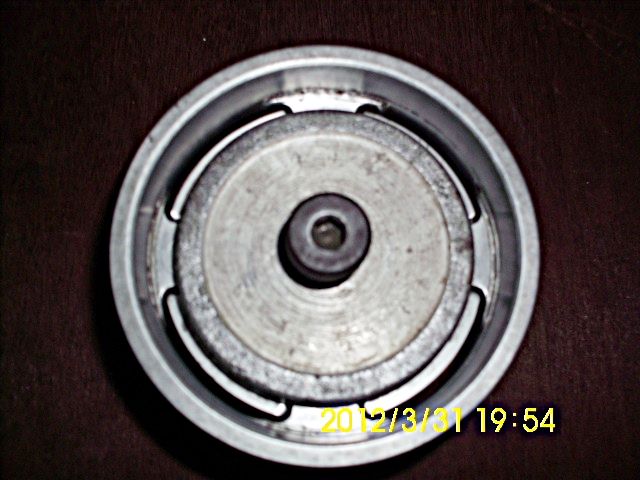 The studs used to mount the pulley and fan to the flywheel are intake manifold studs. Because the original threads in the face of the flywheel are rather shallow, A jam nut is used on the underside of the flywheel. 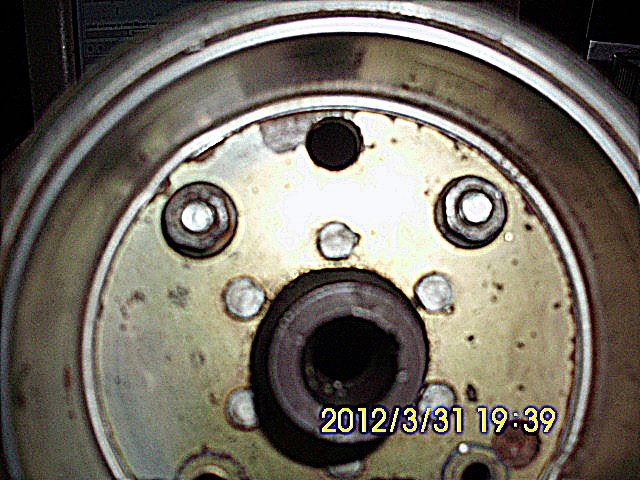 Here's an example of the prototype drive pulley in place using case bolts from another engine. I'll replace this photo with one using studs and spacers between the pulley and the fan. As you can see the cooling air flow isn't compromised at all by the pulley. 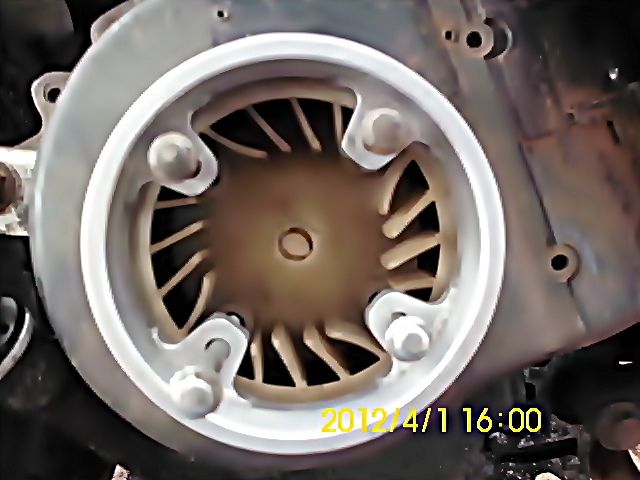 From this angle you can see that the grill has been trimmed flush across the face of the fan shroud. 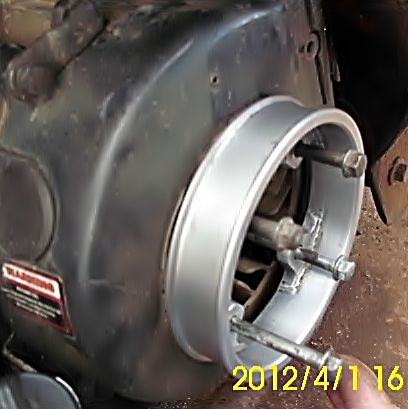 You can also follow the progress by using the link below. www.facebook.com/GY6.SideWinder?ref=ts&fref=ts |
|
|
|
Post by 90GTVert on Mar 30, 2013 11:30:30 GMT -5
Looks like you've been busy since last time you gave us some info. Nice work.
|
|
|
|
Post by hypocycle on Mar 30, 2013 12:36:12 GMT -5
Thanks Brent,
I've been working on it off and on for awhile now(more off than on).... I recently found some inspiration again after getting into the forums. Great job you're doing here. I'll try to keep it going and post back as I get further along.
However, to be quite blunt with all of you reading this, on April,4 I'll find out if I'll have to set this aside for awhile longer. I might have to pay a 6 month debt to society ~ the real reason that I got into the scooter scene, if you follow me.
Have a Happy Easter everyone!
|
|
|
|
Post by 90GTVert on Mar 30, 2013 13:11:55 GMT -5
Just saw you added pics of the drive pulley. Nice looking piece and I like it better without the guard for the fan, but I'm one of the folks that cuts all of my grills away to let more air in and because it just looks cooler. Just seeing that, I can imagine this would be a very cool show piece if offered in a polished finish.
Good luck.
|
|
|
|
Post by aeroxbud on Mar 30, 2013 15:58:16 GMT -5
Could be a very intresting project you have here  |
|
|
|
Post by oldunclestevo on Mar 30, 2013 21:14:44 GMT -5
Thanks Brent, I've been working on it off and on for awhile now(more off than on).... I recently found some inspiration again after getting into the forums. Great job you're doing here. I'll try to keep it going and post back as I get further along. However, to be quite blunt with all of you reading this, on April,4 I'll find out if I'll have to set this aside for awhile longer. I might have to pay a 6 month debt to society ~ the real reason that I got into the scooter scene, if you follow me. Have a Happy Easter everyone! Only two days bro! I feel ya. Same reason i got into it. But im glad it happened for more reasons than one. We gonna need an investor for this project. To "Shark Tank" we go. And by we i obviously mean you... But to see this hit the market i feel like its for all of us! |
|
|
|
Post by moofus02 on Mar 30, 2013 22:06:50 GMT -5
Cool design would be fun an different
|
|
|
|
Post by hypocycle on Mar 31, 2013 21:04:04 GMT -5
Thanks. I really appreciate the feedback guys.
I'm glad I put it up here - It's got me motivated again..otherwise it would have just been another project that goes nowhere.
*I knew I couldn't be the only one oldunclestevo, lol.*
|
|
|
|
Post by hypocycle on Nov 11, 2013 1:24:41 GMT -5
I'm launching a crowd-funding campaign for the SideWinder project on indiegogo. I've decided to get a 3D printer to help speed up the development... |
|
|
|
Post by dan50 on Nov 11, 2013 10:51:53 GMT -5
You HAVE to market this supercharger!  I would like to put one on my 139QMB. |
|
|
|
Post by hypocycle on Jan 13, 2014 23:02:32 GMT -5
Well, the indiegogo.com campaign last month was a flop. But I've never been accused of being prideful so... here we go again. If you'd like to help this project get further along and evolve you can show your support here. www.gofundme.com/67j6jsAny donation will be greatly appreciated. ...and don't be surprised when I launch yet another campaign on Kickstarter after there's a working prototype. |
|
|
|
Post by grikjames on Jan 14, 2014 5:10:32 GMT -5
Shouldn't it be Air filter } carb } charger } intake?
Will it run fine blowing on the carb as in your illustration?
|
|
|
|
Post by nelson on Jan 14, 2014 8:20:41 GMT -5
i had a blow through carb turbo set up. It had hats on top of the carb instead of air filter. like this..  |
|
|
|
Post by moofus02 on Jan 14, 2014 8:31:59 GMT -5
Most of the blow through setups I've seen put the entire carb in a hat so it automatically compensates for the boost never had one myself but boosted is always cool
Sent from my SPH-L720 using proboards
|
|


