|
|
Post by oldgeek on Apr 2, 2016 8:51:57 GMT -5
Oldgeek, I am going to make ya proud again. I got the CT intake manifold out and was pre-fitting and checking things out and I didn't like the step at the top of the intake window, so out came the dremel again. So I went from this.  To this   All thats left is matching the manifold to the intake.  Also trued all the surfaces on the CT manifold and reed cage with my surface plate and sandpaper. Id like to hear your thoughts as well as from others here on this. I mentioned in a previous post that I was doing the oil pump delete, premixing and installing pump plug. Wellllll I was thinking of keeping the pump. Here's why. With premix all your oil is in the gas. Which is great if your running wide open getting the most fuel and oil when wide open. When you back out the throttle(especially from wide open), the needle drops and less fuel/oil as well as air is passing thru the engine but you engine is still spinning at a high rpm due the the clutch has not disengaged and your still moving at a pretty good clip. So my thought was to leave the pump, and unhook the cable so its only supplying oil at idle rate. In doing this the engine is getting that little extra oil it would be loosing from the throttle being closed. I still will be premixing as well. Kinda like a off throttle insurance policy. It might smoke a little more and maybe foul plugs quicker. lol Looking great! You can also round the trailing edge of the upper part on the backside where it matches to the transfers, it should help to get the mixture up into the transfer quicker. As far as the oil pump, IMO get rid of it. I hear that it is a source of air leaks. Plus take a look at my thread and think about filling all the area of the pump with epoxy. It will help offset the extra volume created by using the CT intake and help bring primary compression back up, at least that is my theory. |
|
|
|
Post by joeorange on Apr 2, 2016 9:08:23 GMT -5
really like the build thread. question, where did you get your tecnigas next-r for this? me and my friend have been trying to find one for his puegeot tkr furious.
|
|
|
|
Post by gsx600racer on Apr 2, 2016 13:50:50 GMT -5
Hey joeorange, glad you like. Any and all questions are welcome. If I can't help, I am sure my wingman oldgeek can. I got mine from Racingplanet.com If you dont mind the wait, at the time it was the lowest price I could find. Seeing you are from Canada, you might want to check out here. scootertuning.ca/en/14_tecnigasThe techigas it s decent enrty level pipe for 50cc-70cc mild builds. There are much better if you are looking to go all out. I almost want to say that your friends puegeot tkr furious looks like its the same platform as the honda/kymco vertical engine. |
|
|
|
Post by joeorange on Apr 2, 2016 19:32:21 GMT -5
yeah, racing planet is a no go. i did find one on another Canadian site. scoot-tuning.com. im not sure if the puegeot speedfight and vivacity have the same vertical engine as the TKR? |
|
|
|
Post by gsx600racer on Apr 3, 2016 0:42:12 GMT -5
Well I broke out my trusty Dremel again. Today it was the CT intake and the bottom of the cylinder. Before. 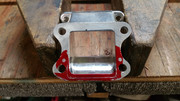 After. 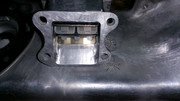 Then I started working on my cylinder fitment issues. I just hate grinding and cutting on something that I know how much I paid for. I removed about 3/16" off the lower cylinder flange to match the side of the intake window(I did both sides) Now its sitting flush to the deck too.  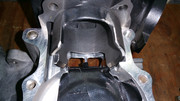 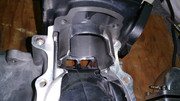 I still have a little to take off on the right flange by the intake window, I wanted to leave it tho. It sorta channels the flow to the center of the intake window Next will be re-installing the crank and assembling case. I am not chamfering the ports till I am done using the degree wheel and setting the cylinder height. |
|
|
|
Post by gsx600racer on Apr 3, 2016 0:55:01 GMT -5
yeah, racing planet is a no go. i did find one on another Canadian site. scoot-tuning.com. im not sure if the puegeot speedfight and vivacity have the same vertical engine as the TKR? Go back to Racing Planet. Look up your friends scooter. Pick out the exhaust you want and go to that item page. There is a TAB that says "Application" Look there. It lists other scooters that the exhaust will fit. Also the part # RP uses is usually the MFGs #. With that you can go any site and see if they carry that part #. Happy hunting. |
|
|
|
Post by gsx600racer on Apr 5, 2016 2:40:40 GMT -5
From the pictures of the To grind or re-shim ? portion of the build I also reinstalled the crankshaft and assembled the two case halves. I chilled the crankshaft, cleaned and prep'd the case halves, greased crank seal lips. I heated the bearing with a heat gun, which didn't take much heat. I dropped in the crank, joined case halves. I also I used the cylinder to help flush the deck/base surface.(even with the 2 alignment pins there was a tiny bit of movement) I snugged the cylinder bolts and torqued the case bolts. I used Hondabond for the case sealer. I took a small break from the engine build to install a Hi/Low light switch. Seems only a few ZX's out in the wild came with this option. Without the switch, only the low beam is wired. Its sorta crazy because the bulb used has both elements.(hi/low) 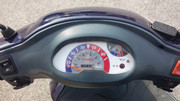 Both of my ZX's did not have this feature. 2005 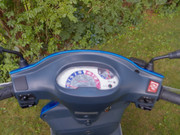
2003 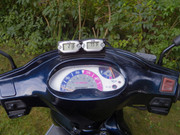 I found this switch on Ebay, I was a little leary seeing they didn't provide decent dimensions, but for 6 bucks total I took a chance. 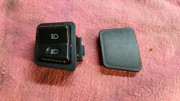 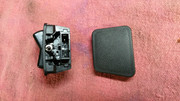 I was not able to find the 4 pin plug that connected to the switch, so instead I soldered wired directly to the switch pins. With a multimeter I pinned out the switch and wired accordingly. More pictures shortly, I am also looking into a 12v/usb port to add while I have the dash apart.  I also have Trail Tech temp & rpm gauges(treats)on the way too.  I know I did a review on an other gauge. I like having both rpm and temp at the same time and I like how I have it configured on my 2003 ZX. |
|
|
|
Post by gsx600racer on Apr 9, 2016 0:12:10 GMT -5
Well a lot has been done since last update. Transmission is all back together. Broke out the degree wheel and here are the numbers: Exhaust Open 89 Close 271 Duration 182 Transfers/boost Open 118 Close 242 Duration 124 Piston(outside dia.) to top of cylinder .021" Squish .033" Compression 155 psi Completed engine assembly, and pressure tested. Had a leak on the intake manifold at the barb for the vacuum line. The last place I expected.  Installed engine on scooter. Made bracket for gauges. FYI, The new 2nd generation of Trail Tech guages(with button on the front of the gauge). I had a problem with my tach when I installed it on the bracket. It does not like being held "tight" with screws thru the mounting holes. When I went beyond snug, half the dispaly stopped working. As soon as I backed off the screws the problem went away. (Pics coming) I completed the hi/low light switch add/modification. Works like factory.  I plan on doing the same thing on my other ZX50. I am still waiting on a few parts that are in transit. Waiting on the extension for the temp gauge, I thought the one I had was long enough, and the 12v/usb outlets. I fired it off last night and could not get it to idle to save my life. So banana head me, when I took out both jets to see what size they were for my notes, when I was putting the slow jet in it felt snug so I stopped. Come to find out the slow jet was not all the way in and seated correctly. It idles fine now. I installed my YMS V8 exhaust on it.(to get it running) It's been raining here a lot and didn't feel like pulling the Techingas of my other scooter. All I can say is the V8 pipe is "louder" than I expected. It needs some carb tuning/variator tuning. I took it for a spin around the block. oldgeek , you can def feel the difference in the gearing. It feels like the clutch is slipping at takeoff up to around 20 mph, then it starts pulling nice after that. Not feeling the "gear" shift also. I think I am already past that when starting off. Iv thought about putting all the stock guts back in for a base line guide line. Right now I am running: Stock variator with 7g sliders SEF ramp plate Blue clutch springs(medium)Malossi Blue contra spring (1500) from Scooter Assassins(was in a kit of 3 for Honda Dio) Stock clutch, bell, and belt. I really don't want to start tuning till I get it all buttoned back up.(hooking up temp gauge) |
|
|
|
Post by gsx600racer on Jan 28, 2017 7:05:41 GMT -5
I'm finally had some motivation to tear down the engine and do an inspection to see whats going on inside. I'v got a little over 34 hours (miles unknown, need to find notes). 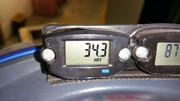 I noticed the back of the engine(mostly where the rear wheel tucks in near then engine case and down the side of the cvt) had a good coating of oil/dirt build up. After I got the shrouds and removed the head bolts, two of them had an oily coating on them where the base gasket is located. Here what the insides look like. Head Removed, the build up on the top of piston wiped off, only where it's not crusty(opposite of exhaust) it was baked on and need to be sanded off.  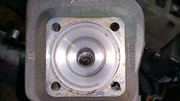 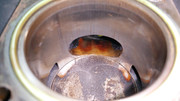
Exhaust outlet 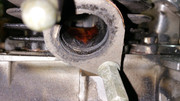 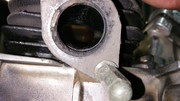
Piston skirts 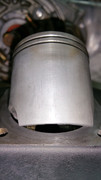 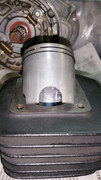
Cylinder 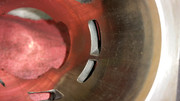 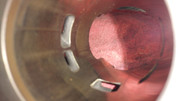 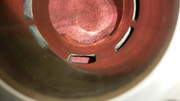 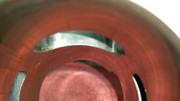
I have to say if there was a cyl/case leak, you would never know it. This engine did visit 400+ degree's territory several times last season. I was running Amsoil Dominator with mix ratio's between 32:1 to 40:1. I don't think it got too hot for the fact that the bottom of the piston did not have any burnt or baked on oil. 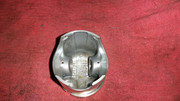 Here is everything all cleaned up 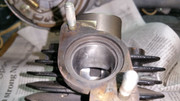 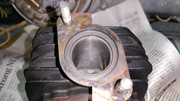 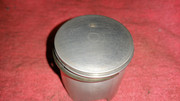 I plan on raising the cyl 1mm (technically .026", new base gasket is .034" minus the .008" metal gasket) because I don't plan on reinstalling the original base gasket(metal) that the kit came with.  I was told with the timing numbers that I had before, it wouldn't hurt to raise the cyl a tad. I plan on breaking out the degree wheel and rechecking everything.(just so I know) Im hoping by opening up the squish and bumping the compression down some, maybe I can get my WOT temps back in check. I plan on reusing the rod bearing, piston pin. I'm not re-honing the cyl only because there is not that many hours/miles on this setup. |
|
|
|
Post by oldgeek on Jan 28, 2017 11:46:06 GMT -5
I didnt know you were having issues with this build.
How does the piston look at BDC in relation to the transfers? I would ditch the paper gasket possibly and just use the metal gasket coated with spray copper. No worries about the paper gasket compressing and leaking. it's just a thought.
|
|
|
|
Post by gsx600racer on Jan 28, 2017 12:32:20 GMT -5
I didnt know you were having issues with this build. How does the piston look at BDC in relation to the transfers? I would ditch the paper gasket possibly and just use the metal gasket coated with spray copper. No worries about the paper gasket compressing and leaking. it's just a thought. Some days would run good and temps were decent, other days it ran HOT. I played with jetting, race fuel, plugs. It seemed I was chasing my tail some days. As for the look down the cylinder @bdc.... This is with the .034" base gasket. 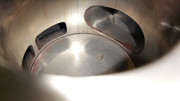 |
|
|
|
Post by gsx600racer on Jan 28, 2017 12:42:59 GMT -5
Here are the #'s with thicker base gasket(current column)
Previous Current
Metal gasket Paper gasket
.008" thick .034" thick
Exhaust
Open 89 Open 88
Close 271 Close 275
Duration 182 Duration 187
Transfers/boost
Open 118 Open 115
Close 242 Close 247
Duration 124 Duration 132
Squish .033" Squish .048"
Compression 155 psi Compression 120 psi
|
|
|
|
Post by greggkinney on Jan 28, 2017 14:43:01 GMT -5
im not sure what im looking at here but with all the work and math involved it seems like you have the science behind 2ts down pat. bet its an ass buster lol.. looking at all this scares me as i know absolutly NOTHING about 2 strokes and i have 2 sf10 kymcos and a daelim horizontal af34/35 clone im fixing to start on. anyways enough chatter jyst wanted to say your work looks awsome and your dedication to is an inspiration. thanks for sharing
|
|
|
|
Post by gsx600racer on Jan 28, 2017 16:19:39 GMT -5
im not sure what im looking at here but with all the work and math involved it seems like you have the science behind 2ts down pat. bet its an ass buster lol.. looking at all this scares me as i know absolutly NOTHING about 2 strokes and i have 2 sf10 kymcos and a daelim horizontal af34/35 clone im fixing to start on. anyways enough chatter jyst wanted to say your work looks awsome and your dedication to is an inspiration. thanks for sharing Thanks greggkinney, not an expert by any means. Iv got a lot of help from the 2t masters here, they know who they are. The #'s are not rocket science. Its just measurements of events per one revolution of the crankshaft. The calculations are just basic math. The #'s will let you know how the engine will behave throughout its RPM range. I'm still learning that part. I have a feeling the "pro's" will tell me to put the metal base gasket back in. LOL |
|
|
|
Post by 190mech on Jan 28, 2017 16:57:53 GMT -5
Ideal setup should have the piston flush with the bottom of the transfers so the mixture will attach itself to the piston top to cool it..Opening the squish could cause detonation due to allowing the burning gasses to to the edge of the piston,keeping it tight and opening up the combustion chamber would likely be the answer..Try your current setup,heck it may be great!!What is your iggy timing like??
|
|


 Installed engine on scooter. Made bracket for gauges. FYI, The new 2nd generation of Trail Tech guages(with button on the front of the gauge). I had a problem with my tach when I installed it on the bracket. It does not like being held "tight" with screws thru the mounting holes. When I went beyond snug, half the dispaly stopped working. As soon as I backed off the screws the problem went away.
 I plan on doing the same thing on my other ZX50.


