|
|
Post by lobarrett on Aug 16, 2016 7:05:02 GMT -5
My 50cc ET2 Build Project - Frame/Body Parts | Painting & BW
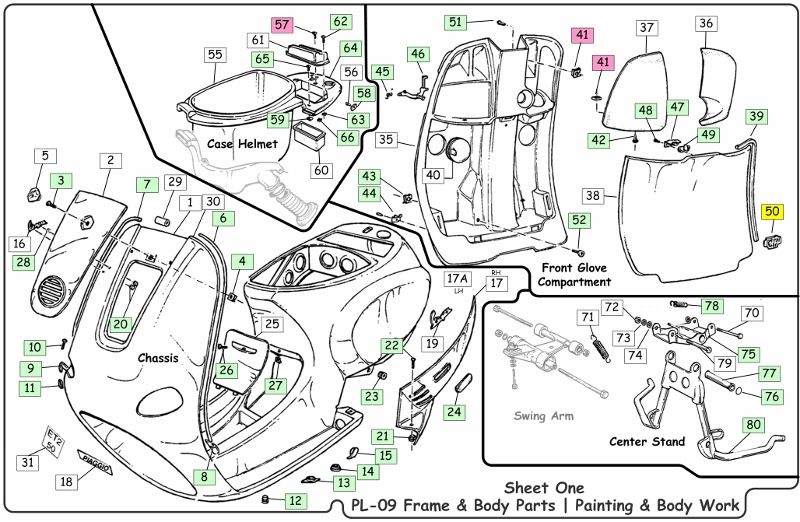
SHEET ONE
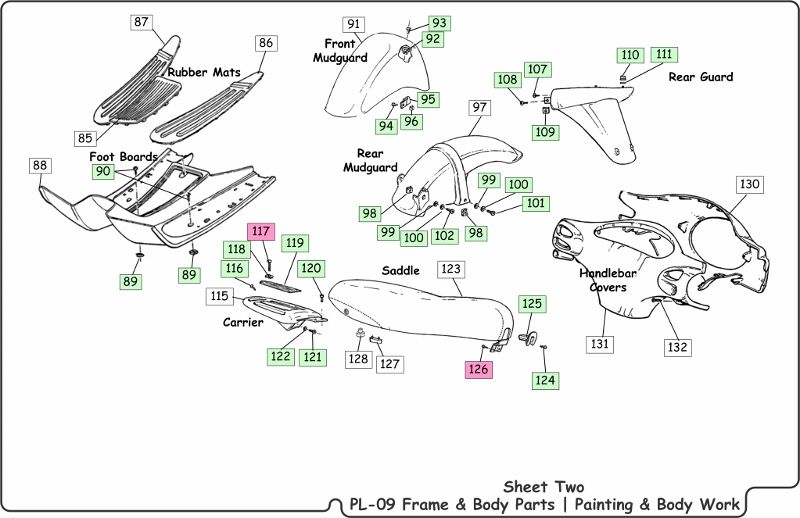
legend - part flags
white - use original
light green - oem or aftermarket parts
light blue - stylized or performance parts
pink - not available - to be determined
Link > to Parts List and Cost Link > back to main the build thread
Status: This is the last of the bulk parts ordering. Lot of nuts and bolt replacement stuff in the Frame & Body Parts but none of it too interesting. The Painting & Body Work section is just a little more interesting - the final stages of powder coating of the frame and engine parts. I stopped by the powder coaters got more pictures of the frame and body. As far as the coating goes, it is done. They just want to touch up some areas and clean it up.
I am in no hurry to get it.
More to come,
Thanks for viewing, larry
--------------------------------------------------------------------------------
|
|
|
|
Post by lobarrett on Aug 16, 2016 19:00:38 GMT -5
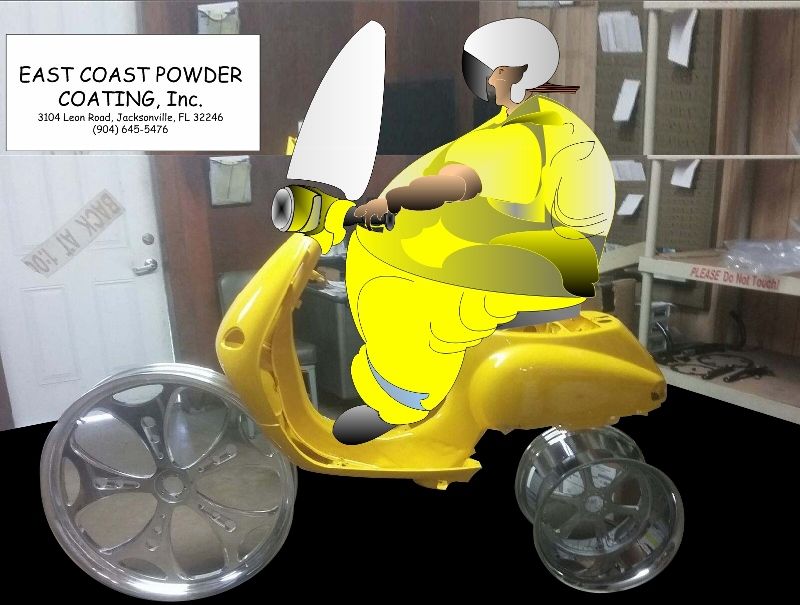
My 50cc ET2 Build Project - New wheel concept for my ET2
The guys at East Coast Powder Coating knew I was having issues with my scooters 10" wheels - I wanted at least 12" - so they did a concept setup up of my scooter with some rims they had in their shop - the following is the photo they took. I added the fat lady in the yellow jump suit.
Got my powder coated parts back - frame and engine. Going to setup the frame in my living room. Have a coffee table that is just about the right height for a scooter stand. This will give me a chance to workout the issues I have with my handlebar setup. Just need to figure out away to work on my engine.
I am not in a hurry - got a lot to learn and a lot of time to do it in.
If I get it all setup tonight, I will get some pictures and post them tomorrow.
More to come,
Thanks for viewing, larry
--------------------------------------------------------------------------------
|
|
|
|
Post by lobarrett on Aug 17, 2016 13:29:59 GMT -5
My 50cc ET2 Build Project - Engine Powder Coating
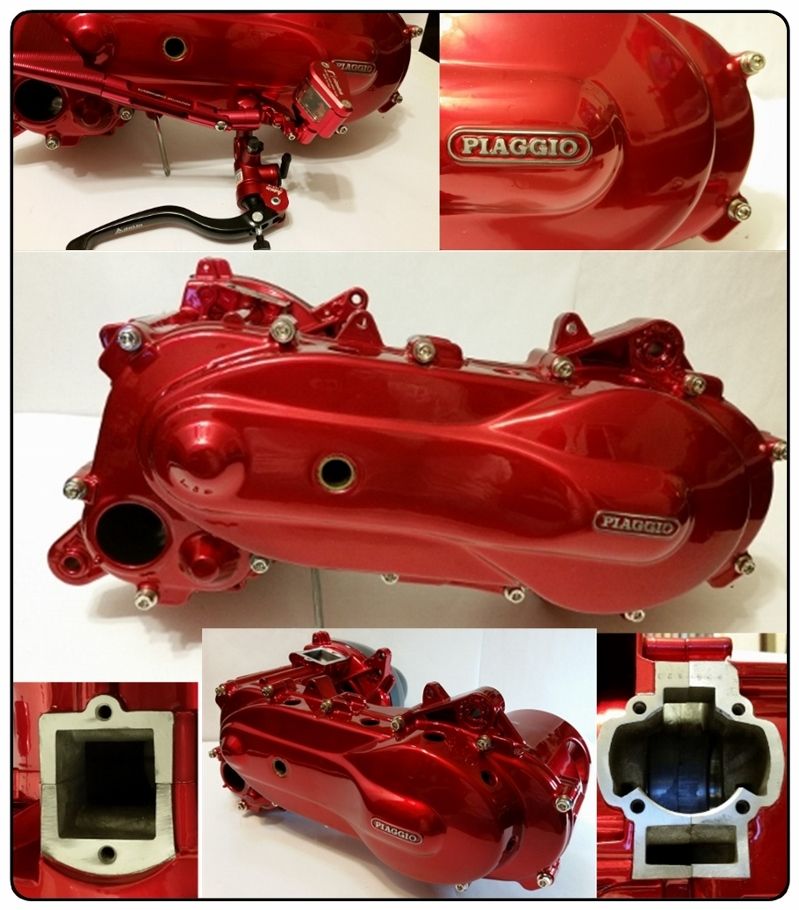
Top Left - the Lolly-pop (Candy) Red used on the engine matches the red used on the radial master cylinder and brake fluid tank for the front brake. It also matches the red used in the mirrors. I am hoping that the red engine in the rear is balanced out somewhat (more in the rear) with the red Bitubo front shocks and red right and left mirrors and brake levers. I want the weight of the red to be in the rear - just enough in the front.
I like how they dressed out the Piaggio on the cover. Also like the chrome plated cover bolts.
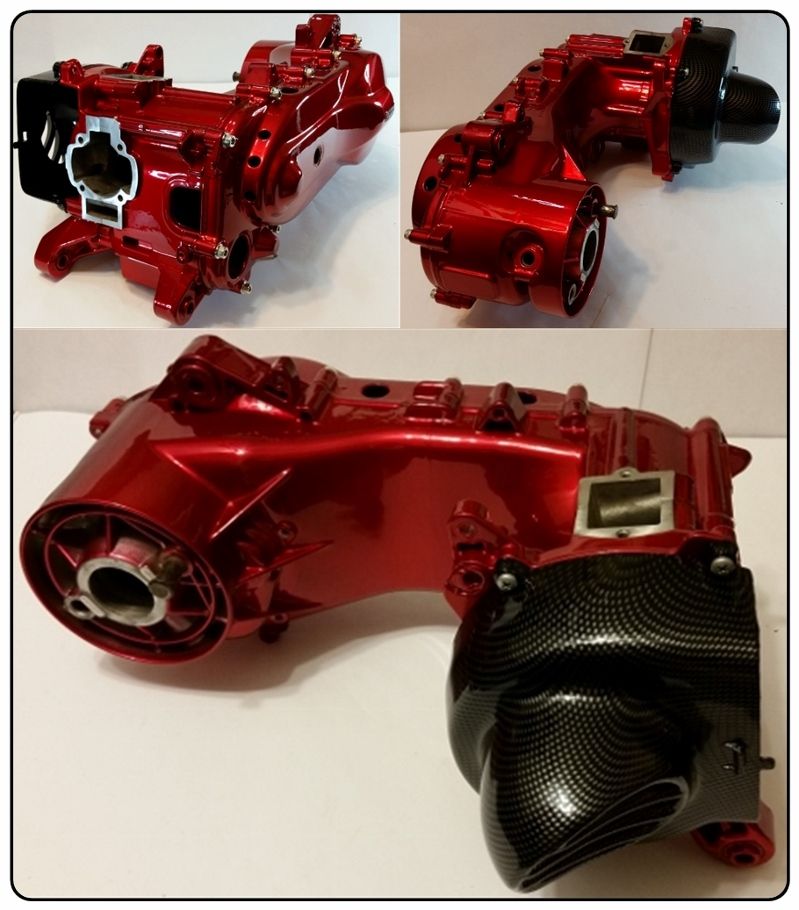
The carbon looking fan cover would probably work but I don't think it will work with my existing cylinder hood. Right now it's not a big issues - I can't find my hood. Think in might of got trashed when I closed my shop. We trashed the body plastic, 2-50cc engine, wheels, etc off of a 07 CPI Runner.
The hoods are not that expensive - but piaggio made two styles for the ET2. Not sure why.
More to come - Frame powder coating,
Thanks for viewing, larry
--------------------------------------------------------------------------------
|
|
|
|
Post by Chris Cristini on Aug 17, 2016 14:55:26 GMT -5
Nice!!!
|
|
|
|
Post by lobarrett on Aug 17, 2016 20:54:54 GMT -5
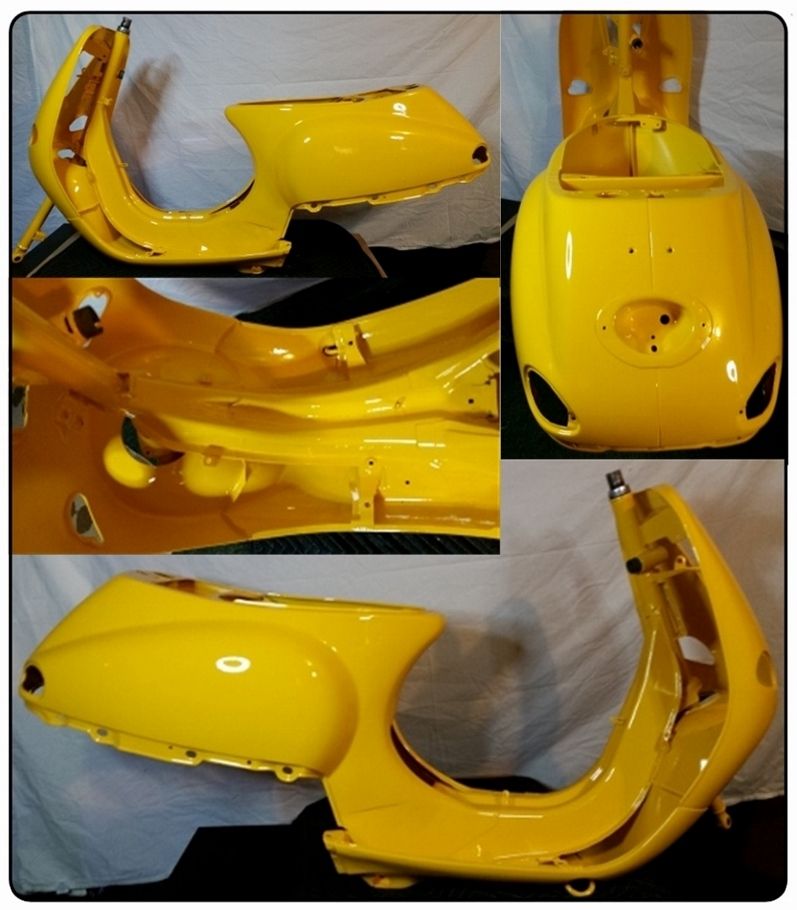
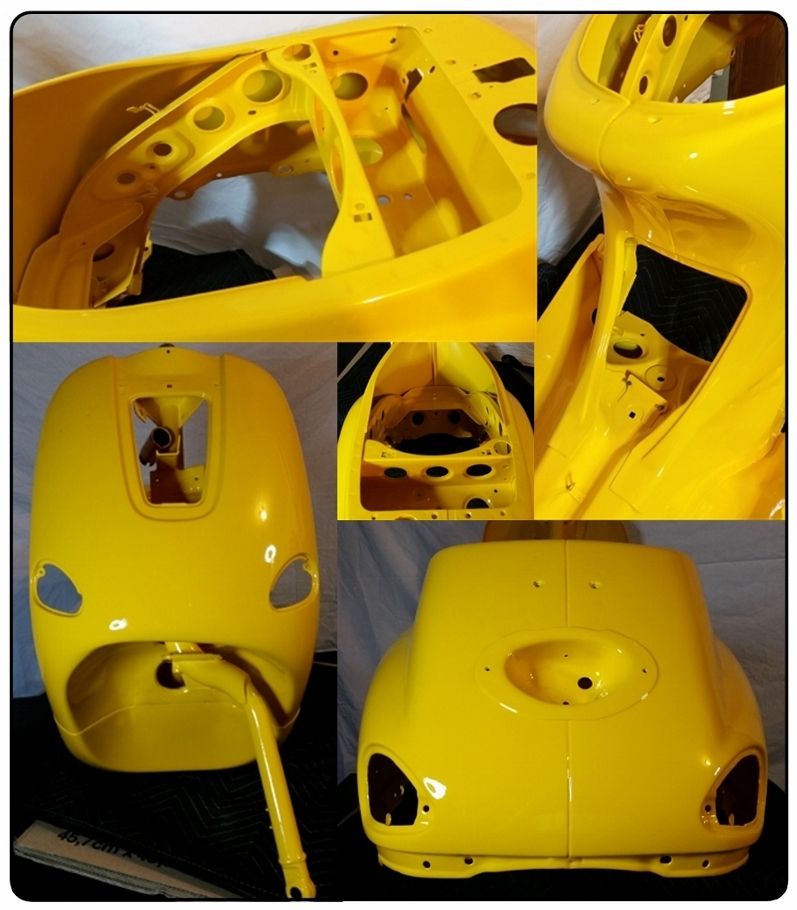
My 50cc ET2 Build Project - Frame Powder Coating
I am really happy with the finished product - I think ECPC did a fantastic job. Now, I have to go to work on putting it all back together.

More to come,
Thanks for viewing, larry
--------------------------------------------------------------------------------
|
|
|
|
Post by 90GTVert on Aug 18, 2016 7:26:38 GMT -5
This thing is going to be so nice and perfect that I'd be afraid to ever ride it or touch it. Can't wait to see it completed.
|
|
|
|
Post by lobarrett on Oct 9, 2016 20:06:48 GMT -5
This thing is going to be so nice and perfect that I'd be afraid to ever ride it or touch it. Can't wait to see it completed.
Thanks Brent.
A lot of my non-scooter friends are saying the same thing. They can not understand why I am putting so much into the details of building my ET-2. However, they know I will most likely never be allowed or able to ride it again. My friends and my doctors may be right, but what they don't understand is that I have spent my whole life not doing exactly what others thought I could or should do.
If I had to bet on it, I'll put my money down on riding it again. I started this project fully functional and I will be again - it just taking more time than I had anticipated.
thanks larry
|
|
|
|
Post by niz76 on Oct 9, 2016 22:10:49 GMT -5
Holy jeez this thing is going to be beautiful. That engine is stunning! All of it is!
|
|
|
|
Post by lobarrett on Oct 19, 2016 3:47:56 GMT -5
Holy jeez this thing is going to be beautiful. That engine is stunning! All of it is! Thanks for the comments. I didn't have much to do with any of this. Other than picking the "corvette yellow" and the "candy apple red engine" - it was all East Coast Power Coaters - they were the ones that had to have it done just right. They did the engines over a few times - something about "out gassing" of contaminants in the aluminum case. They would spray it and bake it - the heat during the baking would burn off the contaminant. They would have a pin hole in the finish. Anyway, something like that - it was all over my head. The guy (Chris) that does all the prep work, all the spraying, all the........ actually he does it all - he is the one that came up with masking off the Piaggio lettering on the CVT cover. Just that little detail adds a tremendous amount to the overall appearance of the engine. Chris's boss (Buddy) did all the body work - and "yes" steel makes it possible. He also kept me on track with the basic color combinations that we had planned on. I get carried away at times and have a few wild hairs. I changed it to purple once - than green - ended up with the "corvette yellow" and candy - which was the original plan. He was right and it paid off. Although Chris came up with the Piaggio lettering detail - it was Buddy that figured out how to plug the two holes that I had drilled in the case through the lettering. I had drilled the holes to get gearbox input shaft's outboard bearing out of the cover. A few days later I found an POST on 49ccScoot by Brent about getting the bearing out without drilling the holes. Today, I try to look on 49Scoot before I do any thing. So far about the only thing that I can take credit for is my handlebars and extensive cover modifications - plastic. That is all mine and actually proves that I have a tendency - when left alone - of getting carried away. I was hopping to have the bars nearly done and POSTed before having to break for surgery but it doesn't look like that is going to happen. They are trying to get me to nail down dates by today - I am trying to finish my handlebars next week. In fact, I had to get my house cleaned up before I went away, so I boxed all the handlebar stuff up and moved the scooter out of the living room and put it up in my bedroom. I will be spending about the next three months in my room - so I wanted the scooter close at hand. Right now it's a huge and expensive laundry basket. By the way, thank you for your post on the left and right mirror thread issue you were having. Never though about it until reading your post. My "new" mirrors were left and right threaded. However, the "new" left and right handed set of handlebar clamps I bought for the mirrors were both right handed. I said the hell with it and made my left handed mirror right handed. I will deal with the problem later.
Thanks for viewing and the comment - larry |
|


