|
|
Post by lordverminaard on Mar 21, 2018 15:11:35 GMT -5
If it has an AC lighting system, as many scoots do, the lights do not come on until the stator is producing voltage. If the starter will not turn, check the brake lever switches as they are in the starter enable circuit. There should be a fuse at the battery, if it blows, the starter will not work. This one will switch on all lights when the key is turned and killswitch is flicked to "run". I'll worry about the brake light switches if I get the lights back and it still won't start.  Thanks, |
|
|
|
Post by lordverminaard on Mar 21, 2018 15:12:28 GMT -5
Not to be an A--hole but was the key turned to the "ON" position? There has been many times where I stood there kicking on the kick starter, only to realize that I didn't have the key turned to that "ON" position. Haha, I have done that before, but this time I did in fact verify all that stuff once I determined that nothing was happening. |
|
|
|
Post by lordverminaard on Mar 21, 2018 15:16:23 GMT -5
My questions: A projected nose spark plug on a performance 2-T? Is it a Squish type head? What number plug is that? Yep, squish type head- at least I think so:  I am using the specified plug in the manual, BP7 HS I think? Not sure if I was supposed to use something different? Thanks! |
|
|
|
Post by Corrosion on Mar 21, 2018 17:23:15 GMT -5
With a Big Bore kit. I drop a heat range number colder and I don't use a projected type.
Both those will make reading the plug difficult.
|
|
|
|
Post by lordverminaard on Mar 21, 2018 21:43:30 GMT -5
Really? Interesting. So a BP8? And what is the specification for "non-projected"? Thanks for the tip!
Also, update: I checked the fuse, sure enough it was popped. I guess I could have shorted something accidentally when I had the jump box out. Didn't have time to work on it though or dig around to see if I had a spare fuse but maybe this weekend.
|
|
|
|
Post by oldgeek on Mar 21, 2018 22:19:07 GMT -5
Just wrap the fuse with tin foil!  And have a fire extinguisher nearby just in case. Lol! JK As far as changing plug type, I was surprised how much the tune changed when I tried a colder or hotter plug on my scoot.  |
|
|
|
Post by lordverminaard on Apr 12, 2018 13:18:44 GMT -5
Replaced the fuse, good to go! Also swapped in a BR8HS, gapped at .8mm. Rode it in to work this morning, it felt pretty darn good. Low end was crisp and it revved out nicely, still a few flat spots but otherwise better than it was before and no sputtering\missing anywhere.
I also ordered a set of 4g sliders which are on the way.
I keep trying to motivate myself to paint this thing but I also think I am going to sell it so it's hard to want to do anything extra to it right now, lol.
|
|
|
|
Post by vlatx on Apr 12, 2018 18:07:49 GMT -5
BR8HS or even BR9HS in warmer weather is a must for that kit.
|
|
|
|
Post by lordverminaard on May 3, 2018 14:10:05 GMT -5
Doing more work! My sliders came, so I decided to tear down the CVT yet again. Cleaned everything, all looked good. Dropped in the 4g sliders: 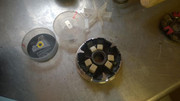 And made my own "torque controller" out of a random PVC fitting: 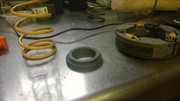 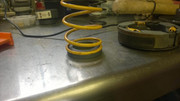 This was when I also found out my 3-year old was smarter than me, I had the fitting and was originally going to use the screw-off cap, which would have required a lot of shaping and sanding, and my kid wanted to know what I was doing so I showed him. A few minutes later he brings me the spring inside the little insert like shown, I didn't even know the insert was part of the fitting (it was screwed together) but he took it apart and realized it fit the spring perfectly. All I had to do was sand down the base flat, cut it short, and enlarge the center hole slightly. Thanks kiddo! I don't know if this fitting will hold up to the heat, or how much heat it will actually be subject to, but I guess I will find out! Upon re-install I immediately noticed belt position was much better and closer to the edge of the rear pulley: 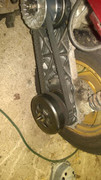 Should be an improvement! Also I still had about 2 mm of front pulley left from the mark I made so hopefully the sliders will push it out a little more under full engagement too. I had an issue with my headlight switch not working, so I got a burr up my arse and decided to try the naked bar look. 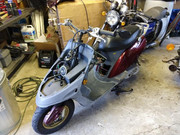 Ordered a set of universal GY6-style controls with brake levers, and a cheap-o tachometer. I realized later that I will probably need a fuel gauge and indicators for turns somehow. Also the turn signals were mounted on the upper fairing so I will probably have to replace them with surface mounts on the lower fairing or something similar. After tearing it down I realized that I didn't even take it for a rip after the slider install, now I regret that since i have to wait for more parts. Sigh. Until next time! |
|
|
|
Post by lordverminaard on May 8, 2018 8:46:01 GMT -5
More work! My controls came, looks like they will work out nicely. I can also use the headlight switch (which the bike didn't originally have) to function like a kill switch. These controls also have a cancel button for the turn signal which will be a welcome addition. Sorting out wiring: 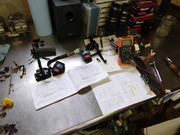 I am going to cut the factory Sundiro handlebar harness, splice in the Gy6 harness to the Sundiro plugs and that way it will plug in like stock and everything will work. Documented it all too for future reference. Zipped off the handlebar tabs: 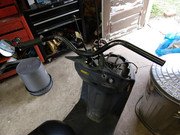 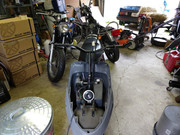 And that's about all I can do until the tach and fuel gauge come. Going to stop by the FLAPS and see what they have in the way of surface-mount lights and also pick up some paint. If none of my stuff comes by the time I get to the garage again, I will probably start prepping stuff to paint, which is basically my least favorite thing to do in the known universe. |
|
|
|
Post by lordverminaard on May 17, 2018 12:43:01 GMT -5
Another minor update. Got the new controls mounted, had to re-drill the little indexing hole since it was in a different place than the original controls, also had to file a bit from the opening of the controls as the Sundiro bars are a little thicker than what these were made for. 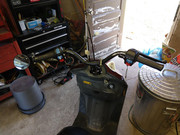 Also lots of wiring, didn't bother to take pics of that boring process but it was cut, splice, test, repeat. Managed to trim out a lot of the stock harness, re-route and consolidate others, overall should be nice. Only thing that isn't working is my kill switch, I wired it exactly the same way the original one was, (continuity to ground when in "kill" position, open circuit when in "run" position) and the new switch behaves exactly the same way but right now I can just turn the key to on and fire it. I guess it's not a major deal but I'd like to figure it out just so it doesn't bug me anymore. My tach came but the fuel gauge has not. So I am not finalizing and\or painting the bars yet until I figure out where I am going to mount my gauges. I did manage to test paint the front cowl and mount some LED flashers, it's not perfect but a hell of a lot better than it looked before! I like the Krylon fuzian paint so far but wouldn't you know as soon as I start spraying the bugs come out and drop right on the fresh paint. 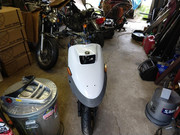 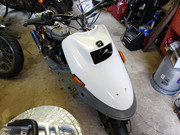 That's about 4 coats, with only minor scotch-brite and alcohol prep. Also test-sprayed the black pieces, this is just one coat with no prep at all other than alcohol wipe-down: 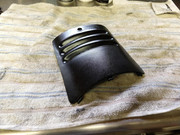 Hopefully I can finish painting the rest of it this week. Feeling pretty good about it, I went and degreased the bike in preparation for spraying the rest of it: 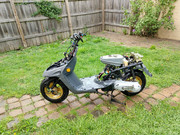 As soon as the fuel gauge comes I can finalize the wiring and the bars, all that is left after that is fabbing a quick bracket to re-mount the hugger rear fender, (ran with it off due to exhaust, BIG mistake, threw crap all over the engine and carb area) paint the rest of the panels, cut and re-position/re-weld the stinger on the exhaust so I can run the lower fairings, and if I am feeling ambitious, clean and paint the wheels and install new bearings. I also ordered a Stage6 remote choke lever, I didn't like the one I used and it was less than $20, should have just done it from the beginning. I also really need a rear shock, but can't seem to find a 295mm\11.5" clevis rear shock for less than $40. Lotta work for a scoot that I am probably not going to keep, lol. |
|
|
|
Post by lordverminaard on May 21, 2018 9:48:33 GMT -5
Weekly update. STILL no fuel gauge, tracking says it has been in Chicago for a week. C'mon already! Finished painting the black parts, so I had to pull it outside and see how it is going to look with the cowl mounted: 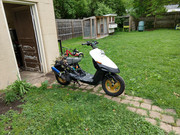 Sorta looks Police-ish. Not really the look I was going for, but I guess we will see when it's all together, lol. Mounted the hugger fender with a little tab to hold it in place: 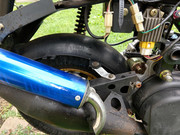 Should work fine. I was about to hack the exhaust at the stinger to weld it back on to provide clearance for the rear fairing, and decided to jam a prybar in and see if I could tweak it instead, and surprisingly enough it worked out pretty well. 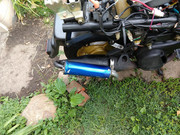 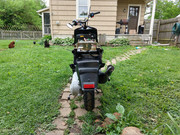 Initial test fit of the rear fairing looks like it will clear. Much easier than cutting and welding. Made a little support extension so that should keep it from vibrating loose too. I did finish painting the rear fairing white as well, it didn't turn out great but I was kinda rushing it anyway. Krylon says you can wetsand and polish after 7 day cure, so I will do that and see what I get. But I've got plenty of stickers to cover up the really bad spots, lol. Plus I was still kinda wanting a half-assed look with this scooter anyway. I need another can of black and I can finish the fairing extension pieces completely and then the paint will be done. I also ran the wire for the tach. I am still waiting to finalize the loom in front until I get the fuel gauge wired in. If the gauge doesn't come this week at least I can finish all the body work. I should also replace the front wheel bearings and paint those wheels too. I hate painting. Actually the painting is fine, it's the tedious prep that I really have issues with, lol. Also unrelated to the project, my Son is really into motorcycles, we went to the Iron Pony (local mega-motorcycle dealership and accessory shop) and he was thrilled to see there were motorcycles "his own age." (that's what he called it)  But yeah, that's why I only get limited time (and money!!!) to work on stuff. Until next time! |
|
|
|
Post by lordverminaard on Jun 4, 2018 15:01:27 GMT -5
Not a lot to update, I didn't get to work on it last weekend, and I have a commitment this weekend as well so who knows what will get done. I did actually get a lot done a couple weeks ago though but not many pictures to prove it, lol. Fuel gauge came, so now I can mount my gauges and finalize wiring. Also ordered a rear shock. I finished the paint job, at least mostly- I am still pretty much half-assing it but I decided to wetsand and polish just to get rid of some orangepeel and a few runs and some crap that got into the paint when I sprayed it. Normally with a car or paintjob I care about, I'd start with 800, 1000, then 2000 grit. I started with 1000 and gave it a once-over, then just used normal medium compound with a Mother's powercone, and I'll be damned if it came out really darn good. I can probably hand-polish a few spots that didn't get done well with the cone but I am more than OK with the amount of non-effort I put into it! Once I get it assembled completely I will have a pic. Also got my nifty Stage6 choke mounted, which actually took quite a while to do since I had to cut and re-solder the cable barrel on, route cable, fit a bracket, etc.. but I am happy with the result. Test fit: 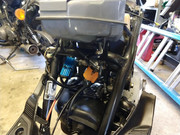 And finished job: 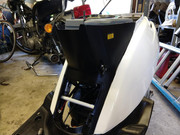 Need to mount the shock, put in a new battery and it's FINALLY done. |
|
|
|
Post by lordverminaard on Jun 7, 2018 10:35:47 GMT -5
Quick update, I wasn't able to work on it last Friday and I have a commitment this Friday as well, but my shock came! 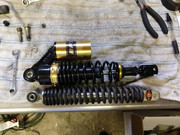 There is a lot of info on these types of cheap clone shocks, for the price I don't think you can beat it, I verified the pressure in the reservoir was good at 70 psi, some people say they are shipped with really low pressure and that causes it to not function properly but this one seems good to go. There is also info out there for rebuilding these and apparently putting correct shock oil in them helps a lot too. That will be for another time though. I did adjust the clevis to be slightly longer than the oem shock, and put about an inch of preload in it too, I guess if I need more I will adjust as needed. It looks like I will need to trim the rear fender slightly to make room but otherwise it will work out nicely. If I get any garage time this weekend I will try to fit it up. |
|
|
|
Post by lordverminaard on Jul 2, 2018 10:51:45 GMT -5
Time to update thread, I have been busy as hell this summer but I have worked on the scoot and have some wins and some fails. So the shock I got wouldn't fit in the upper mount, there was not enough clearance at the top mount. I got one of the cheap shock extenders on Ebay to see if I could remedy this situation. 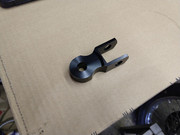 Even though it rotates the shock 90 degrees, there was plenty of room to clear after that. 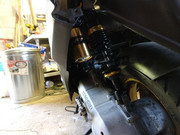 That did make the shock longer than expected, I was able to remove the locknut on the lower perch and adjust it all the way in, still a tad longer than stock- enough that the center stand is more like a side stand now, and my side-stand is too short to use anymore. Oh well, moving on! I wanted to finalize the gauge and handlebars and get this part of the project wrapped up. First I re-purposed the hole I drilled for the first manual choke setup to use as my oil warning light: 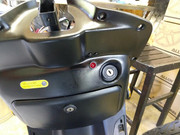 Then instead of welding tabs to the bars, I just decided to form a piece of aluminum and clamp it in place and use that to mount the gauges. 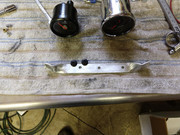 (I later had to re-do the holes and grommets on the fuel gauge, mounting that sucked since it didn't have any mounting provisions at all.) What you didn't see was the hours it took me to wrap all the loom up nice and tuck it away. Finished result: 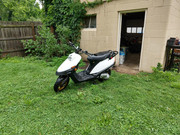 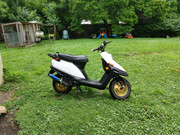 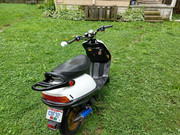 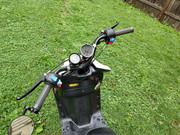 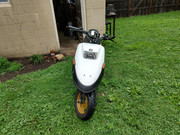 Still have some issues with the tach, it sorta does whatever it wants and I really have no idea if it is accurate or not. It's the type where you wrap a wire around the spark lead. Anyone have advice to make them work better? I finally was ready to ride it, so I threw it all together and decided to ride it to work. It went ok, but it was running strange at half throttle or more, and something with the cvt didn't feel right. I assumed it was due to the new Dr. Pulley sliders so I kept on going. I did notice how smooth the sliders variated but I could tell they weren't variating all the way so my rpms were pretty high for the speed I was going. Also I was experiencing a severe full-throttle cut, felt like a hard ignition cut. It was actually very similar to some of the videos 90GTVert was experiencing during his LC tuning runs. He mentioned checking plug gap so I did the same. I was at .8mm or .031" which I guess is a little high, I lowered it to .7mm or .028". Plug looked rich too, so I swapped the main jet to a 93. I also took apart the CVT to check out if anything was going wrong, and noticed some heavy wear marks on the drive faces of the CVT up to about half travel. I thought that the Dr. Pulley sliders might have been too light. I ended up pressing out the bushings, torching them and melting some solder in each one increasing the weight about a gram. I cleaned everything and re-assembled. Took it for a shakedown run (this was last Friday, it was about 95 degrees out). It was running really well, I could hold it WOT for a long time and no cutting or sputtering, and mid and half throttle was pretty good too. CVT issue was still there, felt good at slow speeds and had great acceleration but no top speed at all. I was about a mile away from the house and right as I thought "hmm, the CVT is starting to get worse, I should head back" ZING! I heard a pop, the engine revved up real quick, I let off the throttle and it died. Coasting along I knew right away the belt snapped. Saw some smoke from the CVT area too. I let it rest a minute, kicked it a few times and it fired back up and sounded good, so I knew the engine was probably ok. I started the long walk back in 95 degree heat, thankfully it is a pretty lightweight scoot. A couple people did stop and ask if I needed help but nobody had the means to haul a scooter (and neither did I for that matter) so I kept on until I got home. So that's where it's at. I ordered a new belt and will tear down the CVT again on Friday. I think I know what is going on. My home-made torque controller is probably spacing the contra spring too much and it is probably coil-binding. The weights were pushing so hard on the belt it caused it to overheat and snap. Ordered a new belt, plan is to tear-down, punch out the solder in the weights bringing them back to stock, remove my torque controller and sand the base down as thin as I can get it. After that it should finally be good to go. Hopefully I have some good news this weekend, lol. |
|