|
|
Post by AtariGuy on Jun 23, 2018 1:21:06 GMT -5
I just rescued a roketa mc-54-250-b parts scooter - for free - which will need a load of parts to get it roadworthy again, plus more massive paperwork getting registration and a clean title. As the dust settles and i start a to-do (shopping) list, i'll start the build thread with pics to boot.
I'm just mostly curious how you guys plan out major projects like this.
Just to emphasize, it is only partial - lots of parts have been taken from it to fix another bike, however the frame is intact with front stem and handlebars, engine mount, both stands, both rims (a front kenda 130/60-13 tire) and... basically a decent crankcase. It still has the rad, cylinder and head, crank, piston, stator/flywheel, water pump, and oil pump. Most of the plastic body panels are gone, 80% of the wiring harness is missing, no control lines (brakes and throttle), no intake (or carb or airbox) and no exhaust. And nothing transmission. Not even the cvt or gear covers. And no output shaft.
I'm screwed lol
|
|
|
|
Post by 90GTVert on Jun 23, 2018 6:45:11 GMT -5
This may not really be a deal even for free. I got a free Chinese 50 once. Put as much into it to get it right as a new one. I would definitely suggest the #1 step to be that shopping list. Put down anything that you know you need or are pretty sure you need, find the parts, and start totaling it up. Compare that to what you can find a decent running Chinese 250 powered scoot for and decide if it's worth it. Then remember that you'll always spend more than you initially plan for and it sounds like you have title issues.
For what it costs to piece together a scoot with all of that missing, you may even get into used big brand scoot territory.
Not trying to rain on your parade, but I wish I did that when I got my freebie scoot. The exception to this may be if you're committed to owning a totally custom 250 scoot and you would replace pretty much everything anyway.
|
|
|
|
Post by pinkscoot on Jun 23, 2018 7:40:46 GMT -5
I owned one of these. It was my first big project bike and I learned a lot with it. It was running and much more complete than yours but it was still a money pit. When I was done I had a big heavy fast Chinese scooter. Maybe think about a naked build or put the engine into something. Linhai engines are great with lots of parts and documentation available. I have my free Scarabeo that has turned into a money pit and I am questioning my sanity now. Sometimes we need to look a gift horse, I mean scoot, in the mouth.
|
|
|
|
Post by AtariGuy on Jun 23, 2018 10:26:34 GMT -5
Maybe i'm eggin myself believing that, instead of loan payments or trying to stick money aside, that i can invest a little here and a little there as i please and when i have it available. Besides, the chief financial officer seems happier with this financial plan anywho. I dont think she realizes i dont want a 3 year build rofl
|
|
|
|
Post by AtariGuy on Jun 24, 2018 11:27:37 GMT -5
|
|
|
|
Post by pinkscoot on Jun 24, 2018 12:32:35 GMT -5
That would be a project.  |
|
|
|
Post by AtariGuy on Jun 24, 2018 17:07:07 GMT -5
I have no deadline for it so i aint sweating it
|
|
|
|
Post by 2stroked on Jun 24, 2018 19:23:39 GMT -5
I absolutely love my MC-54-250B. That Linhai Yamaha clone will scream with you. The wiring harness has always seemed to be overly complicated to me, there wires for stuff that isn't there, and some of the stuff that is there, looks like it was added as an after thought.
Fleabay is your friend with this one. The water pump impeller is plastic that likes to disintegrate.
|
|
|
|
Post by AtariGuy on Jul 8, 2018 22:15:12 GMT -5
I got some catching up to do on this project of mine. Been taking loads of pictures, but have been awfully slow at getting them up for analysis. At this point, these pictures are just purely progress reports and any q/a if anyone needs. When I get to the assembly stage, i'll set up the parts for teardown and make videos of teardown/assembly. Mostly cuz I see that Youtube lacks any real information on DIY vog 250 engine repairs. Anyway, pictures! Primary disassembly and analysis stage. Here's what the head looked like when I first opened it up. 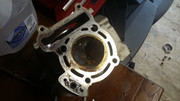 Cylinder - once I finally got the piston unstuck =D 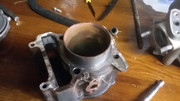
Speaking of, here's the piston and a corner of the crank. 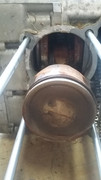
And this was an attempt at peeking into the cases better than i can fit my face around the piston/studs. That crank is junk! 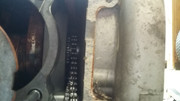
Deeper teardown - heading in towards that crank. Pulled the right side cover off, it was a bit slimy from trace oil and water seeping into the crankcase. Found this. Also removed the starter - it's mostly junk, but i will cover more on that later. The lowest rightmost gear is what drives the water pump - sorta. That gear is mounted to a shaft that runs through the lower front of the crankcase to the left side - where the water pump would be driven by that shaft. The intermediate gear at 6oclock is actually the oil pump. That unit is fully serviceable though they recommend to replace the whole pump assembly instead. Getting way too detailed for this lol 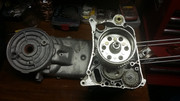
The cover mounts the 18 pole stator (i have the 104mm stator, not the 95mm - pay attention to that if you need to get to yours, more on that much later) - and the crank holds the flywheel inverted. Behind the flywheel is the sprag clutch starter gearing system. That's the 6 bolts inside the flywheel to the crank sprag. The intermediate gear would be at 11 oclock to the crank with the starter at 10:30-oclock. Really technical terms there! 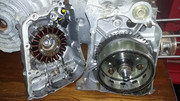
This is a horrible shot and i feel like a jackwagon even showing this, but i set the head on top of the crankcase to get the lighting and angle better to show you that... it doesn't have a full valve cover like most people are used to. It has access windows to get to the rockers! And it's 4mm center, 10mm locknut to anyone who needs to do valve lash. Convenient accessing it that way, but a real pain in the ass if you need to do a full head teardown. Let's get some more shots of how to get to that cam... 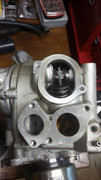
So... the cover for this is this labyrinth deal for positive crankcase ventilation. But we're looking at the cam. It starts with an 18mm bolt, a washer, this plate... 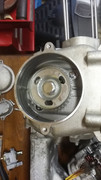
Then the keyed gear. 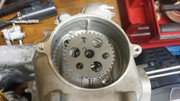
Continuing forward... |
|
|
|
Post by AtariGuy on Jul 8, 2018 22:38:19 GMT -5
Here's the cam bearing retainer. You can also see the 2 rocker arm... installation holes? We'll get back to that. 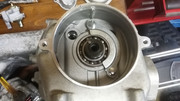
Slightly ahead of myself in this picture - it became more about the day's progress instead of part by part picture analysis by this point of the teardown. This shows the cam out, but you need to first remove the 10mm bolt on the backside of the head from the cam gear - it locks the rear cam bearing in place, then loosen/remove the rocker arm valve points. Like I said, i got ahead of myself and had to reinstall the timing gear. For the cam removal itself, turn the cam so the timing mark is pointing to 12oclock with the combustion chamber down (6oclock) to clock the cam correctly to remove. Then, while navigating the rocker arms so they aren't hanging up on the cam, slowly slide that sumgun out. You could try removing the rocker arms before the cam, but i found the extra room where the cam was helped to worm them rocker arm pins out of their recesses. - VERY IMPORTANT - The intake and exhaust side rocker pins, rocker arms, valve covers, etc are DIFFERENT from each other. I noted - before I even took the valve covers off in the first place - that one cover has 2 bolts, one has 3. Use them as your sorting dishes while you disassemble the head and keep everything from "3 bolt side" in the 3 bolt cover (Exhaust port side), everything from the "2 bolt side" in the 2 bolt cover (intake port side). It will reeeeeeeeally help you on reinstall - but i will pay extra close attention to this when I set up the videos. 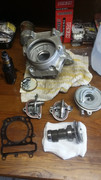
Views of the head after cam removal (but before valve removal) - this is the side with the cam bearing retaining bolt, look by the logo casting above the spark plug for the bolt during your cam removal 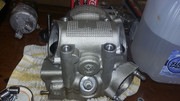
Cam gear side after removal. 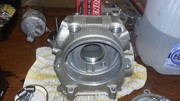
Valve covers used as retaining dishes - and the cam gear cover that doubles as a pcv labyrinth 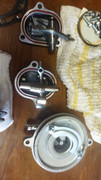
Cam, gear, pcv plate, washer and bolt - disassembly 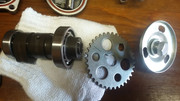
And disassembly of the valves. They're nothing funny, 90GTVert has 3 great videos on valve spring removal - i personally love the second video and made a tool in 5 minutes to pop my valves off. 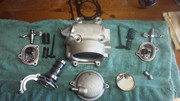 |
|
|
|
Post by AtariGuy on Jul 8, 2018 22:51:02 GMT -5
Part 3 - Realizing there was room still in the last post to include these final couple pictures that have us up to date on diassembly. Something like a week ago, i did start slowing down, polishing up and cleaning up parts as I disassembled. Realizing I may be able to salvage the cylinder if i can be gentle while honing it, I don't know of any oversize pistons if one were to bore out the cylinder. Chucked up the valves into my poor mans lathe (drill) and used scotch brite and wd40 to polish them, still gotta polish the combustion chamber and lap the valves and seats. WD40 on EVERYTHING! It's almost a godsend for cleaning these aluminum case scooter engines and their internals! Anyway, here's the current state of this engine as of this morning. Cranks out - still gonna replace this. Bigend bearing is shot, cvt splines are gone, and there's a touch of rust on the cvt side crank bearing. still gotta test the stator, but the wires coming from the windings are all 3 yellow. The pickup has 2 differing colors. Cleaned the sprag clutch unit, the oil pump, and literally about everything else i could put a scotch brite and wd40 to 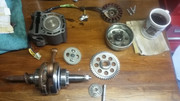
And I have the cases 99% disassembled and mostly cleaned - short of taking them to a DIY carwash. Still have to remove the cylinder studs and the final drive/output bearings - and i think i'm gonna nab some sort of citrus scrub and scour the long casehalf clean. I really want to give this engine a clean coat of paint. 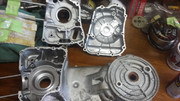 |
|
|
|
Post by AtariGuy on Jul 11, 2018 0:09:15 GMT -5
I've been working on cleaning and prepping the cases for some paint. At work, we have a product called Ox-Out 536 used for descaling and removing oxides from 300 grade stainless, aluminum, and any other nickel-alloy metals. As i've discussed my engine rebuild project with my boss, he told me to try some of that ox-out on the cases, that it should brighten them right up without much elbow grease. I did find a few links on google for it - www.americanflagpole.com/lighting-rod-kit/aluminum-cleaner/ - apparently they sell it? And the company's web page on it, how to use it in an industrial setting, and whatnot - www.chemclean.com/cc_536.htmI will report back when i get a chance to try this out and let you guys know if its worth a try. |
|
|
|
Post by 190mech on Jul 11, 2018 3:58:07 GMT -5
Enjoying the detailed teardown!The head looks similat to many 60's era Hondas with some improvements,,like the ball bearing cam,old Hondas rode directly on the head casting and many had to be binned too early due to wear..Many motorcycles were scrapped because of Honda's expensive parts and no aftermarket fixes...
|
|
|
|
Post by AtariGuy on Jul 11, 2018 11:26:19 GMT -5
Thats quite the issue there honda! I'm glad thats been worked out looking at this one, but having a... (lack of a better term) caged head like this does make it a pain in the ass. Especially trying to tap out valves. I did break a knuckle because of it. I didnt use the old slow valve clamp lol but instead a deepwell socket and a rubber mallet. Note moving forward, anyone intending to use a socket/pipe/tapit tool, make sure your fingers are way further away. Springs give.
|
|
|
|
Post by joeorange on Jul 12, 2018 23:13:21 GMT -5
luckily you can grab a crank for these engines for a rather good price. id suggest a ebay seller bayfar. he sells heads, cylinders, cams, variators, and a few more parts to list for these engines at really decent pricing. ive ordered quite a few parts from him and they are all good quality. here is a link to his store. Bayfar |
|