Deleted
Deleted Member
Posts: 0
|
Post by Deleted on Apr 6, 2021 15:39:37 GMT -5
Time to get rid of some old bearings and seals. Gotta get these cases clean cause tomorrow we start rockin' and rollin'. Blind bearing puller for 25 bones on eBay is so much better than doing the bread trick. I did it on the last build so I would know how to do it, but that took hours off my life. Lol. Couple minutes with a heat gun and slide hammer much preferred. Heat gun and thermo combo is the only way to fly!     |
|
Deleted
Deleted Member
Posts: 0
|
Post by Deleted on Apr 6, 2021 15:41:45 GMT -5
Gonna primary clean and scrape tonight. Get rid of all the old gasket material material and crud. Tomorrow will hit a final clean with the acetone, and then we Jammin! Very excited!
|
|
Deleted
Deleted Member
Posts: 0
|
Post by Deleted on Apr 7, 2021 14:59:47 GMT -5
Well, I got the cases all cleaned up. After doing a final dry assemble I noticed that these two humps gotta go. Piston was just barely bumping them. Bit of a setback for sure, but rather find it out now than later.   |
|
|
|
Post by 190mech on Apr 7, 2021 18:35:08 GMT -5
"When in doubt,grind it out!"  |
|
Deleted
Deleted Member
Posts: 0
|
Post by Deleted on Apr 7, 2021 19:47:07 GMT -5
Yep. That's where I'm at too. Actually have a lot more to work on. Got past the humps, but still draggin in parts. Gonna go around rest of perimeter and see if I can get it sorted out.
|
|
Deleted
Deleted Member
Posts: 0
|
Post by Deleted on Apr 8, 2021 16:06:57 GMT -5
That little booger fought me every step of the way, but I got it cut and smoothed. Crank arm doesn't touch a thing now. Used a craft dremel with tungsten carbide cutting bit on 3rd setting. Switched 60 grit wheel for initial sand and finished off with 220 grit by hand. Came out alright for a first attempt. Broke the job up into bits to make it less nerve wracking. You can see in photo 4 that I took it pretty close to the edge. this was due to a high spot in the case. slightest wobble in the crank caused it to scrape that spot. Now I gotta figure out how to get rid of all the aluminum shavings. Once that's done, I can drop that crank in and seal this bad boy up! Hoping to get the cylinder on by Saturday night and start testing on Sunday morning.     |
|
|
|
Post by aeroxbud on Apr 8, 2021 18:27:15 GMT -5
It's a shame you had to do so much case work, to make it fit. It's never as easy, as plug and play. Even though you would think it should fit right in.
On the home stretch now. 👍
|
|
Deleted
Deleted Member
Posts: 0
|
Post by Deleted on Apr 8, 2021 18:33:26 GMT -5
aeroxbud Not a problem at all! it's all part of the learning process right? Had to learn case work eventually. Since I'm on vacation this week, now is the best possible time.
|
|
Deleted
Deleted Member
Posts: 0
|
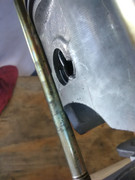
Post by Deleted on Apr 10, 2021 18:17:34 GMT -5
|
|
Deleted
Deleted Member
Posts: 0
|
Post by Deleted on Apr 12, 2021 18:56:16 GMT -5
21mm Oko PWK carb on the way. Not really sure where to start on jetting that. I've never messed with any of the larger carbs and the two that I have all use Dellorto 6M jets. The PWK jets will be a learning experience for sure.
I've seen the Diameter x5 method for estimating the main jet, but I haven't seen anything on that for PWK. Gonna do some reading around to see if I can find a starting point.
Planning to put the head on tomorrow.
|
|
|
|
Post by x7rocks on Apr 13, 2021 20:55:44 GMT -5
21mm Oko PWK carb on the way. Not really sure where to start on jetting that. I've never messed with any of the larger carbs and the two that I have all use Dellorto 6M jets. The PWK jets will be a learning experience for sure. I've seen the Diameter x5 method for estimating the main jet, but I haven't seen anything on that for PWK. Gonna do some reading around to see if I can find a starting point. Planning to put the head on tomorrow. If it helps i used a pwk 24 with a 40 pilot and 125 main on a 52mm bore |
|
Deleted
Deleted Member
Posts: 0
|
Post by Deleted on Apr 18, 2021 14:33:52 GMT -5
|
|
|
|
Post by oldgeek on Apr 18, 2021 15:44:48 GMT -5
Looking good! 3mm of base gasket material may be a little much, over time it can compress and make your squish too tight. You may want to make a metal spacer for the base.
|
|
|
|
Post by 190mech on Apr 18, 2021 16:16:19 GMT -5
|
|
Deleted
Deleted Member
Posts: 0
|
Post by Deleted on Apr 18, 2021 17:23:13 GMT -5
|
|