|
|
Post by rollingbender on Mar 31, 2023 11:21:41 GMT -5
Cool! Considered a baby carrier or small child seat in the under 'tank' bay? Head turning and waving arms for the realistic doll could cable operated. That would be funny!!🤣🤣🤣 |
|
|
|
Post by rollingbender on Mar 31, 2023 20:10:54 GMT -5
Today, I stripped down a couple of automobile bucket seats for recycling. I had picked them up (free) a couple months ago for a side project that has taken a different direction. Now I don’t need them and got tired of tripping over them. The metal bits and pieces went to my scrapper friend, the upholstery went in the garbage and I saved the foam (for now). I also saved the power seat motors, gearboxes, and lead screws. Trying to figure out a nifty way to put a power center stand on the bike. The center stand is the other issue my wife has with the Zuma. It doesn’t have a side stand and she can’t get it on to the center stand by herself so she doesn’t ride unless my son or I are riding too. I’m just not sure these little motors are strong enough to lift it without having a crazy long lever to act as a fulcrum.
Just found out that I will be left unsupervised for most of the day on Sunday so we will see what progress can be made on all the loose ends.
|
|
|
|
Post by 90GTVert on Apr 1, 2023 12:03:38 GMT -5
Have you showed your wife how to use the centerstand? I know that can sound sorta silly, but some people just don't get them on their own or treat them like they need to be gentle. Stand on it with all your weight on that one leg and most people should be able to get a small scooter up.
Other thoughts... Can you extend the arm on the stand without making it awkward to add leverage? As a scooter dude, I like center stands... but side stands aren't that bad as long as they sit the scoot at an appropriate angle. The power stand is a cool idea, but maybe not worth the effort unless it's just another thing that you'll enjoy engineering. You could go the opposite direction to full "race car" and set something up to lift both wheels for quick pit stops. 😁
|
|
|
|
Post by aeroxbud on Apr 1, 2023 12:17:14 GMT -5
After having big heavy bikes with centre stands, there is a definite technique. You want to put as much of your weight onto the stand as possible.
Some people think you just hold the stand on the ground with your leg. Then pull the bars. But it's your weight pressing down on the stand that moves it. Should need very little effort on the bars.
Put enough of your weight on the stand, it should almost move itself.
|
|
|
|
Post by rollingbender on Apr 1, 2023 14:05:35 GMT -5
After having big heavy bikes with centre stands, there is a definite technique. You want to put as much of your weight onto the stand as possible. Some people think you just hold the stand on the ground with your leg. Then pull the bars. But it's your weight pressing down on the stand that moves it. Should need very little effort on the bars. Put enough of your weight on the stand, it should almost move itself. That’s the problem…she doesn’t have enough lead in her pants (as my dad used to say). The physics are not in he favor; too short of foot lever on the center stand, heavy bike, not heavy rider. |
|
|
|
Post by br4inl3ss on Apr 1, 2023 17:53:31 GMT -5
After having big heavy bikes with centre stands, there is a definite technique. You want to put as much of your weight onto the stand as possible. Some people think you just hold the stand on the ground with your leg. Then pull the bars. But it's your weight pressing down on the stand that moves it. Should need very little effort on the bars. Put enough of your weight on the stand, it should almost move itself. That’s the problem…she doesn’t have enough lead in her pants (as my dad used to say). The physics are not in he favor; too short of foot lever on the center stand, heavy bike, not heavy rider. i know that feeling. sometime i'm having a hard time putting mine on the center stand. sure its a 50cc gy6, but its the heavy model like the 150cc. the rider ( me ) is short, not healty at all, and is like a 93 ford tempo : can always rely on to do his job at anytime, but there is ALWAYS something that doesnt work ( plantar fascitis, then armpit abscess, then heavy pain on neck felt up to the forearm that i dont know what is it yet, and counting. it never stops ). and i'm just 36 LOL. i dont want to see myself at 55 lmao. im thinking about ditching the center stand when it runs properly. anyway its unbalanced for idontknowthereason and the front wheel is always lifted instead of the rear wheel. |
|
|
|
Post by rollingbender on Apr 2, 2023 10:26:33 GMT -5
The other thing inspiring a power center stand is that I don’t have a center stand for this project/engine and I got sticker shock when I went shopping for one. So now my motivations are; financial, parts looking for a project, creature comforts for my trophy wife (of 30 years), and of course, the “cool” factor.
I’m gravitating towards a design that would use a “scissor” mechanism. The motor that used to move the seat to and fro has two lead screws on it. I think a scissors action would give it enough leverage to lift the bike. We shall see later today when the supervisor goes off-site and I am free to goof off.
|
|
|
|
Post by rollingbender on Apr 2, 2023 15:28:45 GMT -5
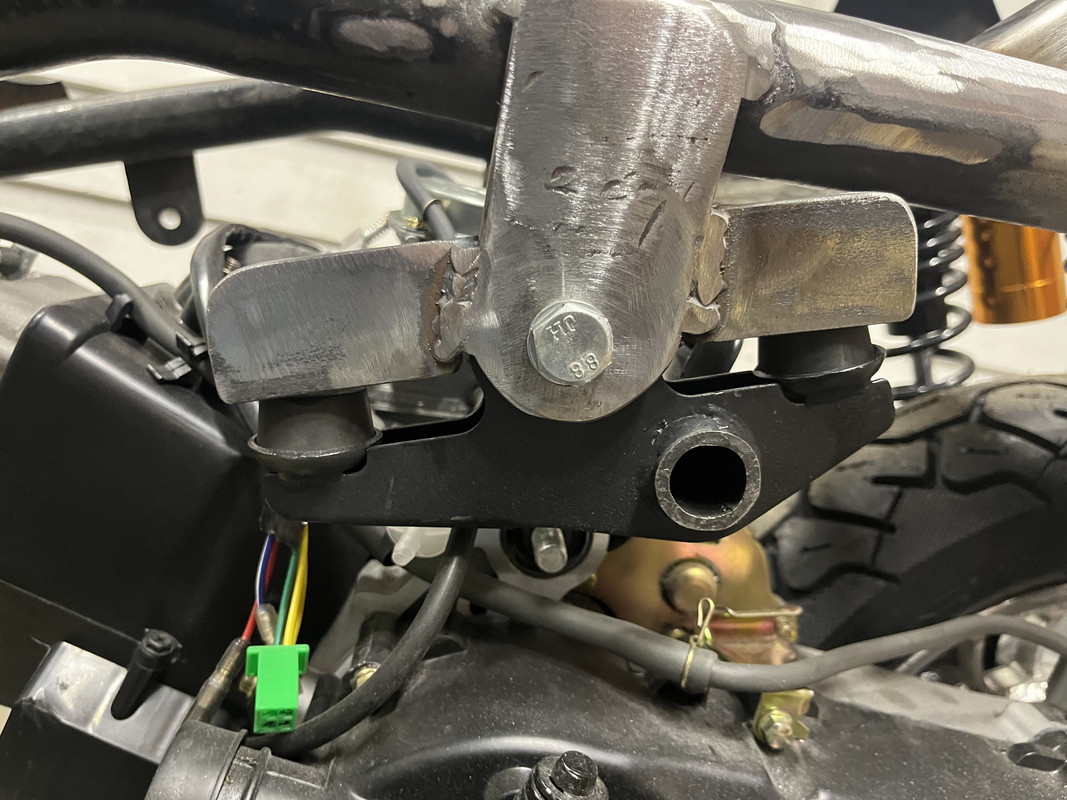
Supposed to be doing this…  …doing this instead!🤪  Weld to grind, grind to paint! Honestly, those welds looked better before I started grinding 🤪. I also did some finish-up work that I started on the engine hanger. As things were with the unmodified hanger, the rear wheel was offset 1/4” to the left. I “adjusted” the hanger by removing a bit off the left side and adding a bit to the right of the part where it bolts to the motor so now the motor fits the hanger nice and snug and the rear wheel is centered. |
|
|
|
Post by rollingbender on Apr 2, 2023 20:24:26 GMT -5
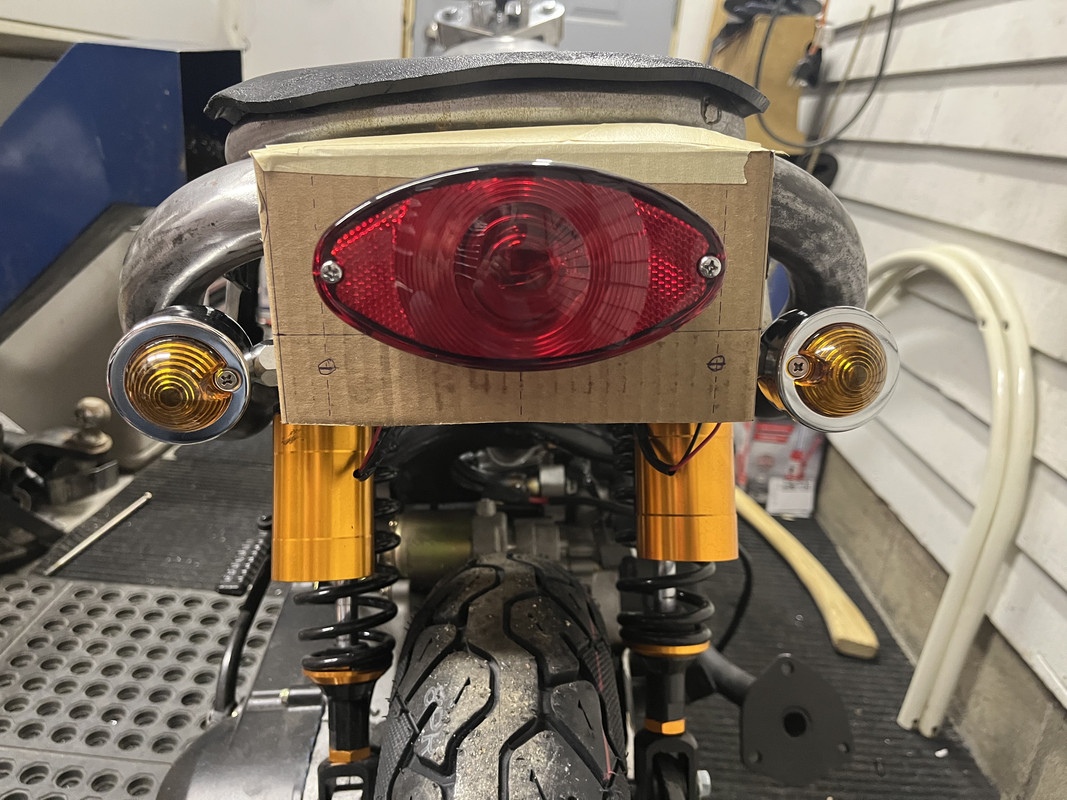
Also made a cardboard mock-up of the bracket for the rear to provide homes for the tail light, turn signals and license plate…while nobody was looking🫣.  I’ll replace the cardboard bracket with some 16ga sheet metal and weld that to the back loop-de-doop of the frame. The cardboard mock-up will be a template for laying out, cutting, and bending the metal version. The sheet metal will be more durable and provide a better electrical ground than the cardboard. After studying the above photo some more, I’d say that the design could use some more cosmetic refinement. 🧐 |
|
|
|
Post by br4inl3ss on Apr 2, 2023 22:17:06 GMT -5
thats getting more impressive every update you push to us.
when do you think to get on the wiring ?
|
|
|
|
Post by rollingbender on Apr 2, 2023 23:16:17 GMT -5
thats getting more impressive every update you push to us. when do you think to get on the wiring ? Hopefully soon. I now have the suspension 100% ready to go. Order of operations is probably: get rear lighting bracket made and welded on, get skirts welded onto seat pan and make seat retainment system, make battery box/electrical control room, wiring. Yea… that mock-up of the rear lighting bracket needs some tweaking. |
|
|
|
Post by rollingbender on Apr 3, 2023 15:24:08 GMT -5
Had to chop a big notch out of the new air box to get it to fit around the shock. Patched the hole with a new piece of 1/8” plastic. This job was a bit small to use the big plastic welder on so I did all this with a soldering gun. Had to add a little bit of filler here and there so I melted in some of the filler rod from the welder.   |
|
|
|
Post by rollingbender on Apr 8, 2023 15:25:02 GMT -5
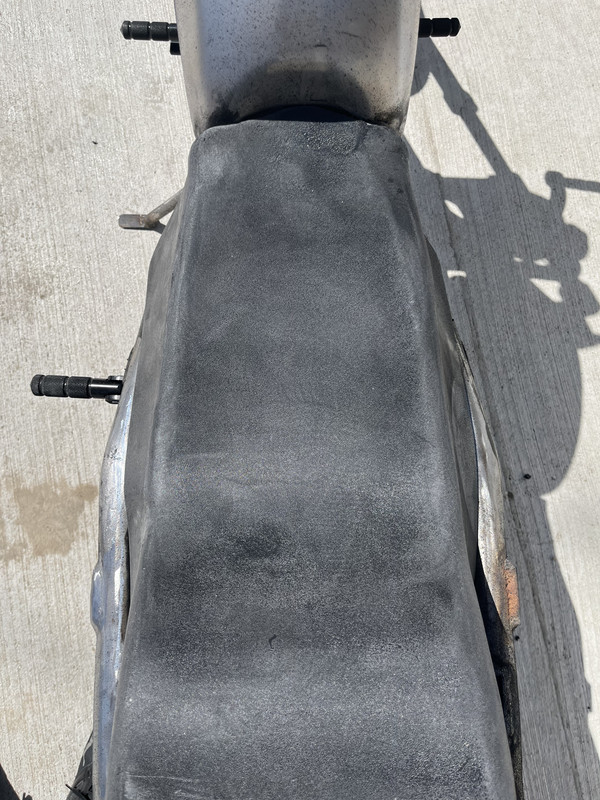
Version 2.0 of seat pan mostly done. Now I’m not so embarrassed to post close up photos of the pan.    I cut the skirts off version 1.0 and welded those onto 2.0 since they were already pretty close to the final shape and bends. This time, I clamped the pan to the bike frame and welded the skirts on in-place. This resulted in almost a “snap-in” fit before even making any provisions for seat retention. I still need to weld in the rear of the skirt and a couple “patches” on the sides of the skirt at the rear to cover some original seat framework that I recently decided I didn’t want and cut out. I needed to get this part done first as I needed to have the tank installed in order to fit the pan to the rear of the tank. 70 degrees today…I should be out riding! But… need to get things done that need to be done before I hand stuff off to the painter. |
|
|
|
Post by rollingbender on Apr 8, 2023 20:23:09 GMT -5
Rear of the skirt welded in! I still want to do some tweaking of the flairs of the skirt but now that I have the rear portion all welded, I’m now done with the tank for awhile so it can go off for painting.   Now my priorities are getting the fender mounts made and coming up with a plan for side plates so that stuff will be ready for paint. |
|
|
|
Post by rollingbender on Apr 11, 2023 15:37:36 GMT -5
The junk man came through for me again! This piece was once a handle on a neglected and abused two wheel cart. Now it is destined to become part of the frame that will become the side panels and place to mount the passenger pegs.  …just needs a little lovin’ and shapin’ with the grinder to make it ready for welding. Then I can cut and shape a plastic panel to cover the blank space. |
|