|
|
Post by 2strokd on Sept 5, 2013 12:46:55 GMT -5
About what I thought. John, I was not aware there was a different casting available. 90cc case? This is a long case, that much I know; wasn't aware they made them in 2 thicknesses, though. What models have the thick case and are they common? Can I find them used anywhere? I think scrappy used to sell complete 90cc long engines for a great deal but I can't seem to find their ad now, might have sold out? I WISH I had a sandblaster! and full sized mill while I'm doing the wishing thing! They are pretty common in small ATV,s but most are all shortcases that ive seen. The Vento and CPI,s from Mexico have 90cc,s in them stock. Some Geely models snuck through the border with stock 90,s. The "FM" style Mina is what we have most it seems?..has beefier cases even in 49cc form. Also, the Yamaha Mina,s seem to have thicker casting with better aluminum. Got a couple of them for sale at the moment. Read more: 49ccscoot.proboards.com/thread/6767/first-build-cpi-oliver?page=10&scrollTo=92034#ixzz2e2dURXs9 |
|
|
|
Post by moofus02 on Sept 5, 2013 14:20:14 GMT -5
My 103 yamaha cases are epoxied from where they went through hogging them out
Sent from my SPH-L720 using proboards
|
|
|
|
Post by shakerdriver on Sept 5, 2013 19:48:39 GMT -5
Shakerdriver, thanks! It's been a fun project, if somewhat irritating at times (this is the fun part, I know I will get my butt whipped when it comes time to tune the CVT as Puchs never had those). what does shakerdriver mean? Freightliner semi's used to be called "freight shakers" and I've been a truck driver so long driving Freightliners I took the name as my handle. Now I drive a trash truck that shakes and beats the hell out of a person so the name still works for me. |
|
|
|
Post by ryan on Sept 5, 2013 21:13:06 GMT -5
i was lucky to get a 90cc with ALOT of room to play, i only had to shave my cases inside 1mm to fit a 48mm crank from maximumrpm,
|
|
|
|
Post by 190mech on Sept 6, 2013 5:35:10 GMT -5
|
|
|
|
Post by waltinhawaii on Sept 7, 2013 16:53:12 GMT -5
Saturday.... welding time. BOY THESE CASES ARE THIN. I'm just being stubborn... and stupid. They are weldable, but behaving very strangely. the case metal actually turns to liquid and blows away from the welded pool of molten metal. I find myself forced to 'skip weld', just do a puddle at a time, and let it cool, then another puddle on top of the old one, let cool, etc. That's why the welds don't look like a normal line or bead... they are just really overlapping puddles. 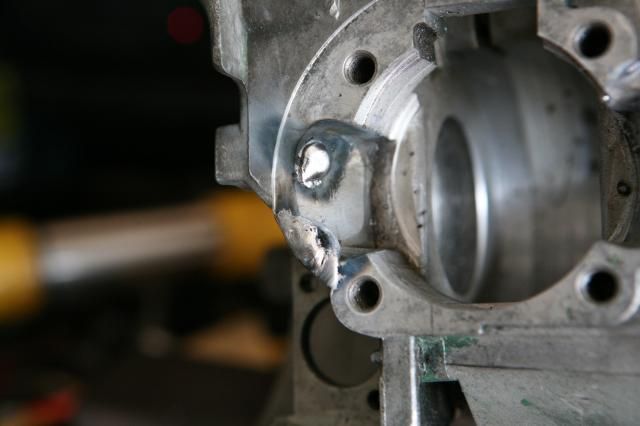 Built up edge a little: 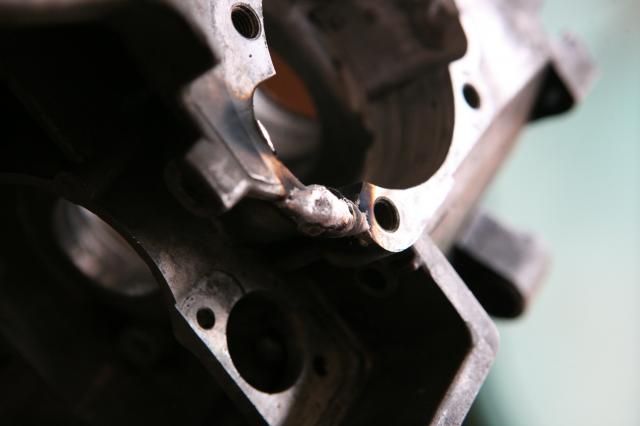 The left side was particularly thin and the whole side turned to liquid, I'm lucky it didn't just fall to the ground: 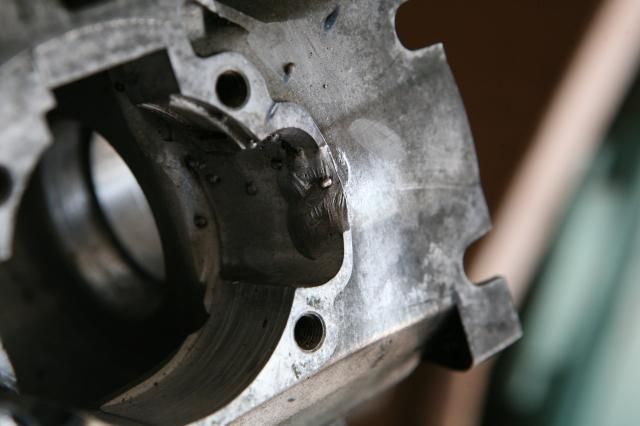 Here I'm holding a flashlight behind and you can see the bright spot on the bottom of the weld shining through... right on the edge of the weld puddle. This is no coincidence. The metal is cooling and pulling into the puddle and tearing a hole right on the edge of the cooling puddle, it's that thin. I was tempted to just run the puddle into the thicker boss near the stud area; however, the metal is so soft I figured I would be in a much worse place if the stud boss melted partially and ruined the cylinder alignment so I stopped and shut it down. This area will have to be reinforced, though. OK, John, you get to see some JB weld in this build after all  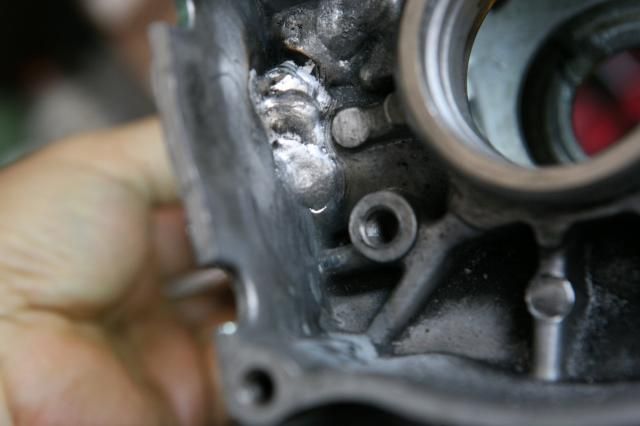 There the right side has been cut back to old margins. The first thing I noticed is that the welded metal is MUCH, MUCH harder and tougher than the case metal. I am using 5356, I think, have to check the welder; judging by how fast the grinder cuts through it, the welded metal is roughly 2 or 3 times the strength of the case metal. 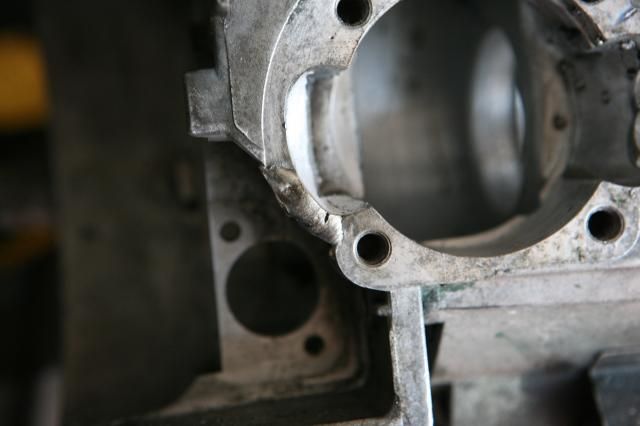 |
|
|
|
Post by 190mech on Sept 7, 2013 19:56:27 GMT -5
Walt,My hats off to ya for bravely striking an arc on those cases!  I hear the European cases weld nicely as they actually use aluminum and not any scrap metal that will melt at 1200F..After working with this junk metal for a few builds(kinda like the 'pot metal' on a "saturday night special" frame),,I do my best to keep the TIG machine parked..I would love to have a stout case with wide studs,long rod,heavy/large crank wheels,reed valve pointed in the right direction or even a rotary valve,but that is a wild dream..  John |
|
|
|
Post by waltinhawaii on Sept 7, 2013 22:07:56 GMT -5
John, you are kind to a fault. Everyone else looking at this thread is thinking, "what an idiot... he wanted a beer from the fridge and instead he flew to france and joined a secret society to get a bottle of wine." Yeah, this metal is really not too good. I'm surprised people don't have problems with pulled studs etc, it's pretty soft. Now I can see what happened to your frankenstein build; this metal just pulls apart. Here I've been thinking of widening the transfer tunnels big time and maybe relocating the studs; I think I'll just call it a day if I can put this thing back together. Building up the left side (it sank right at the area where the cylinder mates to the case surface): 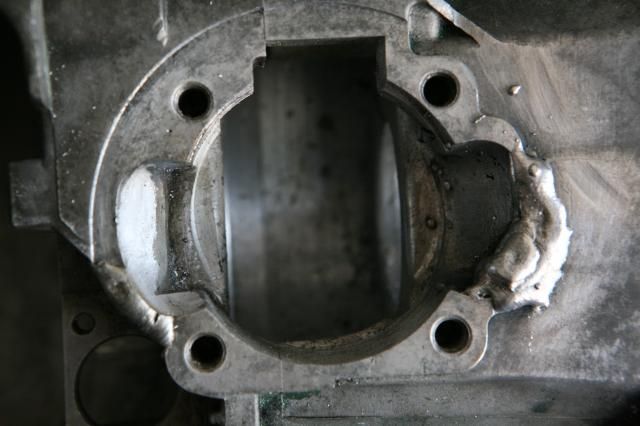 The hardest part is not really the welding, it's grinding it back down and not being too enthusiastic... here, the surface has to be flat to mate up to the cylinder, and I have no real reference. The best way to do this would be to mount it in a mill or lathe and skim the surface until it's even; but this case won't fit into my tiny mill and I don't have a way to mount it onto the cross slide of my lathe and I'd have to make up a flycutter of some sort. Using hand files and frequently stopping to use a straight edge against the surface to see if it is flat with the rest of the case: 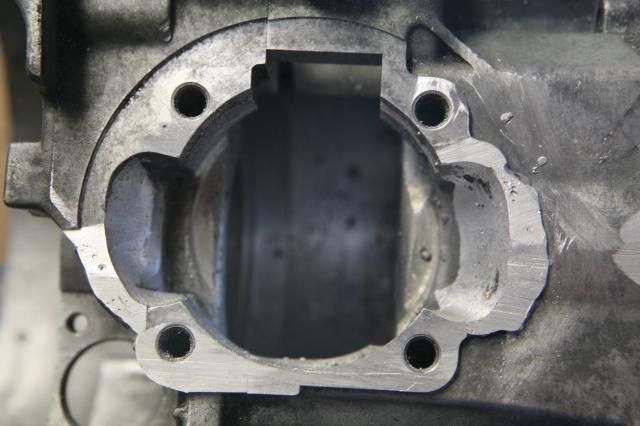 And this is the final: 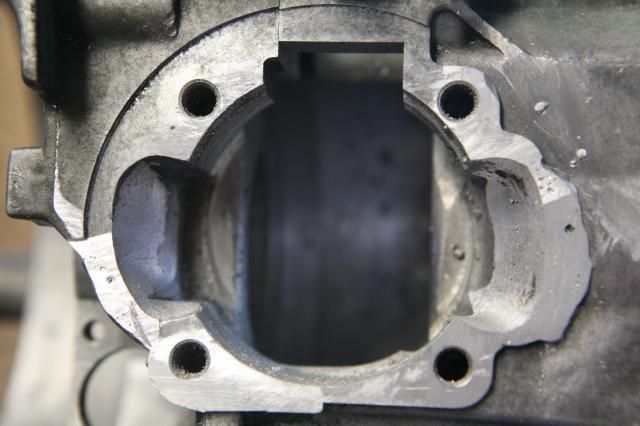 Notice the irregular left margin. This could actually be ported much wider, but then the case would actually be wider than the cylinder. I had thoughts (brief ones) of adding metal to the existing transfers on the cylinder so I could widen them considerably; then I woke up. Actually, what I wanted was to add metal to the inside of the transfer tunnels so that the air path would be a wide archway into the cylinder, not a tall shot that tries to snake up toward the head. Oh well, another victim of cheap manufacturing necessity bites the dust. And the shot that John has been waiting all week for: 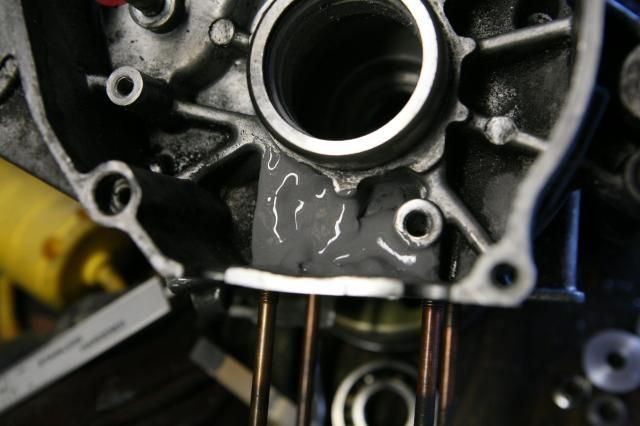 |
|
|
|
Post by pidge883 on Sept 8, 2013 0:12:57 GMT -5
These engines are terrible. I was given one to repair a while a go which had a siezed piston, after just over 1k. Terrible, like you said, soft, cheap metal. Seems a whole lot of effort, but 10/10 for determination!  ~Suzuki GN250 1996 Custom~ (speedpump carb, twin exhaust, K&N air flow, 157 jet) |
|
|
|
Post by 190mech on Sept 8, 2013 5:19:51 GMT -5
Great job!Studs pulling out is very common on all this butter soft case stuff and once the case mouth is hogged out for a bigger jug,there is no room for a HeliCoil..It makes me sick to see beautiful lap welds building up an Italian case to fit a KX85 jug and my hands are tied due to the poor quality of the only type of cases available here! Glad to see the J-B weld there,that means the welder has been turned off.. Here is a link to some alternate thinkers on induction,etc.. www.sprocatti-motori.com/index.htm |
|
|
|
Post by waltinhawaii on Sept 8, 2013 14:10:12 GMT -5
WOW! beautiful hardware. Rotary induction, huh? Can't read anything, looks like they are selling only the small case half to people who want to run a rotary valve? But must be for class racing, they all appear to be small cylinders, judging from the width to the studs. In a 50cc machine, what is the ballpark in HP difference between a reed and rotary induction machine? Years ago I build up a rotary valved yamaha or two, you can probably still find them in old scrapyards dirt cheap, if you've a hankering to try grafting the parts onto a mina case. Come to think of it, the metal in those older yamaha cases are probably worlds better than the current crop of soft mina cases.
|
|
|
|
Post by 190mech on Sept 8, 2013 20:02:15 GMT -5
Rotary valve engines give more power than the best reed engines..Kawasaki used rotary valve induction for ages..
The interesting engine on that link is about midway,,note the wide stud flange welded to the case and the Aprillia style cylinder,,Dang it must be nice to have weldable cases!!
|
|
|
|
Post by waltinhawaii on Sept 8, 2013 20:24:11 GMT -5
Looonggg day. My stupid right angle pneumatic came with a fitting that was a tad too big, so the bits would spin in it or else be a tad snug (depending on bit manufacturer). Changing between the loose and snug bits meant tapping an angled bar into the collet to widen it slightly when changing bits... and of course I tapped a LITTLE too hard one time and the collet broke wide open. this is the grinder: 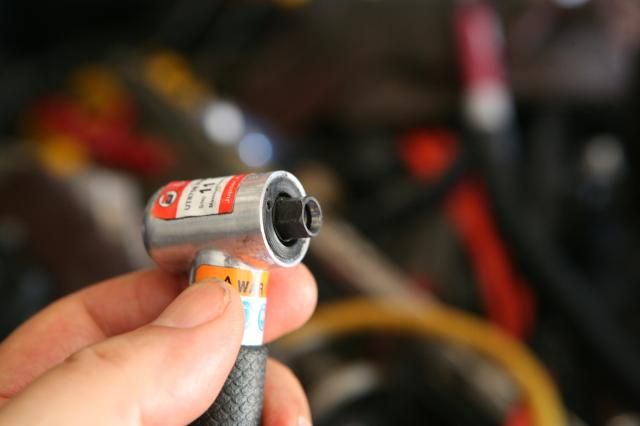 And this is the collet that goes into it to hold the bits. Here, I have tack welded the 2 parts back together again, but of course it won't hold when the grinder is turned on, but I need it back together again to take measurements: 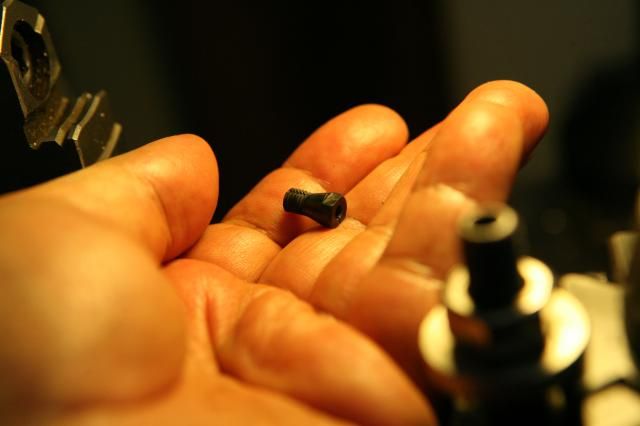 I half inch bar of 11L17 is turned down to same diameter as the collet threads: 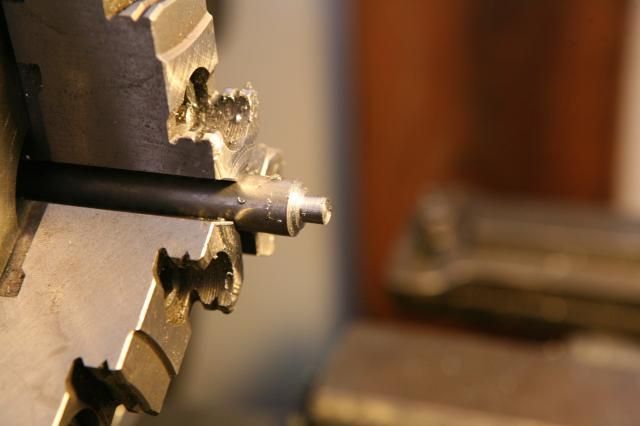 The piece is then threaded 32 tpi and drilled to .120" diameter (bits seem to be around .119"): 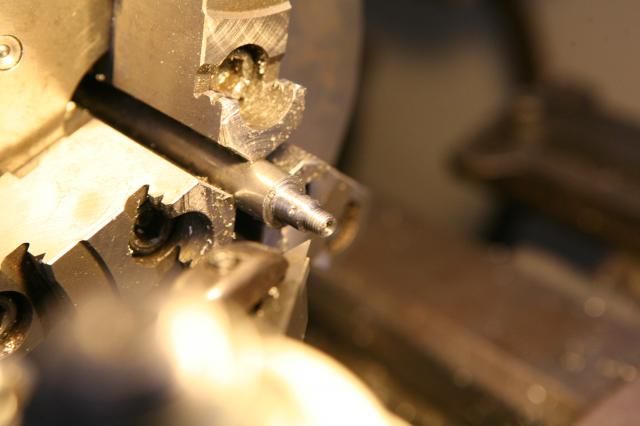 This is the hard part. Had to guess as the taper on original part, I chose 75 degrees: 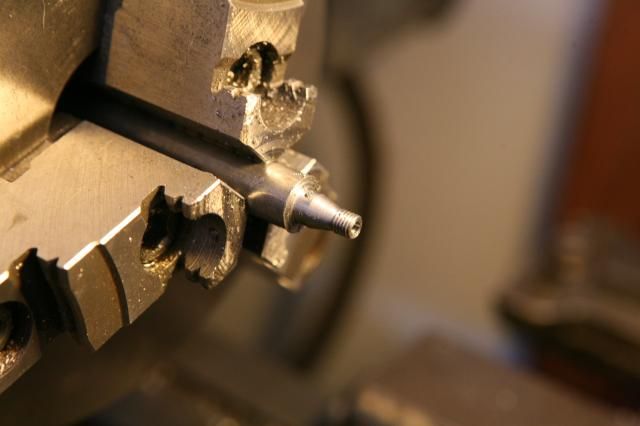 Then I've started to part it off and just in time remembered I have to cut the flats on the end to fit the wrench for loosening/tightening the collet. Off to the mill to cut 2 flats, then back into the lathe to part it off: 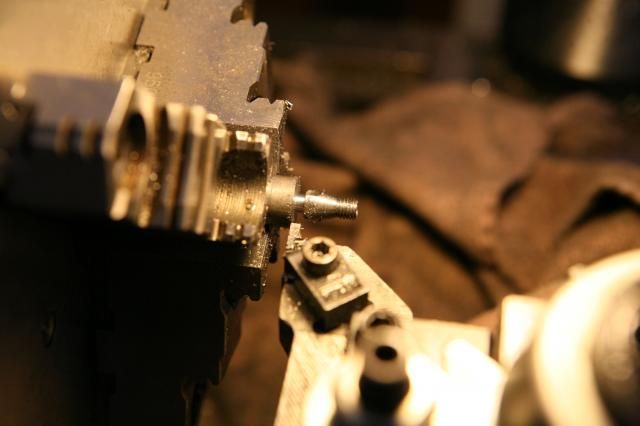 finished product. Mine is on left, original is on right. Taper looks good enough to work: I didn't show putting the finished part back into the mill to use a saw blade to cut the slots: 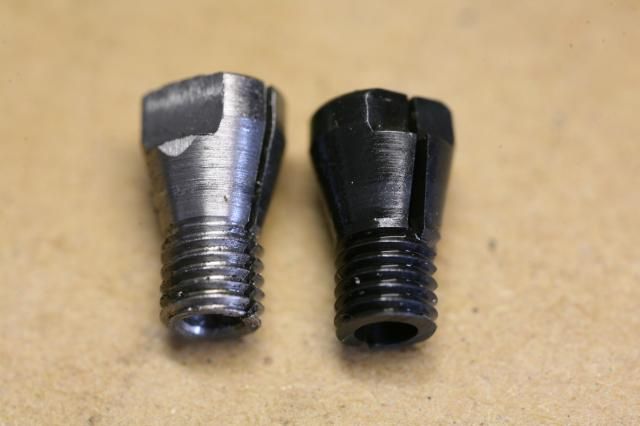 This took a surprising amount of time, most of the morning. I'd never make it in commercial production. OK, now that the grinder is back (and the loose bits don't spin in it anymore!), I can move the exh sub ports up to the line. I know some tuners are delaying the subs opening, but I figured for the first try I want to see what synchronous opening will do. I know that current theory has the aux transfers opening a bit sooner (and the boost even sooner), just a touch; also aux transfers are aimed a bit higher toward head than main transfers and this had boosted mid and high end considerably. However, my ports don't have big arches and the direction is too high to make good stalling, I'll have to live with these port directions as I cannot change them without cutting the outside edges of the transfer tunnels out to redirect the flow as the porting tool only works with the edges I can see, and then only marginally well at that. Right side sub exh: 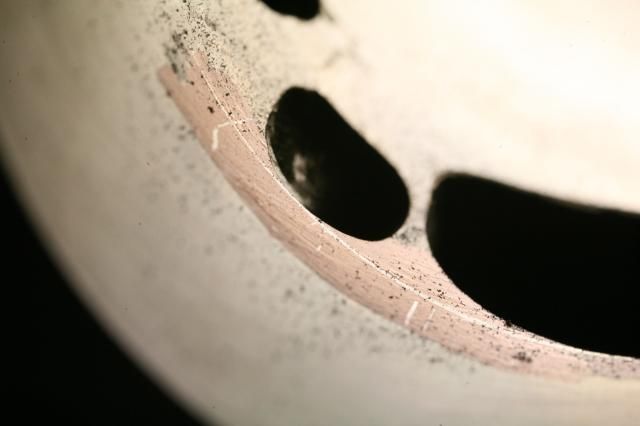 Left side sub exh: 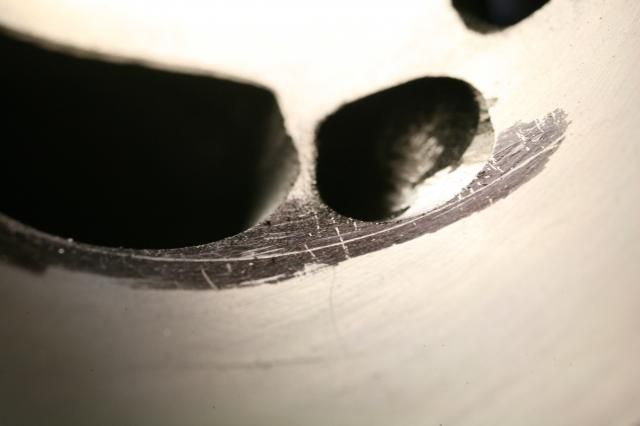 I then did a light chamfer of the ports and wrapped the crank in plastic and threw it into the freezer. Next stop; put the main bearings onto the crank and assemble the cases. They need a good cleaning first. wish I had a solvent tank... |
|
|
|
Post by waltinhawaii on Sept 8, 2013 21:57:00 GMT -5
More housekeeping... matched the boost port and relieved it on the small case side: 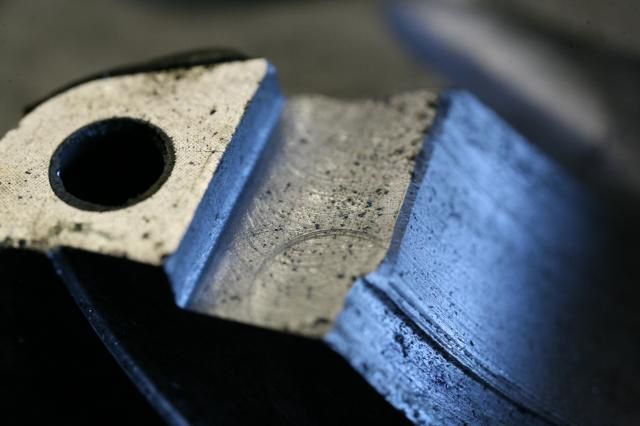 Almost forgot to do the 'mini trench' on the small case side... until a suspicious tiny crack appeared. Under the macro lens, I can see the stress fractures going outward from the crack, indicating it's about to let go into a much larger hole (sigh. time for JB to go to work): 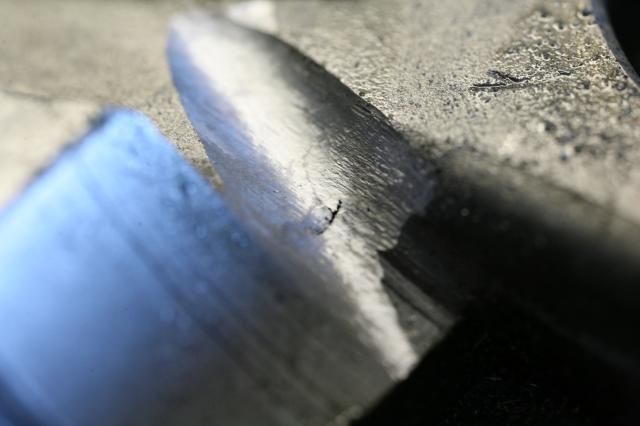 |
|
|
|
Post by 190mech on Sept 9, 2013 4:29:10 GMT -5
That collet fab looks better than the original!Opening the aux Ex ports toward the main port got them to a decent size to flow better didnt it??
|
|