|
|
Post by 2strokd on Sept 27, 2013 9:05:31 GMT -5
A stock reedblock works great to make a 4mm spacer with.  |
|
|
|
Post by Corrosion on Sept 27, 2013 17:05:51 GMT -5
That such a good Idea. Damm... I just threw 2 away the other day.
|
|
|
|
Post by kevin55950 on Sept 27, 2013 22:18:44 GMT -5
I use teflon plate to make spacers, they seal very well and doesn't allow heat transfert to the intake pipe/carburetor.
|
|
|
|
Post by waltinhawaii on Oct 2, 2013 3:54:28 GMT -5
Kevin, that is a good idea. I don't have any teflon plate though... but if ya got it, use it! non heat conducting. Good stuff. I found a used genuine minarelli right side l/c cover with pump, used and pretty beat up but serviceable condition so I'm going to use that, I think. I do not have the 3 studs that mount on the flywheel and go into the water pump plastic drive disc... the moped shop had the studs for $6 DOLLARS each stud, plus another $2 for a tiny rubber sleeve/bushing to go over the stud and into the holes in the plastic drive disc.  ?!! $24 plus tax for 3 studs and tiny rubber doo hickies?? unbelievable. told the guy to put em back on the shelf, I'd use toothpicks to drive the damn sprocket first. Have to go to Home Depot to find some 6mm? bolts, that's what it looks like... will just fabricate what I need. These guys are nuts if they think I'll knuckle under to the price gestapo. Got a couple circlips while I was there ($1 each clip) and although the price was not steep, the back of my mind kept telling me he paid less than $.01 cents each clip in bulk. but not worth it for me to tell him so. I don't mind a guy making a living... but scalping a poor fella, now that's kinda rubbing me the wrong way. Stuck the piston in, and put the head gasket and l/c jacket O ring in place and turned it by hand... nice feel to it. solder wire into the spark plug hole came out clean. About .058" or so, that's near 1.5mm .... I've got too much squish space, but my soldering wire is too small to fill the space, I'll have to find some thicker solder. Pipe fitting solder? instead of electrical... much bigger. will check Home depot tomorrow if I have time. |
|
|
|
Post by kevin55950 on Oct 2, 2013 11:48:30 GMT -5
I've seen guys using 15X12mm rollers on 6mm allen bolts to drive the water pump. Not the safest method, but it's way cheaper. And yes these studs are very expensive  |
|
|
|
Post by ryan on Oct 2, 2013 13:41:46 GMT -5
there are alumium drives on ebay for drr apex that replace the studs etc
|
|
|
|
Post by waltinhawaii on Oct 3, 2013 11:30:23 GMT -5
Thanks guys. Can someone measure a factory stud if you have one, and give me a distance or height from the face of the flywheel up to the top of the stud? (not including the threaded part that goes into the flywheel)
|
|
|
|
Post by waltinhawaii on Oct 5, 2013 23:10:10 GMT -5
My last measurement of the squish was... dunno. Too big to register on my lead solder. So I took the cylinder apart and got the piston to deck height and added it to the slight step in the head deck to squish, then added this to the thickness of the head gasket... and got something close to 3mm. Ouch. So.... took off the cylinder and mounted the 4 jaw chuck: 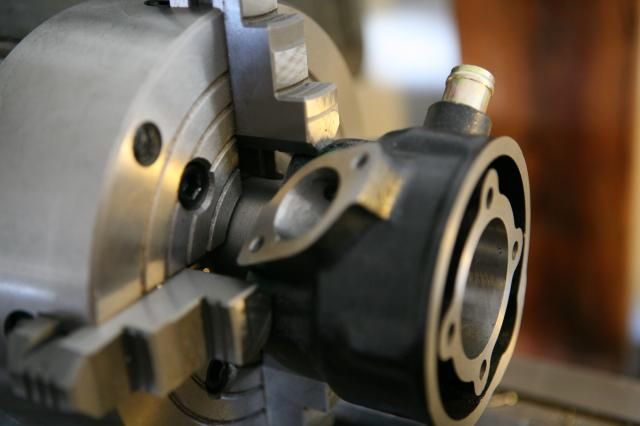 Trouble was, the hole in the center of the chuck is only about 2" on the inside, and the cylinder skirts won't fit in there as the piston diameter is about that size. My plan to skim off about 2mm from the cylinder deck quickly went out the window, as there is no way to grip the cylinder since the surfaces aren't parallel to the boreline. But there is more than 1 way to skin a cat: 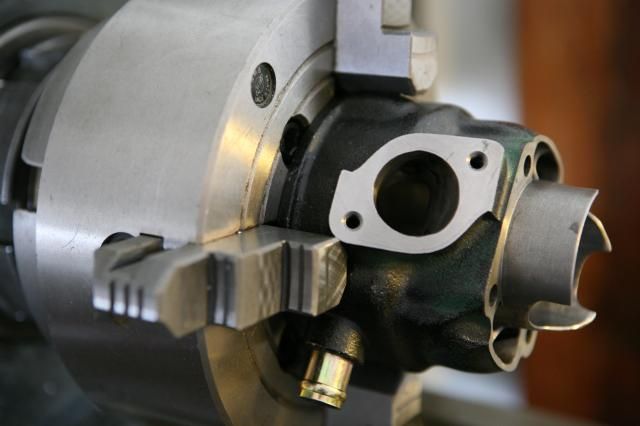 Inverted the cylinder and skimmed the bottom of the cylinder where it mates up to the case: 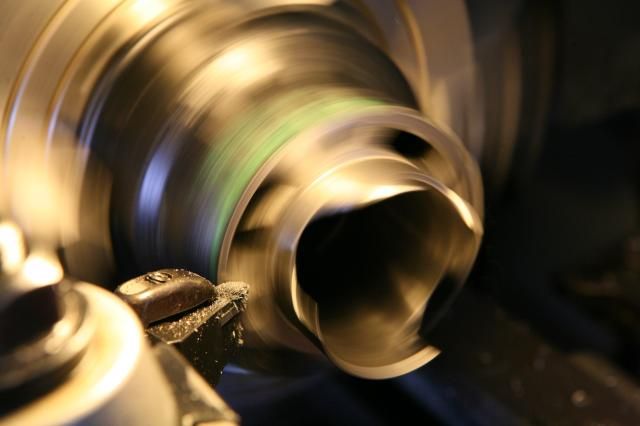 I'm condensing the process as it is easy to remove metal but difficult to backtrack if you take off too much. I initially took off 0.020", assembled the cylinder on the engine and torqued it up, put the solder into the spark plug hole.... ad nauseum until I finally got the solder to squash in teh squish band and got something like 1.5mm or so.... did a final calculation and removed another 10 thousands of an inch until the solder read this: 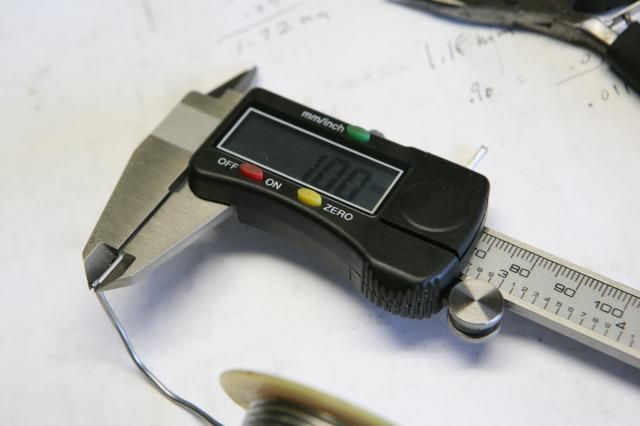 I was aiming for about 1mm, but landed on it by chance. No one's that good. Although taking it apart and shaving the cylinder, reassembling, measuring, etc etc etc took a VERY long time, pretty much the whole morning. In this case, my piston ended up slightly over the deck height: 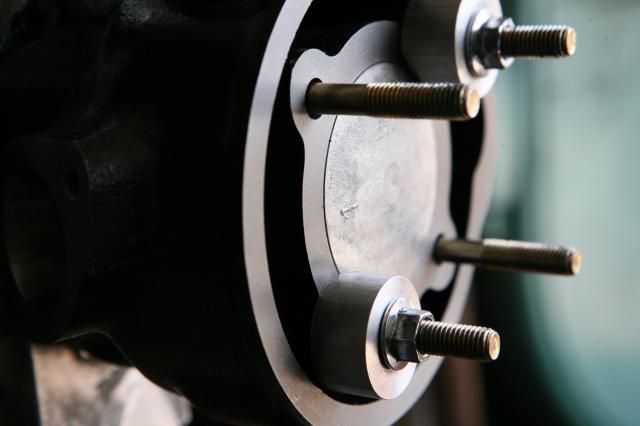 This was necessary because the manufacturer of this head has a rather pronounced step or inset into the head before the squish starts. I cannot cut the head as the cylinder is liquid cooled and cutting the head will mean reducing the O ring groove depth. O rings are designed to run in specifically sized grooves as they can only squash so much and retain their integrity. That's a fascinating subject, by the way... I've cut O ring grooves when designing custom valves for my airguns that have a working pressure of near 3200 psi and you would not BELIEVE how small a space an O ring can extrude itself through.... or how loud the explosion is when it does  Starting on the water pump drive: 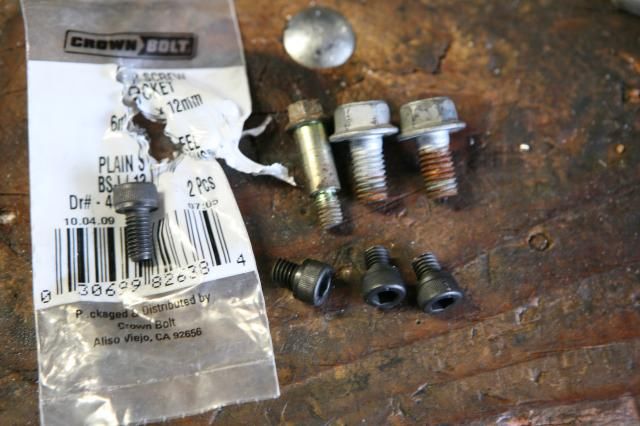 The black bolt on the bag on the left is the stock 6mm item from Home Depot. On the right, I've cut the threaded part down as they are a little long and I don't want them poking out under the flywheel. On the upper right are 3 used bolts from the old used bolt can in the garage, I want to make up some prongs to weld onto the 6mm bolts to hold some rubber. I've decided I should find some 5/8" rubber fuel hose to slip onto the bolts. I have a length of silicon rubber that is soft and about that size, nearly solid... it's a length of rubber from my spearfishing days that I used to power my speargun; but its so soft that I'm afraid the plastic disc in the waterpump will wear through it too fast. I think the fuel hose is a tougher rubber impregnated with nylon and will last a long time. Have to go to Napa or O'Reilly to get a length of hose. |
|
|
|
Post by kevin55950 on Oct 5, 2013 23:23:10 GMT -5
I hope it will work ! It's sad to pay that much for tiny studs which aren't expensive to produce... Even part sellers can't do anything about the price of these. Rollers are a cheap and fast way to do it but they don't cut vibration as rubber does (may damage rotor and crankshaft bearings in long term ? )
Make sure you have good bearing in your pump... I've seen cracked cases because of a worn bearing, where the owners were not able to put a mechanical pump or even a shroud after the damage was done. The pump is held by 2-3 6mm screws so if there's resistance, they can break in no time.
On the last mechanical-pump scooters I worked on, I found using some water pump lube made the idle and revving better (mostly in long term and when hot). This stuff lubricates the seal in the water pump, where some pumps have mechanical seals with a spring behind it, it helps to prevent wear and leaks. My friend was complaining about coolant escaping from the pump on his LC super 9, and we found coolant behind the water pump, where there is the ignition... the seal leaked because of wear and coolant made it's way past the shaft and bearings. By chance we found it soon enough, it saved lots of $.
|
|
|
|
Post by waltinhawaii on Oct 5, 2013 23:29:13 GMT -5
Oh, by the way... I ran the cylinder under the water faucet to clean it up and the water stream coming out from the transfers was VERY interesting. The aux transfers were shooting right across the cylinder and in fact, water would fill up the opposite transfer on the other side of the cylinder and boil up out of the back end! So the stream was very nice... but the main transfers would fire more upward, toward the head  ... wondering if I should try to redirect them... not happy with that. |
|
|
|
Post by waltinhawaii on Oct 6, 2013 1:46:01 GMT -5
Kevin, that is interesting, thanks. What does the lubricant look like and how do you apply it? like a thick grease? Or inside the coolant? I always thought the antifreeze in the coolant was the lubricant... at least that's what I noticed in my high school days. Plain water wore out my water pump bearings quick while antifreeze would make the pumps last much longer.
|
|
|
|
Post by 190mech on Oct 6, 2013 6:39:55 GMT -5
Walt,Those port angles seem about right,(A)25 degrees,(B)8 degrees,(C) 55 degrees..Cutting the base drops your port timing also which is what you wanted was'nt it? I quit cutting cylinder bases in the lathe after snagging a transfer tunnel with the tool bit resulting in a spit out cylinder to the concrete floor being ruined..Got a rotary table for the mill and have used that method with good luck,finish is rougher,but gaskets seem to seal well.. John  |
|
|
|
Post by waltinhawaii on Oct 6, 2013 11:47:37 GMT -5
John, you are right, of course... cutting from the base will change the port timing. Decreasing the effective port open duration will lower my powerband, but its going in the way I want... this is a good thing as it's decreasing duration rather than the other way, as this cylinder is already targeted at too high rpms for a street cylinder. I did think of putting the cylinder on the mill, but my little chinese job isn't very stiff and I hate to do it that way. Now that I think of it more, I should have made an internal mandrel of some sort to hold it between centers and skim the top. But I was just too lazy, it will have to remain a project for the NEXT cylinder I'm afraid! I should redo the duration numbers, but right now I'm sick of taking it apart so many times.
Yeah, I was worried about the ports snagging on the cutting bit too, so I took extremely light cuts, no more than about 3 thousandths at a cut, and also used a very small sharp bit; like a long finger type bit (hard to see in the pic as it's all fuzzed up with cast iron filings sticking to it) rather than a 'normal' rounded bit. The rounded bit gives a better surface finish, but my 4 jaw chuck is not holding the cylinder very securely. I was acutely aware of this, as I could not tighten the jaws down very hard, cast iron is very brittle and might crack if you put too much pressure on it; so the cylinder can't be clamped down hard in the jaws, which means you have to take VERY light cuts as you can't afford to disturb the metal too much on each pass. Having a tiny sharp 'poking' bit instead of a rounded fat bit doing your cutting also takes a much smaller cut bite (and using a very very low feed rate, more like a finishing cut) also helps reduce pressure on your work and reduces the odds of the bit snagging on the work. That's why the job took so long; the cuts have to be excruciatingly slow and small. If I had to do this job everyday, I wouldn't be able to do more than one or two in any given work day, each cut on the lathe is accompanied by reassembling the motor, doing the solder thing, measuring the crushed solder, disassembly, mounting the cylinder on the lathe, re-centering it; each little 10 thousandth cut takes roughly 45 minutes or so. You can take more off, of course; but I only took 20 thousandths the first time, didn't want to risk overshooting and having to run multiple base gaskets.
|
|
|
|
Post by kevin55950 on Oct 6, 2013 21:40:16 GMT -5
You add the lubricant to your coolant  It's sold as ''water pump lubricant'' in most automotive parts stores. |
|
|
|
Post by waltinhawaii on Oct 6, 2013 23:54:01 GMT -5
This waterpump drive is more trouble than I thought. I cut a small step in the bottom of the bolts so they could just be pressed into the 6mm allen bolts: 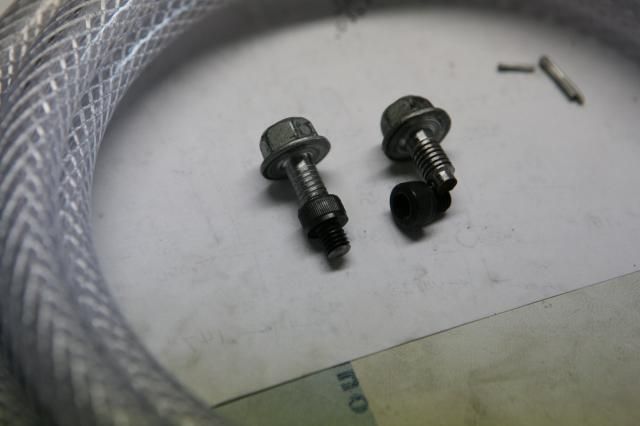 bolts were then welded up: 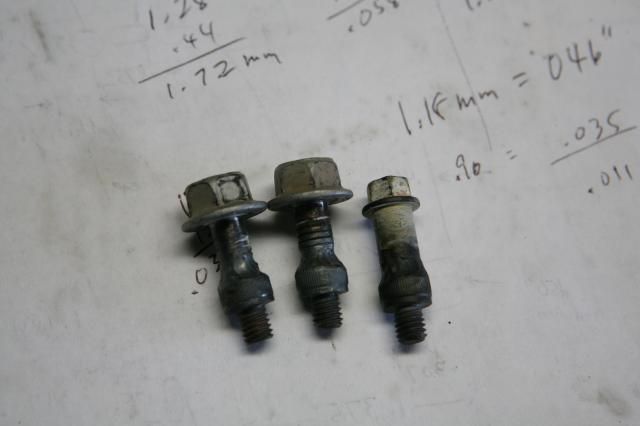 Welded shoulder is machined back down and a length of hose fit over the stud (had to heat up the hose to soften it enough so it would go over the stud: 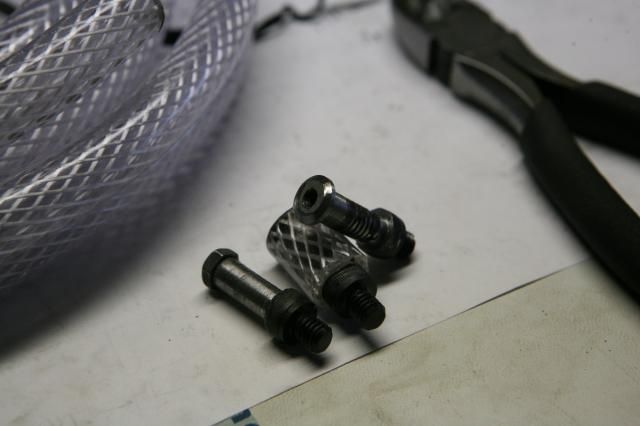 the cover is put on but doesn't seem to fit all the way down: 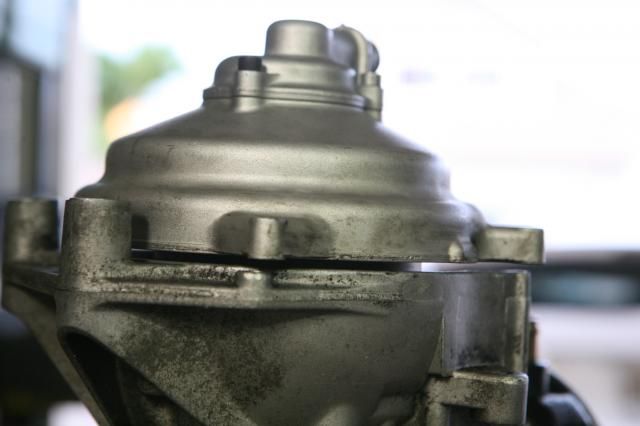 Did I make the studs the wrong length?? they are about 1", the factory ones I saw online were 25mm... should be correct. Then I noticed there is a small hump in the middle of the pump: (you have to looks closely through the holes) 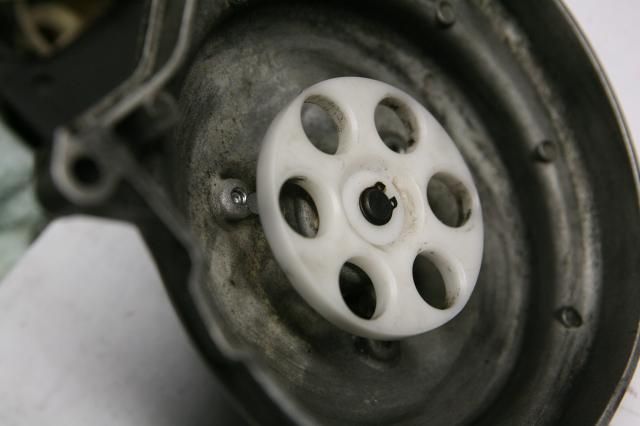 So I sanded the top edges of the rubber to clear the hump better: 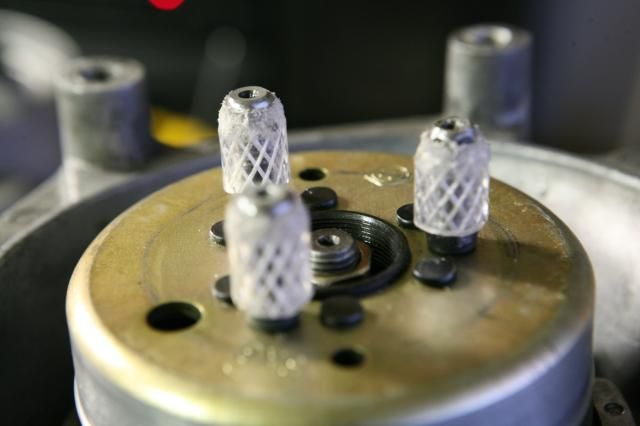 Now the body sits at the correct height: 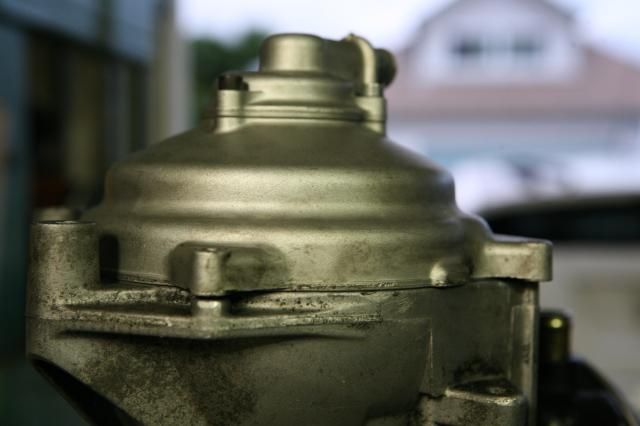 However, this case is missing the lower bolt hole to secure this pump body. There are 2 mounts that secure the pump body, I wonder if I should weld and tap a block to provide the third mounting hole? (left lower in this picture) 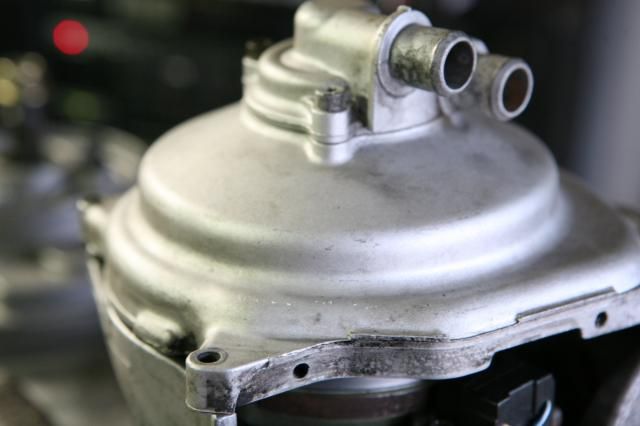 |
|