|
|
Post by 190mech on Oct 7, 2013 18:34:11 GMT -5
Id hate to apply heat to a built up case..What about a "J" bolt?Bend a bolt into a J,drill a hole in the case wall,hook the J in and apply a locking nut to the W-P cover,,OrMaybe weld up a nut to a plate and rivet/screw the plate to the side of the case??
|
|
|
|
Post by ryan on Oct 7, 2013 18:53:23 GMT -5
i would probably go that route since it could cause the bearing to wear faster *uneven but thats my 2cts
|
|
|
|
Post by waltinhawaii on Oct 14, 2013 1:36:35 GMT -5
That was probably the correct thing to do. Trouble is, well, I'm stupid: 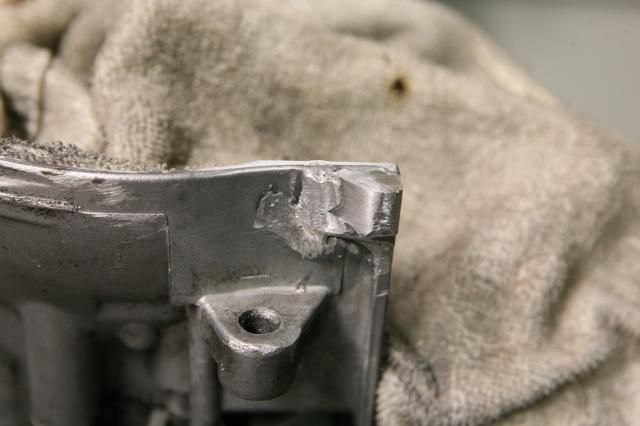 I put a lot of wet rags next to the crank area so keep it cool during the weld: 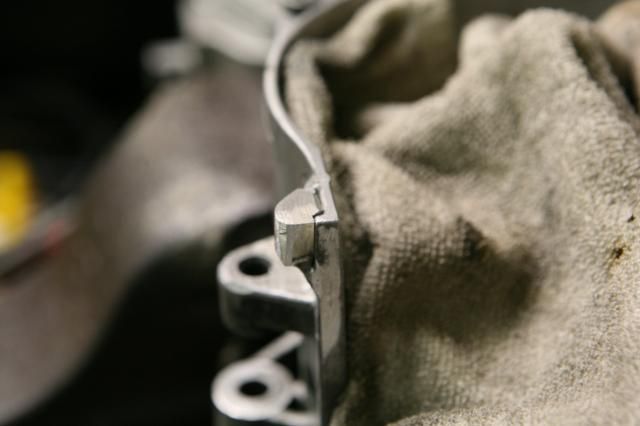 Next, had to drill and tap the hole; so I mounted the cover, and made up a transfer punch using one of the old short cylinder studs by making it just fit the hole in the cover and sharpening the end: 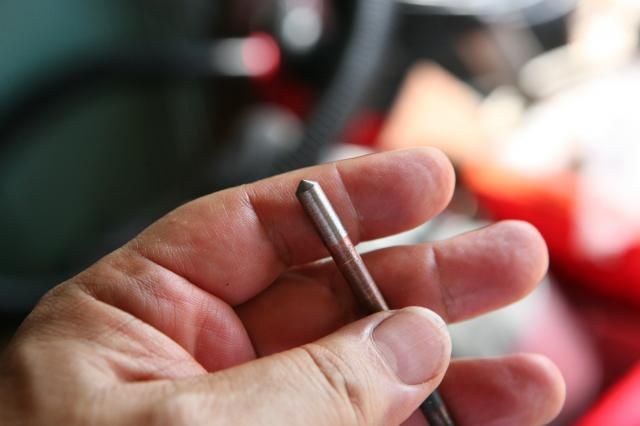 For those of you who have not used a transfer punch before: you can use a regular punch to start a hole, but there is no guarantee it'll be in the middle of where you want it. Using a punch whose diameter JUST fits inside a hole means it is centered and your hole will start where you want it. Just insert the transfer punch and strike it a sharp blow, and now you have a punchmark where your drill bit will start. Next, one of the M8 holes was really bunged up and would not pass an 8mm bolt; so I was going to drill it out to M10 and retap it... a third of the way down, the drill stopped and refused to go farther... ugh. There was a broken off stud inside the hole! ARGHHH. After much work. This is the reason why gorillas should not be shaven down and trained to use pneumatic tools and put to work in moped garages: 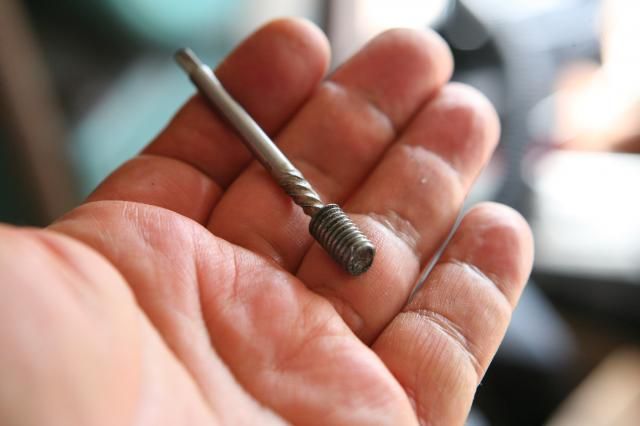 NOW the drill and tap went through without a hitch: 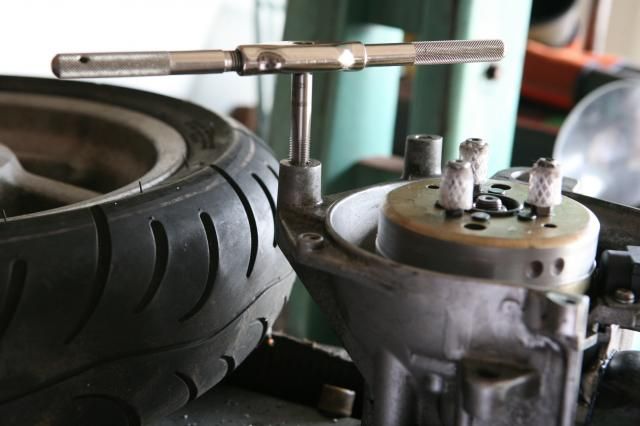 I mounted the rear tire just to get an idea of where everything was going to go, and started cutting up a pipe flange and header to work on this thing: 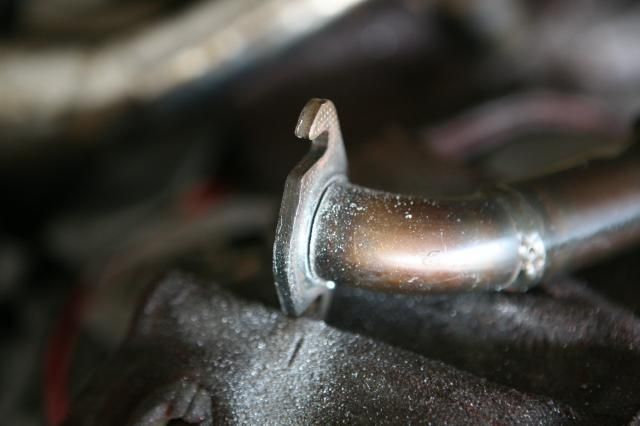 The stock header pipe is around 25mm, a tad too small: 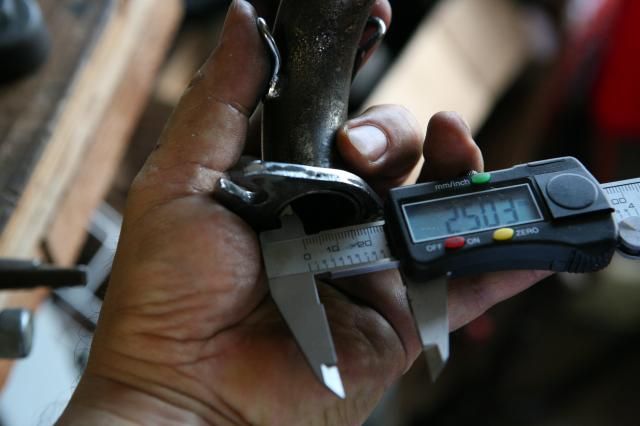 But it does have a taper, so if I lose the beginning part, I should be able to use some of the rest of the stock header: 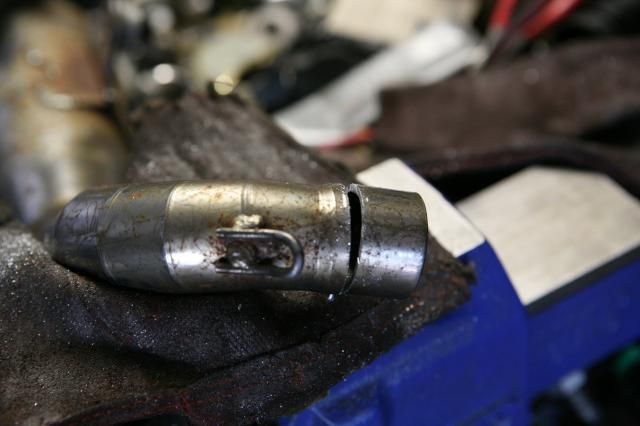 There is a ring inside that needs to be ground out: 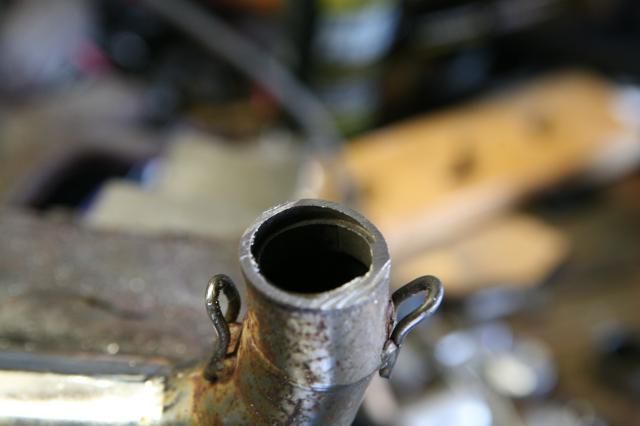 My grinding stone quickly loaded up with metal, leading me to post a short tutorial on grinding in general (in the Handy Hints section): 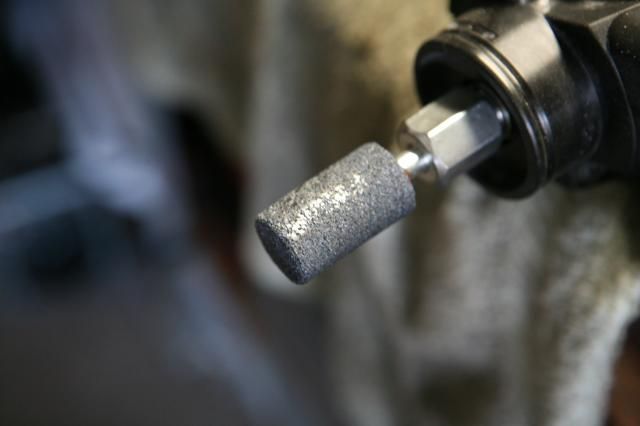 |
|
|
|
Post by 190mech on Oct 14, 2013 5:39:01 GMT -5
Lookin' good Walt!What pipe are you using there?
|
|
|
|
Post by waltinhawaii on Oct 14, 2013 11:27:12 GMT -5
Lots of work! I'm using the header from the stock pipe, and the cones and silencer from a Technigas pipe that I found used for $75 in a local shop. The Technigas header is not tapered, it just uses several different diameters of tubing and steps up every few inches to approximate a taper. Cheap. It is actually for a Honda but I knew I was going to chop it up so didn't really care. The stock header is tapered, by eye it looks under 1 degree... wished it were more, but beggars can't be choosey. The chrome finish bothers me, though; I think I have to grind it off near the joints in order to weld it up.
|
|
|
|
Post by 190mech on Oct 14, 2013 11:54:50 GMT -5
Chrome welds nice!I can send you some pipe dimensions if you want to do a full pipe build..
|
|
|
|
Post by waltinhawaii on Oct 14, 2013 12:25:09 GMT -5
John, that would be right neighborly of ya! Would love some dimensions. I took off a little bit from the base and was too lazy to redo my port numbers but figured they will be close to 192 exh and 131 transfer durations. I am aiming for near 10,500-11,000 peak. I think that will put my pipe length near 30" and my cylinder flange to piston is near 1.5", so that leaves me with a pipe of close to 28.5" from exh flange to middle of exh cone. I'm kinda stuck with the technigas cone diameters, but they should be fairly conservative, I think. If not, I can cut the cones lengthwise and install a small sliver to widen them if need be, but that's a tallish order.
|
|
|
|
Post by waltinhawaii on Oct 21, 2013 11:52:39 GMT -5
Boy, am I tired. Gears came in, but I'm in the middle of trying to make my pipe, so I didn't even bother to unwrap them: 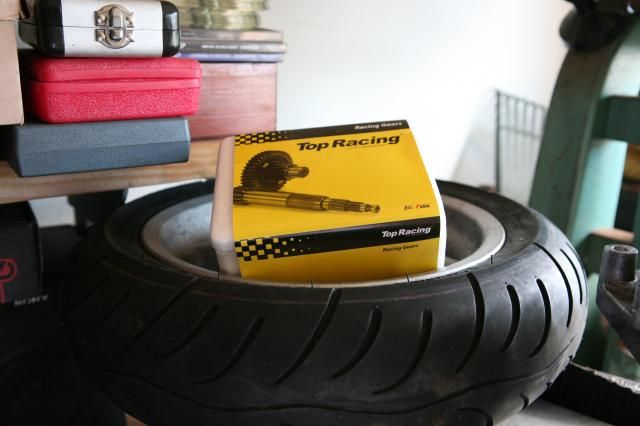 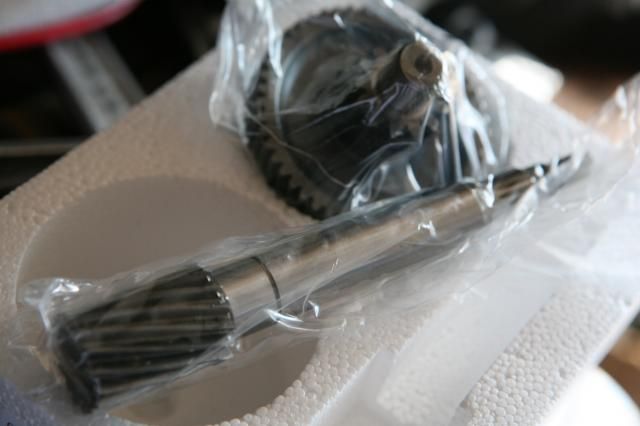 first order of business is to get the flange to fit. This flange is or a Honda cylinder, so it is bigger in bolt spacing but about same in pipe size, which means the outlet is too small. I started by grinding with a cylindrical stone, but it was so slow I put it in the lathe to open up to the size I wanted: 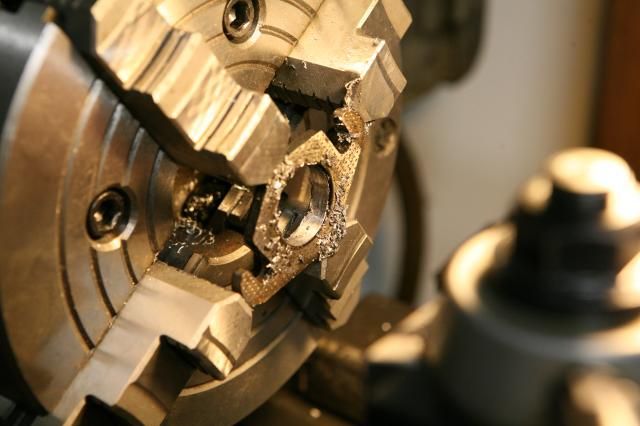 I don't like the slotted flange as I think it is too easy to bend, so I decided to fill in the large empty spaces. I used a piece of metal cut from a piece of L angle iron that is 1/4" thick, so it has to be filed down to match the .200" thickness of the stock flange: 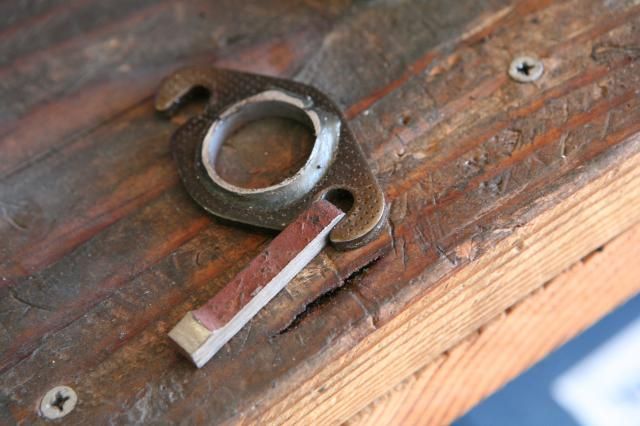 Here, little pieces have been cut out of the L iron to fill the slots and I'm positioning the flange for welding: 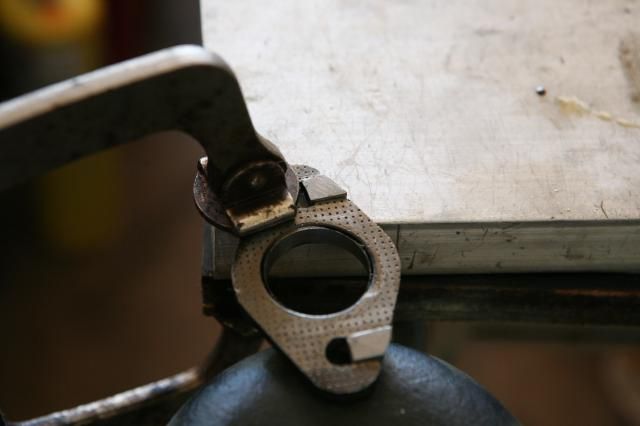 welding completed: 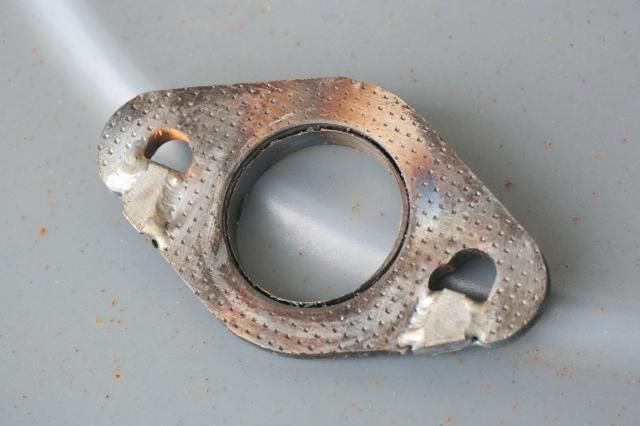 Detail shot of welding. I wasn't very happy with it; they look nice, but if you look at the side of the flange, the weld does not penetrate full thickness of the flange, so the middles inside the flange have not fused. I should have used more heat and gone deeper, but damn I'm tired. 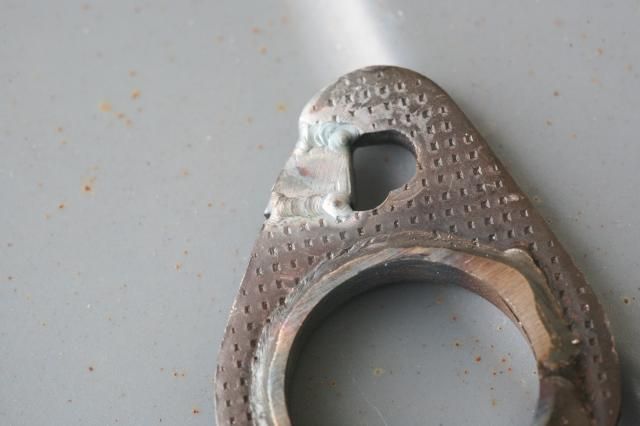 Header tacked into place: 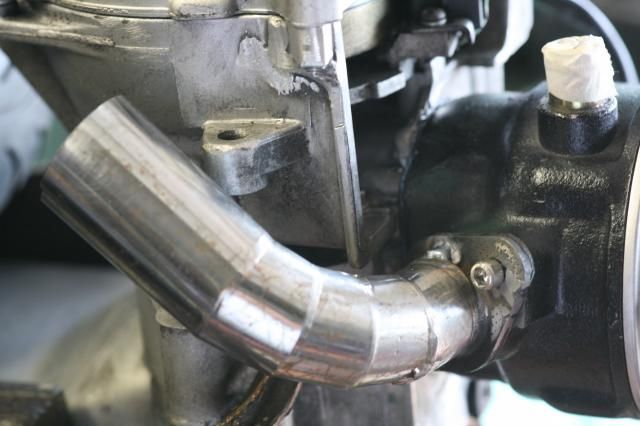 Cutting cones out of the Technigas pipe: 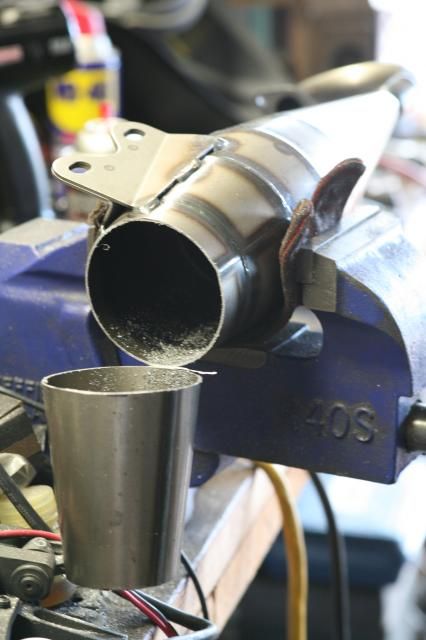 The cones did not match up to what I wanted, so here I have cut a little slender V cut and bent the edges together to make the cone narrower: 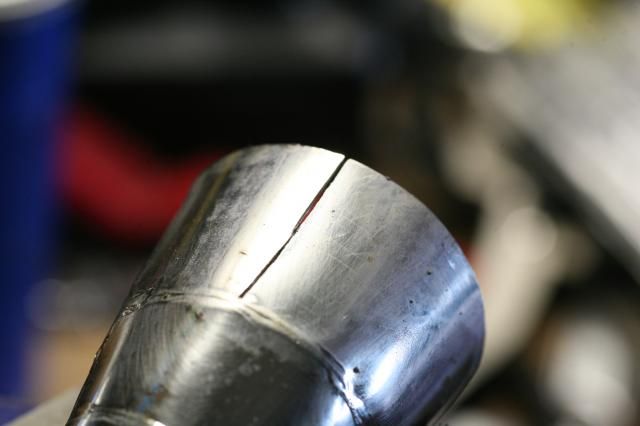 |
|
|
|
Post by 190mech on Oct 21, 2013 14:11:10 GMT -5
As always,nice looking work!Eager to see the finished product.. Looks like the gear set is a drop in,saves press work and much cussing!!  |
|
|
|
Post by waltinhawaii on Oct 21, 2013 14:45:09 GMT -5
Hey John! Man, this pipe is requiring a lot of 'sweat equity'. Wife complains that my shirts are so dirty she will have to throw them out! Really makes me appreciate what you are charging people for your peacepipe... it is a STEAL for what you are doing. Folks, you ain't gonna find anyone willing to work for less money that what John is asking for a custom pipe. I would have tripled his price and still complained it ain't worth my time.
As for the trans gears, I just hope I got the right one! Forget the numbers, I ran them once, something in the neighborhood of 11.2:1? Don't need to press anything with these, but I can still cuss just for the hell of it!
|
|
|
|
Post by 190mech on Oct 21, 2013 18:39:10 GMT -5
Thanks Walt!Most folks dont have any idea how much work it takes to build a pipe!I usually say around 25 hours..Doesnt include the finish work either..Yours will do well from the photo's Ive seen..Clean all the filings out of the pipe before the final closing as the reversion will send them back into the jug on the first good run!  (Ask me how I know..) |
|
|
|
Post by waltinhawaii on Oct 21, 2013 20:26:07 GMT -5
Haahahahha! that hadn't occurred to me  Thanks, will file off the sharp edges inside. Got a few of the cones on the welding table but don't have all the parts there yet, it is a LOOOONG process, cutting, measuring, grinding. I like to do the welding mostly at once, my garage/shop is small and I don't like the cables all over the ground, they are really easy to trip on and cost a mint to replace these days. Not to mention replacing your skull when you bash it in after falling into something is also quite expensive. so will plop all the cones there waiting to be welded up, then have to go to the engine for tacking/fitting in place, then back to the table for welding up... this is backbreaking labor. John has his saw upright as a mini tablesaw; I'm stupider so never built a table for mine and have to pick it up and hold it for each job. I think we might have bought the same saw.... Milwaukee Big Throat? By the end of the day I'm really tired. I also have to straighten the cones by banging them on an anvil, I'll post a pic later. It is a very old anvil but the only thing I have to shape these cones with (I don't have a slip roller, much as I'd like to) so it'll have to do. It's older than I am, and prior history is unknown other than to safely say it's seen more than its share of abuse. The big green bandsaw in the pics works, but it is clunky. The large rubber bands that go around the steel wheels inside and serve as a soft surface to grip the saw blades are so old on mine that they have worn into grooves in the rubber and don't keep the saw blade centered. The blade is very, very unpredictable and I cannot find replacement rubber to make my own bands for the wheels. Mostly it serves as a table for stacking tools. I've been thinking of replacing it with one of them nifty hydraulic horizontal bandsaws, if I could only afford the shipping to get it here  (more than the saw) |
|
|
|
Post by 190mech on Oct 22, 2013 4:22:31 GMT -5
We had an old saw many years ago and glued on an old leather belt from the thrift store,worked well.. If you want a rubber one,these folks are sure to have something! www.mcmaster.com/ |
|
|
|
Post by aeroxbud on Oct 22, 2013 4:36:28 GMT -5
Pipe is looking good  I always buy the stage 6 gears as they are pre pressed. Saves so much grief. The stage 6 ones are straight cut though, sooo noisy lol |
|
|
|
Post by ryan on Oct 22, 2013 10:11:24 GMT -5
the top racing gears look good, if those are the ones i linked im thinking of some taller gearing because my bike pulls so dang hard already with 10.1's. what ratio are the gears you bought?
what pipe is that or sub-model i guess.
|
|