Uh oh that's not good!
I promise we're not being sadists! lol. So at this point I'm guessing maybe no start due to compression loss from the head not sealing??? That's just my guess for now...
Ok, here's some pics I took when I shaved my head about a month ago. My squish was at 1.4mm and I reduced it down to .75 or so- very similar to your situation.
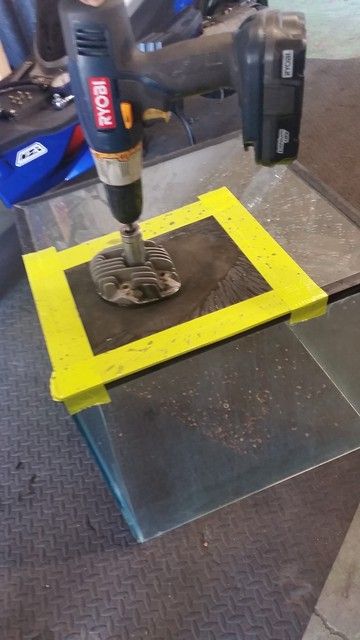
The idea behind using the glass as the surface to mount the sandpaper and sand against is that that the glass is obviously completely flat. You obviously want the head to be completely flat and true so it seals correctly to the cylinder...
Here's my setup: I used a (glass) fish aquarium and taped the sandpaper to it. As you have discovered, 1mm is actually quite a bit to sand away! I started with the coarsest grit I had (220) and ended up using about 4 sheets before I even started to get close to .7-.8mm I was trying to remove. I put a spark plug in the head and used a power drill with a spark plug socket on it to spin it against the sandpaper. I occasionaly sprayed water while sanding just to keep things lubed up and spinning freely...
I'm sure you found out that this part takes a while and kinda sucks! I did my best to keep the socket/drill straight up and down and removing material evenly. After a few minutes of spinning the head I would occasionally put the head in my hand and sand it back and forth straight across the sandpaper and inspect it closely to check that I was evenly removing material. The Minarelli heads are a bit oblong on one side it's kinda hard to keep it spinning perfectly even and keeping even pressure while I spun it. I realized the way the head was spinning, that I was removing a bit more material on one side vs. the other so I ended up putting on a thick glove so I could keep a little bit of downward pressure on the head with one hand while holding the drill in the other. About gave my "pressure" hand a blister! Ok, stopping and checking every once in a while and sometimes I had to sand the head back and forth against the glass to even out the high spots. It's very important that it's true so that it seals properly to the cylinder when finished. Here's what it looked like when I was getting closer to completion...
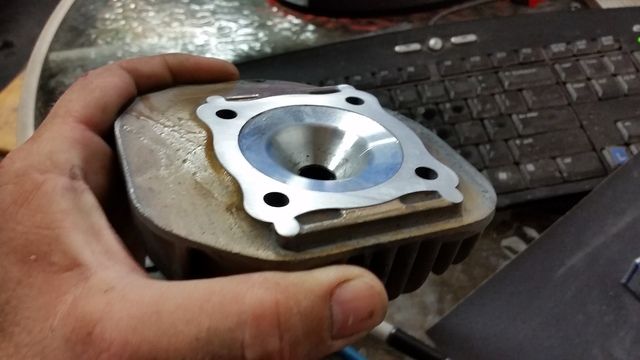
Ok, so the Youtube videos talk about using sanding compound to finish it off- pfft! I pushed it back and forth across some 320 grit and called it done! The copper spray will fill in all the imperfections! You can use a straightedge- a metal ruler or whatever- on it's side to put across the head surface and check the trueness (flatness).
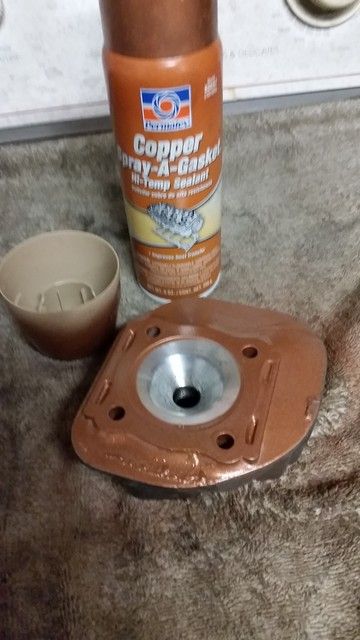
Ok, so lets talk about the copper spray for a minute.... When I spray the head I take the cap off a spray paint can, or even the cap of the copper spray can itself and put centered on the head so that when you spray, you're not spraying the inside circle part of the head- the combustion chamber- and I spray like four or five nice thick coats on there. Be sure to shake the can sporadically and get those layers nice and thick! It should look like this:
Ok, this part is kinda IMPORTANT!- now that you've sprayed the head nice and thick- go set it out in the sunshine for a while to cure! Or, use a heatgun or whatever but it's important that you give the copper spray some time to set-up/cure/harden (it'll never totally harden I don't think). I'm usually impatient and never give it enough time to cure as good as it should, but you should let it sit in the sun for at least like 30 minutes or so... Now, while the head is over there 'curing'- spray the cylinder too! Nice and thick! Thick enough to make up for the human imperfections of hand shaving your head yourself haha.
To spray the cylinder- (it's usually already mounted on the scoot when I spray it)- stuff a rag or paper towel or whatever into the cylinder out toward the edge so that you can spray the cylinder top mounting surface but not
inside the cylinder... I wish I had a pic... get the paper towel situated in there just so, so that the copper spray isn't going inside the cylinder. Ok, now I'm repeating myself haha. You won't be able to get the paper towel sealed perfectly but if you get a little bit of copper spray in the cylinder itself it's ok- no big deal, it's not gonna harm anything. Don't worry about copper spray on the outside of cylinder either- not gonna hurt anything. Now you know why when you see pics of some of the engines we're building and the cylinder is all gold- that's why! Copper spray! Consider a gold copper spray cylinder a badge of honor for real tuners! haha
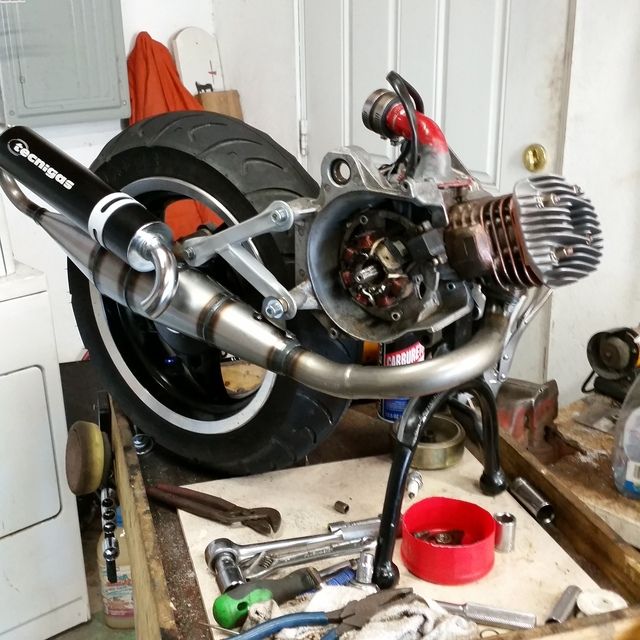
Again, let this cure for a little while before sliding the head on and torquing her down. If you don't wait long enough, the copper spray will still be pretty wet and when you torque the head down it'll just squeeze out the sides... Honestly, I never seem to let it cure long enough and I torque the poop outta the head nuts and some squeezes out but it always seems to seal just fine. Ok, now it's time for a compression test and see the fruits of your labors! If you've removed nearly a full mm from your squish clearance, you should see a significant rise in your compression!! Sometimes my compression is almost
too high! 180 psi is probably starting to get into the danger zone...
Phew- that was a lot of typing!
What are your new squish clearance and compression readings???


