|
|
Post by 90GTVert on Nov 2, 2014 6:55:57 GMT -5
This is an excerpt from a thread about my Vento Triton (B-series chassis) but many of the ideas could apply to other scooters.I've had this idea of a larger gas tank rolling around in my head for a little while now. Even though I get closer to 50MPG average now, there are times when it's just under 40MPG. 40MPG x 1.4 gallons (stock Triton tank capacity) = 56 miles. Then I like to play it safe so I end up making sure I'm at a gas station within 40-50 miles. Most of the time it's not too bad, but when I ride to the beach or just want to go get lost on some roads I don't know that's not great. I'd really like to have closer to a 100 mile range, or at least 80 miles that I could ride without fear that I'm going to break down. I've been looking around, but I can't seem to find anything I really want to dive into right now. The most obvious option is a CPI Aragon 2 gallon tank. It runs about $75-80 shipped online right now. This naked scooter looks strange enough, but it's gonna be even weirder with those things sticking out of the side and I'll have to fabricate a bracket/mounts which will probably be $15-20 in steel. My stock bracket was cashed in for scrap and the mounts were chopped off of the frame. Didn't think I'd need them again. The 2.0 gallon tank would give me 80 miles max if it were 40MPG, and I'd probably end up using something like 60-70 miles as where I made sure I filled up. It's better, but $90-100 and the time to make brackets and possibly having to deal with converting to a fitting that doesn't use a screw-on petcock for that gain isn't selling me. There are pics and installation help for the CPI Aragon tank here : 49ccscoot.proboards.com/thread/1351/larger-fuel-tank-cpi-clonesWhat I'd really like is 2.5 gallons to even 3 gallons, but that's probably gonna be pretty tough without some crazy looking tank and/or a lot of expense and skill. 2.5 gallons would give me 100 miles max range at 40MPG, an easy 80 mile safe range. The beach is a little over 70 miles away so that would at least work out that I could fill up a max of 2 times even if I really rode around a lot. With the spread of gas stations (or my limited knowledge of where they are and inability to travel on highways legally) I'm filling up 5 times on a 200 mile trip. That's about 30 minutes spent at the pumps and mixing oil and not riding, plus the credit card company hates seeing these under $5 charges at gas stations in different states and they always cut off the card and I have to call them to get it working again. Seems I get 3 fill ups in close proximity (time) and then it's cut off. 3 gallons would be amazing as that would give me 120 miles total at 40MPG and 100 miles I should feel safe with, but when you start calculating what it takes to hold 3 gallons on the scooter that seems like dreaming. I took some rough measurements early in the week. I ended up tossing out the paper, but I could fit something like 1 10.5-11" long tank where the existing one is since I stretched the rear of my frame out a few inches. It would need to be a trapezoid shape (looking at the top/bottom) with one end about 9.5" IIRC and the other 4.75" or so. To make it hold 2 gallons it has to be 6.25" deep, again one or more of these may be slightly off but I know I'm close. That was what I initially measured out that I figured would not be too complex. When it gets taller I think clearance at the shock mount could be an issue and then an indented area would have to be made into the tank. I'm sure it's all cake to a real fabricator, but that stuff is just a lot more time and headaches to me. Can't raise it more because of the seat. At any rate, the tank would have to end up taller than that to even get to 2.5 gallons. This part I really don't recall well, but it was over 7" and to get to 3 gallons it gets really crazy. There would also be the option of having the tank come up after the seat, but I really don't want it to start to look like a back rest either, so there's not a whole lot of volume potential there. Looking at the cost of 0.060" steel it appears I'd end up with ~$50 in steel to build a tank. Then I'd need a filler neck and cap. One could be cut off of an old tank, but I am not willing to risk screwing up 2 different tanks. Plus I need a fitting for a fuel outlet. All together the materials are going to approach $100 again, and that's assuming I don't mess up any large chunks of steel. On top of all of that, I don't think my welding abilities are suited to tank building, so I should really take it to a pro. Not sure what that would cost, but it would have a large effect on the total. So that option is even more expensive and it would be a lot of work. Oh, and it would be pretty heavy. Something like a 7-10lb tank according to some online calculators. The option that I was most interested in is a fiberglass tank. I would use what I believe they call the "lost foam" method. Styrofoam blocks/sheets are glued together to form a chunk large enough to carve the shape from. One thing I really like about this is that it allows for a lot of test fitting and working around things like the shock mount and forming a raised section behind the seat much easier than I could with steel. I know all of that can be done with cardboard for sheet metal, but this sounds easier for someone like me that sucks at regular fab work. Once the foam mold is done, then it's covered in fiberglass. Things like the filler neck can be laid into layers of fiberglass as well as a chunk of aluminum to allow drilling and tapping for fuel fittings. It sounds great to me in a lot of ways, although my fiberglass track record is not that great and I have very little experience with it. Two things worry me about the glass method. One is mounting tabs. I don't think they should be made of the fiberglass unless I totally reworked the mounting so it was supported from the underside more or laid on the frame with rubber or foam. That's a good bit of work I'd imagine. Steel mounts could be set in between layers much like the filler or fitting block, but then I'd be fabricating those to curve around however the tank is shaped near each of the 4 current mounts. The other thing that's even worse is that I'm reading that fiberglass tanks are a bad idea these days because of ethanol. Some say use a different resin, others say the resins don't work that great still. Some say coat it and some say that's only good for a certain amount of time. I don't even know what the fiberglass tank would cost, but I'd have to by rolls/mat and resin and some supplies like brushes and containers plus I'd still have to get a filler neck and a chunk of metal and fittings and maybe metal for the mounts, plus acetone to dissolve the foam when the fiberglass is done. Sounds expensive anyway. So it seems to me that this is a pretty tough job for someone that doesn't really enjoy long hours of fabrication work or have much skill for it. Then adding in the $100+ price ranges and still the possibility that I could screw up the job and all of that would go to waste, I guess I'll still be filling up often. Sorry to go on and on about accomplishing absolutely nothing. Just though I'd share my thoughts and maybe someone will say no there's this easy way or at least it will give anyone else that's dreamed of long range riding without frequent fill ups will have some things to think about.
|
|
|
|
Post by 90GTVert on Nov 2, 2014 7:00:51 GMT -5
The only thing I can come up with that may be a feasible option is to modify a stock tank. Use foam blocks to mock up pods that can be attached to the tank, fabricate the pods, then cut the stock tank open and weld them on. Possibly you could practice welding some thin gauge steel, and when your confident move to the tank. Stick welding is NOT a skill I have, but even I can weld with a wirefeed welder after some practice!. I would also flow some inert gas inside the tank when welding to help minimize rust and scale. Its still a lot of work, but possibly less than other methods. I ordered a new stock tank the other day that I plan to use on another build, It cost $55 I think. I had considered the stock tank route. My idea was to cut the bottom off and use a piece of steel to extend the bottom straight down as far as I could get away with. I would use a new tank, and if it went to a welder I don't imagine they'd like the idea of a used tank. Could be the most affordable. I have been reading around and found people saying to get a pro to weld it. I have a MIG, but I've only used flux-core with it. Don't even have wire other than flux or a tank so if that had to be done it's more expense and to me makes it even more worth paying a pro. I can weld for brackets and exhaust stuff, but I weld so little that sometimes I do great and sometimes I do total crap. I can usually make it hold (welded the pegs on T2 that have held my 300lb plenty), but it's rarely pretty. I welded up the engine bay in my car which was tons of welding and had the bright idea to use 18-20AWG steel (0.036-0.047") with my old MIG that had just high and low settings and speed control. That was a nightmare. I'm sure 16AWG and the new welder that is more adjustable would be better, but I'd imagine I'm in for a lot of time to get fuel-proof welds all the way around every seem. I'm certain it would be easy for a lot of people, but I think I'd be cursing a tank. I've given thought to the idea of removing the seat bucket and installing a second tank. I need the space. I have pondered solutions for carrying extra fuel, but nothing there really sounds too great for me. I had even thought of mounting a second fuel tank on the frame support and using a reserve switch to switch tank to tank, but I just don't like the idea that much and it makes it so I'm then filling and pre-mixing 2 tanks on the go. My CPI has lots of space below the tank bottom,cutting out the bottom and making a sheet steel spacer/bottom should give the added capacity you want..Also an "aux tank" could be added anywhere and be pumped into the "main tank" with a small electric or even a crankcase operated vacuum pump..Just switch the aux tank pump on when the main level starts to get low,,been done for ages in the aviation world. Never would have thought of the auxiliary tank and pump idea. Only issue for me is that I have no space to hide anything on this scoot really. You could prob get a decent volume in the floorboard area with some work on a fairing-equipped scoot. I haven't measured the stock tank out, but just guessing by other measurements a 2" extension could probably gain over 1/2 gallon. Old pic for reference. My frame is stretched out a few inches behind the tank now, but I use that area for a rear mount camera at times.  The oil tank on my Kymco Cobra is huge and ive been premixing for awhile now. Ive often thought about using it as an aux fuel cell. Its right beside the fuel tank. I thought a T in the fuel line with another shutoff valve would work for another 1/2 gallon or so?.. Ive yet to finish the project... |
|
|
|
Post by 90GTVert on Nov 2, 2014 8:32:33 GMT -5
What are the approximate dimension of your current tank (just the volume-containing part, not including flanges or mounting tabs)? Here are some better pics and the length is about 9.5". Narrow end is 5.5" wide. Wider end is about 9.5". Average depth is 4.5-5". It curves and such so I know the simple measurements don't tell the whole story, but that's a ballpark. 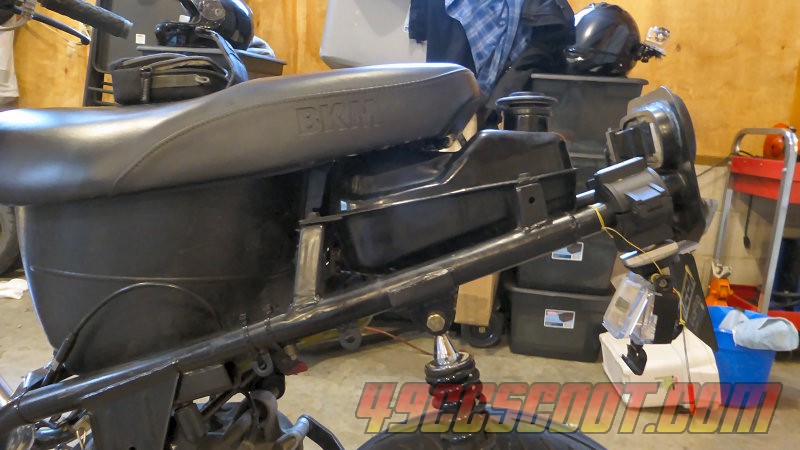 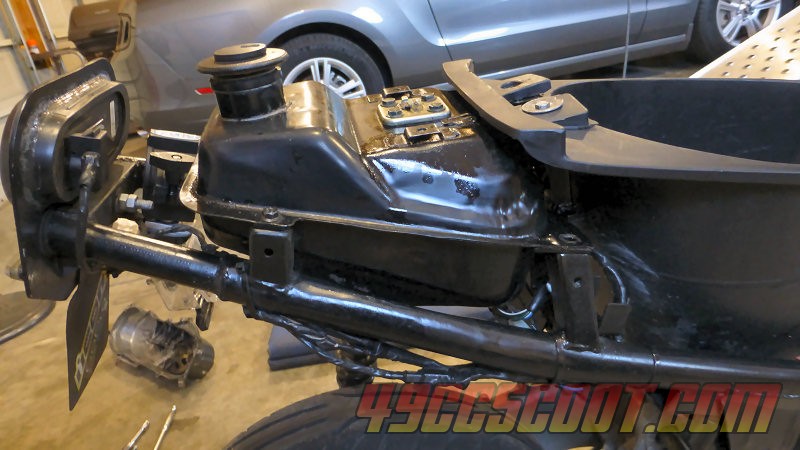 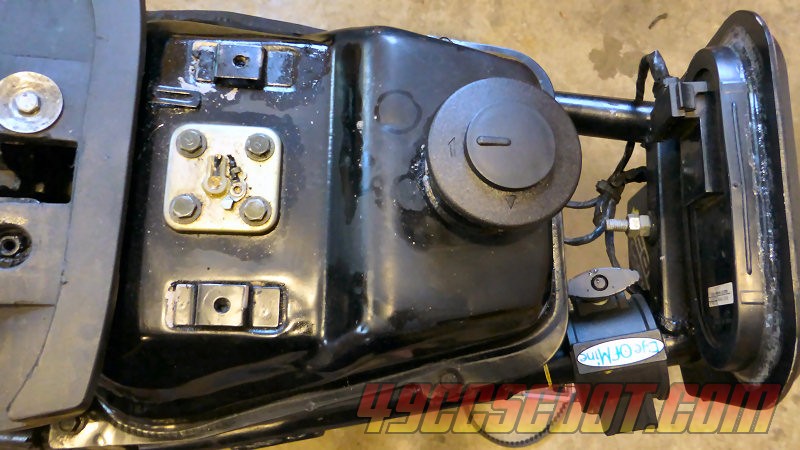 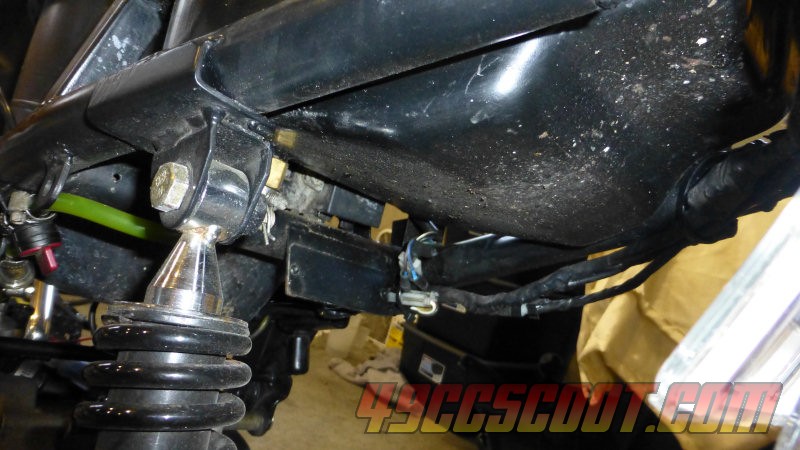 |
|
|
|
Post by 90GTVert on Nov 2, 2014 8:41:51 GMT -5
I decided that I was tired of thinking about a larger fuel tank, and I wanted to do something about it. As discussed, the small tank is not meant for riding 150+ miles at a time. When I take trips to the beach the credit card company shuts down the card because I have to stop so frequently to fuel up and it looks odd to them. I got a new fuel tank from PartsForChineseScooters for $40 shipped on their eBay store (Global Motor Imports). I wanted a new tank for two reasons. First, I have a tank still if I screw this up. Second, no gas fumes to explode. I welded a fuel tank once before that was used after flushing it with water and cleaners and letting it air out for a long time, but it's not the safest thing one can do and I don't recommend it. Also, should it become necessary, I don't think any pro welder will do it if it's used. 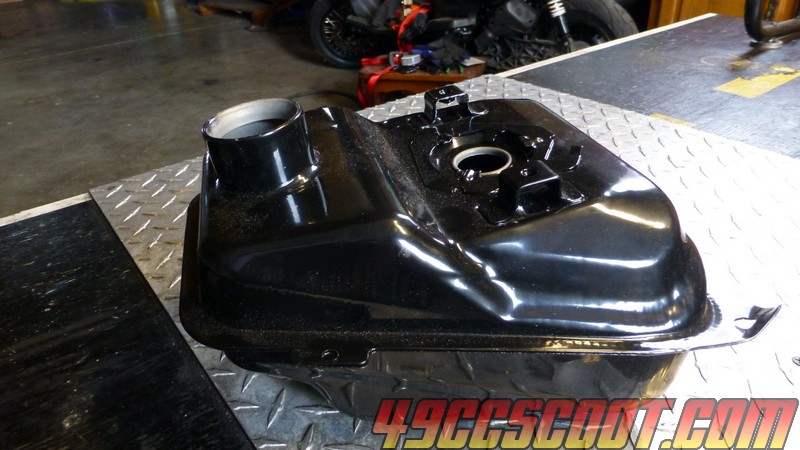 Came bent on one corner, but that's okay... I'll be doing much worse to it. [img src="http://www.49ccscoot.com/pics/tritonv2/Fuel%20Tank/P1020878.jpg" style="max-width:100%;" I've always seen the Triton rated as a 1.4 gallon fuel capacity. Great, but I wanted to see what I came up with. This way I will know if that number is correct for sure and I can use the same method to check after I finish the tank. I used a rubber stopper to plug the outlet. 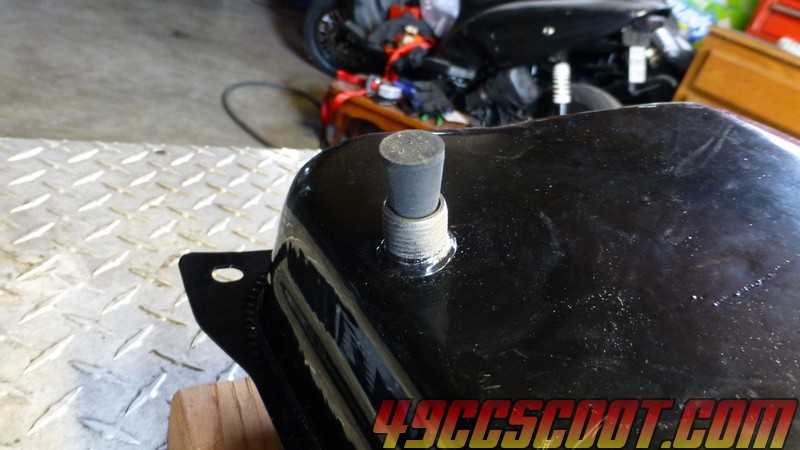 Then I filled it 1000ml at a time with a graduated beaker. 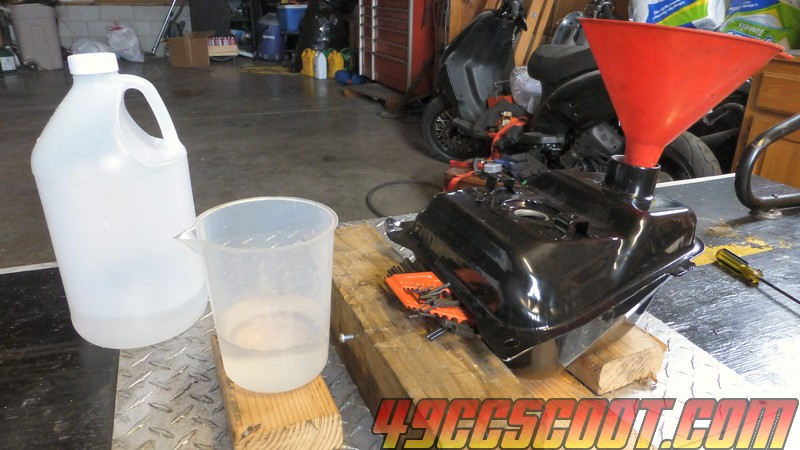 I did it twice and it's about 4,750ml by the time it's filled to the top of the sender opening and to the nozzle stop in the filler neck. That's a little over 1.25 US gallons, but I'd imagine if it were filled to the very top of the filler neck it would be about right or adding the float bowl and lines would make it up. At any rate, I know where I'm starting. 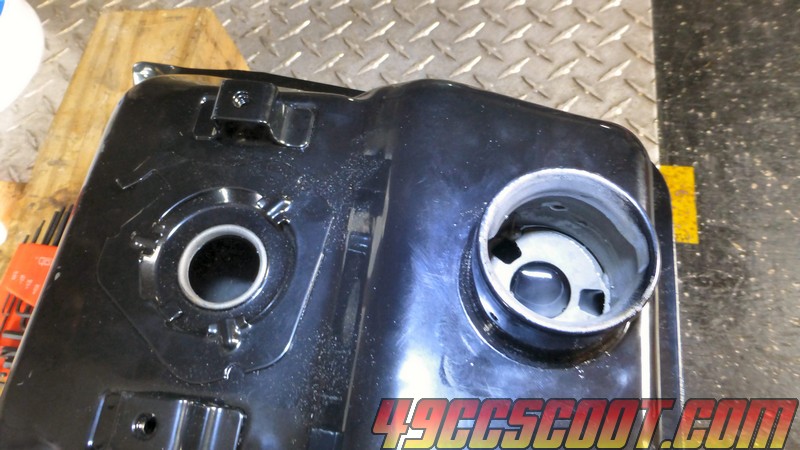 I taped around the tank and marked a straight line across a flat section, then cut the tank in half with a cutoff wheel. I went over it with a sanding wheel in a grinder and some sandpaper real quick to smooth it out and keep me from cutting myself up working with it. 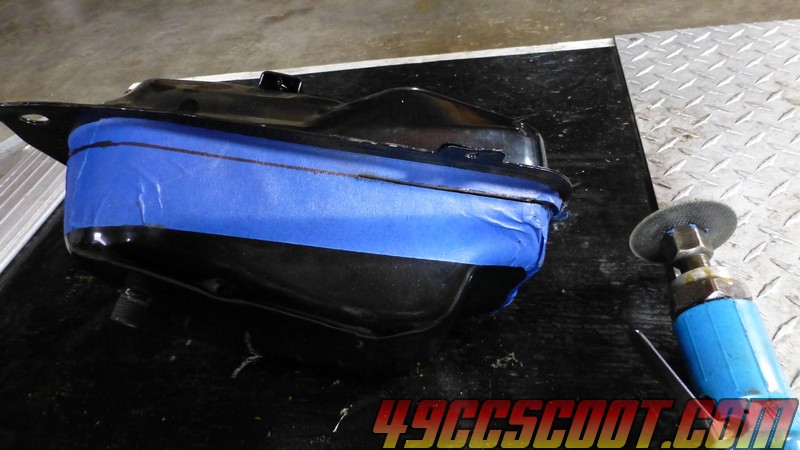 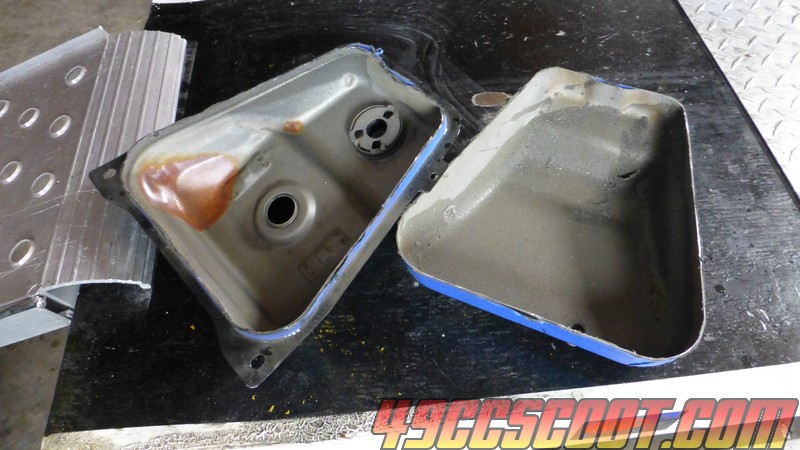 I measured the tank currently on T2 where it's crimped prior to this and came up with 0.030" or so, and decided to go with 18 gauge steel to add volume to the tank. 18 gauge is a bit thicker, but close enough and I'd rather have thicker steel to work with because I'll be dealing with flux core welding. The new tank measured out a little under 0.030". 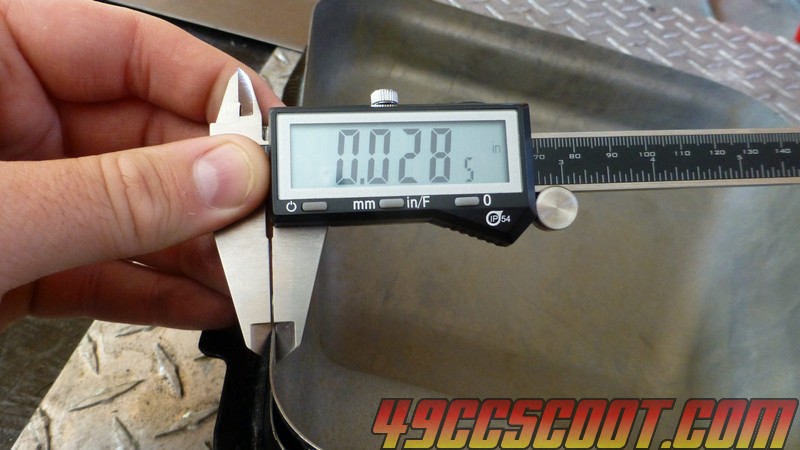 I ordered a custom cut piece of 18 gauge steel from MetalsDepot.Com that is 3" wide by 48" long. I figured that way I would have nice straight cuts that are a pain with a cutoff wheel or hacksaw. 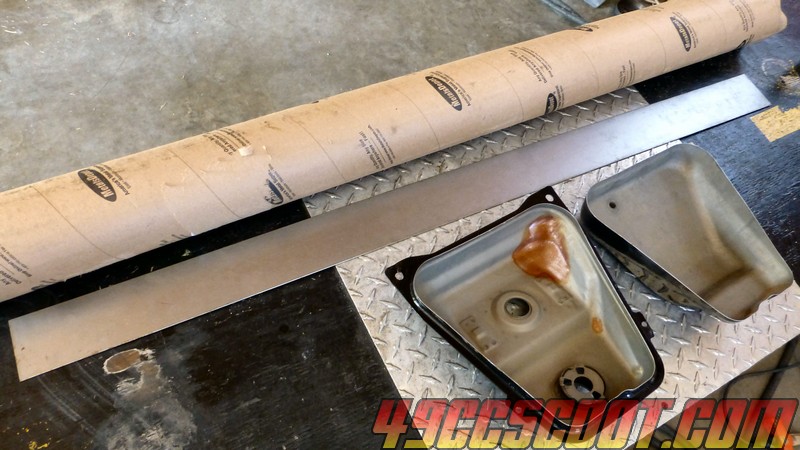 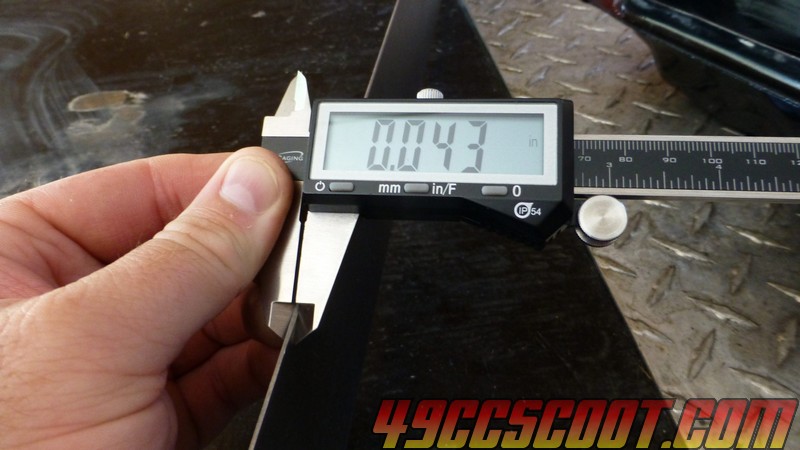 Not sure if it would normally be a good deal to buy online for this because of shipping, but I was planning on getting some 1/4" steel to make a new press apron for my bench top press since I bent it working with a crankshaft a while back. The 3" x 4ft 18ga sheet was only $8.90 and added hardly anything to the shipping with the 17lbs of 1/4" I was ordering. 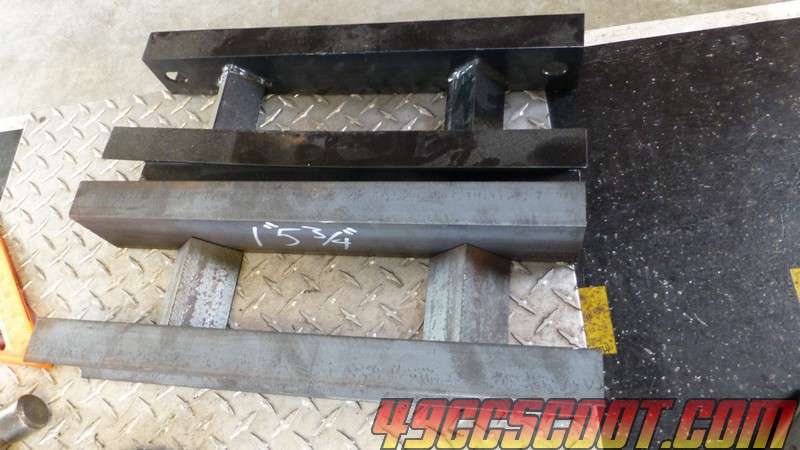 I clamped the steel to the inside of the tank and beat on it with a hammer to form it to the outline of the tank. I also used a piece of steel pipe clamped into a vice to hammer around to help me on the corners. 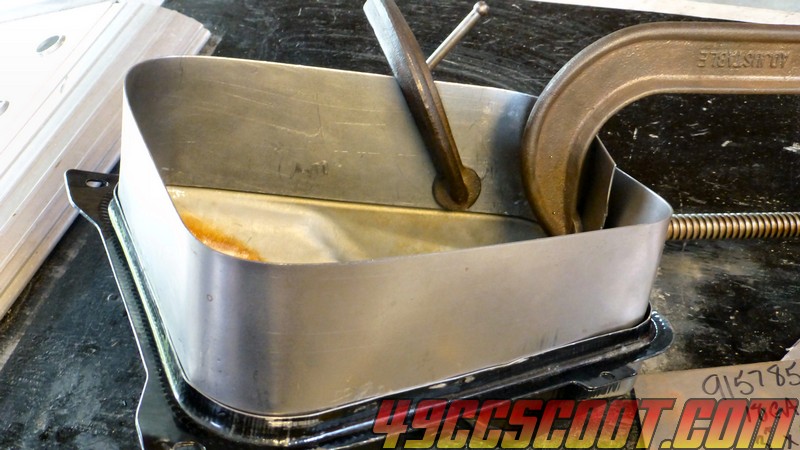 I straightened out the little indentation in the rear of the tank a bit to make that easier to work around. Modified on left, as stock on right. 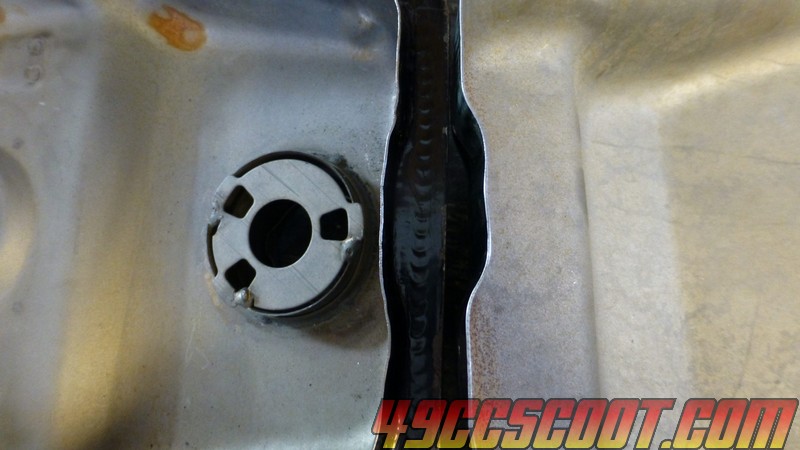 I decided to place the add-on inside of the tank vs butting it up to the tank or outside for a couple of reasons. I didn't want to butt it up to the tank because I think it would make it tougher to weld. Below 18ga with a flux core welder is a pain. Most seem to recommend switching to solid wire about 0.024" and argon/CO2 shielding gas. My welder can do that, but I don't have a tank and I'm not even sure where to do that locally. I'll be using 0.030" flux core wire (thinnest flux core wire). I thought the slight overlap would eliminate potential gaps and help reduce burn-through. I chose inside vs outside because clearance will be an issue so even the extra roughly 1/8" total center width could help. I clamped it together and started welding a strip across the front. The slightest mistake and it's burning through the tank. The 18ga add-on can take a bit more, so the best thing I've found is to start on the 18ga and drag to the thinner tank. No way I can continuously weld or it will burn through. I have to drag down. Stop. Move up and restart. Drag down. Stop for more than a second and I'm hitting and brushing off crap from the flux. Not a lot of fun. As it is there's no way 1 pass will do it. IF if can get it to seal, it will need more passes. The flux core leaves pinholes and such and there's so much risk of burning through the tank every time I touch it. Here's a quick mockup after getting just the front welded, beside a stock tank. 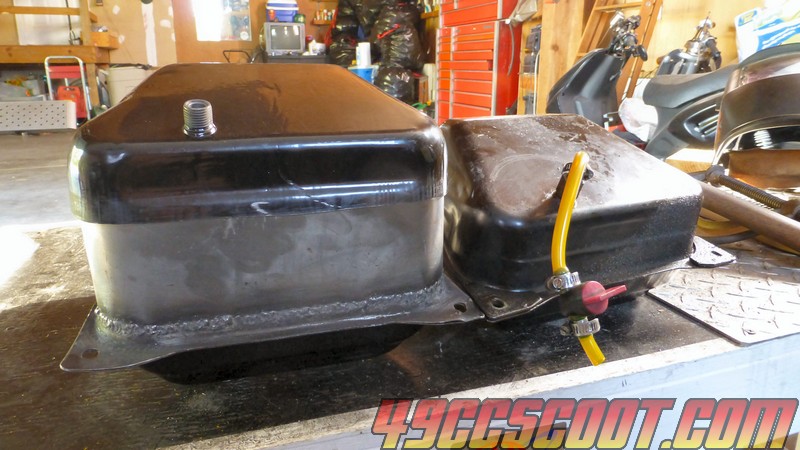 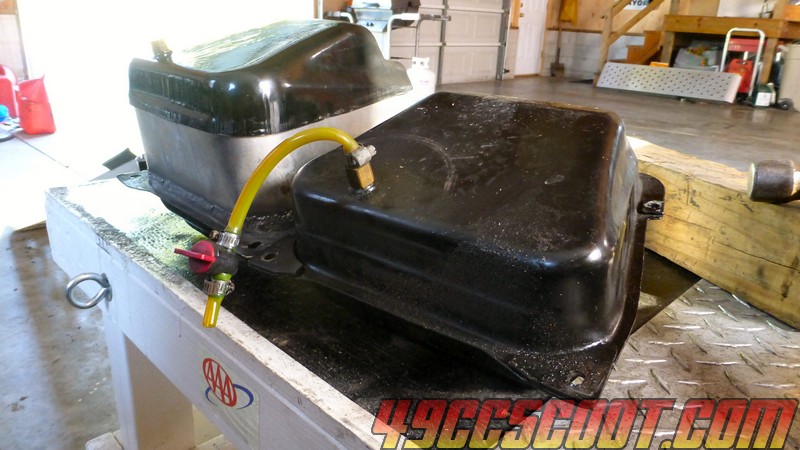 A small argon/mix bottle and solid wire would make a lot cleaner welds..A cheap oxy/acetylene welding setup would be even better,could be welded or even brazed with little porosity.Keep at it,pressure test it at 2 psi and patch the leaks,,J-B weld will take care or the rest. |
|
|
|
Post by 90GTVert on Nov 2, 2014 8:45:35 GMT -5
I got one pass done around the one side and rear seam at least. Ugly, but at least it's that far together. Initially I couldn't get it to fit into the frame, but I beat and bent and cursed it till it would drop in with a little clearance. 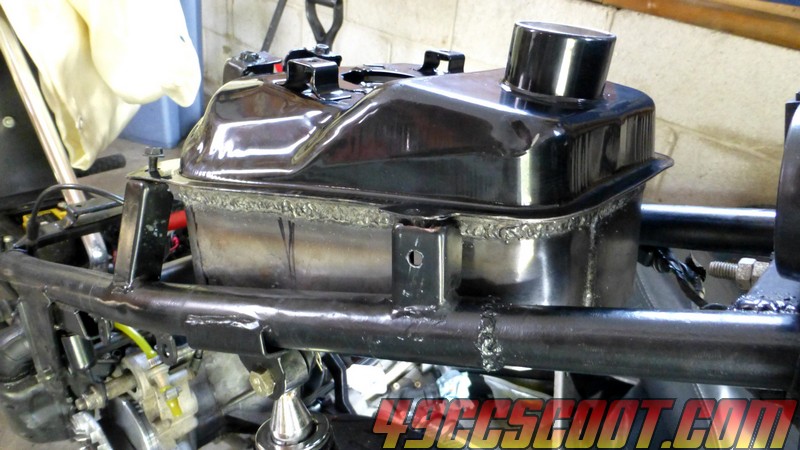 Made it cut in near the shock mount by clamping a board to one side and hammering it. Had to do something similar to clear the CDI up front as well because when I built my own wiring harness I relocated it to tuck in between the tank and seat bracket. Initially it fit fine, but with changing the corners a bit it elongated the tank slightly. 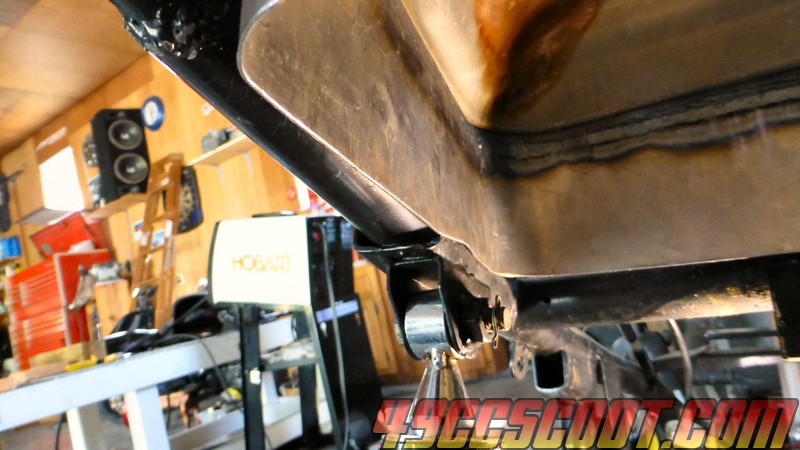 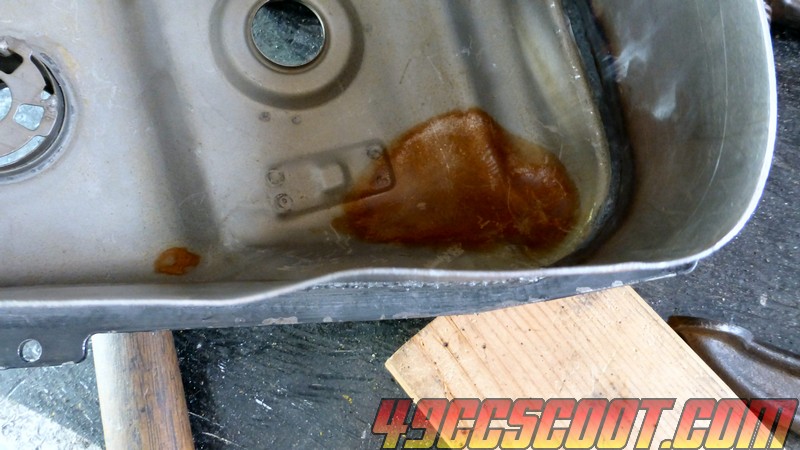 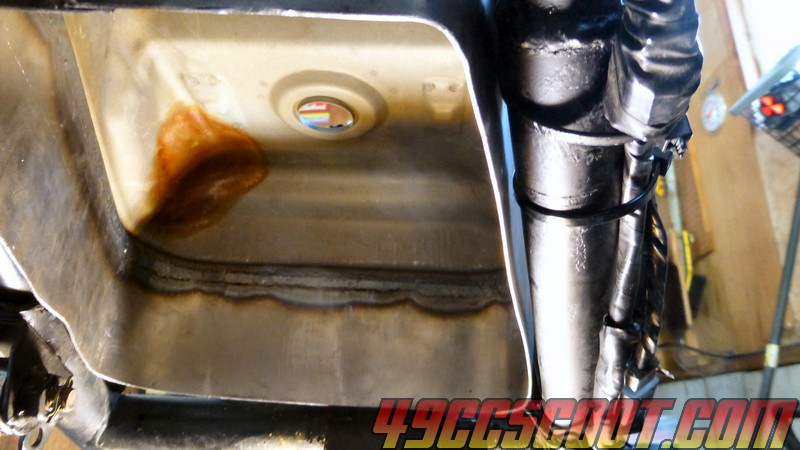 Of course after shaping the rest of the tank different, then the bottom didn't fit. 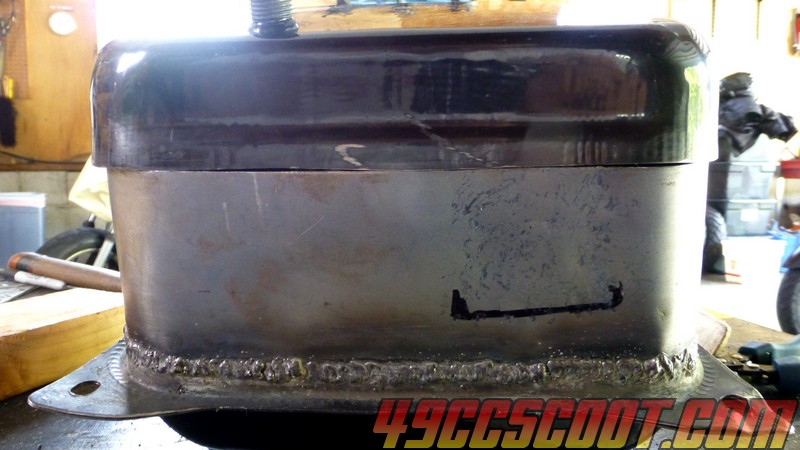 I spent a while bending and tapping till the bottom of the tank was close. It can prob still use a little work before it goes together. 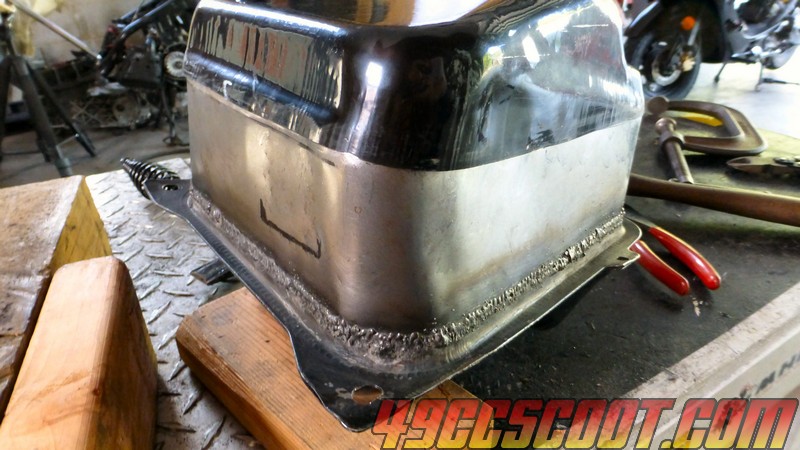 The shock nut and bolt are going to be an issue with the bottom of the tank, I think. You can see them in one of the above pics. I'm thinking it's going to be easiest just to get it welded together and knock that section in as needed. Depending how bad it is, I may cut the bolt shorter. It wouldn't be able to use the pin through the end anymore though. I'm thinking about getting a tank treatment like maybe what POR-15 makes. Just as added protection, because I don't wanna do this again if I can ever get it to seal. www.por15.com/POR-15-Fuel-Tank-Sealer_p_64.htmlI'm sure this stuff is cake for anyone good at metal work and they'd be done in an hour, but it takes me a long while and as pointed out I'm not really using the proper welding setup for this to add more fun. I've had a hell of a time trying to weld up this sheet metal expansion exhaust. Braze doesn't do what I want it to and I keep blowing hole after hole using oxy/acetylene and coat hanger. I'm no pro welder by any means and I know difficult it can be to get a decent weld. I don't know if you have it available, but 190mech mentioned somewhere that he uses solid core MIG wire instead of coathanger now. I applaud both of you doing this. I braze copper almost daily, which is easy, but steel is another world. |
|
|
|
Post by 90GTVert on Nov 2, 2014 8:54:21 GMT -5
I actually looked around before I started this for tips on welding 18ga and thinner with flux. The tip everyone gave was.... drum roll... don't do it! lol Honestly, I would like to try the actual MIG, but I've had no desire to go anywhere and rent tanks or get them filled so I said screw it and I'll just have to see if I can make it work. For anyone that couldn't care less about walking into a shop, just get the MIG stuff if you want to go thin and are already using a machine capable of MIG. This is not fun. I got it welded up all the way around. Not worried about holes, just 1 pass around it. It really sucks when you can't clamp the two parts together, because any gap makes it burn like crazy. I was using a wooden handle to press down on the outermost piece and minimize gaps. I'm not even talking large gaps, just tiny ones that are hard to help will make things difficult with flux core. You can see how ugly it is and also there are spots where it looks like I went nuts and welded a huge area. That is because some spots wanted to burn the instant I touched them and it ended up being patch work. While I wasn't worried about pinholes, I didn't wanna leave big openings. Once it was welded I smacked it around with a hammer a bit, but the bolt and pin were more trouble than they were worth I thought. 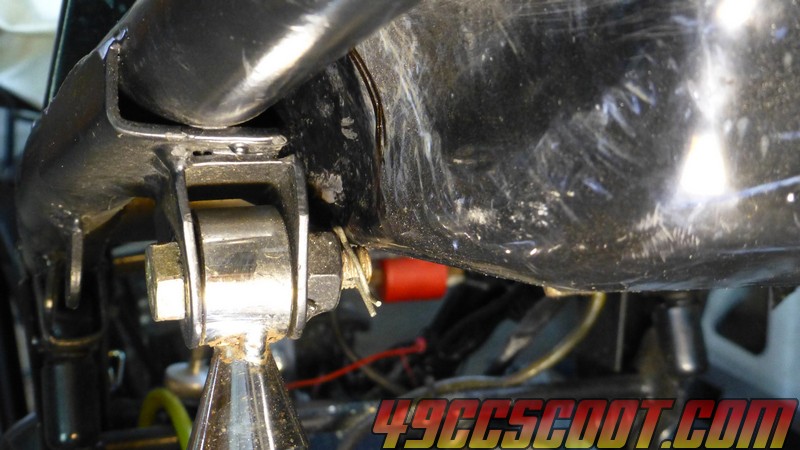 I cut the bolt so it would be flush with the nut and used thread locker on it. A little more work and the tank would fit. 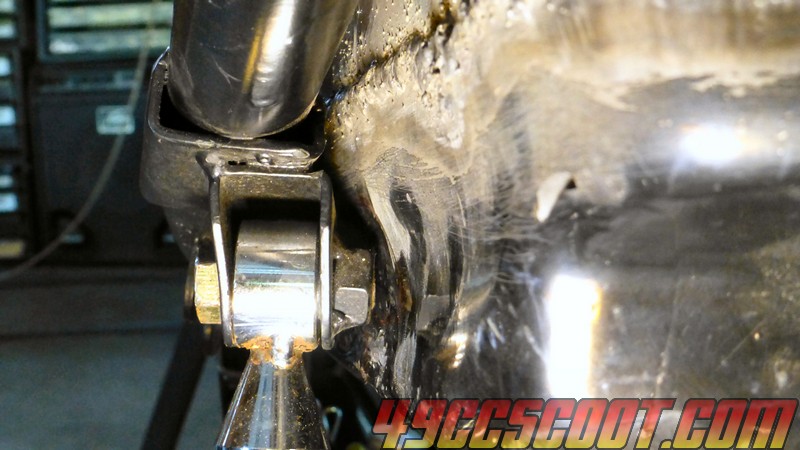 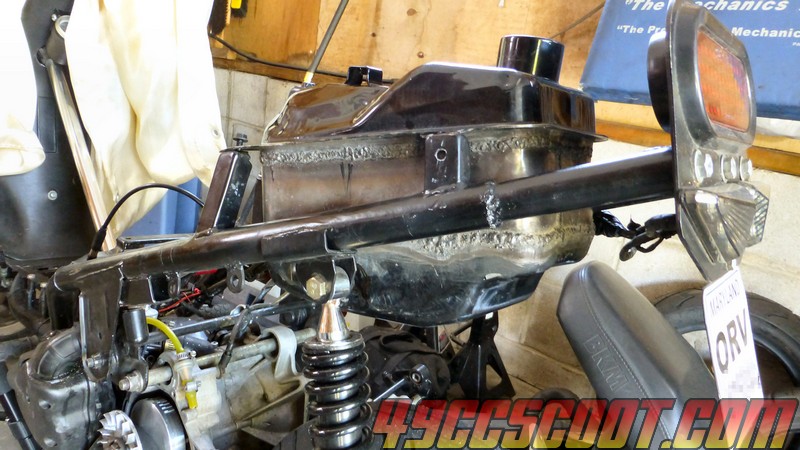 After that was in, I took the pics above and then the electricity went out for 2 hours and some change. I ended up doing more yard work and again by the time I was done I didn't feel like messing with the tank much more. Curiosity got the best of me though and I wanted to find out what it would hold. 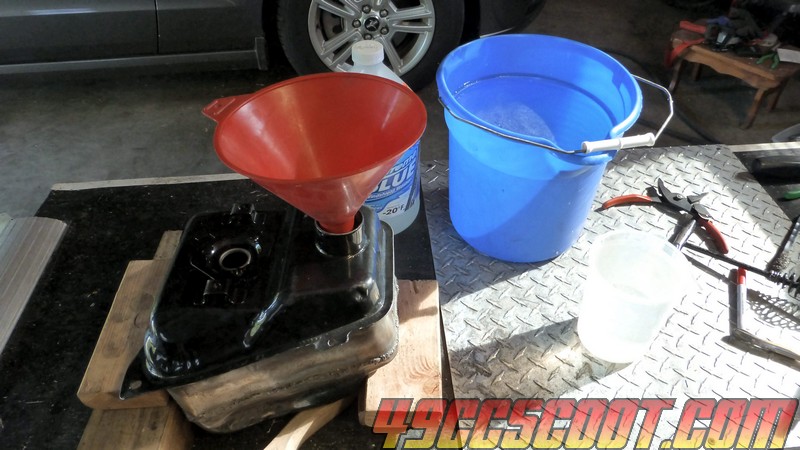 I filled a bucket marked at 2 gallons, just a tad high thinking leaks would be bad and got some more water ready in a beaker. Didn't need the extra. At 2 gallons it overflowed a very small amount. I think the angle was wrong to get the sender hole right so it could be filled. I think it'll hold 1.9 to 2 gallons now, where it was 1.25 by my measurement before. Assuming it was correct at 1.4 gallons by their ratings, with my 40-50MPG avg setups I would have a range of 56 to 70 miles. Assuming 2 gallons, I'd be up to an 80-100 mile range. I initially thought I'd be looking at 2.2-2.3 gallons, but I was also thinking 1.4 stock by my measurements and just rough math not thinking of rounded corners or overlapping vs butting the new steel up. Lots of work to go, but I'm happy with about 2 gallons if I can get it working. |
|
|
|
Post by 90GTVert on Nov 2, 2014 8:59:02 GMT -5
Nice brother. Are you using E-71 or N-211 wire? Lots of evenly spaced tacks will help some with burn trough as it acts like a heat sink. Back stepping, which it sounds like you were doing, helps too along with jumping around in a systematic way on your work.(side to side) A piece of copper makes a good heat sink and backer for patch work and gaps, if you can get to the other side, as the steel will not bond with the copper nor will the copper contaminate the steel. Sometimes you can tack a piece of scrap or something steel to your work and use that to help pull out gaps. Putty knives come in handy also when "tinning" (sheet metal work). Looks good I'm glad niz76 mentioned this to me as this is an up coming step in my build. Just nervous about using a used tank, I've heard & seen too many horror stories on tanks & tires. Fix-a-flat is deadly to welders. (no pun intended). Great job all in all, keep up the great work and experiments. It's Hobart wire and says E71T-11 for the alloy. Honestly I never knew there were multiple kinds. When I had a Campbell Hausfeld welder I just grabbed Lincoln Electric flux core 0.030 or 0.035" wire and since I've had this one I've only used Hobart wire. Thanks for the kind words. I figured anyone that can actually weld would come in and smack their forehead at my horrible work. lol You may still after this update... This tank has a different fuel level sending unit mount than any of the other Triton mounts I've had. 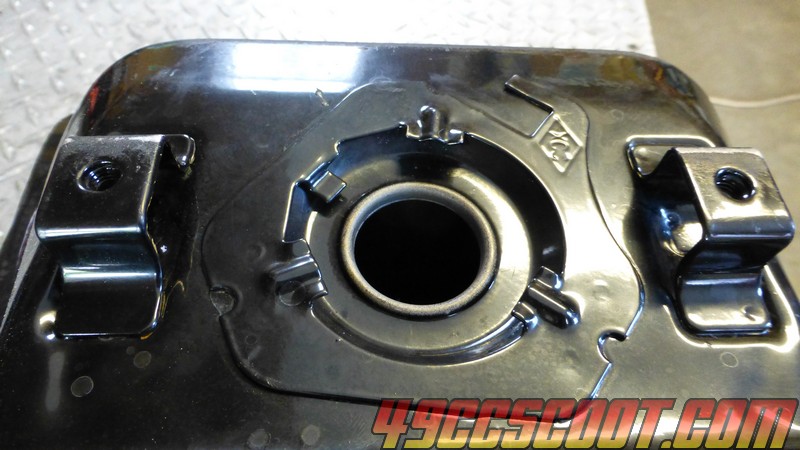 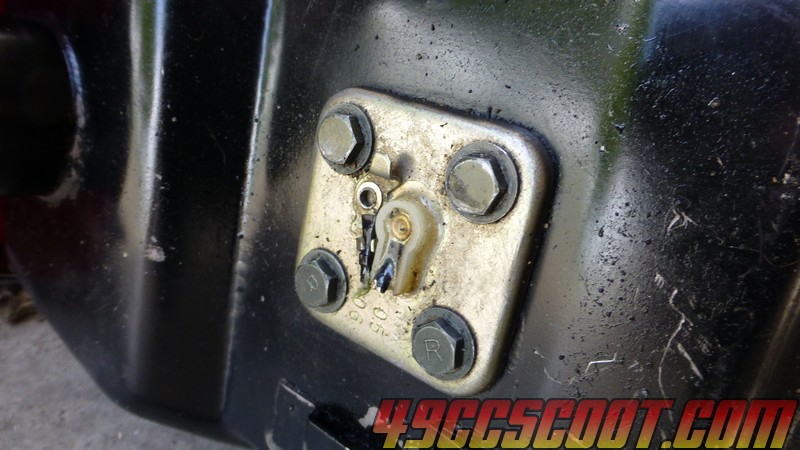 Fine by me, I just cut out a circular piece of 18ga and welded that over the hole. 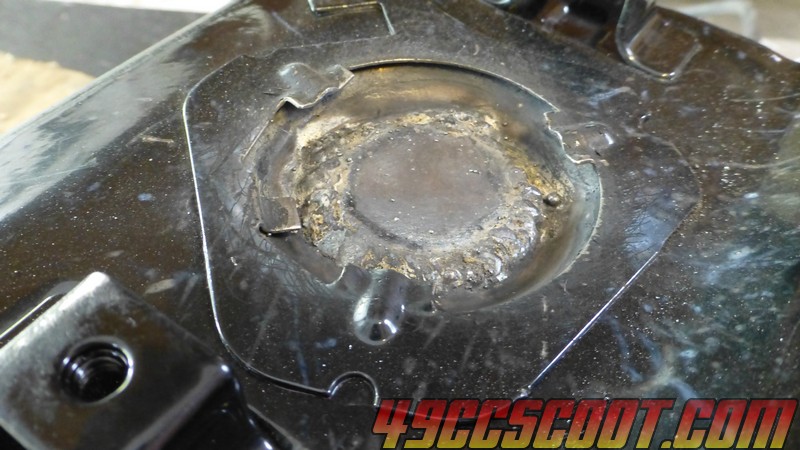 At that point I had all of the welds done around the tank. I mean done as in they were there, not that they were good. I went around and tried to patch up spots where I could see there would definitely be a leak. Then I wanted to figure out how to put pressure into the tank to look for leaks. I decided the easiest way would be to use the case leak tester I use on the 2T engines. I wanted to hook it up to the outlet, so first I had to get a hose barb on there. As shown in the tech area, the stock threads are 14mm or so thread and no common fittings work so I ground it down a little and rethreaded to 1/4" NPT so fittings from a hardware store will work. 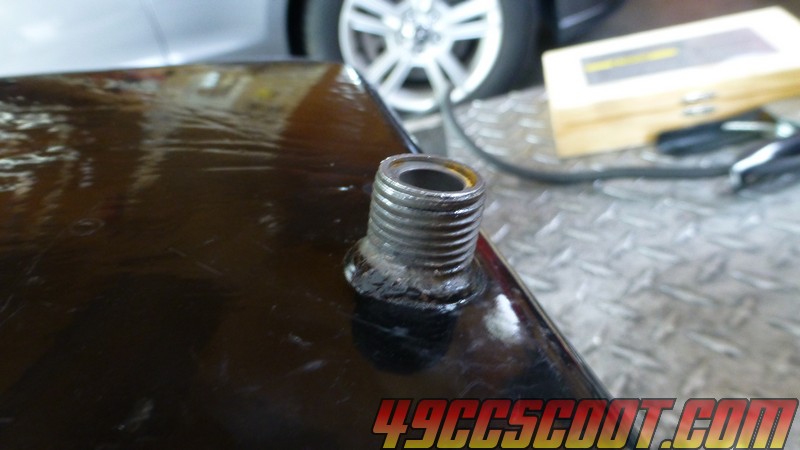 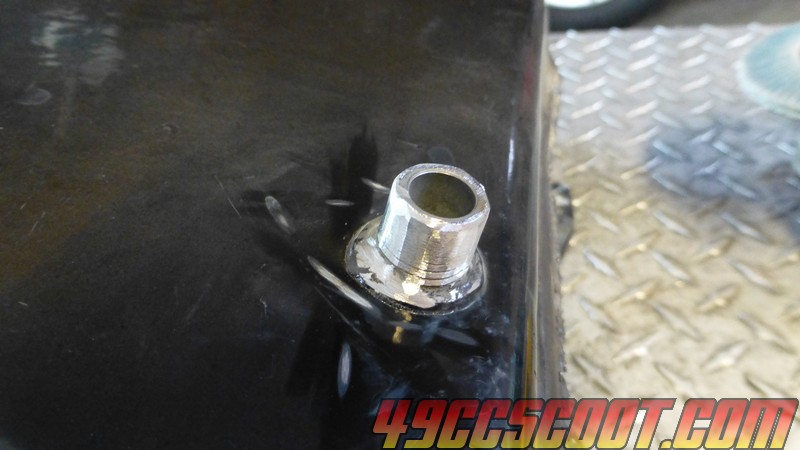 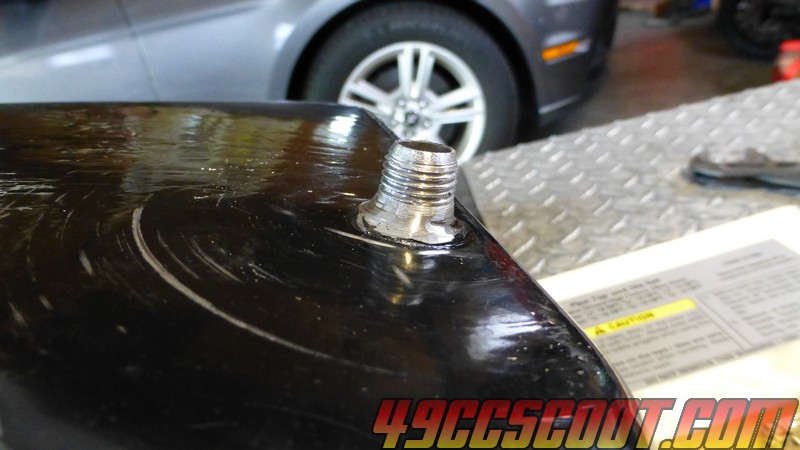 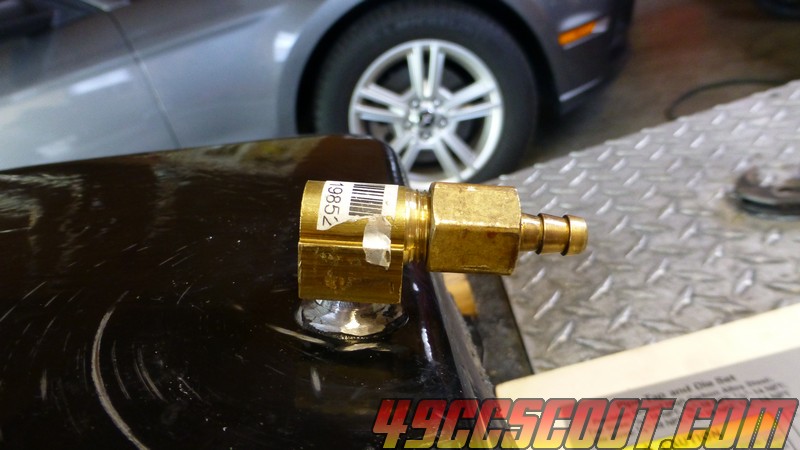 Then it was easy to attach the pressure tester. 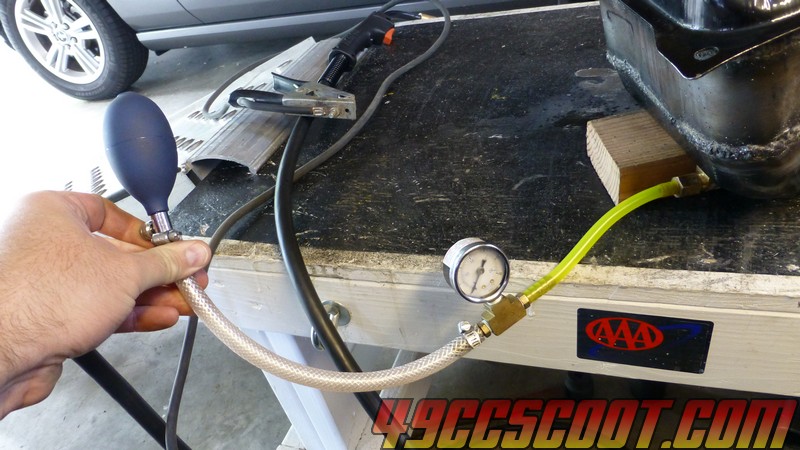 I needed to seal the filler neck to keep pressure in. There's a little vent in it (which I later welded over) so my first attempt was wrapping around that with some rubbery miracle sealer stuff and then using the stock gas cap. I knew the stock cap was vented, but it's quick to try so I did... and that didn't work.  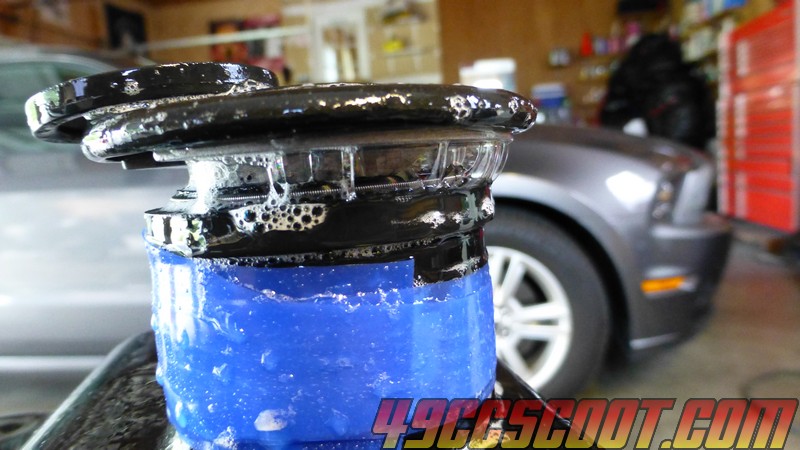 New plan. I found a 1.5" hose coupling that fit over the filler neck and clamped on. Then I just needed something to clamp into the other end to seal it. I happened to have a starter motor nearby that looked about right, and it indeed sealed the filler off. 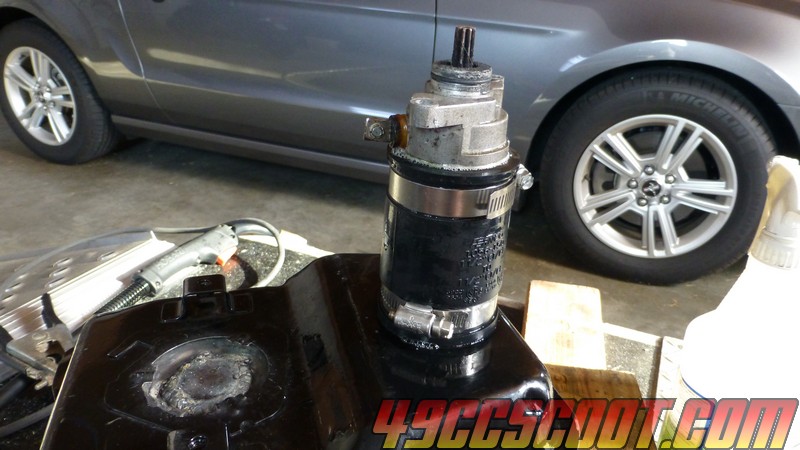 Then the horror story started. I actually didn't have leaks as bad as I expected. I expected 100 leaks and to have no ability to get pressure into the tank at all for a while. I had about 25 tiny pinhole leaks around the tank and I could get pressure in there at least briefly. I started off by just trying to patch each little spot. That didn't work. Then I ground down the spots and tried and that didn't work. Then I ground down whole lengths and tried carrying a bead across and that didn't work. 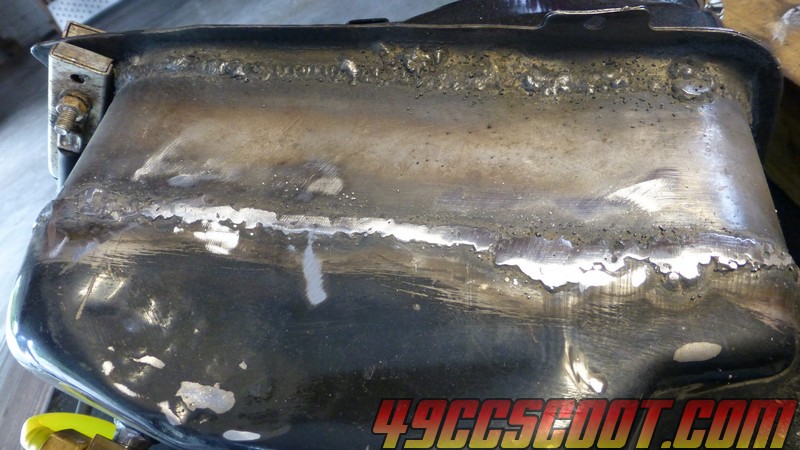 It was extremely frustrating. I'm sure a pro could do it even with what I have here, but I could not get it to seal. When I tried to patch something it would leave pinholes on the edge by the stock 22ga steel. If I tried to patch those, more pinholes. The grinding seemed to be important, because otherwise I was even more likely to burn through bad on the 22ga side. I tried lowering wire speed (already on lowest voltage) and it was either so low that I got popping spatter that didn't want to puddle or once it was good to make some sort of puddle it easily burned through the 22ga. I tried for hours on one section and I got it slightly better, but I could not get it to seal. I ground it down a bit again and went to my last resort, JB Weld. I applied JB over the one seam I had been messing with, good and thick over the whole thing. I let that setup and pressure tested it the next day. No leaks in that section. 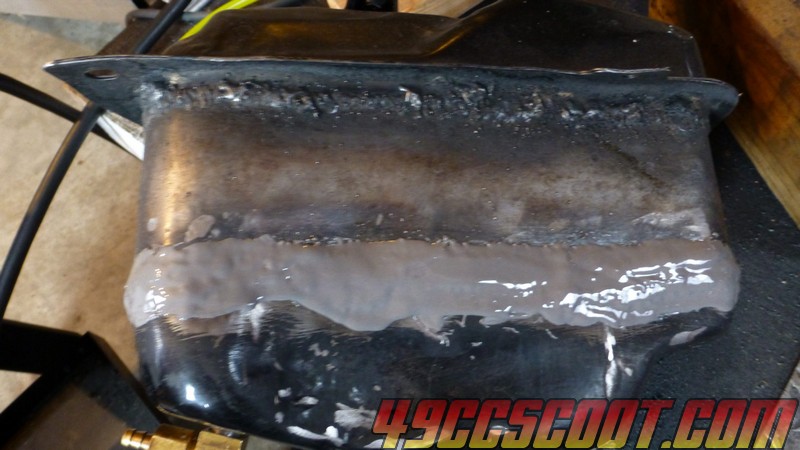 Once I saw that it would seal I ground down the rest of the seams on the tank and then put pressure in so I could try to repair the worst leaks. Then I started applying JB Weld one side at a time. I'm just doing a side at a time because the JB will run a little till it sets up so that keeps it in place plus that way it should naturally want to run down into the holes as it sets up. Still working on flipping and applying JB now. I really thought I had a shot at sealing it with welds, but I didn't see that happening so I had to admit defeat and try the JB Weld. I had no leaks on the one seam that was 18ga to 18ga, but everything else I failed at. If I ever do this over, I think it would actually be easier to build a whole tank from 18ga or thicker than to work with the stock ~22ga stuff with flux core or to get the proper MIG supplies or to try and tack the stock tank and take it to a professional. Tacking would be tricky the way I did it though, because one section needs to be secure and then it needs to be shaped and then the other half worked on. At least I couldn't do it all at once, maybe you could, but you could always take it to a welder twice. At any rate, I don't advise this method to anyone that plans to stick with flux core. It works till you try to make it leak proof, and then you will want to pull your hair out. Us rednecks hook up a shop vac to the filler neck and get a good suction going,warm up the tank with a hot air gun and trowel on J-B .. The heat thins the epoxy and vacuum pulls it into the welding voids...You didnt read this here AND dont try this at home,,just under laboratory conditions!! |
|
|
|
Post by 90GTVert on Nov 2, 2014 9:01:15 GMT -5
I'm assuming you used soapy water & sprayed the Wells to find the leaks. You need clean & dry those areas MEK works really good for that as it doesn't leave a residue like acetone. I was too lazy to mix soapy water, but my 50/50 water and Simple Green mix that is always handy makes bubbles pretty well. Some of the time I did no cleaning other than to let it dry. Sometimes I used brake cleaner and let it evaporate before I did anything else. Prob not the brightest methods either way, but even when I ground it down with no chemicals applied I had the same troubles. Also try snipping off the first inch of your wire before taking or welding each time as some of the flux is burned off from when you stopped your previous weld/tack. I did that and made sure to get the slag off of the end of the welder each time. Not always 1" though. Also a 4-1/2 knotted wire wheel on a grinder to clean before and after welding area. I personally hate them but they are very effective. I used a regular wire brush or a grinding wheel. I have a wire wheel that I can chuck into the drill, but I never even thought about it. Would have cleaned things much quicker and easier. You didn't by chance try patching it under pressure did you? It can be done but not recommended with the little welders. I actually did a couple of times. Burned through quickly each time, obvious by the puff of air. It seemed like a bad idea, but I was getting frustrated and tried it anyway to save time... which just caused me more problems and time lost. E-71 is a good all position wire similar to 6011 bka farmers rod. N-211 is a structural wire and is only for flat welding positions. You can run it all positions but it doesn't have as much flux E-71. The flux is what helps keep the molten wire where it's at till it cools and becomes solid, just like stick welding. There's nothing wrong with flux wire it's what is used mainstream in structural applications. Mainly Coreshield-8. Ppl just seem to have a hard time distinguishing the difference in the puddle (your actual weld) and the molten slag on top. You can see some of my welds in my build post and I basically used the exact same equipment. Remember your write is very susceptible to contamination especially moisture. Keep it dry. They make wire felts to put on the wire inside your feeder to clean off dust contamination before it enters your whip. Also blow out your whip periodically as a maintenance. If you can remove your liner you can pour a solvent through it to help clean it out. If your rollers are too tight it crushes the wire allowing the flux to come out and fills up in the liner. Just some hopefully helpful tips. Speaking if which those wear out fairly quick when doing alot of welding. All in all it looks good. Don't worry you can make fun of me when I get to that point in my build. Keep up the good work. Thanks a bunch for all of the tips and info. I REALLY hope I'm done welding this tank and thin steel, but it's good info for later and hopefully for others that come across the project. I can do alright on thick stuff. Not saying it consistently looks good like what you do... or ever looks as good... but it works. I will weld on a project and then may not touch the welder for a few months. I have a hard time getting back into it and getting the feel for it, and I've never been good at it anyway. At least I'm better than when I started, and it's made projects/repairs that wouldn't be possible for me otherwise happen with scoots, mowers, and cars. Grinding wheels & sanding discs leave grit in the metal which is a contaminant hence the stainless wire wheel. EDIT/ADD: When capping off or sealing off a open space such as tubing or a tank, the air inside is heated to about the same temp as the surface of your work. In other words the air is expanding rapidly creating pressure. This heated expanded air will escape rapidly through any opening pushing your molten filler out creating burn through. I know of 3 ways to overcome this. 1 drill a weep hole. This allows the heated air to vent. 2 when getting to say the last half to quater inch of the sealed weld stop and allow the work to cool completely. Then finish the weld. 3 be sure it's very heavy walled materials as in structural tubing and burn it quick & hot like 275 amps minimum. I've cut into 30yr old columns and had 400+psi blue molten steel back at me. Sorry forgot to mention that. |
|
|
|
Post by 90GTVert on Nov 2, 2014 9:06:42 GMT -5
The JB Weld had about 16 hours since the last part was coated, so I started working on pressure testing it. I got nervous when I first pumped it up and after an hour there was no pressure, but I found the fittings on the outlet were leaking. 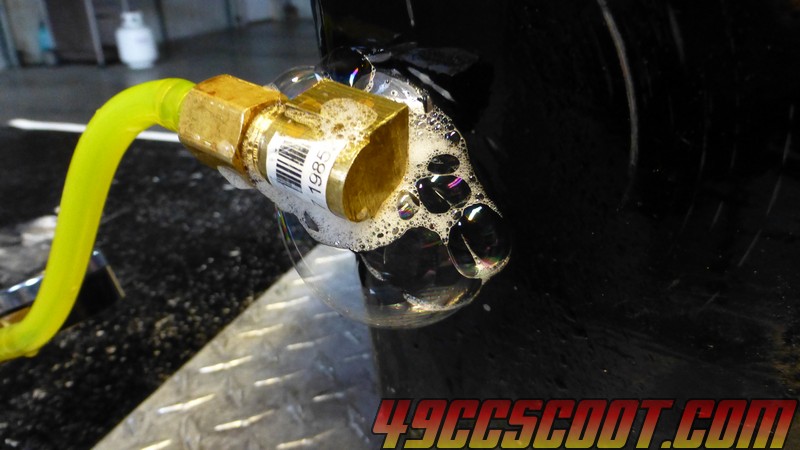 I sealed those up and put in 3psi. 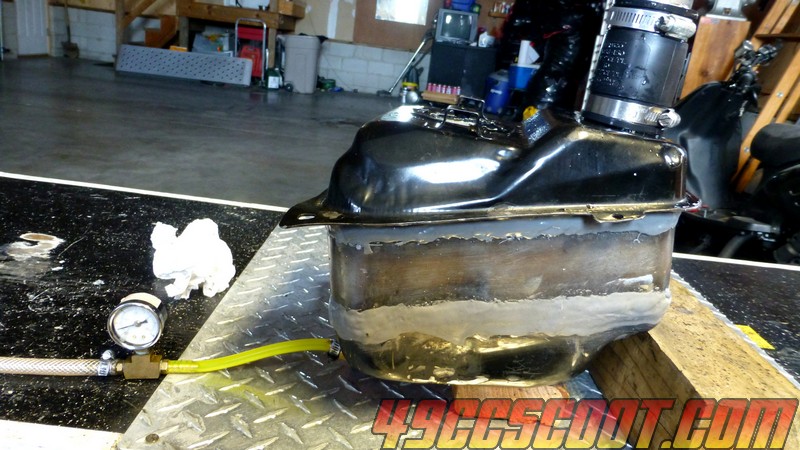 2 hours later it was still at 3psi, so hopefully it's good to go. Since it was sealed and I could take my time, I filled the tank again with water in graduated beakers. By the time the water was up to the stop in the filler neck, it held 7,670ml... which comes out to about 2.03 US gallons. I looked for any water leaks, even though there should be none after the pressure test, and didn't see any. 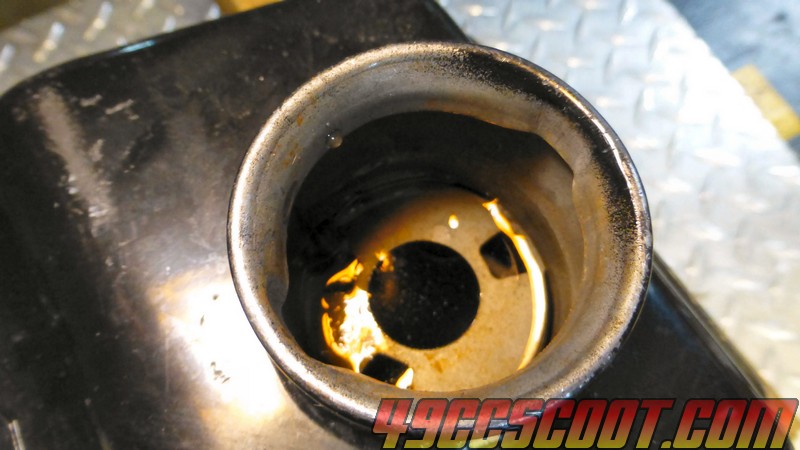 |
|
|
|
Post by 90GTVert on Nov 2, 2014 9:07:15 GMT -5
The POR-15 came in. Normally there's a cleaner/degreaser used, but it seems to be geared toward old tanks and removing sludge so I skipped that. Working on flipping the tank with the metal prep in it now, then it will need to be thoroughly dried before the sealer can be poured in and worked around. 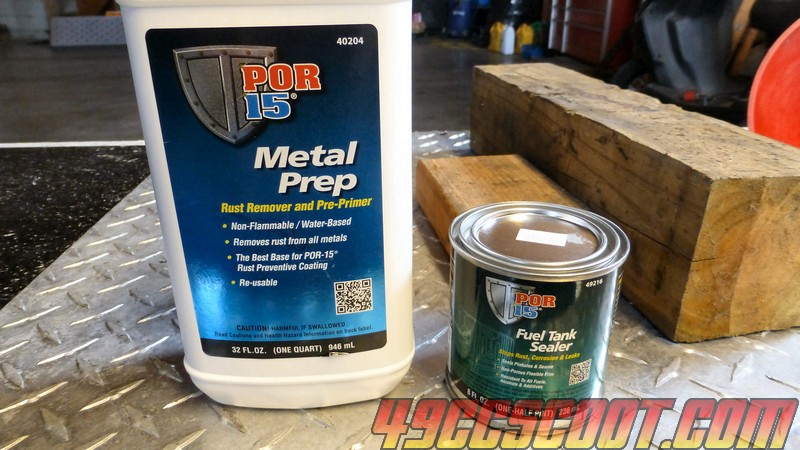 For anyone interested there's a pdf for motorcycle tanks here : qr.absolutecoatings.com/QR-assets/downloads/POR15/CycleTankRepairKit.pdfThe tank is coated now. Says it takes 96 hours to fully cure. 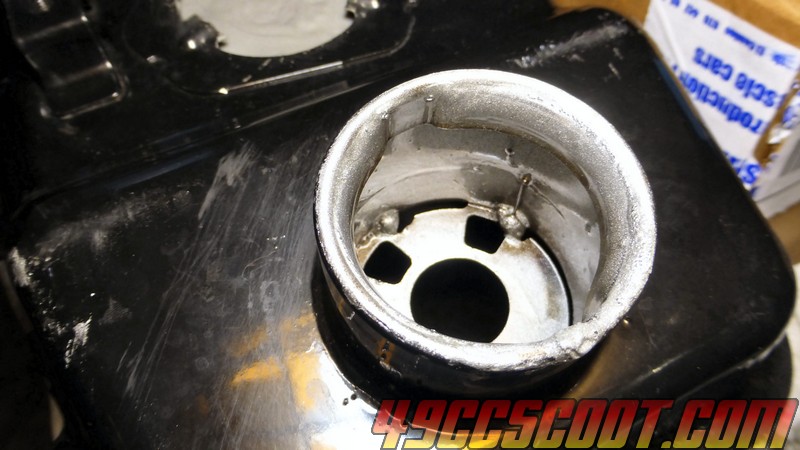 The instructions say to dump the whole container in and after it's done being rolled around to coat everything you let the excess drain. Hardly used any of it. I thought about pouring half in when I started, but they tell you things about it being sensitive to moisture and exploding when sealed off if it's been used so I just dumped it all in. 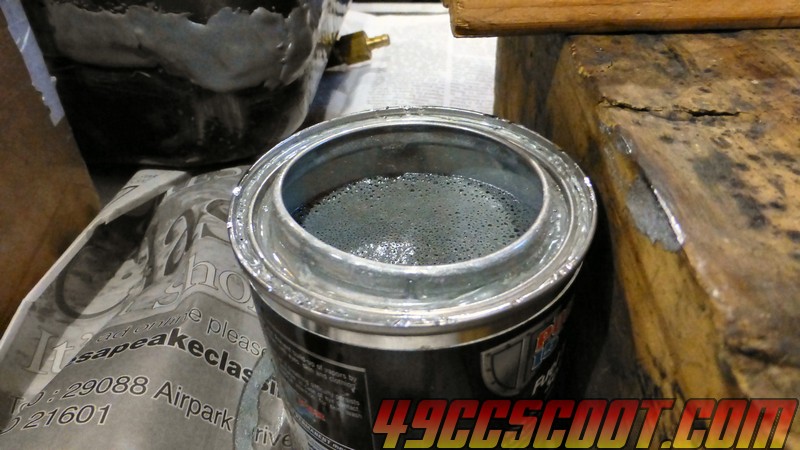 I'll still have to paint the outside and fix the busted mounts on the scooter before it can go on, and it'll be well over 96 hours before I plan to put the scooter to use anyway. |
|
|
|
Post by 90GTVert on Nov 2, 2014 9:10:40 GMT -5
The mounts for the fuel tank were all messed up. A couple came off with the old tank and another was cracked and the nut barely had any threads left. 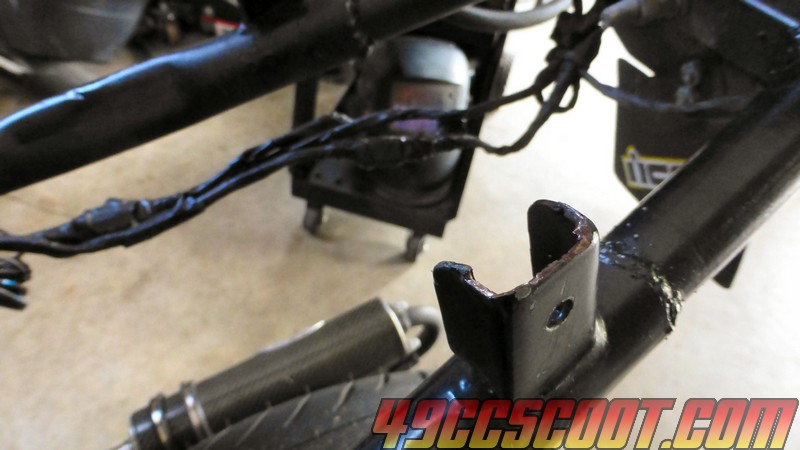  Made a few mounting tabs with M6 nuts attached. 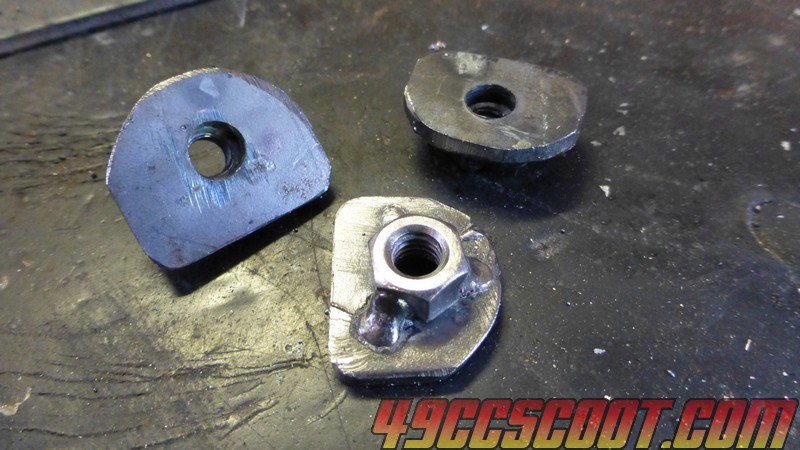 Welded on. You'd think I'd clean the sand out of there while it's open, but no. 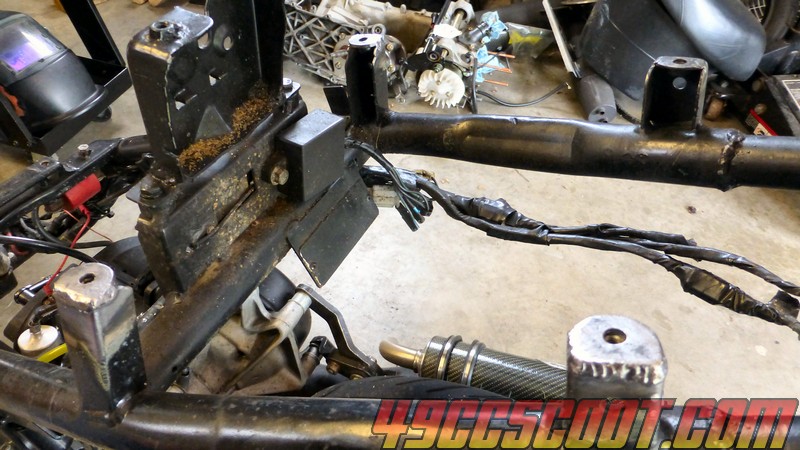 Tank mounted. Everything is painted BBQ black. It won't last. I'd prefer satin black wheel paint by Duplicolor because I've had good luck with it resisting chemicals and wear and tear, but I don't have it around so this will work for now. It's ugly, but what's new? 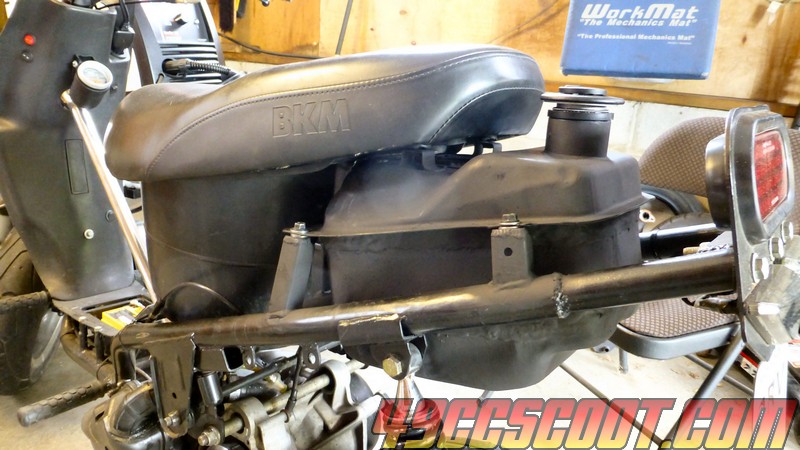 I think on a normal model with fairings you'd prob hardly notice the larger tank till you were really looking for it. I filled the tank with gas on Monday night because I wanted it to sit with fuel in it before I rode it. Paranoid I suppose. So it's been pressure tested and the POR-15 sealer used after and now it's sat for 2 days and no leaks. After welding a fitting to a tank years ago and having it break off while riding, dump fuel/oil on my tire, and cause me to drift through a turn before running out of gas and pushing it home... I'm still a bit nervous that the first ride it'll break into 3 pieces, coat the tire as I make a turn, sparks will ignite the fuel, and I'll set myself on fire while crashing. Oh how I hope that's just my overactive imagination at work but if you read any wild firey scooter wreck news stories... and don't hear from me... |
|
|
|
Post by 90GTVert on Nov 2, 2014 9:16:55 GMT -5
I have since rode many times with the enlarged fuel tank and so far, so good. I've rode 60-80 mile stretches without getting gas and it's been very nice not worrying about running out of fuel if I feel like turning off on a road I don't know to enjoy new scenery. This was by no means an easy modification for me. It took a lot of time and effort, but when it was done it has been very much worth all of that time and effort IMO. If you only ride 20 miles at a time, there's not much point, but for long distance riding it has become one of my favorite modifications.
|
|


