MSD Ignition Coil Installation & Making Spark Plug Wires
Nov 2, 2014 9:58:42 GMT -5
moofus02 likes this
Post by 90GTVert on Nov 2, 2014 9:58:42 GMT -5
I decided to finally buy something I've thought about trying for years and bought what I hope to be a good coil. I went with the MSD 8232 because it's what they recommend with their CDI ignition. Just a stock CDI here, but that's the closest recommendation I could find. I considered a coil on plug setup, but it seemed just as easy or easier to me to mount the coil somewhere on the frame and use a plug wire than to mount it to the engine. Coil On Plug  would have been cheaper though. This was about $80 for the coil and the plug wire kit.
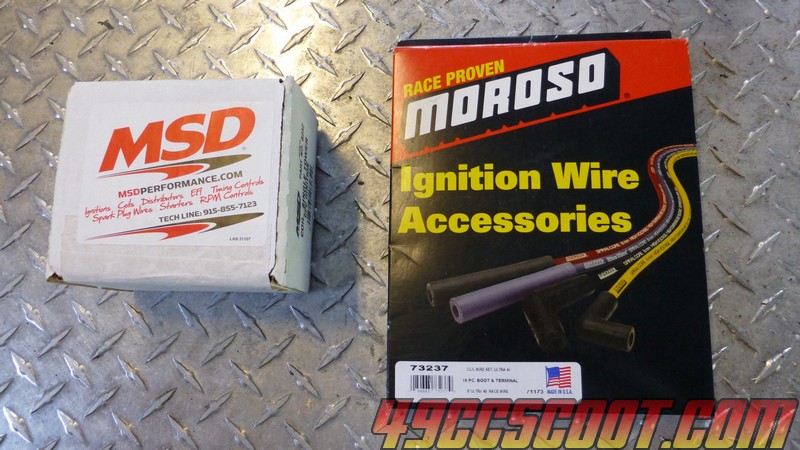
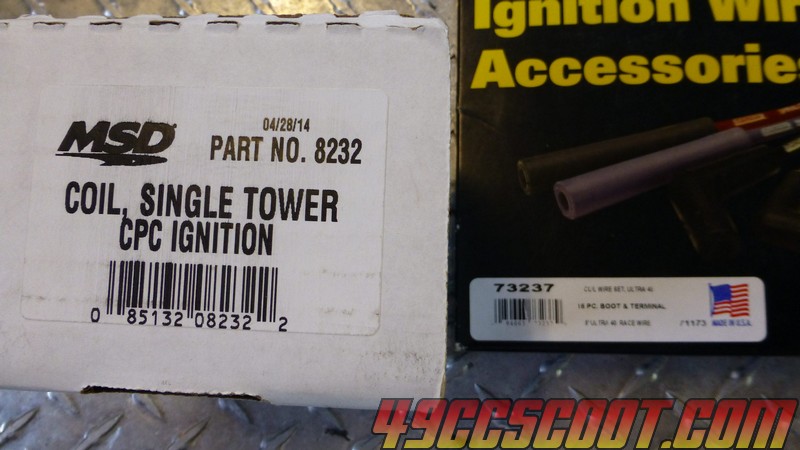
Part numbers.
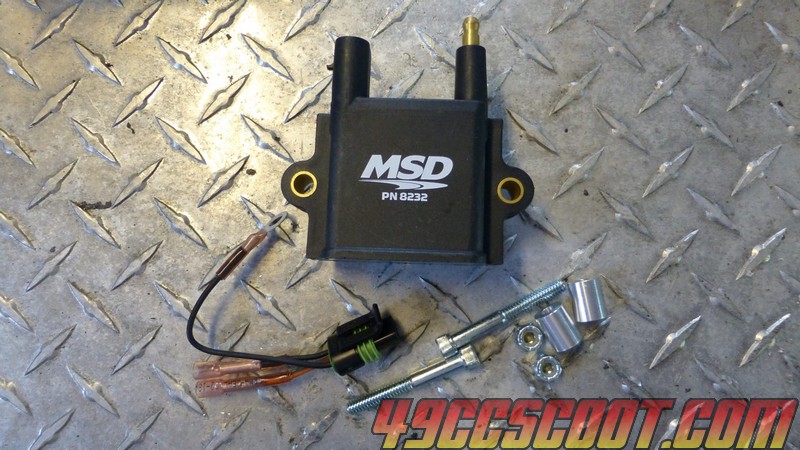
The coil includes mounting hardware and a wiring adapter.
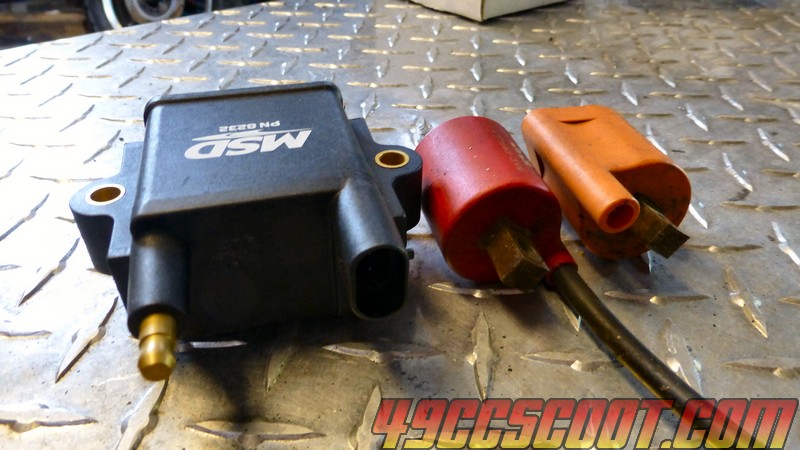
It's pretty big compared to stock style coils.
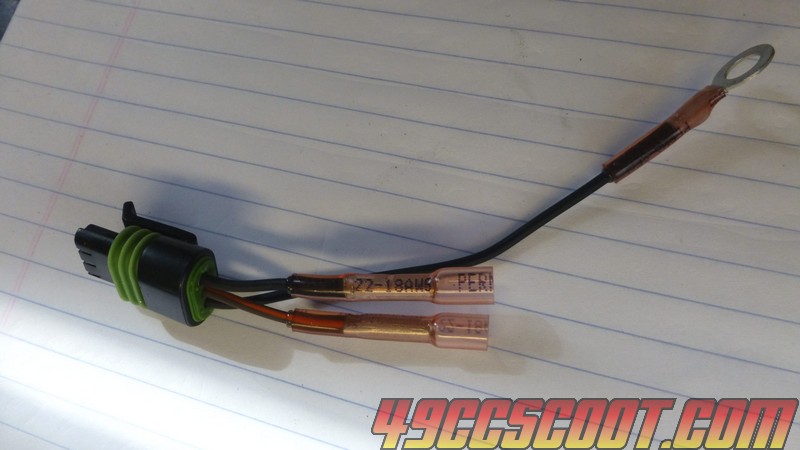
Since mounting would require some effort, I wanted to test the coil before mounting it to be sure it works. Here's a look at the 8232's connector. A wire with a ring terminal to ground and two wires with butt connectors. The brown/orange wire goes to coil positive and the black wire goes to coil negative.
Wiring for my old Bando coil.
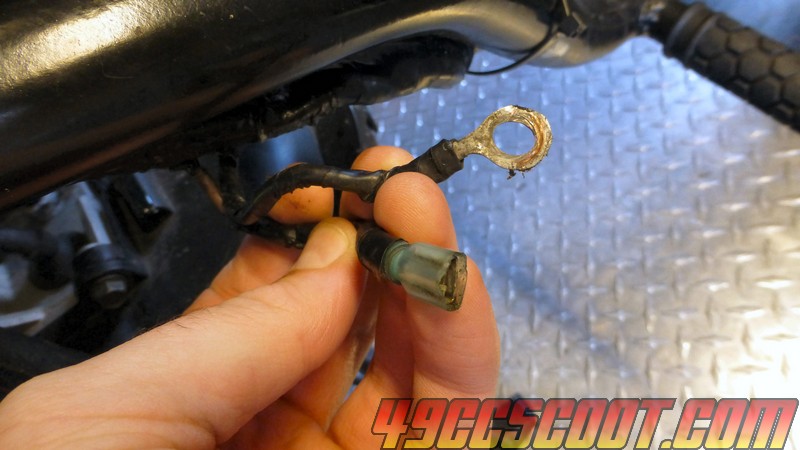
I cut both connectors off of the existing wiring and stripped the ends.
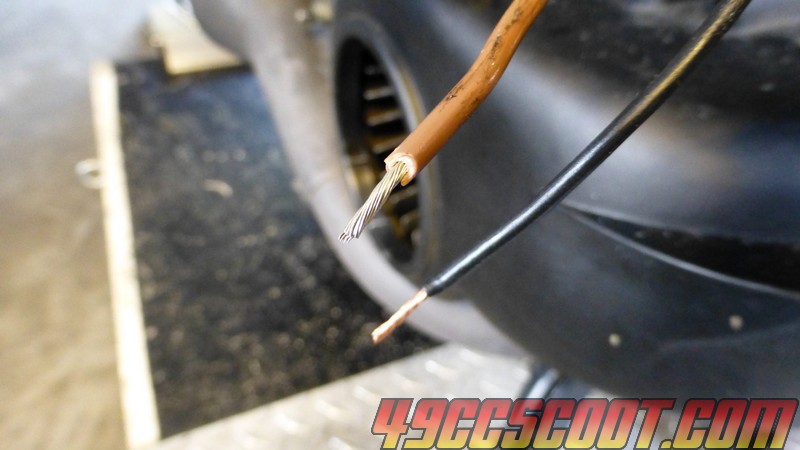
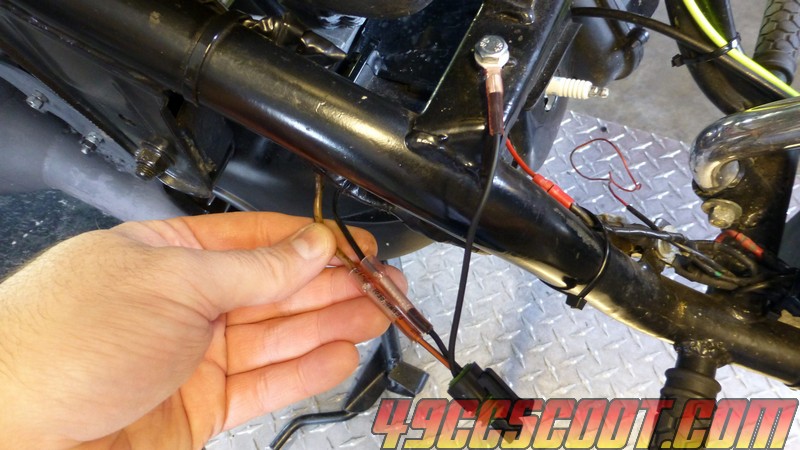
I would need to elongate wires to mount the coil where I wanted it, so I just pushed the stripped wires into the connectors without crimping them and bolted the ground to the frame.
I didn't have any old plug wires lying around, so I had to make one up before I could test the coil. The Moroso 73237 universal Ultra 40 wire kit comes with 6ft of wire and a small assortment of HEI and non-HEI terminals and boots as well as a couple of stickers and instructions.
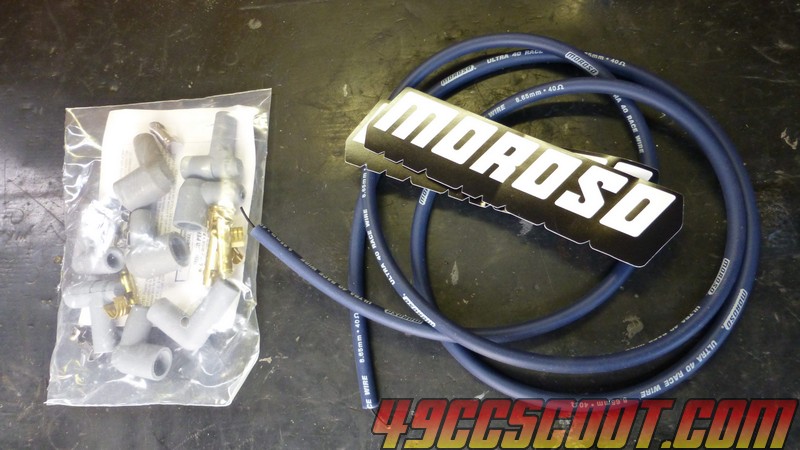
I used an HEI terminal and boot on each.
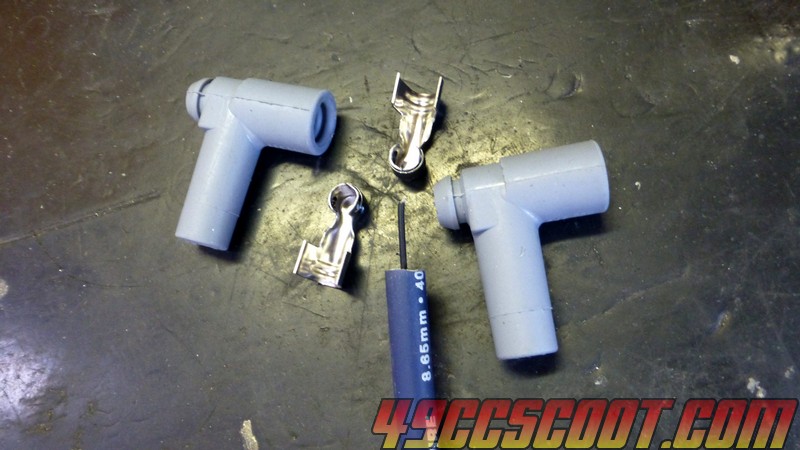
Each end of the supplied wire is already stripped, so the first termination is ready to be done.
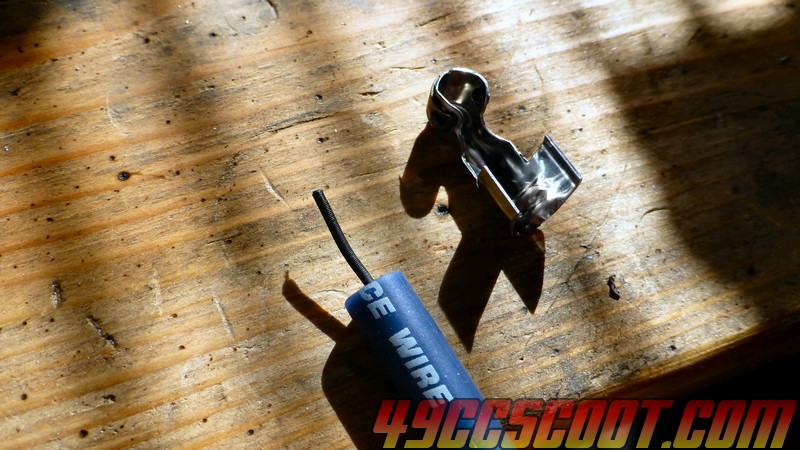
The core needs to be folded over as shown, and then placed into the terminal so the core is up against the terminal.
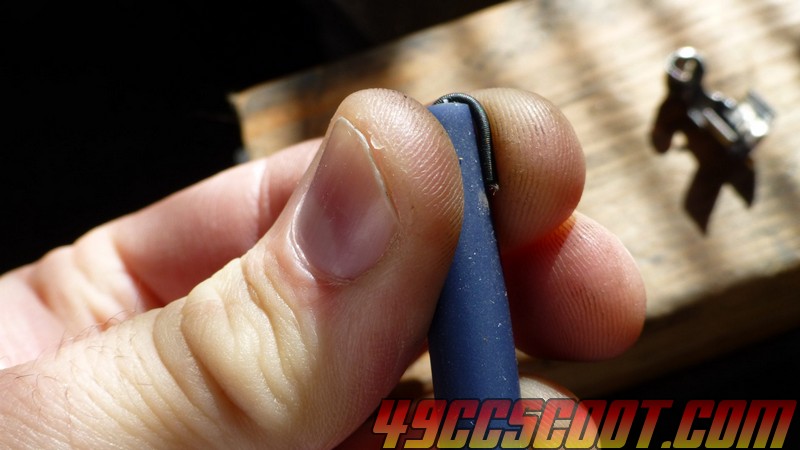
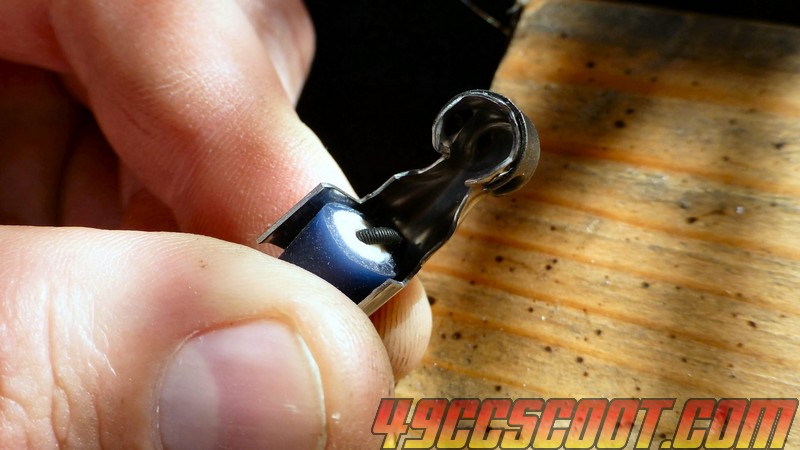
You can bend the terminal ends down to make it more secure while you're working with it. Some suggest bending the very ends at 90° for a better clamp.
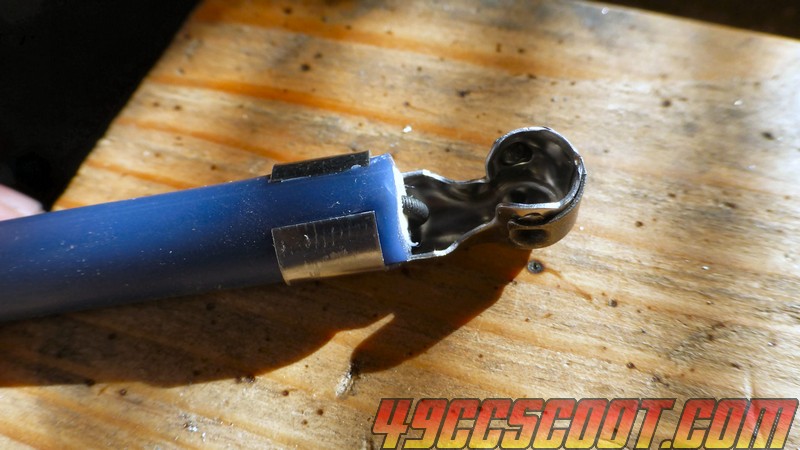
Now the terminal needs to be crimped onto the wire. There are quite a few specialty crimpers that can be expensive, or I'm sure you can do the job with pliers or other methods. I used an MSD 3503 wire making tool. It allows you to use a vise to do the crimping and it costs about $10 vs around $50-$75 for the nicer plier type tools. This crimper is specified for MSD's 8.5mm wires, but worked fine with the 8.65mm Moroso wires.
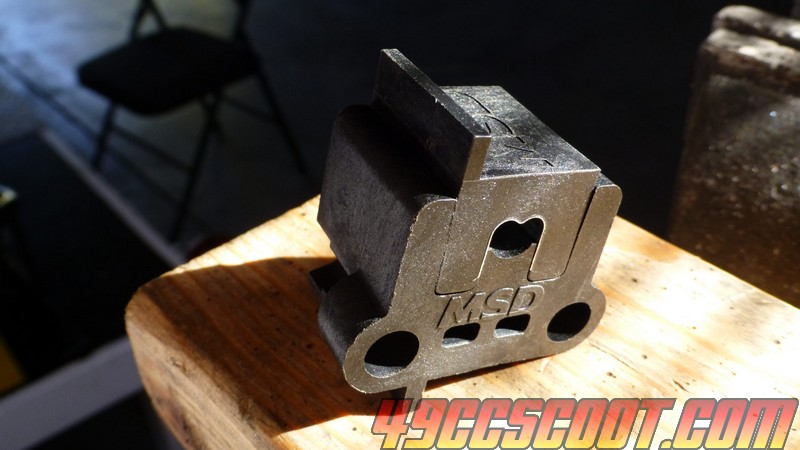
I put the terminal and wire into the small half of the crimper as shown so the open side it facing toward the sort of W shaped side of the crimper.
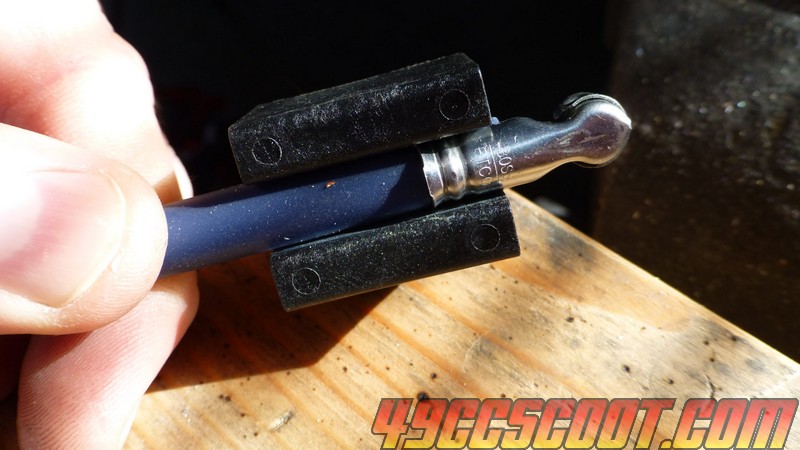
Then I stuck that into the larger half of the crimper.
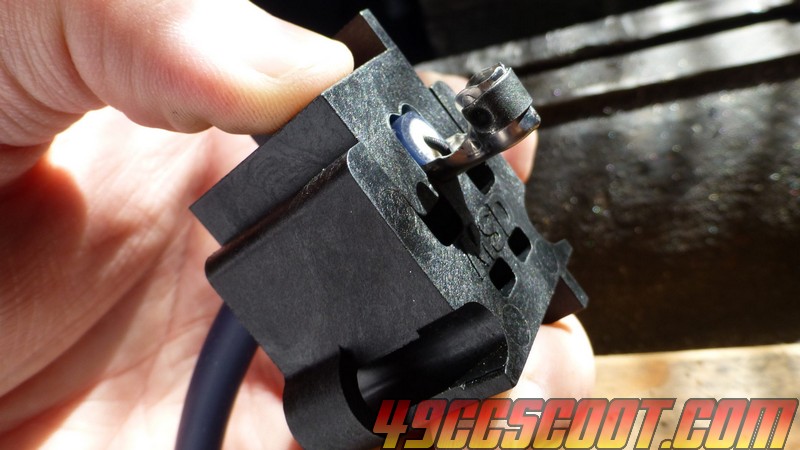
The whole assembly goes into a vise. If you've got the two halves of the crimper together as they should be, there will be a tab going over each side of the vise as shown.
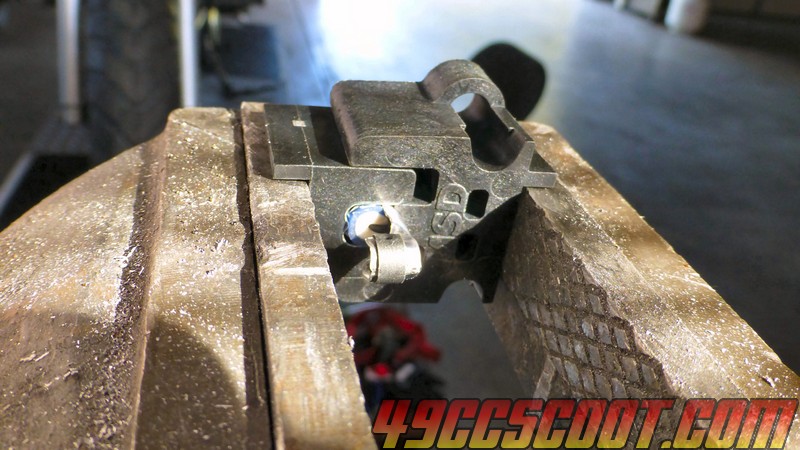
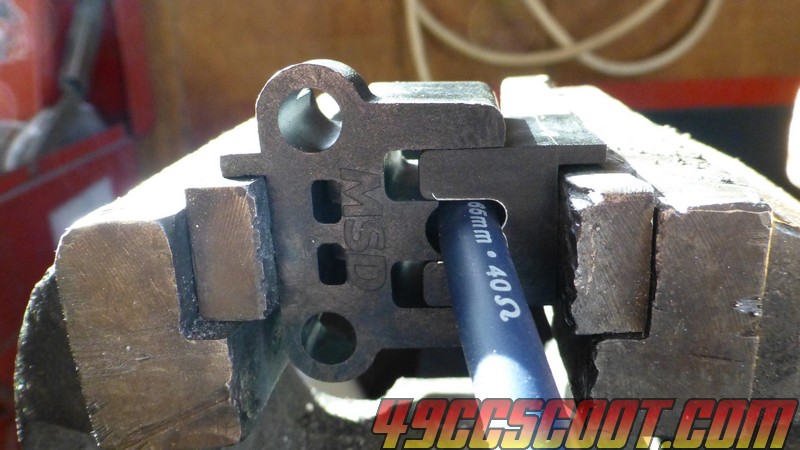
Close the vise until the two halves of the crimp tool come together all the way.
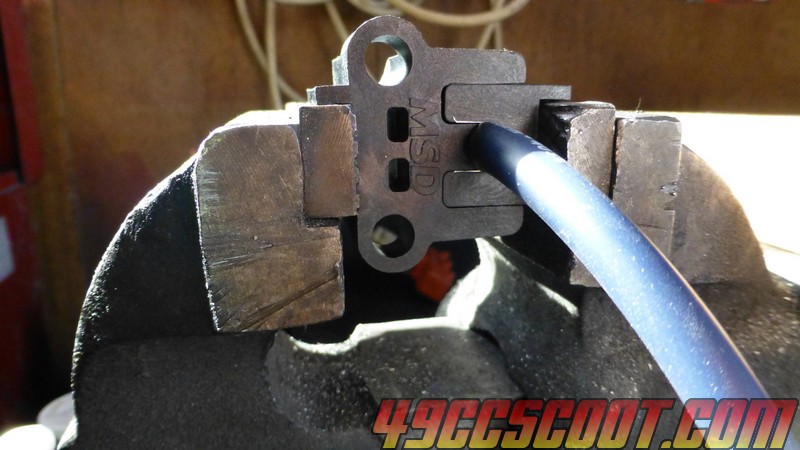
Then the tool can be removed and the terminal should be crimped securely. Give it a little tug to make sure it's not coming off.
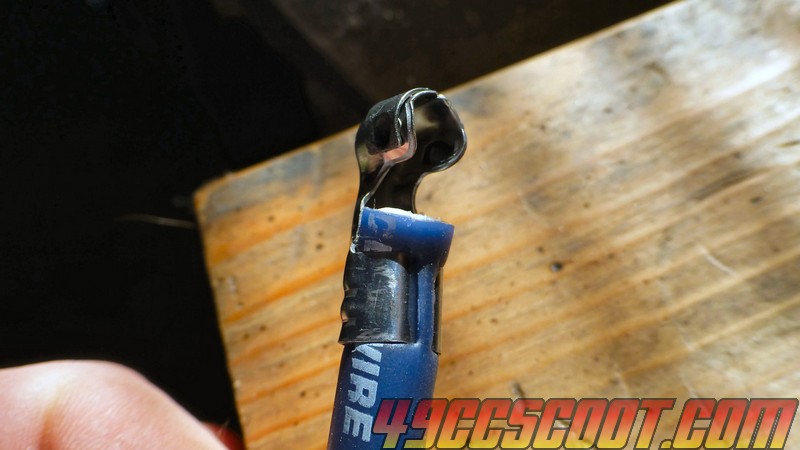
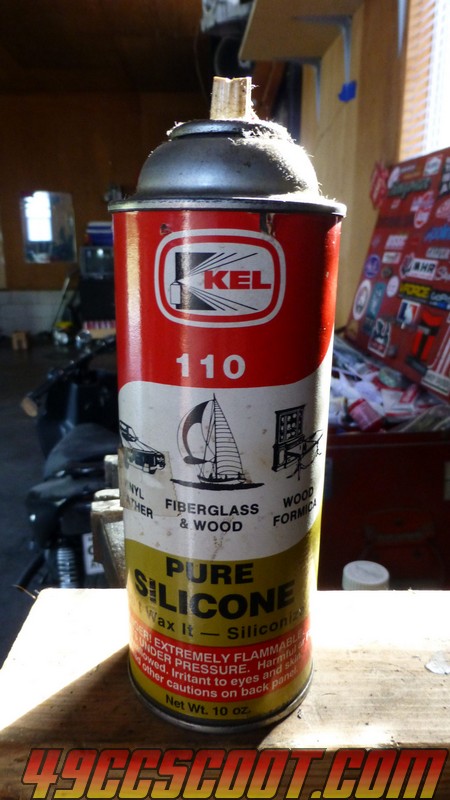
Now the boot needs to be installed over the end of the wire. I used silicone spray to lube the inside of the boot. You could also use a thin coat of dielectric/tune-up grease. Once it's lubed, slide the boot on.
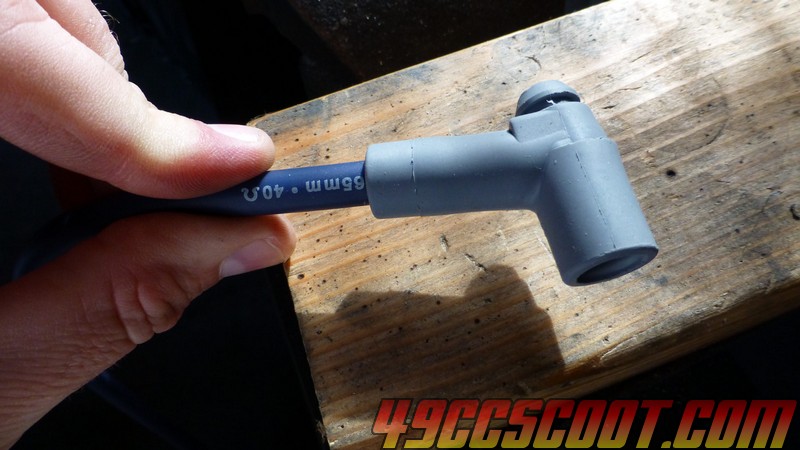
Make sure the wire is seated all the way into the boot and the open end is facing the opening of the boot.
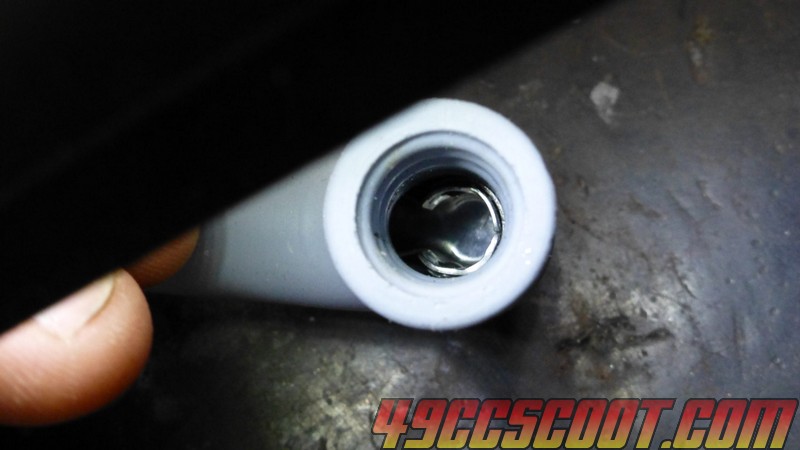
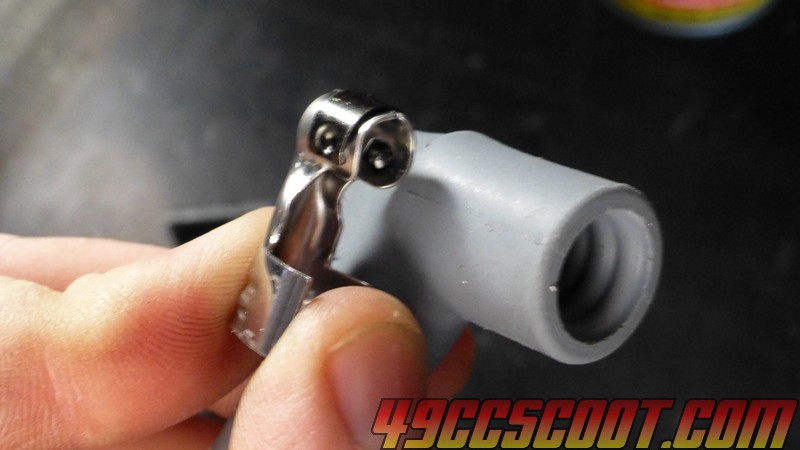
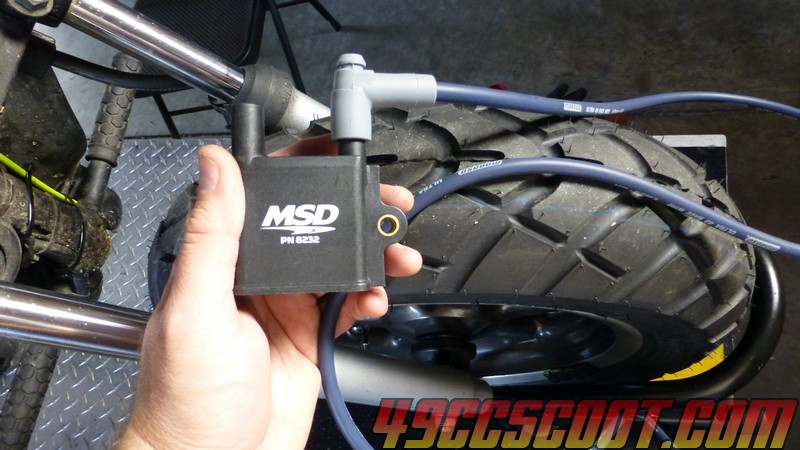
That completes one side of the wire. I connected the finished side of the wire to my coil. Then I held the coil where I wanted it to be mounted and marked the plug wire at the length needed to reach the spark plug and cut it off. Side cutters are suggested, but I used a hose and cable cutter. Whatever you can get a clean cut with should be fine. Double check before cutting and remember to leave a small amount of slack and 1/2" extra because the end will need to be stripped and folded over.
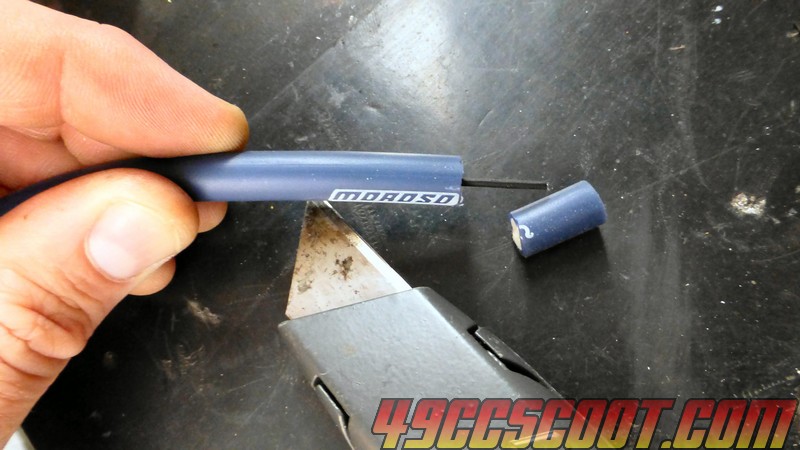
To strip the end and get it ready for installing a terminal, I used a razor knife and gently worked around the insulation to cut off roughly 1/2". The MSD tool has a guide built in and expensive tools with strip it very quickly, but it's not hard to do with a razor knife of some sort alone. Just be sure you aren't cutting into the core.
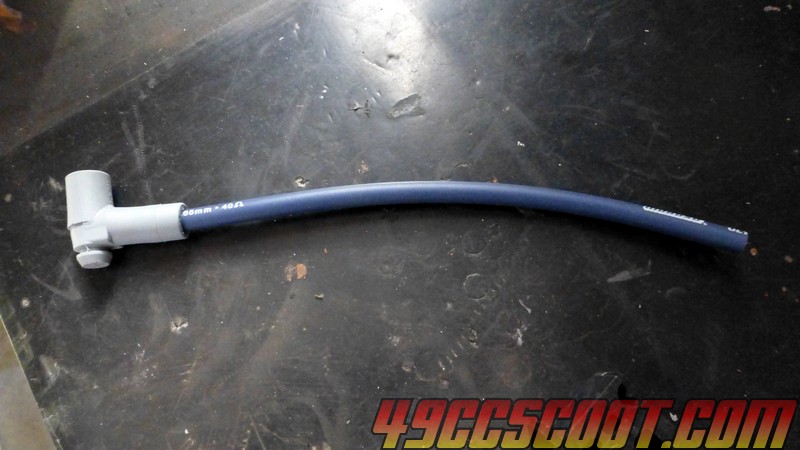
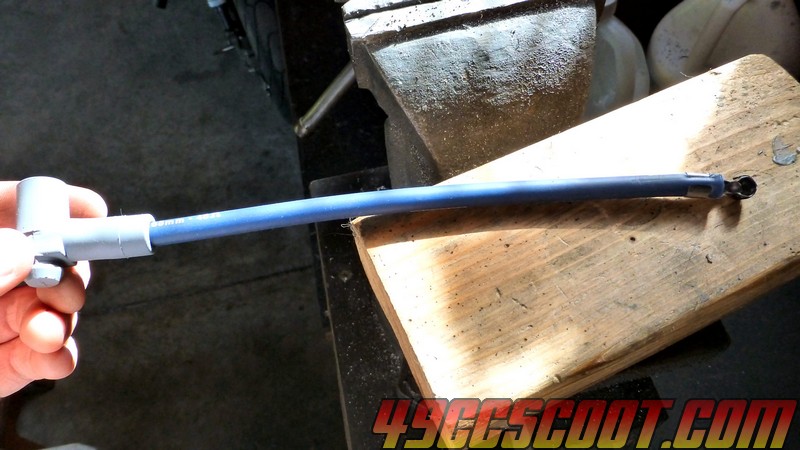
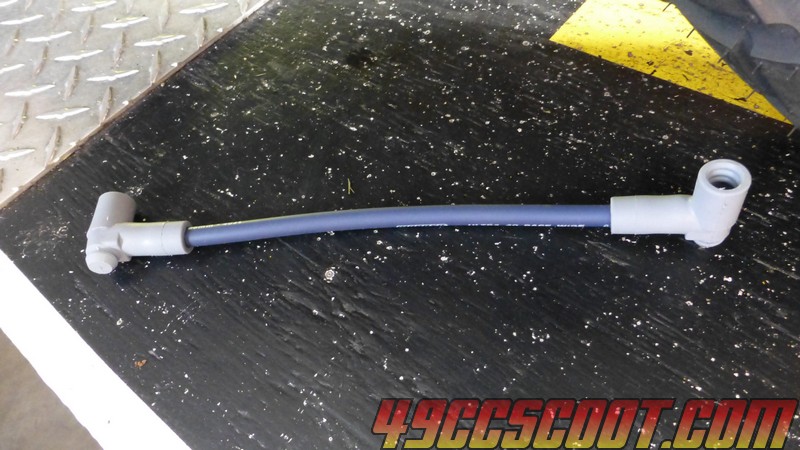
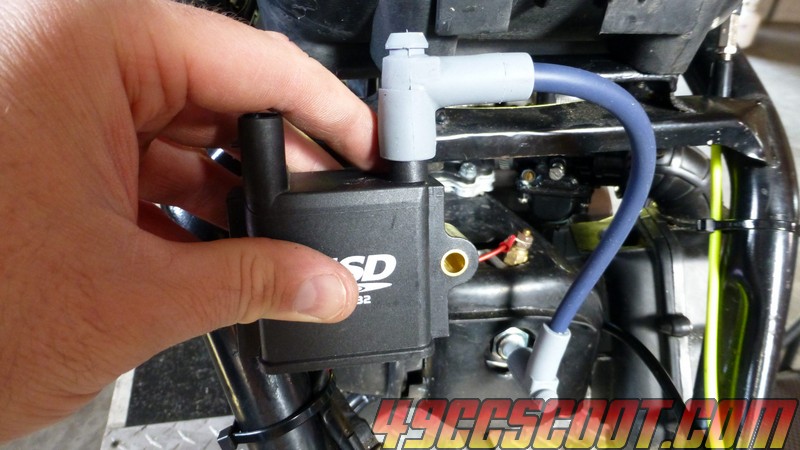
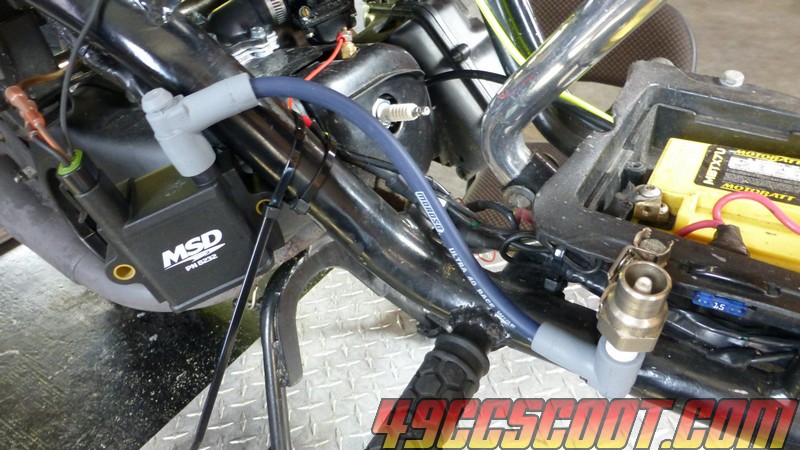
Once that's done, you can repeat the process of crimping on another end and installing a boot. You should pay attention to the orientation of the second terminal. Notice that mine is clocked about 90 degrees different than the first terminal. This was done so the wire would fit on both ends where I was routing it without twisting as hopefully you can see in the third pic.
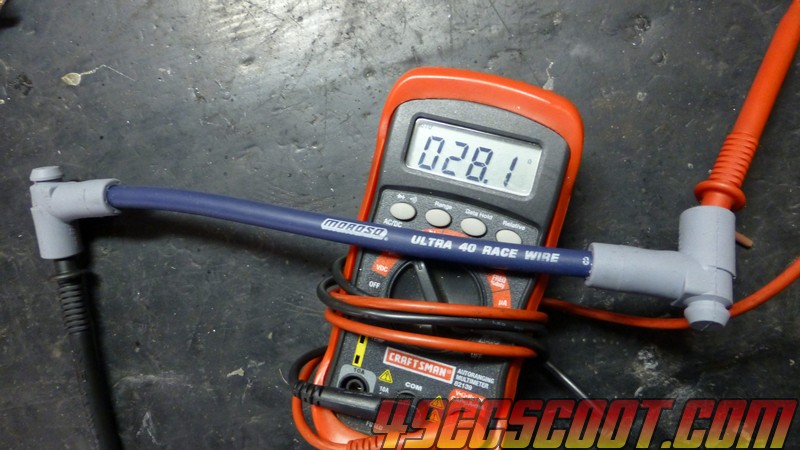
The plug wire should be checked for proper resistance before use. This Ultra 40 wire is named so because it has about 40Ω of resistance per foot. I connected one probe of the multimeter to each end of the wire and set the meter to ohms. It showed ~28Ω for the length of wire about 8", so it checked out alright.
Once I had a plug wire, I could check for spark. I zip tied the coil to the frame so I didn't have to hold it and connected an HEI spark tester. I kicked the engine over and saw and heard good sparks so I knew it was not going to be a wasted effort to work on mounting the coil.
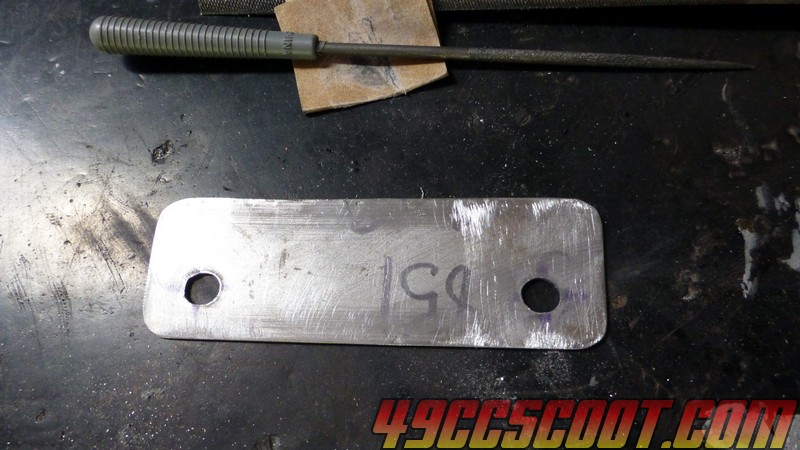
I made up a bracket out of some leftover steel sheet. I paid attention to all edges, making sure they were smooth. It's good practice on anything, but especially if the bracket is in an area you are frequently working around.
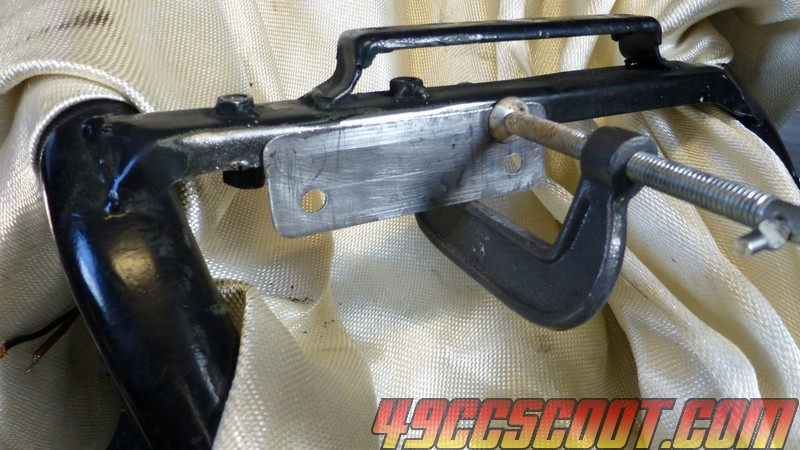
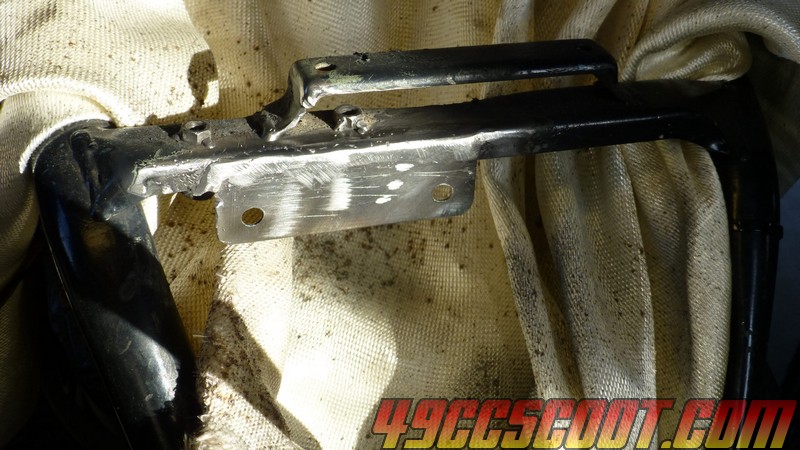
I cleaned the frame, clamped the bracket where I wanted it, welded it on, and applied a couple of quick coats of paint that don't match very well since the frame was last painted a couple of years ago. It would probably be easier/smarter to make a bolt on bracket, but hopefully this all works out and I won't need to worry about removing it anytime soon.
I mounted the coil to the bracket with the hardware supplied by MSD and then worked on the wiring. I decided to use quick disconnects inline so it would be easier to attach a different coil if I need to in the future. I crimped extensions into the MSD supplied connector and added the appropriate connectors to them and my existing wiring.
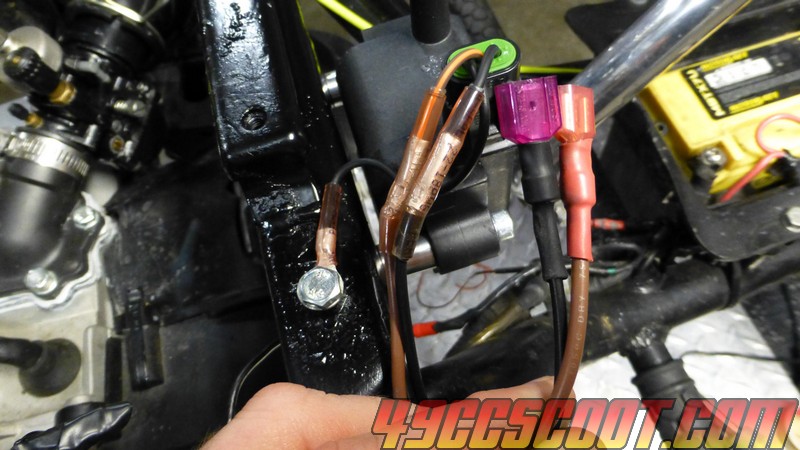
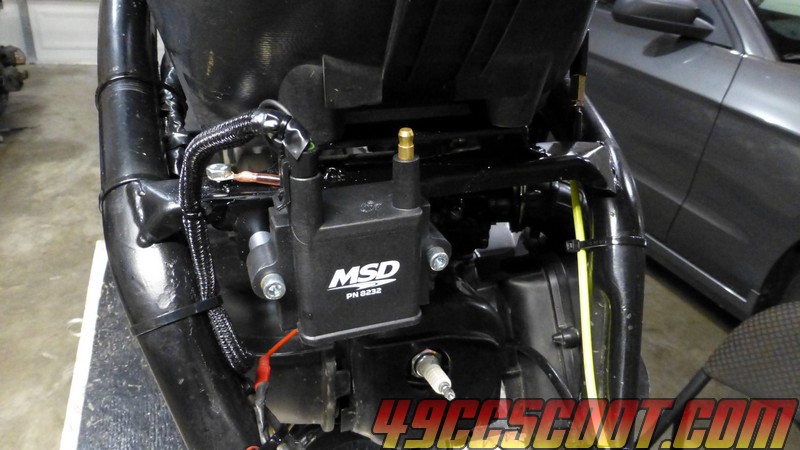
Then I applied a dab of dielectric grease to the terminal on the coil and plug and installed the wire. It's not shown, but I also wrapped my tach's pickup wire around the plug wire and electrical taped it so it's secure.
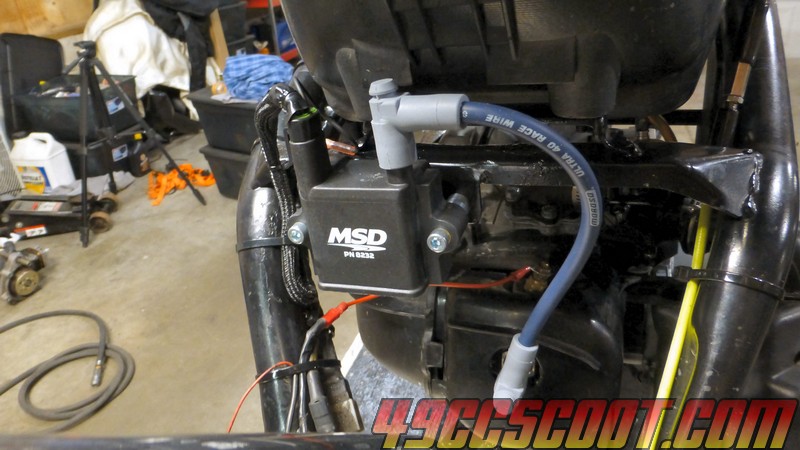
Everything is working well. I even tried opening up my spark plug gap a little from the usual 0.026"-0.028" to 0.030" and it's still done fine for this 9,000RPM setup.
I scanned the instructions that came with the Moroso wires in case those are of use to anyone. Link below.
www.49ccscoot.com/manuals/Moroso_Plug_Wire_Instructions.pdf
 would have been cheaper though. This was about $80 for the coil and the plug wire kit.
Part numbers.

The coil includes mounting hardware and a wiring adapter.

It's pretty big compared to stock style coils.

Since mounting would require some effort, I wanted to test the coil before mounting it to be sure it works. Here's a look at the 8232's connector. A wire with a ring terminal to ground and two wires with butt connectors. The brown/orange wire goes to coil positive and the black wire goes to coil negative.

Wiring for my old Bando coil.

I cut both connectors off of the existing wiring and stripped the ends.

I would need to elongate wires to mount the coil where I wanted it, so I just pushed the stripped wires into the connectors without crimping them and bolted the ground to the frame.

I didn't have any old plug wires lying around, so I had to make one up before I could test the coil. The Moroso 73237 universal Ultra 40 wire kit comes with 6ft of wire and a small assortment of HEI and non-HEI terminals and boots as well as a couple of stickers and instructions.

I used an HEI terminal and boot on each.

Each end of the supplied wire is already stripped, so the first termination is ready to be done.

The core needs to be folded over as shown, and then placed into the terminal so the core is up against the terminal.


You can bend the terminal ends down to make it more secure while you're working with it. Some suggest bending the very ends at 90° for a better clamp.

Now the terminal needs to be crimped onto the wire. There are quite a few specialty crimpers that can be expensive, or I'm sure you can do the job with pliers or other methods. I used an MSD 3503 wire making tool. It allows you to use a vise to do the crimping and it costs about $10 vs around $50-$75 for the nicer plier type tools. This crimper is specified for MSD's 8.5mm wires, but worked fine with the 8.65mm Moroso wires.

I put the terminal and wire into the small half of the crimper as shown so the open side it facing toward the sort of W shaped side of the crimper.

Then I stuck that into the larger half of the crimper.

The whole assembly goes into a vise. If you've got the two halves of the crimper together as they should be, there will be a tab going over each side of the vise as shown.


Close the vise until the two halves of the crimp tool come together all the way.

Then the tool can be removed and the terminal should be crimped securely. Give it a little tug to make sure it's not coming off.

Now the boot needs to be installed over the end of the wire. I used silicone spray to lube the inside of the boot. You could also use a thin coat of dielectric/tune-up grease. Once it's lubed, slide the boot on.


Make sure the wire is seated all the way into the boot and the open end is facing the opening of the boot.


That completes one side of the wire. I connected the finished side of the wire to my coil. Then I held the coil where I wanted it to be mounted and marked the plug wire at the length needed to reach the spark plug and cut it off. Side cutters are suggested, but I used a hose and cable cutter. Whatever you can get a clean cut with should be fine. Double check before cutting and remember to leave a small amount of slack and 1/2" extra because the end will need to be stripped and folded over.


To strip the end and get it ready for installing a terminal, I used a razor knife and gently worked around the insulation to cut off roughly 1/2". The MSD tool has a guide built in and expensive tools with strip it very quickly, but it's not hard to do with a razor knife of some sort alone. Just be sure you aren't cutting into the core.

Once that's done, you can repeat the process of crimping on another end and installing a boot. You should pay attention to the orientation of the second terminal. Notice that mine is clocked about 90 degrees different than the first terminal. This was done so the wire would fit on both ends where I was routing it without twisting as hopefully you can see in the third pic.


The plug wire should be checked for proper resistance before use. This Ultra 40 wire is named so because it has about 40Ω of resistance per foot. I connected one probe of the multimeter to each end of the wire and set the meter to ohms. It showed ~28Ω for the length of wire about 8", so it checked out alright.

Once I had a plug wire, I could check for spark. I zip tied the coil to the frame so I didn't have to hold it and connected an HEI spark tester. I kicked the engine over and saw and heard good sparks so I knew it was not going to be a wasted effort to work on mounting the coil.

I made up a bracket out of some leftover steel sheet. I paid attention to all edges, making sure they were smooth. It's good practice on anything, but especially if the bracket is in an area you are frequently working around.

I cleaned the frame, clamped the bracket where I wanted it, welded it on, and applied a couple of quick coats of paint that don't match very well since the frame was last painted a couple of years ago. It would probably be easier/smarter to make a bolt on bracket, but hopefully this all works out and I won't need to worry about removing it anytime soon.


I mounted the coil to the bracket with the hardware supplied by MSD and then worked on the wiring. I decided to use quick disconnects inline so it would be easier to attach a different coil if I need to in the future. I crimped extensions into the MSD supplied connector and added the appropriate connectors to them and my existing wiring.


Then I applied a dab of dielectric grease to the terminal on the coil and plug and installed the wire. It's not shown, but I also wrapped my tach's pickup wire around the plug wire and electrical taped it so it's secure.

Everything is working well. I even tried opening up my spark plug gap a little from the usual 0.026"-0.028" to 0.030" and it's still done fine for this 9,000RPM setup.
I scanned the instructions that came with the Moroso wires in case those are of use to anyone. Link below.
www.49ccscoot.com/manuals/Moroso_Plug_Wire_Instructions.pdf

