Post by gsx600racer on Dec 31, 2015 1:11:37 GMT -5
This may sound crazy but it has worked for me.
When I have tried cleaning glazed clutch pad with sandpaper by hand, I never could get an even contact pattern afterwards.
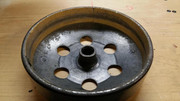
My solution was to line a used clutch bell that's not warped by heat and in working condition with 240 grit paper, I used the kind that had a self adhesive backing usually used for palm sanders.

I first cut the paper to the width of the inside to the clutch bell surface, the paper was small so I needed to cut multiple pieces.
Next I cleaned the clutch bell with solvent/brake cleaner, or your favorite choice.
After cleaning I applied a sparing amount of upholstery contact spray(spray-able contact cement)
I did not want to use brush on cement in fear of not having a even layer between the paper and bell surface.
After drying I started to apply the sandpaper strips end to end(trying to gap as small as possible) Note, do not put a lot of pressure where you start the first piece(reason coming shortly)
I let the last piece overlap the first piece and trimmed both an exacto knife, by doing this both edges will match each other even if you didn't cut perfectly straight(another trick I learned from somewhere)
Then you will have to remove the short piece that was cut from the overlap so the last piece so the first and last piece edges will match perfectly.
Now the tricky part for some 2t's & 4t's(ruckus and minerilli/clones guys that are lucky that can e-start your engine with the cvt covers off)
If you have a driveface where starter drive engages on your variator, I suggest removing the starter drive while doing this.You will have install cvt cover to kick start your engine(unless there a few out there that start their engine with a drill while the cvt cover is off)
I usually put a few cvt cover bolts in around the variator to support the kick starter. Once running I remove the cvt cover.(helps keep the dust accumulating inside the cvt and you can see whats going on.
Now the fun part, I usually use a little brake pressure and use enough throttle to get the clutch to engage, once it starts to engage I release brake and let off throttle.(I think this is more controlled)
I do this once or a few times, its all preference and how bad of shape your clutch is in.
Then stop engine, remove clutch bell and check pads. If you need to do more use compressed air to clean bell first.
Once done remove modified sanding bell, clean and sand the running clutch bell, install and ride on.
I will supply build pics when I reline the bell.
When I have tried cleaning glazed clutch pad with sandpaper by hand, I never could get an even contact pattern afterwards.
My solution was to line a used clutch bell that's not warped by heat and in working condition with 240 grit paper, I used the kind that had a self adhesive backing usually used for palm sanders.

I first cut the paper to the width of the inside to the clutch bell surface, the paper was small so I needed to cut multiple pieces.
Next I cleaned the clutch bell with solvent/brake cleaner, or your favorite choice.
After cleaning I applied a sparing amount of upholstery contact spray(spray-able contact cement)
I did not want to use brush on cement in fear of not having a even layer between the paper and bell surface.
After drying I started to apply the sandpaper strips end to end(trying to gap as small as possible) Note, do not put a lot of pressure where you start the first piece(reason coming shortly)
I let the last piece overlap the first piece and trimmed both an exacto knife, by doing this both edges will match each other even if you didn't cut perfectly straight(another trick I learned from somewhere)
Then you will have to remove the short piece that was cut from the overlap so the last piece so the first and last piece edges will match perfectly.
Now the tricky part for some 2t's & 4t's(ruckus and minerilli/clones guys that are lucky that can e-start your engine with the cvt covers off)
If you have a driveface where starter drive engages on your variator, I suggest removing the starter drive while doing this.You will have install cvt cover to kick start your engine(unless there a few out there that start their engine with a drill while the cvt cover is off)
I usually put a few cvt cover bolts in around the variator to support the kick starter. Once running I remove the cvt cover.(helps keep the dust accumulating inside the cvt and you can see whats going on.
Now the fun part, I usually use a little brake pressure and use enough throttle to get the clutch to engage, once it starts to engage I release brake and let off throttle.(I think this is more controlled)
I do this once or a few times, its all preference and how bad of shape your clutch is in.
Then stop engine, remove clutch bell and check pads. If you need to do more use compressed air to clean bell first.
Once done remove modified sanding bell, clean and sand the running clutch bell, install and ride on.
I will supply build pics when I reline the bell.


