|
|
Post by SMALL CC TEK on Oct 11, 2018 22:00:51 GMT -5
That Sucks when you pop through the case like that . What epoxy did you use ? Here is a tip and i learned it the hard way unfortunately ,I had some Lps Strong Steel Stick it's the putty type. My kid raced gopeds 22.5 or 32 cc Zenoahs we were fast I was porting the case and popped through, and the race was at Circus Circus in the next day here in Vegas I used that LPS and it worked great i thought till the end of the day semi finals then we killed a motor ... The epoxy broke loose because of my prep and hurry it was not the product . So after that experience i took a small piece of mesh and epoxied it to the the case then covered it with epoxy on booth sides waited then reported it worked awesome never cracked and we used that motor for a year..... Your motor is looking good !
|
|
|
|
Post by oldgeek on Oct 11, 2018 22:16:01 GMT -5
That Sucks when you pop through the case like that . What epoxy did you use ? Here is a tip and i learned it the hard way unfortunately ,I had some Lps Strong Steel Stick it's the putty type. My kid raced gopeds 22.5 or 32 cc Zenoahs we were fast I was porting the case and popped through, and the race was at Circus Circus in the next day here in Vegas I used that LPS and it worked great i thought till the end of the day semi finals then we killed a motor ... The epoxy broke loose because of my prep and hurry it was not the product . So after that experience i took a small piece of mesh and epoxied it to the the case then covered it with epoxy on booth sides waited then reported it worked awesome never cracked and we used that motor for a year..... Your motor is looking good ! JB Weld original is the stuff most people here use. It has some metal in it. I used some to mount a speedo magnet to the rim one time and I could see the metal in it reacting to the magnet. I hope this engine even runs! the 50mm cylinder is supposedly designed to work with a shorter stroke crank than the 52.6mm I am using. |
|
|
|
Post by SMALL CC TEK on Oct 11, 2018 23:54:43 GMT -5
|
|
|
|
Post by oldgeek on Oct 12, 2018 7:08:55 GMT -5
I had the cylinder and the head on to check the length on the studs, so I figured I better check to see if the shrouds fit. The big one that covers the fan and half of the cylinder just barely fits without touching anything.  The smaller shroud for the intake side is another story, it doesn't even come close to fitting. I cut the mounting bolt tabs off and slit it some just to get an idea of how far off it is. Not sure how I am going to remedy this issue. I wonder how well it would cool without the smaller shroud? Maybe I could extend the other shrouds sides out further and just leave the intake side of the cylinder open? 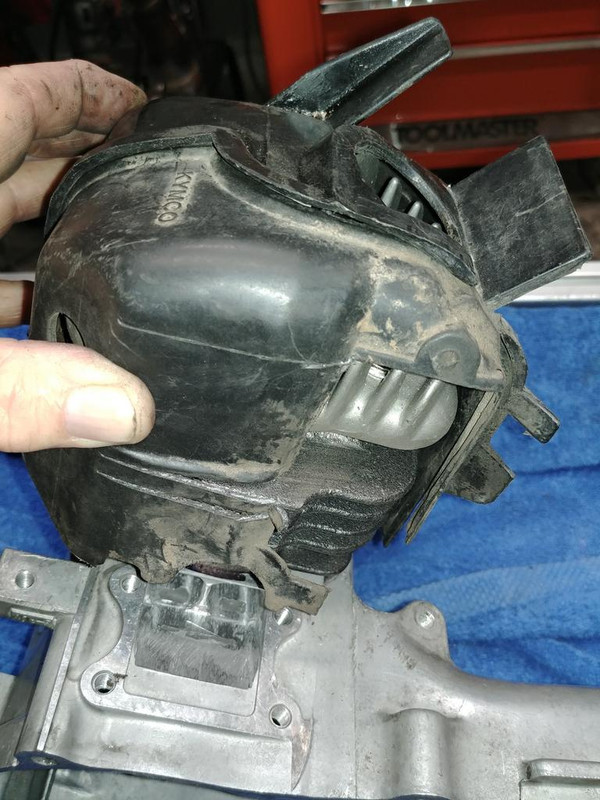 |
|
|
|
Post by ryan_ott on Oct 12, 2018 10:05:32 GMT -5
Pick up some sheets of kydex they are very moldable. Actually might need to check at what temp they get soft at, especially on the intake side.
|
|
|
|
Post by oldgeek on Oct 13, 2018 1:02:18 GMT -5
While test fitting the cylinder and checking durations I noticed if I pushed the crank to either side that it dragged slightly. I know that is not good so I dove in to find out what is going on with it. The crank is a 52.6mm stroke made by Phongeer. It is wider than a stock crank by about 1.5mm, supposedly to make it stronger. Because it is wider than a stock crank it requires crank bearings that have been modified to be about 1mm thinner than stock crank bearings. Stock crank and stock bearing width.  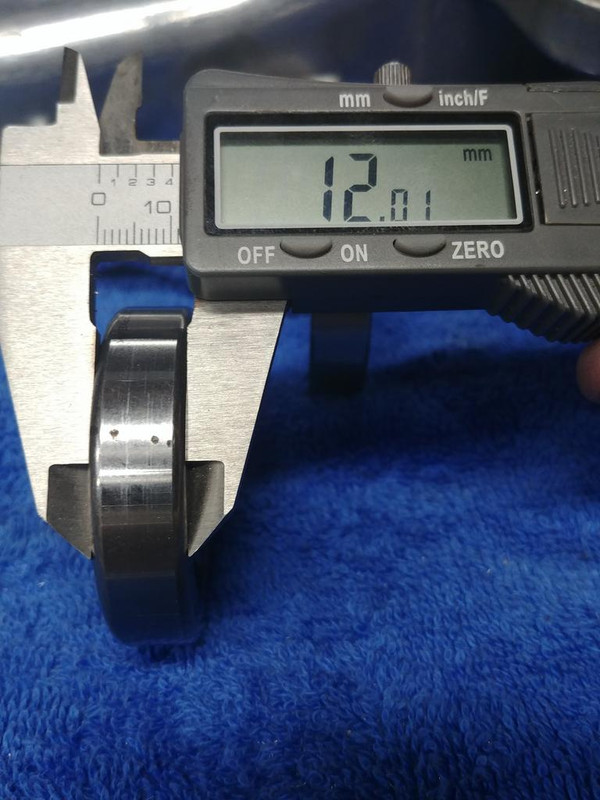 Phongeer crank and modified bearing width 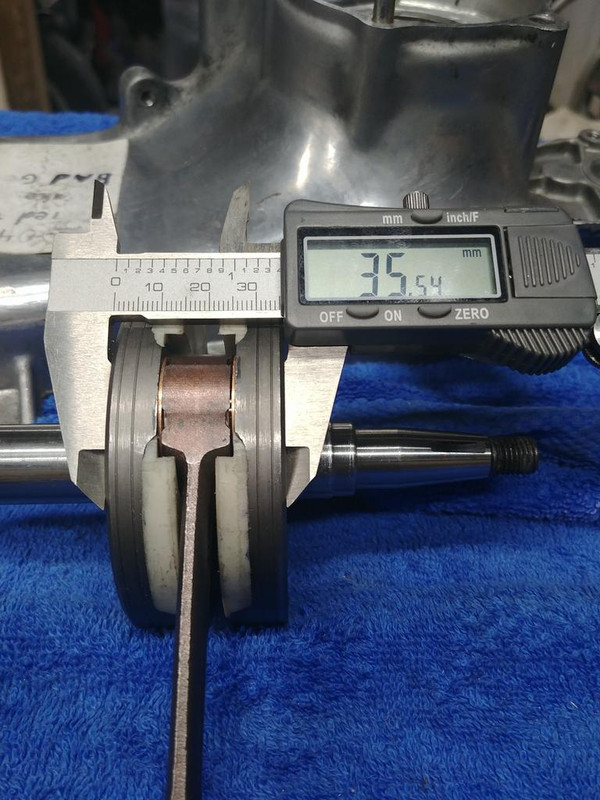  Stock crank on left, Phongeer on the right. 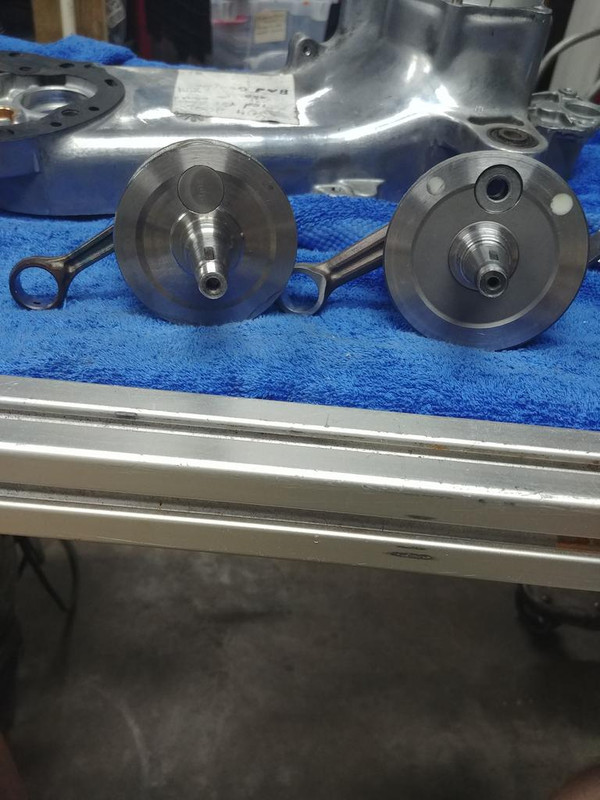 The problem seems to be that for whatever reason, the modified bearings sit to far down in their pocket, so when I push the crank to either side it drags slightly on the cases instead of riding on the bearing. I used several layers of .1mm foil tape to shim the bearings out of their pockets a bit.  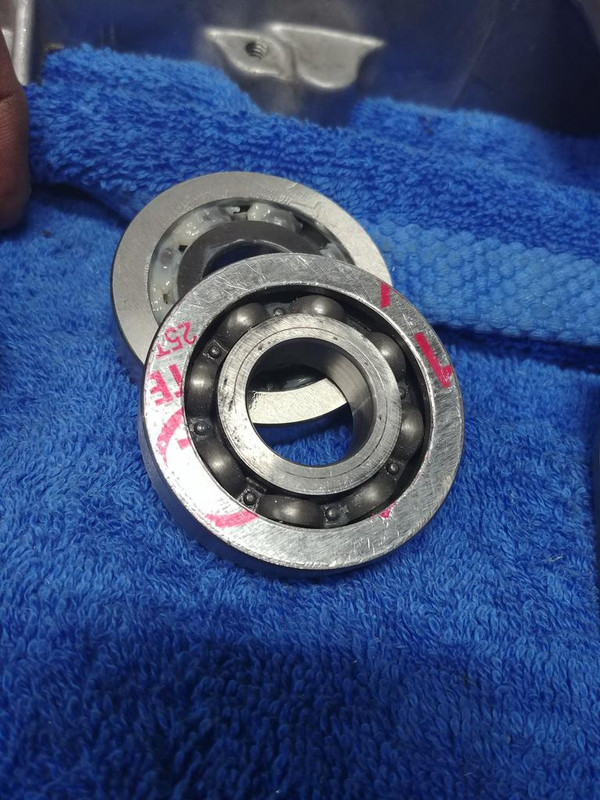 The bearing for the small side of the cases took 2 layers of tape and the bearing for the big side of the cases took 5 layers of tape to get the bearings out far enough so the crank would not drag if it is pushed to either side. These are the slip fit test bearings. I am going to have work it all out during final assembly. |
|
|
|
Post by fly on Oct 13, 2018 3:45:21 GMT -5
If the crank is 1.5mm thicker and both bearings are 1mm thinner you've got that 0.5mm yet to make up getting back to stock width. I guess they should just have made the bearings 0.75mm thinner  But given the specs seems about right, just +0.2mm cause real world. |
|
|
|
Post by 190mech on Oct 13, 2018 6:11:31 GMT -5
Lots of the old motorcycles used selective shims on the crank to get proper spacing with the bearings..  |
|
|
|
Post by SMALL CC TEK on Oct 13, 2018 21:34:35 GMT -5
That is a good idea the tape don't they make shim tape ? I used a pepsi can once worked nice in a pinch . Just cut it with scissors then lay it out trace and cut inside circle and test fit til it fits nice . It is laim but it works and never failed ! lol
|
|
|
|
Post by oldgeek on Oct 13, 2018 21:55:15 GMT -5
That is a good idea the tape don't they make shim tape ? I used a pepsi can once worked nice in a pinch . Just cut it with scissors then lay it out trace and cut inside circle and test fit til it fits nice . It is lame but it works and never failed ! lol Hmm... that's a pretty slick idea you have there. Also possibly instead of having to use shims, I could cut down the cases where they face the crank wheels just a bit. |
|
|
|
Post by oldgeek on Oct 13, 2018 22:17:15 GMT -5
Possibly instead of having to use shims, I could cut down the cases where they face the crank wheels just a bit. Scratch that, I got another idea. I am going to clearance the crank bearing pockets for a close slip fit, and use retaining compound on the bearings for final assembly. Actually the small half of the case is already a slip fit, it was like that when I got it. So now I just gotta do the big half. |
|
|
|
Post by oldgeek on Oct 14, 2018 20:48:17 GMT -5
So the crank bearings I am going to be using for this build are slightly different than the slip fit bearings I made to test fit cranks and cylinders with. I decided to install one of the new bearings on the flywheel side of the crank. I used my tusk crank puller along with an old stock bearing and the inner race I cut from another old stock bearing to push the new bearing onto the crank, pushing only on the inner race of the new bearing. I forgot to take a picture, and it's the first time I ever installed a crank bearing on a crank without using the hot-cold method. Seemed kinda weird. Lol! Then I slipped the crank and bearing into the small side of the case so I could check for dragging on that side. It does not drag at all and the gap between the crank wheel and the case looks very good, so shims will not be needed on the small side. Since I have not yet made the bearing pocket on the big case side bigger, I just used a slip fit up bearing without any of the foil shim tape on it so I could test fit the cases together and check to see if the crank drags on the variator side. The crank would not even spin with the case bolts snugged up. With the bolts just loosened up it is perfect. I did not have a gasket in between the case halves, but I will be using one at final assembly to help seal them up. I think the gaskets added thickness will space things just right. Next up is opening up the crank bearing pocket to make it a slip fit on the big case half. I guess a flapper sanding wheel will work good. Other ideas anyone? Using SMALL CC TEK 's suggestion I ordered two kinds of high temp epoxy putty. I am going to give the putty a try to make the little ramps that will hopefully help the mixture get across the crank wheels better. As ryan_ott suggested I ordered some Kydex for the shroud work. I got the .118 stuff, It's pretty thick and may hold its shape better in the heat. |
|
|
|
Post by drc174 on Oct 14, 2018 20:51:20 GMT -5
make your own flap wheel according to the size you need and you can kinda center it.
|
|
|
|
Post by oldgeek on Oct 16, 2018 22:24:27 GMT -5
I was able to get the crank bearing pocket on the big case half enlarged to a slip fit. I just happened to have a flap wheel that fit the pocket, I used the flap wheel just a small amount and kept test fitting the bearing, hoping everything was square. I stopped using the flap wheel when bearing was able to slip just over halfway in. I made a tool from a used stock bearing and an old large socket I had laying around.I used brake cleaning fluid as a lube of sorts as I pushed down on the top of the ratchet as I turned it.The tool is harder than the aluminum cases so as it turned it polished the scratches from the flap wheel.It took a little while but I like the results. 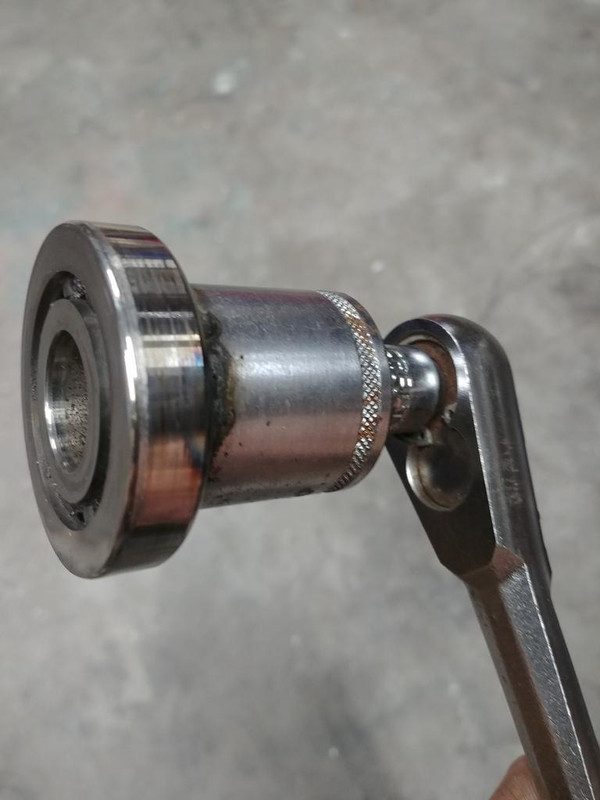 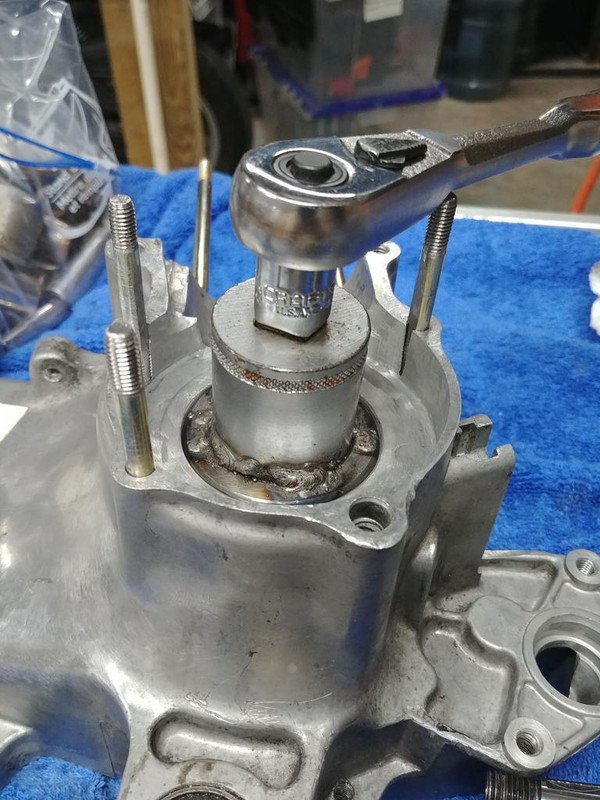 Everything looked good so I installed the other crank bearing with crank tool. I took a picture this time. 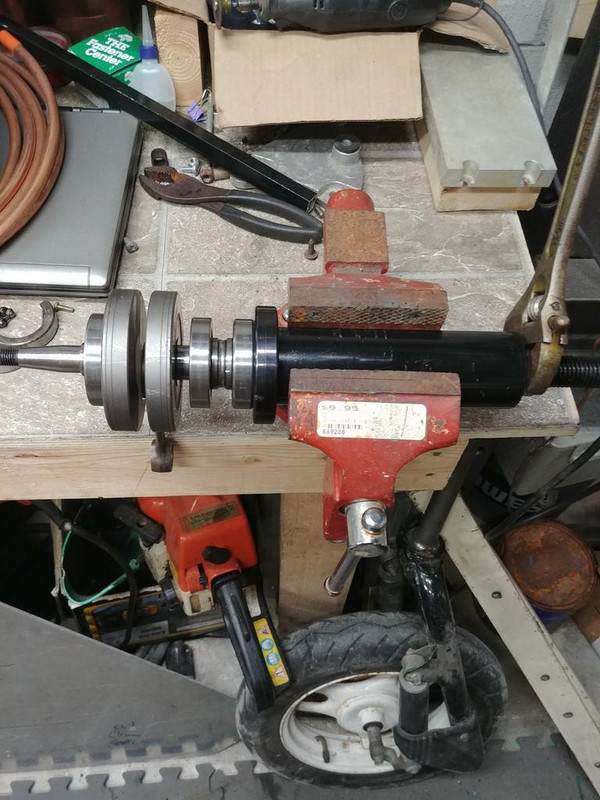 I put the crank in the cases for a test fit, going to need just a very thin gasket between the case halves and it is good! The only concern I have now for this part of the puzzle is during final assembly. Gonna have to be very careful to not get any of the retaining compound IN the crank bearings.  The high temp epoxy putty and the kydex I ordered from Amazon gets here tomorrow, I am slowly chipping away at this project.  |
|
|
|
Post by oldgeek on Oct 19, 2018 22:11:01 GMT -5
Having a heck of a time getting the crank bearings situated. I made a case gasket but it is a bit thick. If I use it I end up having to space the crank bearings a lot. I need to find some thinner gasket material, and or thicker shim material.
I got tired of splitting the cases and test fitting the crank so I switched to another task.
I checked the squish, It was around 1.54mm, quite a bit more than I thought it would be. Lucky there is a roughly .75mm lip on the head I can take off. So I used the big knife sharpener I recently got to slowly remove the lip on the head. I dropped squish to 1.4 then 1.2 then 1.1 and my next check ended up at .7mm. I was shooting for just under 1mm but somehow I went a bit far. After I add motoseal for the cylinder base, and copper spray for the head I think it will be around .8mm
I am not sure what squish I should run on a build like this.
I also snuck in a ride tonight. Fall has finally arrived here over the last couple days, at least during the evening and night time.
|
|