|
|
Post by 190mech on Oct 30, 2020 5:50:31 GMT -5
Aint going to break!Looks like your amps are too high,try some practice welds at "amps to thickness"(60 amps,.060"metal thickness) then try turning it down to 35 amps..I love TIG welding steel,waaay easier than aluminum..
|
|
|
|
Post by oldgeek on Oct 30, 2020 6:32:33 GMT -5
Aint going to break!Looks like your amps are too high,try some practice welds at "amps to thickness"(60 amps,.060"metal thickness) then try turning it down to 35 amps..I love TIG welding steel,waaay easier than aluminum.. I should have practiced waaay more on the steel! LOL. 95% of my practice has been on Aluminum. Welding steel is more like being in first or second gear. Welding Aluminum is like hitting the nitrous from the start, ya gotta move fast! After I posted last night I think I found the reason it was going downhill. Besides the fact I had the amps set too high, when I went to turn the argon off, I found I had only barely cracked the argon bottle open. That causes the flow of argon to look fine for a moment, but then it cannot keep the flow rate up. That explains the splattering I was seeing and the brown haze on some welds. |
|
|
|
Post by Lucass2T on Oct 30, 2020 6:44:30 GMT -5
Looks good OG!
|
|
|
|
Post by oldgeek on Nov 5, 2020 18:31:06 GMT -5
I got the bushings for the swing arm cut, then using the bushings I was able to mark points on the swing arm to cutout for the bushings. I will eventually tig the bushings to the swingarm when the spacing of everything is final. 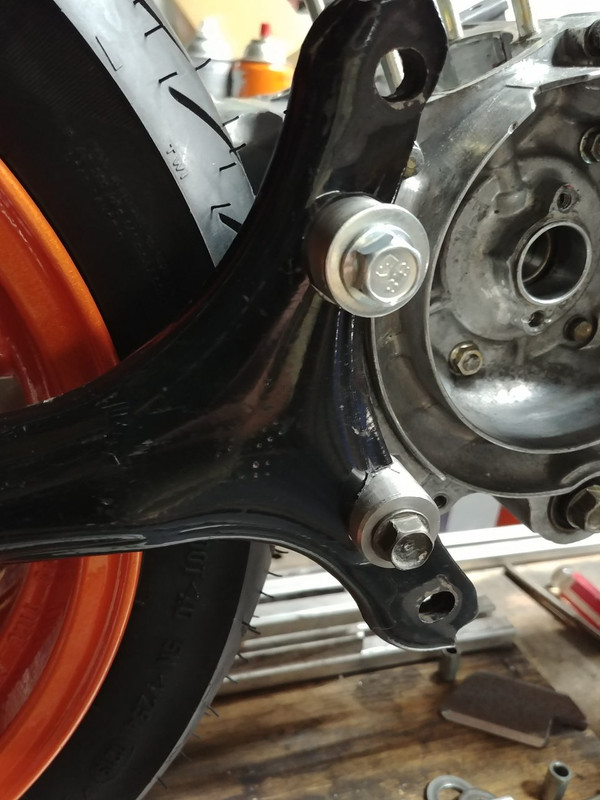 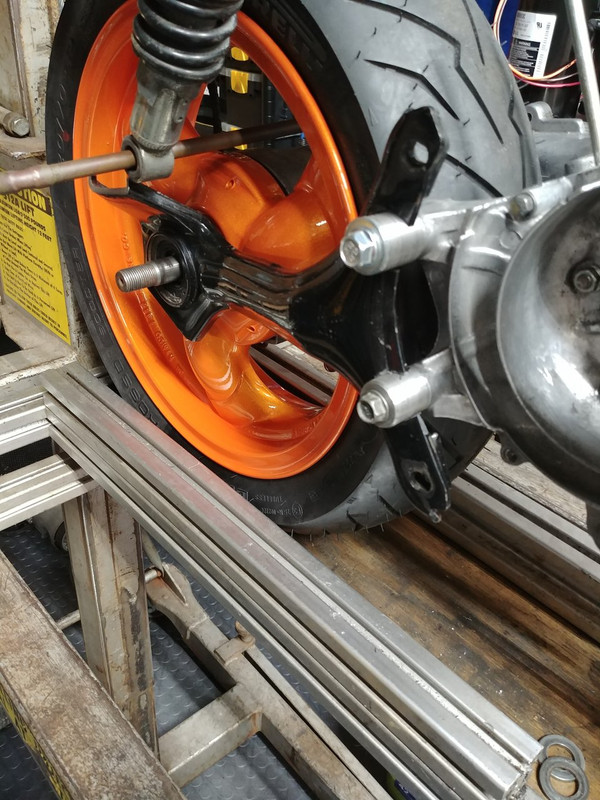 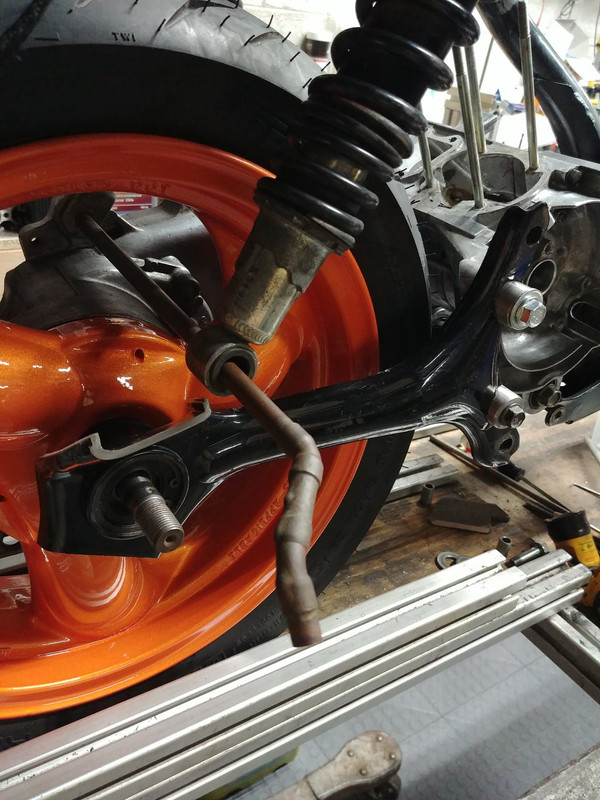 I changed plans with the rear shocks. I am going with a longer set than the stock Kymco shocks. I am likely going to use the shocks currently on it. They came from the helix clone. The original lower shock mount I made will not work with these shocks, So I will be remaking the mount from steel. It will be a lot easier to attach a steel mount to the swingarm, rather than trying to attach an aluminum mount to the steel swing arm. The following picture is some practice I did on some .05" 5052 aluminum. I will likely go with at least .09 when I do the tank. 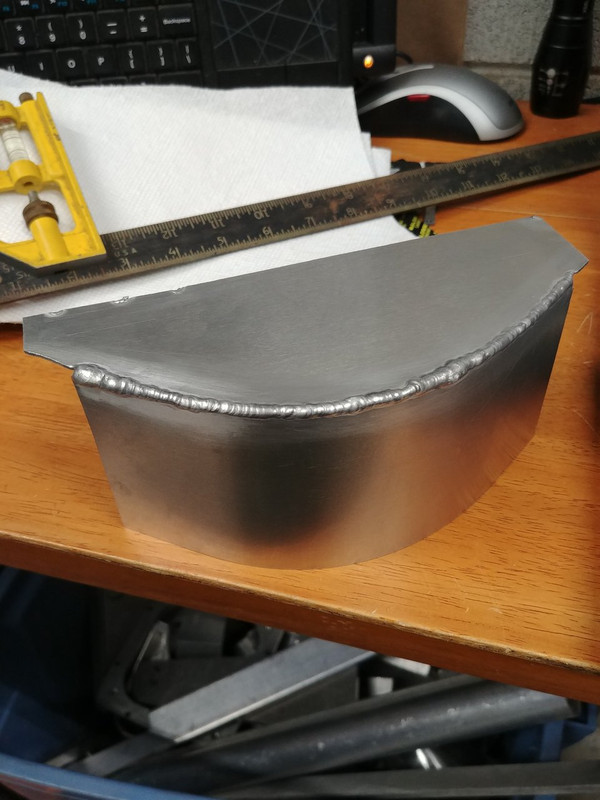 |
|
|
|
Post by oldgeek on Nov 5, 2020 20:57:43 GMT -5
We built 75 and 100 gallon tanks for a WW2 German fighter aircraft out of .050" 5052 aluminum,started with .090,but it was too hard to form.. WoW! Then .050" it is, but that's pretty thin stuff. I liked working with it though. My cylindrical spun aluminum tank seems real thin. I looked it up and their U-weld kits say 0.063" aluminum, though they do use 0.170" for the end caps. You can feel the material kinda give if you get a little frisky tightening a fitting into the bung, but otherwise it's working well. If you happen to have a smaller panel around your fitting(s), maybe you could use a little thicker panel right there if you go with thinner stuff elsewhere. Thanks for the info. Your tank looks really sturdy, so I am surprised to hear it is so thin. But it confirms I can use the .050" without worry. I have been thinking a lot about the construction of the tank, and I dont even have the mounts for it figured out. I do not want to drill into the main frame tube or weld on it. So I have been thinking about some kind of clamping arrangement. I am OK with drilling or whatever on the stainless frame stiffener, just not on the main down tube. Also, I should probably incorporate some type of rubber mounts for the tank because there will still be some flex in the area of the tank........... Ideas accepted from all! Picture reposted for your inspiration. 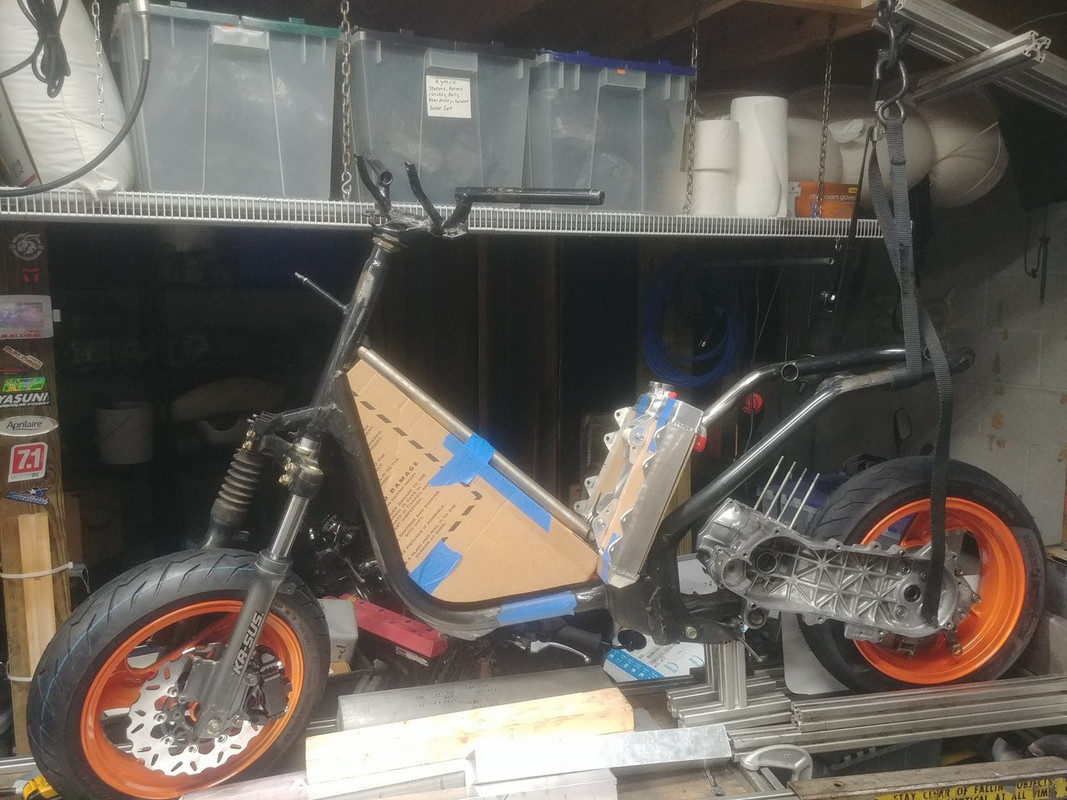 |
|
|
|
Post by oldgeek on Nov 8, 2020 20:36:15 GMT -5
More practice on the thin .050 5052 aluminum tonight. I tried many different settings and I do ok, for the most of it. For me the difficult part is the starting and stopping, everything in between goes pretty well.
I think I am going to get some of the .09 5052 sheet and give it a try. I am hoping it will be slightly easier to weld than the .05 sheet. 190mech mentioned the .09 did not form as easily as the .05 I only have one radius on my tank, so hopefully forming it will not be a big issue.
One thing that hurts is the cost of the raw materials. I am looking around but the stuff seems to be expensive everywhere I have looked. Shipping seems to be the expensive part. A local source would be real nice. I am going to ask around the week and try to find one.
|
|
|
|
Post by 90GTVert on Nov 9, 2020 12:22:34 GMT -5
I use onlinemetals.com and metalsdepot.com some as well as McMaster-Carr, but I've had more luck with some metals lately from eBay and amazon sellers. The shipping can be more than the materials on the sites so I usually try to order anything I think I'll need in the near future to make the shipping worth it. eBay and amazon sellers don't all seem to have that problem for whatever reason. I was able to get a 12"x12" piece of 1/4" aluminum for ~$20 shipped on eBay while the other places wanted to charge me $20 shipping alone. If you haven't looked there already, it may be worth a shot.
EDIT : I see sheets on amazon with free prime shipping. Also noticed that they have 0.080". Maybe that would save a few bucks vs 0.090" and still be a little more beefy and easier to weld than the standard 0.050-0.063".
|
|
|
|
Post by oldgeek on Nov 11, 2020 7:39:19 GMT -5
I use onlinemetals.com and metalsdepot.com some as well as McMaster-Carr, but I've had more luck with some metals lately from eBay and amazon sellers. The shipping can be more than the materials on the sites so I usually try to order anything I think I'll need in the near future to make the shipping worth it. eBay and amazon sellers don't all seem to have that problem for whatever reason. I was able to get a 12"x12" piece of 1/4" aluminum for ~$20 shipped on eBay while the other places wanted to charge me $20 shipping alone. If you haven't looked there already, it may be worth a shot. EDIT : I see sheets on amazon with free prime shipping. Also noticed that they have 0.080". Maybe that would save a few bucks vs 0.090" and still be a little more beefy and easier to weld than the standard 0.050-0.063". I think I have found a local source for my aluminum needs. They quoted me $70 for a 4'x4' piece of .08 sheet. The only issue is I dont know what which alloy it is. The guy selling it is a knowledgeable guy and I have known him for years but he is telling me it is 4043. As a matter of fact he said most all aluminum sheet you will ever come across is 4043 or 6061. This is simply not true. 4043 is mostly a filler material, I cannot find anything on ebay or amazon that is not a filler. And as far as 6061 goes the vast majority of that is supposed to be extruded profiles or plate but rarely sheet.  On another note, The renewals for the STATE registration and tags for the four scooters I have registered came in the mail last week. The cost is supposed to be $10 every 2 years, 3 of the bills were $10 each but one of them was $130 To make a very long story short, I made two trips to the DMV yesterday and they finally got it all straightened out. As a bonus since I had to go to the DMV anyway, I got the VIN for the Honda elite frame (this build) registered and plated. One less thing to worry about. |
|
|
|
Post by oldgeek on Nov 15, 2020 19:05:08 GMT -5
|
|
|
|
Post by oldgeek on Nov 22, 2020 20:56:19 GMT -5
I have moved on for now from working on the gas tank configuration and rad placement. I really didn't like where it was going, especially while trying to allow for foot peg and or floorboard attachment and placement. My wish of not doing any welding on the monotube is likely out the window. And since I will be welding something for the foot pegs, I might as well change the gas tank design and use some welded mounts for it. So it is back to the drawing board for that part of this build. I came up with this setup tonight, inspired by a picture or video I have seen posted here. I think 190mech is the one who posted it but I cant remember for sure. This is a test run on an old stock Kymco rod. I think it is going to work out pretty good. 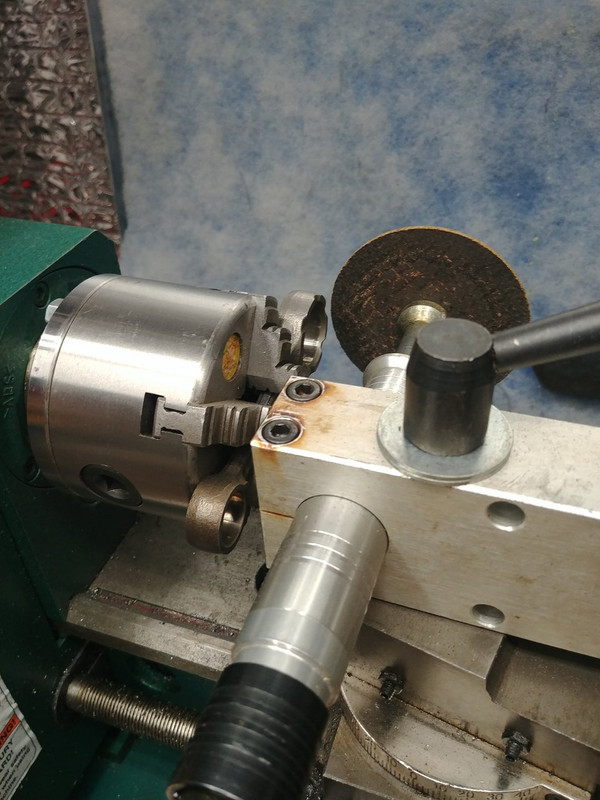 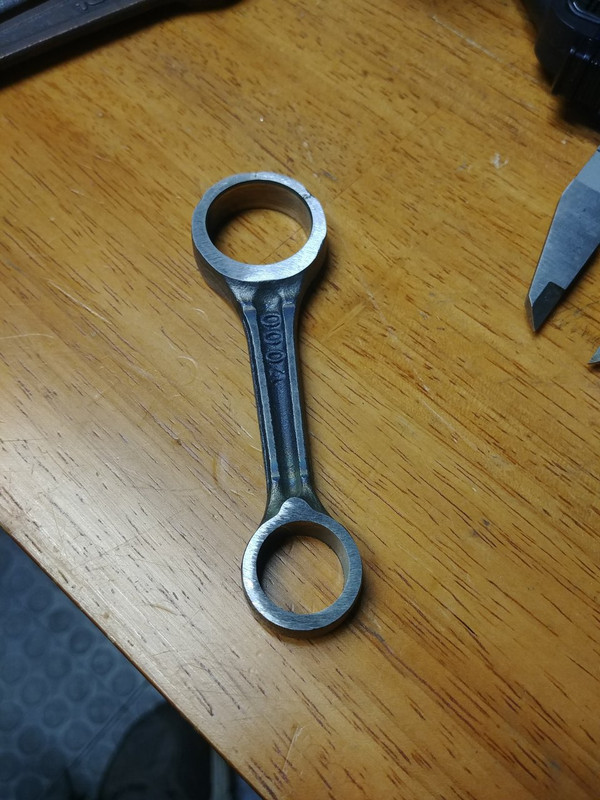 |
|
|
|
Post by oldgeek on Dec 5, 2020 23:16:10 GMT -5
I gave up on trying to learn FreeCAD. I found out Fusion 360 is free for the hobbyist. To me Fusion 360 has been easier to learn. I made this gas tank for under the floorboard. I like it a bit better than my previous tank design. 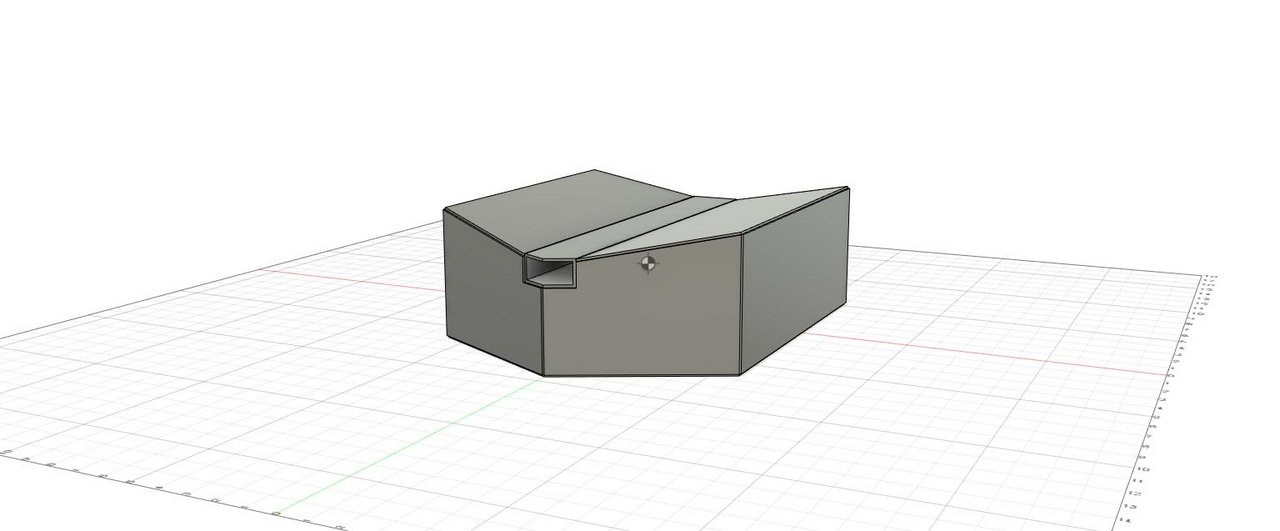 |
|
|
|
Post by oldgeek on Jan 5, 2021 22:32:41 GMT -5
|
|
|
|
Post by aeroxbud on Jan 6, 2021 12:55:17 GMT -5
I wonder if you could incorporate something like the rubber mounts used on motorcycle tanks. The type where the tank slides onto.
Now the tank comes forward of the down tube. It could push into the mounts. Then bolt at the back.
Just throwing ideas out there.
|
|
|
|
Post by hellish100 on Jan 6, 2021 13:54:14 GMT -5
What is the seat situation going to look like? Could you build a tank under the seat?
|
|
|
|
Post by oldgeek on Jan 6, 2021 14:48:26 GMT -5
I wonder if you could incorporate something like the rubber mounts used on motorcycle tanks. The type where the tank slides onto. Now the tank comes forward of the down tube. It could push into the mounts. Then bolt at the back. Just throwing ideas out there. I was thinking of welding mounts to the sides of the frame to accept these rubber isolators. I still am not sold on the tank in this location. 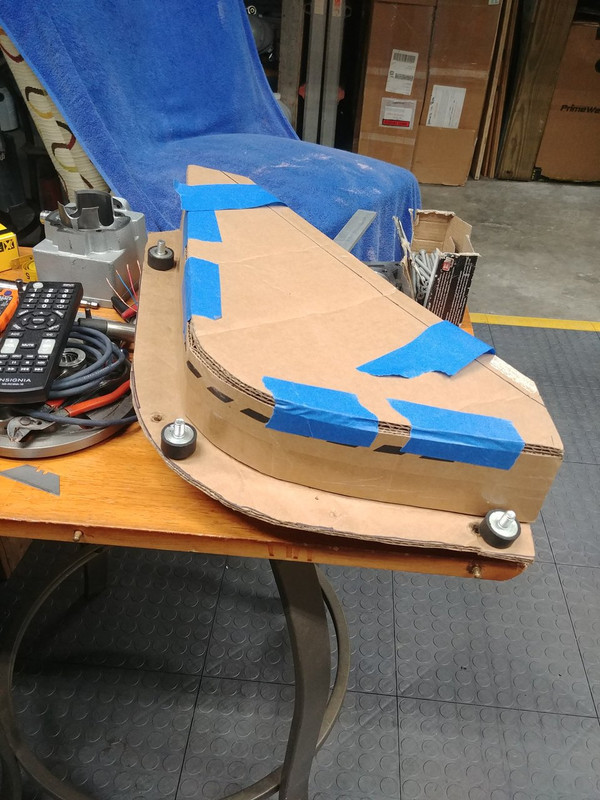 What is the seat situation going to look like? Could you build a tank under the seat? The seat mount will be ruckus style because the exhaust pipe will be run straight out the back directly under the seat. There have been discussions a couple pages back about a tank under the seat, It could still happen. |
|