Maddog Light Repair: Headlight/Brake Light & Turn Signals
Nov 12, 2020 14:24:41 GMT -5
90GTVert likes this
Post by meniscus on Nov 12, 2020 14:24:41 GMT -5
My friend had his bike knocked over by a car in a parking lot. He also had to lay the bike down to avoid an accident. As a result, he broke some of the turn signals, the headlight bracket, etc. I helped him find some replacements and get them installed.
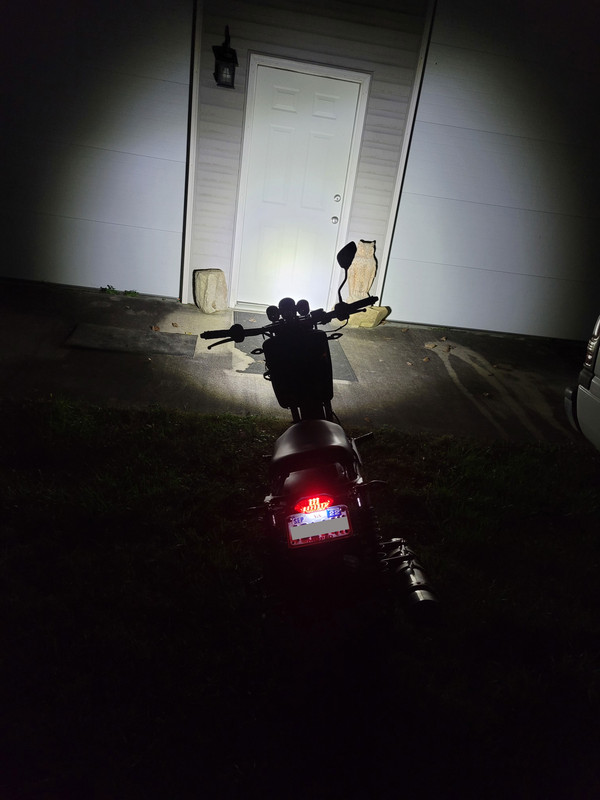
If you own an Icebear Maddog, then you know the low beams are downright dangerous and are not safe to drive at night. The brights are better, but flicker because of the ripple voltage from current running from the stator and the regulator, especially during deceleration. The bulbs are not easy to find or replace. The bulbs also don't seat very well, leading to intermittent connectivity.
Here are the products used in this repair/modification:
Taillight $13: www.amazon.com/gp/product/B0185P9UFC/ref=ppx_yo_dt_b_asin_title_o05_s00?ie=UTF8&psc=1
- Description (in case Amazon removes the product at a later date): FEIFEIER 12V Motorcycle Integrated Brake Tail Light & Turn Signals License Plate bracket LED
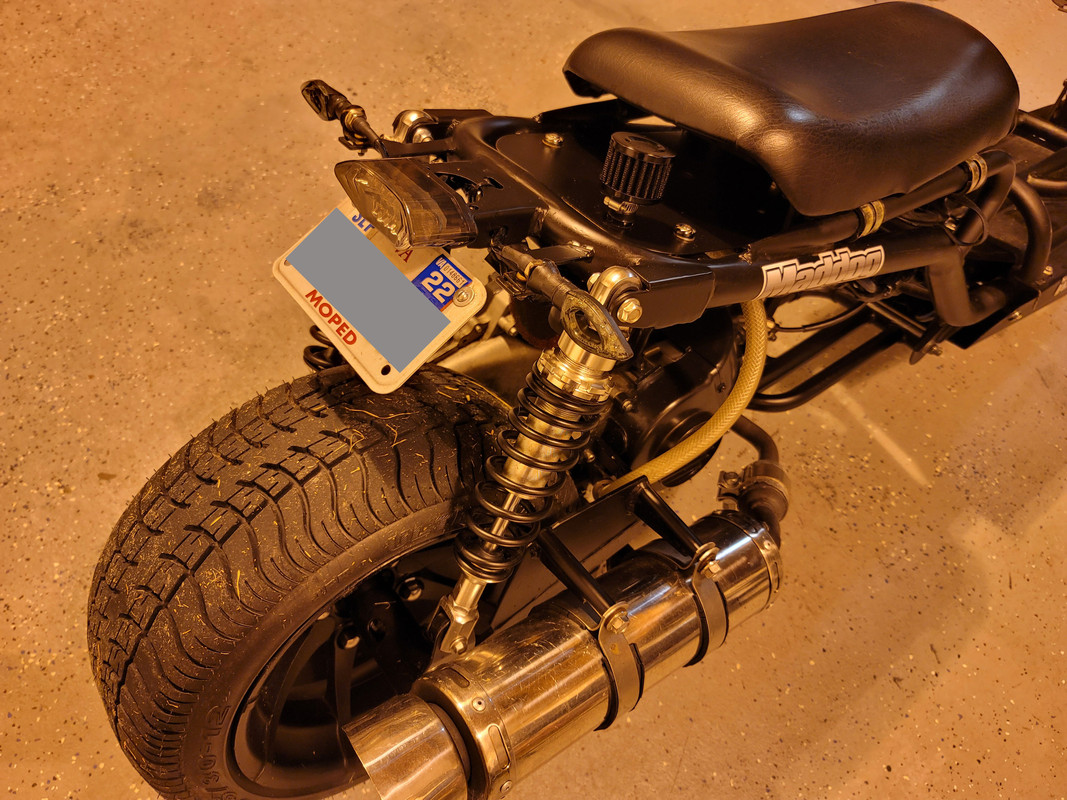
- To install to the bike, you have to use the long screws coming out of the light housing itself. Simply take off the nuts and slide into the existing mounting holds on the bike frame. Then, use washers and tighten down the nuts that came with the light assembly.
- For the license plate, remove the large bolts. Elongate the existing holes as necessary to match-up to your license plate holes. Then use other bolts and a locking nut (or split washer) (not provided) to hold the plate to the bracket. The locking nut or split washer is necessary to keep the nuts from backing off during vibration.
- Wiring should be straight forward. I tapped into the turn signals for the integrated turn signals in the taillight. For me, it was just easier to splice the wires into a single connector which I tied into the turn signals as well.
Turn Signals $10 for two or $14 for all four: www.amazon.com/gp/product/B014ESFEG8/ref=ppx_yo_dt_b_asin_title_o06_s00?ie=UTF8&psc=1
- Description (in case Amazon removes the product at a later date): CICMOD OSAN Universal Motorcycle LED Indicators Turn Signal Light Blinker Marker for Yamaha R1 R6 FZ6 FZ1 FZ FJR Fazer XT WR TT-R (I did not get the ones that have progressive lights, just the normal ones that blink)
- For the turn signals in the back, I used some metal angle that the bike originally came shipped in the crate. I just cut it off to length and drilled holes. For the ones in the front, please look at the description below for the new headlight bracket.
- In the back, I used some heat shrink over the metal part of the turn signal that screws in, just to keep the insulation around the wires in place and to make it less ugly with that chrome looking threads.
Headlight $17: www.amazon.com/gp/product/B00AZPP0Y6/ref=ppx_yo_dt_b_asin_title_o05_s00?ie=UTF8&psc=1
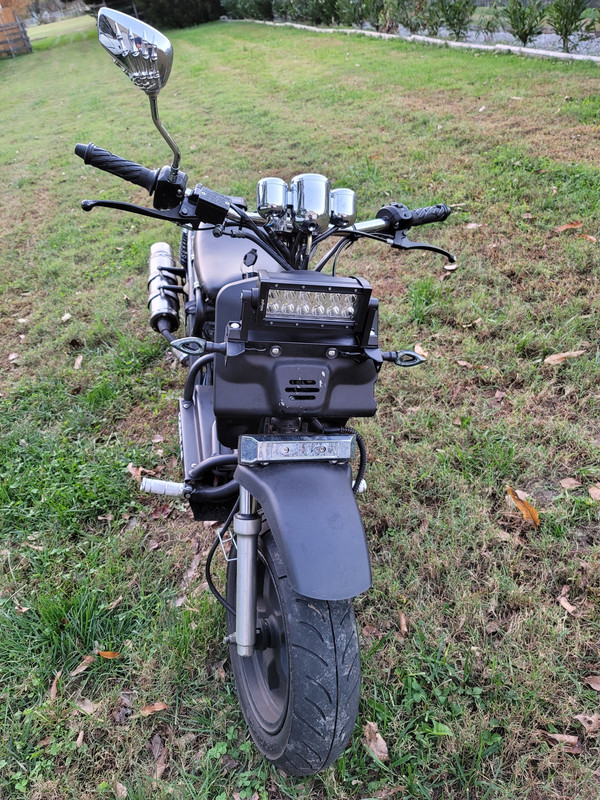
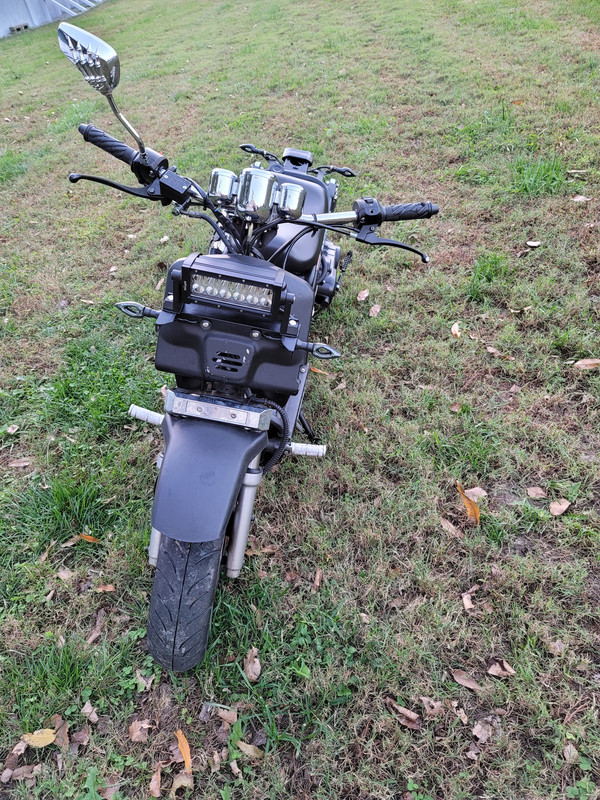
- Description (in case Amazon removes the product at a later date): Nilight 36W LED Light Bar Spot LED Lights Led Bar Driving Fog Lights Jeep Off Road Lights
- I wired the headlight to the brights. There is no low beam and high beam option for these. The reason why I wired into the high beam was to allow the bike to be started with them off (to avoid ripple current during start-up). My friend turns the headlight on all the time when he is on the road.
- For the bracket, see the description below.
Headlight & Turn Signal Bracket (free, or kinda free)
- Using the same metal angle that the bike came with (when it came in a crate), I cut a suitable length to act as a cross member.
- I drilled holes that match the existing bottom two holes on the bike. I also drilled holes to accommodate the wires coming from the turn signals (see picture for reference). When I converted the bike for the new LED lamp, I flipped the angle over and used some slightly longer metric screws than what was previously there. This created a very stable platform that doesn't vibrate.
- I cut two addition pieces of angle to serve as the attachment points for the turn signals. (I previously created this bracket when I remounted the original front bracket from the bike with the two round lights, but later I used the same bracket when I converted to the new LED headlight. That is why there are extra holes forward of the turn signals. I figure he can add fog lights later if he chooses.)
- For all of the brackets, I just sprayed some primer and some flat black paint.
- For the existing hole in the top of the front bracket (not used now), I removed one of the washers and just screwed it in tight. I didn't have any issues with it running into the new headlight.
- I also drilled a new hole through the front plastic plate to allow the wiring from the new LED headlight.
- The headlight angle is adjustable, using the provided bracket that came with the LED light.
Pictures to follow...


