|
|
Post by rollingbender on Apr 16, 2023 19:41:15 GMT -5
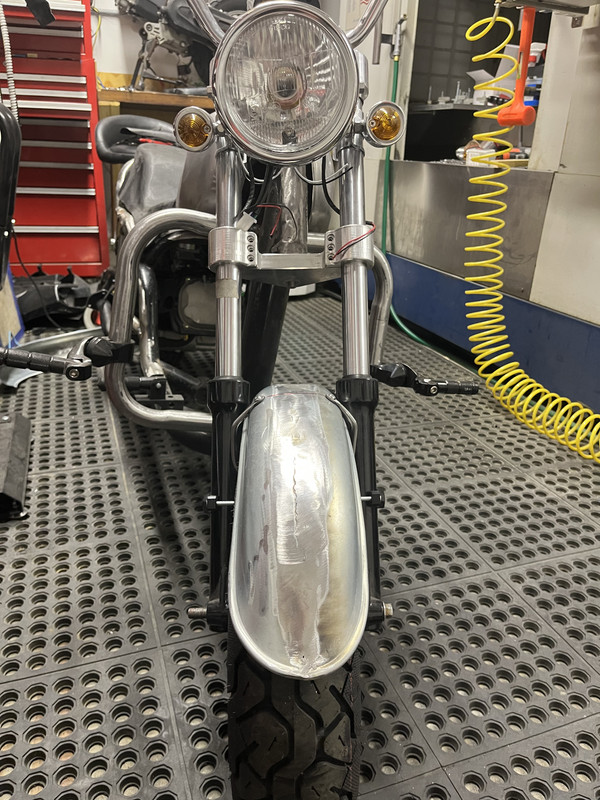
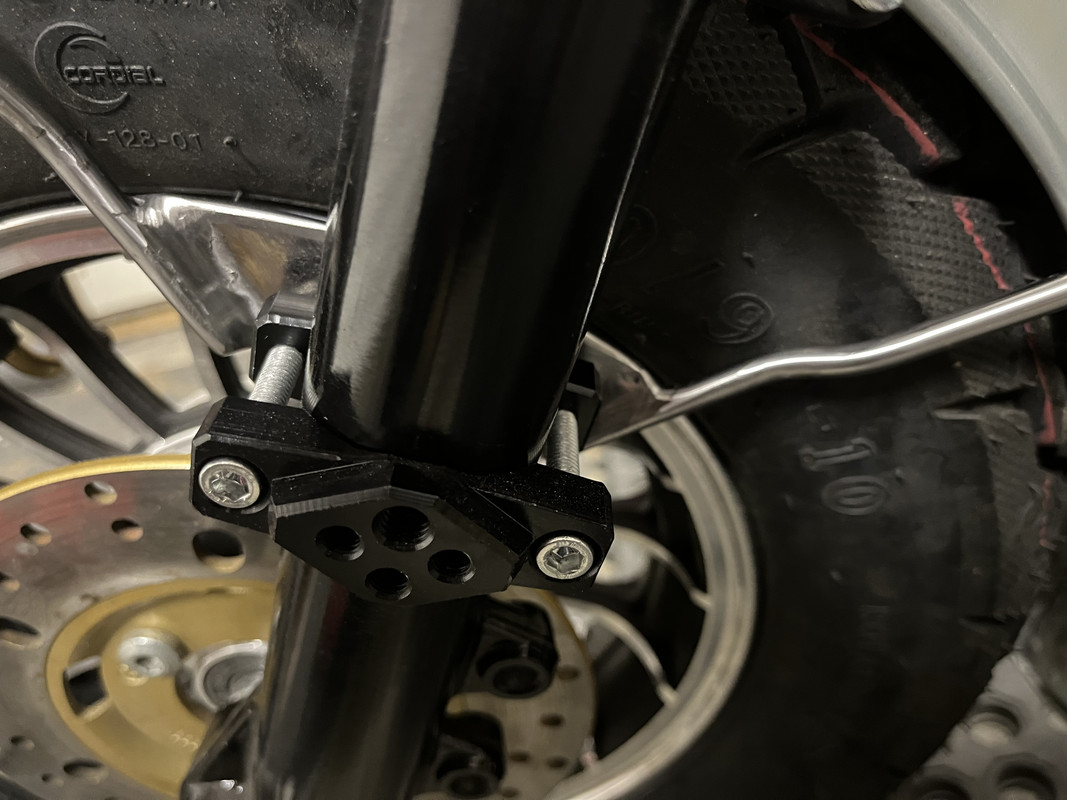
Ok… The Rivnut just won me over as the coolest tool in the box! It works sort of like a pop rivet gun but it leaves behind a threaded insert. I was going to use small bolts and nylock nuts to hold the fender on but there was just no way to remove the fender or tire (or tyre) so I pulled out this tool for its maiden voyage. Works a treat, results are stellar and now I can get the fender on and off.   This tool will be seeing a lot of use in the future. |
|
|
|
Post by aeroxbud on Apr 17, 2023 3:21:29 GMT -5
They work great for certain applications. You can even fit them without the proper tool if needs be.
|
|
|
|
Post by br4inl3ss on Apr 17, 2023 7:45:35 GMT -5
They work great for certain applications. You can even fit them without the proper tool if needs be. yup yup yup yup yup hammered one ( and then j-b welded it ) in my dakota frame in engine bay to hold a heavy fuse box. the tool broke and it had to be done fast because i couldnt install the megasquirt 2 without this heavy fuse box. |
|
|
|
Post by rollingbender on Apr 19, 2023 0:09:52 GMT -5
Front fender is now ready to go to the body/paint shop!     I need to make one more easy-peasy part for the steering stem, a stop for the forks, and then I’m done with my fab stuff that needs the fuel tank so that can go also. Need to make the mounts for the rear fender now. My brain will have a bit more difficult time with this. My CDO (OCD but in correct alphabetical order) wants symmetry but the stuff I have available to attach fender mounts to is not symmetrical. I will endeavor to persevere nonetheless. I think the front part of the rear fender will be a sturdy up-and-over type of thing with only one mounting point on the swing arm. Then, I will make a pair of mounts, one on each side, out of the rod like I did on the front. The left side can bolt to one empty hole in the case near the shock mount. The other side will attach to a similarly located hole to be drilled into the swing arm. Then, the rear fender can go off for painting. Still debating on the side panels regarding color. They could be painted blue to match the fenders and tank. They could be painted black to blend in with the frame. They could be left “raw” plastic and flame polished and still match the frame. I’m a bit worried that with the passenger pegs going where they will be that some little girl would scratch up paint rather quickly with her shoes. And, I think painted blue might draw the eye to a place that I am trying to distract from. Opinions are welcome and appreciated! |
|
|
|
Post by aeroxbud on Apr 19, 2023 4:38:22 GMT -5
|
|
|
|
Post by rollingbender on Apr 24, 2023 9:31:37 GMT -5
Here’s what I have come up with for the rear fender mount at the front of said fender…   The fender will get a pair of rivnuts installed for attachment to the horseshoe shaped piece. The horseshoe shaped piece gets welded to the vertical part. The swing arm will get a pair of rivnuts installed and the vertical part gets attached to the swing arm there. The back mounts for the rear fender will be the same style as the mounts I did on the front fender. |
|
|
|
Post by rollingbender on Apr 24, 2023 14:45:32 GMT -5
Anything worth doing is worth overdoing! Welded together and whilst I was grinding it for paint, things got away from me as far as shaping goes.    Brent said something awhile back about doing a good job until nobody notices. So many of the parts I have labored over on this build are just going to get lost as “that’s just the way they are” and the time and effort will be missed by most. |
|
|
|
Post by rollingbender on Apr 24, 2023 22:16:02 GMT -5
My wife spotted me going from my basement “laboratory” (shop where most of my machines are) to the “factory” (garage shop where the big CNC and the scooter shop is) with a pair of freshly flattened and ground fender brackets and asked, “Where are you going with those spoons”? I was forced to present evidence that I was not using “her” spoons for nefarious purposes and that I was not up to any crimes against the household. So here are the rear brackets for the rear fender. When I am done fabricating these, the sheet metal can go off to the paint and body man!!!  |
|
|
|
Post by aeroxbud on Apr 25, 2023 5:03:11 GMT -5
Oh brilliant you could of just used the family cutlery and saved all that time.  |
|
|
|
Post by rollingbender on Apr 25, 2023 12:10:05 GMT -5
Oh brilliant you could of just used the family cutlery and saved all that time.  Oooohhh!!!! Even better if we were all fancy and stuff and used real silver!!!! 🤑 |
|
|
|
Post by rollingbender on Apr 25, 2023 22:09:14 GMT -5
More progress on the rear-rear fender mounts. I made a pair of mounting blocks with a 1/4” hole in the long way for the rod/bracket and a 1/4-20 hole sideways for mounting to the bike.  The left side block attaches to an unused tab/hole in the transmission case.  This mounting block is very close to where the arc of the brake lever travels but I think the lever is a little out of specified shape and when this is resolved, I believe it will be ok. The right side is mocked up using a couple oversized nuts as spacers so it is sitting a little “tweaked”. With a proper spacer made and welded into the back of the swing arm bracket, it will be sitting symmetrical with the left mounting block. Once the blocks are located and locked down, I can finish tweaking the bends and angles to the brackets, drill the mounting holes and install the rivnuts in the fender.   |
|
|
|
Post by rollingbender on Apr 26, 2023 15:07:06 GMT -5
|
|
|
|
Post by rollingbender on Apr 28, 2023 1:12:54 GMT -5
Did a final consult with the painter (with input from a couple other local hotrod builders for their critical eyes) and we have come up with a plan. The fenders will be mostly blue with just the raised lip being yellow. The tank will be mostly blue with a yellow accent in the inverted “swoosh” on the tank sides. The side panels will be mostly black with a yellow stripe on top following the frame contour (this was suggested by one of the hotrod guys to provide separation of the black of the panel and the black of the seat upholstery).
Everything else on the bike that is not chrome will be black.
I also started making the mount for the tail light, rear signals and license plate. It’s mostly like the one I mocked up but mounted differently to alleviate some boxiness it had before. I also have begun tinkering with the sissy bar/back rest. Once I’m done with those things, I should be about done welding.
Once I get the battery box made, I can bring the components to work with me and fiddle with that in my secret hiding spot 🫣
|
|
|
|
Post by br4inl3ss on Apr 29, 2023 10:31:26 GMT -5
nice work, ALIEN. your spaceship is getting better everytime.
damn i like your mounts.
|
|
|
|
Post by rollingbender on Apr 29, 2023 14:55:42 GMT -5
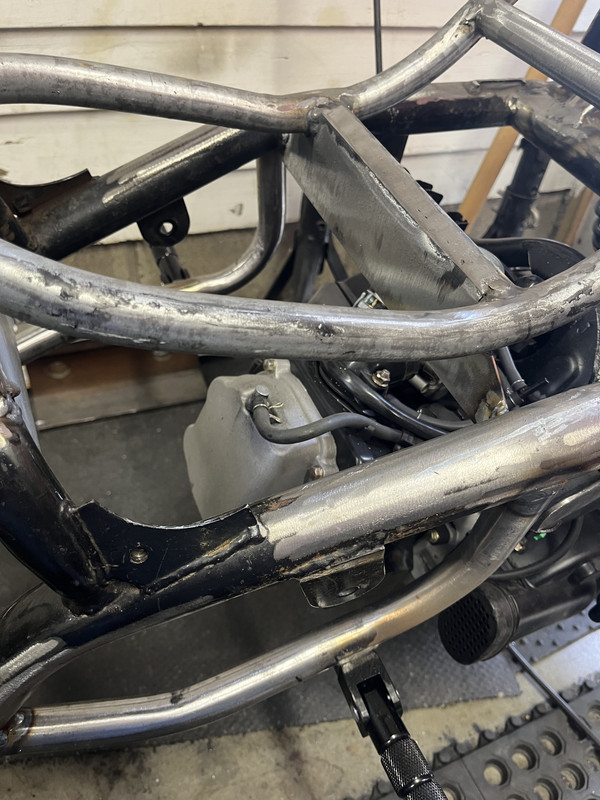
Today has been a day of refinement and detail. I made proper mounts for the driver and passenger foot pegs and have welded them to the frame. My daughter was very cooperative when I was measuring her legs in order to get the correct position for the passenger pegs. I also fitted a couple cardboard templates, transferred them to some 12 gauge steel sheet and cut them out. These two plates have now been welded into the frame. The front plate covers some ugly engineering and also serves as the front mount for the battery/electrical box. The plate under the seat frame is also a mounting point for the electrical box but also serves as a support for the center part of the seat frame.    |
|