|
|
Post by rollingbender on May 16, 2023 21:52:17 GMT -5
Inspiration to drag this project across the finish line has come. A fellow scooter enthusiast has challenged me to bring it to our town’s annual “cruise-in” on June 2nd. He is the owner of the Army scooter I have posted on this site and will be bringing that one to show. He also has a pristine, decked out Ram short box standard cab pickup with a matching scooter for that (same color, same rims, same graphics). Also, a lady I work with has a 50cc TNG Milano that is dressed up to look like a bumblebee. So, time to get this project moving. The paint guy is done with all the body work on the tank and fenders. He said that he primed it over the weekend. Hopefully, he will be done next week. I did some tweaking on the seat pan and now just need to install the rivnuts on the frame for mounting the seat and it will be ready to pad and upholster. I also started construction of the battery/electrical box. Now that I have the skeleton of that put together, I can sit and stare at it for hours in order to come up with the best plan on how to lay out all the electrical bits and pieces. Here’s the box as well as some of the parts I’m considering mounting in or on it.  And, back to the tail light/license plate bracket. A load of fitting, grinding, fitting, contemplating, and a dash of trial and error has brought me to this…   I took the original design, brought it up and back (to keep the license plate from banging the fender) and added a curved feature to the top. I think a UK sized plate would have moved things up onto the sissy bar! 🤣. This design has also inspired (forced) me to slightly relocate the mounting point for the turn signals… these will need to go down and back from their original location in the holes in the bracket which I have since welded back closed. So, there’s three things I can bounce between. I’m sure there will be more. |
|
|
|
Post by rollingbender on May 17, 2023 21:52:53 GMT -5
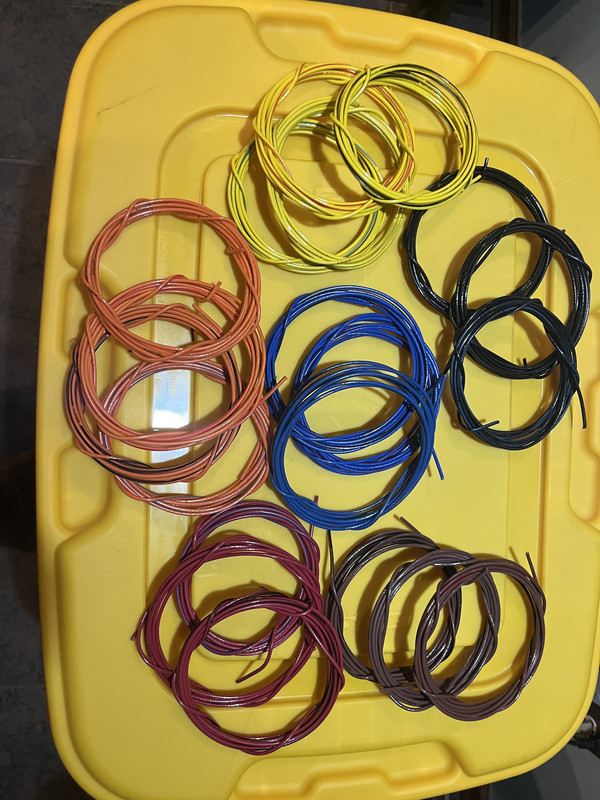
I should have taken a before photo… Early in this project I was trying to figure out how to wire this beast. I shopped a bit for pre-made wiring harnesses but decided against that due to bad reviews, high prices, and the likelihood of need for extensive modification with anything I could purchase. So I resolved to do it myself. Then I went shopping for wire. To get all the different colors was going to be expensive and a limited palate. So, I thought outside the box. I found a few companies who sell these cables by the foot with multiples of individually insulated, color coded and numbered primary wires. I know these are often used in the world of large concerts for wiring up the stages for non-audio signal stuff. I bought a 10’ cable with 20 unique 16ga stranded wires inside for $48.30 + shipping. Tonight, I sat down for some quality time with the cable. I removed the outer sheath, the inner sheath and the plastic string wrapping the wires together. Then I untwisted and separated each wire.  Remember, each wire has a unique color code (one color or main color with a different color stripe) and is actually numbered 1-20 also. Might need some more red and black and probably want to add a plain green just for fun but this should allow me to wire everything up without the need to repeat any colors. |
|
|
|
Post by rollingbender on May 18, 2023 15:39:35 GMT -5
|
|
|
|
Post by rollingbender on May 24, 2023 20:41:45 GMT -5
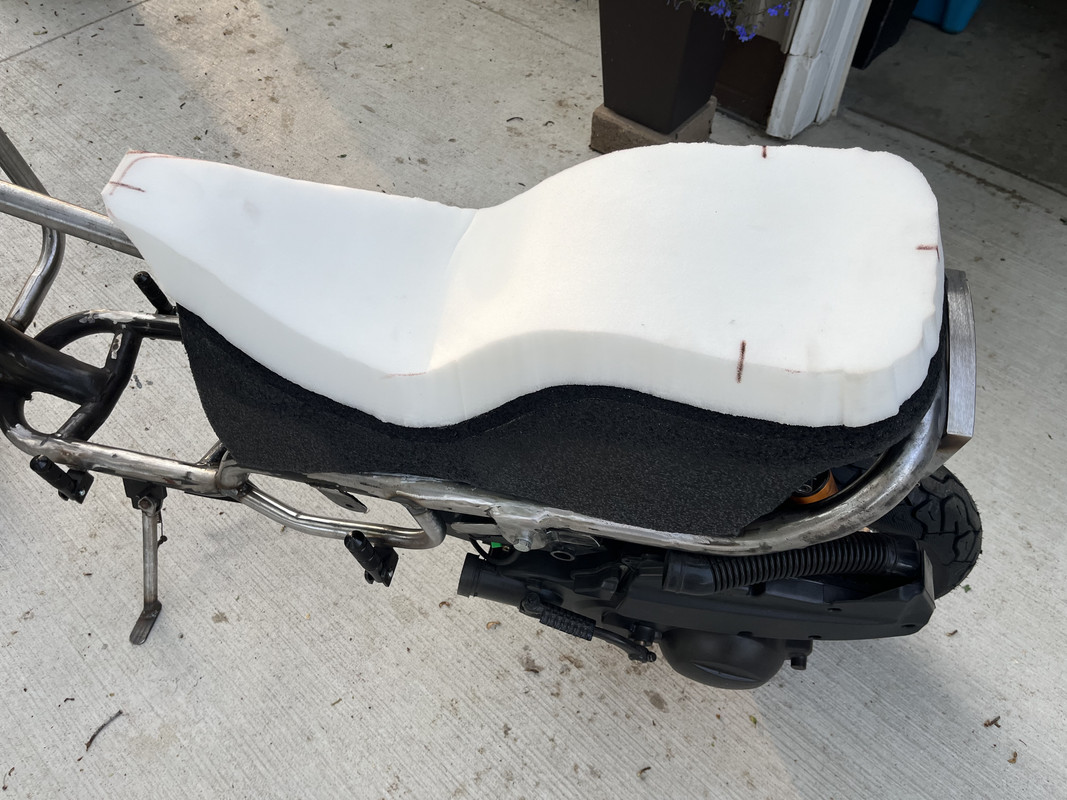
A bit of progress today… Got the tail light/license plate/rear turn signal bracket tacked into place.  Many of the metal additions to the frame, I have described as “tacked into place”. They are quite a bit more than “tacked” but neither are they fully welded. When I strip everything back down so I can paint the frame, I will take some time to weld underneath all of these parts… all the nooks and crannies that I could not weld from the top or sides. I also have finished tweaking the seat pan so that it is not tweaked (warped or mis-fitting to the frame) and trueing up the skirts so that everything is symmetrical. I have also applied the padding. 1/2” of closed cell to the top and sides and 2” of firm open cell polyurethane foam to the top seating surface.   It seems to be very comfy! I also cut out the vinyl for the covering. I made a couple templates so that I would keep everything symmetrical and have added witness marks to the foam and the vinyl so that this symmetry stays symmetrical. |
|
|
|
Post by rollingbender on May 24, 2023 20:47:10 GMT -5
Also got this photo from the painter last night…  He said that he will be masking off the yellow features tonight and then spraying the blue yet tonight or tomorrow!!! |
|
|
|
Post by jackrides on May 25, 2023 11:16:28 GMT -5
That is going to be Striking!
|
|
|
|
Post by rollingbender on May 25, 2023 22:26:34 GMT -5
…and now we have blue!!!  Clear coat tomorrow, delivery on Saturday!!! |
|
|
|
Post by rollingbender on May 27, 2023 12:18:06 GMT -5
Fenders and tank are done!!!  |
|
|
|
Post by rollingbender on May 27, 2023 12:41:33 GMT -5
As I’m tying up all the hundreds of loose ends, I just discovered that my front brake disc is too small of diameter for the fork/caliper combination. I did a quick search for a larger disc to fit this wheel but came up empty handed. Looks like the proper way to address this problem will be to make a new caliper mounting plate so that I can move the caliper farther over the disc.
So much for a maiden voyage in 1 week🤬
Also not pleased with how my seat vinyl is working out. I think I will continue with what I have and the use that as a pattern for a nice one.
Hopefully I can get things all finished up in a month or so. We are planning another family scooter trip to the South Dakota Black Hills. I really want to ride this on some of those twisty-turny roads out there.
|
|
|
|
Post by rollingbender on May 27, 2023 13:38:26 GMT -5
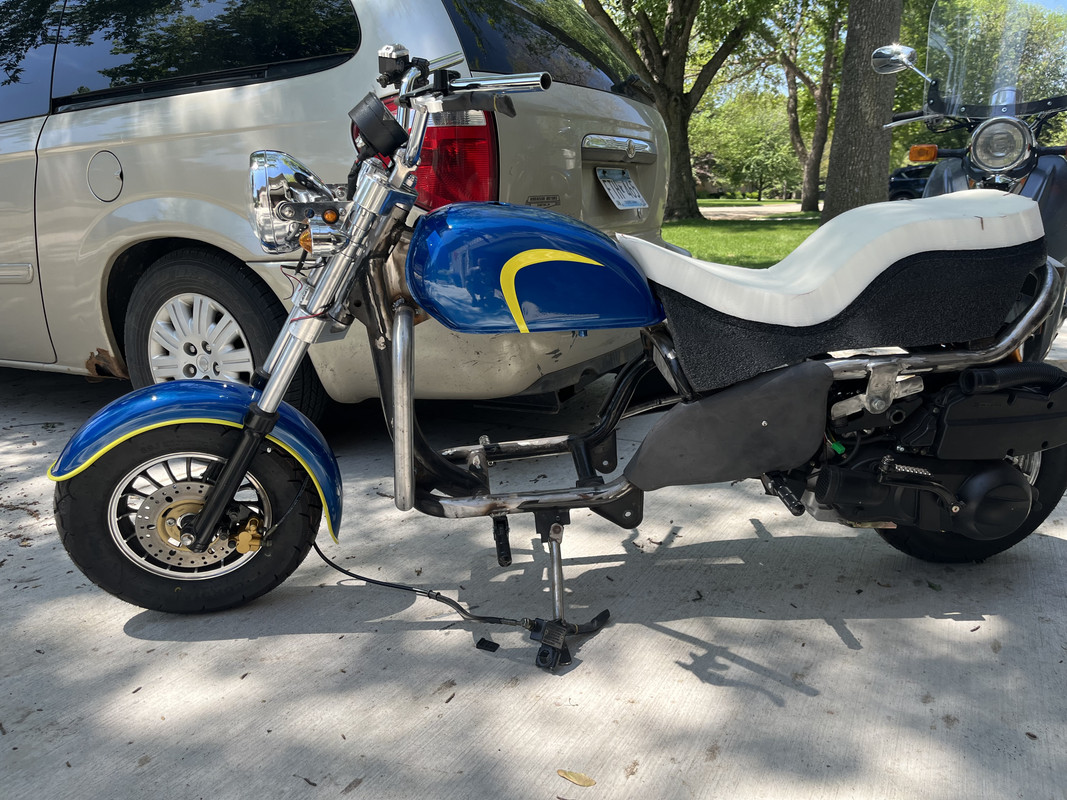
To my eye, the seat is overwhelming the rest of the bike…  Probably won’t be noticeable with a rider or two but I wonder if a different color or maybe some fancy stitching on those big side panels would break it up some. |
|
|
|
Post by jackrides on May 27, 2023 14:18:31 GMT -5
Yes!
|
|
|
|
Post by oldscool63 on May 27, 2023 20:16:04 GMT -5
Hey, rollingbender.
Any plans for the space under the tank?
Sorry if you mentioned it and I missed it...
|
|
|
|
Post by aeroxbud on May 28, 2023 8:41:03 GMT -5
It does look kind of chunky from the side.
Looks comfortable though.
|
|
|
|
Post by rollingbender on May 28, 2023 9:19:38 GMT -5
How about adding some blue panels to the sides of the seat vinyl?  …if I could find a good color match. |
|
|
|
Post by 90GTVert on May 28, 2023 12:12:55 GMT -5
I agree that it needs something to break up the seat side. Maybe even a yellow divider with a little flare between blue and black if you go that route. I dunno. Could go the wrong way and end up gaudy or could be great. Other thought was, am I mistaken about the idea of saddlebags on this at one point? Maybe I'm thinking of someone else. If you had the sorta typical cruiser leather saddlebags mounted up higher in the rear, you'd basically only see the large triangular bottom of the front seat area.  |
|


