bacon
Scoot Member
 
Posts: 55
|
Post by bacon on Jun 17, 2024 14:32:36 GMT -5
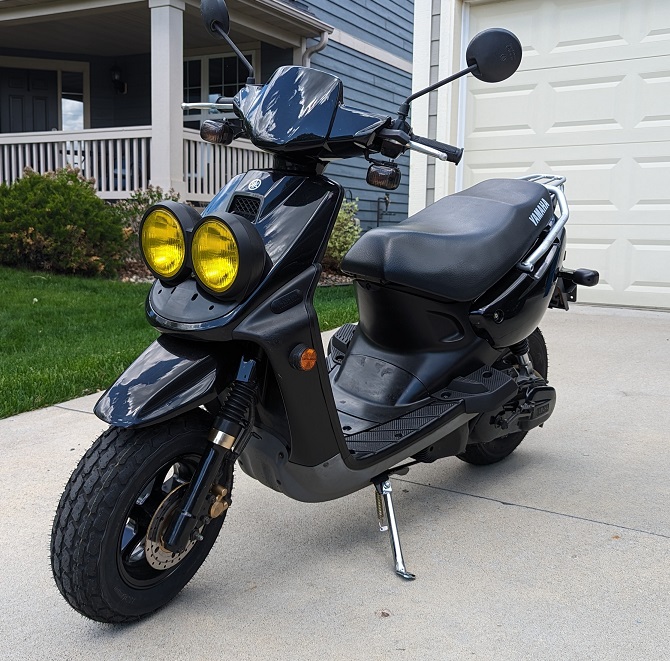
Stage 0 – The Final ConfigurationLet me start off by saying I did NOT intend to do a scooter build…but things happen. I bought this 2008 Zuma 50 with the intentions of cleaning it up a bit and maybe selling it to fund other projects. Well, the wife kind of likes it and calls it “hers” so I guess we might be keeping it for a while. I’ll create additional posts trying to document the progression and what I learned/went through, but below is the “final” configuration, or at least how it sits today. On the flat I can hit 59mph pretty consistently (given enough room) with me on it weighing 185lbs. With the slightest of tail wind or a slight decline in the road I will see 60mph pop up on the GPS. Pretty happy with that and it’s pretty darn fun to rip around town on. 2008 Zuma Bugeye • 70cc Athena Sport BBK (all aluminum) w/ .85 squish • BR9HS NGK Plug • Stage6 19mm Dellorto race carb o 82 Main Jet o 40 Slide o 40 Pilot o W7 Needle (clip in second from top position) o 60 Starter • Stock airbox with UNI foam filter and snorkel removed • Stock reeds and reed box • Yasuni Next R Pipe • Malossi Multivar variator with 5g weights (see post below on tuning) • White Contra Spring • Stage6 Torque Control MKII clutch with stock 107mm bell (see post below on tuning) • New stock Yamaha belt • Athena 15/50 up-gears (11.02 final ratio) The big stock mirrors have been replaced with some nice bar end units, but otherwise this is pretty much how she looks now. 
|
|
bacon
Scoot Member
 
Posts: 55
|
Post by bacon on Jun 17, 2024 14:36:00 GMT -5
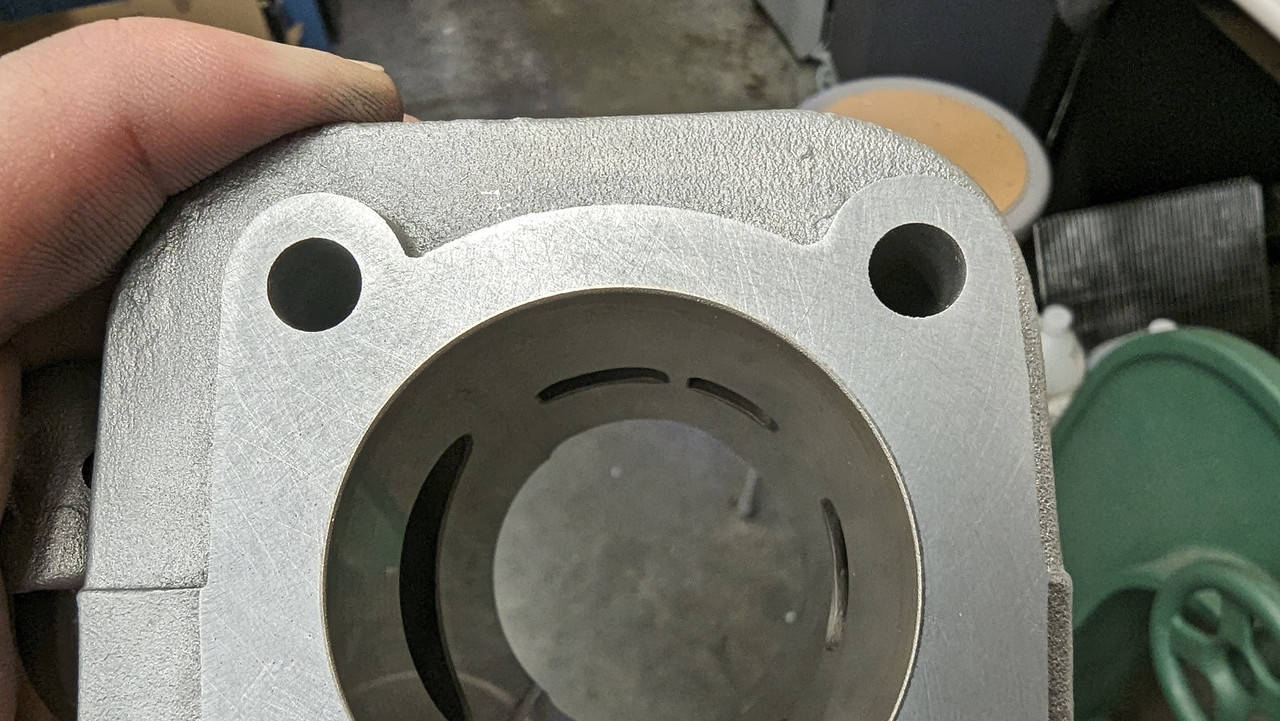
Stage 1 – BBK TimeWhen I got the bike it would start on spray and idle/rev fine. Could never get it to start on it’s own (even with electric choke) so I checked compression and found it to be low at ~90psi. The cylinder and piston looked good, but the rings were goofy and possibly aftermarket. Decided to go BBK since I had it apart, and got an Athena all aluminum 10mm unit with single piston ring. When I got the kit, I dry fit everything and with no base or head gasket, the squish was at .76mm. I didn’t like the “as-cast” surface on the top of the cylinder (where it would mate to the head) because I didn’t think it would seal well with copper spray. Using the provided head gasket would have put me well above the recommended 0.9mm squish. Since the transfer ports all seemed to line up nicely with no base gasket, I decided to machine down the top of the cylinder to allow for use of the head gasket that came with the kit. I took off about 0.015” (0.38mm) and then proceeded to “polish” the machining marks out with some sandpaper on the bench. With some copper spray on the head gasket and some Yamabond in lieu of a base gasket, I got the final squish to sit right at 0.85mm and I’m happy with that. I also put on a temp/rpm gauge while installing the BBK which did require the removal of a small fin or two on the head. So far, no temp issues – the aluminum seems to pull heat out really well because the highest I’ve see my temp was ~260F. Photos of the machining process and temp/rpm gauge below.    
|
|
bacon
Scoot Member
 
Posts: 55
|
Post by bacon on Jun 17, 2024 14:37:35 GMT -5
Stage 2 – Tuning Stock CarbLike I said, I never intended to do a full build. Since I put on a BBK and didn’t want to ruin it, I ordered some jets for the stock carb. I only ordered a few and I found that the 85 was just too rich, but the 82.5 seemed to work pretty well (still a little rich) Given the restrictive stock exhaust, I didn’t expect to need a huge bump in fuel. I also took the opportunity to do the “Dremel mod” to the stock carb to allow it to open fully. After a while I noticed that I had oil seeping into the carb. It seemed that the check valve in the inlet nipple was dirty or not seating properly, allowing oil to pool in the carb over time. I took it out and cleaned it and ended up with much less oil in the carb between rides. Overall, it ran decent but compared to my street bikes it was just such a turd I couldn’t be happy with it. Check valve removed in image below. 
|
|
bacon
Scoot Member
 
Posts: 55
|
Post by bacon on Jun 17, 2024 14:39:35 GMT -5
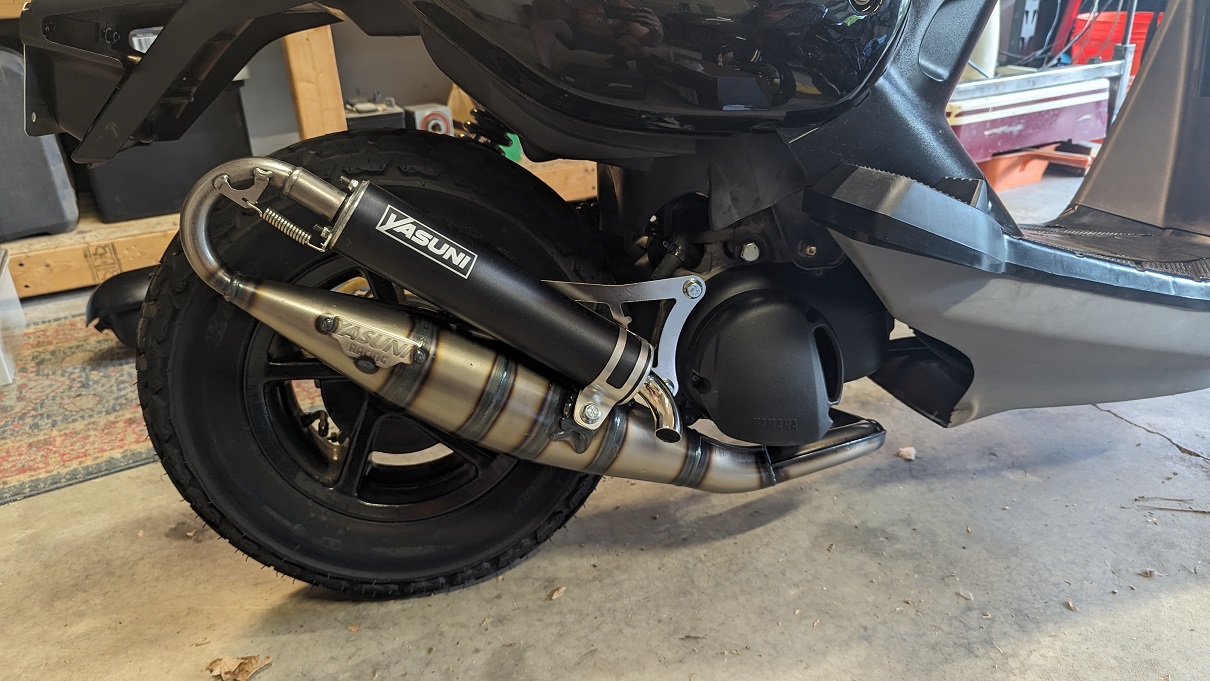
Stage 3 – Intake and Exhaust UpgradesHave I mentioned that I didn’t intend to do a full build? I started looking around at some of the half wave pipes that were out there (thanks Zino for the dyno charts you posted in your build) but found that they were either unavailable, or maybe a sub-par option. Eventually I bit the bullet and ordered a Yasuni Next R full expansion chamber exhaust at the recommendation of others. I was worried about it being too loud, but it’s really not bad at all. Definitely louder, but has a good tone and really can’t be heard from that far away with regular city noise. Fitment was really nice and seems like good quality. As long as I was helping air get out easier, thought I better help it get in easier too. So I put in a new UNI filter element in the stock airbox and pulled out the snorkel. These mods together (along with BBK) really started to wake her up. Yasuni Next R Pipe below - my wife asked if I made the pipe myself  
|
|
bacon
Scoot Member
 
Posts: 55
|
Post by bacon on Jun 17, 2024 14:42:32 GMT -5
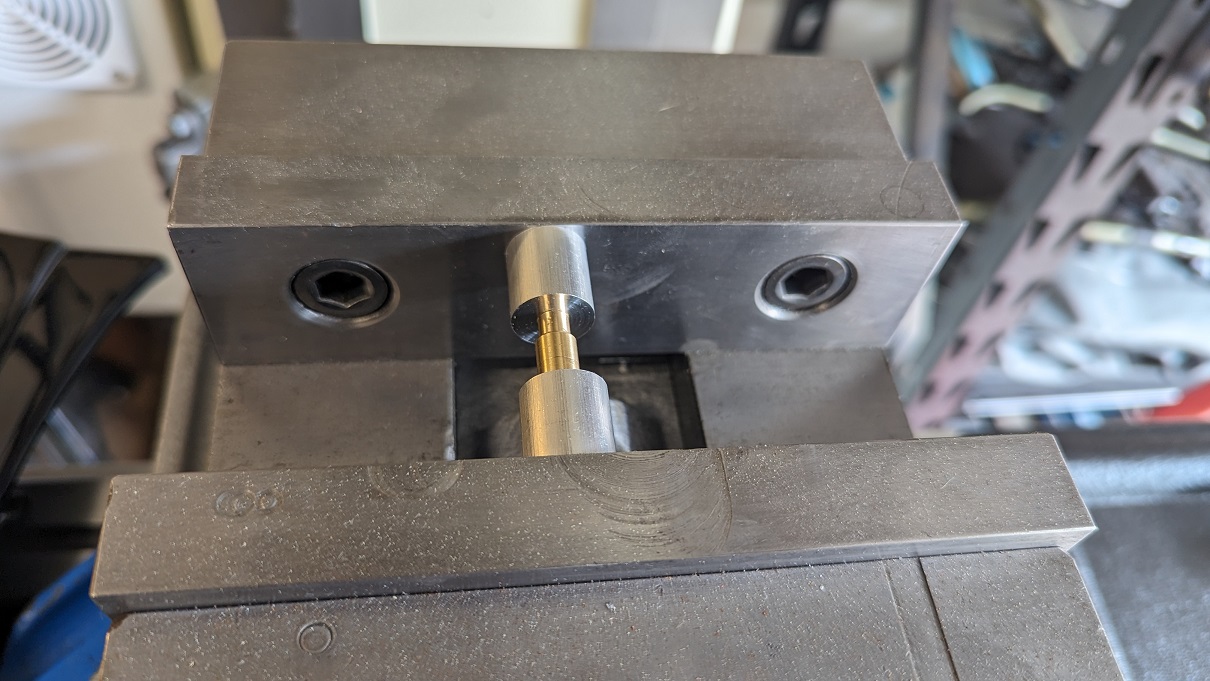
Stage 4 – OK, I’m doing a build now…Bigger carb time.I couldn’t spend that much money on a new pipe and then not fully utilize it now could I? I really wanted to keep the auto-choke for the wife, but due to availability, price, and much toiling over what carb to get, I finally went with a Stage6 Dellorto 19mm race carb and a jet kit. I think I started out with a 90 main jet and no baffle disc (under the main jet) but it was just pig rich. I tried to dial it in as much as I could, but something didn’t seem right. I had to have the idle speed screw and the air/fuel screw both in all the way in order to keep it idling and to prevent clouds of smoke. Rode it a little, but it wasn’t good. After some reading and dissecting, I realized that my carb came with a 50 pilot jet. I ordered a 40 and it was immediately better. I was now able to back the idle and air mix screws out to a normal spot and the throttle response was much better. Still rich, so I dropped the main jet to my next smallest which was an 85. Rode better, but still seemed rich (running cool, bogging slightly, etc). I didn’t want to push it, so I left it as is for a while. After a bit I started noticing oil on the floor again. Turns out the Dellorto carbs don’t have a check valve on the oil inlet nipple like the stock carbs do. Since my pump seems to gravity feed ever so slightly and since I know my pump can drive through a check valve, I ripped the valve out of the stock carb and made an adapter for it. I needed an extension on the oil line anyway with the Dellorto, so I used this as an opportunity to make a barb-barb fitting where I could add a length of tubing. Two birds with one stone as they say. Stopped the oil leak, but it was still rich. With high anxiety, I dropped the main to an 82. Since I worried about going lean and soft seizing (especially when letting off the throttle) I dropped the clip one slot to second from the bottom. It was really starting to run pretty well and was starting to show me where the power band was, so this is where I left it (for now). I think a 38 pilot would be better, but the 40 seems to work well enough and I dont worry as much about soft seizing on throttle closure. In-line check valve and Stage6 manual choke lever below     
|
|
bacon
Scoot Member
 
Posts: 55
|
Post by bacon on Jun 17, 2024 14:46:31 GMT -5
Stage 5 – Variator, Clutch and Up-Gears
More reading, more pondering, more trying to future proof….ended up with a Malossi Multivar, a Stage6 Torque Control MKII clutch, and some Athena 15/50 helical up-gears. I opted to use the stock clutch bell to save some cost and since I kept telling myself I “wasn’t doing a build” the slight gains from a new bell didn’t seem to warrant the cost in this non-race scenario.
The gears were pretty straight forward. For those wondering, yes you can do this in your garage with a big vice and some sockets. I forget what size I used, but I was able to press the old gears apart and new gears together relatively easily. Emphasis on the BIG vice as I did need a cheater bar on the vice handle to get the needed leverage. Sealed up the case and filled with new oil and moved on to the Variator and clutch.
I ordered 5 and 6 gram weights in addition to the included 7g weights that came with the Multivar thinking I could make some useable combinations for tuning. I believe I started with the 6g. I used the provided 2mm shim between the starter gear and the variator and NO shim on the other end of the boss. I also threw the speed limiting plastic washer right in the trash.
Knowing that my Yasuni and carb seemed to kick in right around 6k RPM, I decided to try the orange medium springs that came with the clutch. I put the spring tension somewhere between 1/3 and ½ of the useable range, and I put one brass weight in the farthest hole on each of the clutch arms. Dropped the included white contra spring in and installed everything on the bike.
I know I violated the “too many mods at once” rule, but I felt fairly confident in these changes and kind of knew what to expect. I’d say for so much change at once, it was very close to the mark right off the bat. I did do some final tuning later, but I was quite happy with the overall change and top speed.
Was too excited to take pictures during the unboxing and install, so youll have to use your imagination on this one.
|
|
bacon
Scoot Member
 
Posts: 55
|
Post by bacon on Jun 17, 2024 14:51:48 GMT -5
Stage 6 – Final Tuning StageAt this point I was pretty happy with the scoot, but I knew there was some fine tuning left to do with the variator, clutch, and carb. The main items I wanted to address were: • Belt travel on the variator (started with ~5mm remaining) • Top speed/Acceleration balance (duh) • Flat spots, surging, and general inconsistencies in the mid-range throttle I never really knew how each change would impact another, so I kind of took a shotgun approach to tuning, changing a few things at once. Probably not the best approach, but it worked for me. I ended up trying 5, 5.5, 6 and 7 gram weights in the variator, and really never saw a whole lot of change in the belt travel or top speed. After changing many times, I did find that the 5g seemed to function the best with my clutch/spring setups. Higher weights didn’t give me any more top end (sometimes lost top end) but it did lower my peak RPM. With 5g weights I had good acceleration and my peak RPM sits right about 9800rpm. I did see 11k+ with the stock variator and some other upgrades… fun to hear it spin up like that, but diminishing returns and risky with my 10mm crank. I really spent a lot of time trying to improve belt travel on the variator, but I hit a wall around 3mm remaining. I did learn a couple of things along the way… my clutch was hitting the bell which was limiting the amount it could open, and the boss on the multivar was too long (in my opinion) preventing the halves from closing enough. I ended up making a 1mm shim for the clutch and I took 1mm off the boss of the variator. I then made some new shims for the variator and ended up with a .625mm shim on the end of the boss. Less shim wouldn’t let the belt go down all the way in the variator (impacting low gear) and more would limit how far the belt would travel. I also found that my belt was slightly worn (~15.8mm wide) so I put on a new one (16.5mm) and adjusted shimming. I seem to get a good balance of belt travel and gearing now, so I’ll just have to get over the little remaining variator travel unless I want to find a slightly longer belt. And last but not least I did some final carb tuning with my newly “dialed in” CVT. I seemed to have some erratic behavior in the mid-range, and almost changed the main jet. Instead I decided to move the clip up one position (leaner), except I accidentally did it backwards and lowered the clip. On my test ride it rode like poo and gave me great hope for ACTUALLY moving the clip UP one position. Let it cool off, adjusted carb, and went for a ride. Wow… when you finally get it right, it’s amazing what can happen. The throttle response is nice and smooth now throughout the whole range, it’s got plenty of punch, and my temps stay low in the mid 200s. Wish I could go ride now, but it’s raining… again. Pictures of shimming, markering, etc below.        
|
|
|
|
Post by aeroxbud on Jun 17, 2024 18:33:04 GMT -5
Nice write-up. It sounds like you are finally happy with it. For now......  |
|
|
|
Post by Zino on Jun 17, 2024 19:01:01 GMT -5
just think you start around 40 mph wide open and end up around 60 mph
nice work and great pictures this really will help the next builder
|
|
|
|
Post by monsterunderyourbed on Jun 26, 2024 19:43:29 GMT -5
*drags '04 bugeye from back of shop and starts to remove engine to set on build cart...
|
|