Headlight LED Accent Lighting Install
Apr 27, 2012 20:36:16 GMT -5
dan50, highmoose, and 1 more like this
Post by 440va on Apr 27, 2012 20:36:16 GMT -5
Well, while I'm waiting on my sliders to come in from partsforscooters, I figured I'd make use of those 12" LED white light strips I've had laying around itching for something to be done with them. So I got to looking at the headlight of my Zip, and while I was, one of those new Audi crossovers pulled in out apartment, ya know the ones with the white LED DRL's around the bottom and side of the headlight. Yeah that got me to thinking, and now after a little work I have my own running lights any time the ignition is on, so without further wait, here's the process and pics. Forgive me, it's a camera on my phone, and my scoot has been weathered for a few years, but it's awesome just the same as if it were a brand new scoot!
Step one: Remove the headlight assembly from the front fairing, but be careful handing any plastics, don't want scratches or even worse, breaks!
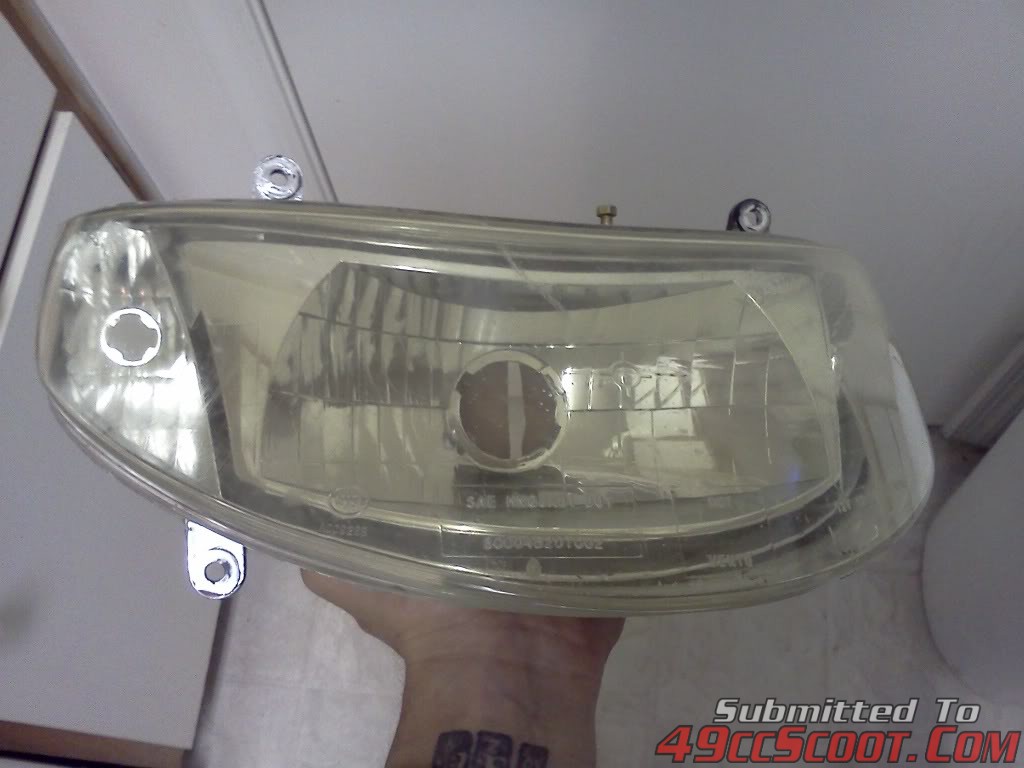
Step two: Take a good look at how to remove the lens from the housing itself, mine was held in place by clips and on the ends, of all things, hot glue. That took a little finesse to get free, it's generally better to start at one end and work your way across to the other side.
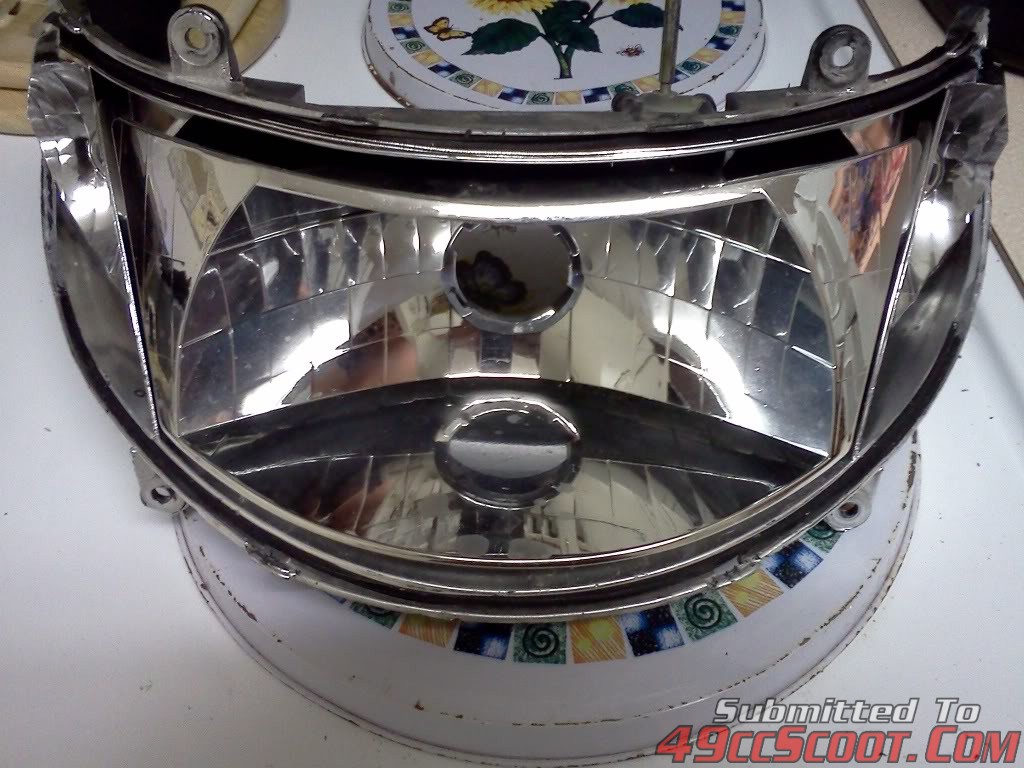
Step Three: Clean both the lens and the housing, and use an alcohol prep pad or something similar to clean where you will be mounting your light strips. You want to make sure they're mounted well, nothing like a light strip coming loose inside your headlight and though I doubt it'd do any damage, it just wouldn't look right.
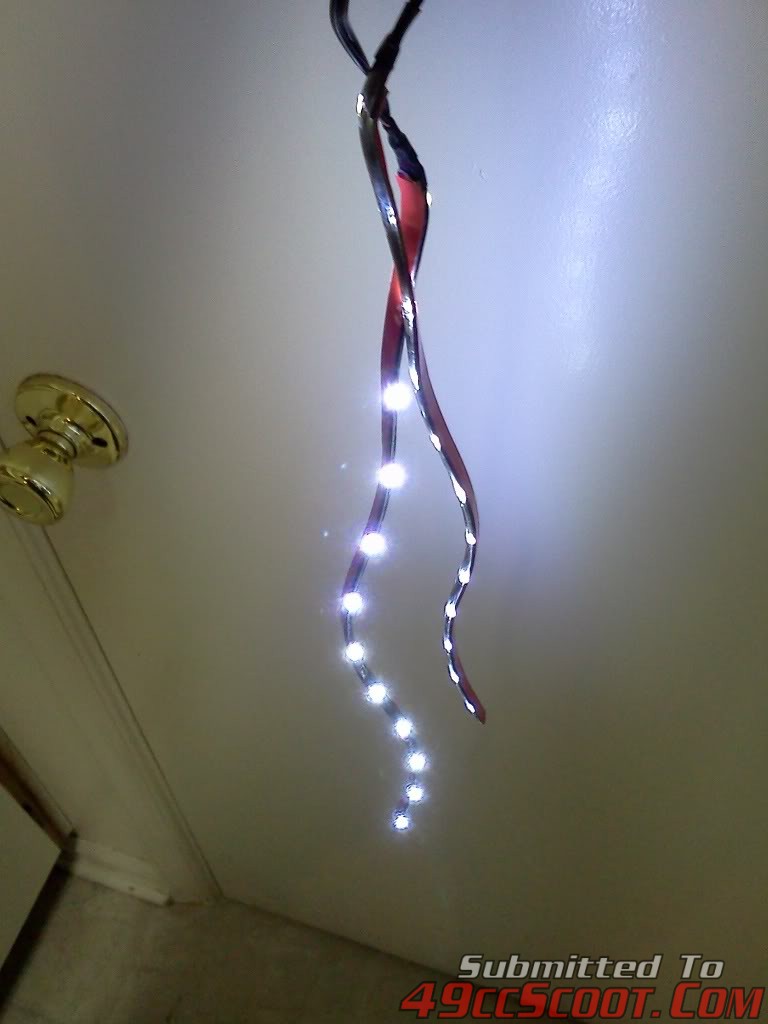
Step Four: mock up how you want them to be mounted, and if necessary, trim to fit, but follow the manufacturers instructions on trimming. ALWAYS double check before cutting, make sure you're on a "cut" line. This is the full string of lights I started with.
Step Five: Firmly press the light strips into place after removing the adhesive backing paper to expose the adhesive, make sure your wires are run the way you wanted them to be in the mock up.
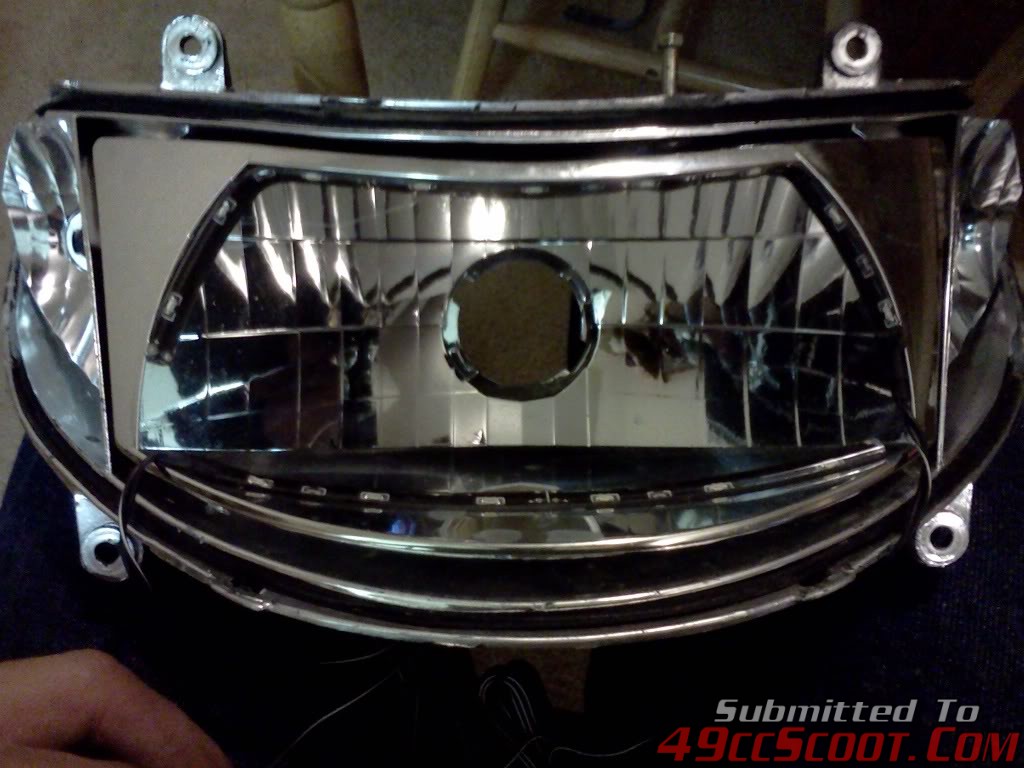
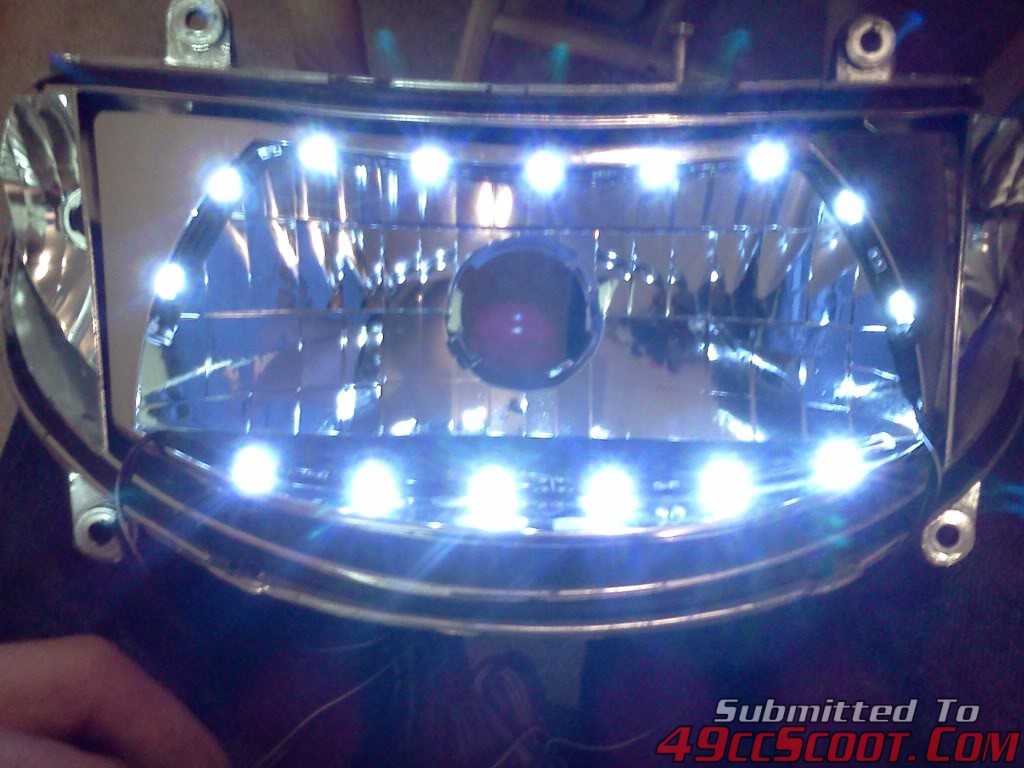
Step Six: Reassemble in reverse order of what you took it all apart. I drilled into the bottom of my housing below the actual headlight lens reflector so the wires would stay out of sight, and made sure to fill the hole with epoxy as to deter moisture and dust from entering the housing. I also epoxied the entire lens to the housing, needless to say I do not intend on going back in there again!
Step Seven: I soldered my two wire sets together and made it one simple set to connect, this may be best for you, or may not be, your choice. Either way, get your wires to their designated power source or switch, mine went to the ignition key on, hot side and to ground. I chose this for added safety, this way I never forget to turn on lights, and I never forget to turn them off.
Step Eight: Put your body back together and enjoy the new accent lights, I chose the ones that lay flat but light to one side rather than light out, kinda hard to explain, but you can get the idea. No other lights on the scoot were on when this was taken.
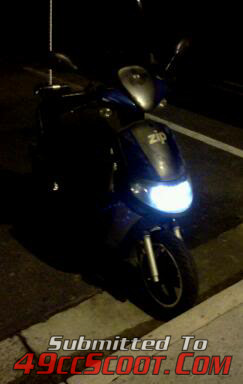
It's condensed, crude and sometimes utterly non-understandable, but it's something my ADHD/OCPD mind came up with and tried to put down in writing. I hope some of you can take the info and put it to use. Best part of it all, the LEd strips are getting cheaper and cheaper, and you can pretty much run wild with your imagination!
Step one: Remove the headlight assembly from the front fairing, but be careful handing any plastics, don't want scratches or even worse, breaks!

Step two: Take a good look at how to remove the lens from the housing itself, mine was held in place by clips and on the ends, of all things, hot glue. That took a little finesse to get free, it's generally better to start at one end and work your way across to the other side.

Step Three: Clean both the lens and the housing, and use an alcohol prep pad or something similar to clean where you will be mounting your light strips. You want to make sure they're mounted well, nothing like a light strip coming loose inside your headlight and though I doubt it'd do any damage, it just wouldn't look right.
Step Four: mock up how you want them to be mounted, and if necessary, trim to fit, but follow the manufacturers instructions on trimming. ALWAYS double check before cutting, make sure you're on a "cut" line. This is the full string of lights I started with.

Step Five: Firmly press the light strips into place after removing the adhesive backing paper to expose the adhesive, make sure your wires are run the way you wanted them to be in the mock up.


Step Six: Reassemble in reverse order of what you took it all apart. I drilled into the bottom of my housing below the actual headlight lens reflector so the wires would stay out of sight, and made sure to fill the hole with epoxy as to deter moisture and dust from entering the housing. I also epoxied the entire lens to the housing, needless to say I do not intend on going back in there again!
Step Seven: I soldered my two wire sets together and made it one simple set to connect, this may be best for you, or may not be, your choice. Either way, get your wires to their designated power source or switch, mine went to the ignition key on, hot side and to ground. I chose this for added safety, this way I never forget to turn on lights, and I never forget to turn them off.
Step Eight: Put your body back together and enjoy the new accent lights, I chose the ones that lay flat but light to one side rather than light out, kinda hard to explain, but you can get the idea. No other lights on the scoot were on when this was taken.

It's condensed, crude and sometimes utterly non-understandable, but it's something my ADHD/OCPD mind came up with and tried to put down in writing. I hope some of you can take the info and put it to use. Best part of it all, the LEd strips are getting cheaper and cheaper, and you can pretty much run wild with your imagination!

