|
|
Post by 90GTVert on Sept 23, 2009 0:05:01 GMT -5
 Jeremy (Enviromoto) sent me this new tool for 139QMB 50cc GY6s from ZTR to review. I have not been kind to ZTR in the past for their advertisement of a clutch tool that costs over $150. They were leading members of another forum to believe that they needed their expensive tool to work on clutches and compress contra springs. I spoke up and even made a video showing people how unnecessary their clutch tool really is. With that said, you can rest assured that if this new variator tool was worthless I'd tell you. This tool is certainly not worthless though. When I first opened the packaging I wondered, "Why didn't I think of that?" It's such a simple concept, yet it gets the job done, and is easy to carry around because it's made of lightweight aluminum and very compact. Remove the CVT cover as usual.  Line this tool up with the teeth on the variator drive face. Then bolt the tool to the engine. 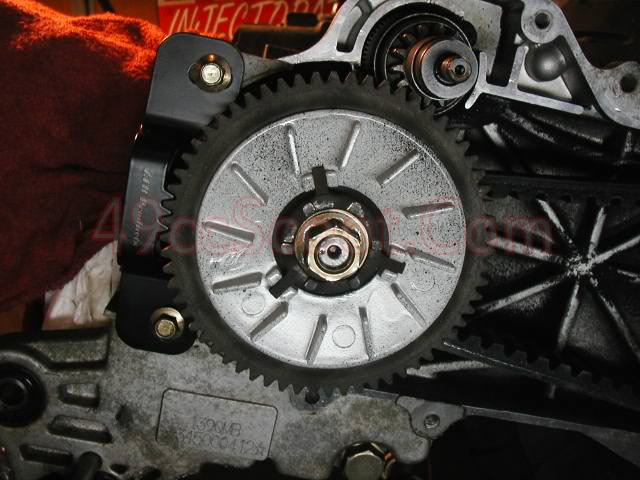 Now your variator is locked into place and you can use a ratchet or wrench instead of getting out the old impact gun. Even more importantly, you can use a torque wrench to install your variator nut to the specified torque setting. 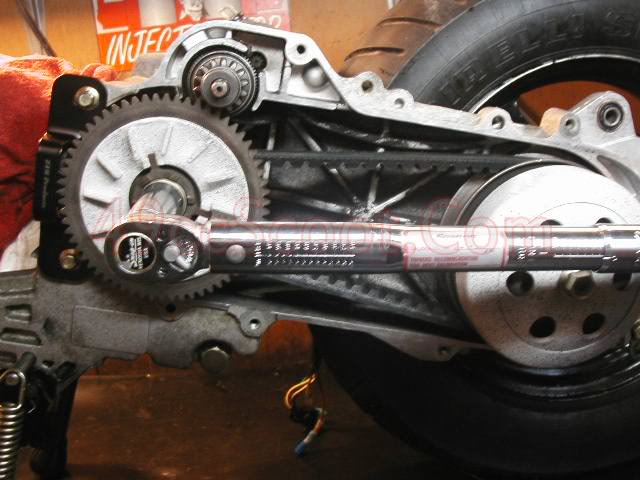 I like this tool. It's not a "must have", but it's definitely a "wanna have" for anyone that works on 139QMB scooters a lot. Take it from someone who has stripped the threads on a crankshaft before, being able to hold the variator in place to apply proper torque makes this tool worth it's price alone. Not to mention, carrying this tool along with basic hand tools in your scooter would allow you to remove the variator on the side of the road should the need arise. UPDATE : I can no longer find the above tool from ZTR, but there are other options that work using a similar idea... A similar tool on Amazon : amzn.to/1Ky84B4Another idea from Hypocycle: hypocycle.webstarts.com/ |
|
|
|
Post by 2strokd on Sept 23, 2009 9:12:25 GMT -5
I put a small prybar between the starter teeth and wedge it into the case while hold the vari with my thumb then with my left hand i hit the button on the impact.
|
|
|
|
Post by 90GTVert on Sept 23, 2009 13:31:33 GMT -5
|
|
|
|
Post by Fox on Oct 7, 2009 18:55:23 GMT -5
I got one today!  Haven't tried it yet but I'm sure it does what it's supposed to. I have an impact now but before that I was using a homemade tool to hold the flywheel. I used a chain wrench to hold the clutch bell to loosen that nut. Talk about living in the dark ages...  I like the fact that if my impact breaks I'm still in business now with this tool.  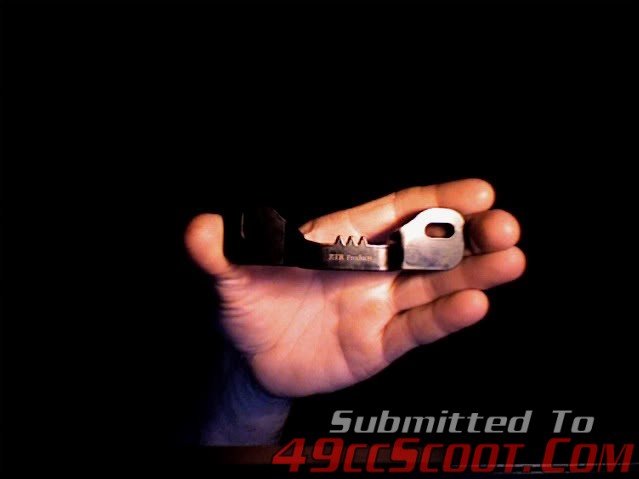 |
|
|
|
Post by Fox on Oct 8, 2009 11:50:50 GMT -5
Well, I tried out the variator tool today and it works well. There were two hex key (5mm) bolts included with the tool. They have a small head so they dug into the tool (aluminum) a little when I tightened them so I'll use some washers from now on to prevent that or I can just get some bolts with larger heads. Other than that the thing works as advertised. I had to pull out a locating sleeve in the case for the belt cover before installing the tool. That sleeve will come out with the cover on some engines and stay in the engine on others... Although $30 seems a bit high, I think it's a small price to pay to be able to change a belt on the road with only a ratchet set, an Allen wrench and this tool. 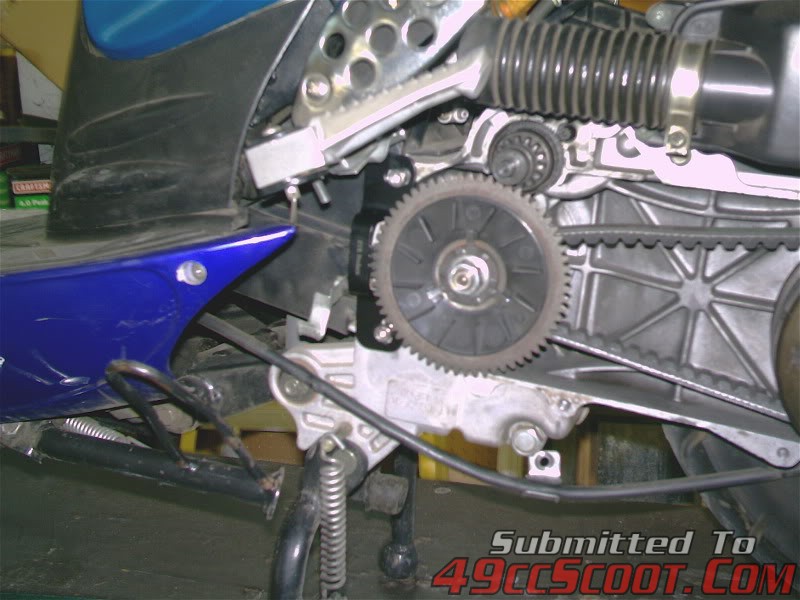 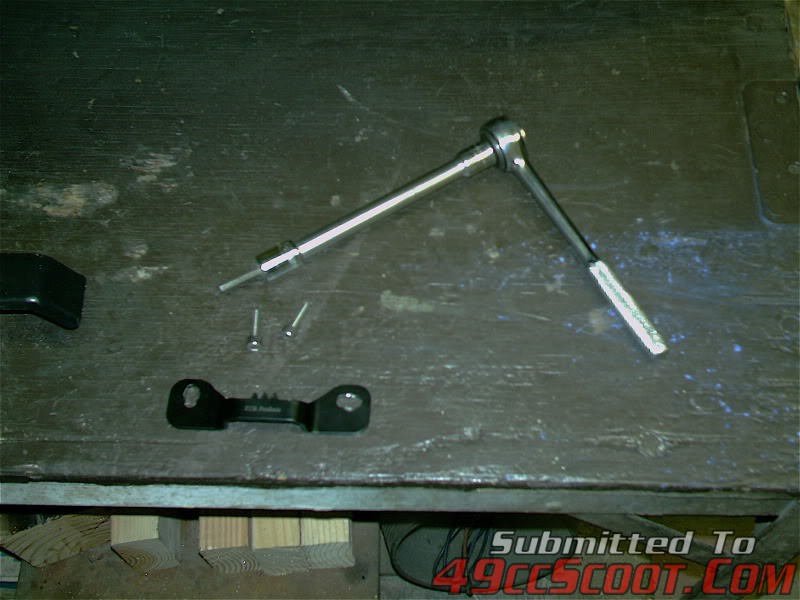 I give it a thumbs up! |
|
|
|
Post by 90GTVert on Mar 17, 2011 16:26:56 GMT -5
I picked up this tool made by Buzzetti to lock the variator into place on my 1E40QMB powered scoots. This type of tool is also made by other companies. You can pick on up from Enviromoto at a good price. 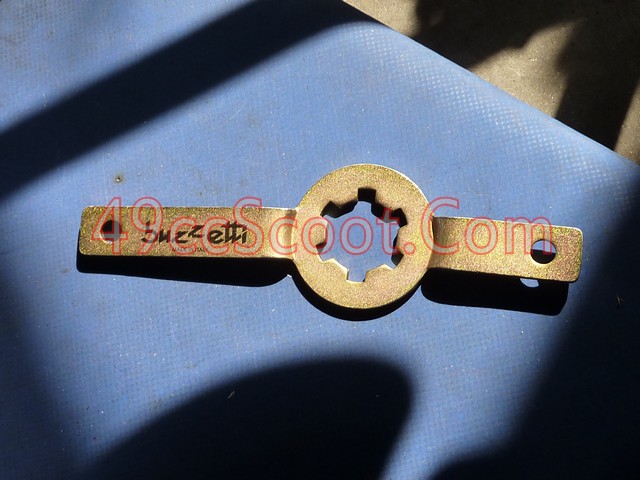 It fits over the kick starter pawl as shown here. 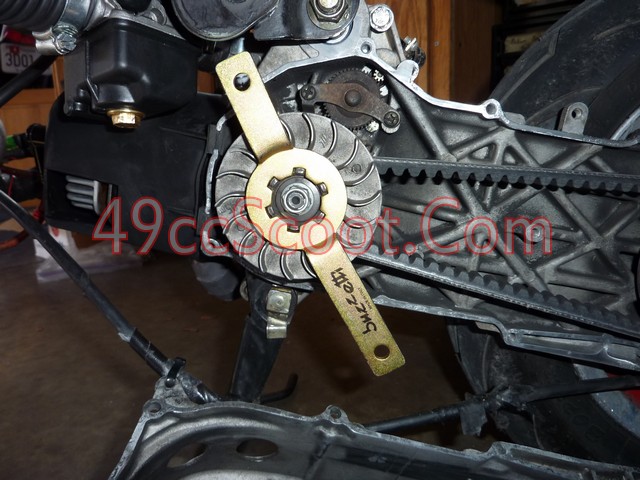 It's supposed to bolt to the case, but it doesn't line up on my Chinese long case minarelli, and you'd need very long bolts. I locked the long side of the tool up against the engine mount bolt that sticks out and was able to use just a ratchet and socket to remove and install the variator. It's a great tool to have handy for roadside emergencies. 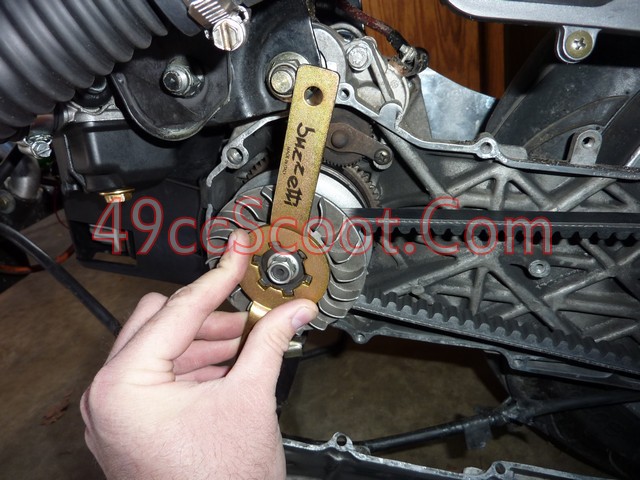 |
|
|
|
Post by Clank on Jan 3, 2015 5:23:13 GMT -5
So this is what I came up with for a quick change variator. 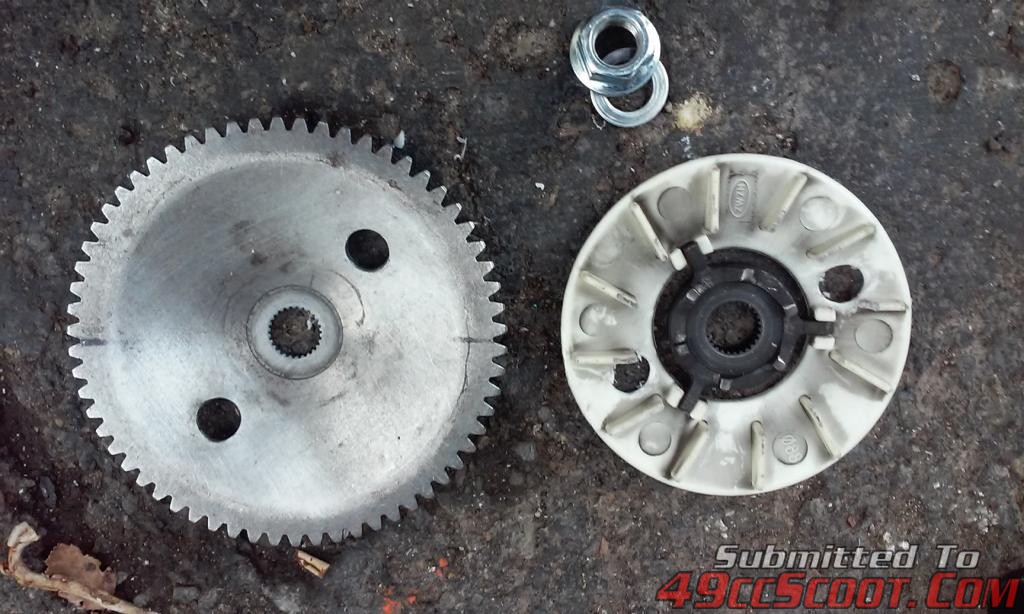 I just drilled holes to match the spanner wrench I'd already built for removing the clutch. 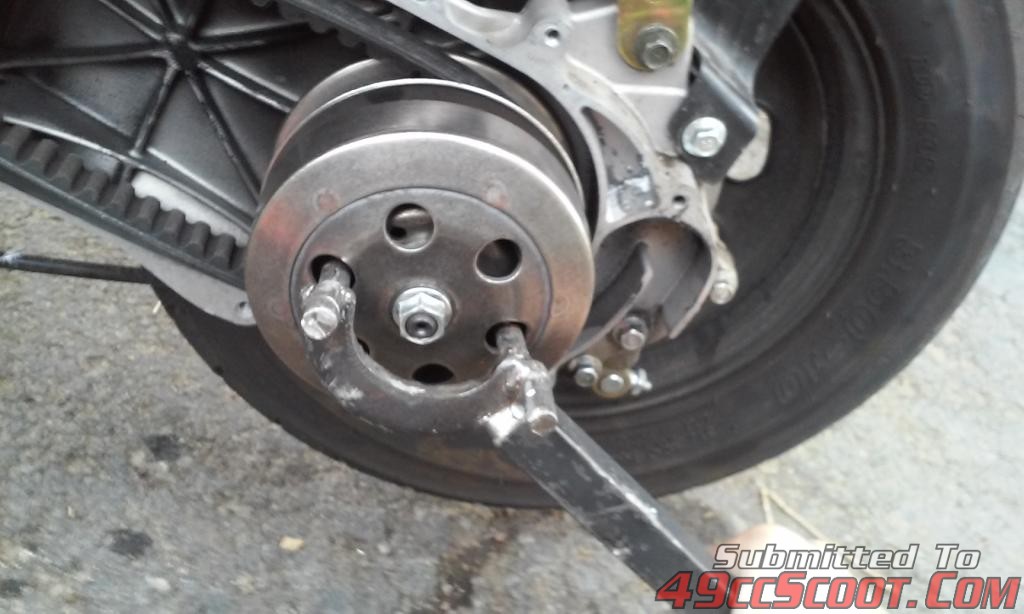 It works really good. 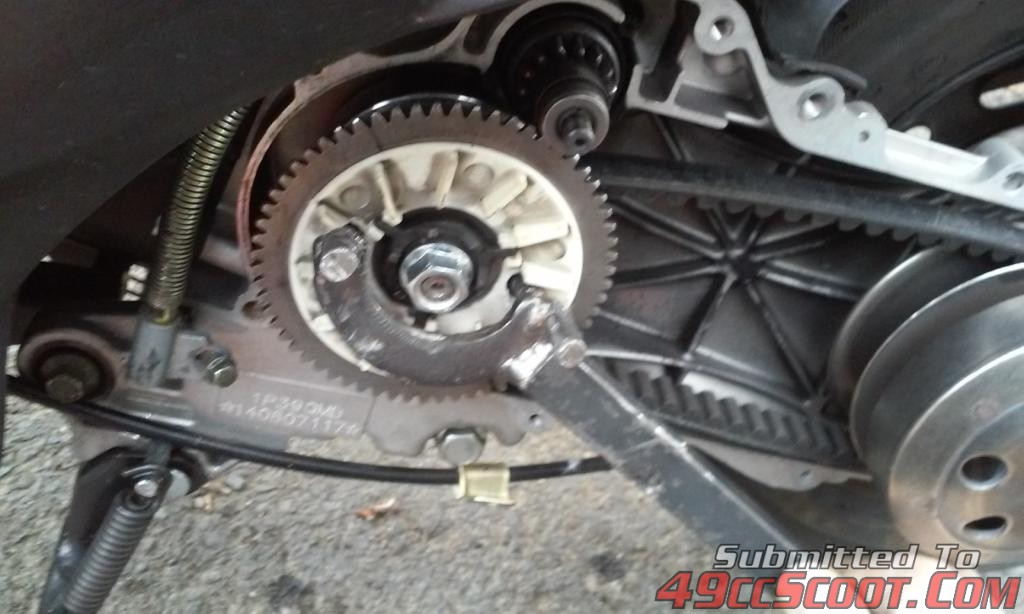 |
|
|
|
Post by niz76 on May 12, 2015 13:48:01 GMT -5
Hi all! I wanted to share this tool that I made to solve a common and often frustrating problem- Clutch Nut Removal! I do have a pnuematic impact gun but it's a wimpy little thing and I only have a small 6 gallon pancake compressor running it so it often can't break the factory torque of a clutch nut that's never been removed. Anyone that's been through the frustrating and often cussing inducing task of removing a stubborn clutch nut without the proper tools has probably said to themself "There's got to be a better way d@mm!t! Lol, Here's the simple tool I made to hold the clutch bell still so a stubborn nut can be removed fairly easily: 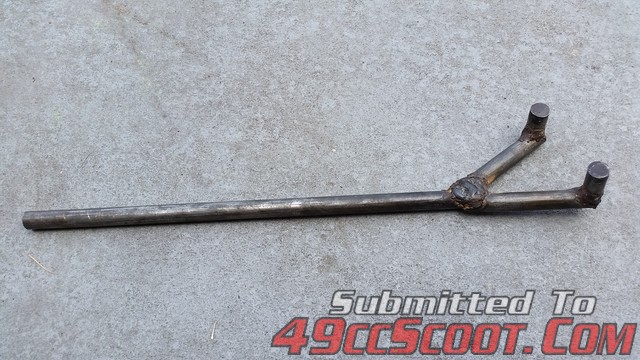 You do need a welder to make this tool and there may also be variations of this tool that do the same thing available at a tool supply store. I made this one out of (3/8" or 1/2") bar stock and welded it together- poorly! Hey the looks aren't important as long as it gets the job done and saves your sanity right? In the next pic I have it on an aftermarket clutch bell, but it does work with (I'm assuming most) stock clutch bells. 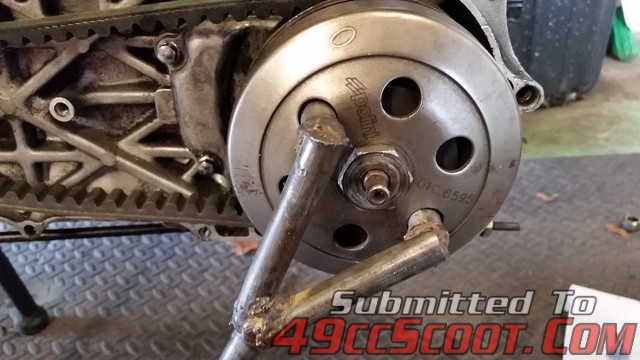 I just eyeballed it when I made it but the measurements are: Total length- 15 inches (even longer might be even better). Distance between "studs" center to center- 2 and 5/16 inches. Just stick the tool into the holes of the clutch bell, hold the scoot down if it tries to pop up and muscle that stubborn clutch nut off! (My clutch nut takes a 15/16" socket - I think a 24mm would do also??) 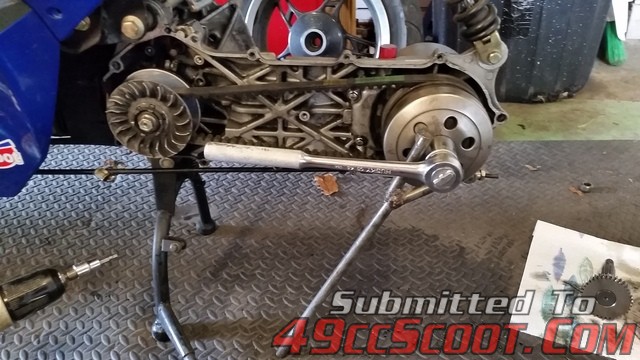 Now you're ready to tackle that project that's going to turn your scooter into a 200 mph fire breathing beast! 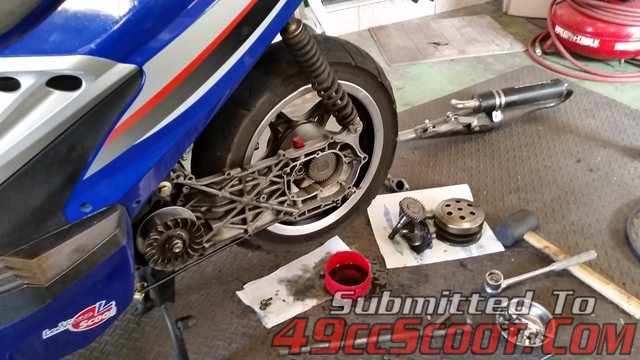 There ya go- Nothing groundbreaking, but a simple tool you can whip up real quick that may just save your sanity! ![]() |
|
|
|
Post by Upgrayedd on May 12, 2015 14:00:49 GMT -5
dude that's way better looking that mine  mine is a 3 foot piece of 1x4 with a couple long bolts ran thru around a holesawed opening over the bolt. it aint pretty. hehe |
|
|
|
Post by Fox on May 12, 2015 18:31:31 GMT -5
It aint gotta be pretty. Way back in 2006 when I got my first scooter all I had no money for tools but I did have a chain wrench that worked good for holding the bell. For the variator I found these pictures online and duplicated the procedure a few times til I finally got an impact. Talk about the dark ages... 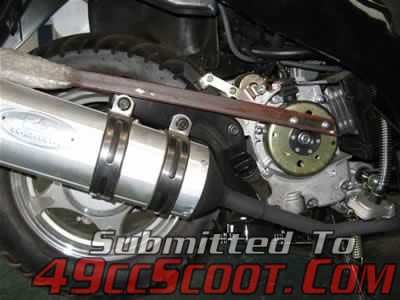  Then I went and got one of these 12V Emergency Tire Impacts from HF. It never fails to loosen up even the tightest ones. They are usually less than $30. I just replaced mine. The first one lasted about 5 years and I used it a lot. The best part is they run off a 12V battery so you don't need a compressor. A fully charged scooter battery is more than enough juice. 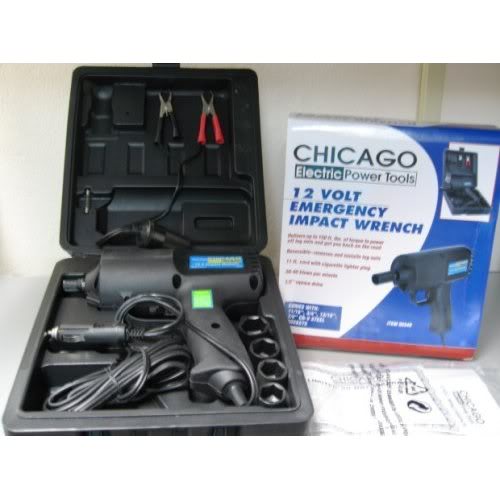 |
|
|
|
Post by oldgeek on Jan 17, 2016 22:51:14 GMT -5
I have been using this method to get the clutch and pulley assembly apart for a while now, it is really easy. First I use a pipe wrench to loosen the clutch nut by holding the assembly in my hands and tapping the handle of the wrench on a solid surface like a vise. A large adjustable wrench works well also. 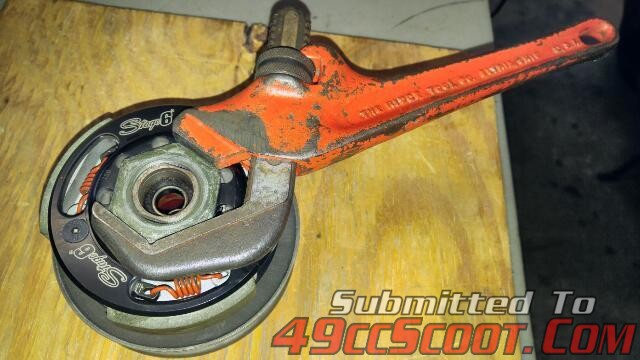 Then I use a piece of plywood with a hole in it to apply pressure to the clutch while removing the large nut with my fingers. 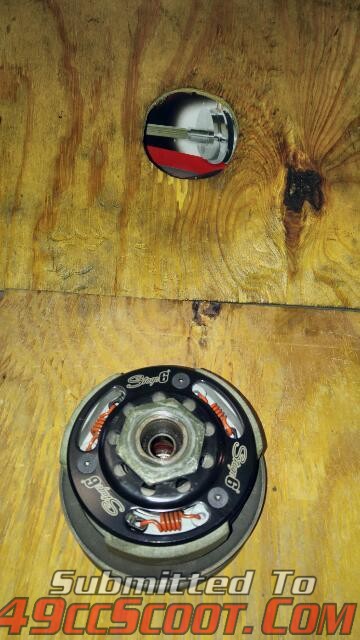 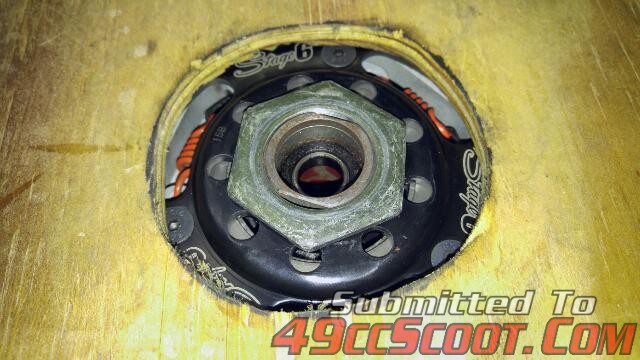 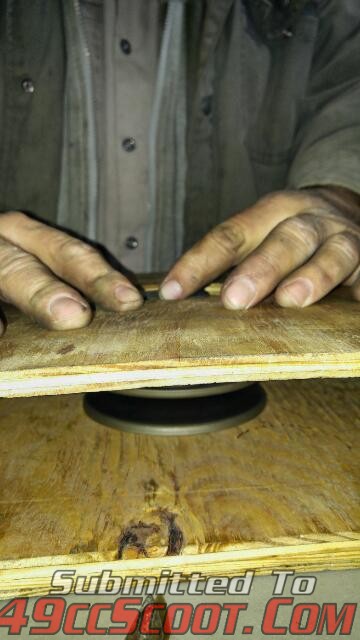 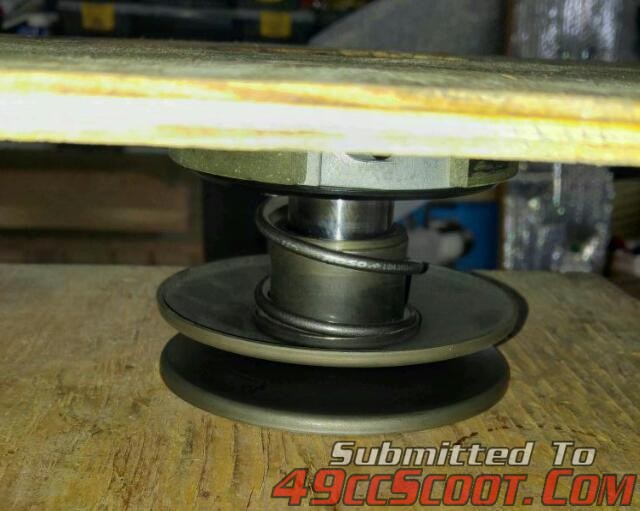 Do the reverse to put it all back together. I like to use a concrete block on the floor, turned on its end to set the clutch on. It becomes easy after you do it a couple times. It makes short work of changing even the stiffest contra spring. |
|


