|
|
Post by aznatama on Feb 9, 2013 3:18:53 GMT -5
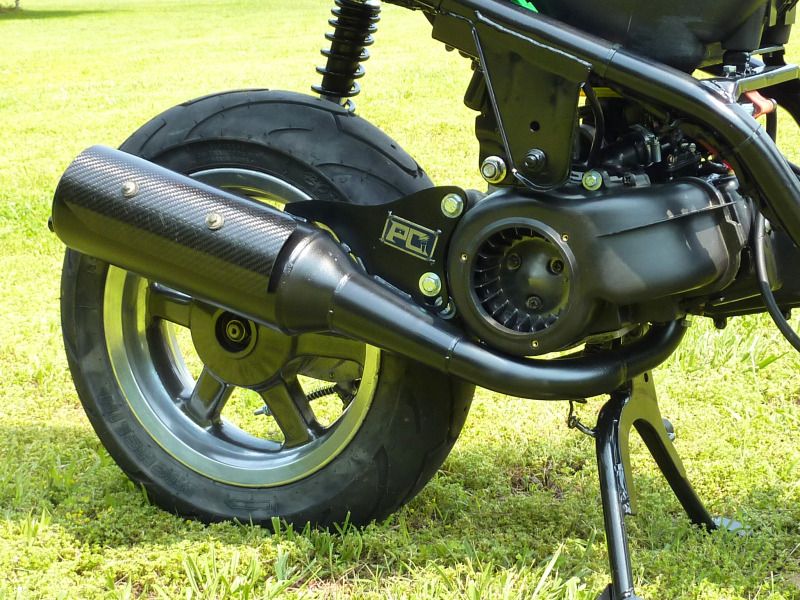
I'll be updating this as I go along. pics of the cylinder install aren't avail since they got deleted, but I'll try to put in more pics as I go along. Stock Specs: 2008 Benelli X50i, bought brand new w/ 1 mile on the clock, modding started w/ 40 miles on the clock 50cc AC 2T horizontal, 792belt length Parts being used: Stage6 Street Race iron bluck 70cc BBK Stage6 Pro Replica pipe Naraku High Speed Variator (included 4/5/6g weights) Naraku V/S 788 belt Naraku sport clutch w/ red springs Stage6 clutch springs (Orange/Red) Naraku Torque Control spring seat Naraku Torque Springs (included 1000/1500) Naraku 21mm black edition Dellorto clone (80~110 main jets available) Oversized fan wheel NGK BR8HS stock plug replacement for tuning NGK BR8HIX Iridium replacement for use after final tuning is done Cylinder install went easier than expected, I found out that inserting the cylinder w/ rings from the BOTTOM of the block was easier than from the top. The bottom is flared a bit, which made it much easier to insert the piston and rings w/o a ring compressor. Just need to make sure it's lined up properly. I had some issues w/ the stock pipe matching up so I couldn't test ride it until today, when the pro replica arrived.  Final set of parts arrived today, I can finally test ride!!  Wow, the fan really stands out, too bad it will be covered by the shroud. I also need to find a way to secure the rear hugger. Time to stop by home depot once I get this thing running since the metro doesn't go there. |
|
|
|
Post by aznatama on Feb 9, 2013 3:25:09 GMT -5
 Variator was installed by using a rad to block the piston when I was installing the BBK. Worked like a charm to block the piston. BBL install also included a new HD needle bearing, so I figure it would be fine this way. I kept the stock bushing, since it allowed the belt to move further down, thus improving acceleration, which is more important to me than top speed right now. I also started with 5g roller weights.  Clutch bell removal with the "Y" tool. Picture was taken when I installed the new spring, so the Naraku parts were already on there. This was easy w/ a 24mm socket  Clutch nut removal w/ the "Y" tool. I spent $10 and a HUGE crescent wrench, which fit over the clutch nut. This was also rather easy to remove. Loosed the nut as pictured, then take the clutch pack off, place on ground, compress w/ feet, and remove nut with fingers. |
|
|
|
Post by aznatama on Feb 9, 2013 3:33:05 GMT -5
 Stock rear pulley guide holes. The stock cap was a pain to take off. The new Naraku one went on rather smoothly. I used the stock on to push on the Naraku Torque Control, and tappes it w/ the back of my smaller wrench to make sure it seated properly. I used the stock grease that was already there since it's still relatively new.  Naraku 1000RPM spring and Torque Control. The Naraku spring is about 2x as long as the stock spring. Interesting.  All put back together now. The nut is just hand-tightened. If it's not properly tightened all the way, it will contact the clutch bell, so since I had no socket this large, I just kept tightening it until it cleared the clutch bell when installed, and made sure it was rather snug. Clutch bell went on and torqued to 45 ft-lb. |
|
|
|
Post by aeroxbud on Feb 9, 2013 5:10:15 GMT -5
That fan is too nice to be covered up!
I would want the clutch nut tight. I brought a socket just for that, and you know you will never ever use it for anything else. It's so big!
|
|
|
|
Post by 90GTVert on Feb 9, 2013 9:19:12 GMT -5
A lot of us remove the outer cover and cut the grill out of our fan shrouds. I've been running all of mine that way pretty much as long as I've been scooting.  |
|
|
|
Post by oldgeek on Feb 9, 2013 10:54:25 GMT -5
All put back together now. The nut is just hand-tightened. If it's not properly tightened all the way, it will contact the clutch bell, so since I had no socket this large, I just kept tightening it until it cleared the clutch bell when installed, and made sure it was rather snug. Clutch bell went on and torqued to 45 ft-lb. 90GTVert has a thread somewhere that shows how to use a vice to gently hold the clutch nut while loosening/tightening the assembly. I have to use a friends vice, but it works well for me. |
|
|
|
Post by PIG on Feb 9, 2013 13:08:07 GMT -5
A lot of us remove the outer cover and cut the grill out of our fan shrouds. I've been running all of mine that way pretty much as long as I've been scooting.  +1 I've had no issues either running like that. Attachments:
|
|
|
|
Post by aznatama on Feb 9, 2013 14:05:33 GMT -5
That fan is too nice to be covered up! I would want the clutch nut tight. I brought a socket just for that, and you know you will never ever use it for anything else. It's so big! Yes, but I'd rather not have little rocks or whatnot make its way into that area. Perhaps I will eventually get around to replacing it w/ a screen, but for now, it remains covered up until I have time to deal with that part. As for the clutch nut, it was tightened rather tightly after I put it back on. The huge crescent wrench was $10, and cheaper than a comparably sized socket. I don't have a vice, bench to put it on, strap, etc. All this work is being done in the underground parking structure of my apartment complex. |
|
|
|
Post by aznatama on Feb 10, 2013 3:11:05 GMT -5
Well, I put the halogens back in, since I need some soldering tools which are on the other coast. I'll live with it like this until I get m tools and can retrofit the HIDs properly. :-( Now, these ugly turn signal things...  the 2010+ scooters have LED signals built into the fairings front and rear. The 08-09 just have a smoked empty lens in those locations. I wish I could find the OEM parts to just plug and play. Anyways, I went ahead and got a strip of waterproof amber LEDs and siliconed them into the housing. You can see the LEDs here, but w/o shining a bright LED flashlight into the housing, you can't see anything, and when turned on, they shine through nicely. I just need to figure out what to do with the rear now.  I also used a pocketknife to "drill" a hole for the S6 manual choke. I'm not really liking this choke since the lever is plastic, and it's rather hard to flip it up. Feels like I'm going to break it. Perhaps I'll need to try attacking a keyring to it so I have some more leverage to pull it at an angle.  |
|
|
|
Post by aznatama on Feb 18, 2013 3:41:18 GMT -5
Was riding home tonight in sub freezing temps, scooter was loving the cold air because I think I was jetted pretty rich. Was holding 45 on the speedo at about 2/3 throttle when I soft seized... pulled over, waited a minute, kickstarted it, and it came right to life again. Took it easy under 1/2 throttle the rest of the way home. Scooter has about 120km on it right now. Iron block seems like it takes longer to break in. Oh well, time to pull the head for inspection as well as some variator tuning Yup, looks like I'm running rich. More carbon on the exhaust side... wow. The head cleaned right up with a quick spray of carb cleaner and wipe down w/ a rag.  carb build-up on the piston was a bit more stuck-on. couldn't get it off w/ the carb cleaner or rubbing w/ a rag. I think I need to scrub it off with something abrasive, but I don't have anything available righ tnow. I just left it as-is   I re-assembled, torqued head bolts to 15ft-lb, and checked compression... 140psi... same as stock. nice. |
|
|
|
Post by aznatama on Feb 18, 2013 3:46:40 GMT -5
Time for variator adjustments... Swapped out the 5.5g weights for 5g weights. Stock drive boss was 38.33mm, Naraku high speed kit drive boss was 36.66. I decided to add 0.9mm of spacers between the drive boss and the variator backing plate to meet in the middle. Should be at 37.56mm now. I ended up using the stock 1mm washer between the variator fan and castle nut since the shorter drive boss didn't allow the castle nut to tighten against the variator fan. Stock  Naraku  Naraku variator tuning washers (0.2+0.2+0.5  |
|
|
|
Post by aznatama on Feb 18, 2013 3:49:49 GMT -5
My case appears to be different from the other chinese scooters as well as the jog... The buzzetti variator tool doesn't work at all. (see for sale section)  Also, I noticed this scuff mark on the variator fan. Not sure how this happened, speculating that using the stock drive boss before was causing the belt to sit too low/loose and the kevlar fibers started wearing away at this spot? not sure, but the boss is shorter now, so this shoudln't be a concern  |
|
|
|
Post by ottootto on Feb 18, 2013 7:00:30 GMT -5
really great job , not a fan of those spring slider coz they need a lot of a care
but when working well life of spring is easy and performance improve
|
|
|
|
Post by kevin55950 on Feb 18, 2013 13:56:28 GMT -5
|
|


