Trail Tech Vapor Information And Installation Help
Apr 17, 2014 12:48:45 GMT -5
wolfbat3, niz76, and 1 more like this
Post by 90GTVert on Apr 17, 2014 12:48:45 GMT -5
Trail Tech Vapor Information And Installation Help
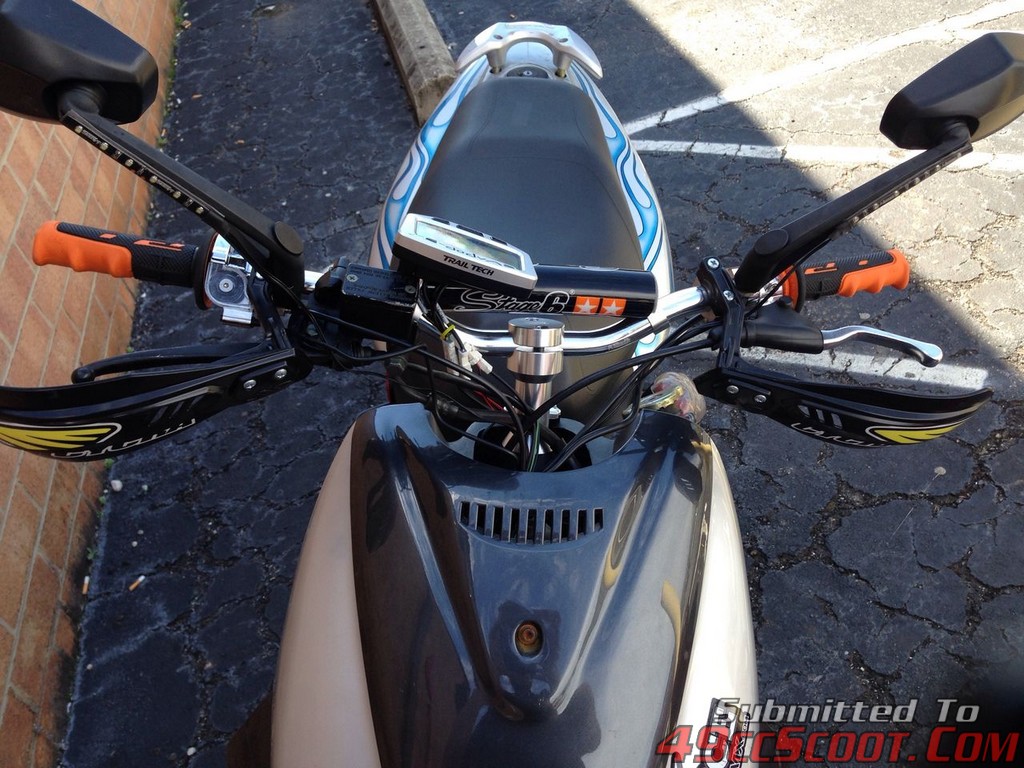
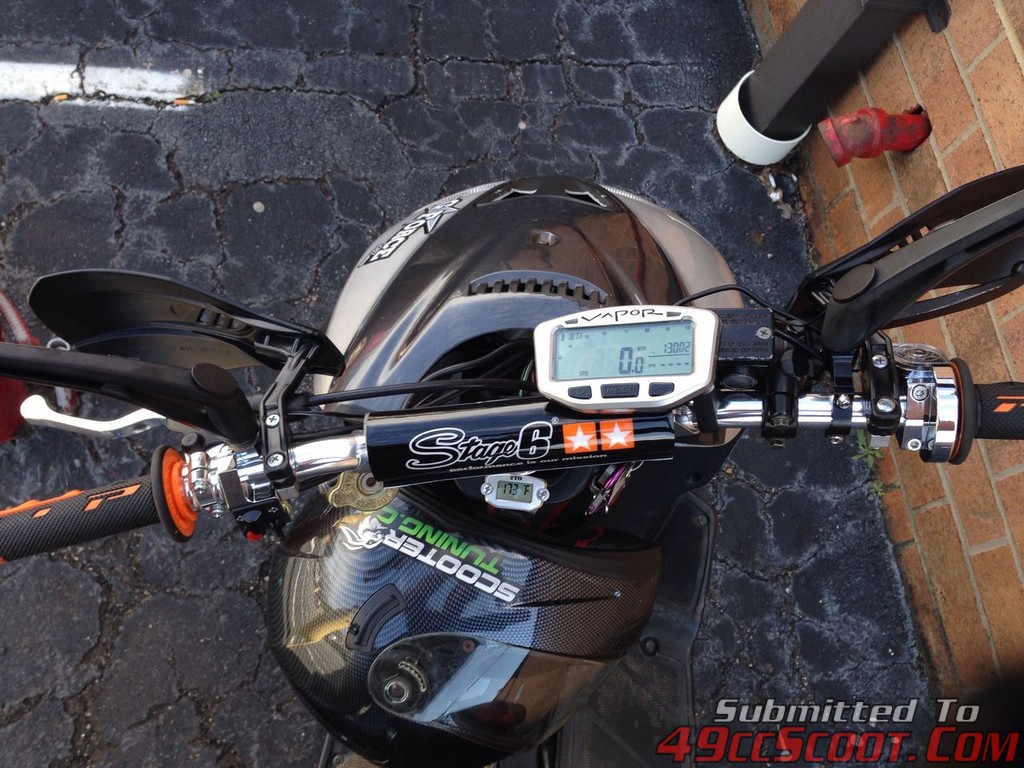
I've had a lot of questions about installing and using the Trail Tech Vapor since I started using one on my TaoTao ATM50-A1. I didn't detail every aspect of the installation when I did it, but I did take a few pics and I can provide some possibly helpful info, so that's what I'll try to do here.
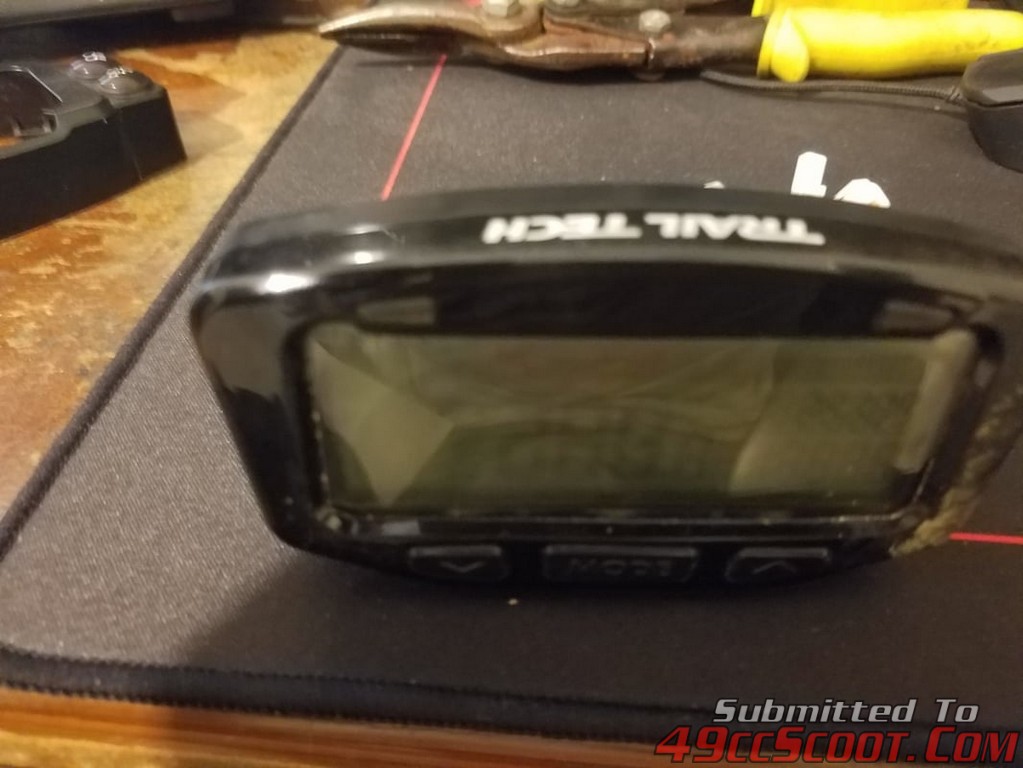
I got the TrailTech Vapor kit as an open box special for $70 shipped on eBay. It displays speed, RPM, one temperature input, and ambient air temperature. You could use one of their senders to monitor the temperature of a lot of things, but most of us with air cooled Chinese scooters will use it for cylinder head temperature. It also has an odometer, trip odometer, hour meter, and more. It records max speed, RPM, temperature, and distance that can be recalled until the info is reset.
I have been very pleased with my Trail Tech Vapor. It's easy to read day or night and as long as it's setup and calibrated properly it seems to be very accurate.
The Vapor is available in a lot of kits with various senders and accessories. If you look through their listings of kits, they sell many combinations that include different temperature sensors, speedometer pickups and magnets, cable lengths, and mounting hardware.
Temperature Sensors
For the typical air-cooled Chinese scooter you will either need a 10mm or 14mm cylinder head temperature (CHT) thermocouple that goes between the spark plug and the cylinder head. The 1E40QMB Minarelli/Jog clone two-stroke engines require the 14mm thermocouple (#7500-3014). The 139QMB and GY6 125-150cc engines use the smaller 10mm thermocouple (#7500-3010). There is also a 12mm thermocouple (#7500-3012). If you have a different type of air-cooled engine, decoding the spark plug's part number should tell you the size or you can measure the diameter of the threaded portion of the plug.

If your scooter is liquid-cooled, Trail Tech has a couple of options for keeping track of coolant temp (or you can monitor CHT just as the air-cooled engines mentioned above). They have a couple of thread-in probes (#V300-001, V300-003) that may fit an existing spot or you could possibly drill and tap a new hole for the sender. They also have senders than can be placed inline with the coolant hoses in sizes from 16mm to 25mm diameter (#7500-3041, 7500-3052, 7500-3060, 7500-3076).
If the CHT sensor leads are not long enough, do not extend them yourself. Use an appropriate extension from Trail Tech. When I installed the Vapor on my TaoTao I tried soldering in wire to make my own extension. This resulted in a temperature sensor that would not work on a regular basis. Sometimes it would, sometimes it wouldn't. Others have reported the same result when making their own extensions. I switched to using an extension from Trail Tech and the CHT has worked great ever since. They have temp sensor extensions from 12" to 72" in length (#V300-12, V300-24, V300-48, V300-72).
Speed Sensors
When choosing a speed sensor there are a couple of basic designs in their kits. You'll find a variety of sensors that are meant to attach to forks or mount beside the wheel or brake. There are lots to look at, but check out part #704-06 for an example. The other style is a thread in where the head of the threaded portion needs to face and align with whatever magnet you will be using. You can see an example of this style by checking out part #101-06. Trail Tech's site has a listing of all speed sensors they offer and they show pictures of each sender as well as a sample mounting pic for each.
You will also need to consider which magnet you can use with your speed sensor. The magnet mounts to the wheel or brake rotor and triggers the speed sensor each time it passes. It's very important that the magnet and speed sensor you choose can be mounted so they are aligned and close enough to work (1/2" or less, but with adequate clearance so the magnet and sensor don't make contact). They have a selection of magnet kits that can be installed into brake rotors or glued onto wheels or rotors and even bolts with magnet heads that may replace existing brake rotor bolts in some cases. They have a full listing of magnet kits on their site to browse. I have used a magnet that clips on through the brake rotor and I've epoxied magnets to the wheel in the past with success.
Here is the installation rotor-mounted magnet (#R011-XR) and the speed sensor (#401-06) I used on my TaoTao ATM50. I started out by drilling a hole in the rotor for the magnet, but the rotor was maybe 0.5mm or so too thick for it to work that way. I had to use a larger bit to sort of countersink it so that the clip could be installed on the backside.


I was lucky enough to have a bracket with 2 bends very close to what I needed in it from an old shifter from my car. I cut it down to size and tweaked the bends just a bit. Drilled a couple of holes and painted. Worked out pretty well. With basic metal skills you could cut and bend your own bracket for something like this or some mounting options may be able to make use of a simple L bracket. Other sensors are able to stick onto the fork or some may be zip-tied.

You can see the alignment here is not 100% perfect. Shoot for perfect, but being a tiny bit off like this has worked flawlessly for me for over 2,000 miles at the time of this article. What you may also notice in this picture is that the brake rotor bolts are pretty much flush on the rotor. For this reason most of the magnet-head bolts from Trail Tech won't work because there will be insufficient clearance and they won't fit in the rotor properly. Your scooter may be different, but look everything over before you make any decisions.

I have not tried extending a speedometer sensor lead, but I would suggest using a Trail Tech extension if your sensor wiring is not long enough. They offer 28" to 60" extensions (#V700-24, V700-48, V700-60).
Refer to Trail Tech's instruction manual to calibrate the speedometer properly. I used their methods and with some fine tuning the Vapor matches up to my GPS and RADAR readings.
Tachometer Leads
The tachometer leads are pretty universal as far as I know for the Trail Tech kits, though I believe they come in different lengths. Most (or all?) will have a red and black wire. The black wire needs to be attached to a ground. This can be spliced into an existing ground wire which is usually solid black or green, but always check first. You could also attach the black wire to a good engine or frame ground. The red wire can be used in two different ways. Perhaps the simplest option is to wrap the red wire around your spark plug wire. Trail Tech recommends 5 wraps as a starting point, and I've had good luck with this method with Trail Tech tachs. You may want to wrap over it with electrical tape after you're sure you have a good signal, just to ensure it stays secure on the wire.
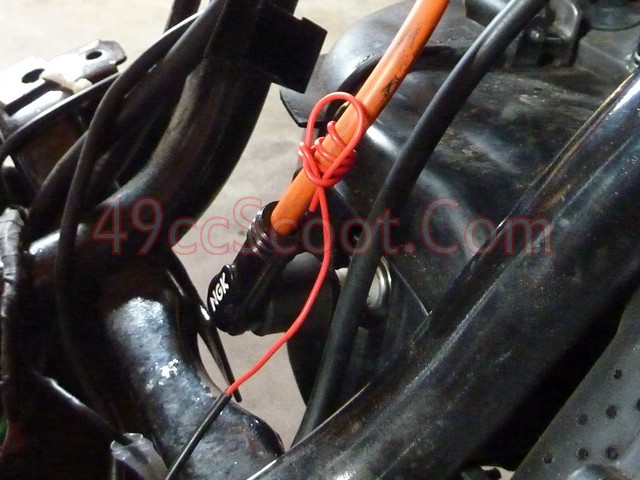
The other option is to connect the red RPM signal wire directly to the positive side of the ignition coil or the wire leading to it. I spliced and soldered mine into the black wire with a yellow stripe on my TaoTao and it has worked flawlessly. Wire colors will vary, so either attach right at the + side of the ignition coil or trace the wire connected to it back to a more convenient spot to splice in. You may want to make a temporary connection before soldering, crimping, or sealing it up to be sure it works.

Extending the tach leads by soldering on additional wire should not be an issue, but I have not had to try it to tell you from experience.
Setting up the Trail Tech is described in detail in the instructions, but I wanted to mention one thing that may throw some off. If you have a four-stroke scooter, many of them use what is often called a "wasted spark" ignition. The ignition fires on every rotation instead of every other rotation. If you have a wasted spark ignition (139QMB and GY6 150 are two very common examples) you will need to set the Vapor to 1 pulse per revolution to get a proper RPM reading.
Power Leads
Powering the Vapor is no more complex than pretty much any other electrical accessory you would install. It has red and black power leads. The black wire needs to be connected to a good ground source. This has already been covered in the previous section about the tachometer signal. The red wire will be connected to the positive side of the battery in most cases. Trail Tech suggests connecting a 0.5 amp fuse between the battery and the Vapor. You should be fine connecting the Trail Tech to constant power as they suggest. It does not draw enough power to drain the battery when your scooter isn't running in normal conditions with a healthy battery. The Vapor could be powered directly off of the stator if your scooter has been converted to running without a battery for some reason (most often racing applications).
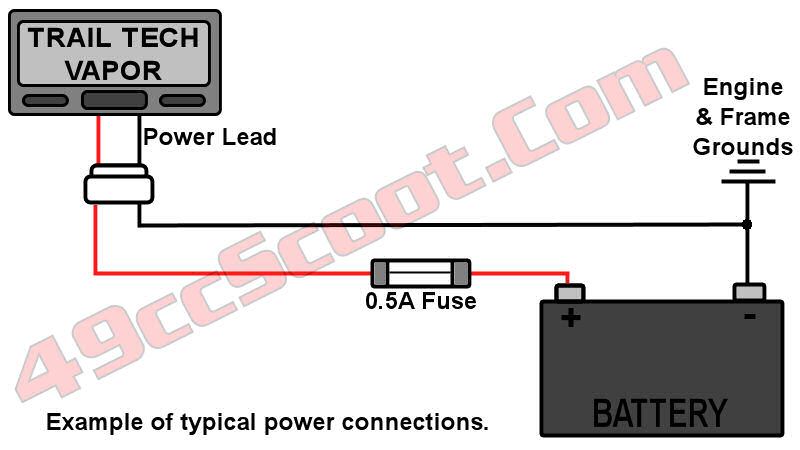
Extending the power leads with the usual methods (soldering, connectors) should not be an issue.
Mounting Solutions
Mounting the Vapor can be accomplished in quite a few ways and you really can get creative here. The most basic mounting solution is to use Trail Tech's #7000-1000 mounting kit that comes with many of their Vapor kits to mount the unit to the handlebars. This will probably be pretty straight-forward on bare-barred scooters, but may prove more difficult on scooters with the handlebars totally covered by controls and plastics. The Vapor does have threaded inserts for M4 bolts on the back of it so it can be secured to a flat surface. The instruction manual provides a template to make installation easier. Trail Tech also makes brackets that help you mount the Vapor to vertical surfaces, protectors, and even dashboards with indicator lights that you can wire in to work in place of existing indicators. You can check those out HERE.
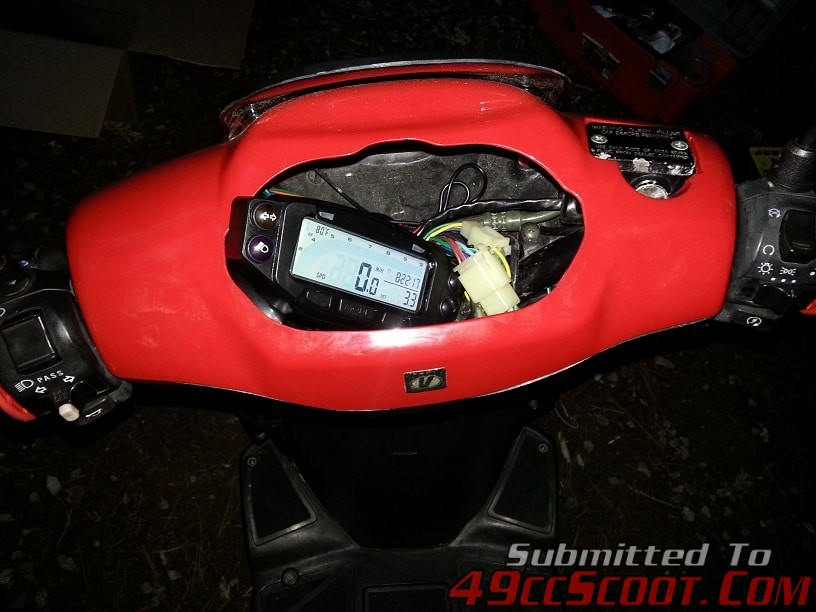
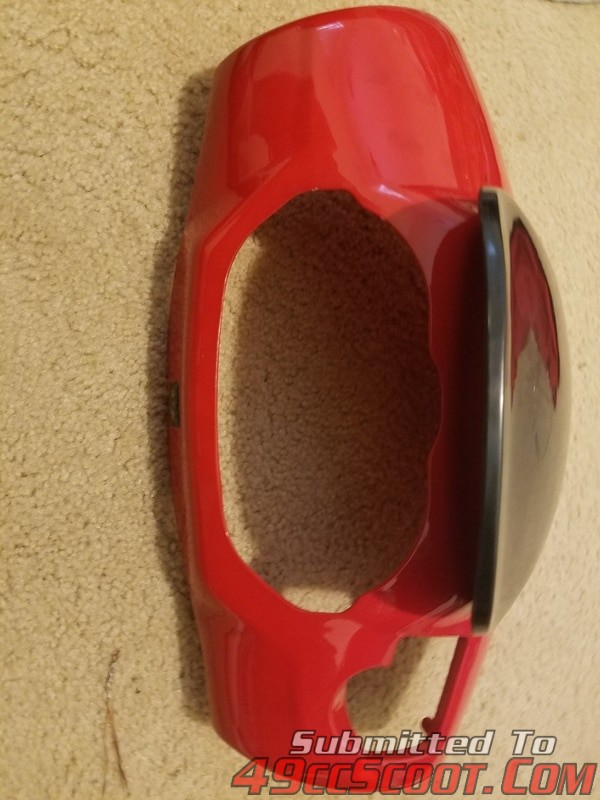
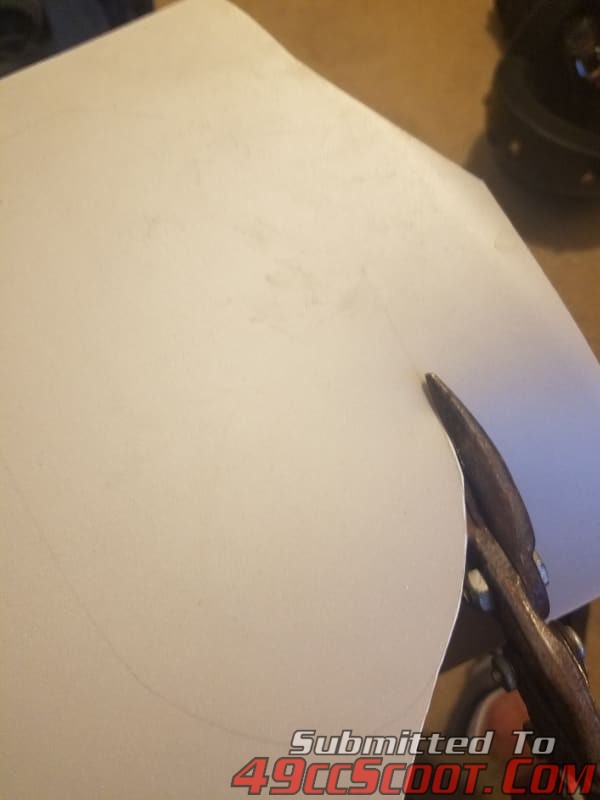
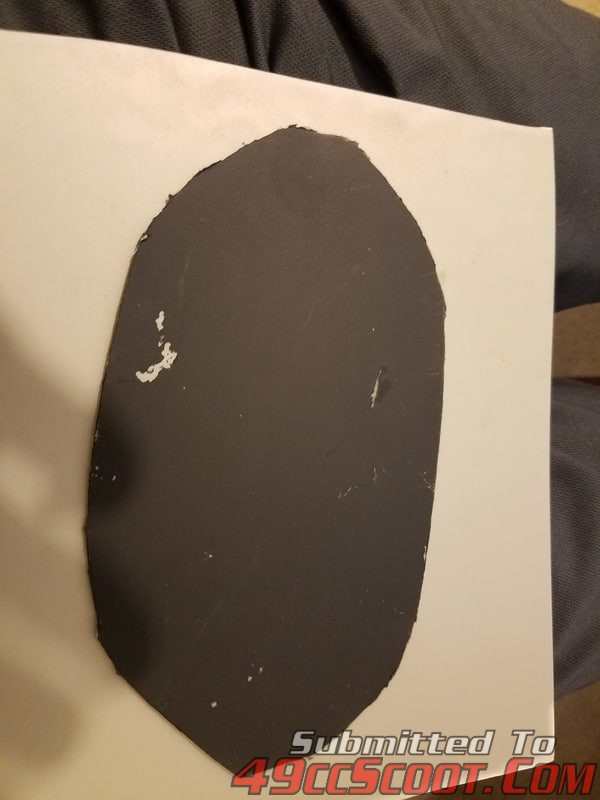
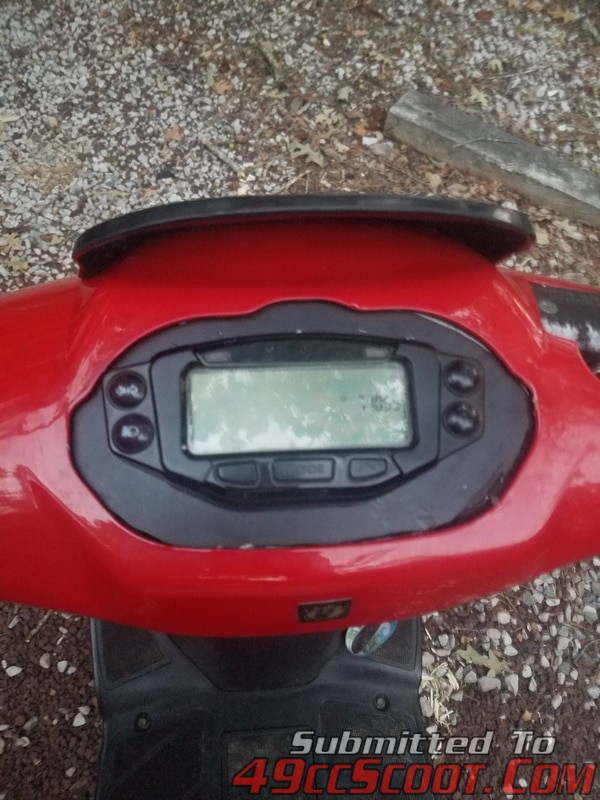
You may be able to make adapters of your own or modify an existing instrument cluster to mount the Vapor. I used a sheet of 1/4" ABS cut to fit under the panel that held the original cluster on my TaoTao ATM50-A1. I used some Plastic Welder to glue it to the stock plastic from the underside. I didn't have a lot so after it cured I added some other 2 part epoxy that I had around. It looks a mess under there, but it's pretty sturdy and has held up for the better part of a year at the time of this article. There are two holes drilled through the ABS that match up to the Vapor's M4 mounting points to secure it to the panel. I used panel mount LEDs I found online to replace the stock high beam and turn signal indicators.


Manuals
Trail Tech Vapor Instruction Manual
www.49ccscoot.com/manuals/Trail_Tech_Vapor_Instructions.pdf
More Wiring Information From Trail Tech
www.49ccscoot.com/manuals/TrailTechWiring.pdf
This is a chart from Trail Tech for checking resistance values at various temperatures for their spark plug thermocouples.
www.49ccscoot.com/manuals/trailtechtempsensorchart.pdf
You can find even more manuals to download at www.trailtech.net .
Which Kit Do I Need?
A lot of people ask me which Trail Tech kit is best for their scooter. I chose mine by seeing what was available at a low price on eBay and then checking the part number and what came with the kit on Trail Tech's site. The kit I used was #752-402 which is for Honda XR250R and other dirtbikes. It had components that worked out alright on my TaoTao, but it won't work for all scooters and may not be the best choice. Please note that the speed sensor shown on my TaoTao above is not what is normally included in the 752-402 kit. Since mine was an open box, I'm guessing it was switched or packaged improperly. That kit should have included the stick on sensor (704-06). I have since purchased 2 more of this kit, each including the 704-06 speed sensor. I contacted Trail Tech and asked for some recommendations for Vapor kits that may work for scooters and here's the information that was passed along to me :
"We have a few different Vapor kits that will work for scooter applications. The one most commonly used is our Honda Ruckus kit which includes a 12mm CHT sensor. www.trailtech.net/75-603
The next most common kit our generic conventional fork kit. This kit also includes a 12mm CHT sensor. www.trailtech.net/75-704
If you need a kit that includes a 10mm CHT sensor than I would recommend this kit. www.trailtech.net/75-402
Another popular meter for scooters is our Endurance II. It is more basic as it only display speed, distance, and time. They are only $84.95 retail and are much easier to install since you only need to connect power and the wheel sensor. You can always have people email us directly to find out what would work best for their specific application(s).
www.trailtech.net/digital-gauges/endurance-ii "
I should add here that you may notice the kit I used is 752-402 and the kit that was suggested by Trail Tech was 75-402. The Vapor is available in silver or black. Adding the 2 after 75 seems to designate the same kit in black.
I've had a lot of questions about installing and using the Trail Tech Vapor since I started using one on my TaoTao ATM50-A1. I didn't detail every aspect of the installation when I did it, but I did take a few pics and I can provide some possibly helpful info, so that's what I'll try to do here.
I got the TrailTech Vapor kit as an open box special for $70 shipped on eBay. It displays speed, RPM, one temperature input, and ambient air temperature. You could use one of their senders to monitor the temperature of a lot of things, but most of us with air cooled Chinese scooters will use it for cylinder head temperature. It also has an odometer, trip odometer, hour meter, and more. It records max speed, RPM, temperature, and distance that can be recalled until the info is reset.
I have been very pleased with my Trail Tech Vapor. It's easy to read day or night and as long as it's setup and calibrated properly it seems to be very accurate.
The Vapor is available in a lot of kits with various senders and accessories. If you look through their listings of kits, they sell many combinations that include different temperature sensors, speedometer pickups and magnets, cable lengths, and mounting hardware.
Temperature Sensors
For the typical air-cooled Chinese scooter you will either need a 10mm or 14mm cylinder head temperature (CHT) thermocouple that goes between the spark plug and the cylinder head. The 1E40QMB Minarelli/Jog clone two-stroke engines require the 14mm thermocouple (#7500-3014). The 139QMB and GY6 125-150cc engines use the smaller 10mm thermocouple (#7500-3010). There is also a 12mm thermocouple (#7500-3012). If you have a different type of air-cooled engine, decoding the spark plug's part number should tell you the size or you can measure the diameter of the threaded portion of the plug.

If your scooter is liquid-cooled, Trail Tech has a couple of options for keeping track of coolant temp (or you can monitor CHT just as the air-cooled engines mentioned above). They have a couple of thread-in probes (#V300-001, V300-003) that may fit an existing spot or you could possibly drill and tap a new hole for the sender. They also have senders than can be placed inline with the coolant hoses in sizes from 16mm to 25mm diameter (#7500-3041, 7500-3052, 7500-3060, 7500-3076).
If the CHT sensor leads are not long enough, do not extend them yourself. Use an appropriate extension from Trail Tech. When I installed the Vapor on my TaoTao I tried soldering in wire to make my own extension. This resulted in a temperature sensor that would not work on a regular basis. Sometimes it would, sometimes it wouldn't. Others have reported the same result when making their own extensions. I switched to using an extension from Trail Tech and the CHT has worked great ever since. They have temp sensor extensions from 12" to 72" in length (#V300-12, V300-24, V300-48, V300-72).
Speed Sensors
When choosing a speed sensor there are a couple of basic designs in their kits. You'll find a variety of sensors that are meant to attach to forks or mount beside the wheel or brake. There are lots to look at, but check out part #704-06 for an example. The other style is a thread in where the head of the threaded portion needs to face and align with whatever magnet you will be using. You can see an example of this style by checking out part #101-06. Trail Tech's site has a listing of all speed sensors they offer and they show pictures of each sender as well as a sample mounting pic for each.
You will also need to consider which magnet you can use with your speed sensor. The magnet mounts to the wheel or brake rotor and triggers the speed sensor each time it passes. It's very important that the magnet and speed sensor you choose can be mounted so they are aligned and close enough to work (1/2" or less, but with adequate clearance so the magnet and sensor don't make contact). They have a selection of magnet kits that can be installed into brake rotors or glued onto wheels or rotors and even bolts with magnet heads that may replace existing brake rotor bolts in some cases. They have a full listing of magnet kits on their site to browse. I have used a magnet that clips on through the brake rotor and I've epoxied magnets to the wheel in the past with success.
Here is the installation rotor-mounted magnet (#R011-XR) and the speed sensor (#401-06) I used on my TaoTao ATM50. I started out by drilling a hole in the rotor for the magnet, but the rotor was maybe 0.5mm or so too thick for it to work that way. I had to use a larger bit to sort of countersink it so that the clip could be installed on the backside.


I was lucky enough to have a bracket with 2 bends very close to what I needed in it from an old shifter from my car. I cut it down to size and tweaked the bends just a bit. Drilled a couple of holes and painted. Worked out pretty well. With basic metal skills you could cut and bend your own bracket for something like this or some mounting options may be able to make use of a simple L bracket. Other sensors are able to stick onto the fork or some may be zip-tied.

You can see the alignment here is not 100% perfect. Shoot for perfect, but being a tiny bit off like this has worked flawlessly for me for over 2,000 miles at the time of this article. What you may also notice in this picture is that the brake rotor bolts are pretty much flush on the rotor. For this reason most of the magnet-head bolts from Trail Tech won't work because there will be insufficient clearance and they won't fit in the rotor properly. Your scooter may be different, but look everything over before you make any decisions.

I have not tried extending a speedometer sensor lead, but I would suggest using a Trail Tech extension if your sensor wiring is not long enough. They offer 28" to 60" extensions (#V700-24, V700-48, V700-60).
Refer to Trail Tech's instruction manual to calibrate the speedometer properly. I used their methods and with some fine tuning the Vapor matches up to my GPS and RADAR readings.
Tachometer Leads
The tachometer leads are pretty universal as far as I know for the Trail Tech kits, though I believe they come in different lengths. Most (or all?) will have a red and black wire. The black wire needs to be attached to a ground. This can be spliced into an existing ground wire which is usually solid black or green, but always check first. You could also attach the black wire to a good engine or frame ground. The red wire can be used in two different ways. Perhaps the simplest option is to wrap the red wire around your spark plug wire. Trail Tech recommends 5 wraps as a starting point, and I've had good luck with this method with Trail Tech tachs. You may want to wrap over it with electrical tape after you're sure you have a good signal, just to ensure it stays secure on the wire.

The other option is to connect the red RPM signal wire directly to the positive side of the ignition coil or the wire leading to it. I spliced and soldered mine into the black wire with a yellow stripe on my TaoTao and it has worked flawlessly. Wire colors will vary, so either attach right at the + side of the ignition coil or trace the wire connected to it back to a more convenient spot to splice in. You may want to make a temporary connection before soldering, crimping, or sealing it up to be sure it works.

Extending the tach leads by soldering on additional wire should not be an issue, but I have not had to try it to tell you from experience.
Setting up the Trail Tech is described in detail in the instructions, but I wanted to mention one thing that may throw some off. If you have a four-stroke scooter, many of them use what is often called a "wasted spark" ignition. The ignition fires on every rotation instead of every other rotation. If you have a wasted spark ignition (139QMB and GY6 150 are two very common examples) you will need to set the Vapor to 1 pulse per revolution to get a proper RPM reading.
Power Leads
Powering the Vapor is no more complex than pretty much any other electrical accessory you would install. It has red and black power leads. The black wire needs to be connected to a good ground source. This has already been covered in the previous section about the tachometer signal. The red wire will be connected to the positive side of the battery in most cases. Trail Tech suggests connecting a 0.5 amp fuse between the battery and the Vapor. You should be fine connecting the Trail Tech to constant power as they suggest. It does not draw enough power to drain the battery when your scooter isn't running in normal conditions with a healthy battery. The Vapor could be powered directly off of the stator if your scooter has been converted to running without a battery for some reason (most often racing applications).

Extending the power leads with the usual methods (soldering, connectors) should not be an issue.
Mounting Solutions
Mounting the Vapor can be accomplished in quite a few ways and you really can get creative here. The most basic mounting solution is to use Trail Tech's #7000-1000 mounting kit that comes with many of their Vapor kits to mount the unit to the handlebars. This will probably be pretty straight-forward on bare-barred scooters, but may prove more difficult on scooters with the handlebars totally covered by controls and plastics. The Vapor does have threaded inserts for M4 bolts on the back of it so it can be secured to a flat surface. The instruction manual provides a template to make installation easier. Trail Tech also makes brackets that help you mount the Vapor to vertical surfaces, protectors, and even dashboards with indicator lights that you can wire in to work in place of existing indicators. You can check those out HERE.
You may be able to make adapters of your own or modify an existing instrument cluster to mount the Vapor. I used a sheet of 1/4" ABS cut to fit under the panel that held the original cluster on my TaoTao ATM50-A1. I used some Plastic Welder to glue it to the stock plastic from the underside. I didn't have a lot so after it cured I added some other 2 part epoxy that I had around. It looks a mess under there, but it's pretty sturdy and has held up for the better part of a year at the time of this article. There are two holes drilled through the ABS that match up to the Vapor's M4 mounting points to secure it to the panel. I used panel mount LEDs I found online to replace the stock high beam and turn signal indicators.


Manuals
Trail Tech Vapor Instruction Manual
www.49ccscoot.com/manuals/Trail_Tech_Vapor_Instructions.pdf
More Wiring Information From Trail Tech
www.49ccscoot.com/manuals/TrailTechWiring.pdf
This is a chart from Trail Tech for checking resistance values at various temperatures for their spark plug thermocouples.
www.49ccscoot.com/manuals/trailtechtempsensorchart.pdf
You can find even more manuals to download at www.trailtech.net .
Which Kit Do I Need?
A lot of people ask me which Trail Tech kit is best for their scooter. I chose mine by seeing what was available at a low price on eBay and then checking the part number and what came with the kit on Trail Tech's site. The kit I used was #752-402 which is for Honda XR250R and other dirtbikes. It had components that worked out alright on my TaoTao, but it won't work for all scooters and may not be the best choice. Please note that the speed sensor shown on my TaoTao above is not what is normally included in the 752-402 kit. Since mine was an open box, I'm guessing it was switched or packaged improperly. That kit should have included the stick on sensor (704-06). I have since purchased 2 more of this kit, each including the 704-06 speed sensor. I contacted Trail Tech and asked for some recommendations for Vapor kits that may work for scooters and here's the information that was passed along to me :
"We have a few different Vapor kits that will work for scooter applications. The one most commonly used is our Honda Ruckus kit which includes a 12mm CHT sensor. www.trailtech.net/75-603
The next most common kit our generic conventional fork kit. This kit also includes a 12mm CHT sensor. www.trailtech.net/75-704
If you need a kit that includes a 10mm CHT sensor than I would recommend this kit. www.trailtech.net/75-402
Another popular meter for scooters is our Endurance II. It is more basic as it only display speed, distance, and time. They are only $84.95 retail and are much easier to install since you only need to connect power and the wheel sensor. You can always have people email us directly to find out what would work best for their specific application(s).
www.trailtech.net/digital-gauges/endurance-ii "
I should add here that you may notice the kit I used is 752-402 and the kit that was suggested by Trail Tech was 75-402. The Vapor is available in silver or black. Adding the 2 after 75 seems to designate the same kit in black.


