Fork Oil Change, Stiffening Forks, Seal Replacement & More
Jun 23, 2014 18:57:10 GMT -5
Fox, craisin, and 5 more like this
Post by Upgrayedd on Jun 23, 2014 18:57:10 GMT -5
Here's a quick guide for flushing your forks/changing your fork oil, and adding a spacer to your forks to stiffen them up if needed.
First thing is to get to the forks. I start by unbolting the brake caliper:
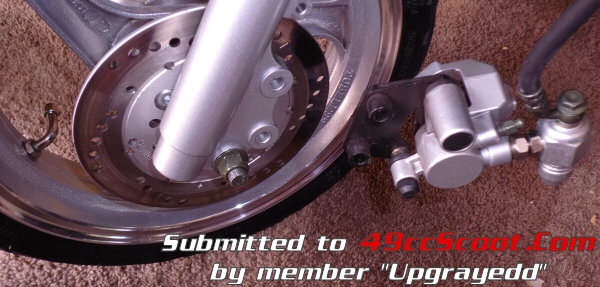
Then unhook your speedometer cable. Let those 2 lines hang.
Next, remove your front wheel.
Now you need to remove the front fairing/body panels that are covering the top of your fork tree. On mine, it is two pieces of body plastic.
At this point you should be able to get to where the forks bolt in. I start with removing the bolts that clamp the forks in place:
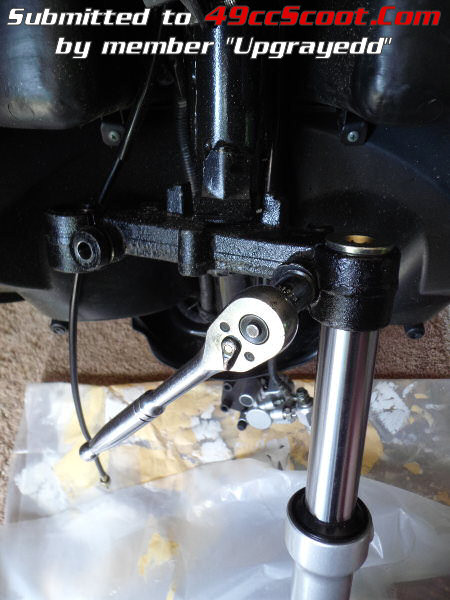
On my TaoTao, the forks will not slide out of the tree until they are uncapped, so next I take off the caps, one by one. My fork caps are set up to accept a large size hex key, I find a regular 3/8" socket driver does just fine:
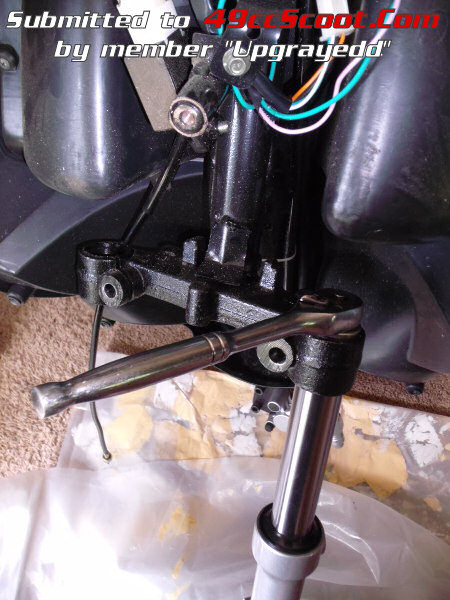
I like to loosely recap mine after I slide them out of the tree, then lean them up on something vertical while I get set up. Youll need a couple towels, a couple rags, a few spare plastic shopping sacks if you got them (to set parts in and keep dust/dirt off them while you work) and you will need an oil drain pan, or a container to drain old oil into, and finally, some new fork oil. I use ATF in my forks. Most all the ATFs out there are close to a 10 weight fork oil. ATF also has antifoaming agents and seal conditioners, like the fork oils do. Back before fork oil came out, most bikes called for ATF in their forks. Some folks use regular motor oil (10w40, 15w40, etc) and it works fine for them. And the bike shops to have the fancy fork oils too if you want to use them.
I am using this in mine today:
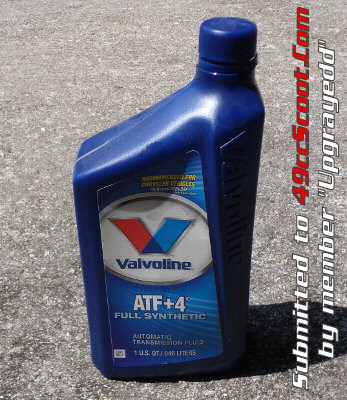
It's not cheap, but like most Valvoline products, it's high quality. Plus I use it in another vehicle I own so I always have it on hand.
So now you have your forks removed, and are ready. Start with one and uncap it. Keep your caps handy, set them on a rag or on a plastic sack. Remove the fork spring (slides right out), wrap it up in a plastic sack so it stays clean and set it aside, then turn your fork over a drain pan and pump it (work it open and closed) to get all the oil you can out of it. I Set my pan on an angle and near a wall, and I let my forks stand up leaning in the pan and drain while I work, to get more out.
This is what will be coming out:

That's how the spring and cap go back in when you reassemble, I was taught the tighter wound part of the fork spring always goes in first (face down)
FLUSHING (optional) So now you have drained both forks, and if what came out was real dark and dirty/almost black looking oil/had metal flakes in it, it may be a good idea to give them a flush. Look down in your fork and youll see a valve down in there. Pull the fork open so its fully extended, and pour some fork oil in it so that it comes up over that valve. Screw the cap on (doesnt have to be tight, just snug) and work the fork manually 20-30 times, compressing it, face up, upside down, let that fork oil swish all around in there real good. Now uncap it and drain it out, working the fork again to get it all out. I use the flush oil in both, so I am actually draining that fork oil into fork #2, and repeating the process. Drain that. If that pours out real dark, flush them again if you want. I do. The fork springs shave metal off the inside of the tubes, and they do so a lot especially in new forks, so the first time it may take a couple flushes before the oil comes out nice and clean looking.
Now your forks have been flushed out and cleaned. You can set them upside down to let them drain a bit, even hang them with a piece of wire over a pan for a few and let it all get out of there.
FORK FILLING: I fill my forks to the level of the dust seal with the fork fully collapsed. That's how I was taught to do it, some may use a different level.
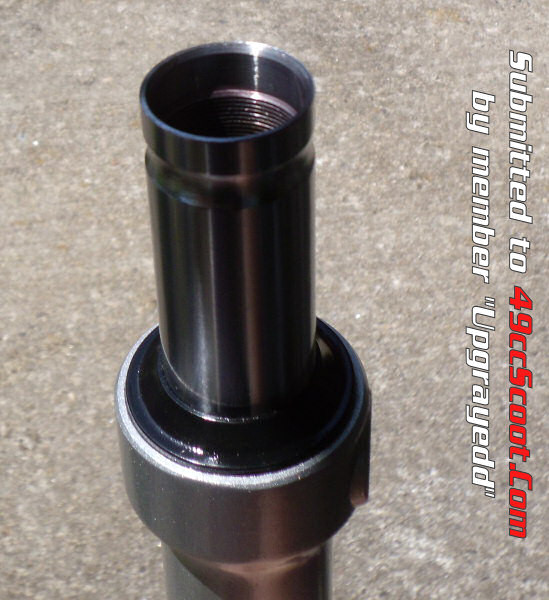
Filll it right about even with that black plastic dust seal, then work the fork manually a few times to help get the air out and recheck the level. Youll probably need to top up the level once or twice as the air comes out. As you get them filled to that level, pull the forks back open to their fully extended positions, put the springs back in them, and cap them both loosely. Now they're ready for re installation.
Re installation is pretty much the reverse of how they came off. I start by making sure the tree is clean of dirt and debris (which could fall down into your forks) and then install them one at a time. The cap will need to come off, then slide it up in the tree from underneath, then thread the cap in place and tighten it down.
The fork cap will be under pressure now with the spring behind it, take care not to cross thread the cap. An easy method is to hold the cap in place with the socket driver on it, and turn the fork itself backwards against the cap (the direction to loosen) until you feel the thread click, then turn the fork back the other way and start the threads. Once the cap is tight, Reinstall the clamp bolts. The clamp bolts can be snugged first if you need help getting the fork caps started, or tightened, but I think it is better to tighten the caps first and then the clamp bolts. Make sure those are all tight, then reinstall your front body panels, and finally, mount your front wheel and bolt your brake caliper back up. This is a great time to clean up and grease your speedo gears, cable, axle, etc. since you're already right there.
ADDING A SPACER FOR PRELOAD / STIFFENING THE FORKS:
I decided to add a spacer to my forks since they were too soft for my liking, and getting worse. I used (1) 1/4"x1" diameter washer, and (1) 1/2" CPVC Pipe Cap in each fork:
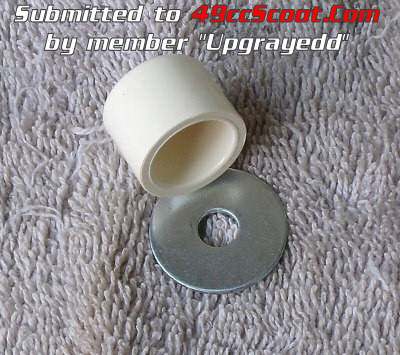
I installed them like this:
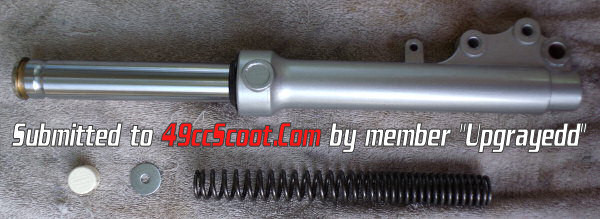

Adding a bit of preload with a spacer will stiffen up a fork. It does reduce the amount of travel the fork has, but when a fork is already sagging and the bike is just parked... well it's not really losing any usable travel.
I placed the caps in with the open side of the cap facing the spring. Spacers are OK to use, the important part is to use a washer in between the spacer and spring, otherwise the sharp edges on the spring can chew away at the spacer. Its fine to use a cutting of actual PVC pipe to make the spacer, that's really the common way I've usually seen them done / done them.. but these forks needed such a small spacer and the caps looked just right, and I didn't even have to cut them
The washers were 10 cents a piece, and the CPVC caps were 24 cents a piece, bringing the total cost of this mod to well under one dollar. The spacers added about 5/8"-11/16" of preload, and I am very happy with the improvement they gave to my front suspension.
First thing is to get to the forks. I start by unbolting the brake caliper:

Then unhook your speedometer cable. Let those 2 lines hang.
Next, remove your front wheel.
Now you need to remove the front fairing/body panels that are covering the top of your fork tree. On mine, it is two pieces of body plastic.
At this point you should be able to get to where the forks bolt in. I start with removing the bolts that clamp the forks in place:

On my TaoTao, the forks will not slide out of the tree until they are uncapped, so next I take off the caps, one by one. My fork caps are set up to accept a large size hex key, I find a regular 3/8" socket driver does just fine:

I like to loosely recap mine after I slide them out of the tree, then lean them up on something vertical while I get set up. Youll need a couple towels, a couple rags, a few spare plastic shopping sacks if you got them (to set parts in and keep dust/dirt off them while you work) and you will need an oil drain pan, or a container to drain old oil into, and finally, some new fork oil. I use ATF in my forks. Most all the ATFs out there are close to a 10 weight fork oil. ATF also has antifoaming agents and seal conditioners, like the fork oils do. Back before fork oil came out, most bikes called for ATF in their forks. Some folks use regular motor oil (10w40, 15w40, etc) and it works fine for them. And the bike shops to have the fancy fork oils too if you want to use them.
I am using this in mine today:

It's not cheap, but like most Valvoline products, it's high quality. Plus I use it in another vehicle I own so I always have it on hand.
So now you have your forks removed, and are ready. Start with one and uncap it. Keep your caps handy, set them on a rag or on a plastic sack. Remove the fork spring (slides right out), wrap it up in a plastic sack so it stays clean and set it aside, then turn your fork over a drain pan and pump it (work it open and closed) to get all the oil you can out of it. I Set my pan on an angle and near a wall, and I let my forks stand up leaning in the pan and drain while I work, to get more out.
This is what will be coming out:

That's how the spring and cap go back in when you reassemble, I was taught the tighter wound part of the fork spring always goes in first (face down)
FLUSHING (optional) So now you have drained both forks, and if what came out was real dark and dirty/almost black looking oil/had metal flakes in it, it may be a good idea to give them a flush. Look down in your fork and youll see a valve down in there. Pull the fork open so its fully extended, and pour some fork oil in it so that it comes up over that valve. Screw the cap on (doesnt have to be tight, just snug) and work the fork manually 20-30 times, compressing it, face up, upside down, let that fork oil swish all around in there real good. Now uncap it and drain it out, working the fork again to get it all out. I use the flush oil in both, so I am actually draining that fork oil into fork #2, and repeating the process. Drain that. If that pours out real dark, flush them again if you want. I do. The fork springs shave metal off the inside of the tubes, and they do so a lot especially in new forks, so the first time it may take a couple flushes before the oil comes out nice and clean looking.
Now your forks have been flushed out and cleaned. You can set them upside down to let them drain a bit, even hang them with a piece of wire over a pan for a few and let it all get out of there.
FORK FILLING: I fill my forks to the level of the dust seal with the fork fully collapsed. That's how I was taught to do it, some may use a different level.

Filll it right about even with that black plastic dust seal, then work the fork manually a few times to help get the air out and recheck the level. Youll probably need to top up the level once or twice as the air comes out. As you get them filled to that level, pull the forks back open to their fully extended positions, put the springs back in them, and cap them both loosely. Now they're ready for re installation.
Re installation is pretty much the reverse of how they came off. I start by making sure the tree is clean of dirt and debris (which could fall down into your forks) and then install them one at a time. The cap will need to come off, then slide it up in the tree from underneath, then thread the cap in place and tighten it down.
The fork cap will be under pressure now with the spring behind it, take care not to cross thread the cap. An easy method is to hold the cap in place with the socket driver on it, and turn the fork itself backwards against the cap (the direction to loosen) until you feel the thread click, then turn the fork back the other way and start the threads. Once the cap is tight, Reinstall the clamp bolts. The clamp bolts can be snugged first if you need help getting the fork caps started, or tightened, but I think it is better to tighten the caps first and then the clamp bolts. Make sure those are all tight, then reinstall your front body panels, and finally, mount your front wheel and bolt your brake caliper back up. This is a great time to clean up and grease your speedo gears, cable, axle, etc. since you're already right there.
ADDING A SPACER FOR PRELOAD / STIFFENING THE FORKS:
I decided to add a spacer to my forks since they were too soft for my liking, and getting worse. I used (1) 1/4"x1" diameter washer, and (1) 1/2" CPVC Pipe Cap in each fork:

I installed them like this:


Adding a bit of preload with a spacer will stiffen up a fork. It does reduce the amount of travel the fork has, but when a fork is already sagging and the bike is just parked... well it's not really losing any usable travel.
I placed the caps in with the open side of the cap facing the spring. Spacers are OK to use, the important part is to use a washer in between the spacer and spring, otherwise the sharp edges on the spring can chew away at the spacer. Its fine to use a cutting of actual PVC pipe to make the spacer, that's really the common way I've usually seen them done / done them.. but these forks needed such a small spacer and the caps looked just right, and I didn't even have to cut them

The washers were 10 cents a piece, and the CPVC caps were 24 cents a piece, bringing the total cost of this mod to well under one dollar. The spacers added about 5/8"-11/16" of preload, and I am very happy with the improvement they gave to my front suspension.


