90cc Minarelli Engine And Swap Info
Sept 22, 2010 13:05:37 GMT -5
theabomb, Chris Cristini, and 1 more like this
Post by 90GTVert on Sept 22, 2010 13:05:37 GMT -5
90cc Minarelli Engine And Swap Info
50-70cc Yamaha/Jog/Minarelli two-stroke setups are nice, but it's hard to beat the 90cc versions of these engines for street scooters. They can provide lots of torque and a pretty wide powerband to make riding and dealing with traffic, hills, or other obstacles faced by 50cc scooters much easier to deal with. The biggest problem with these 90cc engines is that they are hard to find in scooters and hard to build.
Building A 90cc
Building a 90cc or greater displacement engine can take a lot of work and/or money, and the time, tools, and skills involved make it a task that less people are inclined to take on. The cases need to be clearanced for larger crankshafts. The cases also need to be opened up to accept the big cylinders with bores of 50mm and above. In some cases, the crankshaft might even need to be machined to leave enough material intact on the crankcases rather than machining them until they are very thin.
You can find more details on stroker crankshafts and 90cc+ builds here:
49ccscoot.proboards.com/thread/10392/
Short & Long Case Engines
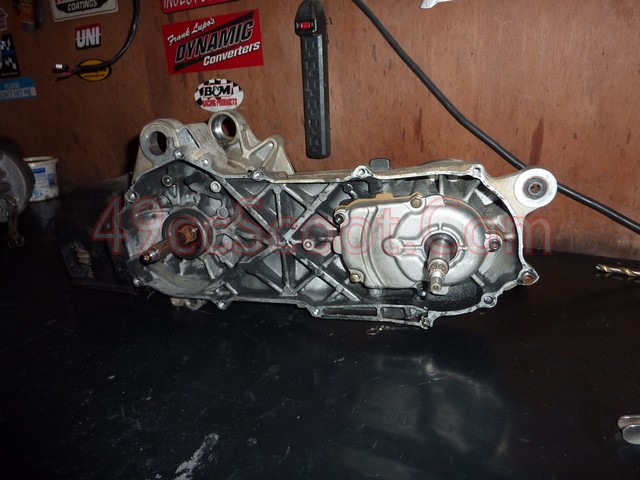
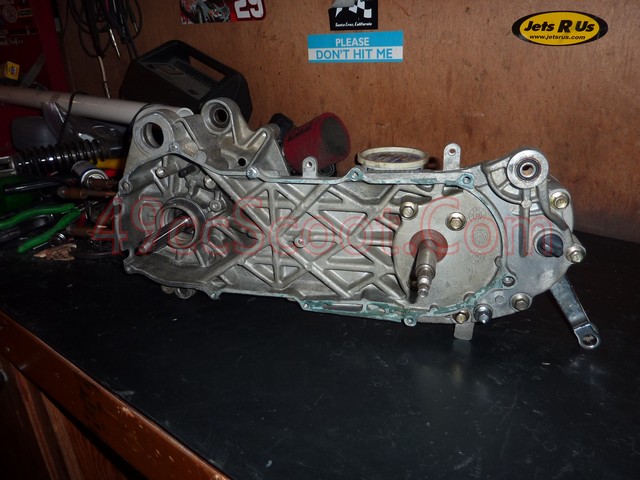
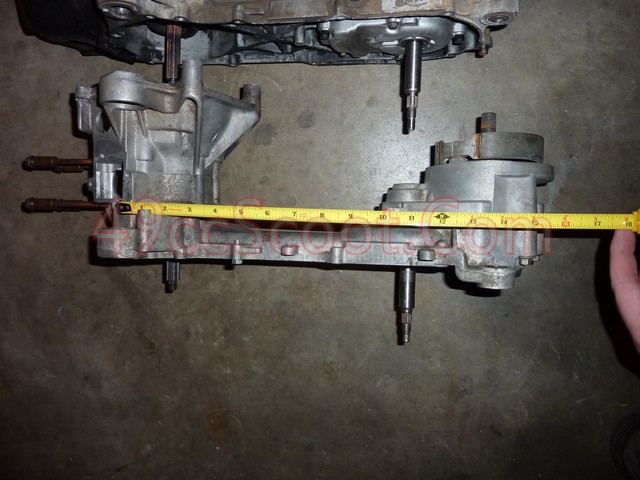
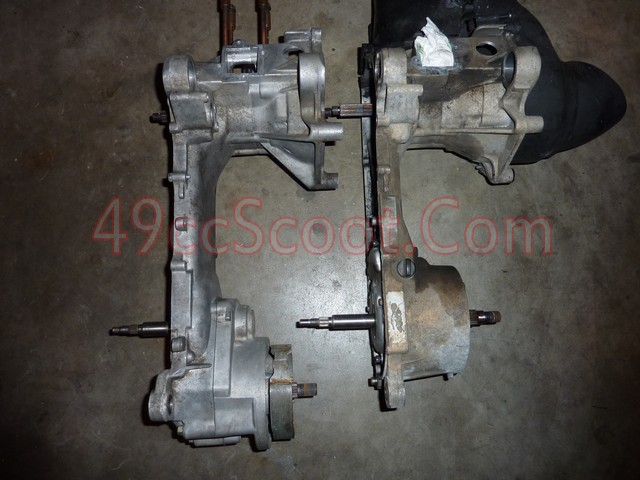
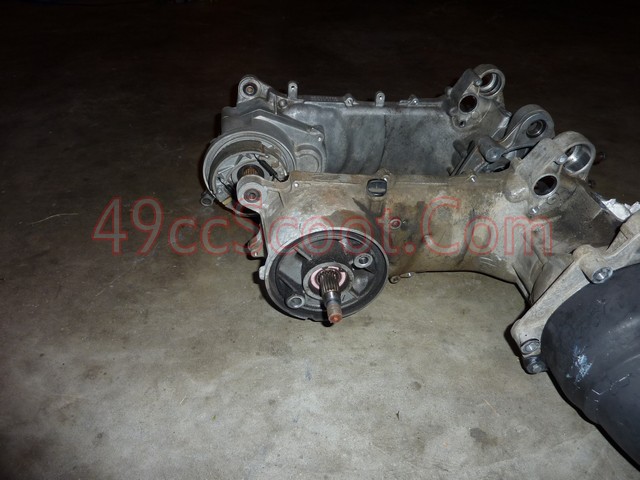
Horizontal minarelli engines common in scooters come in both long and short case versions. Figuring which of these you have is the first step to a swap. You could probably fit a short case where a long case should be, but it would shorten the wheelbase and change the handling and appearance of the scooter. A long case engine could be made to fit in most short case scooters with some work as well, but again it's much easier to stick with the engine style that your scooter has. On top of being easier, it can help you keep a closer to stock appearance. If you look over pictures of both, it's pretty easy to tell what you have. There are pics below of both types.
Short Case
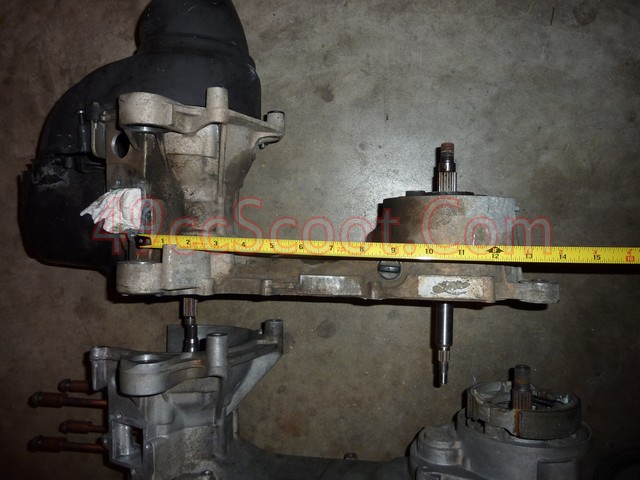
Long Case
Where can I find a 90cc?
You can find more details on stroker crankshafts and 90cc+ builds here:
49ccscoot.proboards.com/thread/10392/
Short & Long Case Engines
Horizontal minarelli engines common in scooters come in both long and short case versions. Figuring which of these you have is the first step to a swap. You could probably fit a short case where a long case should be, but it would shorten the wheelbase and change the handling and appearance of the scooter. A long case engine could be made to fit in most short case scooters with some work as well, but again it's much easier to stick with the engine style that your scooter has. On top of being easier, it can help you keep a closer to stock appearance. If you look over pictures of both, it's pretty easy to tell what you have. There are pics below of both types.
Short Case


Long Case


Where can I find a 90cc?
You can find the 90cc long case engines in some Vento Tritons from Mexico. The engine codes (mine was 1V1E52QMG) and the instrument panels being in metric units can help you identify one of these somewhat rare machines. Here is the speedometer in kilometers from my 90cc Triton.

The easiest way to get ahold of a 90cc long case minarelli that I know of is to pay the money out and order a brand new one. Parts For Scooters sells them for $470 at the time of this article.
Short case 90cc engines came in Vento Zips from Mexico. Like the 90cc Tritons, they are identified by gauges in KPH and 90cc engine codes. They are also available in 90cc versions of the Jog.
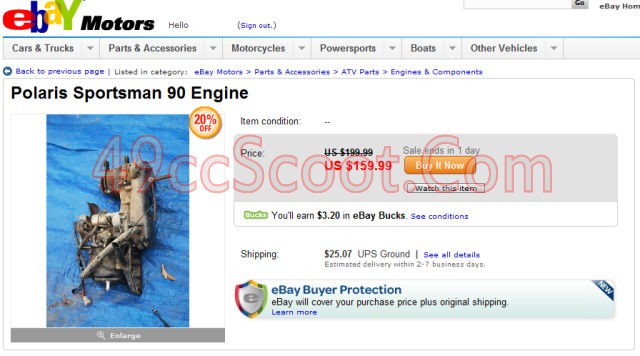
The most common sources for short case 90cc engines that I know of are ATVs. Dinli, Eton, Polaris, Kasea, and others make or made ATVs that use the 90cc minarelli short case engines. An eBay search for "Polaris Sportsman 90" will usually bring you some nice finds for 90cc parts and engines. The ATV motors do require a little work to be compatible, whereas I believe most scooter engines of the appropriate short or long length will bolt in. If an ATV swap interests you, continue to read and I will go over more of the details on an ATV engine swap.
Some Geely scoots are also supposed to have the 90cc engines. Tomcas was kind enough to provide this info :
"The Geely 2003 FX16 came with 90cc engine even though is was sold as a 50cc. The barrel was cast with 82cm3 marking on the side but it's really a 52mm jug, 12mm wrist pin, and the crank has a 42.5mm stroke for a 90.3cc displacement."
There are 100cc versions in other scooters like the Aerox available overseas too. I think they are a bit different still from the 90s and can handle even larger bores and strokes, but I have never had the pleasure to work on or be around one of them. I'm sure there are other models out there that may have 90cc+ motors as well.
Other Considerations For 90cc Engine Swaps
The first thing I suggest for anyone considering ANY engine swap is to have at least basic fabrication skills. I'm not saying you need to be a pro welder with a machine shop and every tool at your disposal, but the ability to make or modify parts can really come in handy and may be necessary for some swaps. It's pretty common to need new brackets, spacers, and things of that nature any time you are installing and engine from a different vehicle into your scooter. There are engines out there, like the engine mentioned from Parts For Scooters above, that should bolt in with no hassle as long as you've chosen it for a scooter with a compatible frame.
Another thing to consider is if it will fit. As long as you get the appropriate short or long case, you will probably be alright. The 90cc+ engines are just a little bit longer from the crankcase forward though, because of the longer stroke and the longer cylinder that must me used. This probably won't be of any concern in most larger framed scoots, but some of the small scooters may have some clearance issues. My little retro Keeway Venus was a pretty tight fit and I doubt that many scooters will be much tighter than it, but you should always check these sorts of things over before you plan an engine swap.
Do you have a carburetor that will work with a 90cc? Most of the 49cc minarelli two-stroke scooters that I have worked on have a carb the same size as the carbs that come stock on 90cc minarelli engines. I believe they are around 14-15mm (12x17 oval venturi). I have seen people claiming their carbs are only 12mm on similar scoots though. If you have an extra small carburetor, I would suggest getting a larger version or at least a 19mm carburetor more ideally. Some carb swaps may take extra work as well, such as longer cables, new throttle assemblies, larger intakes, etc... so be cure to research that before you jump into anything.
Is your exhaust suitable for a 90cc engine? If you have a stock exhaust it may be. If you have an aftermarket exhaust, it still may be. The stock exhausts on most minarelli powered scooters usually have a good sized header and a simple muffler, sometimes with a catalytic converter included in more recent model years. Most of these setups should work with 90cc engines. It would not be a bad idea to consider modifying the stock muffler to make it a little more free-flowing, but it might not be necessary.
Most aftermarket exhausts for two-strokes are expansion chambers. These performance exhausts are tuned for a certain powerband and they are designed to keep a certain amount of heat in the exhaust and cylinder. Expansion chamber pipes designed for 50cc and 70cc engines may not perform as well as they should on larger engines. Worse than that, they can cause the engine to run too hot in some cases. Excessive heat can lead to major engine damage and/or failure. If you do decide to try to use a 50-70cc tuned exhaust on a 90cc, I suggest taking very short test runs at first. Listen for signs of excessive heat like detonation (generally increasing in severity the longer the engine runs and heats up), soft siezing, and engine run-on.
90cc ATV Engine Swap : How-To
The details involved with removing and installing an engine are not included in this guide. anyone ready to take on a swap like this should be fairly familiar with the basics. If you need a little help, there is some engine removal and installation info at the link below.
49ccscoot.proboards.com/index.cgi?board=gentech&action=display&thread=392
The scooter that I used for this swap is a 2008 Keway Venus retro with a 49cc minarelli two-stroke. It uses a short case engine, so an ATV 90cc worked great for it.
The first step was to find a suitable engine that fit my budget. I found a low mileage90cc from a Polaris Sportsman 90 on eBay at a great price. It was a bit dirty and missing the stator, flywheel, fan, and fan shroud, but those pieces could be swapped from my original engine becaues it has the larger crankshaft like a 90cc. The fan shroud from a 49cc fits the 90cc just fine. If you find an engine missing the shroud that covers the cylinder and head you will need a 90cc shroud. The 49cc cylinder shroud is too short to work on a 90cc engine.
A few days later the 90cc engine arrived.
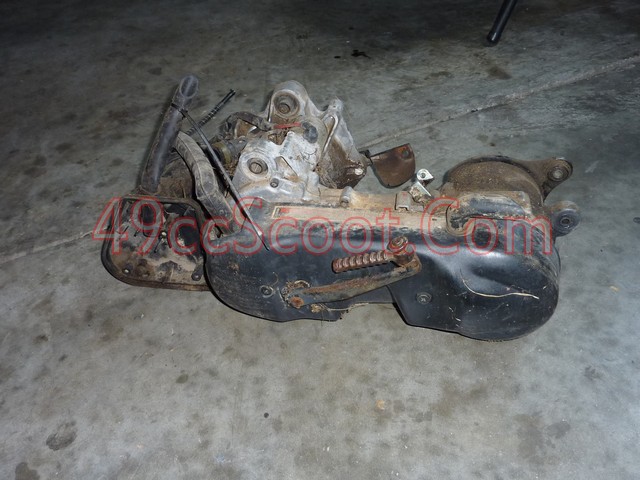
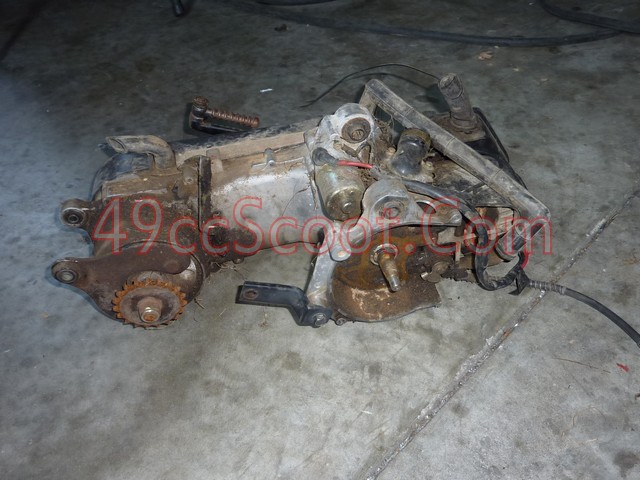
I removed the engine and transmission shrouds and covers, brackets from the ATV, and removed all of the CVT and starter components. I also removed the stock oil injection system, because I will be pre-mixing.

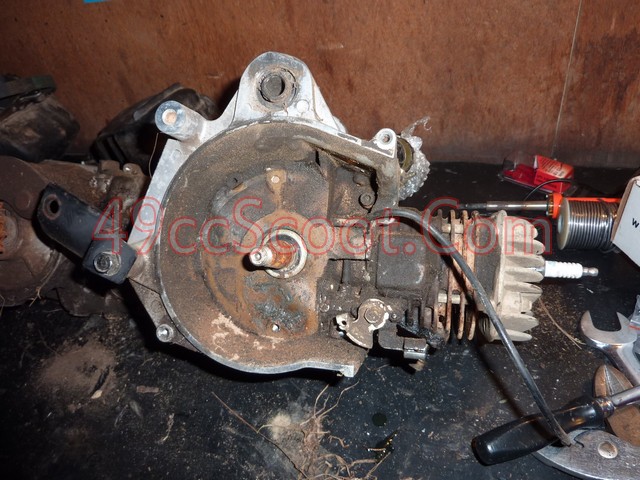
I plugged up the exhaust port, intake, and protected any sensitive areas. Then I sprayed the engine liberally with a degreaser and let it sit for a few minutes. After that, I used a power washer to knock off all the dirt and oil. It's always nice to have a clean engine to work with.
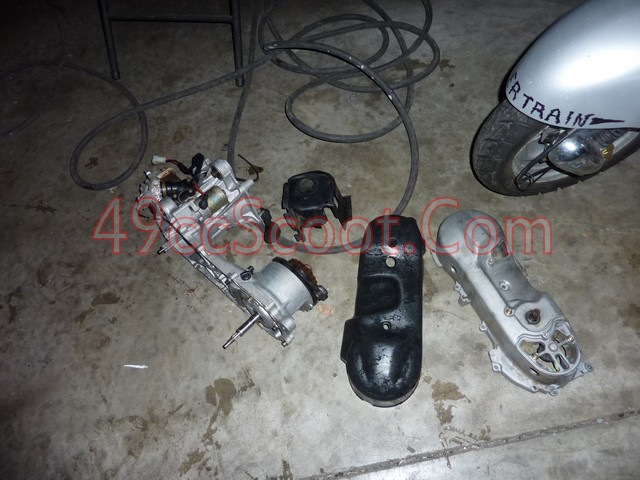
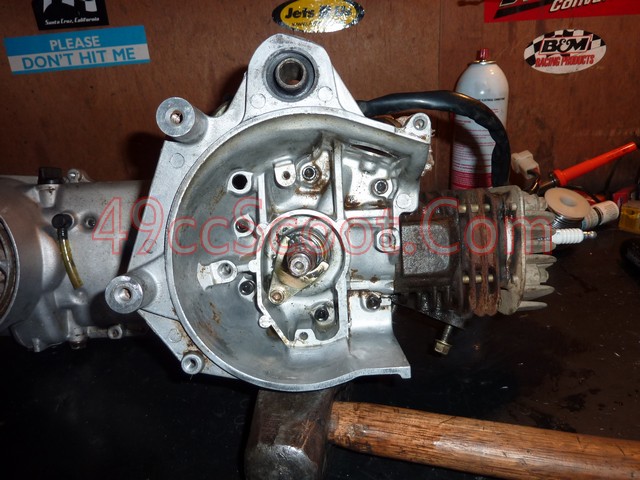
As you can see in this image, the ATV engine drives a sprocket instead of directly driving a wheel like a scooter. The sprocket and the mounting bracket will need to be removed, which requires disassembling the final drive transmission. While that's apart, you will also need to install the drum brake hardware from the scooter engine.
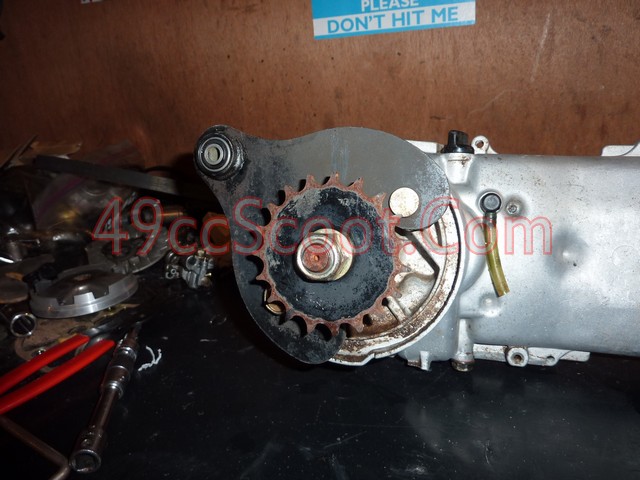
Remove the axle nut, then the washer, and the sprocket should slide off of the splines.
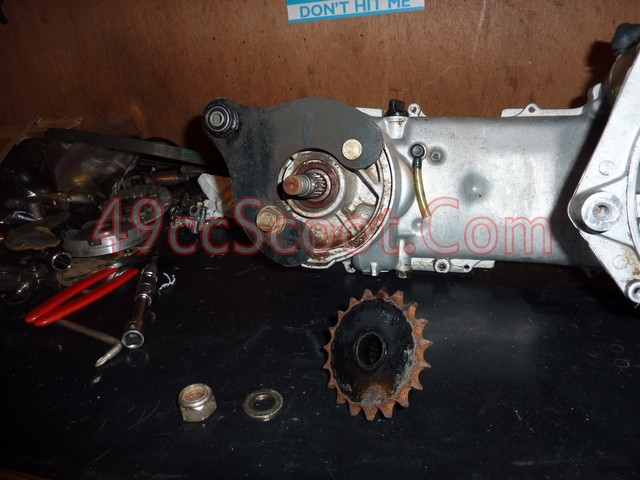
Now you'll need to remove the bottom bolt holding the bracket on. There is a nut on the other side that will need to be held while you losen the bolt.
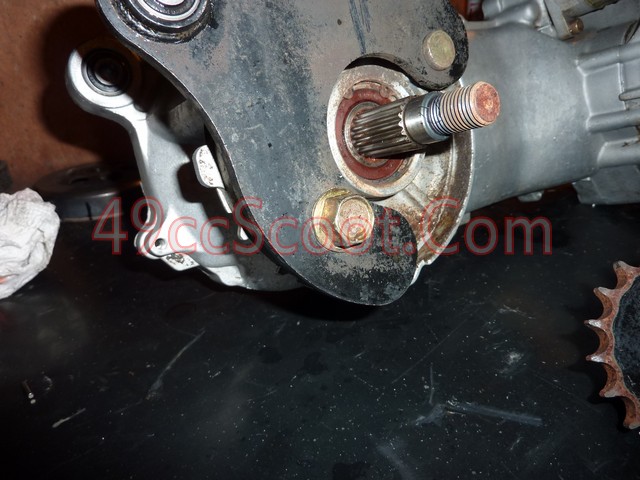
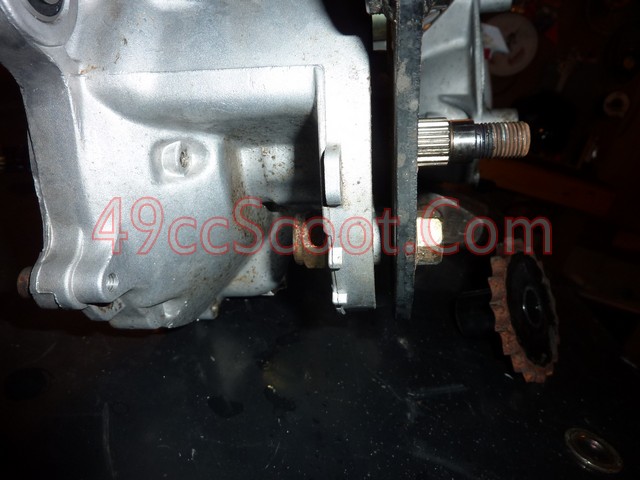
The top bolt can't be removed without opening up the final drive transmission.
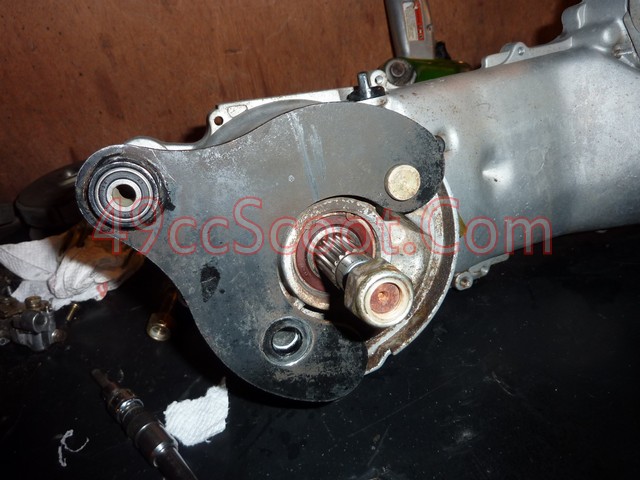
Before you begin to disassemble the transmission, you should drain teh gear oil. There is a bolt on the bottom of the case. Remove it and catch the oil in a small container (it should only be around 100mL of oil). One small tip : If you don't want the unmistakable smell of gear oil on your hands, now is a good time to put on a pair of latex gloves. Reinstall the drain plug once all the oil has drained.
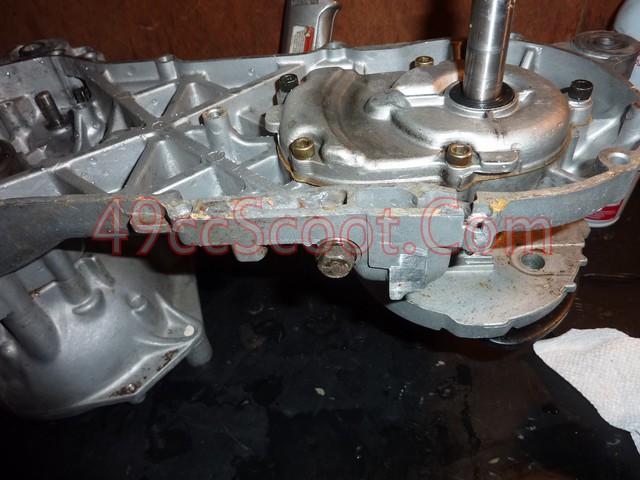
Loosen the bolts that hold the gear cover in place.

You should notice that there are two bolts longer than the rest. Remember where they go.
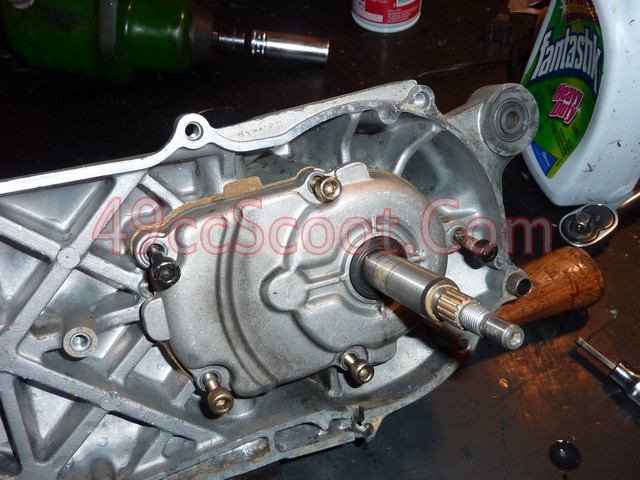
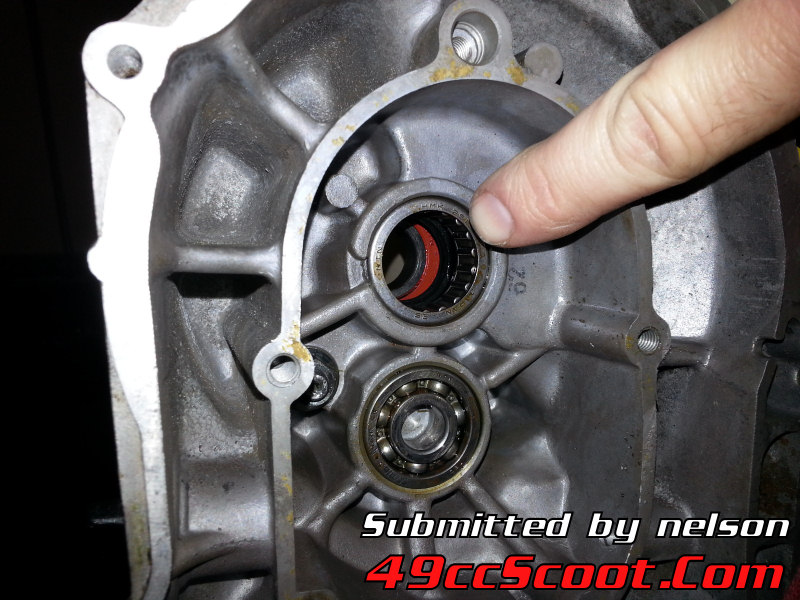
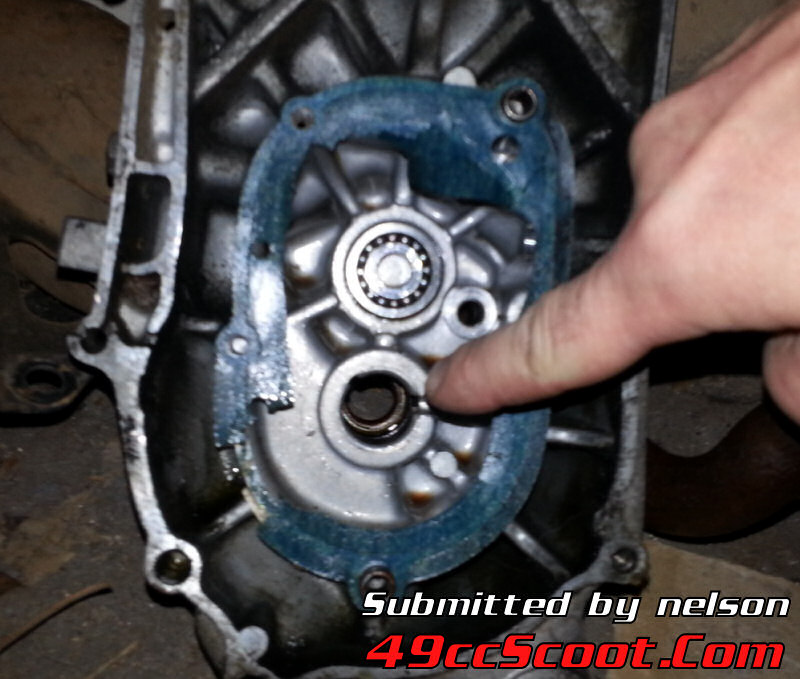
Remove the cover completely. There should be a spacer washer either on a gear or stuck to the cover as shown here. Make sure you don't lose it, and remember where it goes.
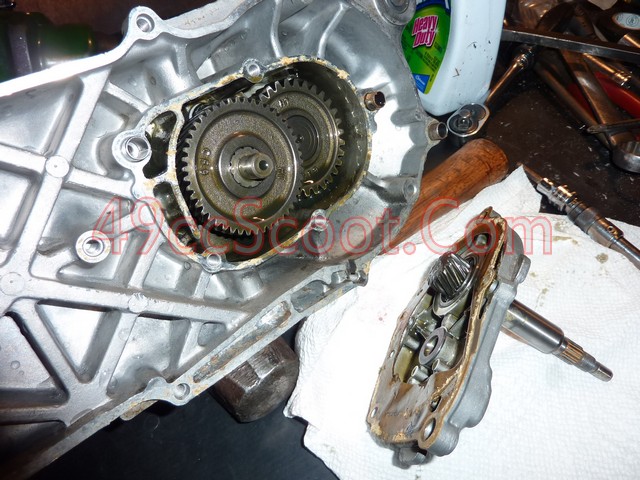
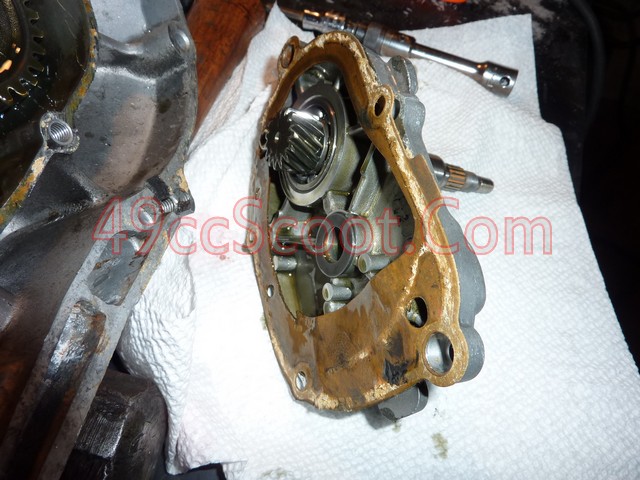
Remove both gears from the transmission case. They should slide out pretty easily.
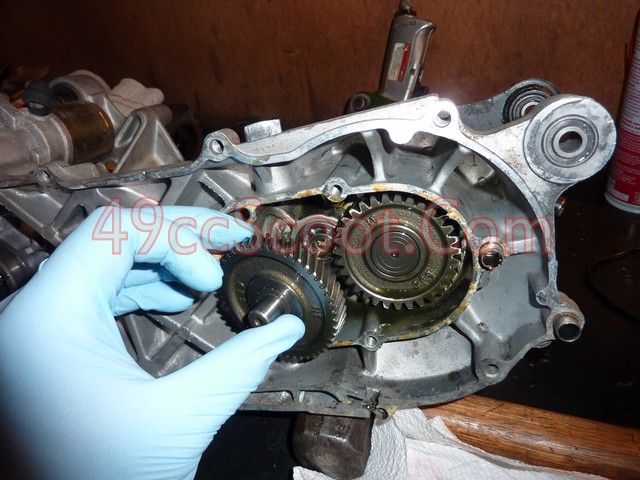
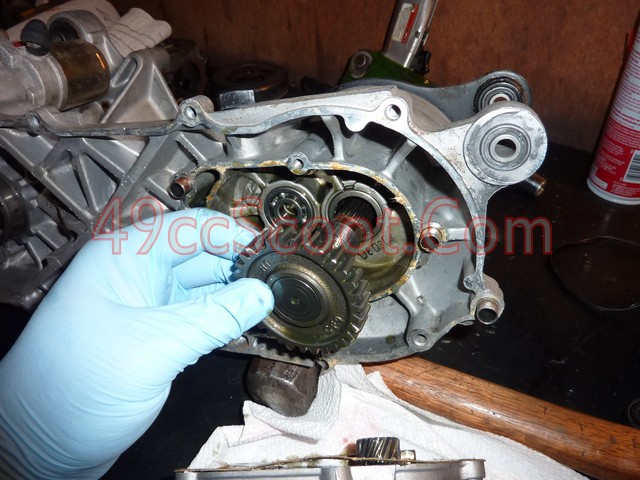
Now you should be able to see the nut and bolt holding the bracket in place.
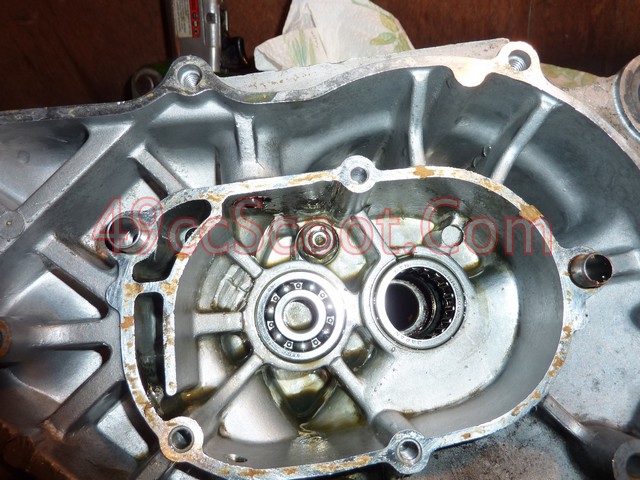
Remove the nut, washer, and bolt. Then bracket will come off.
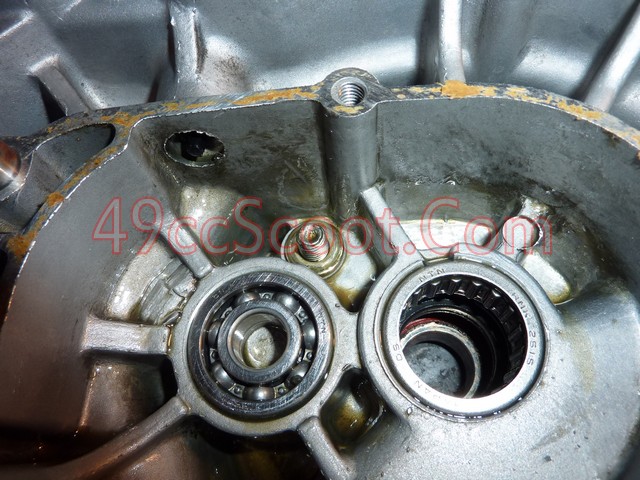
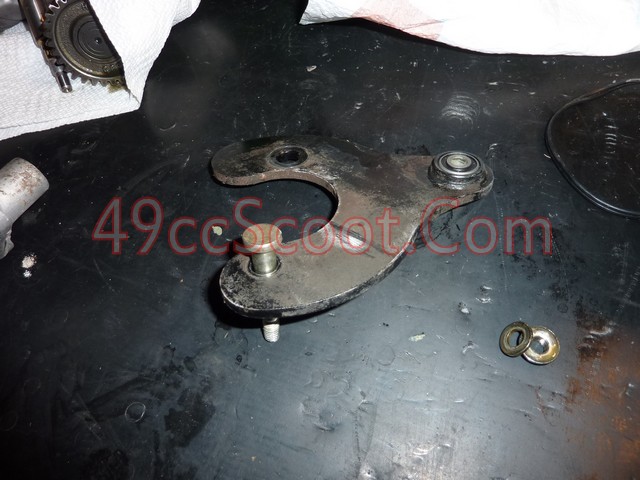
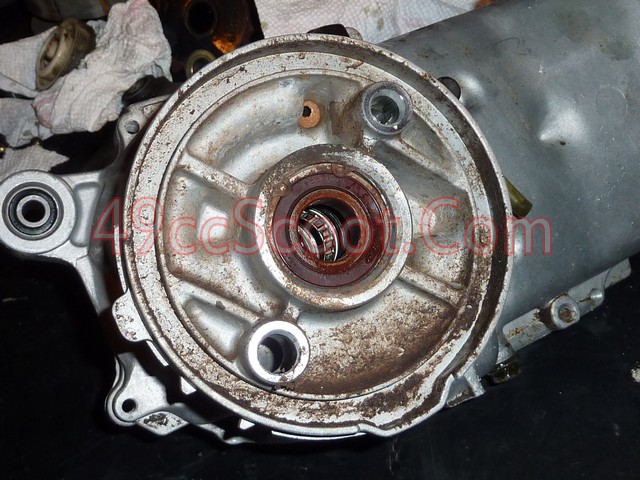
The goal is now to get the rear brake setup from your stock scooter engine installed on the new ATV 90. Begin by removing the nut and washer that holds the rear wheel on, and then remove the rear wheel.
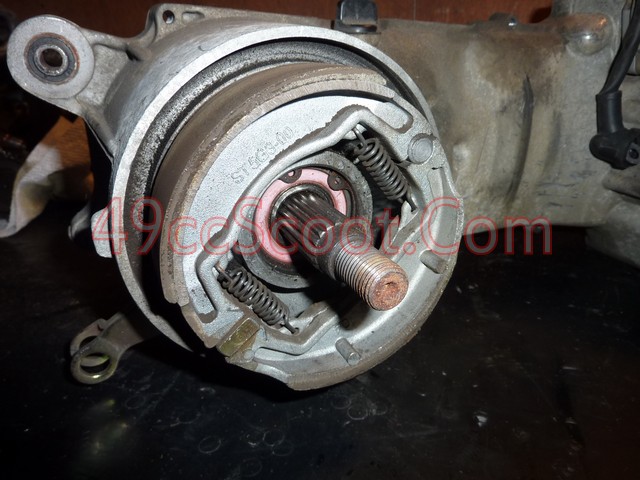
Remove the rear brake shoes and springs. You can sort of "fold" the shoes off as you see here pretty easily, and they should stay together.
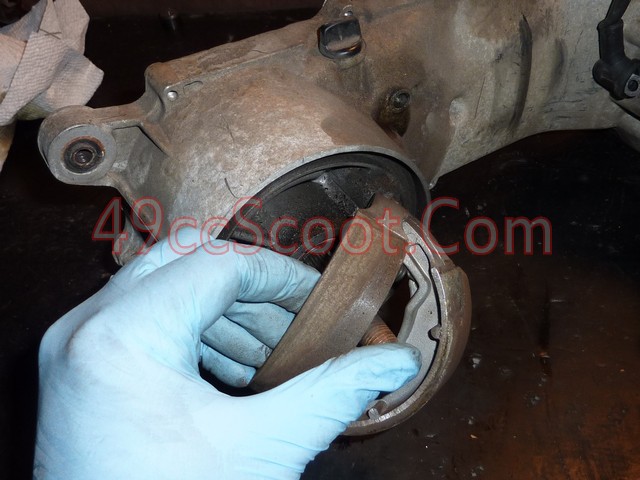
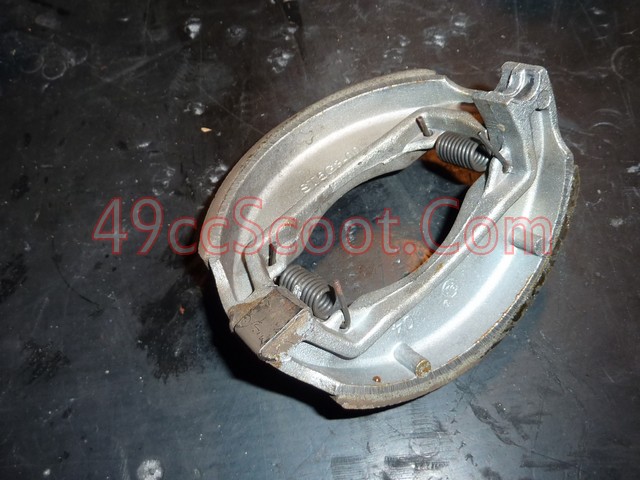

The bottom piece that spreads the shoes is held on by the brake lever on the on the other side. Remove the nut and slide the bolt out of the lever. The lever and spring will come off and then you can remove the pin.
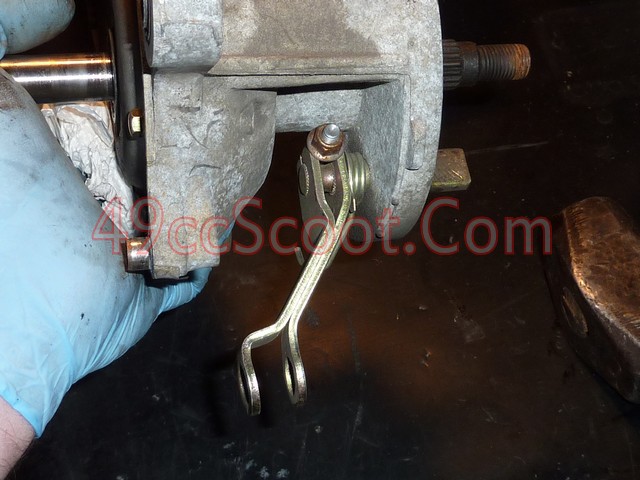
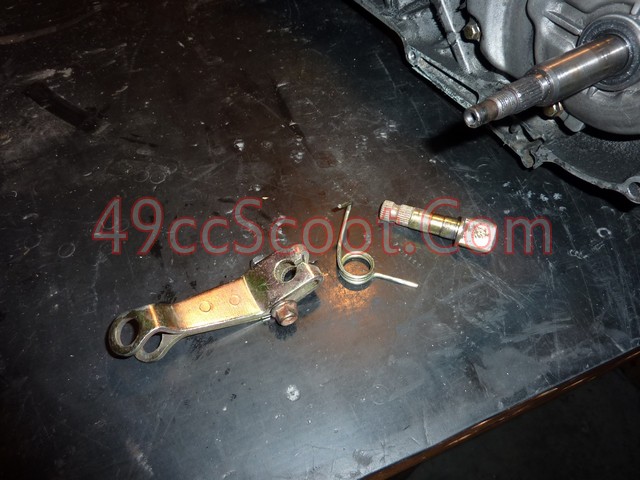
Just like the 90cc, you'll need to open the transmission case and remove the gears to get to the top pin.
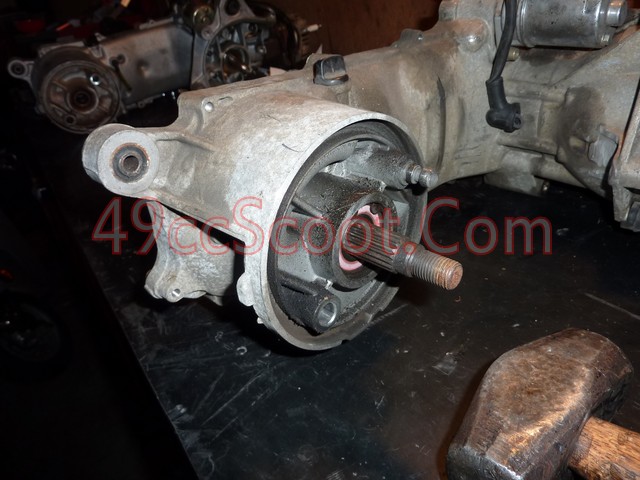
Drain the transmission oil on your stock scooter engine, then replace the drain plug.
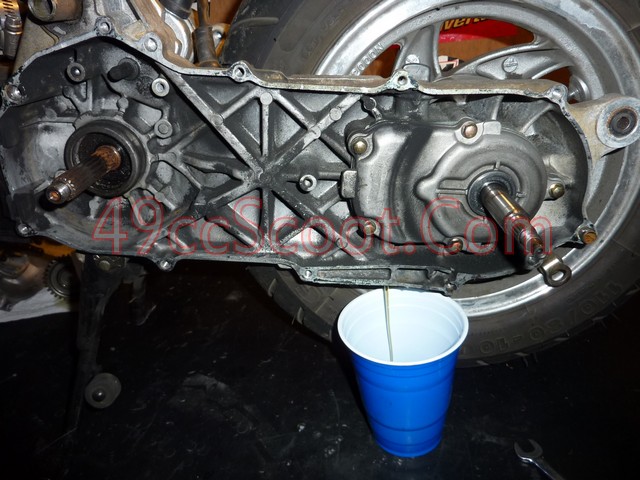
Remove the transmission cover, spacers, and gears, just as described earlier for the 90cc engine.
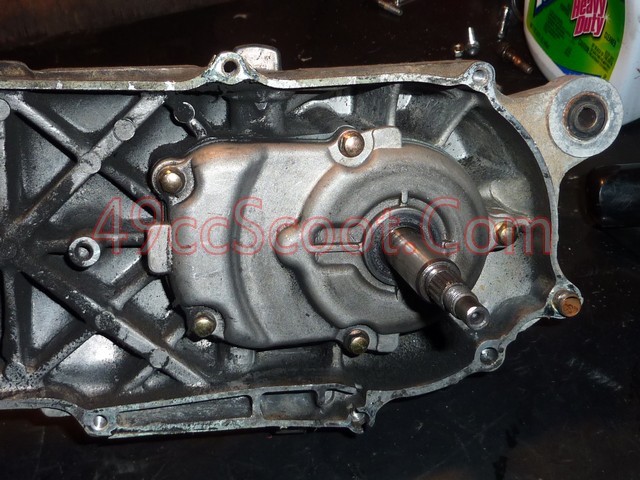
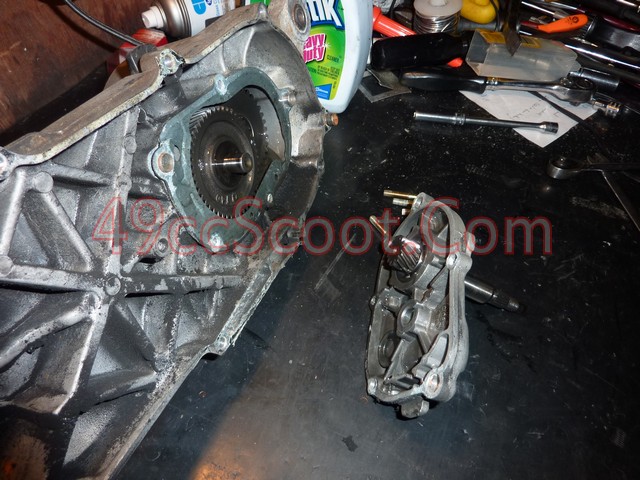
Now you can see the nut and bolt from the top pin that you need to remove. Take the nut off and the pin should slide out from the other side.
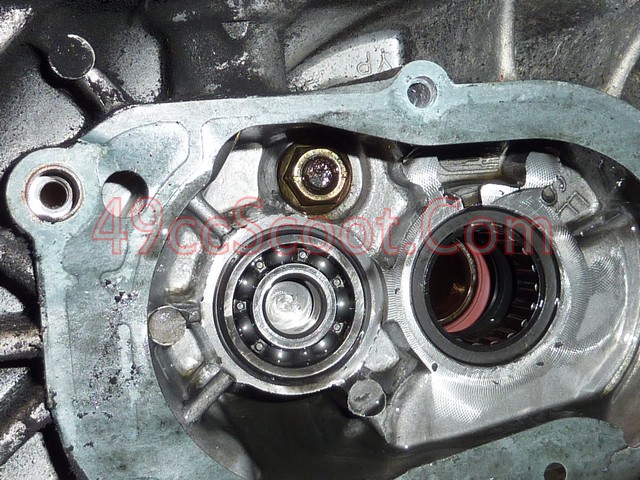
Move back you your 90cc engine and slide the top pin that you just removed into the top hole of the 90cc engine.
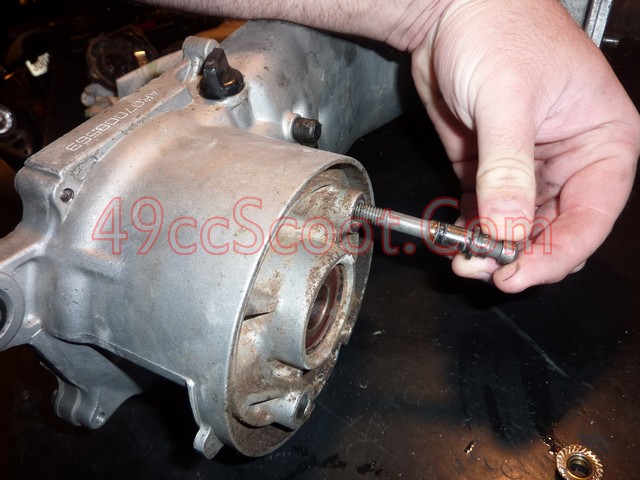
Install the nut.

Slide the pin from the bottom of the scooter engine through the hole in the bottom of the ATV engine.
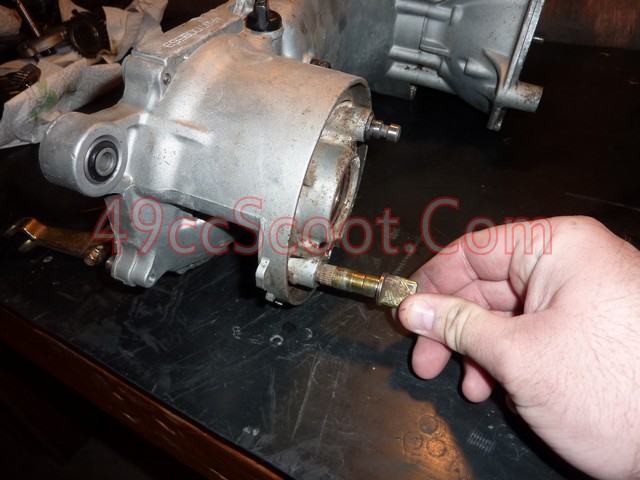
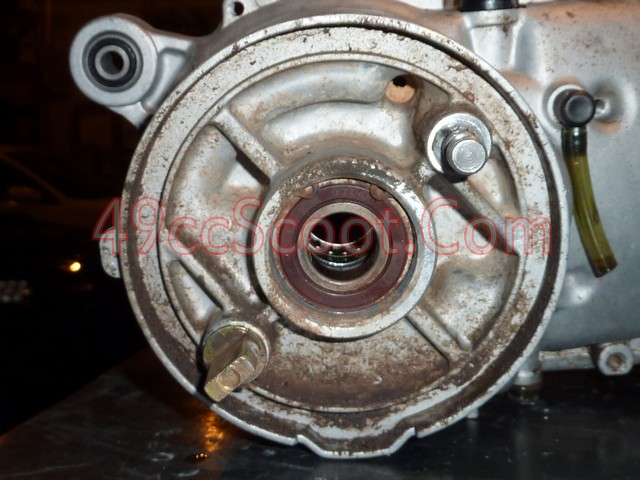
The pin should be oriented as shown for proper rear brake operation.
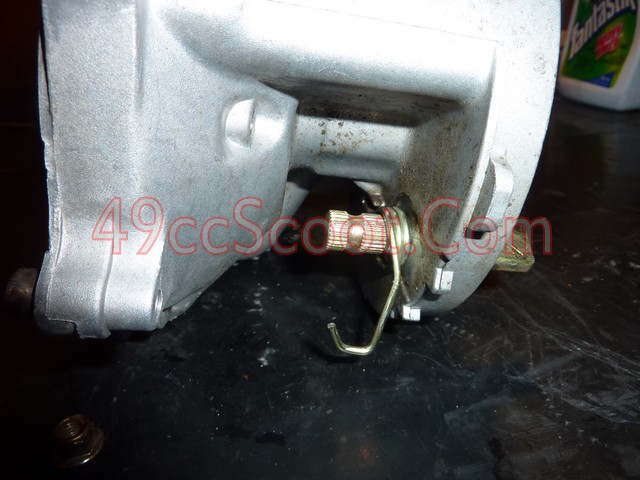
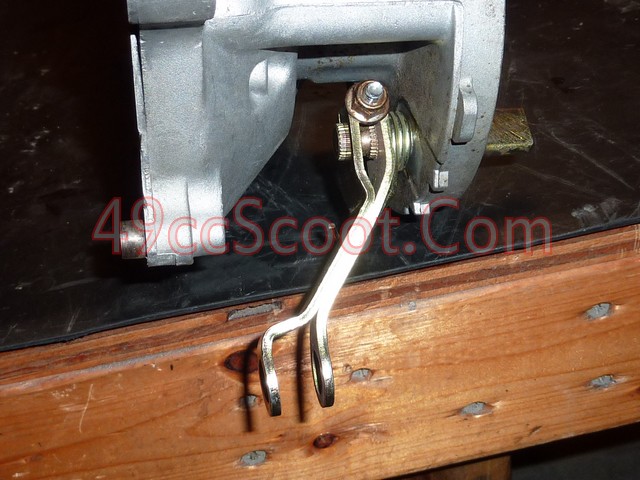
Install the brake lever spring from the scooter onto the pin as shown. It should provide tension if you push the longer protruding section shown toward the front of the engine.
Install the brake lever as shown.
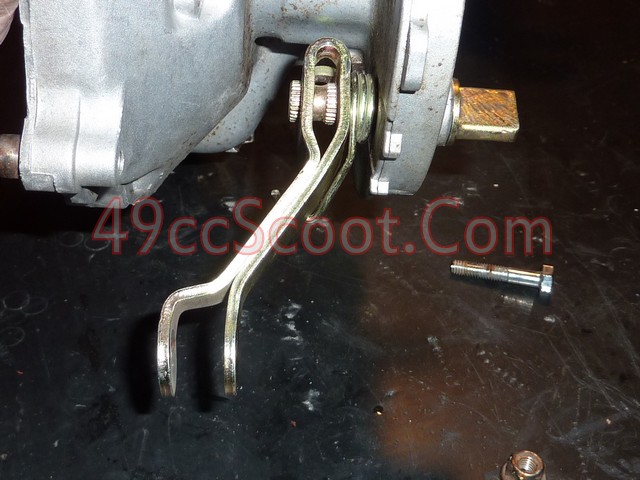
Slide the bolt through the brake lever and install the nut.
Now you have a choice to make. You should have both the gearset from the scooter and the ATV at your disposal at this point. Either set should be compatible with the ATV transmission case.

Both sets of gears are likely to be different final drive ratios, so you should choose the set that will be most likely to help you accomplish your goals with the engine swap. In my case, the 90cc gears would be more useful for top speed and the 50cc gears would provide superior acceleration.
90cc Gears
Primary = 15/47 = 3.133333333333333:1
Secondary = 11/31 = 2.818181818181818:1
Final Drive Ratio = 8.830303030303029:1
50cc Gears
Primary = 13/48 = 3.692307692307692:1
Secondary = 12/36 = 3:1
Final Drive Ratio = 11.07692307692308:1
If you aren't sure what all that means, let me explain it briefly and how you can find your final drive gear ratios. I believe a lot of 50cc and 90cc rations will be the same as these, but it never hurts to check.
There are 2 gearsets in the transmission that form one final drive ratio. They are the priomary and secondary gears. Primary gears are the gear on the end of the shaft drive by the clutch and the gear that it drives. Secondary gears are the gear on the axle and the gear that drives it off of the primary gears.
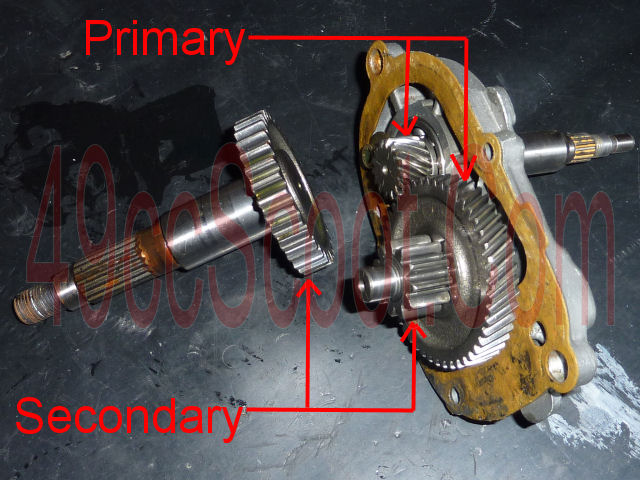
To determine your primary, secondary, and ultimately the final drive ratio, begin by counting the teeth on each gear and writing it down. t is often helpful to mark the tooth that you start counting on with a dot from a marker so you don't forget exactly where you started. If you have any doubt that you miscounted, do it over again to be sure.
You sohuld now have two numbers for your primary gears and two numbers for your secondary gears. Using my 90cc gears and an example :
Primary : 15 / 47
Secondary : 11 / 31
Now we can use division to determine the ratios of each gear set. Divide the number of teeth the gear being driven has by the number of teeth of the gear driving it. Again using my 90cc gears as an example :
Primary : 47 / 15 = 3.133333333333333:1
Secondary : 31 / 11 = 2.818181818181818:1
Now you know both your primary and secondary gear ratios, so you just need to combine them to determine the final drive ratio. Multiply the primary and secondary ratios to find the final drive ratio. Using my 90cc gears as an example again :
3.133333333333333(Primary) x 2.818181818181818(Secondary) = 8.830303030303029:1(Final)
You've determined the final drive ratios of each gearset, but what do those numbers mean? The gear ratio expresses how many revolutions of input are needed to output one revolution. In the case of the final drive ratio, the number represents the quantity of revolutions of the clutch bell turning the driveshaft that are needed to rotate the tire one full revolution. For example, my 90cc gears have an 8.830303030303029:1 final drive ratio. So my clutch bell revolves 8.830303030303029 times in order to rotate my rear tire just once.
The more times the clutch bell has to rotate to spin the rear tire once, the greater the potetntial for acceleration. The less revolutions the clutch bell needs to make to rotate the rear tire once, the greater the potential for top speed.
Numerically Higher Gear Ratios = Greater Acceleration/Higher Cruise RPM
Numerically Lower Gear Ratios = Greater Top Speed/Lower Cruise RPM
Determining exactly what speed you can achieve with these gear ratios is a little tricky, but the numbers should give you some idea of what you want to try. I went with the scooter gears (11.08:1) on this build and so far I've seen 58MPH at as much as 8,800RPM. Acceleration is great.
Once you've decided on a gearset, you can begin installing them. Installation is very simple. Slide the secondary gear with the axle attached in first.
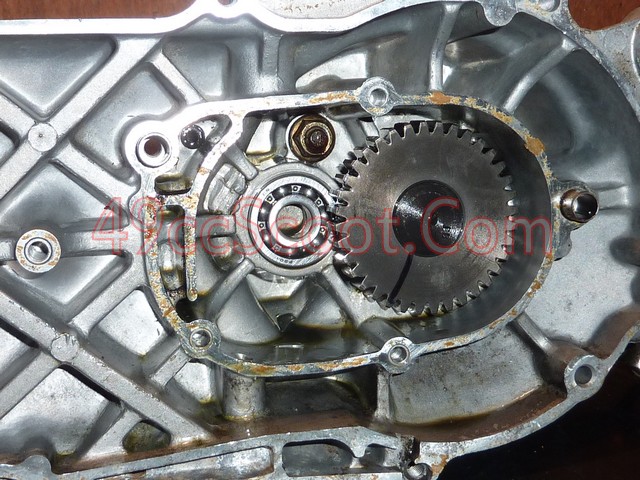
Put this gear into place in the bearing and mesh the teeth with the other secondary gear.
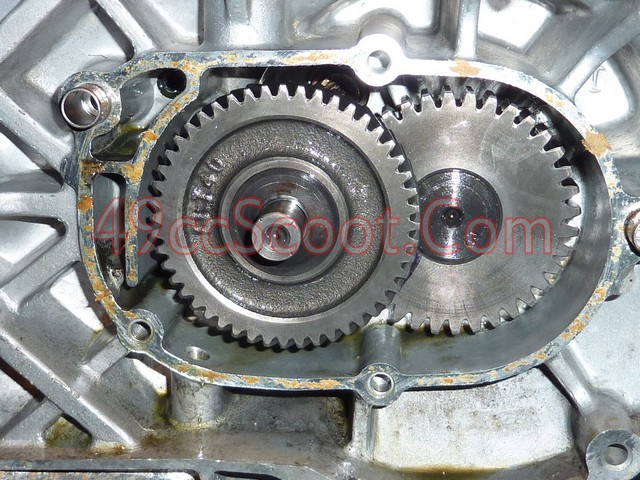
Install the washer over the gear shaft as shown.
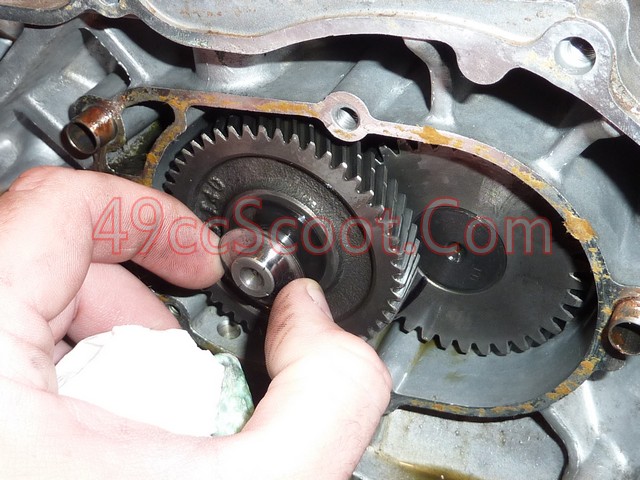
Install the cover with the appropriate drive gear. You could swap gears from cover to cover, but it's way easier just to swap the whole assembly. Make sure both gasket mating surfaces are clean and use a new gasket. I coat my gaskets with a thin layer of Three-Bond 1194 sealant for added peace of mind. Don't forget to install the 2 longer bolts in the proper spots.
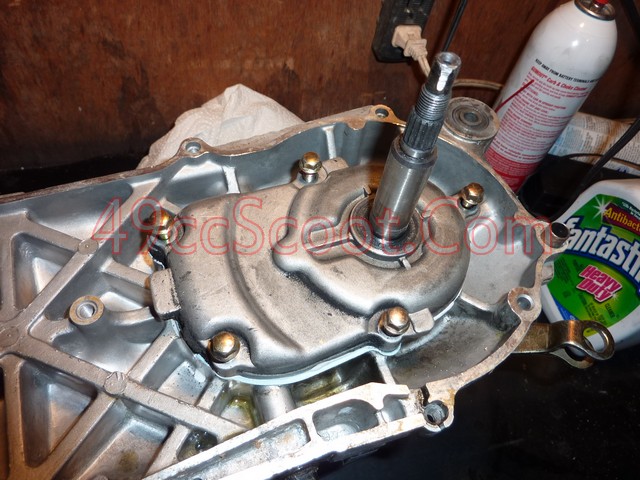
I wait on adding gear oil until everything else is finished. That way I can turn the engien however I want and I don't have to worry about gear oil coming out of the overflow passage in the case. It's a good idea to make a note that you can't miss using some masking tape to assure you don't forget the gear oil later.
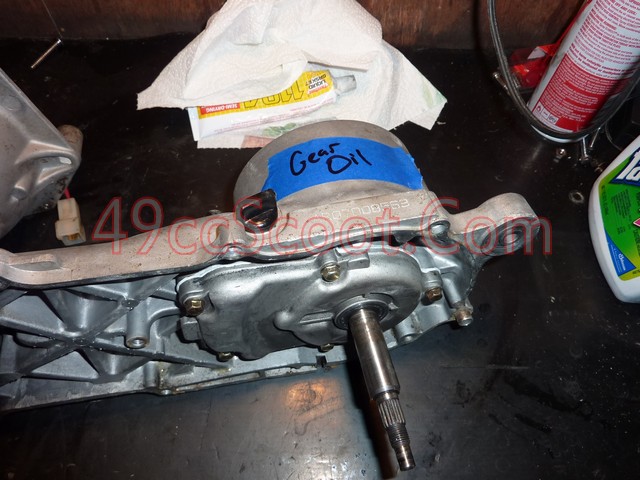
Now that you have the proper pins, you can install the rear brake shoes and springs. As I showed earlier, I remove them as an assembly. I install them the same way. Place one shoe onver the pins, while the other is sort of foled outward with the springs attached. Then stretch the springs and pop the other side in place.
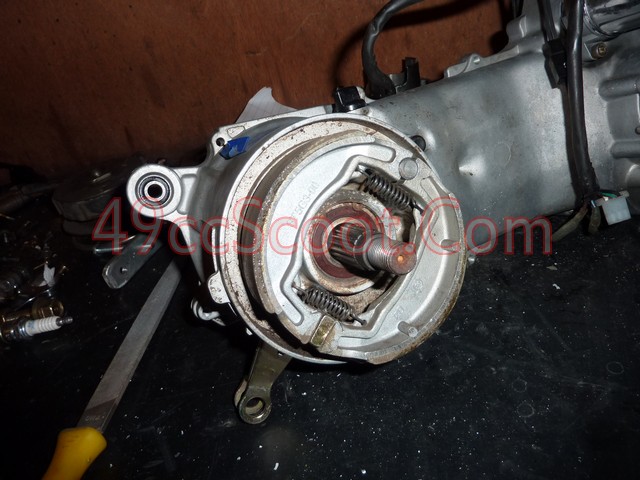
Now that the brake shoes are on, the next issue is the engine mount. The ATV uses a different mount than the scooter, so you'll need to swap the mount from your scooter's engine onto the 90cc.
ATV mount.
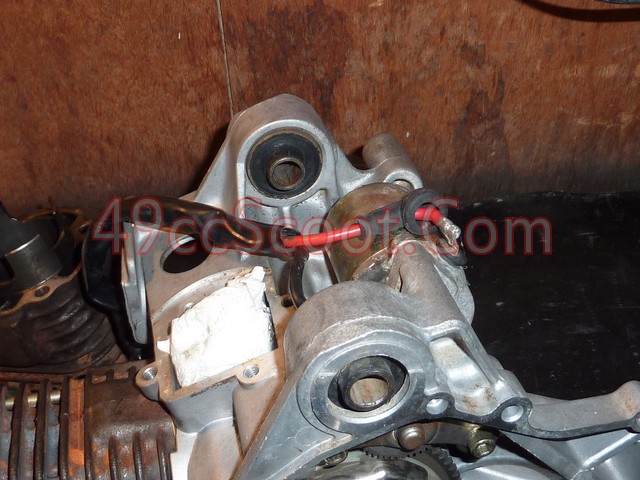
Scooter mount.
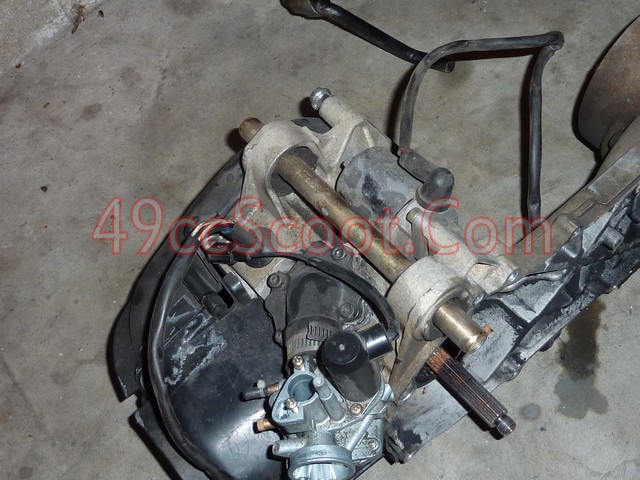
The ATV mounts need to be pressed out or knocked out. They have to be pushed through from the outside of the case, toward the inside. There are lots of mthods to do things like this. I found that the easiest in this case was to cut out the center first, just leaving the outer ring of the bushing. I used a sharp chisel, and in a few minutes the center was out.
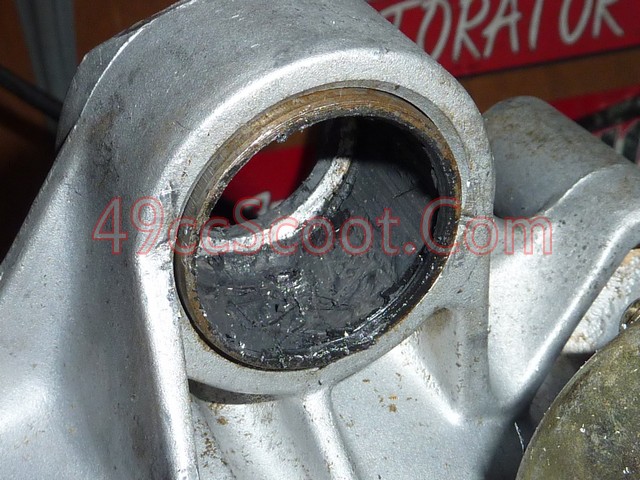
Once the center was out, I used a chisel to dig into the side of the bushing's metal case and hammer it out. Be careful if you choose this method. A sharp chisel can cut through the bushing and damage your case.
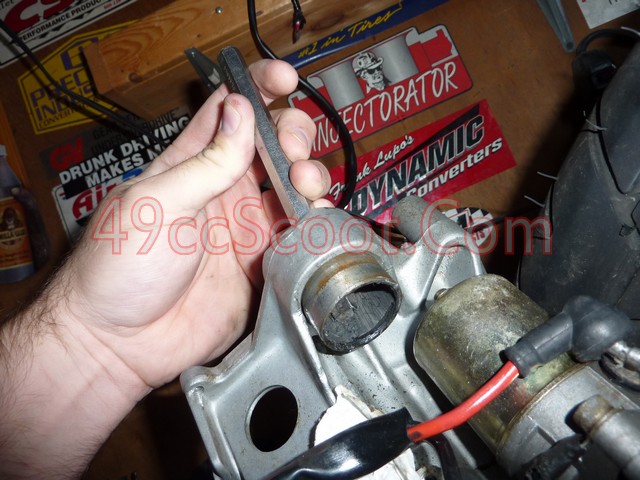
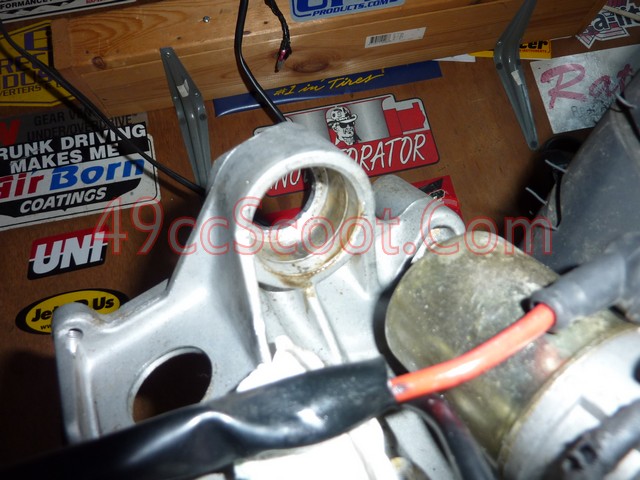
Repeat that on both sides and clean the areas that the bushings came from. Now you'll need to remove the mount from the scooter engine.
There are two clips holding the bar from the engine mount in position. They are located on the insides of the bearings as shown here. You'll need to remove them from the grooves in the bar using snap ring pliers. I find it easiest to slide them to a different spot and slide them off while removing the bar, rather than opening them and removing them at this point.
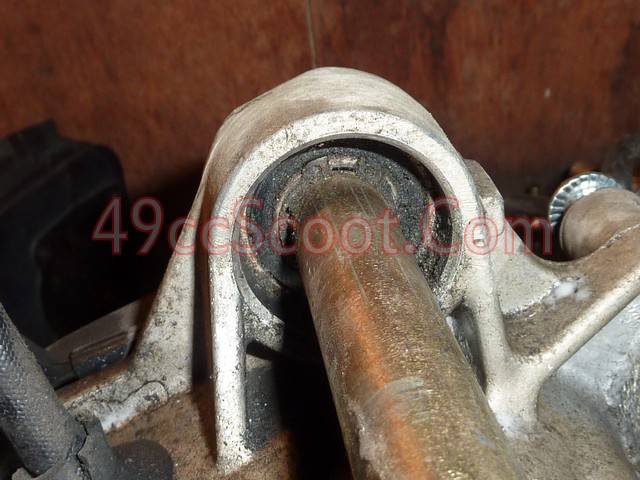
Once both clips are out of their grooves, begin tapping the bar out of the bearings. Once you are able to, slide the clips off of the bar and completely remove the bar.
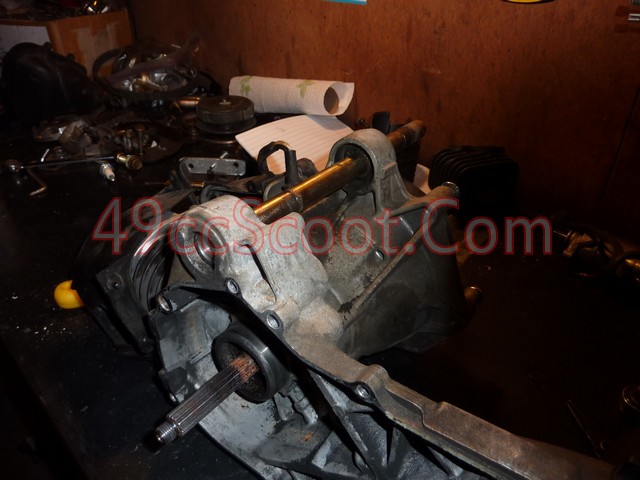
Now you need to remove the bearings from the case, unless you are replacing them. If there is any play or rough movement, they should be replaced.
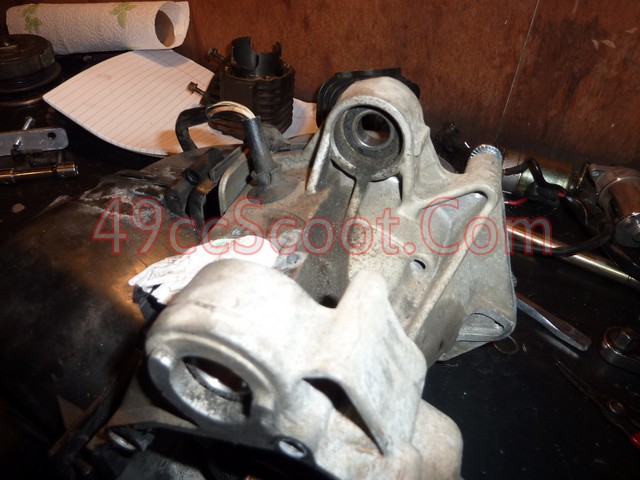
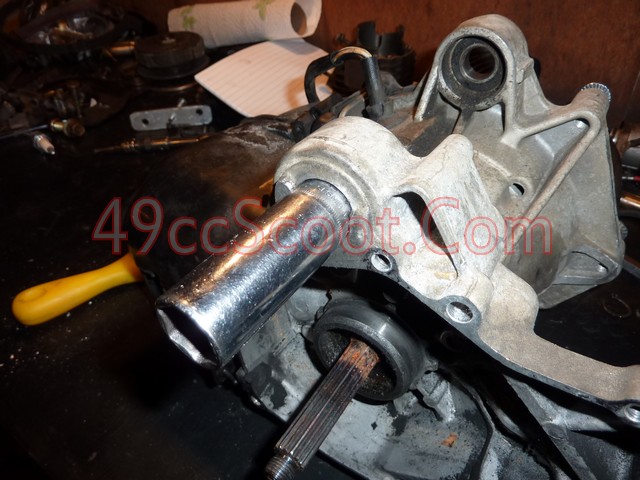
You will need to tap these out toward the inside of the cases, becasue the outside hole is too small.
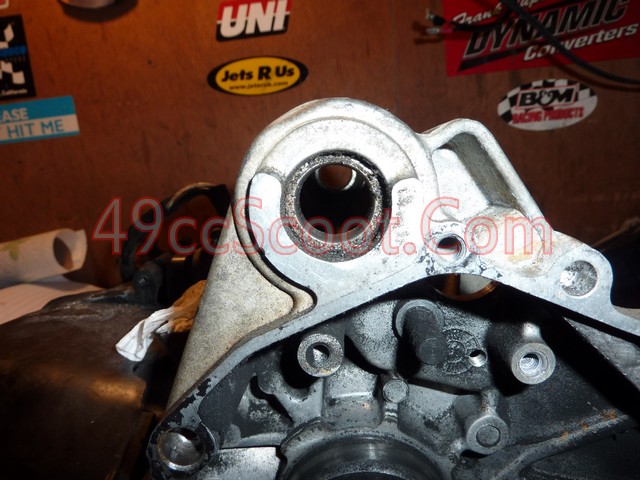
I use a socket just small enough to fit through the outer hole and tap the bearings out with a rubber mallet.
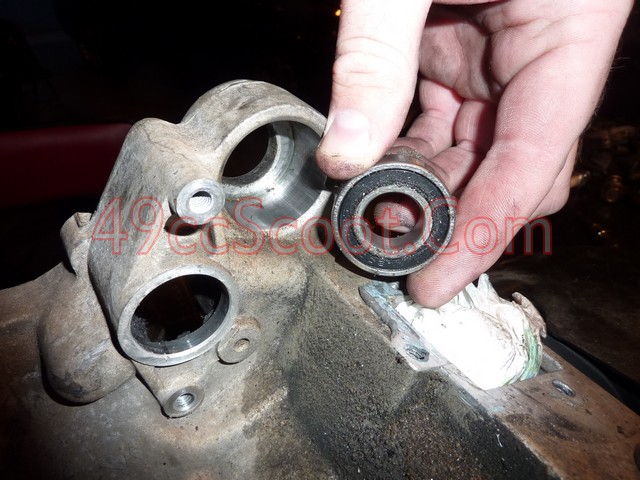
Place a bearing into it's race in the 90cc engine. Get it as straight as possible, and press it in by hand a little.
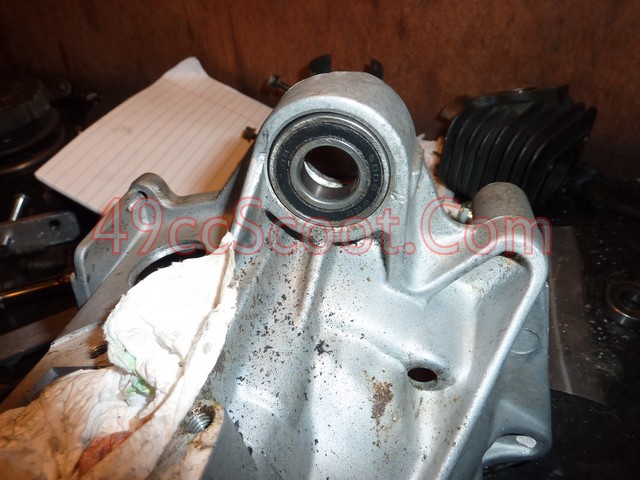
I use a bearing and seal driver to drive the bearing in the rest of the way. You could also use a socket the size of the outer ring of the bearing.
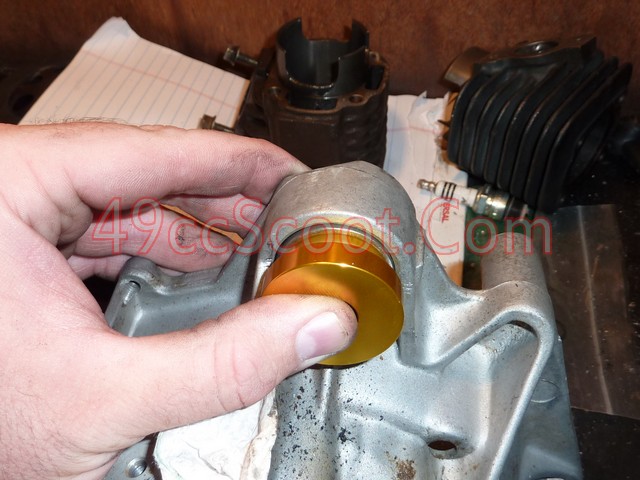
be srue to get the bearing seated all the way in, then repeat the process on the other side.
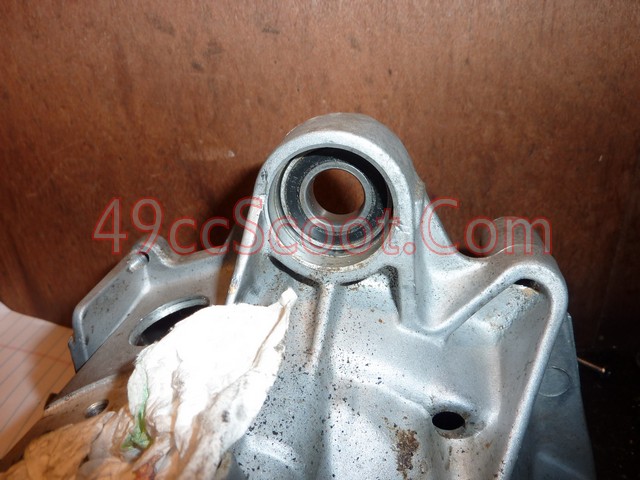
Slide the engine mount bar through one side and then slide both clips over it. One clip should go to the center of the bar. The other can be put in it's groove.
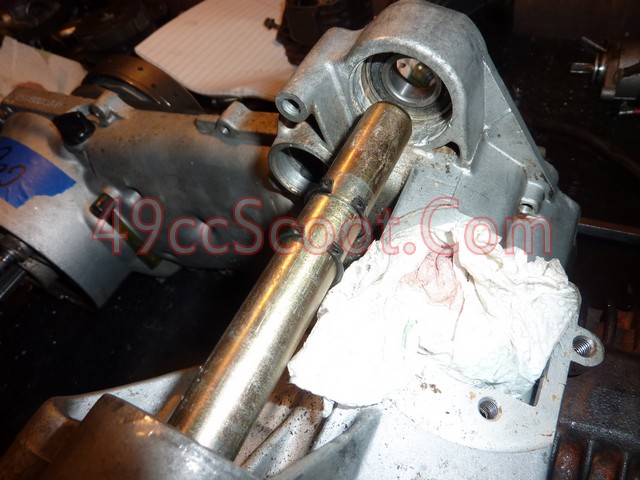
Slide the bar in until the clip stops it. Then slide the second clip into it's groove and the mount swap is complete.
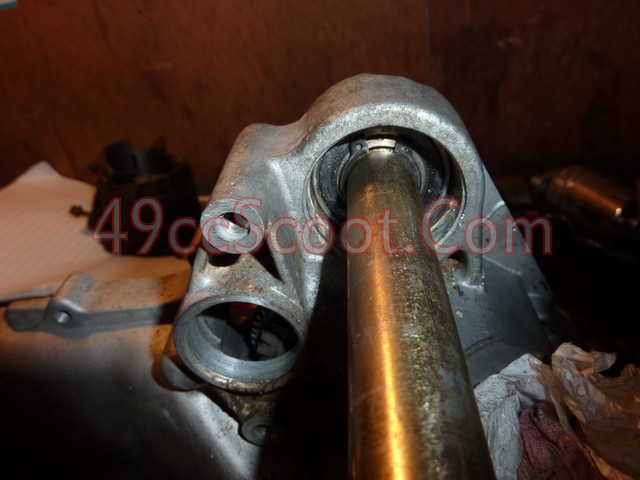
Now you can move on to swapping the scooter's center stand onto the ATV engine.
Turn the the scooter's engine on it's side or upside down. Remove the clip and washer on the end of the pin that holds the center stand in place.
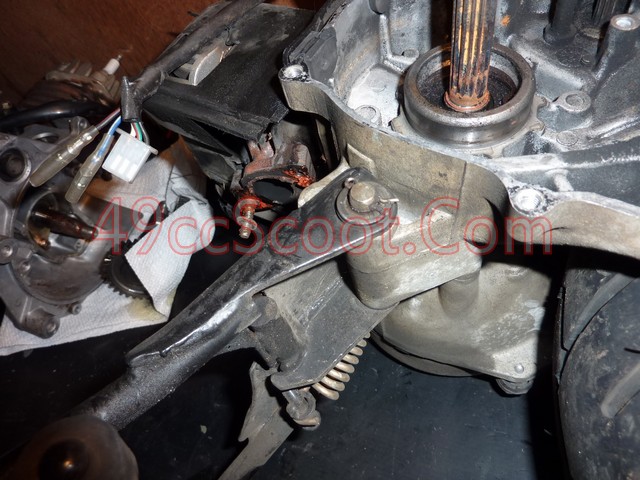
Press the pin out using a punch or a screwdriver. You may need to tap it out gently with a mallet. Once the pin is out it should be easy to remove the stand and the spring from the scooter engine.
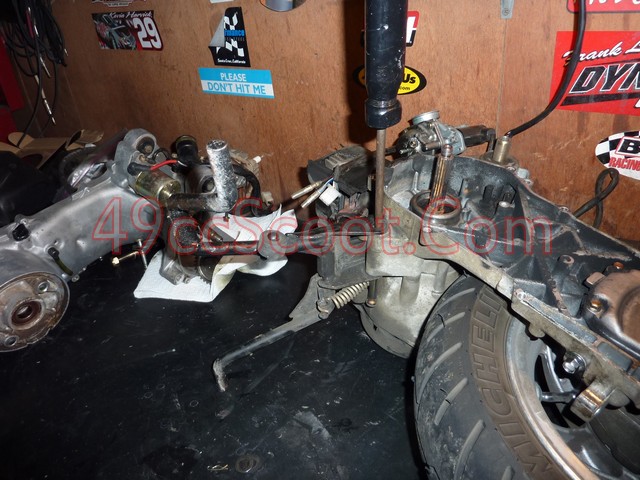
Turn your ATV engine on it's side or upside down and put the stand into position. Slide the pin through and install the clip and washer, just as it was installed on the scooter engine.
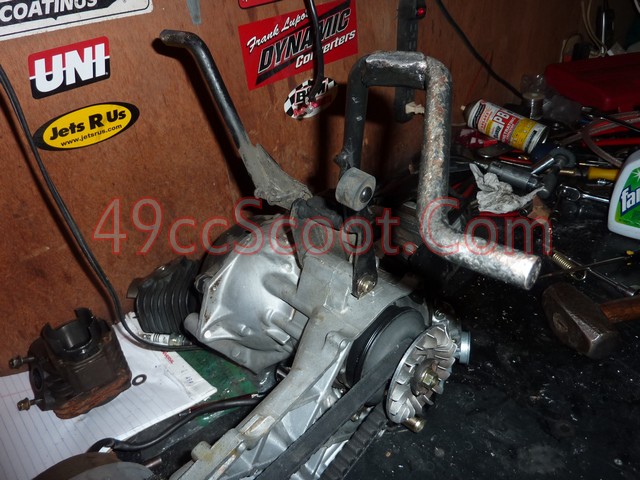
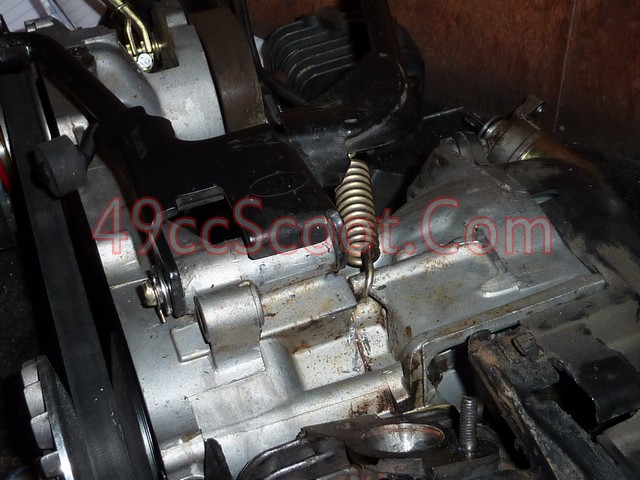
Put one end of the spring over this spot on the center stand.
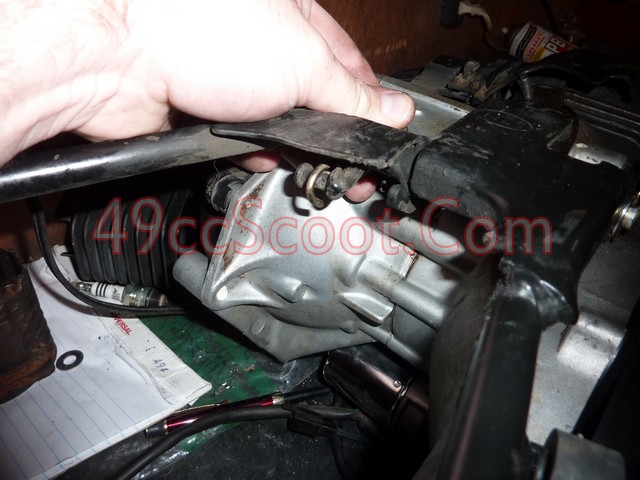
Now you need to stretch the spring and install it on the spot shown in the image below. Be careful doing this. It does require a bit of force. You can use a pair of pliers that will grap and close on the end to pull the spring. I don't suggest vice grips or standard pliers, but something that will not allow the spring to slip. I chose to use a screwdriver to stretch the spring into place. Put the screwdriver through the end of the spring and then put the tip of the driver behind the pin on the case wher ethe spring needs to go. Then you can pry the spring across and tap it down with a small mallet if necessary.
Now you can install the rear wheel, washer, and nut from the scooter. One nice thing about the ATV engine is that it has a little more clearance than the scooter engine. I had to grind away part of my exhaust mounts to fit this larger tire (110/80/10) on my scooter engine, yet it bolted on the ATV engine easily with no modifications.
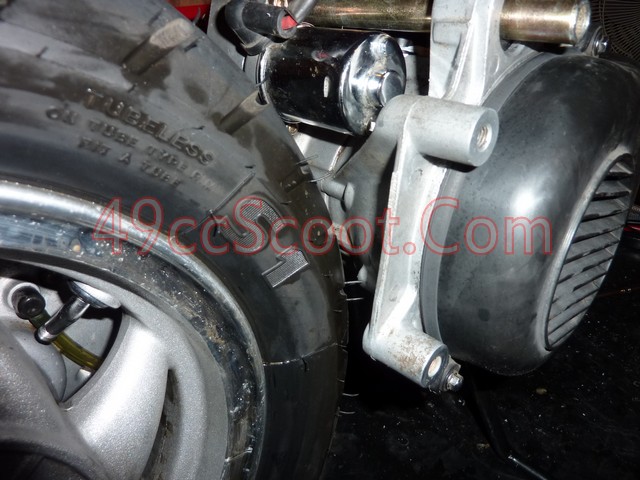
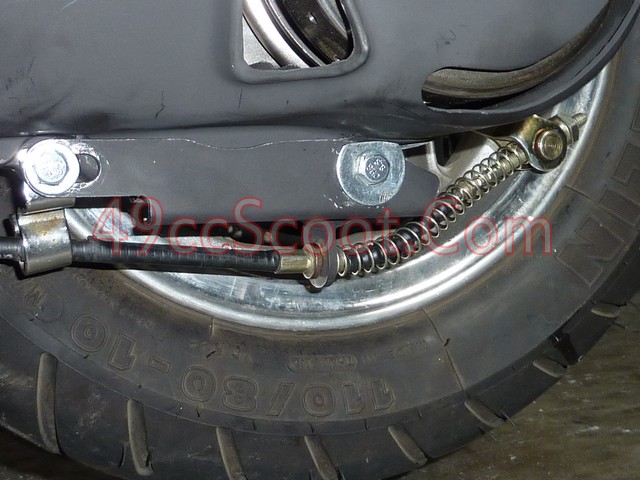
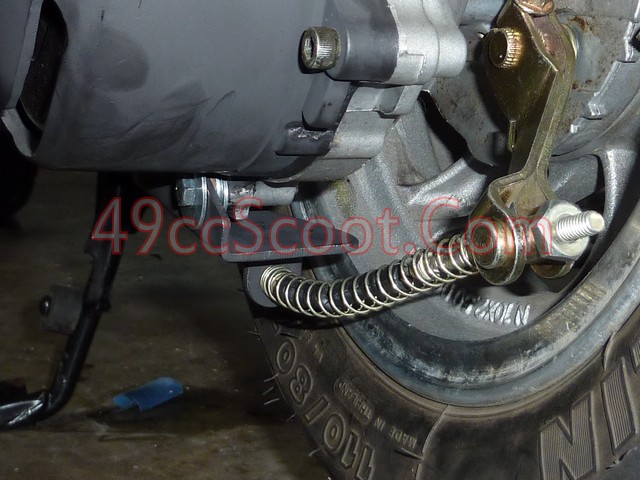
Scooter engine cases have this part molded into the case to hold the rear brake cable in place. The ATV engine has no such thing, so you will need to create your own so your rear drum brake will work properly.
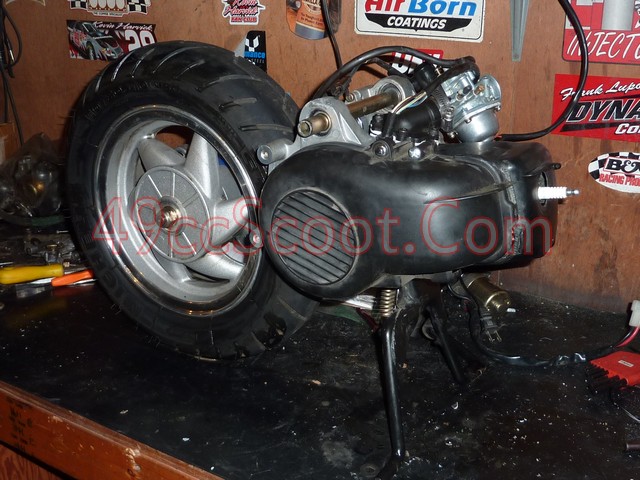
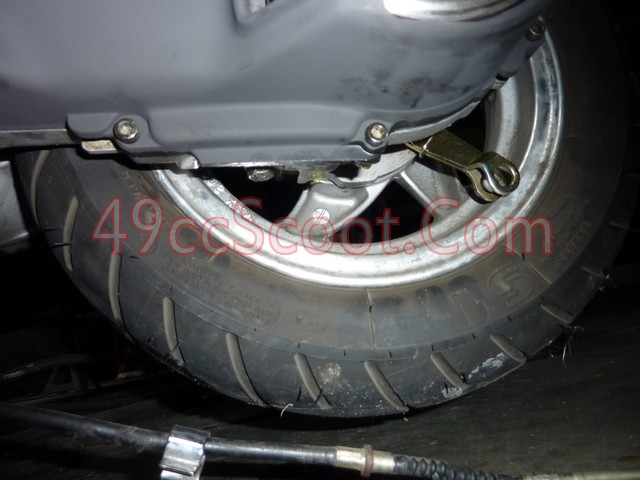
I used some steel that I had around to create a bracket for my rear brake cable.
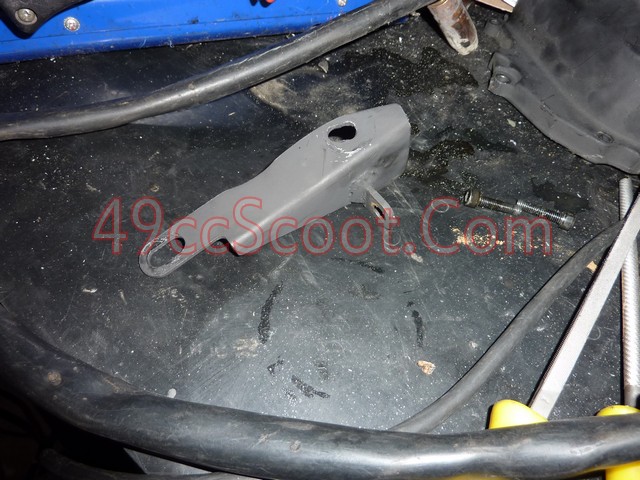
It sits on to two of the lower CVT cover bolts and a tab on teh bottom holds the cable in place. The hole in the tab for the cable to fit through must be the correct size. It must be large enough to fit the end of the cable through it, but small enough that the stop on the cable won't go through it. Take your time and make sure you get everything in the right spot. Be sure that the bracket is constructed sturdy so it does not flex or bend when you apply the brake. This is the hardest part of the ATV engine swap.
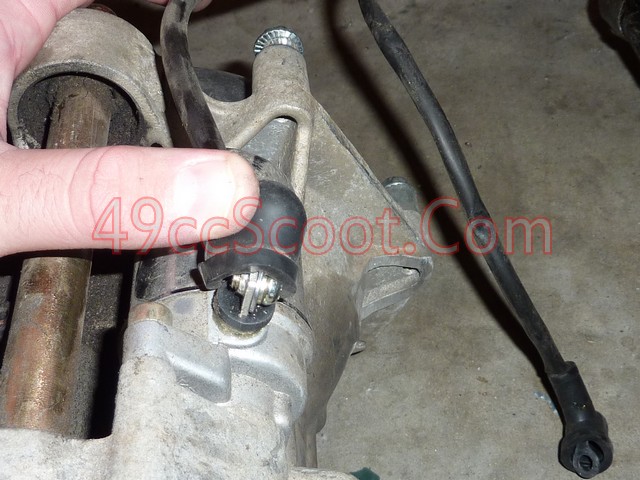
Check to make sure that the starter on your ATV engine is able to connect to your scooter. My ATV engine used a connector with a ground and power lead soldered to the starter, while my scooter used a ring terminal connection to the starter's positive tab and recieved it's ground from the engine case. I swapped starters, but you could modify the wiring to work for your needs if necessary.
ATV starter connection.
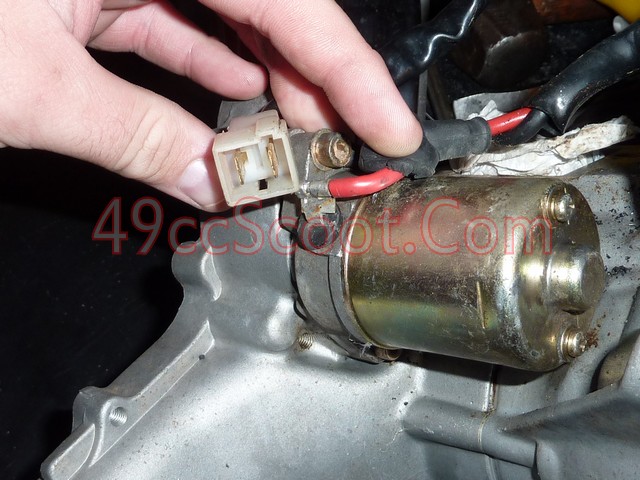
Scooter starter connection.
Finish swapping any remaining parts and accessories that you wish to use from the scooter engine and fill the final drive transmission with about 100mL of gear oil.

Now you can install the engine into the scooter, just as you would with a normal scooter engine.
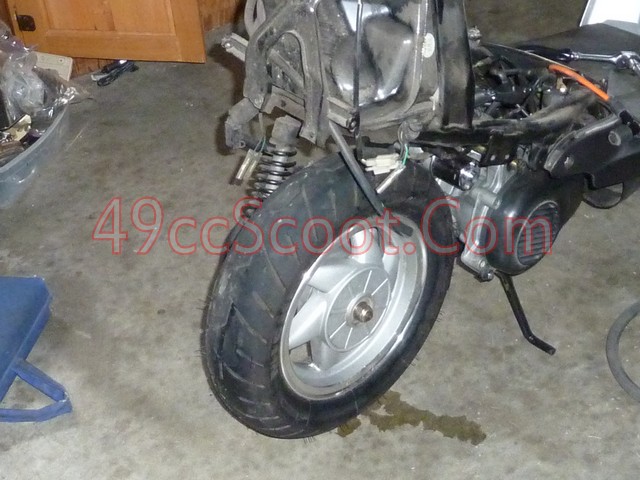
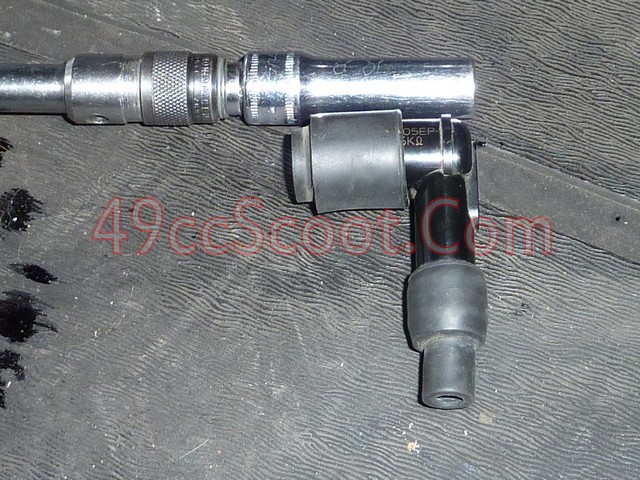
One thing that may be a problem on very small framed scooter is fitting the spark plug boot onto the plug, because clearance is so tight.
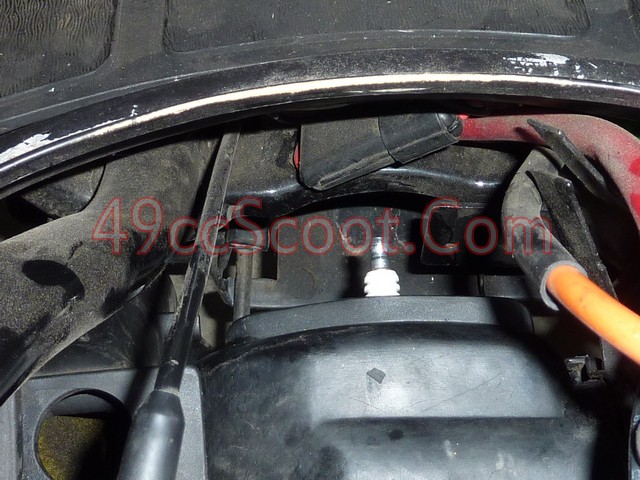
I used a hacksaw to cut a little bit off of the end of my spark plug boot and solve the problem. Leave as much as you can while still allowing relatively easy installation of the plug boot.
Before
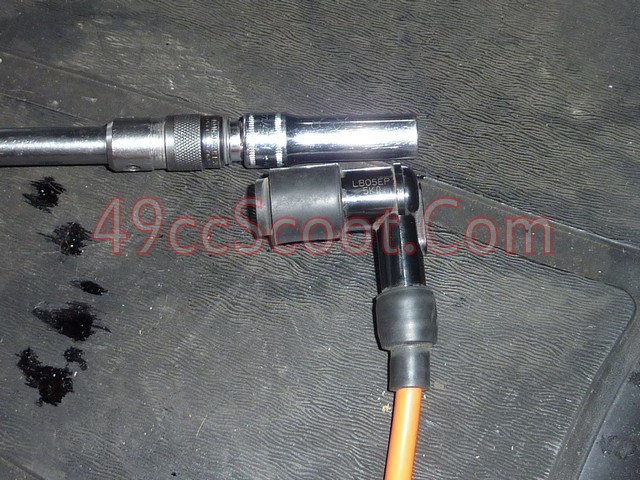
After

All that's left now is to make sure you have a suitable exhaust and carburetor setup, get it tuned, and ride!
Engine Codes
Here are engine codes that are known to be 90-100cc engines. If you know of other engine codes for these motors, PM me so they can be added to this list. If you can identify the engine as a minarelli type and the middle numbers are 50 or above, you have probably found a 90cc or better. Those numbers should represent the engine's bore.
1E50QMF
1E52QMG
[/div]


