|
|
Post by lagerhead on Mar 19, 2011 14:04:18 GMT -5
I sure this has been covered here before but I'm having a brain fart and can't find it.  I'm installing a new 70cc kit on my air cooled Minarelli horizontal, the new base gasket matches the cylinder exactly but the port areas on the new cylinder are larger than the case opening areas. I'm pretty sure that things would work better if the cylinder matched the case but I'm not sure how much grinding needs to be done. Do I just knock the corners off? Do I grind a 45 degree angle back to the edge of the gasket line? Take all of the metal out straight back into the case? And, is this something I can do without splitting the case? or is there a way to keep all of the debris out of the engine that I can't think of? Here's where I'm at right now... 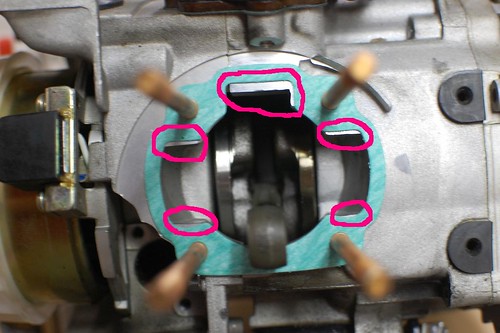 hmmmm hmmmm by benandangie, on Flickr Motoforce 70cc cast iron kit Leo Vince ZX pipe Stage 6 carbon reed block Motoforce manifold Stock Mikuni CV carb and airbox Thanks everybody. |
|
|
|
Post by 90GTVert on Mar 19, 2011 14:32:32 GMT -5
Basically straight back. You wanna make sure it's a smooth transition from the case up into the cylinder. You can try to stuff the case with a rag or something the best you can. Flush it out very thoroughly afterwards, even if you don't think anything got in there.
Kudos for paying attention to detail on your first build. I pretty much just slapped my first BBK on and rode. lol
|
|
|
|
Post by 2strokd on Mar 19, 2011 18:28:29 GMT -5
lol, me too ;D. Cool Ben, your building a 2T  :cheers: ! Looks to be a genuine Yamaha or equivalent Minarelli to. Good one! I was able to match a case somewhat while still together but i didnt go all the way to the crank in fear of getting metal in the case and bearings. It would be best to split the case IMO. And if you go that far you might as well put a better crank, bearings, and seals in  . Like Brent said, you can blend it better with the cases complete. I took my reedblock out and stuffed a wet rag in the case as tight as i could. When i was done, i pulled it out of the front (cylinder) side of the case. Good luck, should be a fun build :riding: |
|
|
|
Post by lagerhead on Mar 20, 2011 13:44:48 GMT -5
Thanks guys! Well I tried the rag stuffing trick and it seemed to be working OK but I just wasn't happy with it so after a little brain storming I came up with this... I cleaned everything as well as I could with a rag soaked in brake parts cleaner. Then I masked off the crank, case and intake area with tape... 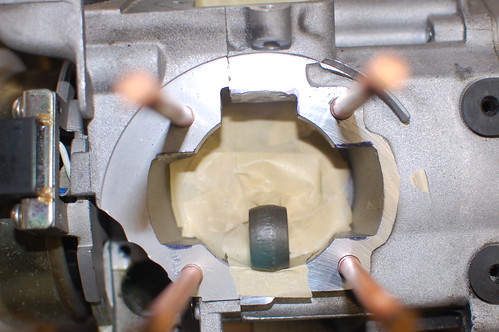 Masking tape Masking tape by benandangie, on Flickr 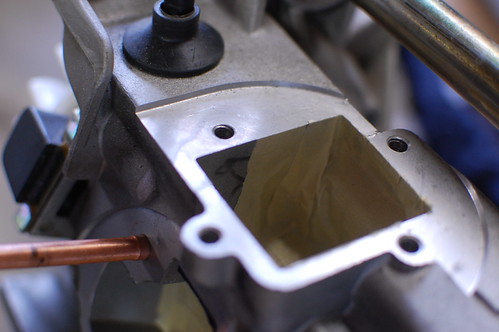 Masking Masking by benandangie, on Flickr Then after I thoroughly cleaned out my shop-vac, I hooked the hose to the discharge output and taped it to an old intake manifold I had laying around... 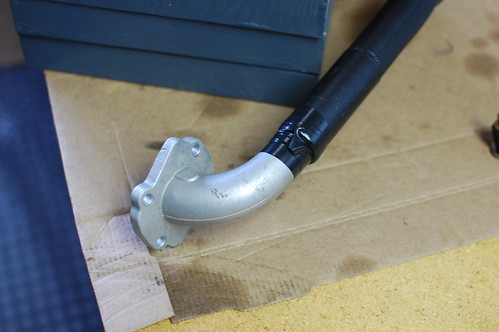 Intake Intake by benandangie, on Flickr 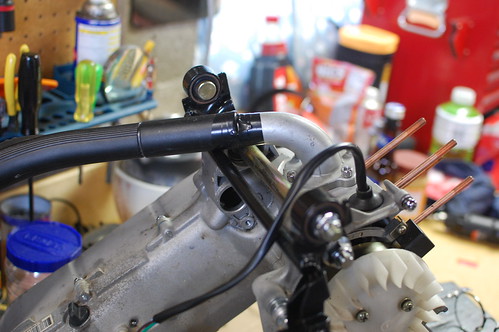 Forced air induction Forced air induction by benandangie, on Flickr Turn on the shop vac, put on safety glasses and grind away.  So far it looks like it's working awesome, I can't see any shavings inside the case and from the amount of glittery dust I'm finding everywhere else in the garage I can't imagine too much made it inside. :rockon: Still a little more to go but here's where we stand right now. 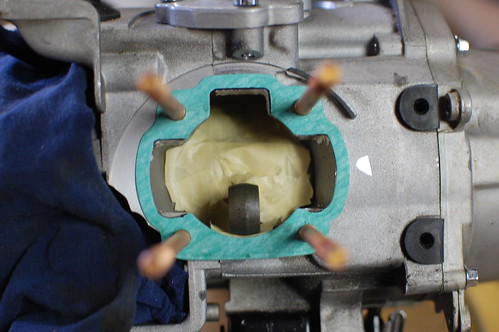 Fitting the gasket Fitting the gasket by benandangie, on Flickr 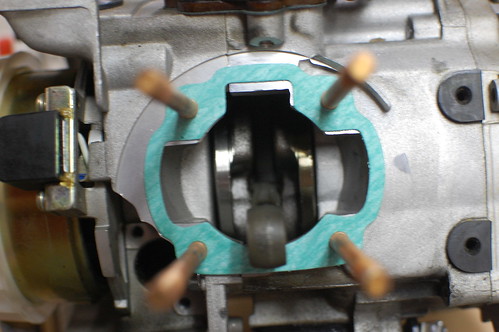 new gasket new gasket by benandangie, on Flickr |
|
|
|
Post by lshigham on Mar 20, 2011 13:54:19 GMT -5
Good work :thumb:
|
|
|
|
Post by 90GTVert on Mar 20, 2011 14:06:21 GMT -5
Nice work on the ports, and I really like your idea for keeping it clean.
|
|
|
|
Post by 2strokd on Mar 20, 2011 15:05:39 GMT -5
Great idea! Looks good!
Guess that isnt a yammi mina. Must be a CPI?
|
|
|
|
Post by lagerhead on Mar 20, 2011 15:45:43 GMT -5
|
|
|
|
Post by shakerdriver on Mar 20, 2011 19:42:22 GMT -5
Cool idea there with the vac hose Ben, i might've put it on the suction hose though. less to clean up later, but still cool idea.
|
|
|
|
Post by lagerhead on Mar 21, 2011 5:34:49 GMT -5
Cool idea there with the vac hose Ben, i might've put it on the suction hose though. less to clean up later, but still cool idea. I'd thought about running the vac in suction mode but didn't like the idea of pulling the debris into / thru the case and intake. But... as of last night, she's a roller! 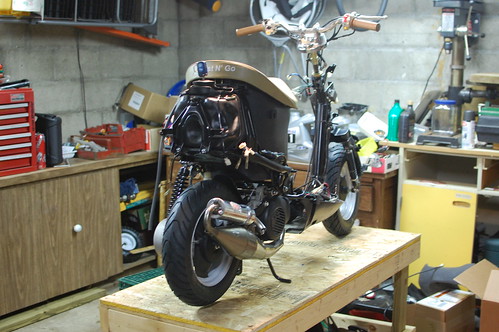 DSC_1903 DSC_1903 by benandangie, on Flickr :rockon: |
|
|
|
Post by 90GTVert on Mar 21, 2011 5:51:22 GMT -5
Looks clean. I like the paint job on the wheels. I may borrow that idea someday. ;D
|
|
|
|
Post by 2strokd on Mar 21, 2011 7:44:11 GMT -5
Good work :thumb:
|
|
|
|
Post by Enviromoto on Mar 21, 2011 21:16:00 GMT -5
Very clever way to use the vacuum and the build is looking great. Keep up the good work  |
|
|
|
Post by Thebatman on Mar 22, 2011 9:18:55 GMT -5
Love the vaccum idea... sure wish i had thought of that.... ;D
Looks like a great job to date... :thumb: ...(i am right there with you on a 1st build. :cheers: )
|
|
|
|
Post by lagerhead on Mar 22, 2011 9:31:41 GMT -5
Thanks everybody. I finally got it out of the garage for the first time...  standoff standoff by benandangie, on Flickr Man that thing is tiny! I didn't really plan on working on it last night but of course everytime I got near it I would just tighten this or adjust that and before I knew it... it was running! Yahoo! :nana: Not running really well but running. 90Gtvert - does this need to go to the "builds" section? |
|