|
|
Post by 'O'Verse on Feb 15, 2017 22:15:55 GMT -5
I noticed your door knob lamp. But who's to judge?
|
|
|
|
Post by AtariGuy on Feb 16, 2017 1:34:17 GMT -5
I just tossed it together quick for a picture lol dont ask me how i missed it but its already out there for the whole scoot world to know lolol but it was just a 5 second throw together - i would be taking my time assembling it triple checking my work. On that note, triplebond 1184 or permatex moto-seal for sealing the cases together? Or does anyone recommend something else?
|
|
|
|
Post by AtariGuy on Feb 16, 2017 4:09:50 GMT -5
Ok, i started reading dozens if not hundreds of forum posts outside of this forum on which crankcase sealant i should use. I should probably redefine or retract the question as to not start world war 3. Here's what i did learn.
1 - engine cases flex. This eliminates hardening sealants. Best option is a semi-dry or rubber-like flexible gasket.
2 - a case sealant needs to hold up to oil and gasoline. Pure silicone does not (try it some time, put some silicone on a piece of metal, let it cure, then give it a 3 day bath in gasoline, instant goo) - question though, since RTV (Room Temp Volatile/Vulcanized) is silicone based, wouldn't it share the same properties as regular silicone?
3 - a case sealant should withstand heat expansion and cooling contraction throughout its lifespan (shares with point 1) so it needs to be temp rated - in this case, whats a safe temp estimate of crankcases on an air cooled high revving 2 stroke? One would imagine no higher than 400 at the cylinder base gasket...?
4 - at some point, it should be considered that an engine may need to be disassembled, so it can't be completely permanent. Some sealants state they are easily removed, one even claimed that its practically reusable (hylomar racing blue i think it was?)
This pretty much had me down to yamabond 4 or 6b (ducatibond, fijibond, hondabond, whatever), threebond 1194, hylomar (unspecific to which number), some napa aviation brush-jug sealant, and some mentions of rtv ultra gray...
Based on this narrowed down list, i'm probably gonna give the yamabond a shot. The local cycle shop here is a yamashop, maybe a slight markup, but dollars to pesos says i'll have exactly what i'm looking for right away for less than 10 bucks. Lot better than the other parts stores would do for me. Story for another time, but theres a parts store in town that a few of their "certified parts handlers" lack sufficient mechanical knowledge to do their jobs, they just try to make worthless sales... they had no idea what a manual fuel shutoff switch was... told me to look down the electrical aisle...
|
|
|
|
Post by 190mech on Feb 16, 2017 4:42:39 GMT -5
Ive used the Permatex Ultra Grey or Ultra Black on many cases,havnt had a problem...
|
|
|
|
Post by oldgeek on Feb 16, 2017 6:28:45 GMT -5
Permatex ultra grey or Yamabond for case sealing, intake sealing, and sometimes cylinder base sealing. Most of the time I use coats of copper spray on the cylinder base gaskets and head gasket, or just the copper spray instead of a head gasket depending on what I am trying to do with the squish.
|
|
|
|
Post by ryan_ott on Feb 16, 2017 6:44:20 GMT -5
I have used ultra grey for all case intake sealing. I don't prefer the moto seal, too thin for my liking. If you have a small engine shop around you can get the B&S gasket sealant (100106) which is three bond for cheap. I've been using that recently.   free photo hosting free photo hosting |
|
|
|
Post by AtariGuy on Feb 22, 2017 18:28:12 GMT -5
Currently masking off my carters for a paint job. EDIT - Rustoleum Chevy Orange engine enamel. Found that golf tees mask the m6 holes rather well, just gotta snip them short, the top threads will grab the taper so a light finger twist will seat them enough to prevent paint from accessing the threads. I had to skip bearing removal as i'd need a tool similar to a 3 jaw puller with an outside brace to pop them out. I tried the hot case, air duster bearing pull using a collet style slide hammer and wasnt able to yank them. So i'm just masking over them instead. Problem is, i cant get to the rear axle seal between the needle bearing and the outer rubber sealed bearing - and i have to bake the case to do my crank install. Hopefully i get another shot at yanking that bearing during the crank install monday... 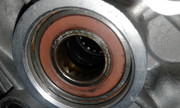
That one way in there thats difficult to see |
|
|
|
Post by AtariGuy on Feb 24, 2017 13:17:55 GMT -5
|
|
|
|
Post by AtariGuy on Feb 24, 2017 13:26:11 GMT -5
Finally the paint 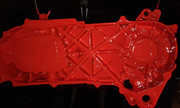 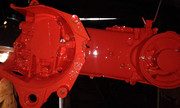 Awaiting the drying and prep for second coat. Its a little rough right now, but i'll clean it up tonight |
|
|
|
Post by AtariGuy on Feb 24, 2017 13:59:46 GMT -5
I'm trying to do these pics from my phone, and tbh, this phone is jacked up. The colors arent coming out right, and the posting of the pictures was slightly interrupted so it came out across 2 postings. Anyway, i'm going with chevy orange rustoleum engine enamel for the carters, going to tidy up the cooling shroud and leave it black, perhaps paint the cooling fan blaze orange as well, and the cvt cover will be black...
|
|
|
|
Post by AtariGuy on Feb 27, 2017 20:39:45 GMT -5
Grand Reveal!
Ok not really a grand reveal, but here's my progress the last couple days. I unmasked the case halves, acetone across all the gasket points, cleaned it up nice and good. Assembly all day today. Used Permatex Ultra Grey, funny thing though, i got that half ounce tube from the parts store, should have gotten the 3 ounce. I didn't realize how near empty that little tube was, it was like screwing with an empty tube of toothpaste to get the last 2 brushes worth out. Once i got the cases together over the crank, I prepped everything for assembly. Gave me that hour rest period before torquing down the case halves onto the permatex. The only major problem was the stator I got from Niz.  I knew there was a difference in output wires, but i neglected to count the coils, my original had 7 coils, 5 wires and the one he sent had 6 coils... Niz, I know you're reading this, I apologize for the mixup. I did however do some hardcore stator rebuilding and got 1 complete unit. As for the piston & cylinder, I used my old piston, just worked the carbon off it best I could, then used the jug and head 180 sent me. And a major thanks to ryan_ott, the front variator bits came in handy here too, cleaned up nice! There's even a brand new brake cable, a good cooling shroud and cooling fan too! I just need to get bolts for them from the LHS. The next set of bits I still have yet to find are the SHORTCASE cvt cover with some kickstart bits, a valve stem, and a throttle cable. Then onto the body work! OK OK, here's the pictures you wanna gawk at! Enjoy! 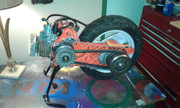 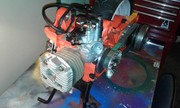 This pic here is almost the best representation of the color it actually is! I like it! 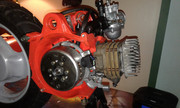 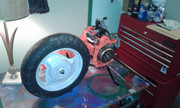
|
|
|
|
Post by AtariGuy on Mar 1, 2017 2:18:47 GMT -5
Ok ya'll, i know its been a bit of a letdown reading my "build." I admit this was the classroom build for me and i posted a lot of redundant stuff everyone already knew, how to rebuild a parts bike. For me though, it has been quite the experience so far. I've learned more in a hands on approach in this last few months than i expected and yall have been huge support throughout. Added bonus, i have acquired a nice supply of tools to handle most everything i need to fix. I still plan to post all my progress getting this back on the road, then we'll start looking at the parts i'd like to give it.
Speaking of parts, is it just me or are there a drastically small amount of cylinder kits designed for a 12 pin? Or can i use one brand of piston on another brands cylinder? Example, i've been staring at this naraku 47mm sport ported cylinder, could i use another 47mm piston that fits my wrist pin?
Plans wise, i dont want a hyper race setup as i do a lot of town driving, but i'd like to definitely add more to my ride for the country road rides. I dont have the skill yet to mill out a case for a 90+ build, and i'd like to keep SOME low rpm power for in town riding. So ideally, i'd like to give this a 70 sport cylinder paired up to a tecnigas next r and a dell 21 carb. After that, i'd like to get into an overrange cvt and gear closer to 10.5 from 11.07. That way i have some 50mph out of town while keeping nice response in town. Any suggestions?
|
|
|
|
Post by AtariGuy on Mar 1, 2017 2:21:09 GMT -5
(I'm saving hyper race for my next scooter) (evilgrin)
|
|
|
|
Post by ryan_ott on Mar 1, 2017 6:24:51 GMT -5
Good job saving another scoot. There are plenty of 12mm cylinder kits around just need to look. Scootertuning.ca, scoot-tuning and treatland.tv are all good places to start. If your planning on lost of miles I'd look at the cast over the aluminum cylinders. Also something to think about is when it's upgrade time is just going for a complete 90 engine. 49ccscoot.proboards.com/thread/17423/epa-crackdown-sale |
|
|
|
Post by niz76 on Mar 1, 2017 21:23:30 GMT -5
Oh man the stator was different? Not exactly sure how much of a difference the # of coils makes-might not matter- so you may want keep it around for your next build lol.
There's tons of 12mm kits out there. Keep in mind that the horizontal Jog, Zuma, Aerox, 1e40qmb, etc cylinders are all the same when shopping. After a while in the hobby you get to know which scoots use the Mina horizontal engines so you'll know when browsing sites like scootuning which bikes you can click on for engine parts that fit yours...
|
|