|
|
Post by 90GTVert on Nov 17, 2011 11:04:07 GMT -5
Trying To Get Back On TrackAfter quite a bit of searching, I could only find one of the rear pulley assemblies with the JOG... markings. It was on eBay and I couldn't see the back of the pulley. I tried to contact the seller, but they would not reply. I saw the JOG.. marking on the clutch bell in image he had posted in the listing and thought it would be pretty likely to have the same markings on the back and be what I need. Luckily, I was correct.  This rear pulley did have the pulley face I was looking for, as described previously, but the torque driver did not have grooves of the same length. They looked like any other TD I've seen and fell short of allowing full travel. For that reason, I opted to use the torque driver I modified (shown previously) along with the new fixed half of the rear pulley to be as close as I could to how it was setup. I installed a fresh contra spring and the same 6g sliders as I have been using. I still find that it's not the same feeling it had. It's close, but the top speed varies more than it did and the acceleration is a little bit different. While I would like to keep everything as consistent as possible, the weather here in mid-late November is going downhill fast and I would like to at least finish out this phase of the project. Also, it has become apparent so far that I'm not seeing any big power gains and if I do, I will notice them in other places besides just top speed. CHT readings and fuel economy numbers should be accurate and again I can report power changes whether it shows on the GPS or not. For those reasons, I will be continuing this phase of the project as setup now. As I have said before, even the slightest changes in angles or how easily something can move can make a big difference and I feel it will be impossible to get it setup just as it was and I don't want to start the whole phase over. |
|
|
|
Post by 90GTVert on Nov 17, 2011 14:14:18 GMT -5
19mm DellOrto PHBG CarburetorNext in line is the 19mm DellOrto 19mm PHBG. Just like the Arreche tested before it, it's a 5mm larger venturi than the stock carb. Here's a look at the 19mm Dell beside the stocker.  Stock 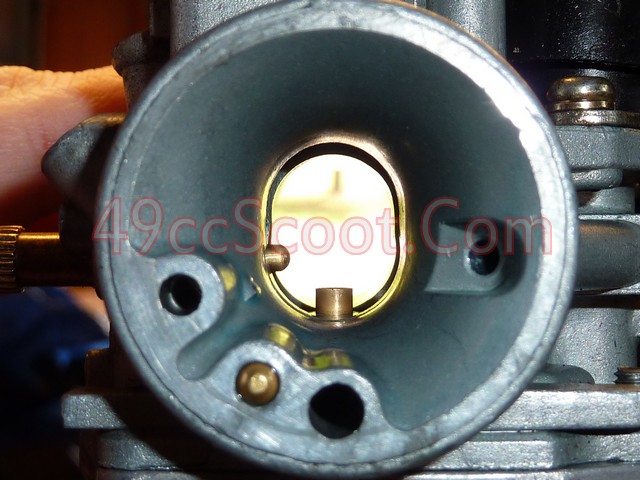 19mm PHBG. Notice the black adapter. These carbs use screw on adapters to allow more fitment options easily. This is a 38mm adapter to work with the stock airbox.  Connections etc...   There is a standard and a racing edition of this carburetor. This is the standard edition, part of which means it has no easy access to the main jet through a plug in the bowl. There are bowls available with plugs that you can add later, but I hear the quality of many non-DellOrto bowls is sub-par, so shop around or just buy the black/racing edition to begin with if that's important to you. There isn't a big price difference in the two. 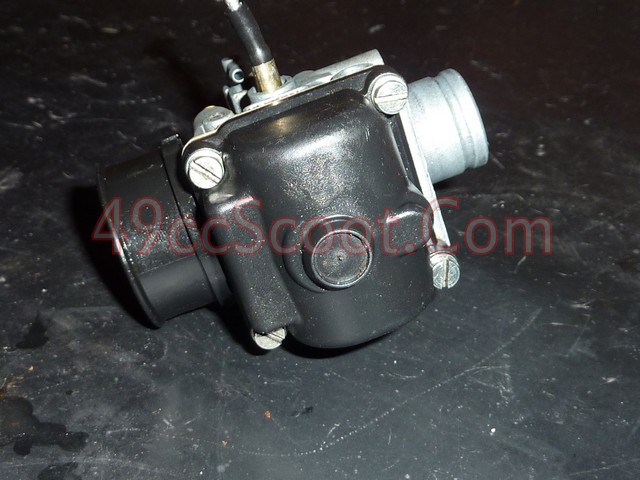 Inside the bowl.  Throttle valve, needle, pilot jet, starter jet, main jet, atomizer. 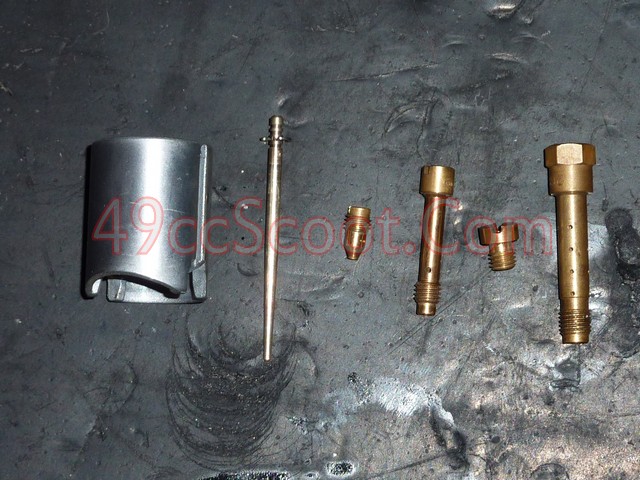 The Dellorto carbs of this series use 5mm main jets, until you go larger than 21mm and they switch to 6mm mains.  Here's a closer look at the pilot jets used for this series of carburetors.  I bought this carb used, so I'm not sure of the stock specs. Upon searching, I found that these can come in different configurations of jetting and needles. Installation is simple. The compact size allows it to swap in mostly like stock and it has connections to allow for oil injection as well if you would like. There are a few changes. The first is that the locater nubs on the stock intake hold the carb out farther than I like. It would clamp in fine, but I chose to use a razor and slice off the nubs to allow for a flush fit.   These carbs also come with only manual enricher options. There may be some sort of automatic enricher setup available for these, I'm not 100% sure. I believe the manual chokes work better anyway, and prefer them though. This carb came with a pull up manual enricher as shown. The only issue with it is that it can be harder to access under the seat than other enricher setups. You can get a lever version or cable actuated versions too. The cable operated chokes let you mount it wherever it suits you for easy access.   Whichever you choose, they're easy to swap out. They just screw into an opening in the carb. Some of the cable units will require a bit of adjustment to get them working perfectly though.   I had to switch to the smaller cable adapter that comes stock with some of these for clearance reasons, instead of the large one shown in some pics. If using a stock cable you should be able to find an adapter that would work or modify your stock cable to work with this.  Once you sort out the little details, it fits quite nicely in place of the stock carburetor. It is a bit of a squeeze installing the airbox onto the adapter on the carb's inlet, but it is very secure once installed.  I ended up with a 95 main jet, 40 pilot, and the W3 needle was set in the next to richest position (of 4) to get it in tune. The pilot jet started out at 50. Needing to use a smaller pilot jet seems to be quite common with these carbs from my own experience and that of others. I went for a 39 mile test ride, where I observed 49.38MPG. That's pretty close to some of the numbers I've seen with the stocker and 10+ MPG better than the Arreche of the same size. Maximum speed was 59MPH at around 8,500RPM. Cruising speeds remained right on par around 48-52MPH sitting up at WOT. Everything felt about as it did with the 19mm Arreche. More power at lower throttle positions than stock, but it didn't translate to much improvement in WOT performance.  Cylinder head temperature readings were very close to the results with the Arreche and showed a big drop vs the 14mm stock carb. I saw 235 - 245°F cruising at 40MPH and 280 - 295°F at WOT with ambient temps of roughly 45°F. The difference in temperatures between the two 19mm carburetors probably has more to do with main jet selection and needle settings than anything else. I like this carburetor, and if I were going to choose another 19mm, there's no doubt I'd pick the DellOrto over the Arreche every time. It's easier to get parts for, I like the manual enricher setups offered better, it's shown to be pretty far superior in fuel economy on this test, and I feel that it's a little easier to tune. The Arreche does have access to the main jet in the bowl, but you should be able to get the black/racing edition of this PHBG for about the same price as the Arreche. |
|
|
|
Post by 90GTVert on Nov 20, 2011 0:48:46 GMT -5
21mm DellOrto PHBG Racing EditionFor the next test, I moved up from the 19mm DellOrto PHBG to a 21mm DellOrto PHBG racing/black edition carburetor. Here's a look at the 21mm DellOrto beside the stock carb. You can get a pretty big increase in venturi size with this one in a small package that fits where the stocker will.  Stock.  21mm. Just like the 19mm DellOrto, this one uses an adapter on the inlet for more fitment options. The 38mm adapter is used here.  Here's a look at the 19mm PHBG and the 21mm PHBG. The whole line of carbs uses the same body, just with larger bores and other differences.  The most obvious difference between the standard and black/racing edition of these carbs is the paint job of course. They also feature a screw on cap instead of a cap that uses two screws to install it. Check the image above if that's unclear. The best difference IMO is the easy access bowl on the racing edition. It makes main jet swaps much faster.  Use a 16mm wrench or socket to remove the plug and then swap out the main jet. It doesn't get much easier.  Of course the bowl must be removed completely to access the pilot and starter jets, as well as other bits.  The 21mm uses the same 5mm main jets and the same pilot jets as the 19mm DellOrto tested previously.   Starter jet, pilot jet, main jet, atomizer, needle, throttle valve.  Stock Specs Stock SpecsMain Jet : 92 Pilot Jet : 50 Starter Jet : 60 Atomizer : 262AU Needle : W7 Throttle Valve : 40 Connections.   Just as with the 19mm version, it's helpful to remove the locator nubs from the stock intake for a flush mount.  I'm using the same choke used with the 19mm version as well. Everything fits neatly in place.  I used a 98 main jet, 40 pilot, and the needle clip in the next to richest (of 4) positions. On a 41 mile test ride, I got 62.86MPG. That's the best fuel economy I've seen in all of Project 90 to date. WOT cruising was right on par around 48 - 52MPH, and max speed was 58MPH at about 8,500RPM. Again, the rear pulley just doesn't work quite as it did. The difference in MPH isn't a power difference as best I can tell. I felt no difference in WOT performance vs any other carburetor tested in this phase so far. Acceleration at low throttle positions was greatly improved, as with all of the larger carbs so far. With this 21mm, it seemed like next to no throttle was necessary to stay at 40MPH. I saw increased CHT readings at 40MPH of 240 - 255°F. WOT was 265 - 280°F with 50°F ambient temps. I think the elevated 50MPH cruise temps stem from needle selection and adjustment. Since the throttle is open less to go the same speed, it needs to be fattened up a bit on the low end.  I was pleased that this carburetor showed such great fuel economy as well as improved cylinder cooling. It offers quite a dramatic increase in low throttle power as well. Once again, no noticeable power increase. It's easy to tune with the quick access to the main jet and the wide variety of DellOrto parts available. It's a very nice carb at a reasonable price. |
|
|
|
Post by 90GTVert on Nov 22, 2011 9:04:42 GMT -5
25mm DellOrto PHBLThis time around, it's the 25mm DellOrto PHBL carburetor being tested. Up 11mm in venturi size from the stocker, and with a larger body. 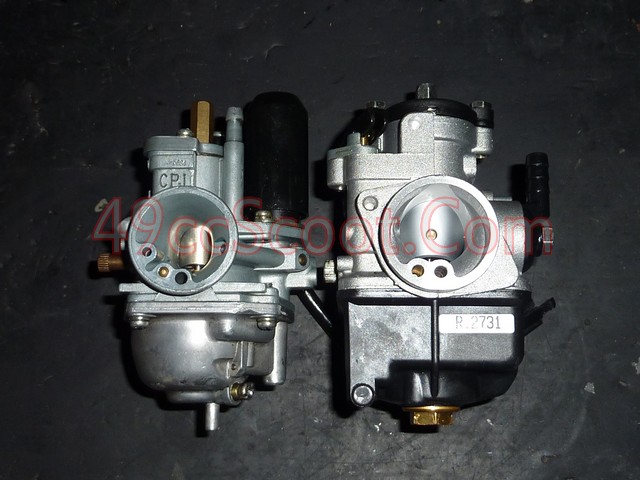 Stock.  25mm.  Connections etc...   Like some of the other carburetors tested, the PHBL has a plug in the bowl for easy access to the main jet. You need a 14mm wrench or socket to remove it.  Access to the main jet is slightly different though. The plug is also the main jet holder. You can swap the main jet without trying to stare up into the carb from below as with others. It also serves as the sole fastener to hold the bowl on. The bowl does stay attached to the carb when you remove the plug, but with just a bit of effort the bowl will pop off too. Not only can you changes the main jet faster, you can get to anything in the bowl faster.   Here's what you'll find inside of the bowl.  Starter jet, pilot jet, main jet, atomizer, needle, throttle valve. 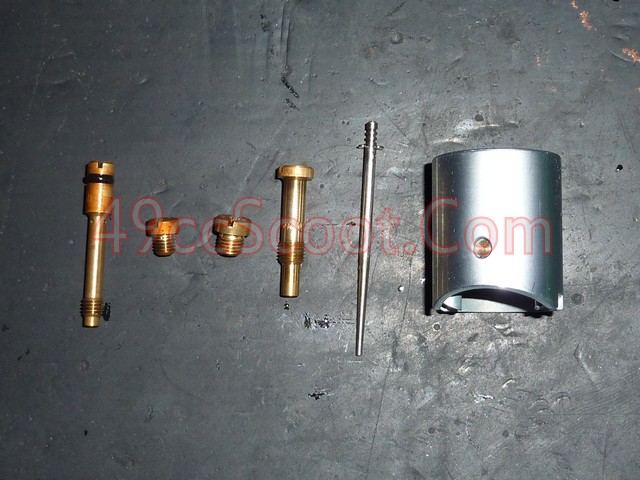 This carburetor uses a 6mm main jet and the pilot jet is the same 5mm as the smaller DellOrtos use for a main jet.  Stock Specs Stock SpecsMain Jet : 102 Pilot Jet : 70 Starter Jet : 60 Atomizer : AQ266 Needle : D22 Throttle Valve : 40 The PHBL uses a slightly different enricher than the smaller versions. It's the same idea, just attaches a little differently. This one came with a lever "choke".   This carb is just too big to fit into the stock intake, and it would be restricted by it if it could fit. I used a Polini 25mm aluminum intake. It's larger and a little bit longer, which pushes the carb farther outward. It also has 2 nipples to use for a vacuum source or for oil injection. I believe this intake was around $50 when I bought it.  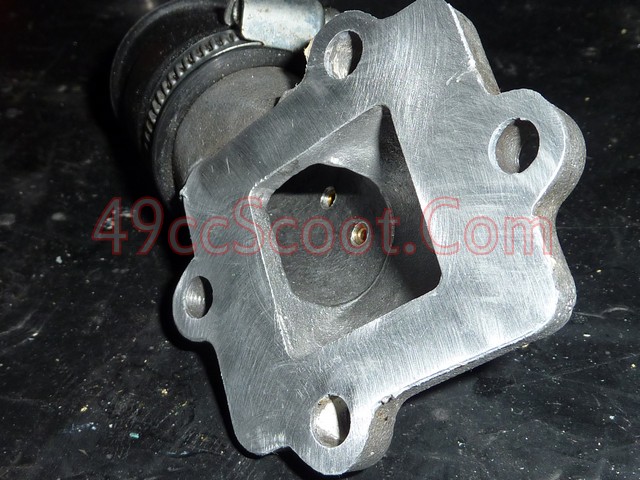 Stock vs Polini. 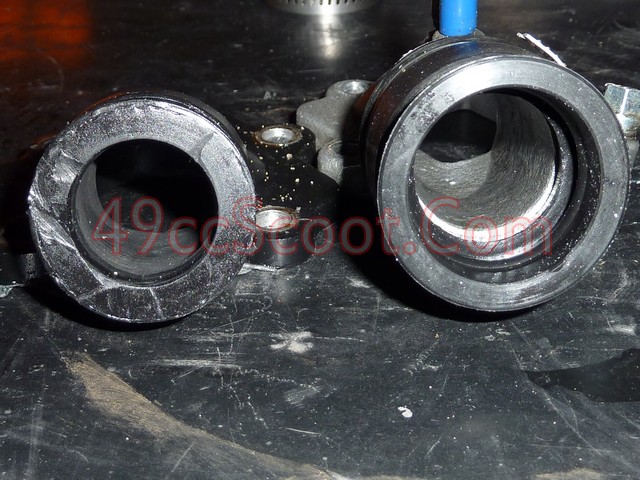 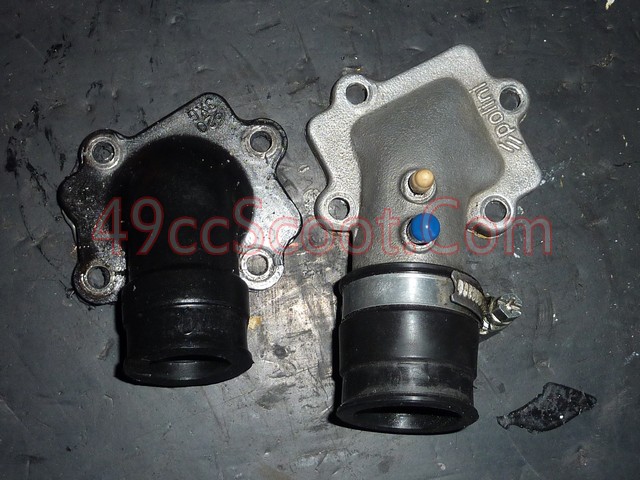 The larger carb and intake fit pretty well, although you can see in the second picture below that clearances are pretty tight with the frame.   You should notice in other pics that I'm using the same style of adapter for the cable that I've used on the other DellOrto carbs. The biggest difference here is that you may find the stock throttle assembly on some scoots won't work. The pull needed to fully open and close larger carbs is greater, so there is the possibility that you'll need a new or modified cable and a new different throttle assembly. The stock airbox could be made to fit over the inlet of this carburetor, however it's inside diameter is pretty small. I'll be using a modified airbox, as I mentioned in the beginning of this phase. All of the details can be found in the links below as well as in the baseline post for this phase of the project. 49ccscoot.proboards.com/index.cgi?board=carb&action=display&thread=134649ccscoot.proboards.com/index.cgi?board=carb&action=display&thread=2387&page=1Here's a look at the airbox I'll be using. 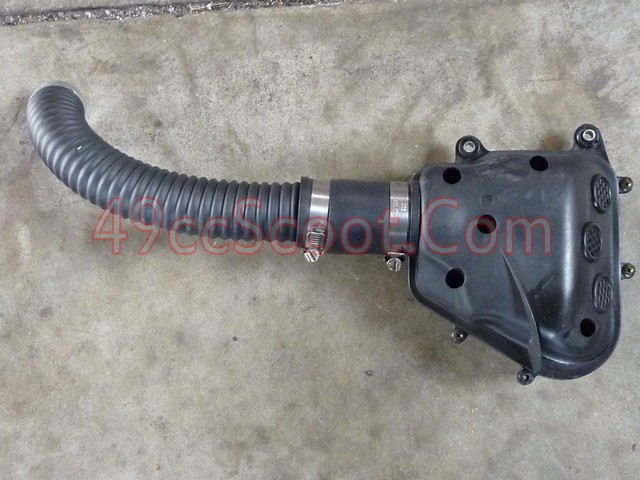 Here's the difference in ID between stock and the modified setup.  I use a hose clamp to attach the airbox to the carburetor and the airbox is mounted to the frame.  With everything installed, I tuned the carburetor and ended up using a 108 main jet, 62 pilot, and setting the needle clip in the next to leanest position (of 4). I went for a 35 mile ride, again being careful to ride the same as I have in other tests of this phase in an attempt at accurate fuel economy figures. I got 46.91MPG, the second worst of this phase to date. Cruising speeds at WOT were again 48-52MPH. Max speed was 59MPH at just above 8,500RPM. It did feel as if the scooter ran better when wide open than it has before. As with other carbs tested, the larger bore makes part throttle do more. It doesn't take a lot of throttle to cruise at lower speeds. Cylinder temps stayed pretty well on par with what I've seen from the other larger carbs. Ambient temp was 55°F. 40MPH cruising showed 240 - 255°F CHT, while WOT cruising CHT was 275 - 290°F. 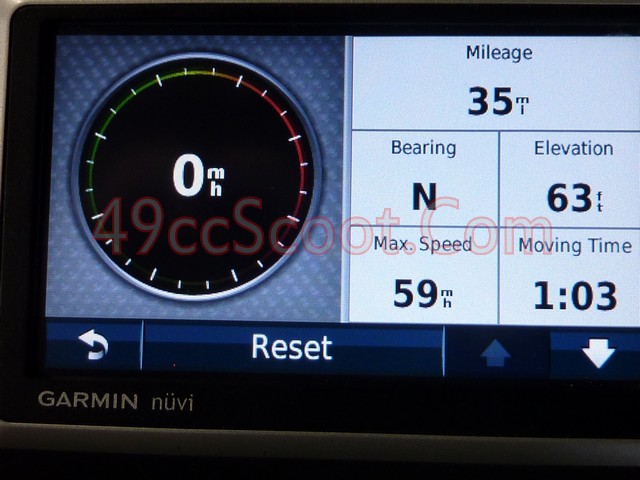 While I did feel a slight gain in power while wide open, fuel economy wasn't great and cylinder temps didn't drop any more. Add in the additional effort and cost of needing a different intake manifold and airbox setup and you have to think a little more before choosing this one. Then remember I have no fairings on this project. If you have fairings or a smaller frame, it's going to be even harder to fit. It's certainly not a bad choice, but I think at this point you really need to start weighing out pros and cons for what you want out of your scoot, where the 21mm DellOrto offered hardly any setbacks. |
|
|
|
Post by 90GTVert on Nov 27, 2011 17:35:29 GMT -5
28mm DellOrto PHBHNow comes the big boy, the 28mm DellOrto PHBH. You can see below that it's quite a bit larger than the stocker, double the size if you go by bore diamter since the stock carb is 14mm. Much more if you go by area. Stock would be roughly 194mm², while the 28mm is about 616mm². Just over three times the area.  Stock. 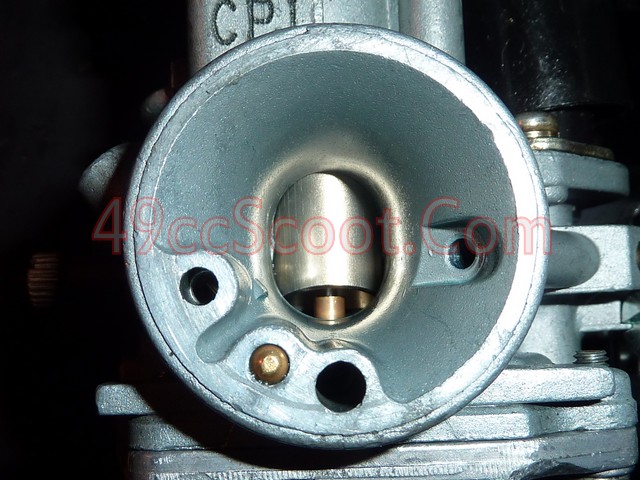 28mm.  Connections.  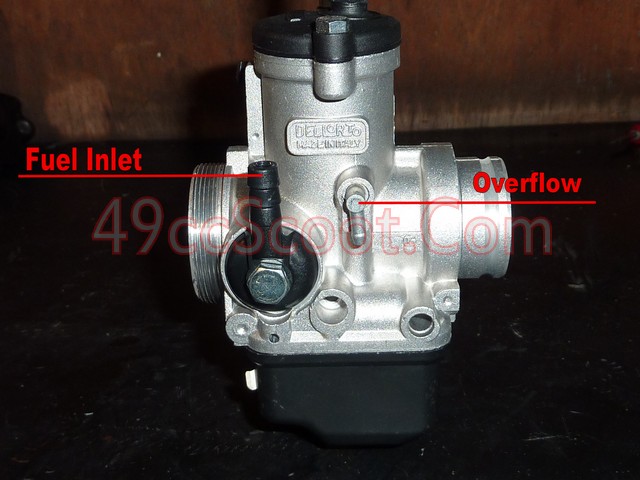 The PHBH has the same type of bowl and main jet setup that the 25mm PHBL has. The main jet comes out with the plug in the bowl, and that plug is all that secures the bowl.  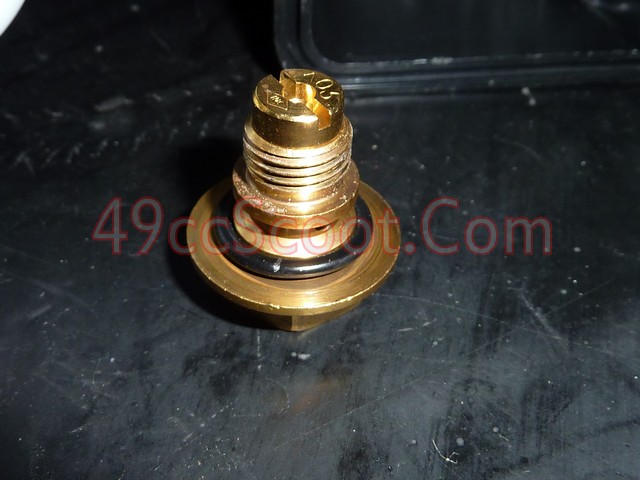 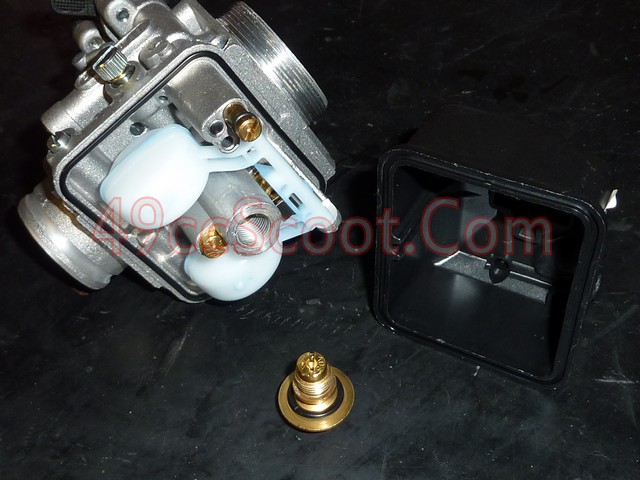 Inside of the bowl. 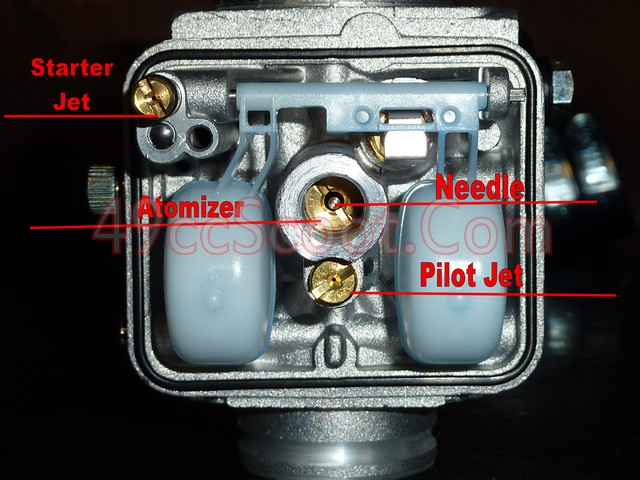 Starter jet, pilot jet, main jet, atomizer, needle, throttle valve. This carb uses the 6mm main and 5mm pilot jet. 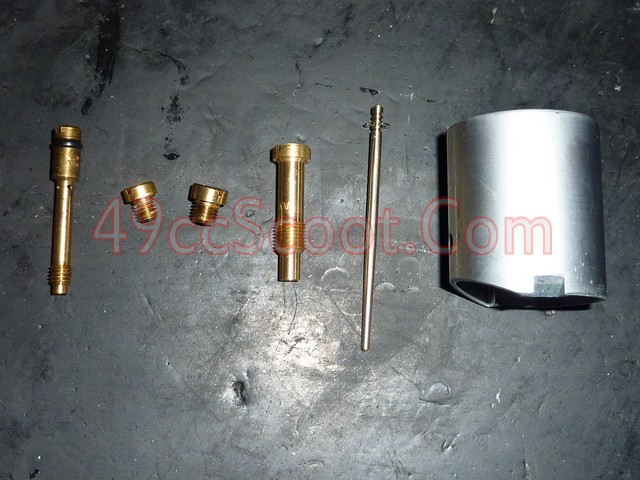 The stock specs of this carb are listed below. It's mostly good to go on my setup, but the main jet is way off for what I expected and needed. Stock SpecsMain Jet : 105 Pilot Jet : 55 Starter Jet : 70 Atomizer : A4264 Needle : X2 Throttle Valve : 40 This one uses the same enricher as the 25mm PHBL, with a manual operated lever.  This big carb requires a much larger intake than stock, and is too large for the Polini intake I used on the 25mm. I chose a Hoca intake (PN 169-124 from Parts For Scooters ) that could handle the task and came in at only $35. 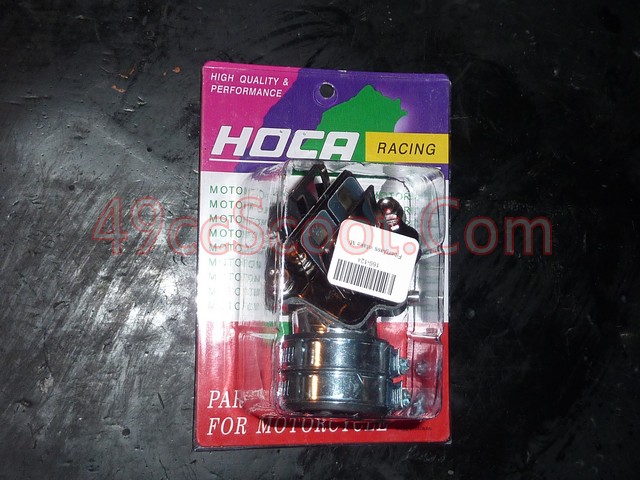 Here's the difference in the stock intake vs the Hoca. 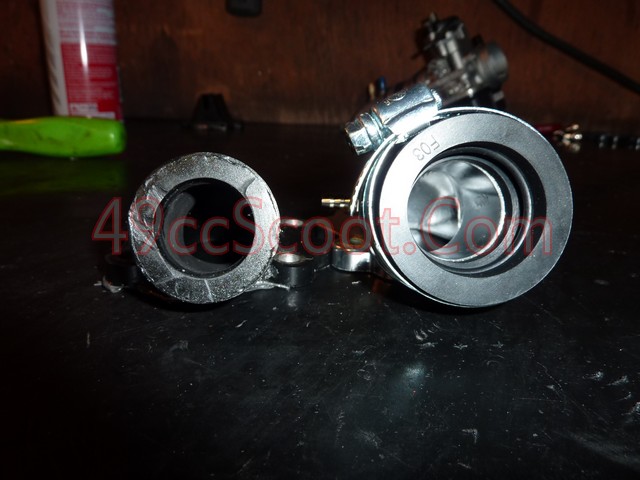 It's got a very large ID throughout. 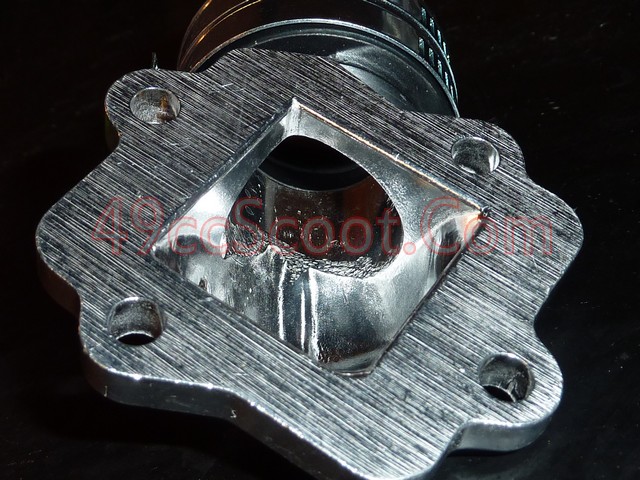 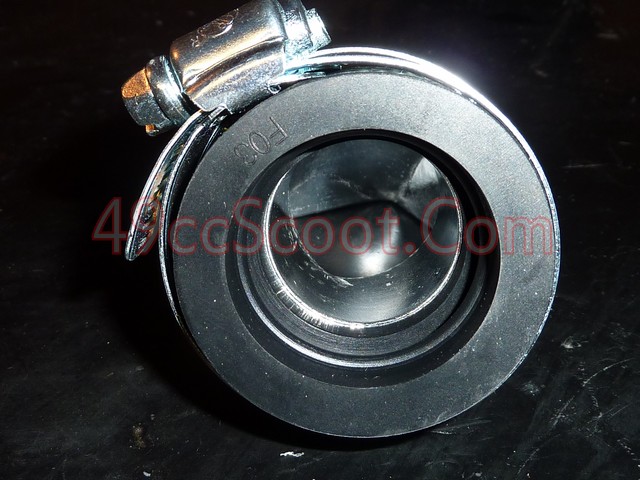 The Hoca is a bit longer than the stocker as well. 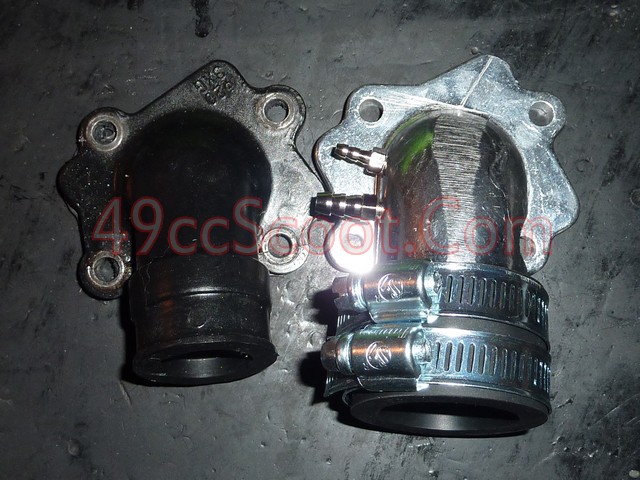 It includes 2 ports that can be used for a vacuum source or for plumbing in oil injection. 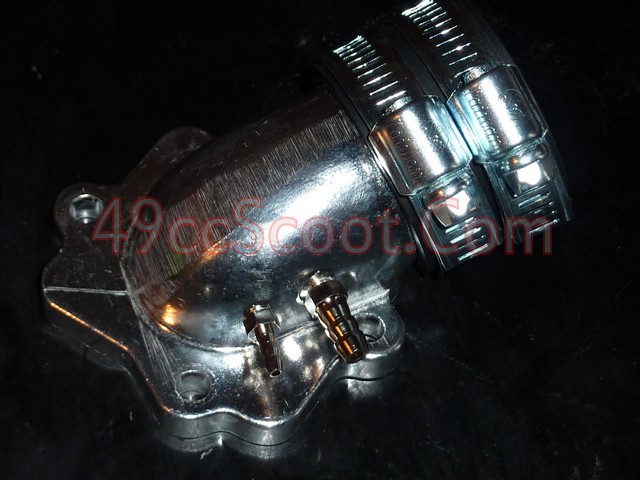 You may have noticed in the initial shot that this intake came with reeds. It's available with fiberglass (as shown) or carbon fiber reeds. I chose not to use them. They don't get great reviews. I have used them long ago, but after using brands like Malossi and Polini I found them to be inferior quality. Here's a look at what it comes with anyway. Still hard to beat for the price if you go with a big carb. 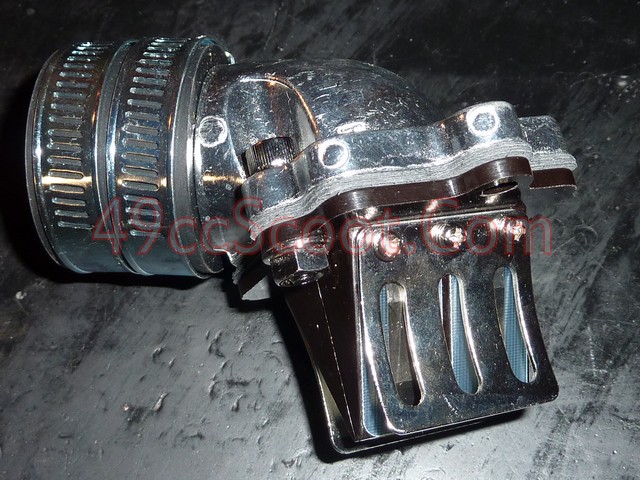 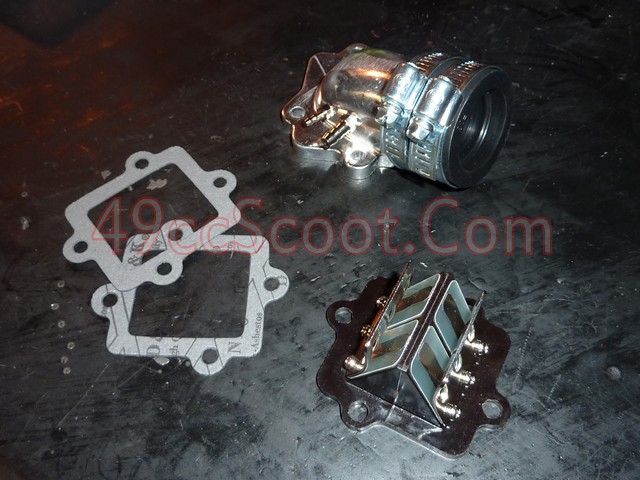 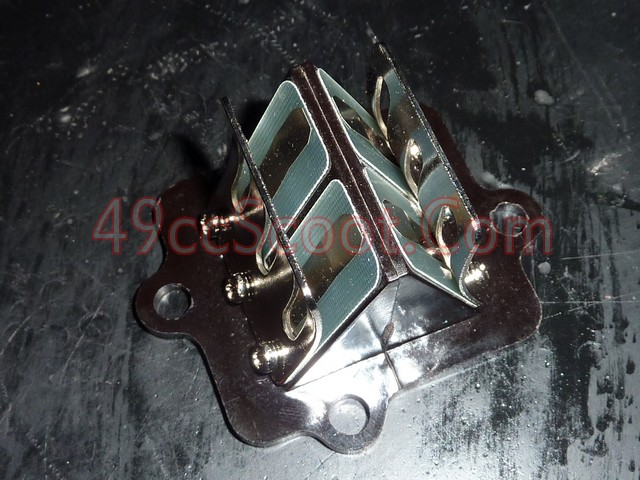  I tried using the carb along with the intake just as it came, but clearance problems with the frame wouldn't allow that. 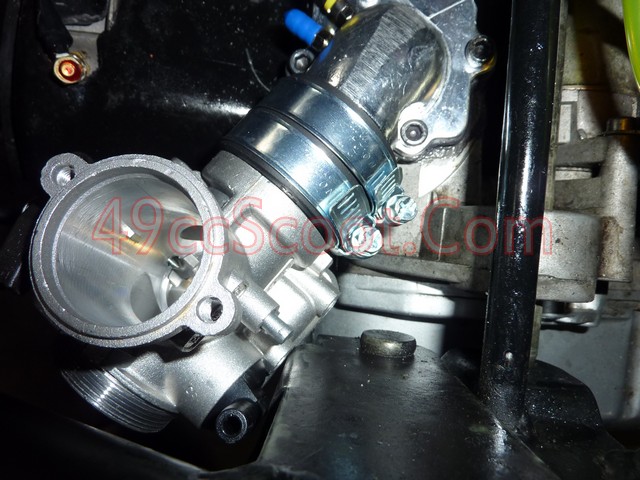 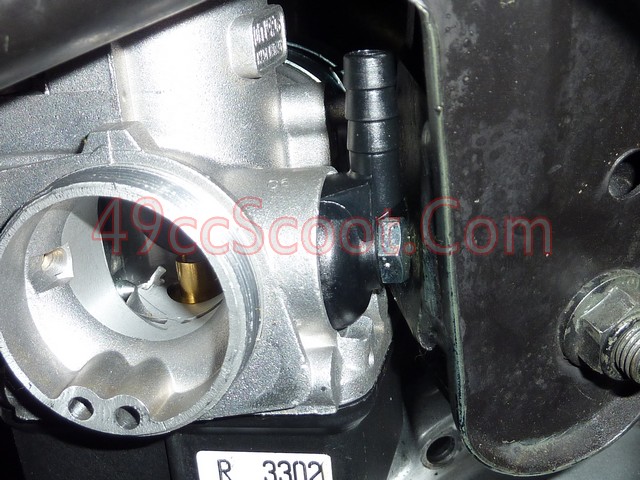 While this may not look too bad, there are grooves inside of the boot and if it doesn't sit straight it's not in the grooves and will come off pretty easily. 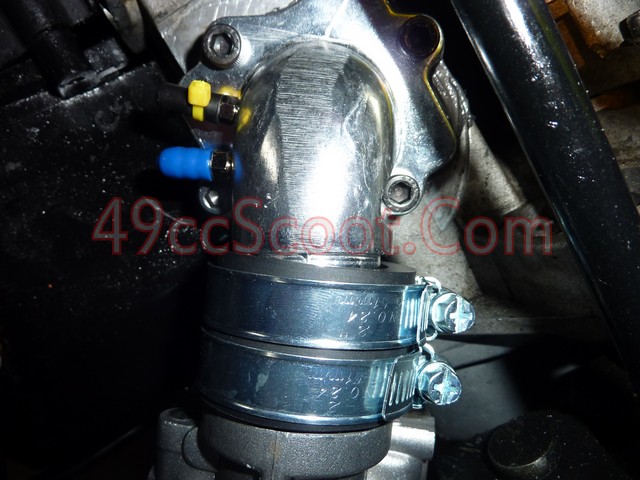 Luckily, I had an adapter from some past setup around that's a bit longer and allowed for a little more flex. 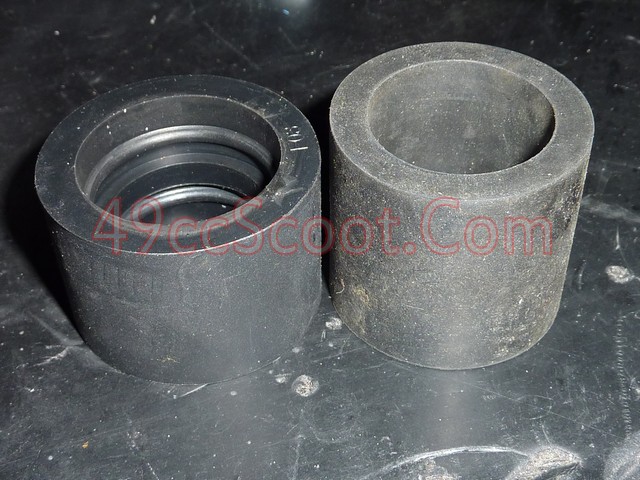 Clearances are still close, but it works at least. 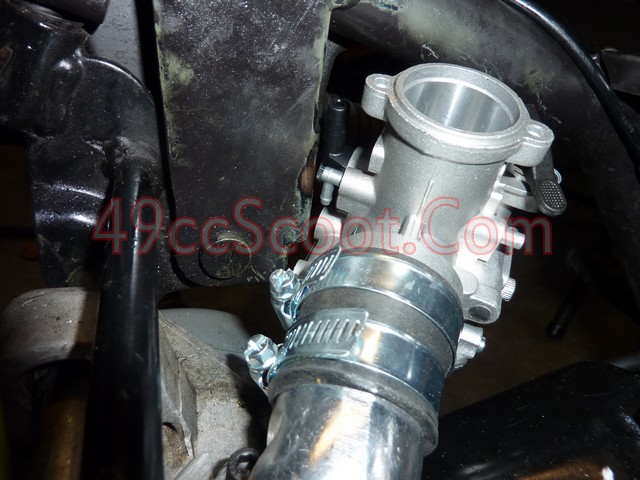 The next issue is that the tubing I use on my modified airbox is the same diameter as this carb's inlet. It's a good match, but won't fit over it. 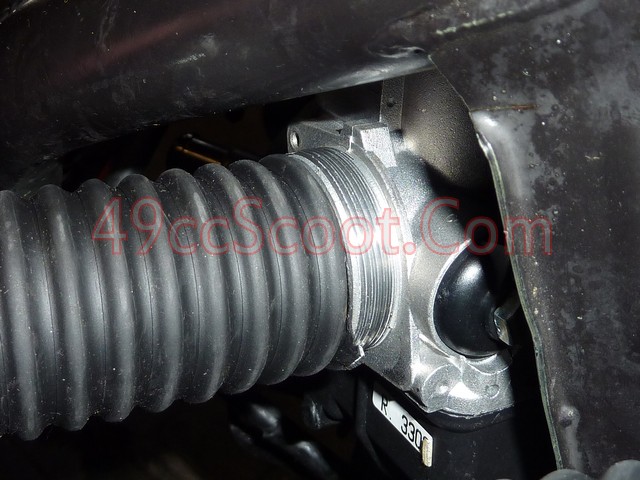 I used a piece of a rubber pipe coupler and a couple of hose clamps to connect the two. 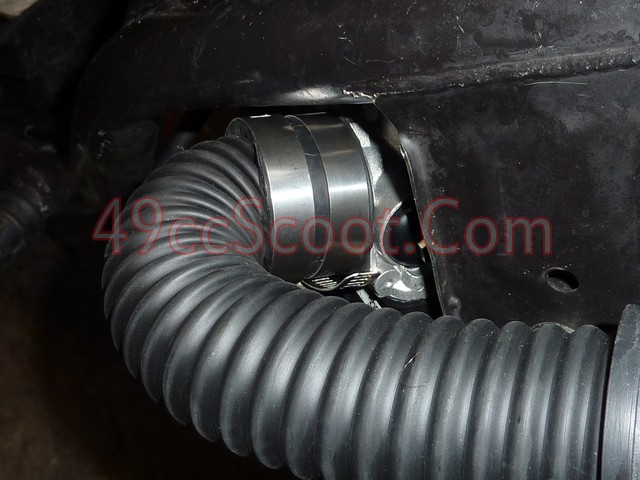 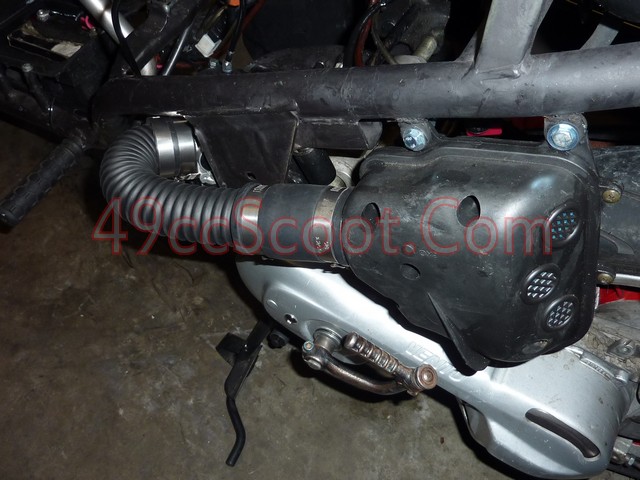 By this stage, you'll almost certainly need a new throttle assembly and cable setup. This carburetor has the longest travel of the bunch and needs more cable length than the rest. Here's a look at the stock setup beside this one to give you an idea. 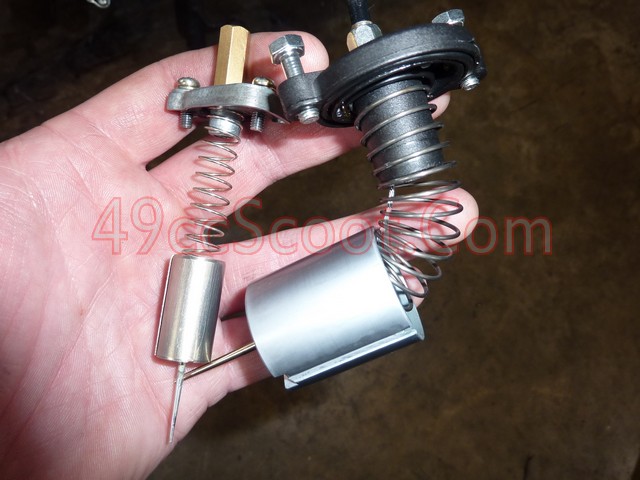 With everything else taken care of, it fit's OK. Not great, again all the clearances are tight, but not too bad. I expect this carb would be less than fun to fit into a scooter with all of it's fairings or a small frame though. 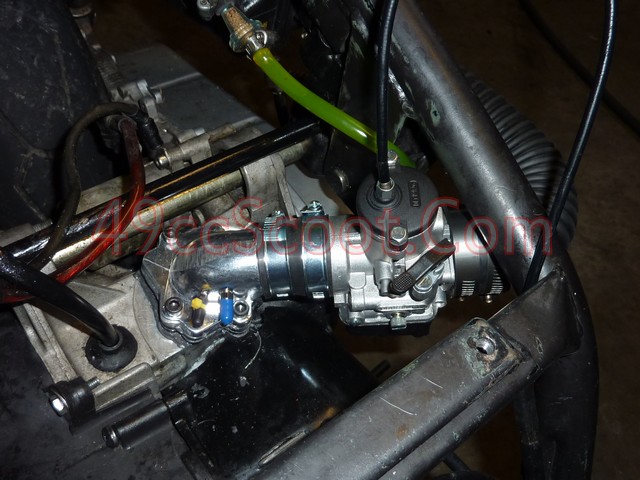 Well, until I put the seat on that is. When I went to install the seat, it was pushing down hard on the carb and cable. I added a bunch of washers below each of the front mounts to the seat and it's enough to make it work. Again, not ideal, but it works. If you have fairing, this may not work out so well, since often the fairings tie in with the seat. 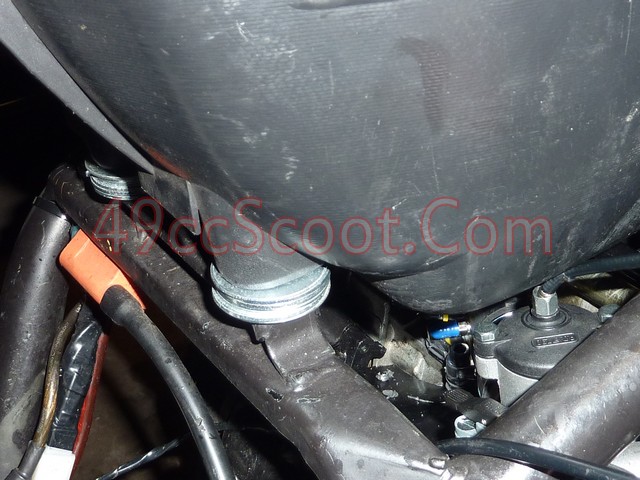 With everything finally fitting well enough, I started tuning. I used a 125 main jet, 55 pilot, and set the needle in the richest position. I went for a 33 mile ride and recorded 49.8MPG. Not bad for such a big carb. WOT cruising speeds remained the same again, 48-52MPH. Max speed was 57MPH at roughly 8,500RPM. It felt as strong as any other carburetor tested, but the CVT is still being inconsistent. Cylinder head temperatures also stayed pretty close to what most of the other larger carburetors have shown. On a 50 degree night, cruising at 40MPH produced 240 - 255°F CHT. WOT cruising showed 270 - 285°F. 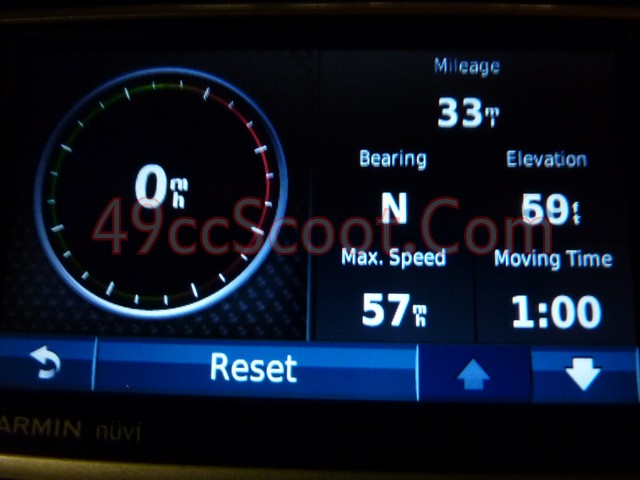 The biggest difference with this 28mm carburetor was the responsiveness at low throttle positions. It's very sensitive to slight changes and it actually makes it a bit of a chore to try and ride in town at a steady speed. Then it feels like there's little change after 1/2 throttle. You still need to get to full throttle for max power, but it's pretty unresponsive in the last half of the throttle. Overall it's not a bad carb, but I dislike the feeling the throttle has and the mounting problems. Can't say I'd recommend it unless you have a setup that really needs such a large carb. |
|
|
|
Post by 90GTVert on Nov 29, 2011 8:14:44 GMT -5
21mm DellOrto Follow-UpI've used two different airbox assemblies during this phase, as I detailed in the first post from of the phase HERE. When I originally tested the 21mm DellOrto PHBG carburetor I used the stock connection from airbox to carb, as shown below.  I realized that the other airbox would also fit this carburetor pretty well, so I decided to try it out and see if it made any difference. I just used a hose clamp to attach it to the carb. 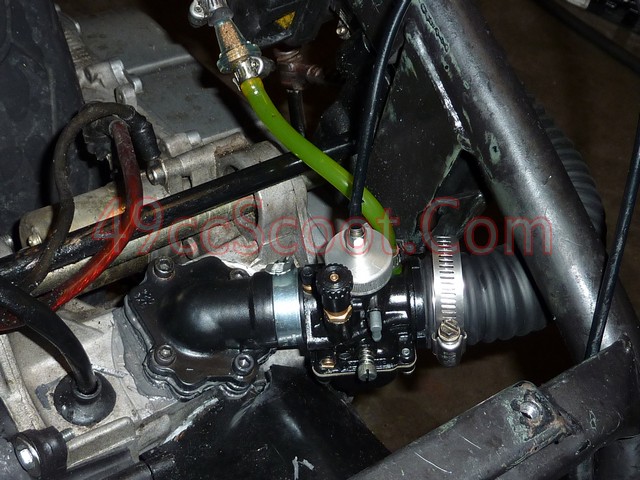 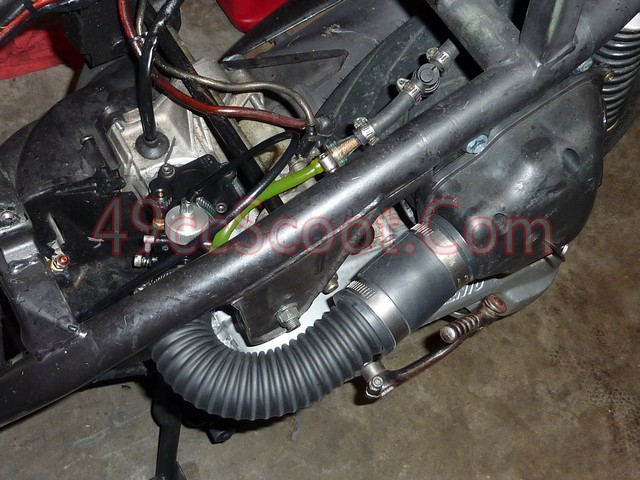 Installing this airbox required a re-tune. I moved up from a 98 main jet to a 106 main jet. I kept the same 40 pilot jet. I played with needle position a bit and even tried switching needles, but never got the results I hoped for and didn't wish to spend tons of time on it. It ran and responded well, but part throttle CHT was high as if it were on the lean side at low throttle positions. I went for a 33 mile ride. Fuel economy was 62.35MPG. With the other airbox, fuel economy was 62.86MPG. Cruising speeds and max speeds remained on par with results from the rest of the test as well. 48 - 52MPH WOT cruising. 57MPH max, and again I must state the CVT has been inconsistent lately. I felt no difference in power vs the first airbox tested. CHT at WOT was 275 - 290°F. 40MPH cruising temps were 250 - 265°F. 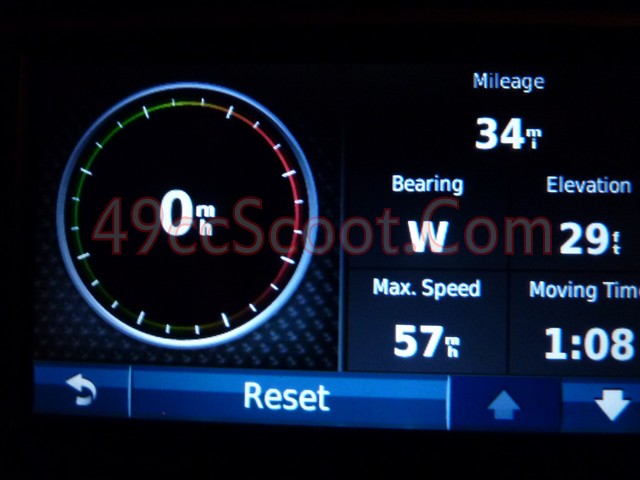 Essentially, both airboxes performed the same. The biggest difference being the airbox with the larger connection to the carb requires richer jetting. This is good news for the results of this phase, and helps to compare jetting a little better between carbs using different airboxes. I'd pick the airbox with the stock connection to carb vs the large tubing connection. It fits easier, requires less work, and seems a little easier to tune with. The only real advantage of the other setup is that you can get to the bowl plug to change jets without removing the airbox. A few seconds there isn't worth the extra tuning time you might spend getting it dialed in though. |
|
|
|
Post by 90GTVert on Nov 30, 2011 9:30:58 GMT -5
Phase 3 : Results & Review Prices may vary depending on the dealer and shipping charges. The MPH shown is inconsistent in this phase due to CVT issues (explained earlier in the phase in detail). I'm simply including it to have all the data from this phase in one spot, but it does not reflect any power differences between carburetors. Carburetor | Max Speed | Peak RPM | Price | 16mm Stock | 59MPH | 8,500RPM | N/A | 19mm Arreche | 58MPH | 8,500RPM | $130 | 19mm DellOrto PHBG | 59MPH | 8,500RPM | $100 | 21mm Dellorto PHBG Racing Edition | 58MPH | 8,500RPM | $120 | 25mm DellOrto PHBL | 59MPH | 8,500RPM | $150 | 28mm DellOrto PHBH | 57MPH | 8,500RPM | $150 |
I kept all rides as consistent as possible. I rode to the same town each time, maintaining 40MPH cruising most of the way there and back, with short bursts of WOT cruising. I took a very similar course through the town each time, and all rides were at night when traffic is not a factor. I then headed back toward home and got fuel at a station near my house. Any additional mileage (some rides were longer) was after the fill-ups. Changes in carburetor tuning would likely change these numbers to some degree, but I think they would stay reasonably close. I made sure none of them had bad rich or lean spots anywhere. You will notice there are two DellOrto 21mm entries on the table below. The first is the original test with the stock connection to carb. The one marked "2" is the follow-up with the larger tubing to connect the airbox to the carb. Carburetor | Main Jet | Fuel Economy | 16mm Stock | 90 | 56.95MPG | 19mm Arreche | 90 | 38.18MPG | 19mm DellOrto PHBG | 95 | 49.38MPG | 21mm Dellorto PHBG Racing Edition | 98 | 62.86MPG | 21mm Dellorto PHBG Racing Edition 2 | 106 | 62.35MPG | 25mm DellOrto PHBL | 108 | 46.91MPG | 28mm DellOrto PHBH | 125 | 49.80MPG |
I believe the most important numbers here are the wide-open throttle temperatures. 40MPH cruising can be swayed more by other settings. The carbs required different throttle openings to cruise at 40, stock is closer to half throttle while the largest carb is probably 1/8 - 1/4 throttle at the same speed. I spent the most time to ensure that the main jet circuit was correct at WOT. The rest of the tuning was done to ensure there were no obvious rich or lean conditions throughout the throttle and for good throttle response. From the differences I saw when jetting the carbs, a clip position either way could probably sway some results to be quite similar at part throttle cruising at 40MPH. Ambient temperature didn't seem to make much difference, judging from my tuning sessions that would normally be when it was warmer in the daytime versus what I saw on my cooler rides. I'm sure it makes some difference, but with the close range of temperatures for testing, I don't feel that it had much influence. Carburetor | Ambient Temp | 40MPH Cruise | WOT | 16mm Stock | 50°F | 275 - 285°F | 325 - 340°F | 19mm Arreche | 45°F | 225 - 240°F | 285 - 300°F | 19mm DellOrto PHBG | 45°F | 235 - 245°F | 280 - 295°F | 21mm Dellorto PHBG Racing Edition | 50°F | 240 - 255°F | 265 - 280°F | 25mm DellOrto PHBL | 55°F | 240 - 255°F | 275 - 290°F | 28mm DellOrto PHBH | 50°F | 240 - 255°F | 270 - 285°F |
Unfortunately I experienced some CVT difficulties along the way that made speed figures pretty much useless for this part of the project. They really aren't necessary IMO however. I can tell you that there was no major gain in wide open throttle performance with any of the carburetors. I'm not saying you couldn't see numbers on a dyno or feel any difference, but nothing to write home about. I wouldn't spend the money on any of these carbs strictly for performance with the modifications done at this point. I can't graph it too well, but throttle feel and responsiveness did change as the carburetors got larger. Larger carbs felt very good at part throttle, since the increased venturi size allows more flow at lower throttle settings. The stock carb and up through to the 21mm DellOrto felt pretty good throughout the pull of the throttle. The larger 25 and 28mm carburetors did not. The 28mm carburetor felt very responsive up to perhaps 1/4 throttle and then reasonably responsive to 1/2 throttle or a little less. Up to 1/4 throttle it felt amazing actually. If performance remained linear, it would have turned the scooter into a monster. The big carbs definitely make you feel as if you are riding something much more powerful... until you get closer to WOT and realize most of the work is done at low throttle positions and the last bit of throttle feels almost unnecessary in the worst cases. One fairly large negative for the largest of the carbs, especially the 28mm, is that it makes low speed riding a bit more difficult. I found that by the time I was trying the 28mm DellOrto, it was hard to maintain constant speeds in town because such slight movements in the 1/8 - 1/4 throttle range affect speed a good bit. It made the ride a bit less relaxing IMO, because I had to pay close attention to moderation of the throttle at low speed or I'd look down and realize I was 5MPH or more above where I wanted to be cruising. Fuel economy varied quite a bit with the selection of carburetors testing, varying by over 20MPG from best to worst. The Arreche was the clear loser here at nearly 19MPG worse fuel efficiency than the stock carburetor. The 21mm DellOrto PHBG came in first with almost a 6MPG improvement over stock. Cylinder head temperature drops were definitely the biggest improvements among the data shown. It appears that 19mm and larger carburetors are much better suited to cooling the big air cooled jug. I suspect that higher RPM and wilder setups may show that cooling doesn't level out until a little larger carburetor is used, but for this nearly 100cc engine revving to 8,500RPM at max speed, 19mm seems to be all that is necessary for a dramatic improvement in cylinder temps. Ease of installation and use is another factor that you should consider. The 19 and 21mm carburetors tested fit quite easily. They fit into the stock intake and the stock airbox will fit over them as well. The stock throttle cable should be able to work without too much effort. The larger carbs of the group required larger intake manifolds to fit them. If you don't already have an aftermarket throttle and/or cable you may need one to operate them properly. Then you need to adapt your stock airbox to them or find another solution. All of those things add up and make the cost of using the biggest carbs much greater. Clearance issues with the frame and seat could be a real problem on some scooters. This is a fairly large-framed scoot and I have a huge advantage of not having body parts in my way. Small frame scoots and those with full fairings will have even more trouble with the larger carbs than what you've seen in my installation details along the way. I should note that this applies to the carbs tested, but other brands and models of carburetors could be larger or smaller bodies. Don't assume any 21mm will fit easily and any 22mm won't. Research before you buy. Looking over all of the details, the choice of carburetors seems pretty simple to me. The 21mm DellOrto PHBG showed the best fuel economy, is capable of keeping cylinder temps as low as any of the carbs, has a good throttle feel throughout it's range, ran as well as any of them, and installs easily in place of the stocker. The 19mm version offered many of the same benefits, but fuel economy was a bit less and I feel the 21mm would leave more room for growth with the setup. I wish I could explain exactly why things are working as they are. For example, why the 21mm seems to be just right and above or below that the fuel economy drops. I'm not completely sure how much is an effect of the DellOrto's design itself and how much is due to the bore size of the carb. I think 190mech and stepthrutuner are on the right track with thoughts they shared... It looks like the Mina 90/100 has a carb size practical limit as you have carefully documented here.I suspect it is due to the engine design,small transfer tunnels,short connecting rod and small reed valve area.All those are hard to over come That big muth'r sucker has an intresting egg shaped throttle opening that is narrower at the top. I attribute the poorer fuel economy on the bigger ones to poorer fuel atomization on account of the more sluggish fuel draw-up through the larger main jets as well as to slower, less turbulent flow through the venturi and larger intake manifold. A benefit of the larger droplets is increased cooling and enhansed quench at the combustion boundaries due to the droplets clinging to the surfaces. The larger droplets provide superior lubrication, however. Perhaps this is why huge carbs are used in harsh racing conditions. The additional cross sectional flow area cannot really be all utilized by the drawing ability of the engine but the poorer atomization has valuable cooling and lubricating properties. I also wanted to comment that I apologize for the lack of diversity in carburetors, with almost all being DellOrto. I bought the Arreche 19mm years ago and was reasonably pleased, but after I purchased my first DellOrto carb I kept buying more, so that's what I had around to test. Here is another thread with some carb selection info just to add more food for thought... 49ccscoot.proboards.com/index.cgi?board=carb&action=display&thread=1366 |
|
|
|
Post by 90GTVert on Apr 21, 2012 6:37:16 GMT -5
Project 90 : Phase 4Project 90 is back for another phase. This will be yet another exhaust test phase. In Phase 1 I tested a few pipes on a stock setup. Each aftermarket pipe gained about 2MPH top speed and showed an increase in power and acceleration. In Phase 2 I tested pipes with cylinder tuning and an aftermarket variator. Once again the results were disappointing to me. Very little max speed increase, although some showed a very nice improvement in acceleration and made cruising faster easier. For this phase of Project 90 I plan to test the pipes with the afore mentioned modifications, as well as with a larger carburetor and intake setup to see if that allows the pipes to perform better than before. I'll be using the 21mm DellOrto PHBG Racing Edition carburetor, stock intake modified to match the larger carb, and the airbox has been slightly modified as well. All of this was discussed in great detail in Phase 3 with plenty of pictures as well. Refer to that for farther info on the components. I did spend time tuning the carb beyond what I did for the test in Phase 3. I'm using a 95 main jet, 40 pilot jet, and a W9 needle in the next to leanest position for the baseline tune.  If you recall, I had a lot of problems with consistency regarding the transmission, most specifically the torque driver, in Phase 3. I wanted to settle that before continuing the project, so I replaced the whole rear pulley with a new one from Parts For Scooters . I used a Koso 1,000RPM contra spring and a Malossi Torsion Controller in the rear pulley this time around. All the CVT specs are listed near the bottom of this post. The new torque driver and tune seems to have cleared up the major inconsistencies I was experiencing with speeds.   For the baseline of this phase, I'm using the stock exhaust once again. I did want to note that it appears to be having some issues. I have noticed that it begins to glow near the outlet at night and the paint is turning white there. Then I noticed that it sounds as if it's coming apart on the inside. I notice no difference in performance with all of this happening, but I'm quite glad the pipe is only being used for the baseline of this phase. I don't believe anything is clogged at this point, but who knows when something could clog and cause real problems, like overheating and ultimately engine damage. I'd suggest replacing the pipe if yours ever does what this one is doing.  www.youtube.com/watch?v=6VqFLJ_8RN8 www.youtube.com/watch?v=6VqFLJ_8RN8On top of what's mentioned, I also went over compression, changed the belt, changed the gear oil, etc... as I do on all baselines to try and keep results as fair as possible. With everything tuned, I took the scooter for a 39 mile test ride. Not much change on the baseline compared to some past tests. 40MPH cruising required very little throttle and RPM was around 7,300. Wide open throttle and sitting up provided cruise speeds that stayed mostly between 48-50MPH at roughly 8,300RPM. Max speed, WOT and tucked, was 57MPH at 8,450RPM. WOT max and cruise speeds are just slightly lower than some past tests, but not far off. I'm not terribly concerned with max performance for Project 90, but more finding out what works and what doesn't. I think the torque driver could probably be worked on a little to get the slight extra max speed back, but it seems to be consistent so I'm going to leave it alone. The other issue is that I am a little heavier than when I was last doing tests. I don't think it has a big effect on anything, but obviously the more weight you add the more the harder it is on such small engines.  Outside temperature for my test ride was 60°. 40MPH cruising cylinder head temp was around 270 - 280°F. This is warmer than past results even though I used a richer needle. I'm not exactly sure what the deal is with the cruise temps. Being heavier is likely part of it, increasing load on the engine. Setting the needle richer doesn't provide any great results before it becomes too rich. It seems almost as if something changed with the airbox, though I have no idea how or why. Along with elevated temps at cruise it appears to be a little louder than before, but everything is in place and undamaged.  WOT cruise temps were about 285 - 300°F, on par with past results. Fuel economy decreased slightly from the past test with this carburetor. I believe because I am now using a richer needle to deliver more fuel at part throttle as well as the afore mentioned additional weight. In the past test in Phase 3 with the DellOrto 21mm I saw 62MPG. For this test I got 52.75MPG. Project 90 : Phase 4 : Baseline SpecificationsBore : 52mm Stroke : 45mm Displacement : 96cc (95.56747199999998cc) Cylinder : Stock Ported w/1.2mm Base Spacer Exhaust Duration : 188° Boost/Transfer Duration : 130° Cranking Compression : 175psi Squish Clearance : 1.1mm Cylinder : Stock Ported w/1.2mm Base Spacer Cases : Port Matched & Mildly Trenched Carburetor : DellOrto 21mm PHBG Racing Edition Main Jet : 95 Pilot Jet : 40 Needle : W9. Clip next to leanest position. Air Filter : Stock Airbox w/o snorkel. Inlet enlarged and UNI filter vents added. Fuel System : Stock tank, 1/4" hose, 1/4" fuel filter, manual petcock. Oil Delivery : Pre-mix. I removed the stock oil injection system in favor of pre-mix in order to provide consistent oiling with any modification. I am using AMSOil Sabre Professional 100:1 Premix, mixed at 50:1. Intake : Stock, Enlarged To 22mm Reed Block & Reeds : Stage 6 VForce3 w/5mm Reed Spacer Exhaust : Stock 49cc Ignition System : Stock CDI, stock stator/flywheel, Bando coil, NGK BR8HS spark plug. CVT Belt : 788 17 28 Bando Variator : Hoca Performance Variator w/Modified Fixed Drive Face Roller Weights : Dr Pulley 7g Sliders Clutch & Bell : Stock Contra Spring : Koso 1,000RPM + Malossi Torsion Control Clutch Springs : 2,000RPM Final Drive Ratio : Approximately 10.125:1 Max Speed : 57MPH Cruise Speed : 48-50MPH Fuel Economy : 56.15MPG CHT @ 40MPH Cruise : 270 - 280°F CHT @ WOT Cruise : 285 - 300°F Ambient Temperature : 60°F Other Info For ReferenceElevation : ~40ft Above Sea Level Rider Weight : 300lbs Fuel : 91-93 Octane (Premium) |
|
|
|
Post by 90GTVert on Apr 22, 2012 7:45:13 GMT -5
Phase 4 : Leo Vince SP3 50-70ccThe first pipe tested in Phase 4 is the Leo Vince SP3 50-70cc. It has been tested two times prior. Links to both are below. For pics, sounds, and fit info please refer to the Phase 1 test. Phase 1 TestPhase 2 TestTuning for the SP3 required swapping up to a 100 main jet and adjusting the mixture screw a bit. Otherwise I used the same carburetor and CVT settings as the baseline. I did a 36 mile test ride, observing 51.88MPG. Max speed increased by 2MPH over the baseline to 59MPH at just over 8,500RPM. WOT cruising speeds increased to 50-53MPH sitting up on flat ground with engine speed around 8,300-8,400RPM. These results are very similar to what I saw in Phase 2, with essentially the same setup minus the carb and intake changes. I do feel like this is a stronger setup than without the larger carburetor though for two reasons. I am a good bit heavier than a I was for the other phases. The transmission, while more consistent, does seem to be off perhaps 1-2MPH under what I believe the previous one would have achieved. The baseline shows a 1MPH drop.  In past tests I noted the RPM that this pipe worked best up to roughly 8,200RPM. With the addition of the carb for this Phase, it feels like the pipe works well up around 8,500RPM. Power felt good throughout the revs. Ambient temp for the test ride was 70°F. CHT cruising at 40MPH was 285 - 300°. WOT cruising showed 300 - 315°. I'm not sure if the increase in temperature at WOT is due to pipe design or perhaps it could have used just a step larger main jet, like a 102 to drop the temp? At any rate, temps were not a big concern, which is good to see with a pipe intended for a 50-70cc used on a 96cc engine. I was pleased with the Leo Vince SP3. I'm quite sure it won't be the best result in the bunch, but it's not bad. It's a good improvement over the stock pipe that wasn't hard to tune for. Not what I think I'd buy specifically for a 90-100cc engine, but I'd use it if I had one around over stock. Improved acceleration, improved speed, quiet like stock, and doesn't draw much attention with it's looks. |
|
|
|
Post by 90GTVert on Apr 23, 2012 11:08:40 GMT -5
Phase 4 : Leo Vince ZX 100ccNext up is the Leo Vince ZX for a 100cc Aerox. It has been tested two times previously. Links to both are below. For pics, sounds, and fit info please refer to the Phase 1 test. This pipe has been de-restricted, and there's a link to that information below as well. Phase 1 TestPhase 2 TestDe-restriction InfoI swapped up to a 100 main jet and otherwise made no changes to the carburetor for the ZX. I later realized a richer needle setting would have likely been beneficial. I went with 1 gram lighter, 6g, sliders to keep the revs a bit higher for best results with this pipe. I noted 51.7MPG on a 39 mile test ride. WOT cruising speeds increased to 52-54MPH at around 8,700RPM. Max speed was 61MPH, a 4MPH gain over the stock pipe, just shy of 9,000RPM. The addition of the carb, even with a heavier rider, allowed for a 1MPH gain over the test in Phase 2. It seems as if the larger carburetor shows it's benefit when RPM gets much beyond 8,000RPM. Since the ZX prefers to stay at a little higher revs most of the time, acceleration also feels stronger than in past tests. 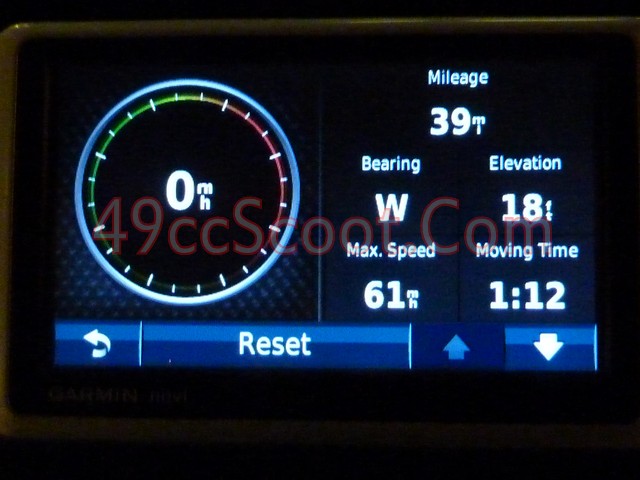 Outside temperature was 65°F. Cruising at 40MPH, cylinder head temps were 295 - 310°. That's higher than other results since the larger carburetor was added. For one thing, I know it was a little bit lean at part throttle. I even heard a little bit of spark knock at times. I think a needle adjustment or swap could have helped the part throttle temps and knocking. I believe the other factor in the increased heat was increased RPM. With lighter roller weights to keep in the ZX's higher powerband, cruising at 40MPH required 300-400RPM more than the setups that could use heavier sliders. WOT cruising CHT stayed pretty much right on target, just a slight increase over some results, at 295 - 305°F. Overall I was pleased with the Leo Vince ZX 100cc exhaust. The 4MPH increase is much more like what I hoped to see. This pipe improved all around performance as long as you keep it in the proper rev range with CVT tuning. Looking back at the results from Phase 2 with this pipe, the larger carburetor seems necessary to get this pipe, or likely any pipe, to work at a bit higher revs. One thing that I have been a bit surprised by during Project 90 is the failure of this pipe to rev even higher. I used this exact pipe in the past with a similar setup and saw revs approaching 10,000RPM on a regular basis. It's just not wanting to do that for any of my tests here to date. Perhaps a larger carb is in order? I'm not quite sure yet. Regardless of that, the ZX worked well in this test. |
|
|
|
Post by 90GTVert on Apr 26, 2012 7:58:49 GMT -5
Phase 4 : Leo Vince ZX 50-70ccFor this test I am going to try the 50-70cc version on the Leo Vince ZX exhaust. I picked it up used for a great price and compared it to the 100cc version of the ZX, but only with sight and measurements so far. You can see plenty of pics and diagrams and other info in the 50cc vs 100cc Comparison link below. As you can see in that thread, this is the model for a Yamaha Zuma which uses a different mount and has dents in the pipe to clear the centerstand. Otherwise the main difference in the design of the pipes appears to be a larger header section for the 100cc version. The 100cc has been de-restricted by removing both the cone in the header and the sound deadening inside the expansion chamber. De-restriction info is linked to below as well. I have also provided links to the 100cc ZX tests on Project 90 for comparison purposes. 50cc vs 100cc ZX Comparison100cc ZX Phase 1 Test100cc ZX Phase 2 Test100cc ZX Phase 4 TestZX De-restriction InfoMounting the ZX intended for use on a Yamaha Zuma took a little bit of work. I first tried with it as it came. To get the mounting holes nearly lined up it sat at an angle that pressed the pipe into the rear tire. 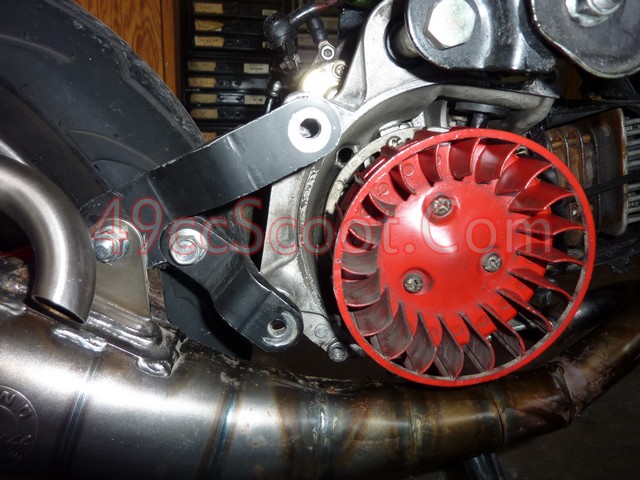 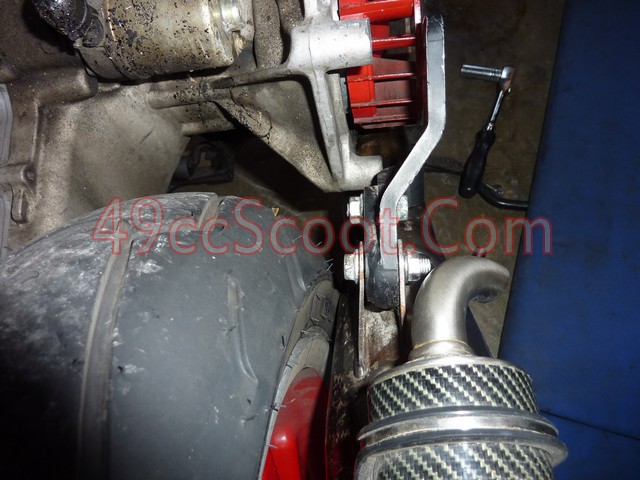 The pipes are so similar that I thought I could simply swap the bracket from the 100cc version that has worked well onto the 50cc version. 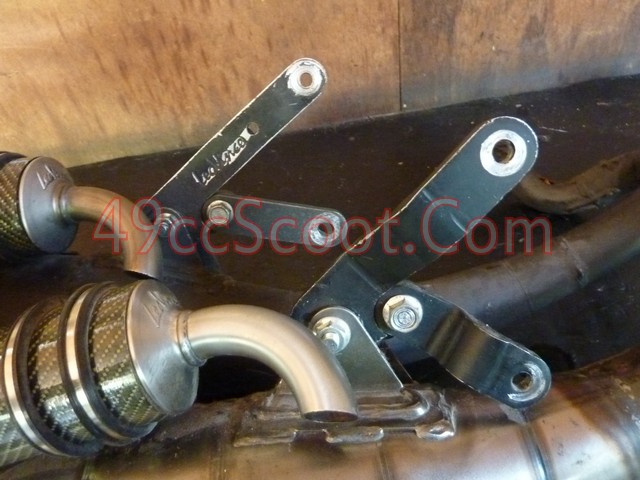 That didn't work out either. It seems the 100cc has the mount placed farther back, because it's bracket comes too far forward when attached to the 50cc ZX. 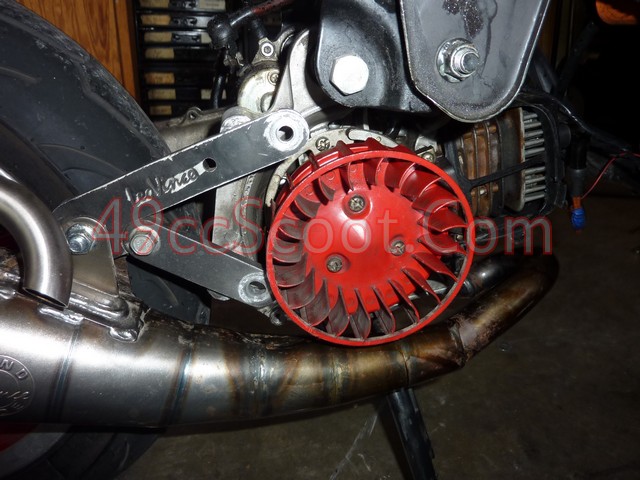 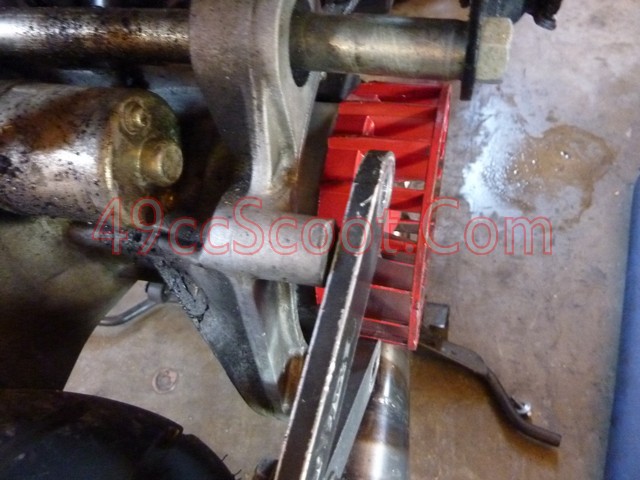 I ended up using a mounting bracket from one of 190mech's older style Peace Pipes with an extra hole drilled to match up to the case and ZX properly. You could make the same thing with some 1/4" thick aluminum. You'll also need a spacer or washers as shown in the second image below. 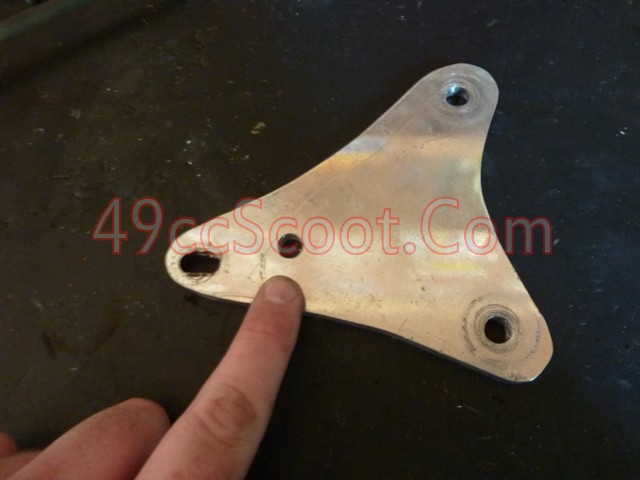 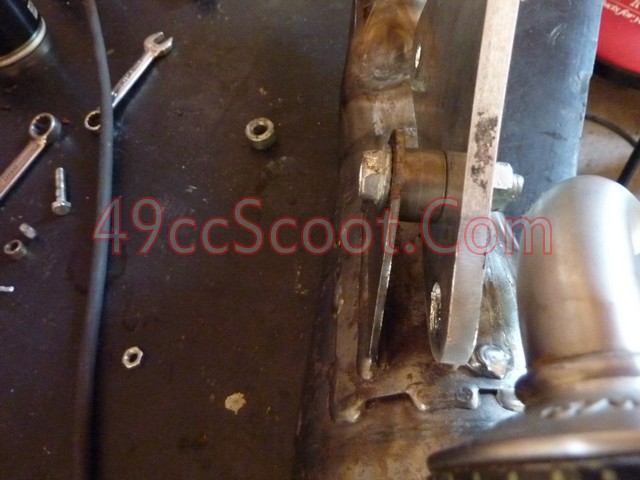 Here's a look at it installed. 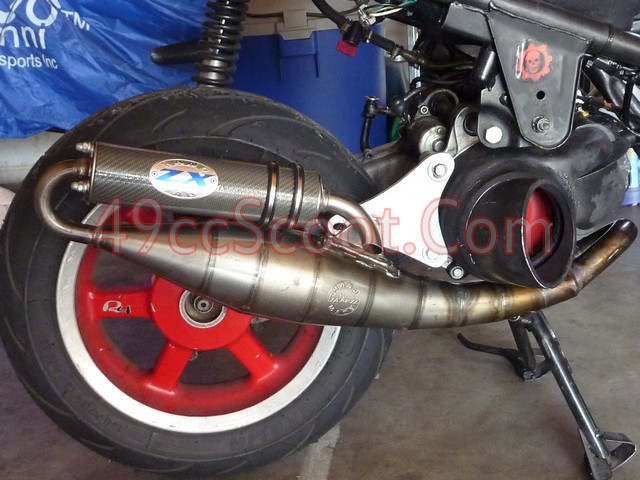 I wish I could say getting the 50-70cc ZX mounted was the end of my troubles with this test, but I definitely cannot. I left the carburetor and CVT setup as tuned for the 100cc ZX with a 100 main jet and 6g sliders, otherwise unchanged from the baseline tune. When I fired the engine up it was obvious that the tune that worked for the 100cc ZX test was not working for this one. It sputtered and chugged out smoke and lacked power. It appeared to be very rich, so I started working on tuning the carburetor. I tried a huge range of jets and nothing I did seemed to be working. I could get it to run rich or run lean, but it never felt like it was in tune. It felt dead. I thought perhaps something was wrong with the carburetor, so I disassembled it and did a thorough cleaning. 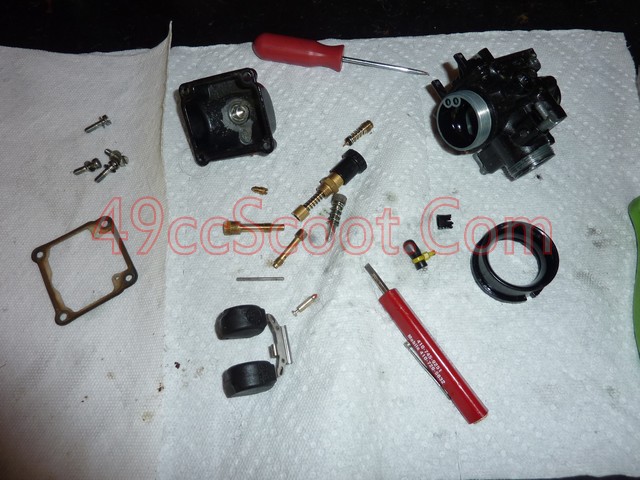 After cleaning the carb, I swapped around a few jets that had seemed the closest. Still weak. Takeoff had no kick, it struggled to accelerate, and revs were low. It reminded me a bit of what I had seen in the past with an engine suffering from low compression. I did a compression test and found it to be at 175psi, dead on where it was when tested for the baseline. 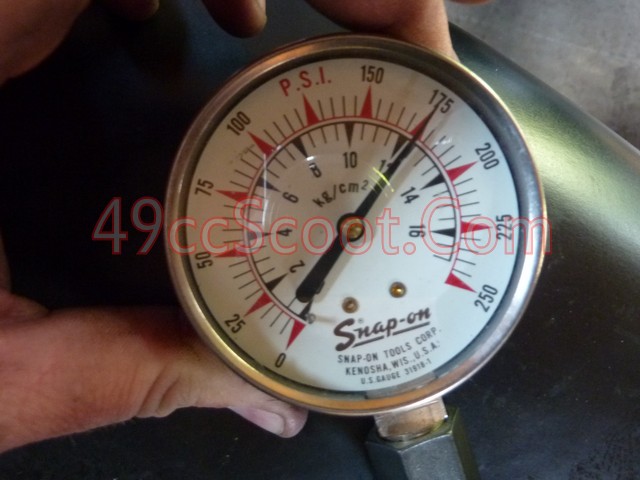 I hadn't even taken the scooter on the road at this point. I had just been riding around the yard, because it was so far from feeling like it should. I put one of the better performing main jets in, I believe it was a 90, and took it out for a brief test ride. It reminded me an awful lot of riding a stock 49cc scoot. I managed to get the scooter up to 38MPH at about half tuck with a slight tailwind. 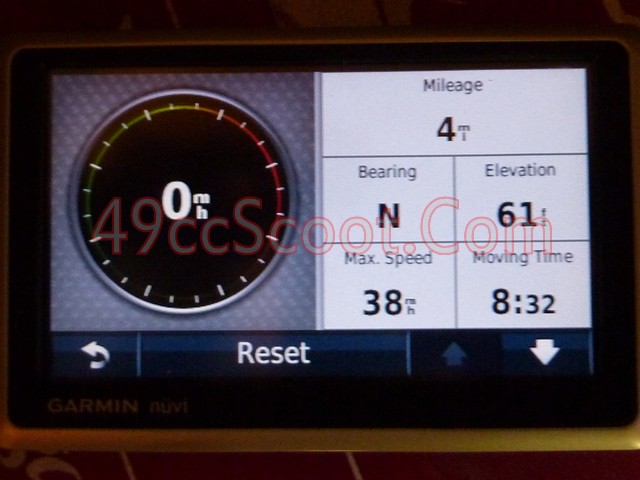 Something has to be pretty far off to lose about 20MPH! At that point I started thinking there has to be another restrictor in this thing. I was sure I removed the header restriction. I couldn't imagine the little bit of sound deadening in the convergent cone would have this sort of effect, and I had ran my 100cc ZX with that in place with no troubles. I pulled the silencer off thinking that maybe LV had started using restrictors in that area as I've heard of other manufacturer's doing. 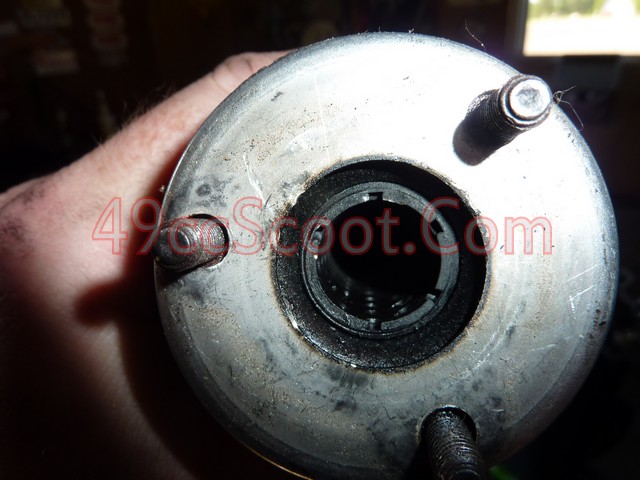 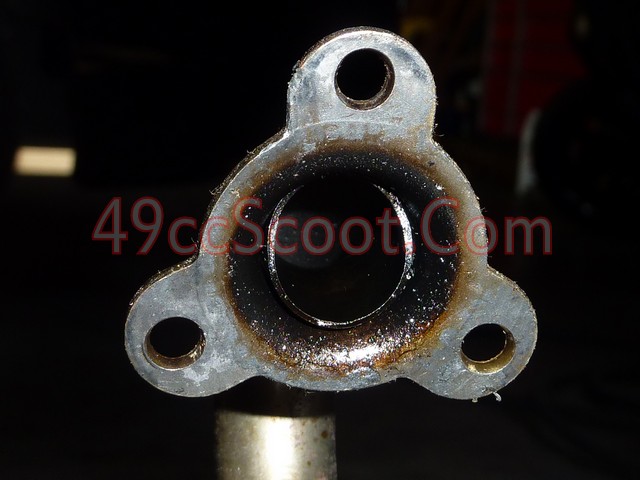 Nothing there. Hmmm. Well, I wonder if it's possible that the smaller header of the 50cc version coupled with the dents for fitting a Zuma's center stand are reducing volume so much that it's running weak? I wouldn't think so, but I was running out of ideas, short of cutting the pipe apart for a look or installing a different pipe to see if it was actually an engine related issue. Here's another look at those dents, shown with the unbeaten 100cc ZX.  I removed the exhaust from the scooter to possibly try and remove the dents and what did I see? 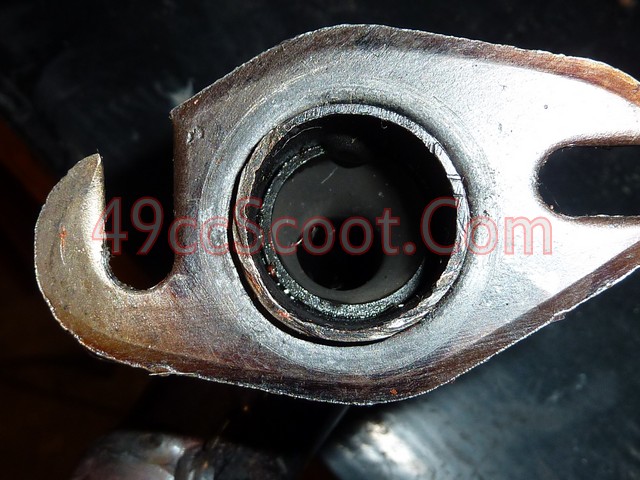 That's right, the header restriction that I was certain I had removed was still in place. I could have sworn it was gone and even looking over the flange to fit a gasket and install it I never noticed it since it was black in a black header. I had to have looked right at it, but I "knew" it wasn't there so I never looked for it. To make that really long story short, don't be a dummy like me. Pay attention to every detail when you do things like this. Don't be in a hurry. That 5 seconds you save could cost you hours. It did for me. Part of me wanted to leave this out, because frankly it made me feel like an idiot. I'd rather feel dumb and give you more info though than leave it out. So now we can all see exactly what happens when you run with one of those restrictors in place. Jetting changes a lot and a 96cc runs like a 49cc. I ground out the weld and removed the restrictor. 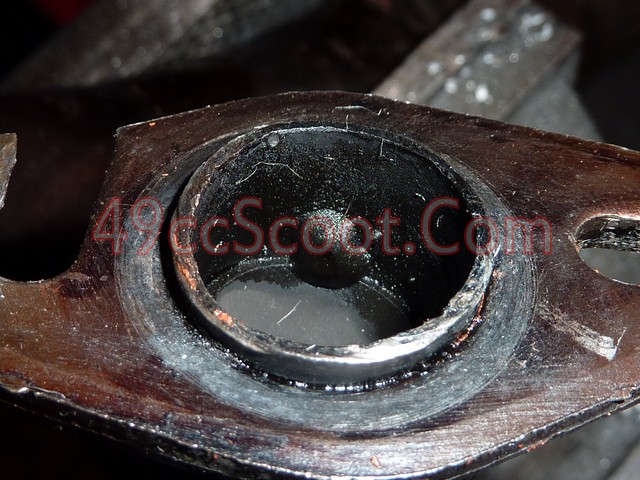 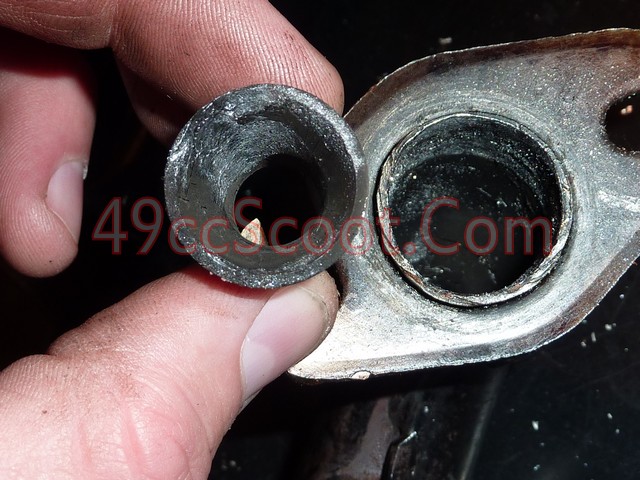 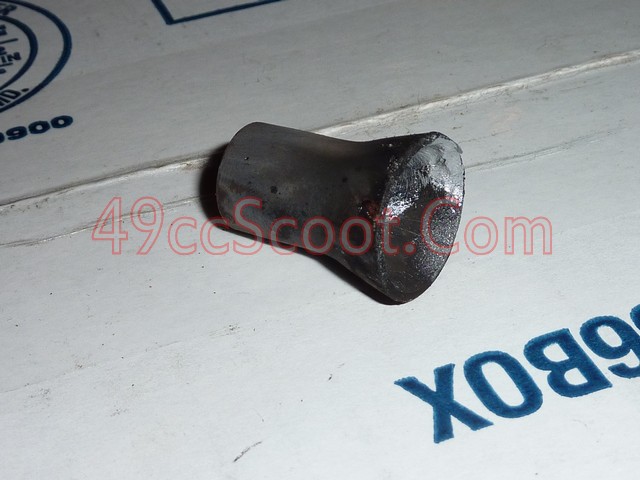 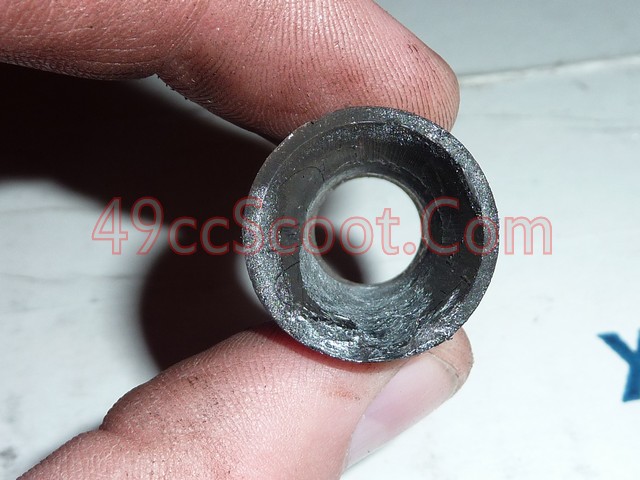 Just how small is this thing? About 10mm smaller than the header would normally be at the flange. 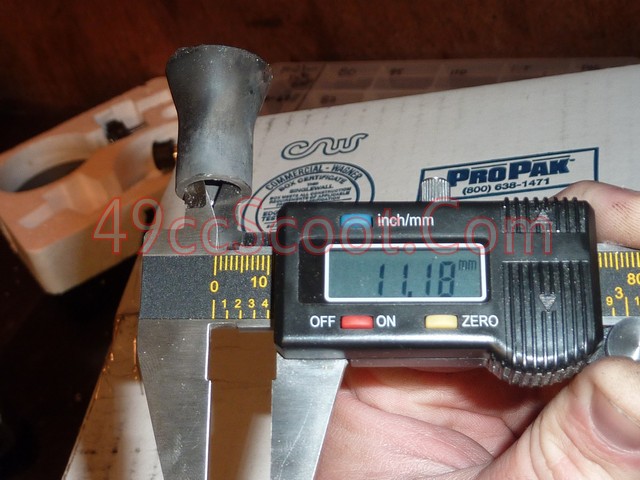 I smoothed out the inside of the header and gave it a quick coat of BBQ grill paint. 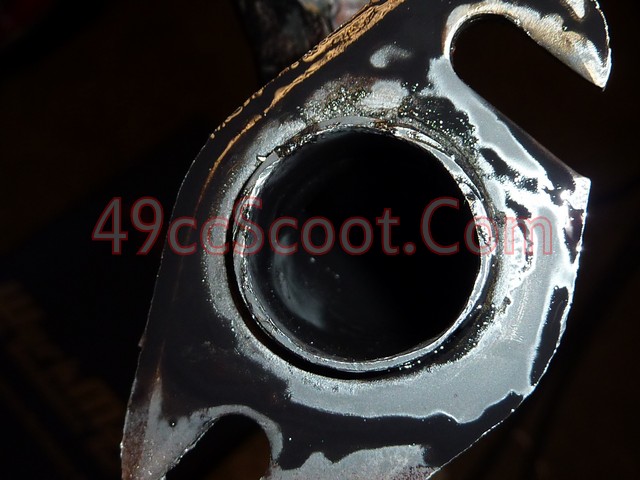 Since the exhaust was off and we've had a few days of rain, wind, and low temps, where I wouldn't be riding anyway, I decided to go ahead and try to freeze the dents out of the exhaust. It seems like it would be a more fair comparison between the 50-70cc and 100cc pipes if this one were not bashed in. Reading comments from people that have used the dented Zuma pipes it seems they do work alright, but it's hard to believe it would have no effect. Here are a bunch of shots to give you kind of a 360 view of the dents. 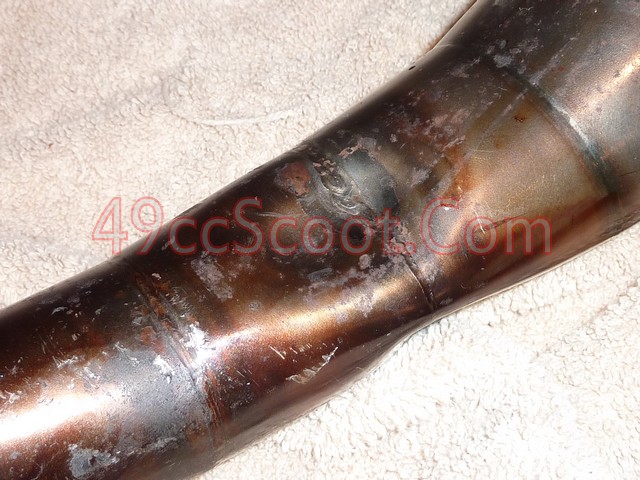  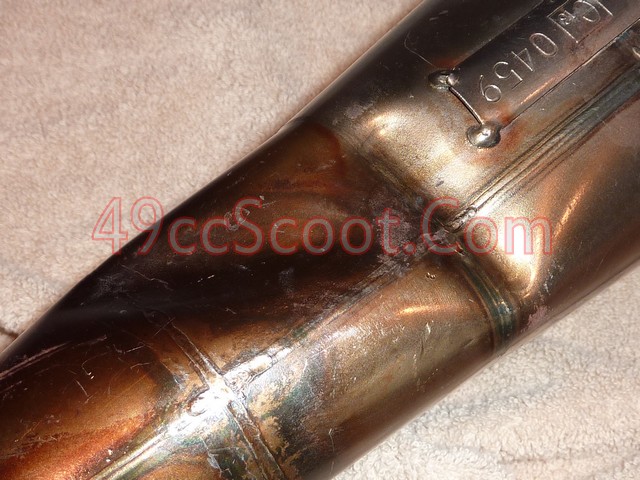 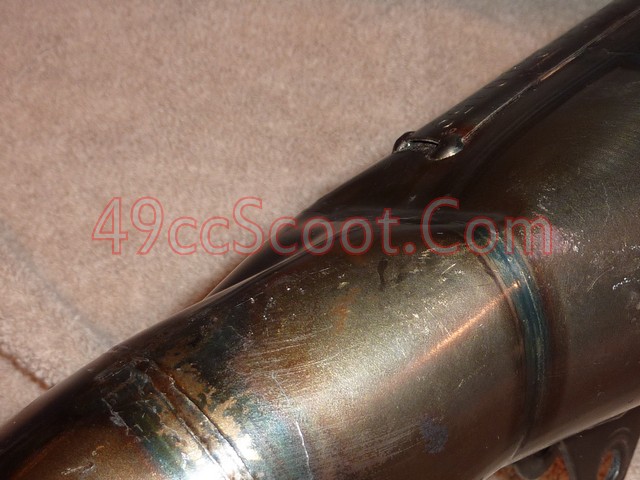 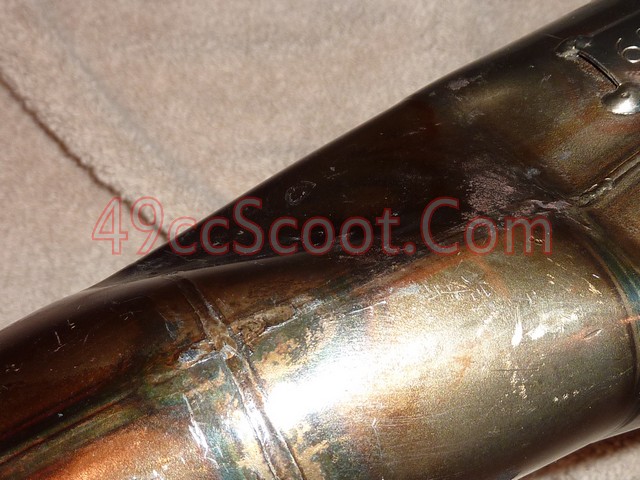 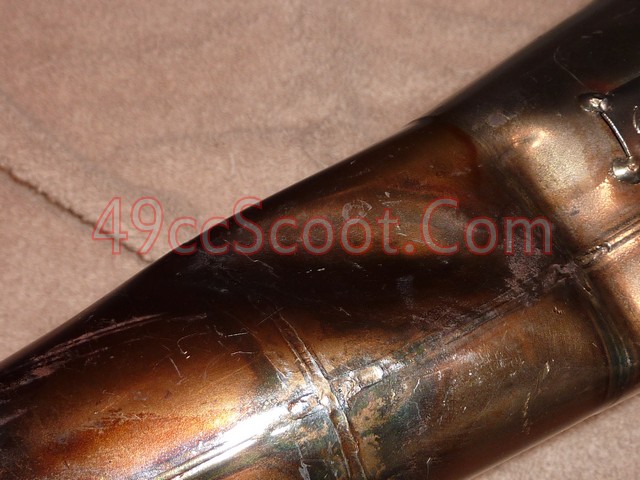 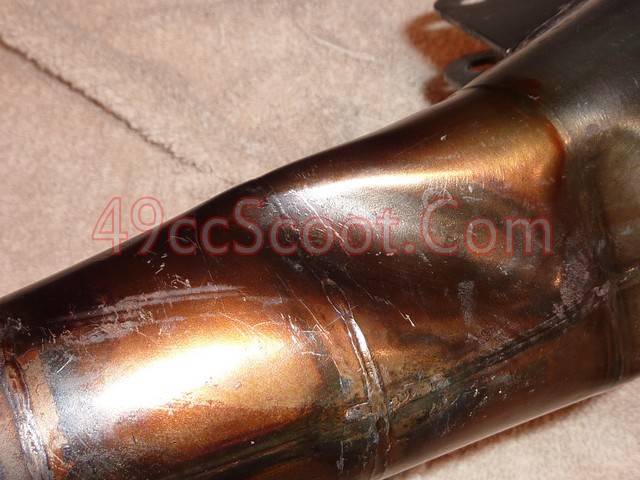 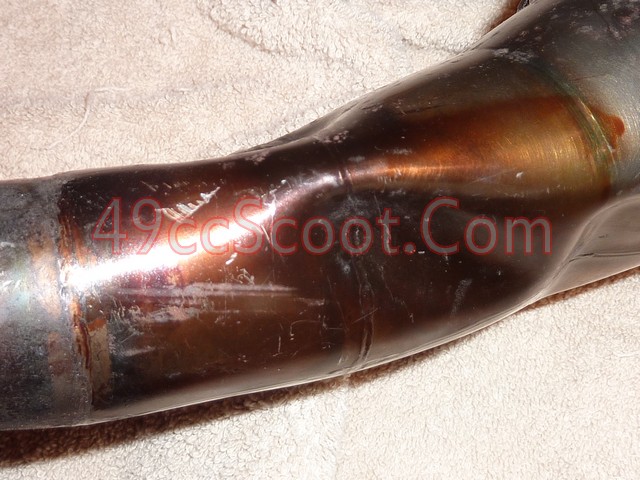 I filled the pipe with water the best I could. Some suggest submerging the pipe to fill it faster. That would be a good idea. I took the more time consuming method for some reason and filled it from a faucet. Once I got a bit of water in there I plugged the stinger end of the pipe so I could move it around without the water coming out, because I had to fill a little then change angles to get the water to go through the header and into the body. Kept doing that till it was full and then capped of the header using an aluminum plate and an exhaust gasket. 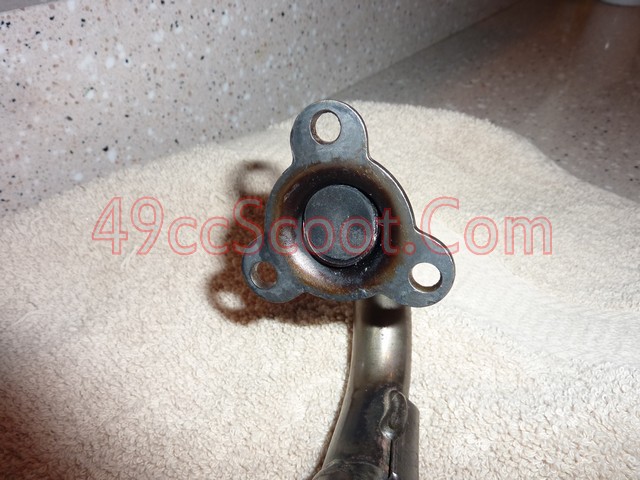 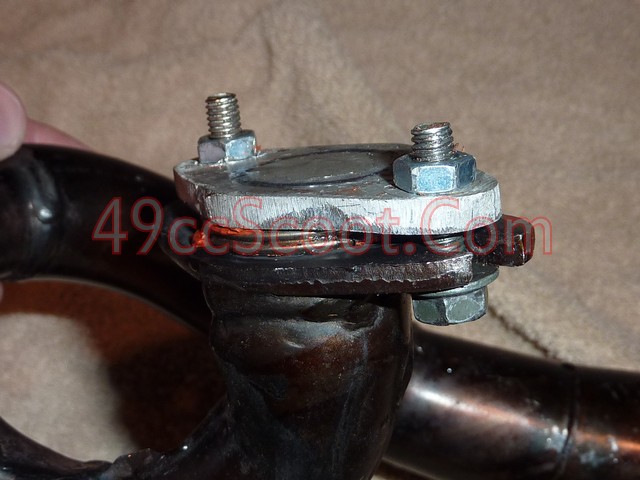 I've seen some people saying sealing is not necessary and others saying it is. As you can see, I opted to seal it. I don't think it was necessary for me, at least not on the stinger end. The rubber cork was pushed out during the process, once everything was pretty well frozen. I think if you have dents in the larger, more central, areas like I did, the small areas on each end like the stinger and header will probably freeze up and contain the pressure in the larger areas. I put the pipe in the freezer at 3PM, wrapped in a towel to keep my TV dinners clean.  By around 8PM it had frozen up and pushed the rubber cork out of the stinger end. I checked it about every 30 minutes to an hour until around 11PM and saw very little change before I went to sleep. I woke up at 3:30AM and found that the dents had been mostly removed. I was quite happy to see this and stayed up till 4:30AM, checking each half hour. At 4:30AM I saw no more change and opted to go back to sleep for a bit. I got up at 6AM and the dents seemed the same, but I decided to give it a little more time before giving up, even though I didn't have much hope for the dents coming out anymore since it had been 2 1/2 hours since I noticed them pushed most of the way out. I also set the freezer to it's coldest setting to see if that would do anything. I removed the pipe from the freezer at 9AM when I noticed that it had busted open. It broke open where the Leo Vince Hand Made stamp is. It seems the stamp made this area the weak spot. I don't fault them for that, it seemed to hold up to a bit of pressure before letting go, and I'd prefer it to bust there than at a seam where it may distort worse and be harder to fix. 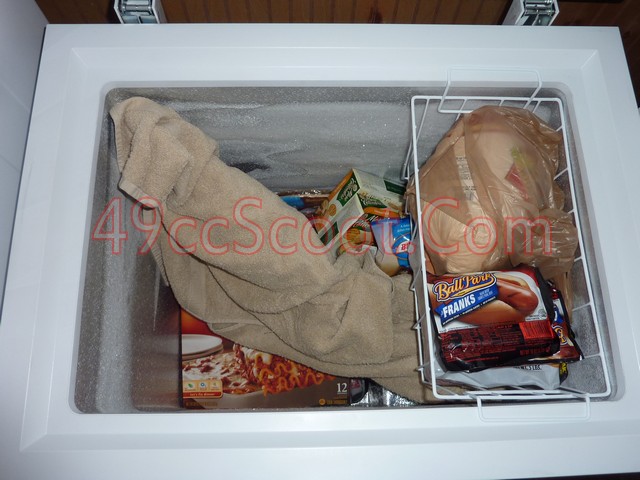 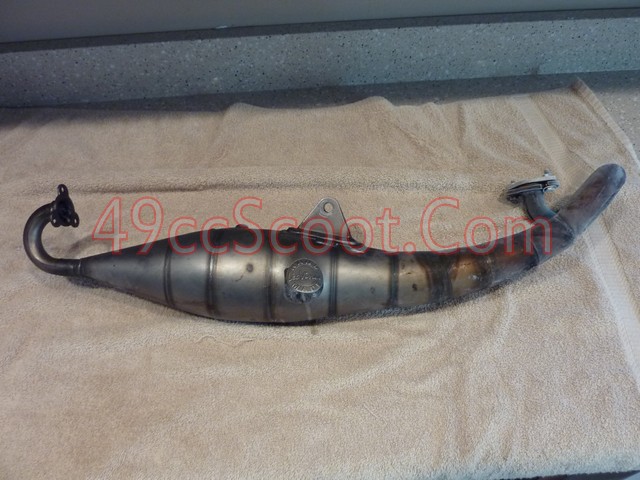 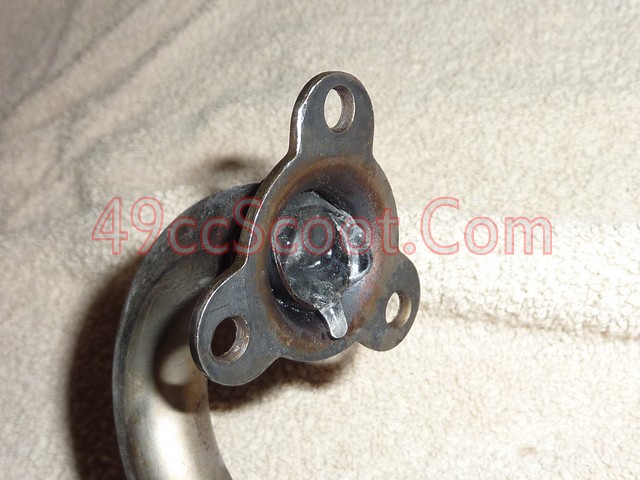 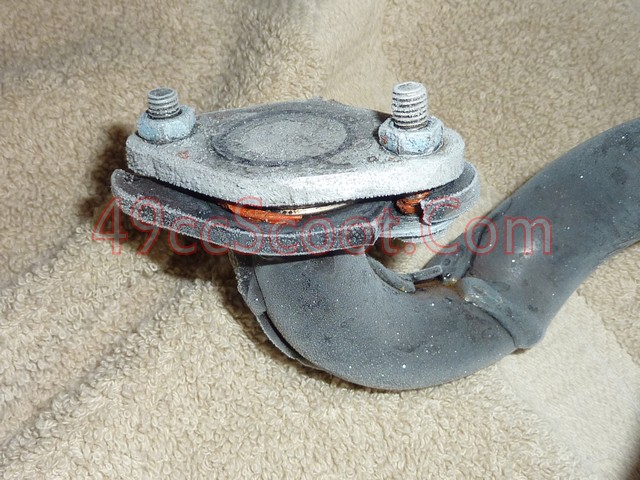 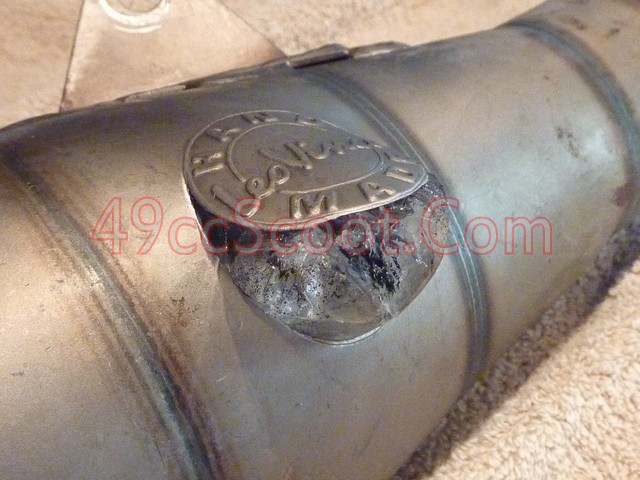  So the actual dent removal was done within 12 1/2 hours in my case. Possibly a little sooner since I was sleeping and not checking between 11PM and 3:30AM. I don't suggest using my time as a guide though. Volume of the pipe, temperature, material, material thickness, and probably other variables could change the time significantly. I'd suggest freezing the pipe in the morning on a day when you will be able to check on it often. Perhaps settle on the dents being mostly removed rather than busting your pipe open like I did. Look for signs of swelling in areas that aren't dented and remove the pipe from the freezer if you see that. Be prepared for the possibility of the pipe splitting or cracking and needing to be welded if you choose to try this method. Do it at your own risk. I was very pleased with the results, other than me leaving it in the extra time to cause damage. The dents are much much better. Still present, but barely. Here are a bunch of shots all around the dented area after the pipe was frozen. 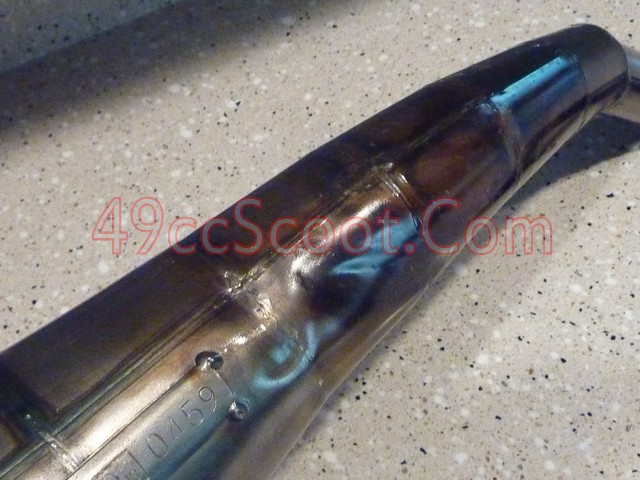  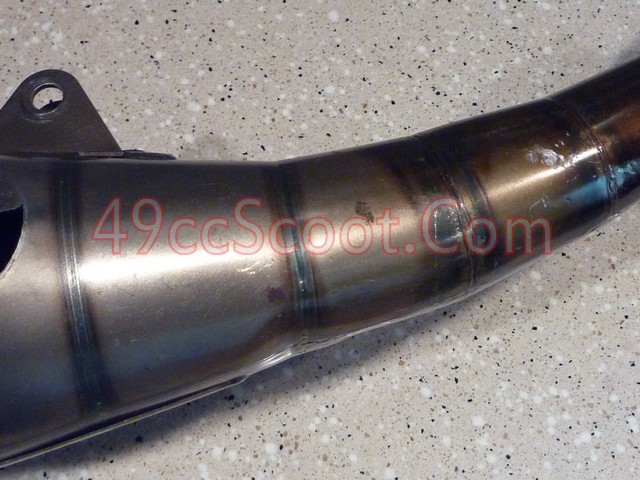  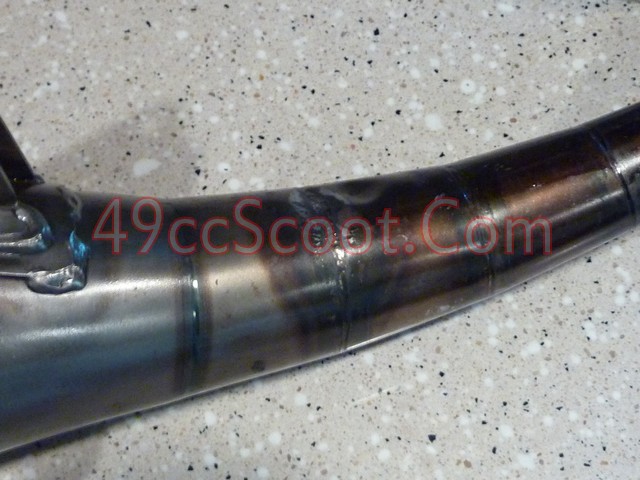  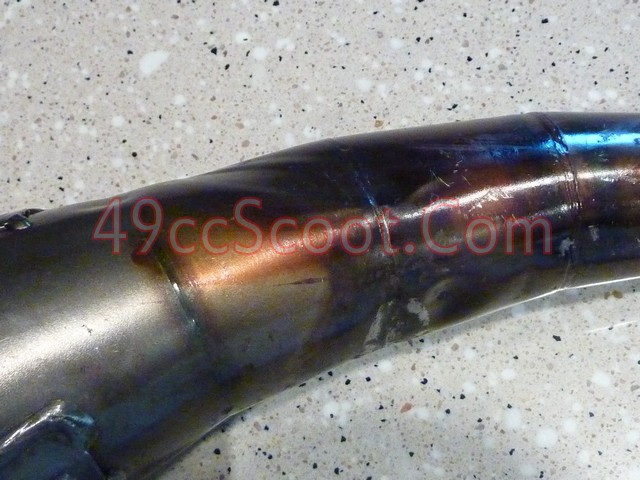 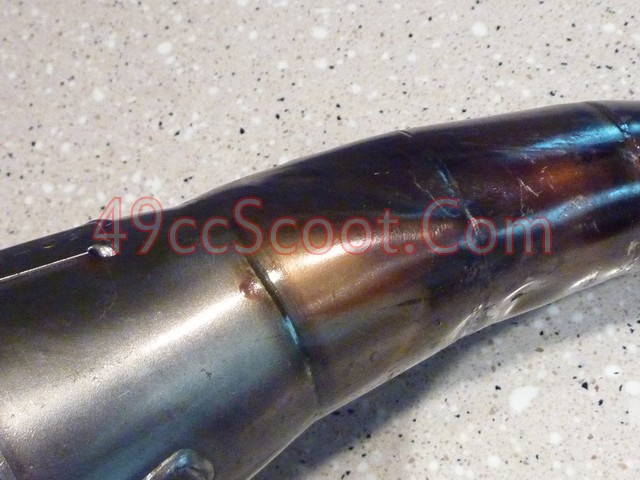 After everything thawing out, I bent the blown out area back and welded it up. I painted the pipe with BBQ black to keep it from rusting and re-installed it. It felt like a beast when I fired it up after hearing and feeling it with the restrictor in place previously. 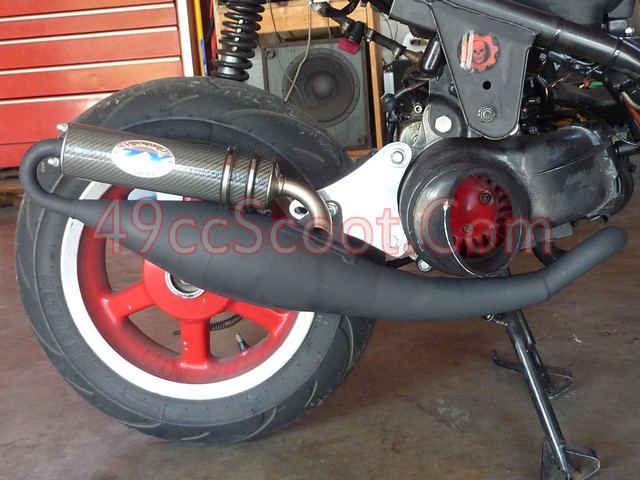 With the pipe free of any major restrictions, I got it tuned. Tuning was very simple. I just went back to the settings I had used with the 100cc ZX. I used a 100 main jet and put the W9 needle back in with the clip next to leanest. I did try the clip richer after having some part throttle heat and ping on the 100cc ZX test, but it sputtered like it was too rich. Later, on the test ride, I saw results that lead me to believe a 98 main jet may have been a better choice. It performed well with the 100 though. Here is a video so you can hear this pipe revving and while riding. Please note that if you try to compare this clip to the clip of the 100cc ZX there are a couple of differences. The 100cc clip was done with a stock airbox, while this one was done with a modified airbox. You can hear the airbox noise more in this video. The 100cc ZX has the sound deadening material in the convergent cone removed and this one does not. I think you can pick up the difference that makes between the two videos. With that material intact, the ZX is a pretty quiet pipe. www.youtube.com/watch?v=ugnAEVR--bwI went on a 37 mile ride and got 52.12MPG, right on par with the other pipes so far. 40MPH cruising was done at about 8,400RPM at light throttle, just like the 100cc version of this exhaust. WOT cruising speeds could not match up to the 100cc ZX however. I saw 50-53MPH sitting up at full throttle on flat ground, usually hanging around 51MPH, while the 100cc ZX cruisied at 52-54MPH in the same conditions. The 50-70cc ZX couldn't match the 100cc in max speed either. Top speed was 59MPH at just over 8,900RPM, 2MPH shy of the 100cc pipe's 61MPH max. Acceleration felt strong, but again not quite as strong as the 100cc pipe.  Outside air temp for the ride was 55°F. 40MPH cruising showed 275 - 290°F cylinder head temps. WOT riding heated up to 280 - 295°. Both of these readings are cooler than the 100cc ZX tuned the same way. The WOT temp is just slightly cooler, by about 5°, than what I'm used to seeing from a lot of pipes. This is the reason I mentioned earlier that it could have possibly used a 98 main jet. It ran well though and the plug looked good. I don't think it had any significant effect on power and it could just be related to how the pipe was working. One thing is for sure though, this 50-70cc Leo Vince ZX did not cause me any overheating issues on the 96cc engine. I wouldn't say the 50-70cc ZX did bad, but it definitely didn't perform as well as the version intended for this displacement. The rev range that the pipe was comfortable in matched up spot on. Both pipes felt very similar, this one just lacked a little power. This version matched up very closely to the performance of the 50-70cc Leo Vince SP3 tested earlier. I think I'd rather have that pipe and keep a stock look and a little lower RPM at that rate. I'm not sure if the header volume is the key here, or if it is partially due to the additional modifications I've done to the 100cc pipe. Likely a little of both, but I know pipe volume should be designed to certain specs for certain displacements. I also don't remember any big change when I modified the 100cc pipe. To sum it up, the 50-70cc Leo Vince ZX did increase performance on the 96cc engine and it did not cause any heat buildup or engine damage like I saw when I used the MRP 50-70cc tuned pipe. I believe stinger size is the determining factor there. It was right in the middle between a stock pipe and it's 100cc counterpart. Not bad, but I'd definitely choose the correct version if possible. If nothing else, I think this may help to show just why these things are called "tuned" pipes. Two pipes built to the same length and specs other than one having a larger header which creates more volume, and one doubles the MPH increase of the other . |
|
|
|
Post by 90GTVert on Apr 28, 2012 16:09:18 GMT -5
Phase 4 : Leo Vince GP 50-70ccThe next pipe to be tested is the Leo Vince GP 50-70cc exhaust. I've heard so many negative comments about this pipe that I was reluctant to even try it on Project 90. It's such a great looking piece though, I couldn't wait to bolt it on. Just a note, it does not come polished. I did that myself. You can see before and after pics in THIS THREAD.  This is the version intended to fit a Yamaha Zuma, so it has dents to help it clear the center stand. I opted to leave these alone instead of trying to remove them as I did with the 50-70cc Leo Vince ZX exhaust. This pipe is stainless steel, and I could not repair it myself if something were to be damaged in the process of trying to remove the dents. 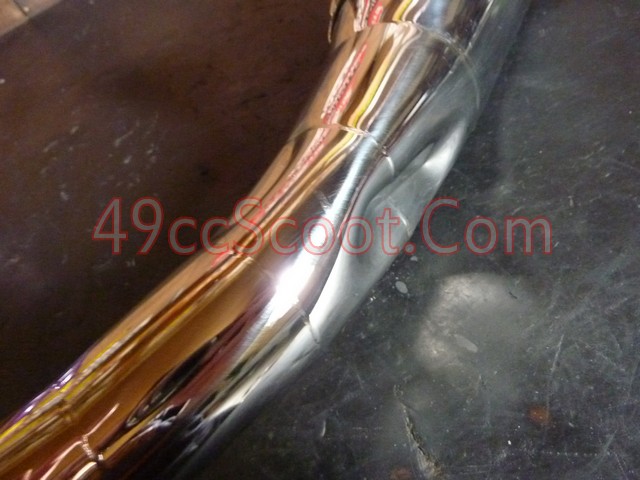 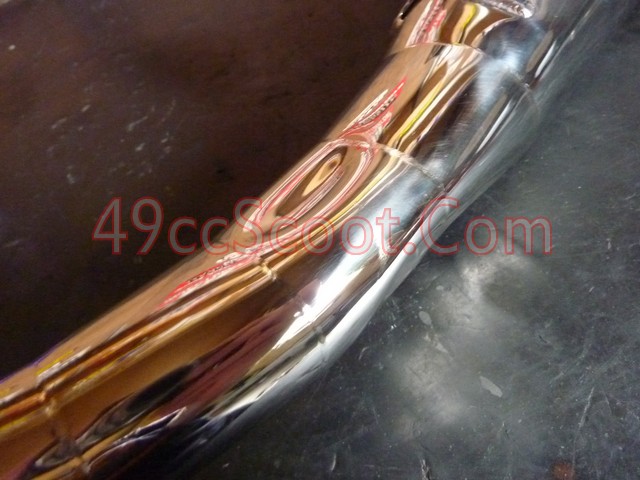 I got the pipe with no brackets, but I assume it would not fit with it's stock bracket anyway since the ZX for a Zuma did not. Just like with the ZX, I used a bracket made of 1/4" aluminum and some spacers to mount the exhaust. 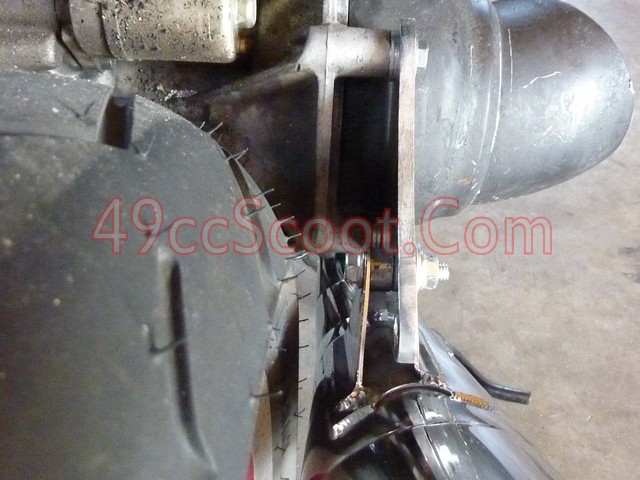  Once I got it mounted, I got it in tune. No changes were made to the CVT, and the carburetor used a 100 main jet with no other changes. Here's a video of the GP riding and revving. Please note that while a lot of videos of pipes taken for Project 90 used a stock airbox, at this stage of the project the airbox is more open. It makes more noise, and I think you can hear the airbox more than the exhaust at times. This is a quiet exhaust. It would get more attention from it's looks than it's sound. www.youtube.com/watch?v=ca63LyBBkgsI took a 37 mile test ride and recorded 51.67MPG. Max speed was 59MPH at right around 8,500RPM. Cruising speed while sitting upright at WOT was about 50-53MPH at 8,300-8,400RPM. Acceleration improved, and the GP seems to increase power across a fairly wide RPM range. The best power seemed to be 8,000-8,500RPM. 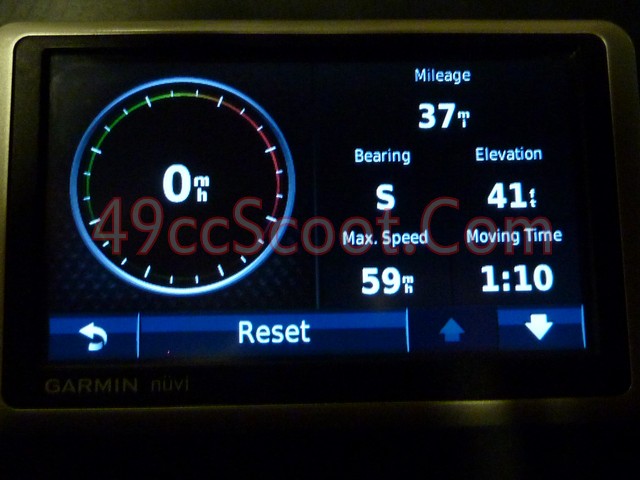 Outside temp for the ride was a cool 50°F. Cylinder head temperature was 270 - 285° riding at 40MPH. WOT cruising showed 290 - 305° CHT. I didn't expect a result this good after some of the negative press I've read on the Leo Vince GP. It's certainly nothing spectacular, but it kept up with all of the other Leo Vince 50-70cc pipes on the 96cc. In fact, it feels exactly like the SP3 to me. Odd considering the SP3 is often stated as the better of these two street exhausts. From the test results, overall feel, and sound, the GP and the SP3 are essentially the same pipes with slightly different construction techniques to create two different appearances as far as I can tell. They may perform totally different on a 50-70cc setup, but if I shielded you from viewing the exhaust, I don't believe you'd be able to tell there was a different pipe installed from performance and probably not from sound, if I swapped the GP for the SP3 or vice versa on this setup. With that said, the choice between the two pipes would come down to styling and price. If you want a beautiful pipe, the GP wins that hands down IMO. For a more stealthy pipe it'd have to be the SP3. Pricing isn't much of a comparison, sadly. Looking around online it appears a new GP will likely cost about $100 more than a new SP3. |
|
|
|
Post by 90GTVert on May 1, 2012 11:20:01 GMT -5
Phase 4 : YMS V8The YMS V8 is the next pipe up to be tested. I tried this exhaust in phase 2 and wasn't too impressed. I thought that it was better suited to perhaps stock engines rather than those with ported cylinders. For that reason, I almost skipped it in this phase. Since you're reading this, you already know I changed my mind and decided to see if the larger carburetor, intake, and VForce3 reed cage would be of any benefit to the YMS V8. Check out the results of phase 2 in the link below, where you can also see pics, video, and fit info. Phase 2 YMS V8 TestI used a 102 main jet and left the W9 needle next to the leanest position. On the test ride, I saw some pretty hot part throttle temps and got some dead spots and even moments of spark knock at certain throttle positions. The needle definitely should have been richened up. As I believe I have said in the past, I don't spend much time on the part throttle settings for these tests. If I don't see any obvious problems on the test ride, I basically just dial in the main jet, make sure it idles well and revs quickly, and select the right slider weight for the CVT. Speaking of the CVT, I stuck with 7g sliders. I went for a 36 mile ride and got a mere 44.14MPG. I rode quicker and faster than usual (trying to get a ride in before some rain came through the area) and aggressive riding really kills fuel economy. If you want to save gas, stay at low throttle positions. Most of the pipes have been close enough to call them even on fuel economy so far, and I don't think the YMS would have strayed that far from other results with the same riding style. Max speed was 60MPH at around 8,600RPM. WOT cruising while sitting up kept speeds from 51-53MPH most of the time at 8,300-8,400RPM. 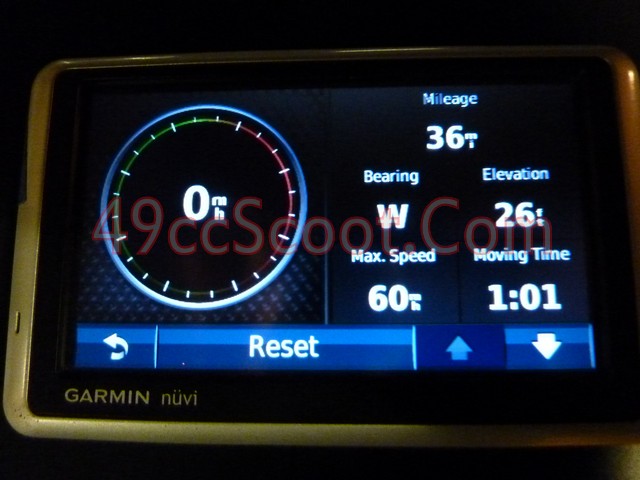 Air temp for the ride was 60°F. WOT cruising kept temps around 290 - 305°. Part throttle cruising was a bit tricky from the lean needle setting I mentioned earlier. Part throttle temps varied greatly, some much higher than I'd like to see. I was a bit surprised to see such a good result after the performance of the V8 in phase 2. I was not expecting it to be more willing to rev than the other street class pipes tested so far. Since it did push slighty past where the other street pipes did at max speed, I gave it a test run with .5g lighter rollers (6.5g). It cruised at about the same speeds as before, while revving to 8,700-8,800RPM. Max speed was 2MPH slower though, at 58MPH. While it was reasonably comfortable at the slightly higher RPM, that's just not where it wants to be for peak output. Acceleration was degraded with the lighter sliders, although of course it would jump into the revs faster. The V8 just doesn't pull as hard when revving beyond the low to mid 8,000RPM range. I was pleased with the V8's performance overall. It's cruising and max speeds were not far off of the more expensive, louder, and sport level Leo Vince ZX 100cc and acceleration was about even between the two. It nosed by the 50-70cc pipes in cruising and WOT speeds, and acceleration was better than theirs. Not bad at all for a pipe I had discounted and almost didn't test. |
|
|
|
Post by 90GTVert on May 1, 2012 14:52:41 GMT -5
Phase 4 : Phongeer ExhaustThe Phongeer exhaust is next in line. This one hasn't really disappointed me so far. I wasn't really pleased with it in phase 1, but then none of the pipes impressed me with stock porting. In phase 2 it was my favorite for a few reasons. Check out the links to phase 1 and 2 results below for pics, videos, and more info. Phase 1 TestPhase 2 TestA 100 main jet with no other changes put the carburetor in a good state of tune. The engine was revving to nearly 9,000RPM just cruising with the 7g rollers that the baseline and other street style pipes have used, so I tried some other weights. I ended up using 7.5g sliders for best results. After the engine and CVT were tuned, I went for a 39 mile test ride. Fuel economy was 54.61MPG, a couple MPG better than what we've seen with other exhausts in phase 4. I stuck with the same riding style that has shown consistent numbers (again the poor economy with the YMS was a result of hard riding). I believe the increase was a result of the ability to remain at lower RPM for in town riding with the heavier rollers, because cruise RPM stayed pretty similar. Max speed was 61MPH at about 8,700RPM. Sitting up at full throttle I could cruise at 52-54MPH at 8,500RPM or so. 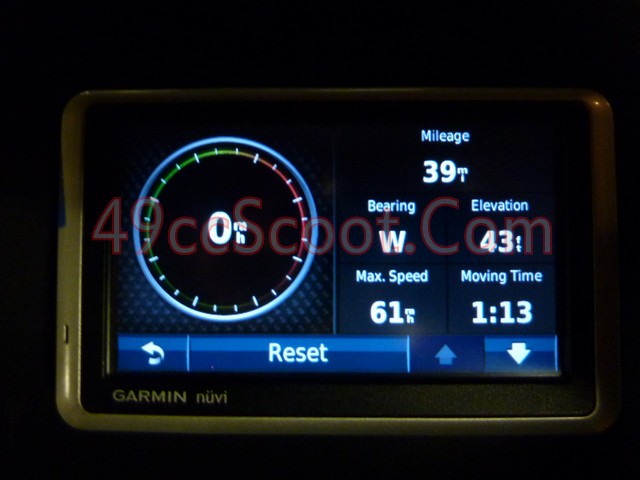 The temperature for my ride was 55°F. 40MPH cruising at 7,100ish RPM gave me cylinder head temps of 270 - 285°. WOT CHT was 290 - 305°. The Phongeer did excellent once again. It's speeds matched any pipe tested so far in this phase. It's acceleration was better than any pipe tested thus far. The fact that I had to use heavier sliders to calm down the revs says something about the Phongeer's power output. From my experience, needing heavier rollers or sliders to achieve the same RPM means more power is being made. I assure you that was evident when taking off. The PG makes good power and it's delivered smoothly. Most of the exhausts have a more evident drop off RPM that you need to keep above. The Phongeer makes it's peak somewhere in the mid 8,000RPM range. It doesn't feel so much like it's "hitting" there though. It feels more like you have an overall more powerful engine under you as it starts off strong and just continues to get stronger. Add to that the fact that it's quiet and not an eye-catcher and you can probably see why I think this is a great exhaust. |
|
|
|
Post by 90GTVert on May 5, 2012 21:29:59 GMT -5
Phase 4 : Peace PipeI've removed the center stand, so it must be time to try out the Peace Pipe. In phase 2, using the stock carb, I couldn't even get the engine in tune properly with this exhaust. It was fast, but not ridable. For pics, details, and sound clips, check out the link below to it's test in phase 2. Phase 2 TestTuning with the Peace Pipe turned out to take more work than any other exhaust I've used. That's how it tends to work with more race oriented parts. I initially tried to get a ballpark using the cylinder head temperature gauge. With setups in great tune they generally stick right around 300°F on a full throttle pass for P90. I was maxing out the CHT gauge, which goes to 340°, with any jet that didn't make the engine sputter from running overly rich. I went to reading plugs and ended up with a 105 main, which happened to be the largest jet that didn't make the engine sputter. I moved the needle clip down a slot to the next to richest condition to eliminate high temps and spark knock at part throttle. I was rich when not WOT, but that helped it cool down fast and I'd greatly prefer rich and cool to lean, hot, and experiencing detonation. Once I got the carburetor in tune, I moved on to tuning the CVT. I'll start by saying this pipe would have liked a later clutch engagement for the best results. There is a little bit of lag getting on the pipe at times. It's not bad, but it could be better. I already have 2,000RPM clutch springs installed, and those are the stiffest springs I have around. I think lightening the stock clutch would work just fine, as I've done that for other scoots with good results. You can see more details about lightening a stock clutch HERE. I opted to leave the clutch alone, because I haven't done that sort of thing to accommodate any other exhaust so it didn't seem really fair. It also wasn't completely necessary, but ideally the clutch should engage later than it was for the Peace Pipe to do it's best work. I had been using 6g sliders for tuning the carb, 1 gram lighter than the baseline tune for phase 4. With 6g sliders it accelerated well to start, but then bogged a bit accelerating to higher speeds. This was caused by the torque driver "shifting". As I went over back in phase 1 HERE, the torque driver in a stock scooter has a dual-angle grooves for best street performance. It starts off in the half of the groove that resists change the most to keep revs higher and get a good takeoff. Then it switches over to the other angle once it's up to say 30MPH or so and that part of the groove lets the torque driver open easier to keep RPM lower for cruising. It's a great setup in most cases for a street scooter, but it starts to become a weakness when working with race parts like the Peace Pipe that have a higher and narrower powerband. I feel a straight groove torque driver is much more appropriate for a pipe like this, but I stuck with stock to remain fair and keep consistent MPH results. If this torque driver talk has you a little confused, please go back to THIS POST for more detail and pics of exactly what I'm referring to. I tried 5g sliders and then the engine would rev way too high initially, and higher than I wanted at speed as well. It was hitting somewhere over 10,000RPM and breaking up , and then wanting to cruise around 9900RPM or just over. I swapped to a mix of 5g and 6g sliders to equal 5.5g. That's what seemed like the best result to me. Revving a bit high at first, but then settling in around 9,600RPM or so and pulling hard. I know that's a lot more of an explanation of the tuning than I normally give, but I wanted to give a little insight on the additional challenges you need to be ready for if you decide to go for more aggressive parts/setups. Just to sum up the tune more quickly : 105 main jet, needle clip moved to next to richest position, and 5.5g sliders. With the carb and CVT in tune, I went for a ride. I did this test ride different than all of the others for this phase. Normally I ride a little shy of 10 miles to a larger nearby town, ride around there a bit, and head back. I get gas at the same station every time, usually 25-27 miles into the trip. After I get gas I can stop worrying about keeping results for fuel economy accurate and I run it harder and get the max speed figures. The Peace Pipe is quite loud, and I really would prefer not to ride it in that town in the middle of the night as I normally do, or earlier for that matter. I ride a lot, and there are quite a few cops on duty there at any time, so I'd rather not push my luck with this pipe echoing off of everything in town. As of now the officers don't pay much attention to me, and I'd like to keep it that way. I stayed out of any larger towns. Since I was not doing the same type of riding, there's no way that any kind of fuel consumption numbers would be accurate either, so I just kinda rode how I wanted to and observed performance. Besides, I don't think you buy a pipe like this looking for the best fuel economy. I took a 26 mile ride. Sitting upright and WOT kept me cruising at speeds of 55-58MPH most of the time, and as high as 60MPH from time to time. The low end of the average cruising speed was higher than the high end of what any other pipe has done. The high end is pretty much on par with the other pipes with me tucked down on a long stretch of road. That's impressive IMO. It takes a good bit more power to do 60MPH sitting up compared to tucked, because of the additional aerodynamic drag you have to overcome. When I tried to tuck down for more speed, nothing really happened. I got to 60MPH easily, and then it just didn't do anything else. I know it's making enough power to push past what the other pipes have done, and yet it's 1MPH short of the best results I've seen. By the time I was at 60MPH the revs were right around 10,000RPM. I suspect that with the current porting it just doesn't want to rev higher. 190mech says this pipe should be setup for peak around 10,500RPM, and I've seen this exact pipe pull to 11,000RPM or a little beyond on a more aggressively ported cylinder on one of my other big minarelli engines. That engine has a larger 25mm carburetor as well, so perhaps that is also a part of it. Considering that this pipe puts WOT cruising temps at 340+, a larger carb wouldn't be a bad idea for cooling purposes, even though I had no trouble with it due to the heat. I think it actually ran hotter than this with much milder setups before I added the 21mm carb and larger cooling fan. 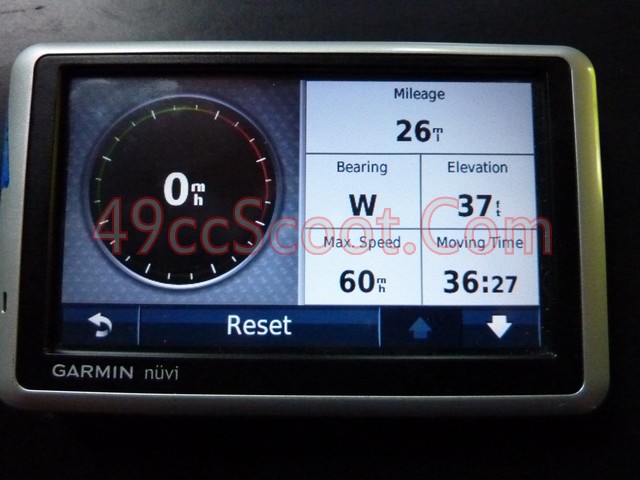 Since I did a ride in the daylight for a change, you can check out some video instead of just listening to me ramble on about it. ;D At some point after the ride, I noticed that the clamp used to support the end of the silencer had broken. When I spoke to 190mech about this, he said he had used a clamp off of a cheap Chinese pipe for this particular one. It looked good to me while it lasted, but it didn't hold up too well. Support for the end of the silencer near the outlet is important to keep stress off the stinger and the pipe near it, so I made a replacement out of some aluminum flashing that I had around. Unfortunately, I seem to have forgotten to take a pic of it. Nothing fancy, just a strip of flashing that was tight around the silencer when bolted in place.  I was really disappointed in the lack of speed increase when tucked on the test run. As I said earlier, I felt like there was more than enough power to push speeds higher. I decided to try again with heavier sliders to keep the revs down a little more. I used 6g sliders, instead of the 5.5g used on the last test ride. The pipe has a higher an more narrow power band than most, so I couldn't drop the revs too much or performance really suffered. I made no other changes. Cruising speeds dropped to 53-56MPH at WOT and sitting up, 2MPH short on average from the lighter sliders. WOT cruising was done around 9,300RPM. When tucked down I saw 64MPH somewhere near 10,000RPM. Once again it felt like the RPM is what held it back more than power output. 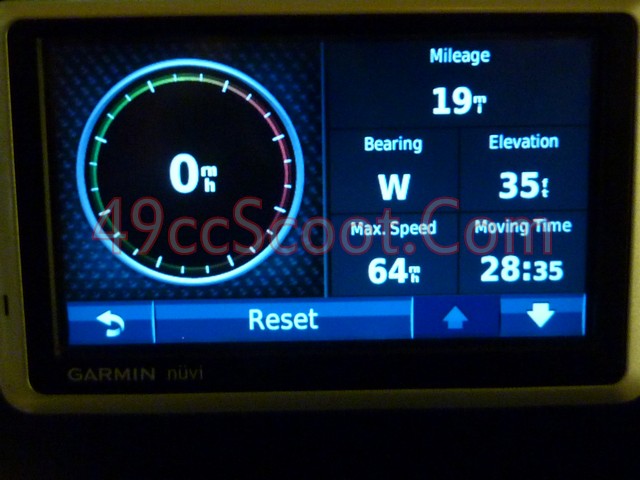 When I hit 64MPH, that was only 8 miles or so into my test ride. Just after that I got this odd warble or wawawa type of sound from the exhaust and then it was suddenly VERY loud along with a clank clank clank. The stinger and silencer had broken completely off. I picked it up and rode 10 miles home to avoid going through town. I thought it was loud before, but this certainly made me realize the silencer was doing something. 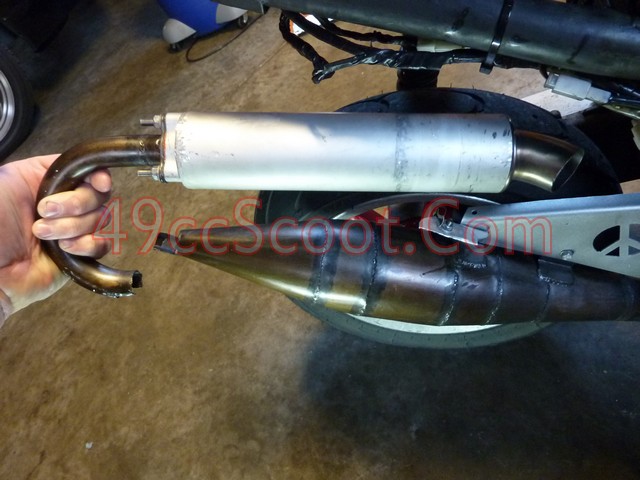 I think the replacement clamp I made from flashing was just too thin to do it's job. You can see part of it is still bolted on, but the rest ripped right off. I assume whatever distance I rode with the last clamp busted must have stressed the pipe and my clamp just wasn't enough to keep it in place or perhaps it's all my fault. No way to know for sure. 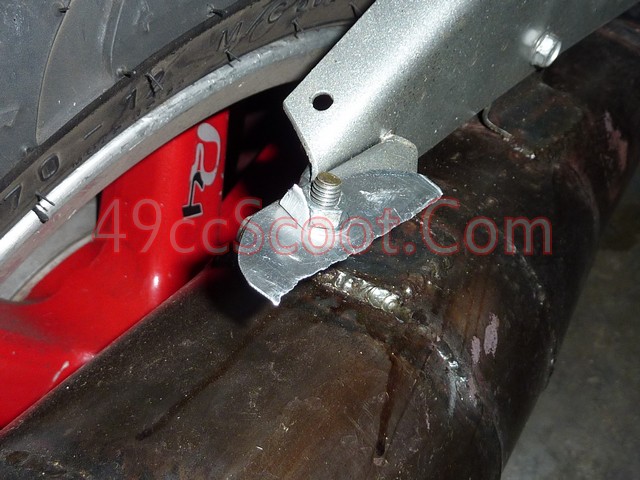 The good thing to know about that situation is that 190mech is working to ensure it doesn't happen again. As I understand it, his new designs now use a bushing in the mount to absorb vibrations. He also only used that Chinese clamp on this pipe, so that's not a problem. Still, after I told him of the failure he was concerned and will be looking into even more changes to farther improve the design. I believe I am the only person really racking up miles on the street using these pipes as this is being written, so he doesn't get a ton of feedback for R&D. Remember, this is one man building these pipes, not a big corporation like Leo Vince that can spare no expense in testing. The funny part of that is that the Leo Vince 100cc pipe comes nowhere near the power output this Peace Pipe is capable of. I've told you the results from and characteristics of the lighter and heavier sliders, so which would I choose? Lighter. No contest. I find higher cruising speed much more useful than higher max speed. Max speed is more about bragging rights than anything practical. Not too many people want to spend their whole ride tucked down for max speed. My real opinion is that I'd choose neither. What I'd really suggest is to port the cylinder to better match the pipe's output, probably 192-194 exhaust duration and 132-134 transfer duration. Those are just a guess, but whatever you think will work for 10,500RPM peak. On top of that, I'd add a straight groove torque driver to keep the RPM more constant and remove the need for so much compromise. Lightening the stock clutch or stiffer clutch springs would get it off the line better. Add in a larger carburetor for better cooling, 24-28mm I'd guess, and you should have a pretty stout setup. That's an awful lot of add-ons for a pipe, I know. That's because I don't really think you should choose this pipe unless you are up for a serious project and spending some time dialing it all in. It's loud and you can't use a center stand, so coupled in with all the other reasons, the Peace Pipe is basically for people that care more about a quick and fast scooter than the best daily rider. If you are one of those people, and you understand the drawbacks I've mentioned... you're gonna have a blast! If you're looking for a pipe purely for race, there's just no other smart choice among the pipes I've tried. |
|


 WOT cruise temps were about 285 - 300°F, on par with past results.


 By around 8PM it had frozen up and pushed the rubber cork out of the stinger end. I checked it about every 30 minutes to an hour until around 11PM and saw very little change before I went to sleep. I woke up at 3:30AM and found that the dents had been mostly removed. I was quite happy to see this and stayed up till 4:30AM, checking each half hour. At 4:30AM I saw no more change and opted to go back to sleep for a bit. I got up at 6AM and the dents seemed the same, but I decided to give it a little more time before giving up, even though I didn't have much hope for the dents coming out anymore since it had been 2 1/2 hours since I noticed them pushed most of the way out. I also set the freezer to it's coldest setting to see if that would do anything. I removed the pipe from the freezer at 9AM when I noticed that it had busted open. It broke open where the Leo Vince Hand Made stamp is. It seems the stamp made this area the weak spot. I don't fault them for that, it seemed to hold up to a bit of pressure before letting go, and I'd prefer it to bust there than at a seam where it may distort worse and be harder to fix.


