|
|
Post by aeroxbud on Jul 24, 2020 16:54:26 GMT -5
I think it would look a lot better closer to the edge of the frame. Probably stronger too.
|
|
|
|
Post by oldgeek on Jul 24, 2020 17:51:21 GMT -5
I think it would look a lot better closer to the edge of the frame. Probably stronger too. Yes, that is what I was trying to describe. I did the mod and added a picture to the previous post. |
|
|
|
Post by hippo008 on Jul 24, 2020 17:58:57 GMT -5
Oh man this is going to be cool. The under seat exhaust look is going to be amazing. Im hoping this bad boy will have that internal muffler that 190mech used on Brent's pipe for that sweet PING POP PING
|
|
|
|
Post by oldgeek on Jul 24, 2020 18:07:52 GMT -5
This is crazy! I was looking around Scootopia for a center stand for this build and found this swing-arm I had. It must have come off of the helix clone I stripped down. I totally forgot I had it but it looks like I found it just in time. I was planning to buy a swing-arm from somewhere this weekend. This one looks better than any of the ones I saw online. Looks like it will work fine with a few mods. 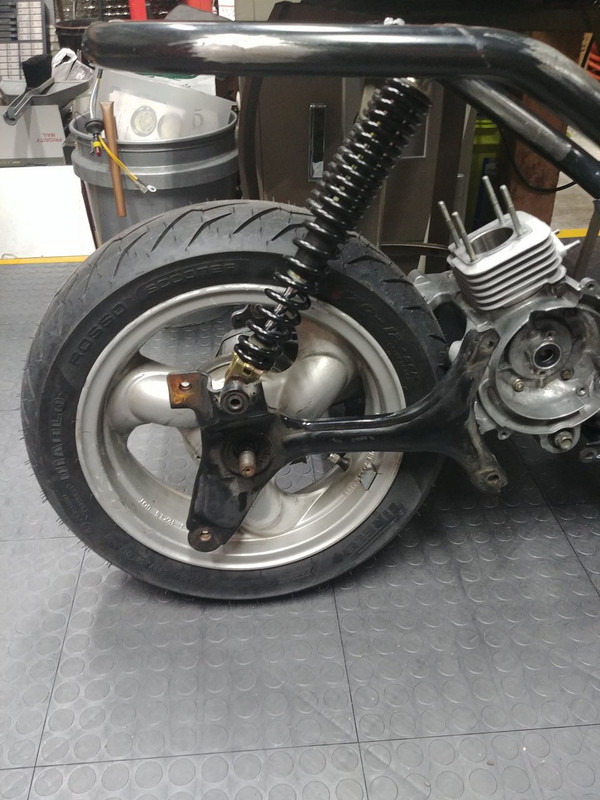  |
|
|
|
Post by aeroxbud on Jul 24, 2020 19:17:21 GMT -5
How lucky is that. I would be fitting the replacement before I found it. 😁 I thought we were not going to mention the helix clone again?  |
|
|
|
Post by oldgeek on Jul 24, 2020 19:23:33 GMT -5
.......I thought we were not going to mention the helix clone again?  I got over that one fairly quick! I also plan to use the controls from the Helix clone for this build. |
|
|
|
Post by hippo008 on Jul 24, 2020 19:58:15 GMT -5
Not sure if this of interest oldgeek but I think I struck oil with this idea. Instead of using a bracket to hold the pipe extended over the tire you could use an exhaust flex pipe as an exhaust header. That way the peacepipe could be mounted to the seat frame without the worry of stressing the pipe. You'd need to do some serious fab work and who knows if the exhaust flange could accept the flex pipe but I think it could be worth a shot. I think this stuff could work. Its stainless so you would need to braze or tig it. www.bennettbuilt.com/shop/Muffler_Accessories--Stainless_Steel_Flexible_Exhaust_Tubing_1_ID.html |
|
|
|
Post by oldgeek on Jul 24, 2020 22:05:38 GMT -5
Not sure if this of interest oldgeek but I think I struck oil with this idea. Instead of using a bracket to hold the pipe extended over the tire you could use an exhaust flex pipe as an exhaust header. That way the peacepipe could be mounted to the seat frame without the worry of stressing the pipe. You'd need to do some serious fab work and who knows if the exhaust flange could accept the flex pipe but I think it could be worth a shot. I think this stuff could work. Its stainless so you would need to braze or tig it. www.bennettbuilt.com/shop/Muffler_Accessories--Stainless_Steel_Flexible_Exhaust_Tubing_1_ID.htmlThat idea might fly on a 4Poke but it aint happening on a 2T. Now if you can get me a custom formed u bend made to my specifications with proper end to end taper I would love to give that a try. I am pretty sure I got the pipe mount worked out. It will be attached at the exhaust flange, along with a support coming off the head somewhere, and a stiff arm down to the shock mount area on each side of the swing-arm. Possibly some type of cradle arrangement for the pipe to sit in. It would be nice to make it quick release or at least easy to attach and remove from the scooter. |
|
|
|
Post by jloi on Jul 26, 2020 14:10:44 GMT -5
excellent all around dude
|
|
|
|
Post by oldgeek on Jul 26, 2020 19:02:23 GMT -5
Actual money making work got in the way of progress this weekend. I did fit these bars for giggles. Anyone digging these apes?..................me either  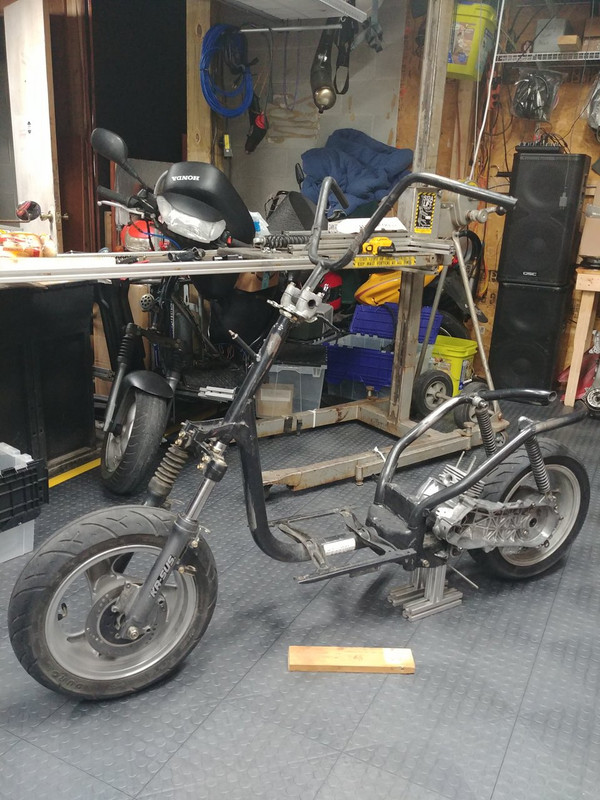 |
|
|
|
Post by hippo008 on Jul 26, 2020 19:39:44 GMT -5
Actual money making work got in the way of much progress this weekend. I did fit these bars for giggles. Anyone digging these apes?..................me either    Go big or go home  |
|
|
|
Post by oldgeek on Aug 2, 2020 17:20:42 GMT -5
Over the last few days I have spent many hours on various areas of this project. I got frustrated to no end trying to make a part for the motor on the lathe. So I gave up for now because the lathe is simply too small to do the job. It is a fairly simple job but the lathe chuck will not open far enough to do it. I moved on to the right rear shock mount, because it is so important to this build to get it worked out. I started with the donor swing arm looking like this.  After a lot of failed ideas I think I came up with a winner. I chopped a few unneeded pieces from the swing arm and made up a shock mount tab from a rather large chunk of aluminum I pulled from the scrapyard haul the other day. 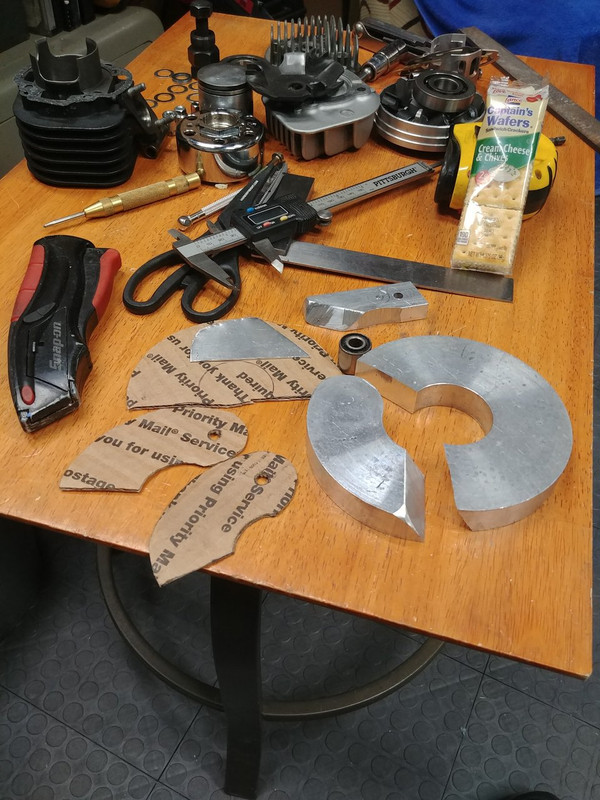 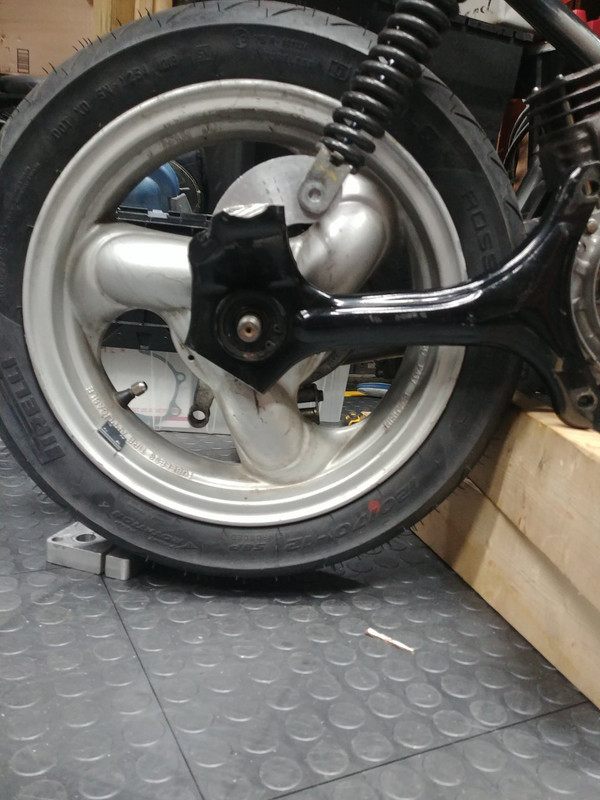 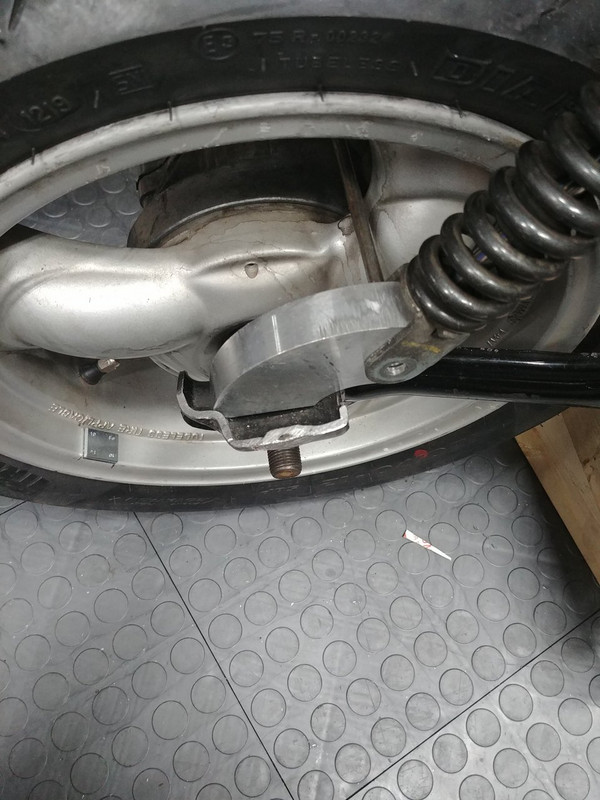 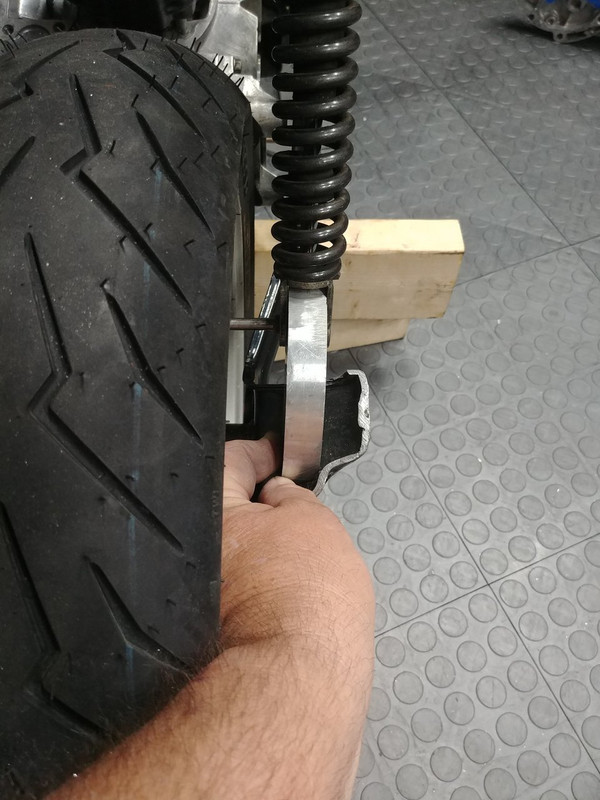 I still have to drill the tab out and install the shock mount in it and come up with a way to mount the tab to the swing-arm. Then I still have to make some kind of adapter for the front of the swing arm where it mounts to the cases.Overall I think this route is easier than just building a swing-arm from scratch like I was thinking at one point. The place doing the wheels called and said the castings looked very rough after they were chemically stripped, said more $$ to smooth them out a bit. I said sure but they are not "show wheels" so don't go overboard, please. |
|
|
|
Post by oldgeek on Aug 4, 2020 18:41:11 GMT -5
I am kinda proud of my accomplishment today. I did not really do much but I did it with the lathe. I needed to mount the 20mm silent block for the rear shock into the big shock mount I made. First I tried drilling progressively bigger holes using the drill press. The biggest bit I had was about 14mm and by the time I got to it, the hole was off center and not straight through the piece. After cursing a while I thought about it and pulled the 4 jaw adjustable chuck for the lathe out. I completely removed one of the jaws leaving just three in it and test fit the shock tab in its jaws. It seemed to just have enough bite to hold it securely so I installed the chuck on the lathe. I spun the piece on the lathe and got it centered up where I wanted the hole to be. I set up the boring bar and went at it. I tried to attack it by reaming out the center but that was not going well at all. Then I realized a plunge cut from the face would work better. It took a while but it worked out well. I was able to finish the hole and straighten it out in the process. Small Victory! 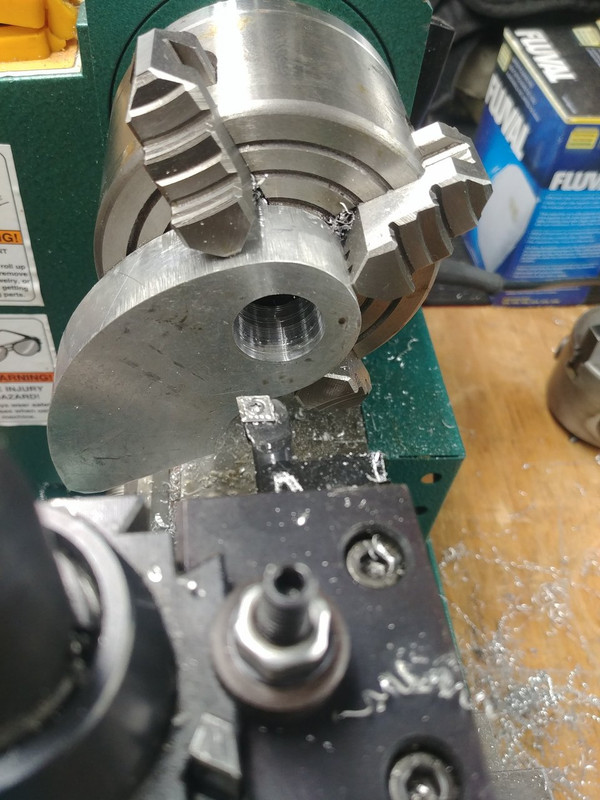 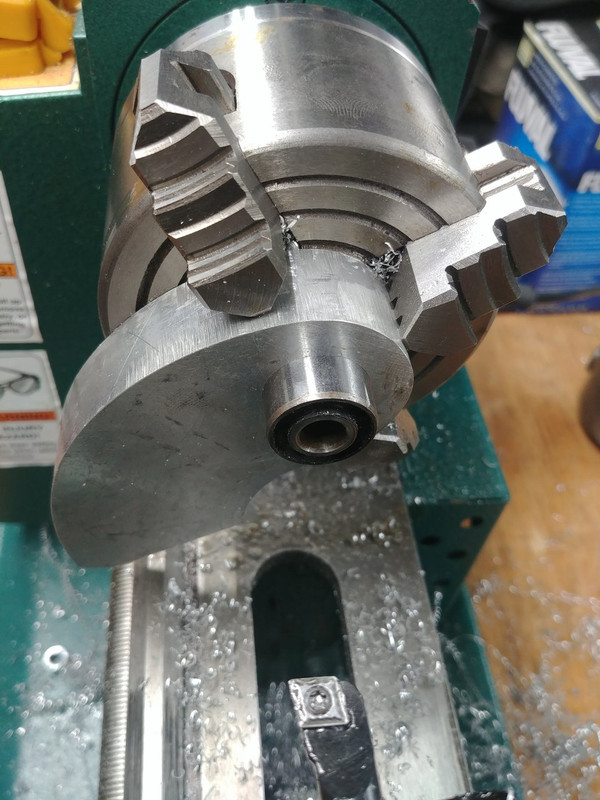  |
|
|
|
Post by aeroxbud on Aug 4, 2020 19:10:34 GMT -5
That worked out well. Small victories add up. 😁
|
|
|
|
Post by oldgeek on Aug 6, 2020 10:08:14 GMT -5
I picked the wheels up from the powder coater today. Not the florescent orange I requested, but I am not surprised since they seemed very reluctant to do that color. They went with a metallic orange I chose from a book they showed me. There was a slight mixup in the price, they billed me twice the quoted price but then realized the office lady was trying to charge for 4 wheels. So they ended up costing $240 total. They look really good in the sunlight. Now all I need is a scoot to put them on. 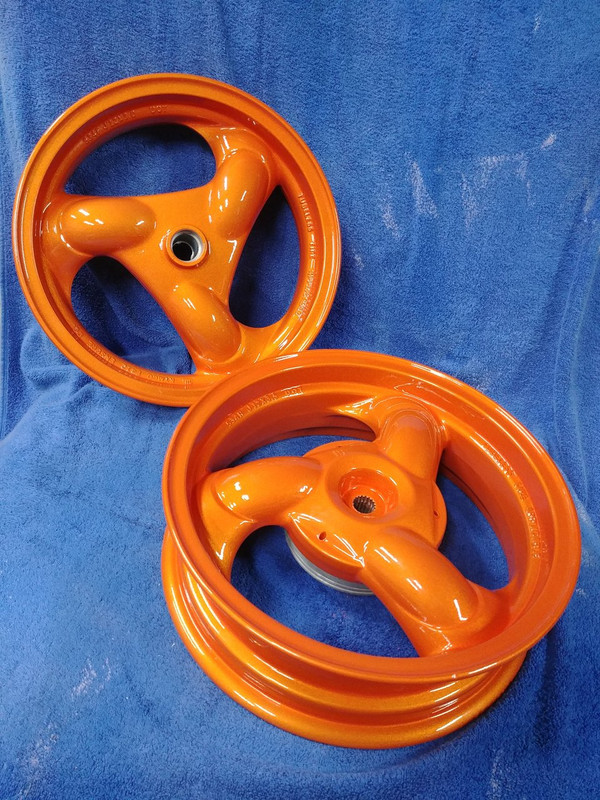 |
|