|
|
Post by proy on Feb 21, 2023 20:09:52 GMT -5
went back outside and took some photos of the gages installed. Tachometer:  Temp/Voltage:  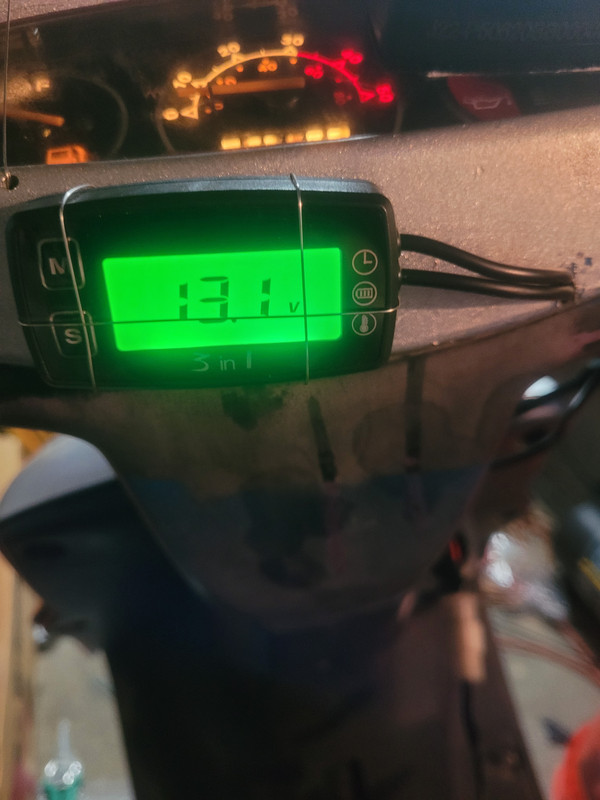 Installation notes Tach: I installed this and it was pretty straight forward. it was a few inches shorter then I would have liked so I ended up putting the wraps closer to the coil. The instructions say to wrap the pickup wires behind the plug cap. Other then that it works exactly as expected. Installation notes temp voltage: This was a lot harder to get to fit. If you don't have soldering experience I wouldn't suggest this gauge. The leads for the temp gages sensor were too short along with the fact that its hard to use the size eyelet that comes attached. So first I used the broken temp lead from my first sensor that I broke, cut the new sensor mid way and soldered in a extension. second about the sensor, I don't like the options that utilized the eyelet so since its copper I snap the eyelet off. The sensor left behind is a small round tube with a set screw. Yes I know this isn't "correct" but in the gap between the edge of the underside of the head and the top of the cylinder the sensor tapped in lightly using a hammer and a small punch. now when I say lightly I am only using the weight of the hammer not putting force behind it. anyways the sensor fits snuggly there and stayed put for over 1000 miles on the stock cylinder so I'm not too concerned about it jumping out and falling into the cooling fan/flywheel. I could shave it down and epoxy it in between two cooling fins but I like being able to remove the sensor easily. Even with the splice and extra cable (same type and size) it read room temp the same as before so i think its accurate. Well I guess that about wraps that up. |
|
|
|
Post by aeroxbud on Feb 22, 2023 6:07:49 GMT -5
Removing the electric start gear makes a noticeable difference to how fast the motor spins up. 👍 Post a picture of the intake.  |
|
|
|
Post by proy on Feb 22, 2023 17:36:26 GMT -5
|
|
|
|
Post by aeroxbud on Feb 23, 2023 4:29:05 GMT -5
I have used anywhere from mid 90's to low 80's jetting for a pipe and BBK before with a stock air box.
Might have to buy another pack of jets to run the airbox. If you haven't, try removing the snorkel. See if it makes a difference.
|
|
|
|
Post by proy on Feb 23, 2023 9:12:12 GMT -5
 Feb 23, 2023 4:29:05 GMT -5 aeroxbud said: I have used anywhere from mid 90's to low 80's jetting for a pipe and BBK before with a stock air box. Might have to buy another pack of jets to run the airbox. If you haven't, try removing the snorkel. See if it makes a difference.
I agree. I am going to buy another set of jets and see what I can get going with the airbox. I am trying to optimize fuel efficiency as much as possible.. I re attached the pod filter and up to a 105 main jet. Thats all it needed to open up the PowerBand again so I know it's running too fat.
|
|
|
|
Post by proy on Mar 12, 2023 22:45:23 GMT -5
so today I took apart my CVT trying to chase down a belt slip issue plus not getting full travel on belt engagement. I am starting with the drive boss because the CVT seams to be slipping. I replaced the belt with a slightly longer belt and that allowed it to ride as high as possible in the clutch pully but didn't help enough to give me full front pully travel. sadly the only belt in the length I wanted was slightly narrower then the stock pully.
Before the pipe the belt did not slip with the 70cc setup. Now with the pipe hitting at roughly clutch engagement it blows through the front pully on take off. Next time I'm in the transmission I will note belt sizes stock and extended.
so instead of switching back to the shorter belt and losing rear pully travel I measured the drive boss at 38 MM. I ground the drive boss down to roughly 37.3 MM. Went for my normal ride which includes a lot of steep uphill. I also down jetted from a 105 main jet to 100 and lowered (richened) the needle one position in an attempt to clear up midrange. Top end power improved marginally between the re-jet and cutting the drive boss I gained several MPH. Nothing GPS confirmed but on local speed trap signs I would too out at 39 MPH BEFORE cutting the boss. Now on the same trap I clocked 48 MPH. so I assume its fair to say I picked up "10-ISH" MPH.
CONCLUSION: Although I received dramatic gains without taking a big low end hit on power I wouldn't suggest jumping to cutting your boss. The only reason I maintained my low end take off was because I had already gotten a longer drive belt that happened to be slightly narrower then the stock belt. If you don't have this extra room to work with then cutting your drive boss will give you better top end but you will lose takeoff power. It just so happened that I was able to take advantage of the skinnier belt and get a better overall gear ratio at the same time. next time I go out I will try to get GPS speed data.
|
|
|
|
Post by proy on Mar 13, 2023 10:06:04 GMT -5
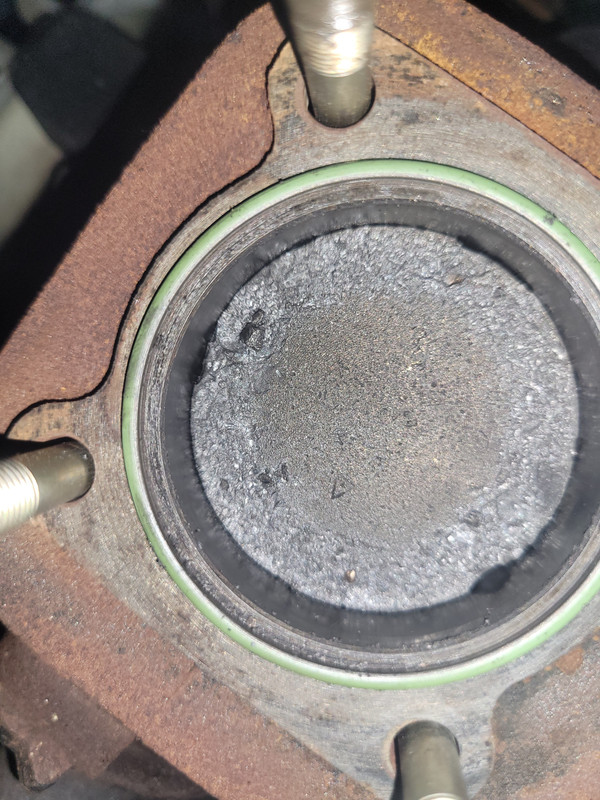
Ok so todays project was to port map my polini 70cc kit. I pulled the jug and inspected the cylinder wall which had no scoring or overheating marks. While port mapping my cylinder I noticed a small lip all the way around the exhaust port (less then 1mm) so after making a port map I took a small half round file and broke the lip left by casting and slowly filled it flush to the casting main body. Mind you MY goal isn't to raise the exhaust port by a major amount just to remove the lip on the exhaust port.
My exhaust originally measured: 17.8 MM Tall and 30 MM wide
After removing exhaust port lip measured: 18.5 MM Tall and 31.57 MM wide
overall I gained 0.7 MM on the port height and 1.57 MM in width on the port.
Re-assembling and testing the engine it feels like I picked up power across the bored. Acceleration seems about the same Without the slight bogg I had on takeoff prior to the mod. As I only went around the block I didn't get to see if power carries over 10K now I managed to rev to 10.2K RPM and it was still pulling.
as I do more work I will update the build.
|
|
|
|
Post by proy on Aug 17, 2024 13:54:01 GMT -5
|
|
|
|
Post by 190mech on Aug 17, 2024 16:31:46 GMT -5
Glad you selected 12mm pin! Have an Eton that killed 3 cranks and top ends due to shattered 10mm pin bearings..Went ahead and converted it to 90cc+ (all have a 12 pin), no problems there after.  |
|
|
|
Post by aeroxbud on Aug 17, 2024 17:30:06 GMT -5
That's a good upgrade. 👍
|
|
|
|
Post by proy on Aug 17, 2024 20:14:47 GMT -5
Any sugestions on a set of aftermarket forks that would fit the beamer. I havent had much luck finding any that will for sure fit without modification.
|
|
|
|
Post by proy on Aug 20, 2024 21:36:59 GMT -5
So my 12mm polini crank that i ordered was on back order saddly but im dead set on the crank if i can get my hands on it.
In the mean time i reinstalled the oem crank after retapping the threads. Lukily the case's only suffered a few nicks and scratches.
Ordered a cheap naraku 70cc topend and a new polini small end bearing. That all came in this afternoon and 6 hours later im back up and running.
Once i get the carb properly tuned to the cylinder i will update with new top speed and honest impressions.
The polini sport cylinder topped out at 43 on flats and mild downhills. I am interested to see how the naraku compares.
|
|
|
|
Post by aeroxbud on Aug 21, 2024 5:30:40 GMT -5
If you fit the standard head with the Naraku kit. Make sure you check the squish band, as some will hit the cylinder head.
I ran a Naraku for thousands of miles on the aerox. I liked it for the price. Not as powerful as the Polini sport. But makes really good torque of the bottom.
|
|
|
|
Post by proy on Aug 21, 2024 18:47:38 GMT -5
|
|
|
|
Post by proy on Aug 21, 2024 19:08:29 GMT -5
   Took the scoot to work and then on my normal 20 mile loop. No jetting changes sam setup as i ran the entire life of the polini sport. It was running hot but not criticaly hot so ill pull the plug tonight and upjet from there and do a few laps arond my block before work tomorrow. First impressins before the carb is tuned right. 40 on flat with no headwind 42 downhill. Can fell the extra power down low compared to the poilini sport with my attempt at porting the exhaust. Didnt ride more than a few miles on the polini before moddifying the exhaust port so hard to compare it fairly. Feel like i can improve takeoff and topend with a slightly lighter roller weight and propper jetting and possibly come close to the polinis top speed. Will continue to post as i play around while i wait for the cooler order of parts to get here. Didn't get a picture of the jug but the skirt on the same side as tje piston also broke. Im assuming that shrappnal was what cooked the top of the piston and head. Wount lie i didnt have the right plug for any of my 50cc heads so after a luch break at work with our wire wheel set up for aluminum and a lot of hope i re intalled the polini 70cc head in the photo after checking for safe squish and haven't heard any spark knock yet so fingers crossed untill the other parts get here. |
|


