|
|
Post by aeroxbud on Sept 28, 2021 9:36:14 GMT -5
Someone had a link on here of one cut open. It's not an expansion chamber really. Just the first half a cone. I guess that's why it's called a half wave pipe.
|
|
|
|
Post by hippo008 on Oct 4, 2021 16:32:06 GMT -5
I got the pipe in from 190mech today. He did a great job with the fabrication. The exhaust header fits  Sadly the exhaust bracket doesnt fit. I went around the bike a few times scratching my head trying to figure out what was different. I double checked the build thread and everything was mounted correctly. It turns out the bracket not fitting is actually my fault and not 190's. When we were fleshing out the details of this pipe he asked if the Dio is the same as his AF16. The motors are very similar, they use the same cylinders, the same cooling shrouds and the same exhaust mounting points. The difference wasnt the motor it was the frame of the scoots. 190 used his "AF16 without a cause" scooter as a template for the exhaust bracket. I forgot to tell him that the frame he used on his scooter is not the same as the frame on my Dio. 190mech's frame looks similar to a Honda spree or G dash frame while the Dio has a much wider engine mount. The pipe contacts the bend in the engine mount and wont seat all the way like it would on his frame. Heres a photo comparison. A bummer for sure but I can only blame myself for that one. I considered using 190s bracket and just cutting my frame but I decided against it. Im pretty sure it would be fine to just trim the area a little with a grinder but im very nervous to modify the structure of the scooter. These little guys are already dangerous enough, i dont feel comfortable riding on a cut frame no matter how small the trim may be. 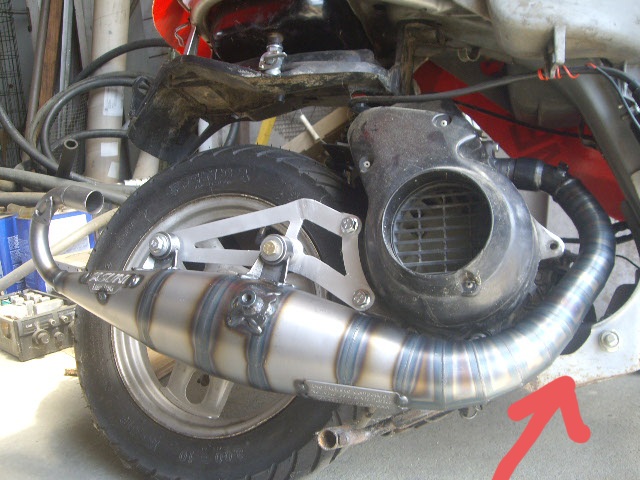 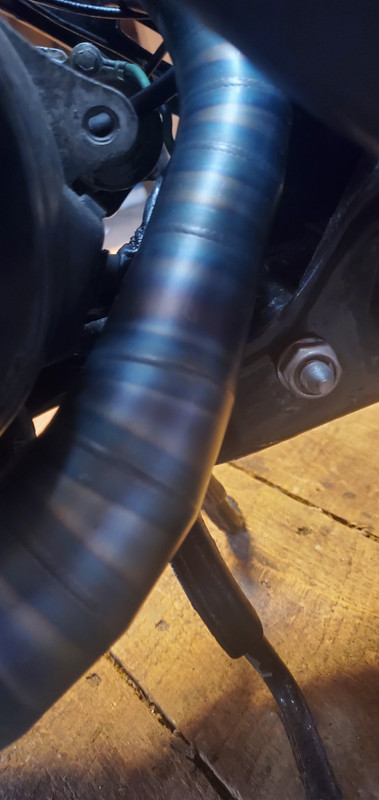 So i decided to try and make my own bracket. It was going fairly well until I bent the aluminum flat stock. 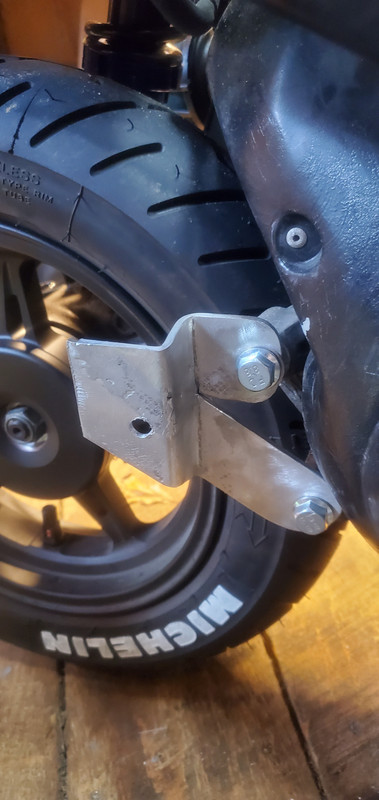 While bending the aluminum it cracked near the bends. The cracks were somewhat small so I wasnt too concerned. I tried to clean out the crack a little with a file and fill it with some alumaweld. Unfortunately for me I heated the material up too much and melted the joint and the back of the flat stock.  I was pretty disappointed so I put it down for the day and I will return tomorrow to try again.  I think I went wrong during the bending process. Im thinking aluminum work hardens and becomes brittle as you bend it sort of like copper. I think if I were to bend the part in stages with annealing between each stage I could prevent the cracking in the bracket. If all else fails ill design a new bracket in CAD then have it cut and bent by SendCutSend. |
|
|
|
Post by repherence2 on Oct 4, 2021 17:54:51 GMT -5
You have to bend aluminum against the grain, or else it will crack. Even if you heat it to try an anneal it, it doesn't work like other metals because of the grain.
So when doing your layout you have to take the grain of aluminum into account.
|
|
|
|
Post by hippo008 on Oct 4, 2021 20:10:48 GMT -5
You have to bend aluminum against the grain, or else it will crack. Even if you heat it to try an anneal it, it doesn't work like other metals because of the grain. So when doing your layout you have to take the grain of aluminum into account. I did my best to bend against the grain. To get the bracket to work I ended up needing to bend it sort of across the grain. I read a few articles on annealing aluminum. It looks like most aluminum becomes soft somewhere between 500° and 750°F. My current plan is this. Layout the bracket. Braze the top and bottom half together. Use sharpie as a temperature indicator with a propane torch and anneal the pieces Bend to appropriate spec Braze on last section Does this seem like it would work? Its moments like this i *really* wish I knew how to TIG. This would be worlds easier if I had the proper equipment. |
|
|
|
Post by repherence2 on Oct 4, 2021 21:07:41 GMT -5
hippo008 ever thought about "brazing" it with that "alumalloy" stuff. ...it's like ghetto TIG but with a flame torch instead of a electric "flame" TIG torch. **seems more like "solder" for aluminum.** maybe instead of bending 1 plate twice, you can fab 2 smaller plates and in lieu of the bend, use bolts and spacers. or you can always do like i did, use a single "plate" and space it out from the block like i did on mine. im sure you could fab a nice bracket if you had some "alumalloy" so that you could join your pieces together instead of bending the aluminum.
|
|
|
|
Post by aeroxbud on Oct 4, 2021 22:59:59 GMT -5
That's a shame about the exhaust. I'm sure you will make it work though.
|
|
|
|
Post by hippo008 on Oct 5, 2021 0:01:35 GMT -5
hippo008 ever thought about "brazing" it with that "alumalloy" stuff. ...it's like ghetto TIG but with a flame torch instead of a electric "flame" TIG torch. **seems more like "solder" for aluminum.** maybe instead of bending 1 plate twice, you can fab 2 smaller plates and in lieu of the bend, use bolts and spacers. or you can always do like i did, use a single "plate" and space it out from the block like i did on mine. im sure you could fab a nice bracket if you had some "alumalloy" so that you could join your pieces together instead of bending the aluminum. Thats my current setup. I use a MapGas cylinder with a torch and some aluminum brazing rod. Im not sure if its technically brazing or not, whatever it is it works pretty well. The trouble with brazing the angles together is the nature of the filler rod. With silicone-bronze brazing you melt the filler rod into a pool with a TIG torch or Gas setup. The heat is mostly local to the joint and right around the joint. With aluminum brazing you heat the whole part evenly and then apply the rod. If you make joints too close together the joints adjacent will fail. The heat isnt local its universal. I thought about using some wet rags to cool adjacent joints but I dont know if that will work. I have a plan C. Plan C is to say screw aluminum lets go mild steel and weld it. I was gifted an old oxy-acetylene setup and the tanks are still in hydro. I could get them filled up at a local welding supply buy some filler rod and let her rip. Ive never welded before and gas welding is supposedly pretty difficult so this is a last resort. |
|
|
|
Post by oldgeek on Oct 5, 2021 6:50:26 GMT -5
IMO aluminum is not going to hold up well unless it is very thick. It needs to be rigid or cracks will develop in the mount and pipe.  |
|
|
|
Post by 190mech on Oct 5, 2021 7:39:31 GMT -5
Steel is the only thing that will make the long haul!!
|
|
|
|
Post by hippo008 on Oct 5, 2021 20:58:29 GMT -5
Steel is the only thing that will make the long haul!! This makes the most sense to me so I am going with this. I wanted to use aluminum because I can work with it and it wont rust. To get the ball rolling I made a plate with cardboard and then drafted it in CAD. The red lines represent 90 degree bend lines. I havent printed this bracket out and tested it on the frame so just be aware it may not be a perfect fit, my CAD-fu is pretty bad. EDIT: Not sure of the final design. Well see how it turns out cosmetically. I also accounted for the pipe hitting the different engine hanger mount so there shouldnt be any rubbing.  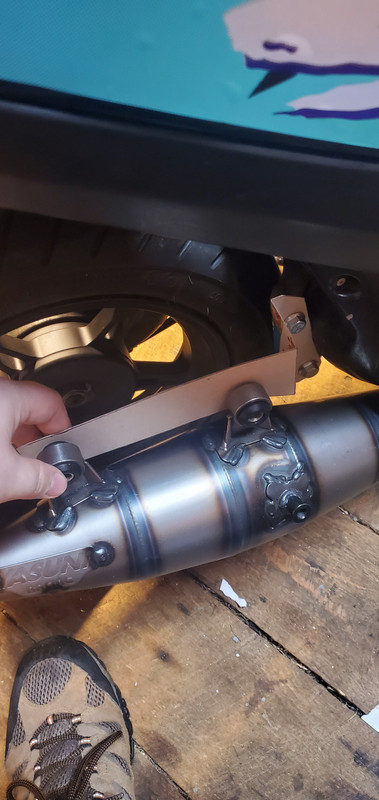 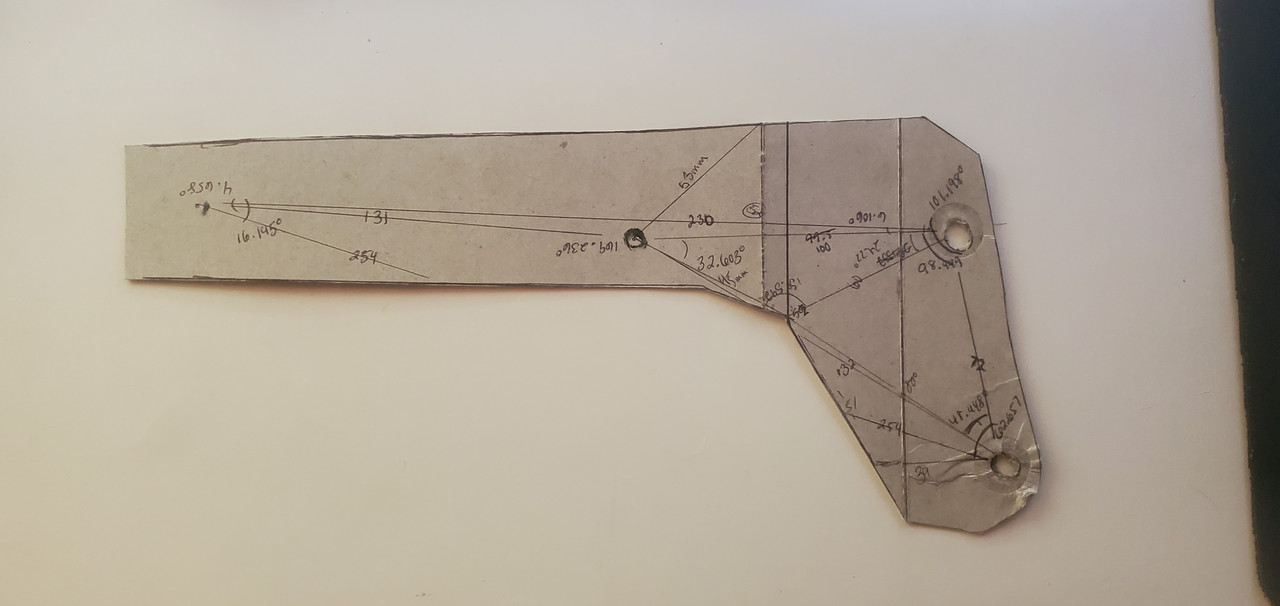 |
|
winner3ty
Scoot Enthusiast
   2 Strokes for life
Posts: 324
|
Post by winner3ty on Oct 6, 2021 8:09:05 GMT -5
as far as neighbors... i have found that if you are a "nice" neighbor, you can get away with having a loud moped/scooter. "nice" as in don't go rippin' it down the road you live on. say hi or wave to your neighbors when you see them, chat with them. i have found that there is a kind of "amnesty" when you do things like that. ...but maybe it only works like that here in Hawaii. the old lady that lived in the apartment unit below me used to bring me lunch when she knew i was downstairs working on my moped. but then again, i used to help her with small plumbing issues because she was afraid that if she told the landlord about it, the repairs would result in a rent increase. she felt safe knowing that i lived in the unit above her. i guess it depends on the kind of people that live around you. culture here in hawaii is different versus on the mainland. for me, if you're respectful to neighbors, and not make a lot of unnecessary noise when you ride down your street, they will tolerate it. i guess for us in hawaii, Aloha aku, aloha mai. "you give Aloha, you get Aloha".
Atleast here in my town I do alright, I only ride up and down the street when I'm trying to dial in my pipe, I wave to neighbors ect. If someone did complain id probably apologize and say I was trying to get the carburetor adjusted. We do have nice Neighbors, and I never ride my bike after dark. and who could possibly complain with the musical instrument on my zx50  |
|
|
|
Post by hippo008 on Oct 6, 2021 16:50:07 GMT -5
The bracket seemingly works! It fit right up to the frame with minimal adjustment. The back of the bracket needed to be trimmed to fit around the fan shroud but thats no big deal. When im done with the CAD ill post it here for download. EDIT: I updated the bracket a little to clear the fan shroud. I also made some small adjustments that add some clearance around the bottom fan shroud. I updated the photos to reflect the changes.  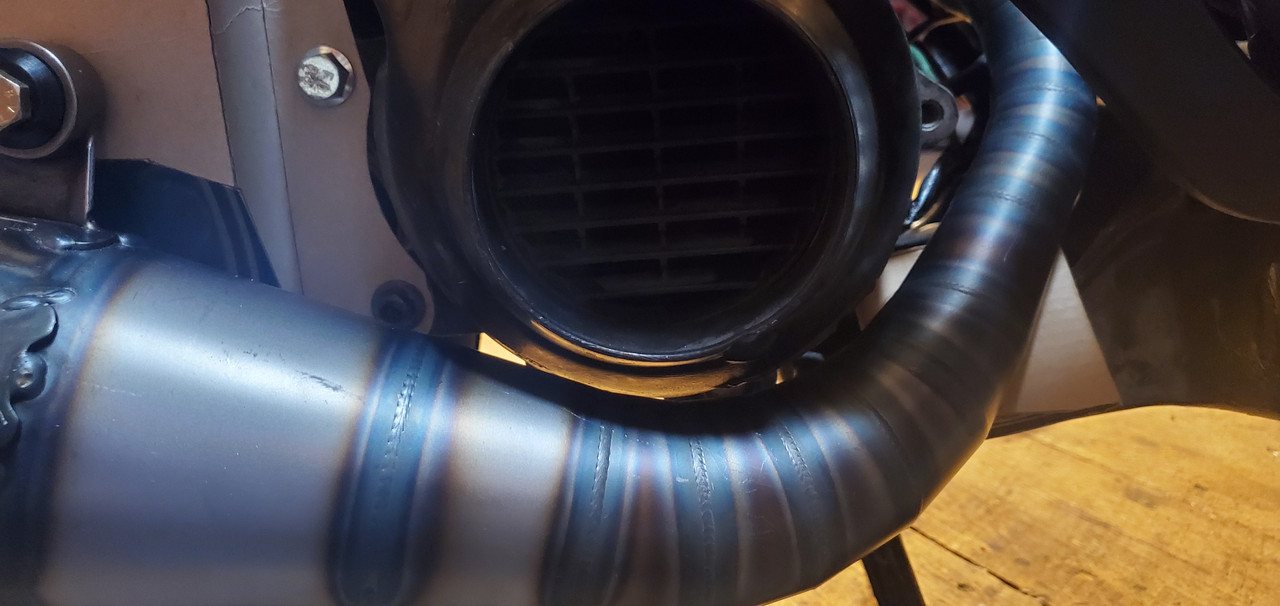 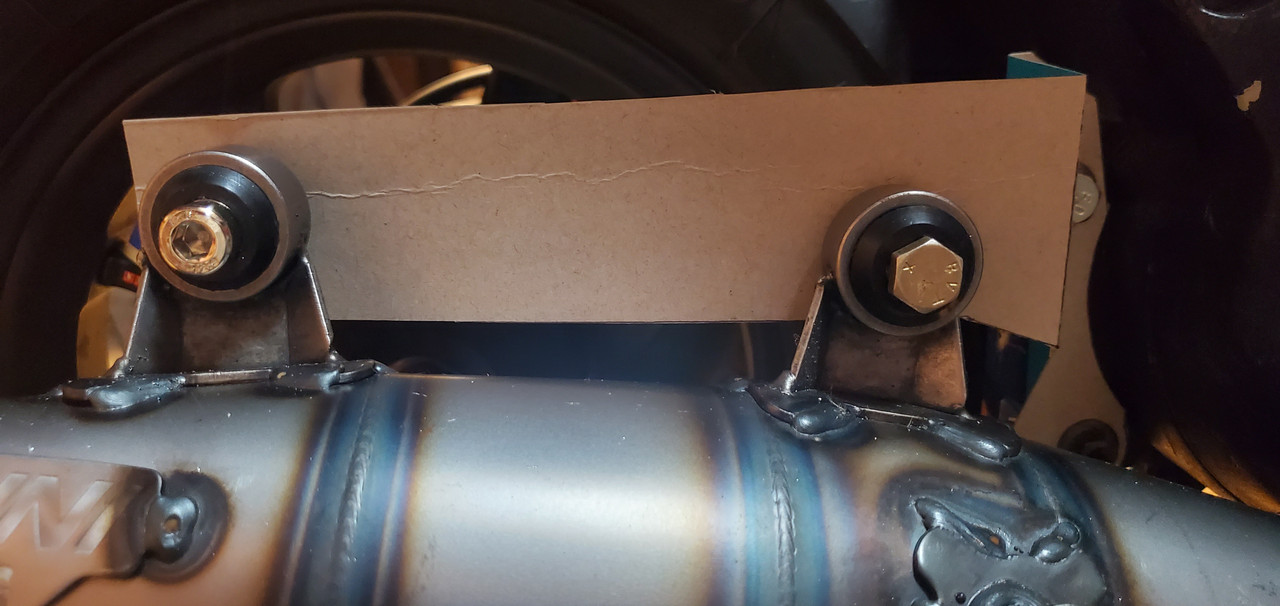 |
|
|
|
Post by hippo008 on Oct 10, 2021 17:10:31 GMT -5
Ill add the CAD to this post later tonight.CAD .dxf for C16 Mounting Plate RED lines denote 90 bends. The bracket works a treat. I purchased some 16ga steel to test out my bracket design. Unfortunately 16ga just isnt thick enough to support the weight of the pipe bouncing around back there so this was just a proof of concept and to hear the C16 for the first time. I measured the OE Yasuni bracket and it comes out to a beefy 3.2mm or 10ga according to the charts I found online. If you are going to make this bracket I suggest you do as the pros do and use the same materials that Yasuni intended. Ill probably have mine laser cut and bent out of 10ga Stainless Steel. Heres a video in case youre interested in the sound or setup. EDIT: I am also going to make a bracket for a modified stock flange. I figure this way anyone who wants to use the C16 but cant weld could just grind up the provided exhaust header and purchase the correct bracket to make it fit. Hopefully this will make this pipe swap more available to less "hands on" people. |
|
winner3ty
Scoot Enthusiast
   2 Strokes for life
Posts: 324
|
Post by winner3ty on Oct 11, 2021 14:07:01 GMT -5
Ill add the CAD to this post later tonight.CAD .dxf for C16 Mounting Plate RED lines denote 90 bends. The bracket works a treat. I purchased some 16ga steel to test out my bracket design. Unfortunately 16ga just isnt thick enough to support the weight of the pipe bouncing around back there so this was just a proof of concept and to hear the C16 for the first time. I measured the OE Yasuni bracket and it comes out to a beefy 3.2mm or 10ga according to the charts I found online. If you are going to make this bracket I suggest you do as the pros do and use the same materials that Yasuni intended. Ill probably have mine laser cut and bent out of 10ga Stainless Steel. Heres a video in case youre interested in the sound or setup. EDIT: I am also going to make a bracket for a modified stock flange. I figure this way anyone who wants to use the C16 but cant weld could just grind up the provided exhaust header and purchase the correct bracket to make it fit. Hopefully this will make this pipe swap more available to less "hands on" people. Nice video, Ive spoken with you on youtube before. Anyhow I love my arrow as well, seems to be a nice torquey pipe and I want to get a Corsa on it |
|
|
|
Post by juma on Jul 16, 2023 5:59:11 GMT -5
Hey Hippo, thanks for the design. Gonna get that cut out for sure for my Canadian model SK50 Dio. If I read this correctly, do you still need to use the modified exhaust header with that custom bracket you made? Trying to avoid buying/fabbing that header but I can most definitely make that exhaust bracket.
Cheers
|
|