|
|
buddy50
Oct 19, 2021 19:09:09 GMT -5
via mobile
Post by snowmeiser on Oct 19, 2021 19:09:09 GMT -5
I had some issues where I didn’t get the tach wire wrap enough times around and tight. Wrap the wire where there isn’t any protective casing.
|
|
|
|
Post by 90GTVert on Oct 19, 2021 23:31:32 GMT -5
would the spark knock cause back feed to the tach? Doubt it. Knock is a function of events in the combustion chamber. It may be related to ignition advance, but should not affect the ignition system... aside from perhaps the spark plug. if i grind the head, does the finish need to be smooth or could i get away with a flapper disc? It needs to be reasonably smooth. Some flapper discs could probably produce close-enough results regarding finish... but it's vitally important that the surface is flat/true. You aren't going to do that with a handheld grinder. I have used a grinder and flapper wheels to take a large amount of material off of heads before, but they were always finished with sandpaper on glass to true them. If you make any deep spots with a grinder, you may end up having to take off a lot of material to make the mating surface flat again. For small changes I just used the sandpaper on glass. Here's more info on truing. I currently use an old digital bathroom scale with a thick glass top. Much more durable than the thin stuff the local hardware stores carry. 49ccscoot.proboards.com/thread/941/truing-surface-glass-repair?page=1 |
|
|
|
Post by farmerjon on Oct 20, 2021 1:56:07 GMT -5
thanks 90GTVert.
i would need to lower the compression so i wouldnt grind the mating surface just dome the inside. im having the same problem as jkeney had with his buddy with too much squish, but dont want to space the jug higher because it would change the port timming, i remember seeing on the bottom stroke, the exhaust port would be perfectly level with the top of the piston head. or find a concaved piston. I live on an island that doesnt have a machine shop, so everthing has to be mailed in or out
|
|
|
|
Post by 190mech on Oct 20, 2021 3:56:09 GMT -5
You mentioned the piston flush with the Ex port bottom at BDC,the transfer ports are more important to be flush with the piston,lots of cylinders have the Ex port a few mm's higher than the transfers at BDC,,It would be easy to add another base gasket to correct the squish and test ride it,you might like it!!
|
|
|
|
Post by 90GTVert on Oct 20, 2021 8:31:24 GMT -5
If it comes to that, some of us have chucked heads in a drill before as a "poor man's lathe" and used files and grinding tools to reshape combustion chambers. Use that idea at your own risk, as it isn't the safest. It takes some care and effort, but it can yield good results. Here's a 70cc head that I turned into a 90cc head that way. 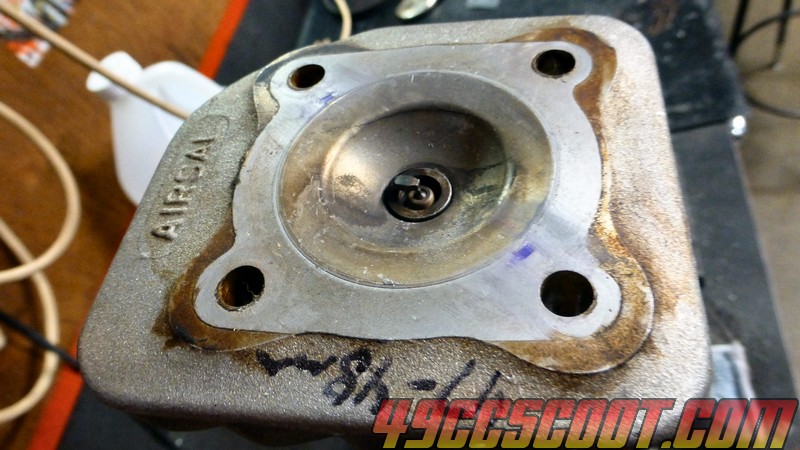 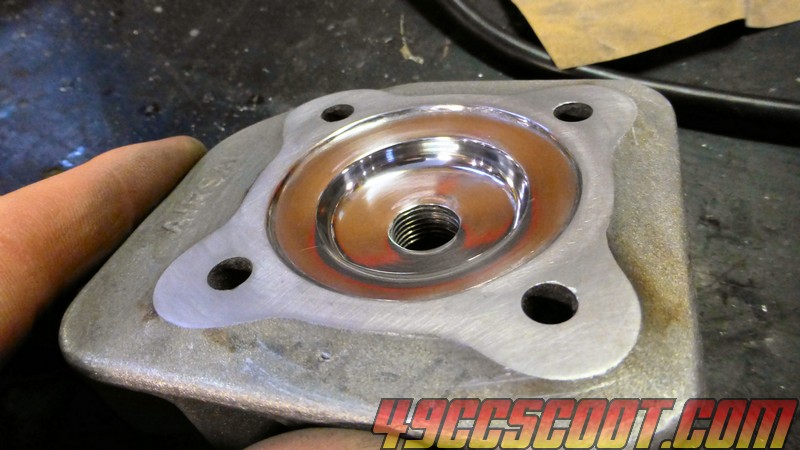 |
|
|
|
Post by snowmeiser on Oct 20, 2021 18:37:02 GMT -5
That’s awesome headwork, where did you come up with the design? Do different designs work better than others. It looks as the plug tip is nice and close to the piston for a good burn.
|
|
|
|
Post by farmerjon on Oct 20, 2021 18:39:56 GMT -5
back to the jetting, so i ordered this from scoottuning around $30 and a sigma jet at the same time. i knew the polini jets would come first. I found myself switching back and forth between 44 jet and 46 jet, the mix screw would either be all the way in 44 or all the way out 46. 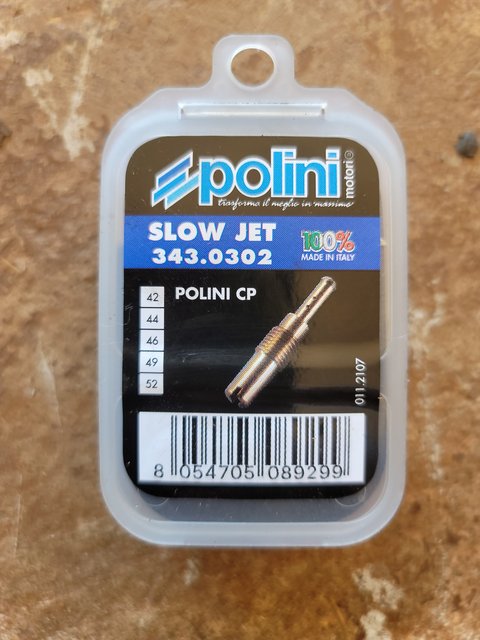 then this comes in with main jets. that is why i suggest sigma, the price you pay for a pack of main jets and pilot jets would cost almost double. 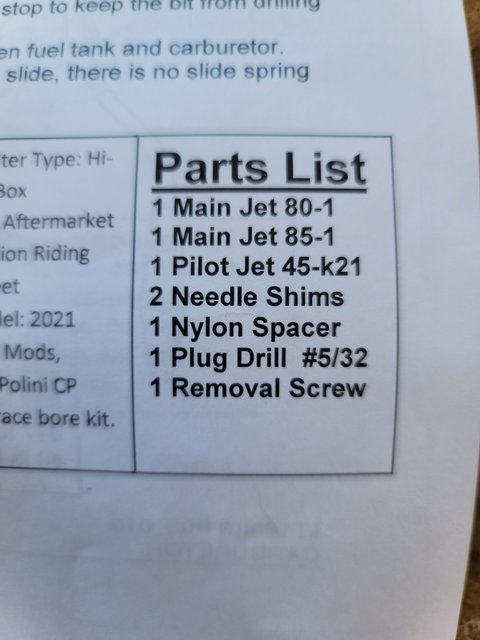 |
|
|
|
Post by snowmeiser on Oct 20, 2021 19:09:00 GMT -5
My roughouse sigma kit came with 38 pilot ,80,85,90,95 main jets. They recommended 38 pilot 85 main and 2 shims for a stock roughhouse and just with a Yasuni Z pipe at 0-1500 elevation.
|
|
|
|
Post by 90GTVert on Oct 20, 2021 21:03:49 GMT -5
That’s awesome headwork, where did you come up with the design? Do different designs work better than others. It looks as the plug tip is nice and close to the piston for a good burn. It was at 190mech's advice. Supposed to be more in line with modern thinking, though likely not quite right being done by me. That one's basically a trapezoidal shape, where the roof is pretty flat. Some are more torroidal, where it curves down to the floor more and then curves back up in the center (around the plug). Some of mine have been either plain hemispheres or somewhere between trapezoids and hemispheres. I don't know if there's one right design for all center plug applications or maybe some things benefit from certain designs TBH. I think if you get the compression and squish where you want them with some reasonable shape, the changes between those may be for the dyno folks to find and the rest of us to guess at. If you're going to stress over one specific, maybe make it the angle of the squish band (trying to match the piston crown) and keeping within a target squish area. The real pros are looking for whatever creates the right mean squish velocity, and there are calculators online for that. |
|
|
|
buddy50
Oct 22, 2021 3:09:35 GMT -5
Post by farmerjon on Oct 22, 2021 3:09:35 GMT -5
is this normal? i noticed the clutch wobbling under the clutch bell. the scooter vibrates but not as much when i hold the brake 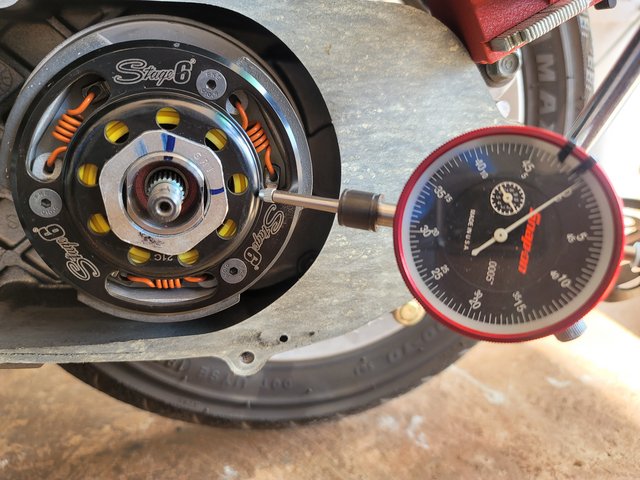 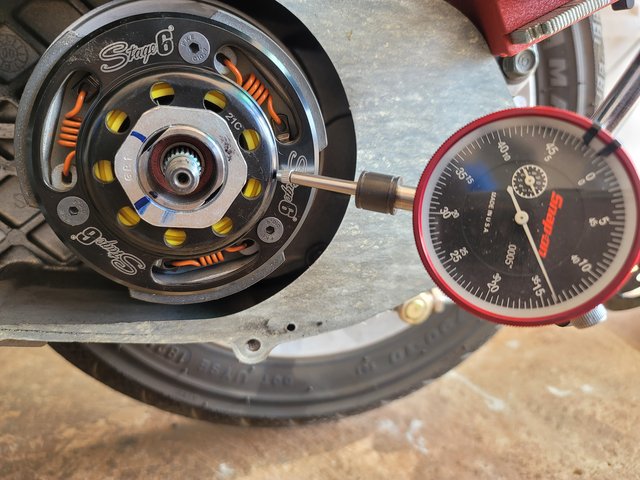 |
|
|
|
buddy50
Oct 22, 2021 21:09:37 GMT -5
Post by farmerjon on Oct 22, 2021 21:09:37 GMT -5
stock clutch max 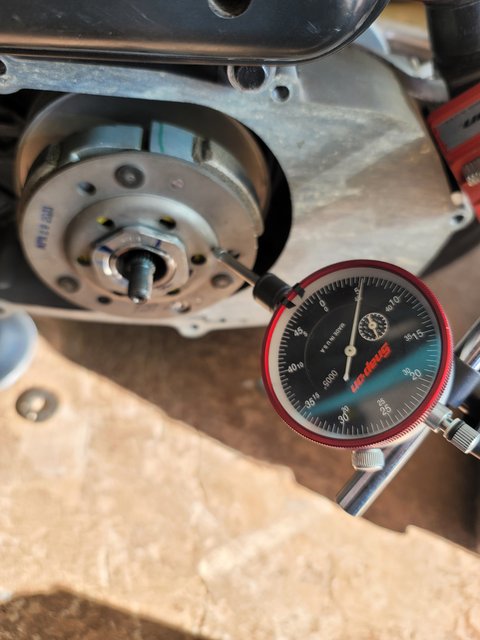 at 0 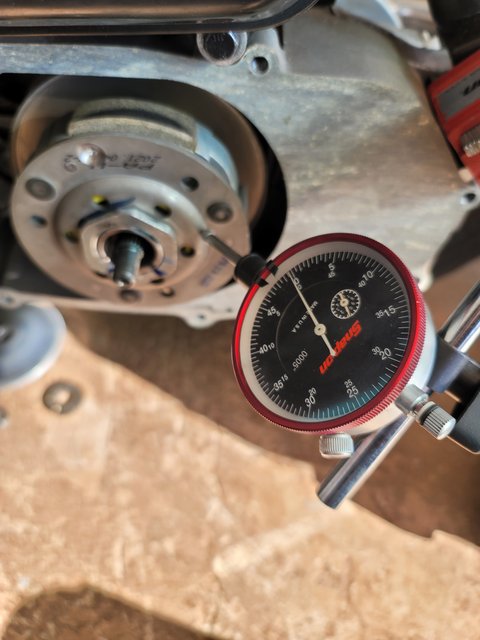 |
|
|
|
Post by repherence2 on Oct 22, 2021 21:39:16 GMT -5
it's probably due to "slop" and the position (axial alignment) that the clutch gets locked down in when you tighten the clutch nut. it's not like it's a tight fit to mate up a clutch to a pulley.
if you really want to align a clutch to zero t.i.r. you need to get a dial caliper and measure the o.d. of the pulley and the i.d. of the clutch. and then shim it to zero the runout.
for example, when the stage6 clutch was installed you had .013" runout. i would have cross checked by indicating off the rim as well to see if it was .013" at the rim as well. the rim is a machined surface. so with .013" total indicator runout, i would take .006" feeler gauge leaf and cut a thin strip, same thickness of clutch and use that as a shim to to centralize the clutch to the pulley axis. then your runout should be around .002" or less.
you gotta cross check the rim and the raised area on the Stage6 clutch. if both of are the same, and it's not slop, then i could be that the center hole was machined off center and it will never run concentric.
you can also use a dial caliper to measure the i.d. of the clutch and the o.d. of the pulley to see what the diametrical clearance. it you get a difference of .013", that explains the .013" on the dial indicator. from there, you can shim accordingly with feeler gauge leafs.
|
|
|
|
Post by farmerjon on Oct 22, 2021 22:04:58 GMT -5
well i just did a side by side test and the bikes not vibrating like when it had the stage 6 clutch. and im not going to put it back in.
If stage 6 doesnt want it back its for sale only 140 miles on it $100 obo
its a great clutch but im thinking in the long run, how much vibrating till the seal starts leaking gear oil all over the cvt
i totally understand what you mean by slop but my opinion is this is a new scooter it has 240 miles on it, it wasnt vibrating before the clutch, the clutch was taken off a total of 4 times, when you take off the clutch you can clearly see where the manufacture created a raised outer edge too machine flat "i will take a picture when i change the stock clutch springs to harder ones" to me that top plate on the stage 6 just got a little warped or something, maybe shipping
i posted a video on utube if u want to check it out
|
|
|
|
buddy50
Oct 23, 2021 5:48:57 GMT -5
via mobile
Post by snowmeiser on Oct 23, 2021 5:48:57 GMT -5
After changing if the clutch did it resolve you rpm issue?
|
|
|
|
buddy50
Oct 23, 2021 18:24:16 GMT -5
Post by repherence2 on Oct 23, 2021 18:24:16 GMT -5
to me that top plate on the stage 6 just got a little warped or something, maybe shipping i posted a video on utube if u want to check it out
i see. in my craft, for pump alignment we always have to indicate off of the face (for parallelism) and off of the rim (for axial) of the coupling hubs. pumps and motors that both can weigh 2000 pounds each. for noise critical equipment, our tolerance is .002" t.i.r. for axial and parallelism so for me, any time i use a dial indicator, it is just a habit to take a reading on the face (near the rim) and then take a reading on the rim.
|
|