|
|
Post by chadbullet on Jan 6, 2022 13:27:30 GMT -5
I use silicone sealant on everything (except o-rings, oil seals and exhaust) downstream of the carburettor. Intake, reeds, cases, base gasket. Some say it's unnessecary but a very thin film never hurt nobody. I did use sealant for case halves and intake, I just thought I'd give the oil a try. Probably the last time. Back to sealant! |
|
|
|
Post by chadbullet on Jan 6, 2022 20:04:11 GMT -5
|
|
|
|
Post by chadbullet on Jan 6, 2022 20:27:15 GMT -5
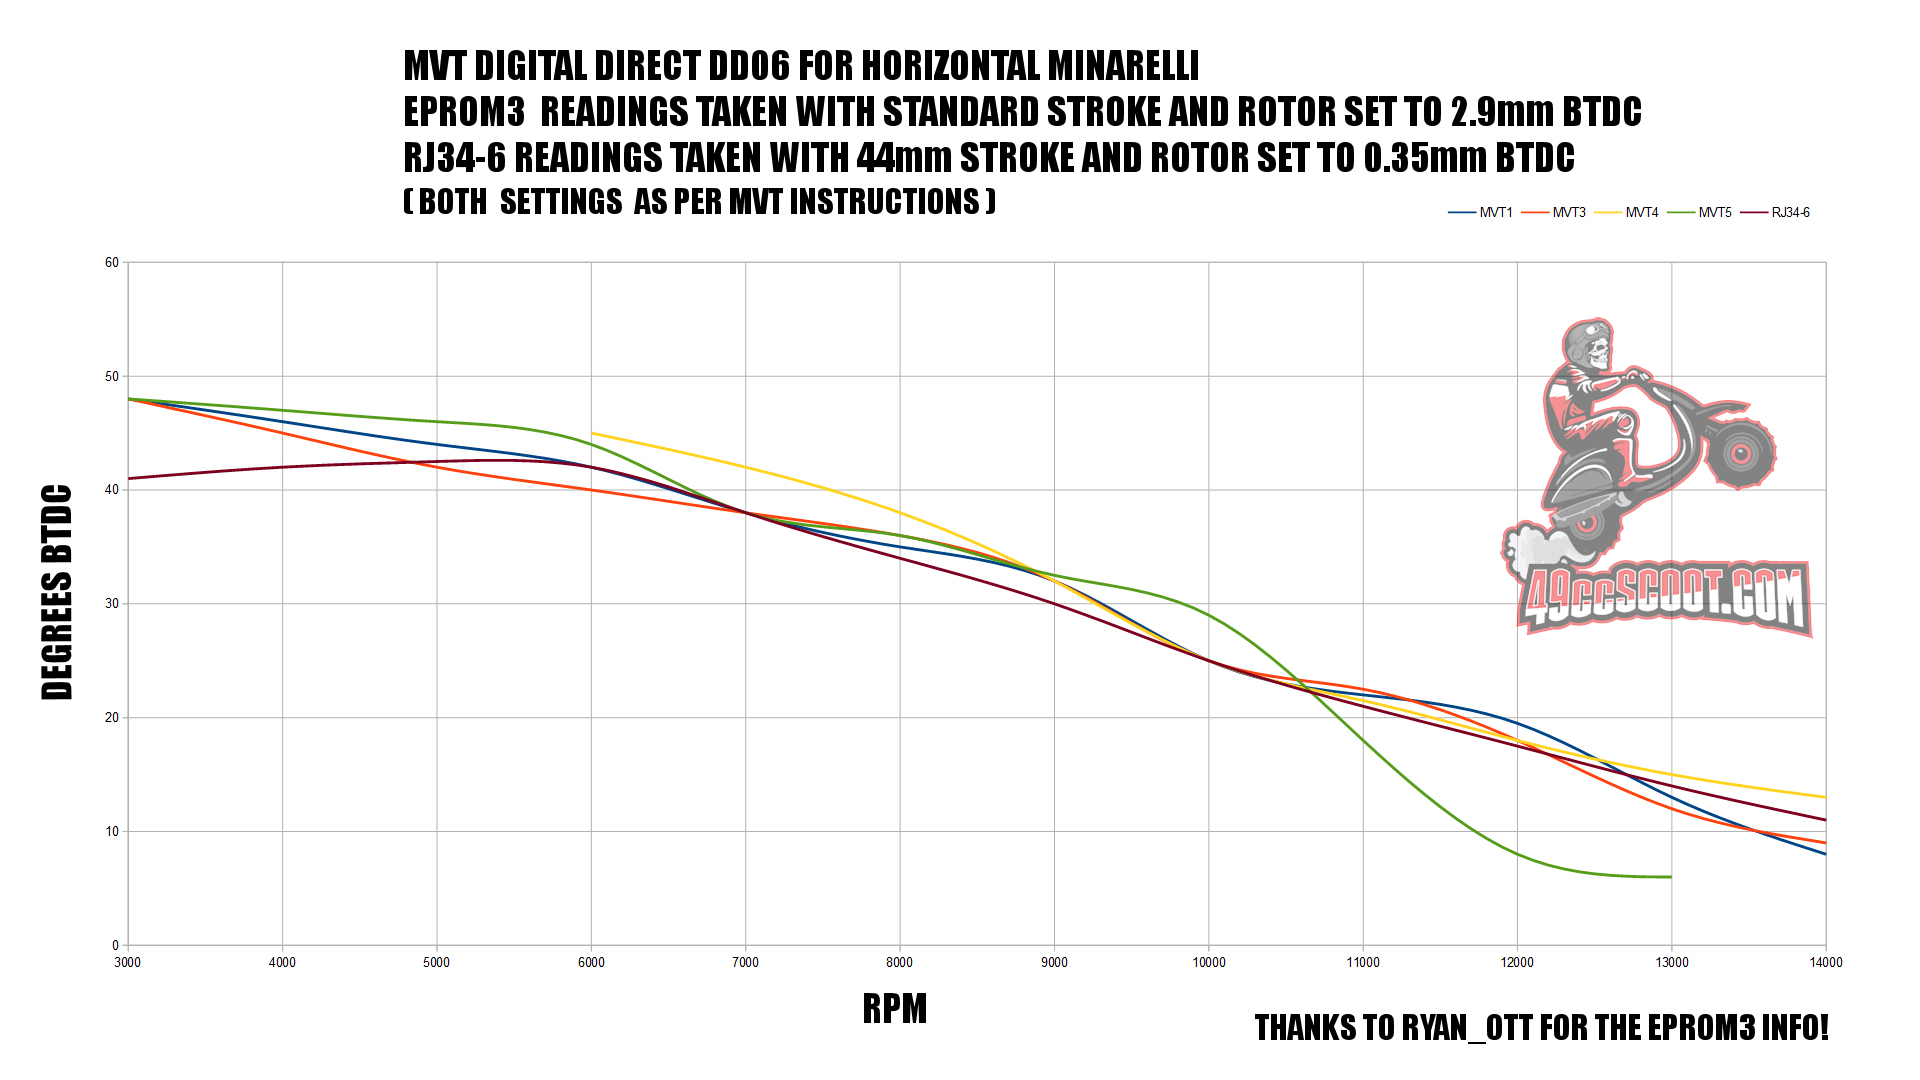
HPI says to set it at 2-4mm BTDC. I tried to find info from others using this ignition, but I didn't come up with much. One person in Italy that said they burned a hole in their piston at 2mm btdc and thought he should go to 3 or 4mm btdc. That would make it run hotter and that didn't make any sense. I also came across CornPed's tutorial on installation. He runs 1-2mm btdc. www.youtube.com/watch?v=mH9IVF1RMVQI used this calculator to determine how many degrees btdc 2mm is for horizontal minarelli.  Then I compared it to the HPI timing curve.  And adjusted, I think I should be around 47 degrees btdc at 3000 rpm which puts me in the ballpark of these MVT timing curves.  Hoping this puts me in a safe enough place. |
|
|
|
Post by niz76 on Jan 6, 2022 22:44:49 GMT -5
That's a pretty sweet lil flywheel. Been out of the scoot game for a few years and seen many a turned down and thin
stock flywheel so this is great. Is this from Treatland?
|
|
|
|
Post by Lucass2T on Jan 7, 2022 2:44:19 GMT -5
HPI says to set it at 2-4mm BTDC. I tried to find info from others using this ignition, but I didn't come up with much. One person in Italy that said they burned a hole in their piston at 2mm btdc and thought he should go to 3 or 4mm btdc. That would make it run hotter and that didn't make any sense. I also came across CornPed's tutorial on installation. He runs 1-2mm btdc. www.youtube.com/watch?v=mH9IVF1RMVQI used this calculator to determine how many degrees btdc 2mm is for horizontal minarelli.  Then I compared it to the HPI timing curve.  And adjusted, I think I should be around 47 degrees btdc at 3000 rpm which puts me in the ballpark of these MVT timing curves.  Hoping this puts me in a safe enough place. I'll ask my buddy, he had one on his Puch Maxi and now it's on his Batavus TS49. Yeah i'ts kinda a pain to base set this HPI 2-ten as how they are called. It's a belgian company maybe 1 hr drive just across the border from where I live. You have to use a timing light tho otherwise it's a straight shot in the dark where your timing sits. Read the timing curve and read the timing light and go from there. You want to end up at around 15 degrees BTDC at peak power. |
|
|
|
Post by chadbullet on Jan 7, 2022 7:51:07 GMT -5
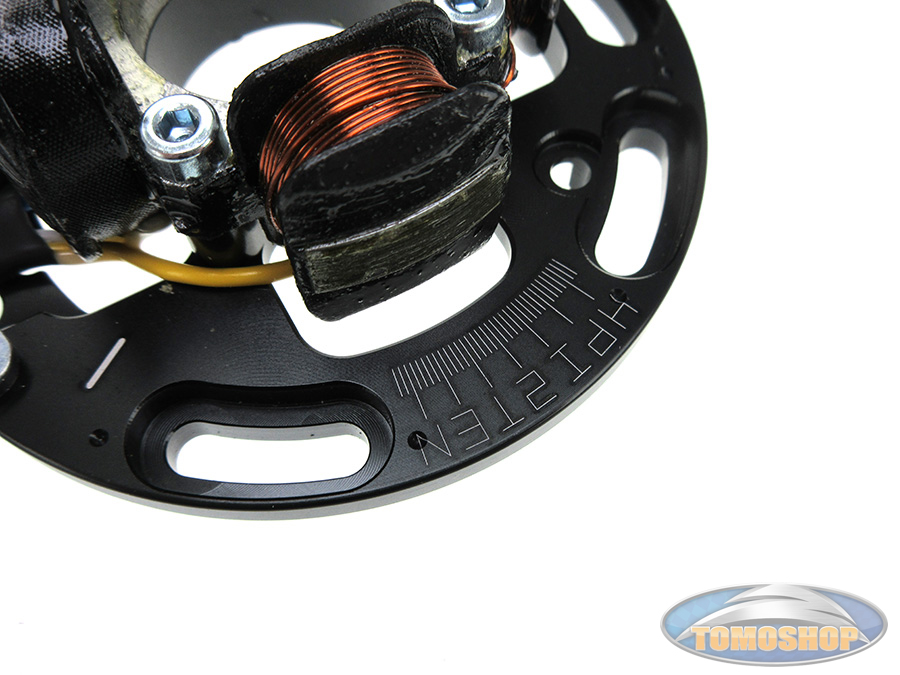
That's a pretty sweet lil flywheel. Been out of the scoot game for a few years and seen many a turned down and thin stock flywheel so this is great. Is this from Treatland? I did order it from treatland during one of their sales. It seemed like a pretty good deal for ~$230 shipped. You can also order it from HPI directly. I like that it still has a 60w lighting coil. And down the road if I want to get super nerdy with it, I can simply buy their digital cdi and I can have full programming control of the ignition curve. Lots of possibilities with the HPI ignitions. I'll ask my buddy, he had one on his Puch Maxi and now it's on his Batavus TS49. Yeah i'ts kinda a pain to base set this HPI 2-ten as how they are called. It's a belgian company maybe 1 hr drive just across the border from where I live. You have to use a timing light tho otherwise it's a straight shot in the dark where your timing sits. Read the timing curve and read the timing light and go from there. You want to end up at around 15 degrees BTDC at peak power. Great! It'll be nice to have more data points to compare to. It's not a complete shot in the dark. The rotor and stator are both marked, and when aligned should spark. And how the rotor is placed on the crankshaft right now, when the marks are aligned I'm at 2mm btdc. |
|
|
|
Post by 90GTVert on Jan 7, 2022 8:43:01 GMT -5
In case you haven't seen my posts or vids about it; if you end up wanting to use a timing light and it won't pickup a signal to flash then go cheap. It's an issue with some ignitions. My MVT didn't work with most lights and my HOCA ignitions could be bad about it too. I had an Actron, then bought Harbor Freight, Innova and even an old Crafstman light from the 60s. All fails. Finally bought a cheap light with no frills at Ryan Ott's suggestion and it worked. Here's a link to one on amazon. You may find them a few dollars cheaper on eBay or $10-15 cheaper on AliExpress if you are in no hurry. amzn.to/3F6sBLDThe only issue with the no frills light is that you have to have marks to tell where timing is since you can't rely on the light to see it changing. I spent a long time making a bolt on timing indicator, but you could just make hash marks every 5-10 degrees or find a way to bolt a small degree wheel on. |
|
|
|
Post by chadbullet on Jan 7, 2022 9:08:51 GMT -5
In case you haven't seen my posts or vids about it; if you end up wanting to use a timing light and it won't pickup a signal to flash then go cheap. It's an issue with some ignitions. My MVT didn't work with most lights and my HOCA ignitions could be bad about it too. I had an Actron, then bought Harbor Freight, Innova and even an old Crafstman light from the 60s. All fails. Finally bought a cheap light with no frills at Ryan Ott's suggestion and it worked. Here's a link to one on amazon. You may find them a few dollars cheaper on eBay or $10-15 cheaper on AliExpress if you are in no hurry. amzn.to/3F6sBLDThe only issue with the no frills light is that you have to have marks to tell where timing is since you can't rely on the light to see it changing. I spent a long time making a bolt on timing indicator, but you could just make hash marks every 5-10 degrees or find a way to bolt a small degree wheel on. I have seen them! It's unfortunate that the nicer timing lights don't work well with these systems. It's probably time I add a timing light to the toolbox. I've been wanting to retard the MVT Millenium on my other prebug anyways. I saw this for an idea for creating timing marks. May be the route to go.  |
|
|
|
Post by 90GTVert on Jan 7, 2022 9:28:38 GMT -5
I saw this for an idea for creating timing marks. May be the route to go. That's basically what I did, just way quicker and cheaper. Sometimes I get wrapped up in a project or just want to create something. As long as that's made stationary, centered and accurately marked, that would work just fine. |
|
|
|
Post by chadbullet on Jan 7, 2022 9:37:12 GMT -5
Doh! Also completely forgot that HPI puts marks on their stator. I'll just have to mark the rotor.  |
|
|
|
Post by chadbullet on Jan 9, 2022 15:14:08 GMT -5
A bit of an oversight, and a fundamental issue with the build    There's no clearance for the fan shroud. |
|
|
|
Post by hellish100 on Jan 9, 2022 15:17:51 GMT -5
I was worried about the same thing on my ruckus swap. Do you have a heat gun?
|
|
|
|
Post by 90GTVert on Jan 9, 2022 15:30:17 GMT -5
If you can't mod it with a heat gun, maybe just cutting it as little as you can will be enough. You'll have to keep a close watch on CHT at first to be safe either way.
|
|
|
|
Post by aeroxbud on Jan 9, 2022 16:04:21 GMT -5
On dear. Might end up with a slight stretch after all.
|
|
|
|
Post by snaker on Jan 9, 2022 16:57:17 GMT -5
Don't have that rig but:
The hanger bracket, is it two piece's?
And is there a chance it could be mounted so the lower portion is be moved to outboard of the frame bracket?
|
|