|
|
Post by 90GTVert on Apr 23, 2010 9:02:30 GMT -5
The bearings and the seats or races or whatever look fine and there was never much play at all in the bearings and crank. It's the conrod that's moving excessively side to side and even worse up and down.Moving it up and down makes a nice clank, and I'm guessing that's the horrible clatter I was hearing from the engine.
More surface area should allow more heat transfer... but I'm not entirely sure that's the case when you're dealing with a painted on finish.
|
|
|
|
Post by 90GTVert on May 21, 2010 14:41:45 GMT -5
From Autotech355...  |
|
|
|
Post by 190mech on May 21, 2010 15:55:36 GMT -5
WOW!Starting to see a bunch of those orange stuffer cranks!Am anxious to see what T2's port timings will be..
|
|
|
|
Post by 90GTVert on May 21, 2010 15:58:02 GMT -5
I just couldn't pass the deal up when Carlos said he didn't have many of these kits left complete with bearings and seals.
|
|
|
|
Post by 190mech on May 21, 2010 17:23:08 GMT -5
Smaller thread on the CVT side from my CPI crank.I measure 84mm for the rod length,is that what you are getting?
|
|
|
|
Post by 90GTVert on May 21, 2010 18:05:53 GMT -5
Yeah, both of my 45mm cranks from Carlos have had smaller threads. I never measured those because I got lucky and had a flanged nut around that fit last time. I'll have to measure the conrod. I haven't messed with it yet other than to post a pic.
|
|
|
|
Post by 90GTVert on May 21, 2010 18:17:29 GMT -5
The threads for the vari are M10x1.25. I woulda said 85mm center to center for the conrod. Kinda hard to be 100% accurate, but that's my guess.
|
|
|
|
Post by 190mech on May 25, 2010 8:50:37 GMT -5
Got that nice crank installed yet??
|
|
|
|
Post by 90GTVert on May 25, 2010 9:28:53 GMT -5
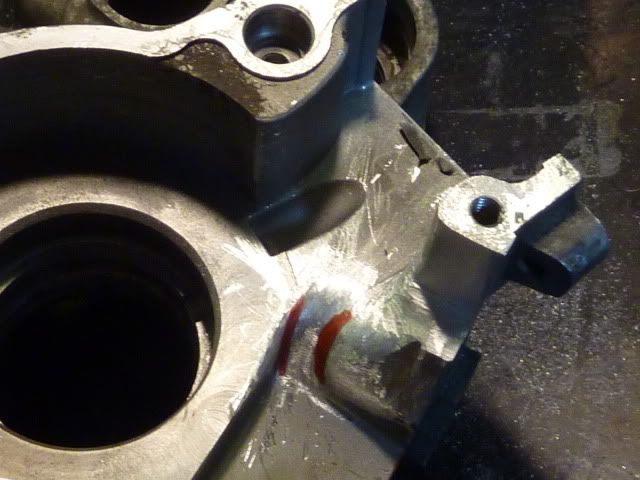
Not installed, I was just getting ready to upload some pics for consideration though. I was messing with making how-to stuff more lately, and messing with the SunL's head and intake and all that stuff. I did spend a bit of time on one case half last night and this morning though. It's kinda hard to see with the flash and lighting, but I took plenty of pics. Here's the case half in stock form.  What I've done so far...   Not sure if it is a good idea or if it will even do anything, but I cut a baby trench here. I'm not looking to go wild like John and wax and have to fill. I measured the depth of the bolt hole, and only went this far to leave plenty of the floor intact there. I figured it may have some small effect, not really sure though.   Since it's hard to see... The green areas were cut down to match the boost port. The red area was cut down to be level with the reed inlet area. The blue area was cut away and rounded. A couple of things I was considering... I might cut this area away a bit to hopefully allow more flow to the boost port.  I might cut this area of the cylinder just slightly to help flow to the transfer through my mini-ditch. I would mock it up with the piston in place just to take a look first, although I'd imagine that little bit would be safe from what I've seen others do to their cylinders.  I think I'm going to round this area to smooth flow up to the transfer.  Any thoughts? Is it futile to make minor mods like this? I mean, does it need a full transfer ditch to do anything or could this help out a little? At least I can see taht the ports weren't matched very well, so hopefully I'll get some improvement out of this engine from that and the few extra cc anyhow. |
|
|
|
Post by 2strokd on May 25, 2010 9:44:49 GMT -5
Looks good, better, and safe to me but im no pro!
Wonder just how much is "safe" to cut off when it comes to the cylinder skirt in the way?
Im gonna hack one up some day! With what you have done so far my common sense says it will help. Then again, my sense aint so common lol.
|
|
|
|
Post by 190mech on May 25, 2010 11:24:40 GMT -5
Looks great to me!The piston extends beyond the cyl skirt so skirt cutting will only help on the induction stroke(up).Might consider cutting the notch a bit larger on the rear skirt so the boost port can breathe better.
|
|
|
|
Post by 90GTVert on May 25, 2010 14:20:02 GMT -5
This side is pretty much done. There are some scratches that should be sanded out, but I'm tired of filing and sanding right now.  Untouched vs matched cases. I had to remove a good bit from the transfer. It looks like I removed nothing from the boost port, but I removed a bit there to match it up to the cylinder.  Here are views looking toward the transfers on the modded and unmodded sides. Nothing great, but you can see a bit of difference.   I haven't messed with the cylinder at all yet. |
|
|
|
Post by 90GTVert on May 25, 2010 18:51:53 GMT -5
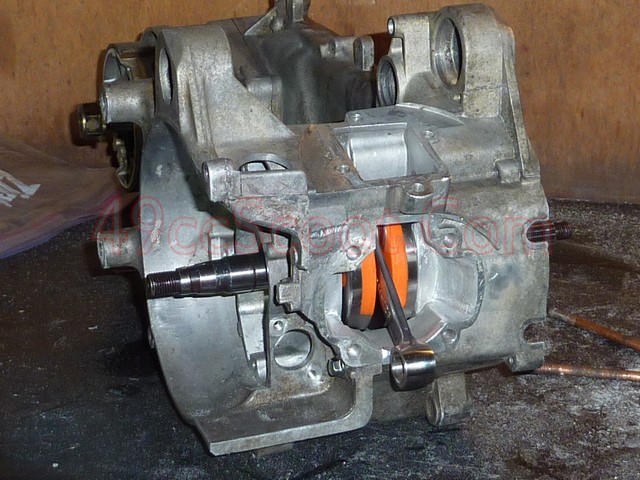
I didn't end up doing much to the other case half. I matched the ports, but I couldn't cut even a mini-trench in this half. It would have to be filled because it would cut through. It's a shame they weren't both constructed the same way. I still need to sand both cases a bit, but they should be about done otherwise. Stock.  Modified.  Cases together.  The crank fits (just in with dummy bearings).  When I went to do a mock up, I realized I can't find my wrist pin. I had a pin from a 70cc kit, but it's too short to use for the big piston. With 2 base gaskets, the piston sits .5mm above deck. I got 182 exhaust duration and 124 transfer/boost duration. I'm thinking I should probably use a .5mm-1.0mm spacer and a base gasket on each side and that will sit the piston level to .5mm negative. If it were level, I'd need a new head or to use 2 head gaskets. If I got the piston .5mm below deck I could probably get roughly 1mm of squish using one head gasket. I think my port durations will be fine with raising the cylinder that high, but I'll have to check sometime to find out. |
|
|
|
Post by 2strokd on May 26, 2010 3:27:22 GMT -5
Looking good  ! Couldnt trench the small end at all huh? Even if you filled in "cut thru" some after? Probably wouldnt do any good or you would have done it. I read about cases being different thicknesses. I guess they can very from one manufacturer to the next. CPI, Vento, etc seem to be thinner than BWS, Aprilia etc..?..I bet you will be ok with port timings that high. I have no program nor math but i imagine that you will end up with around 190-130. Thats not too high with the right pipe is it  . The darn CVT the trick if its gotta rev before the power comes on. But with the bigger cubes, and a tuned case you will have im not sure you will have that problem  |
|
|
|
Post by 90GTVert on May 26, 2010 7:16:22 GMT -5
It could be trenched if I wanted to fill and cut through. I'm just not really willing to risk ruining these cases. I have no idea where I'd find another set of long 90cc cases. I'm thinking I'll be pleased anyway. When it was running right I was happy with it before. Just opening the ports up as much as I had to for them to match should give me some gain, plus adding a few cc.
Pipes work a bit different on the "big" motors. On the 75cc John's pipe had a hell of a time trying to hit and then hit hard. On this engine at 99cc it ran fine, pretty much like the Leo meant for 100cc. What sucks is that neither of those pipes hit. I've had the MRP pipe on a 70cc and a Sidewinder pipe on a little 2T midbike. Both of those very discernibly hit. Other 70s I've rode did as well. Either I've never got an engine running right, or they make pipes for bigger motors to have wider powerbands.
|
|