|
|
Post by 190mech on Jun 11, 2022 18:38:20 GMT -5
Nice work!Labor was likely 25 cents an hour, much like the pipes I've built...  |
|
|
|
Post by fly on Jun 12, 2022 16:07:53 GMT -5
Nice work!Labor was likely 25 cents an hour, much like the pipes I've built...  Maybe less! 😂😂😂 This was always gonna be a passion project, thank goodness I derive enough joy from the process that it makes it worth it! |
|
|
|
Post by fly on Jun 13, 2022 22:08:25 GMT -5
Oh goodness, I was alerted to a batch of quality 25Ah lifepo4 cells with the same physical dimensions as the 20Ah I've prepped for this. They're much better cells, brand new EV cells and guaranteed. So I ordered 8 to have enough for an extra 4s for something else. So scoot will be rocking a 25Ah instead of 20Ah, and I'll be much more confident in the battery.
I used 24 of these same cells to build a 1.92kWh battery last year. I'm stoked to have scored more! 🙌🙌🙌
|
|
|
|
Post by Lucass2T on Jun 14, 2022 0:19:41 GMT -5
Oh goodness, I was alerted to a batch of quality 25Ah lifepo4 cells with the same physical dimensions as the 20Ah I've prepped for this. They're much better cells, brand new EV cells and guaranteed. So I ordered 8 to have enough for an extra 4s for something else. So scoot will be rocking a 25Ah instead of 20Ah, and I'll be much more confident in the battery. I used 24 of these same cells to build a 1.92kWh battery last year. I'm stoked to have scored more! 🙌🙌🙌 You can build a hybrid power scoot with a batch of such cells! |
|
|
|
Post by fly on Jun 19, 2022 16:54:34 GMT -5
You oughta see the battery I built it of 24 of them!
In other news, I went ahead and ordered the Stage 6 subframe for Aerox/Nitro. I'm guessing it fits.
I am not happy enough with the Easy-boost to use it for this. They use aluminum tube to space the plates and act as cross members. Which compresses so much more readily that steel, and I've seen countless pictures of this stretch sagging inwards.
I was never going to run it stretched, so the sagging would have been less of an issue. But I was still going up want to weld it with steel cross members, and by the time you add up costs to make the Easy-boost more solid it didn't make sense. I also like the way the Stage 6 sub frame mounts up a lot more.
The whole thing about the sag/splay if the Easy-boost is that's a big stress on the crankcase halves, as I see it. It adds a parting stress at the case halves, much moreso than the S6 one.
I also figured I'd just get a new front caliper while at it. I got their grey hard anodized one as it fits the color scheme, and will be all fresh vs. the rebuild kit that's 25% of the cost anyway. 🫤
I've got my old R/T brake (needs pads at least) I'll probably sell, and a new Easy-boost stretch kit I'll sell, as well. Hmu if interested. 🤷
I'm on second go of intake. R&D + manufacturing your own parts is fun, but definitely time consuming. Trying to keep carb angle as low as possible and intake as close to reeds as possible. Dialing in the angle has been the tricky part.
|
|
|
|
Post by fly on Jun 25, 2022 3:44:19 GMT -5
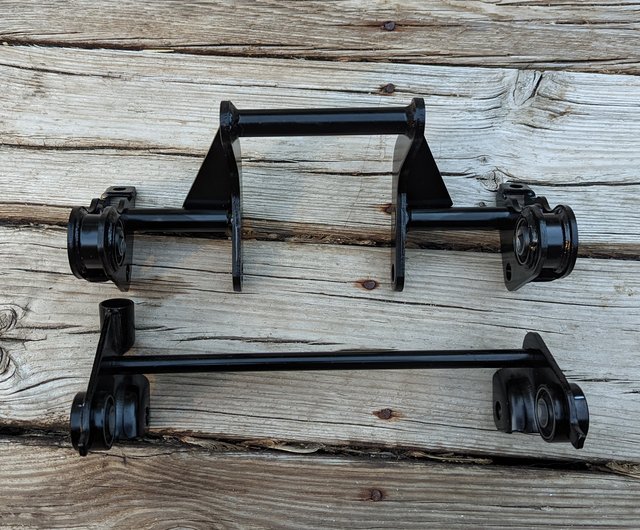
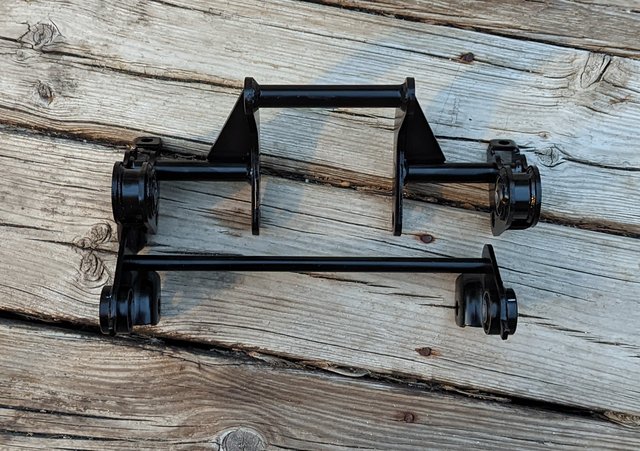
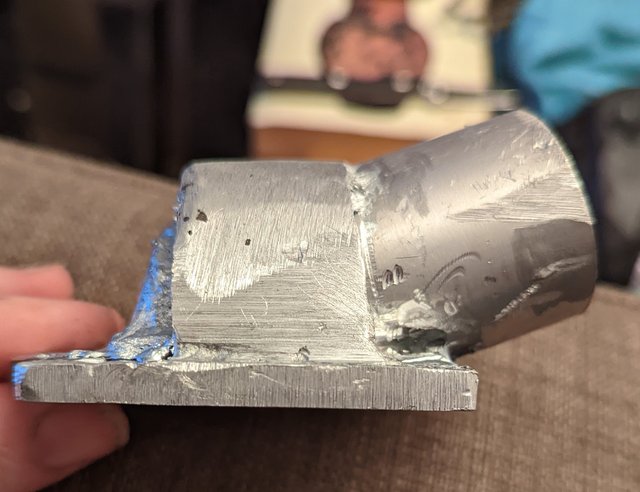
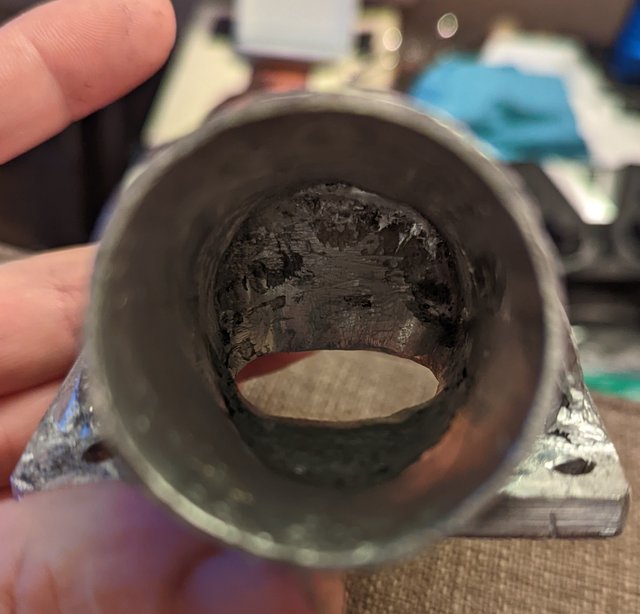
Ok. So I found the angle, as I Believe I mentioned, for the intake. Mk1 intake was taken apart and put back together probably a half a dozen times trying to get the angle and placement just right. You can kinda tell... I used a bit of the straight tube cut off the elbow I bought to find the angle. Mk2 is being made right now with the elbow, I won't have that extra volume in the back. Will be a lot cleaner! 😅😅😅😅
I won't be able to use the part of U I wanted to, but I'll weld a flat plate on the back at that angle. Then I will attach a flange adapter for 28-30mm PWK. Should be g2g, veey close to reeds, clean path, least amount of angle I can run.
Spacer/adapter had to have the back filed out at a bit of an angle to fit the reed cage.
Figured out how to make Stage 6 subframe for Aerox work.
Soon as I bolt on this intake system I get to change gears, excited to get into the frame, body, cooling, and electrical. Sounds like a lot, maybe it will be, maybe it'll go quicker. Not having to R&D parts for that so much.
Got another S6 R/T front caliper in "hard anodized," which is really just grey paint. They don't even screen S6 R/T on anymore, they just slap a sticker on. :/ Can't help wonder if the old one is better quality. The tipping point for me was not only I wouldn't have to rebuild the old one, but that it would be actually hard anodized. Would not repeat it buying anew again, Voca is the same thing and substantially cheaper. Live and learn.
pics, no particular order. don't be harsh on the brazing, it's only to figure out angle!
    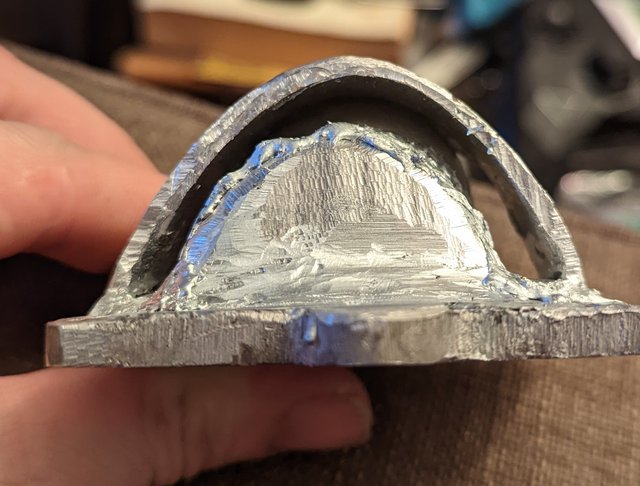 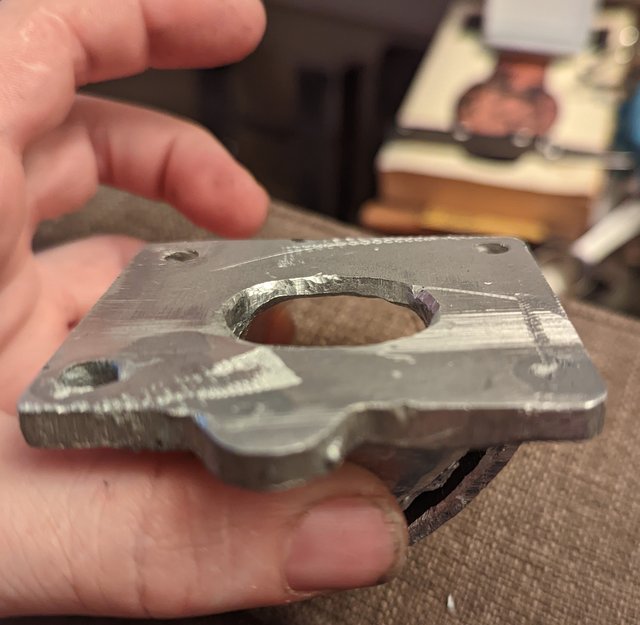 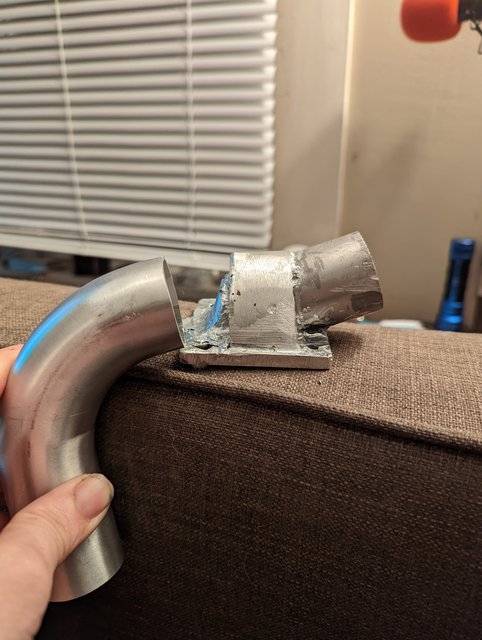 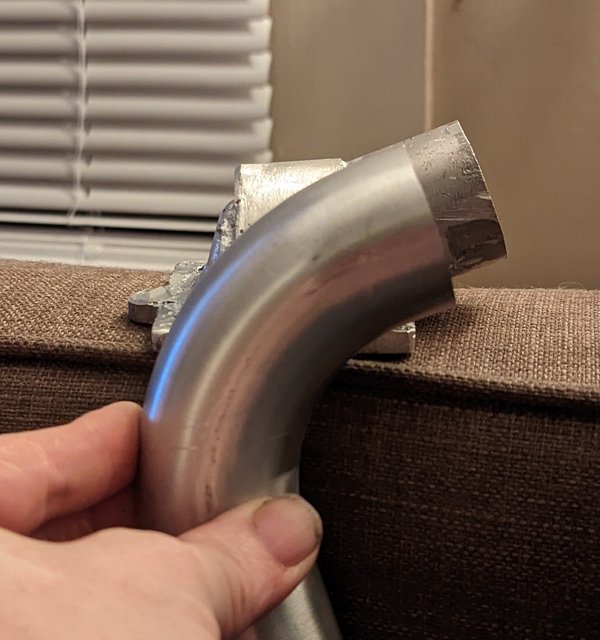 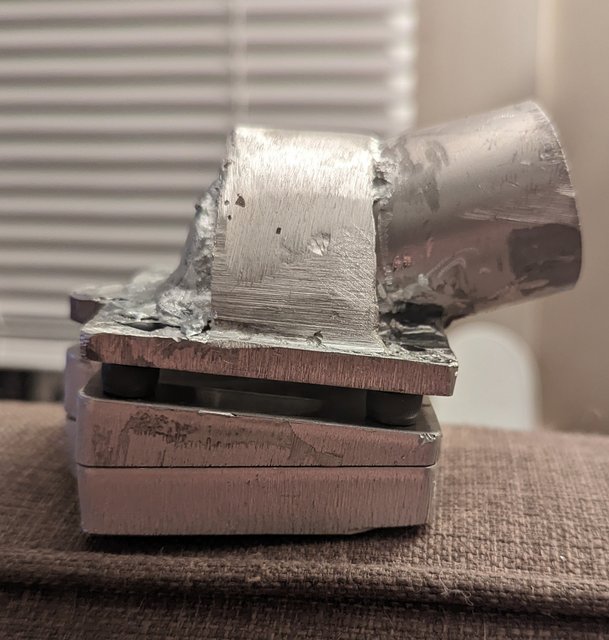 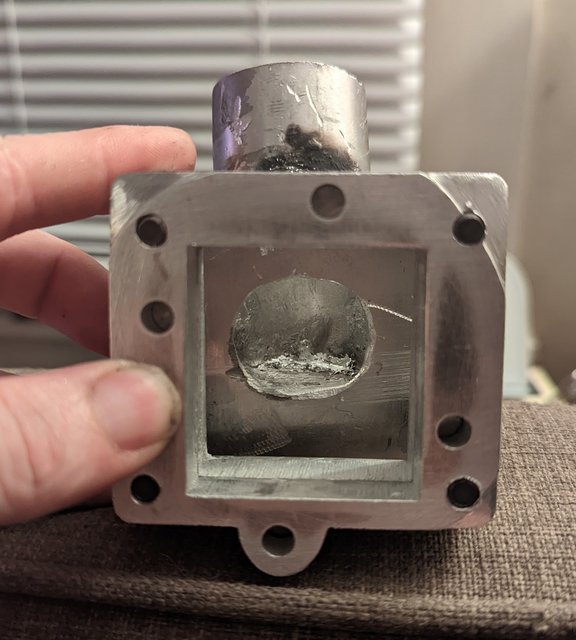 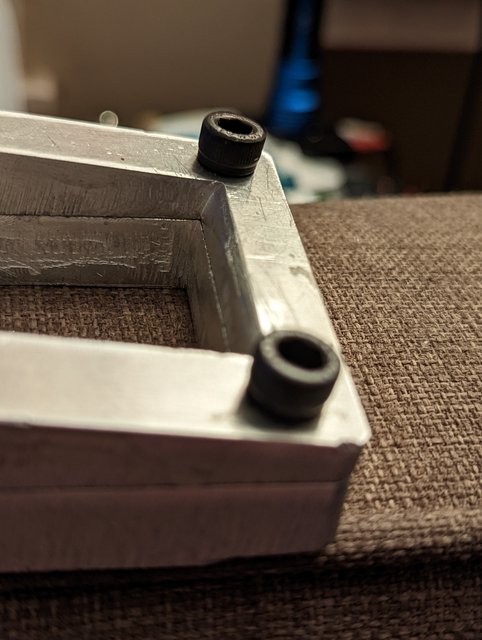 |
|
|
|
Post by fly on Jun 25, 2022 10:03:40 GMT -5
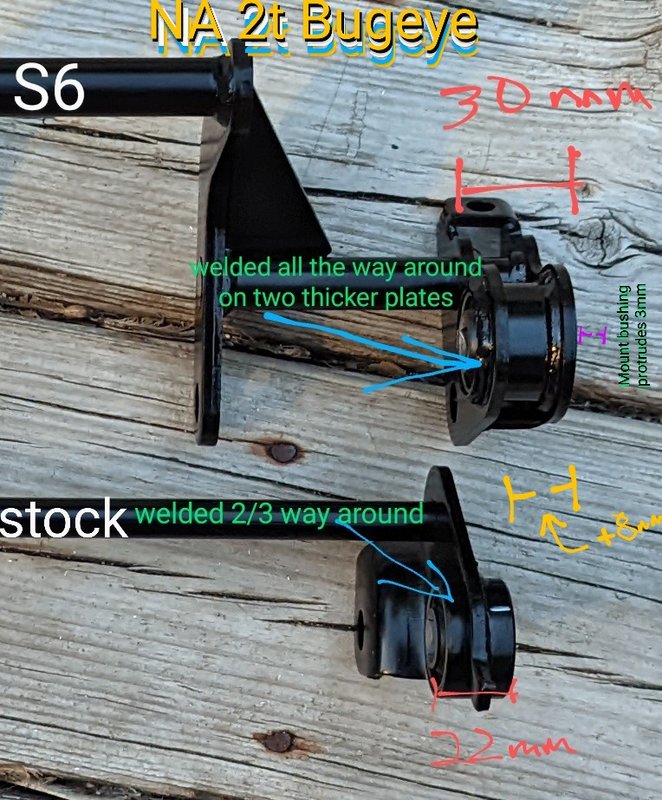
So if i can manage to press out the bushing I actually just need to grind the outside back in a couple millimeters from the high spots on the outside. then it'll fit. if I feel it's too skinny I can build it up with brass braze behind no problem. Either way, it's so much more substantial than the stock one I'm not worried about it. I'll deal with the bushing offset with a washer, easy peasy. From what I understand all you really need is flush width to the outside of the plate to get it to fit. I'll go back a bit more with +2mm bushing pin protrusion and it should be cherry. 🤌 |
|
|
|
Post by fly on Jun 30, 2022 18:37:34 GMT -5
Here's what I'll be cooking with. I'm not sure if I want to use the red hose type coupler, or to attach a flange and use the black adapter. The sleeve type is necessarily longer, and I don't have much room to trim more off the intake tube. I like the idea of the flange. I can't trim the tube back more, and it should be a sturdier connection closer to the reeds. The intake is a straight shot to the aperture in the top of the reed valve and the carb outlet. The opening is pretty well matched with the aperture in the read valve, 28 mm by 30 mm. I added a little bit of trapezoidal-ness. I will clean up the whole system a little bit more in terms of sanding/ smoothing it out. The interior I plan to paint with an engine enamel, and I'm going to paint the outside with a wheel paint. I like the angle I came up with. that should work out pretty nicely. I am going to run a rear fender, and I'm also going to support the car with a bracket off the cases. Looking at the radiators, I don't think I'll have a problem fabbing up bracket for that. I removed the entire electrical system, it's getting an entirely custom system. Honestly, I'm not expecting any problems with that, that's relatively straightforward. I also don't foresee a problem fitting the stage 6 subframe. I'm going to try and just push back the bushings and grind. it looks too skinny I'll push the bushings out and bronze braze up support. Again, the Stage 6 subframe is so much more well supported I'm not sure whether I will feel compelled to do that or not. 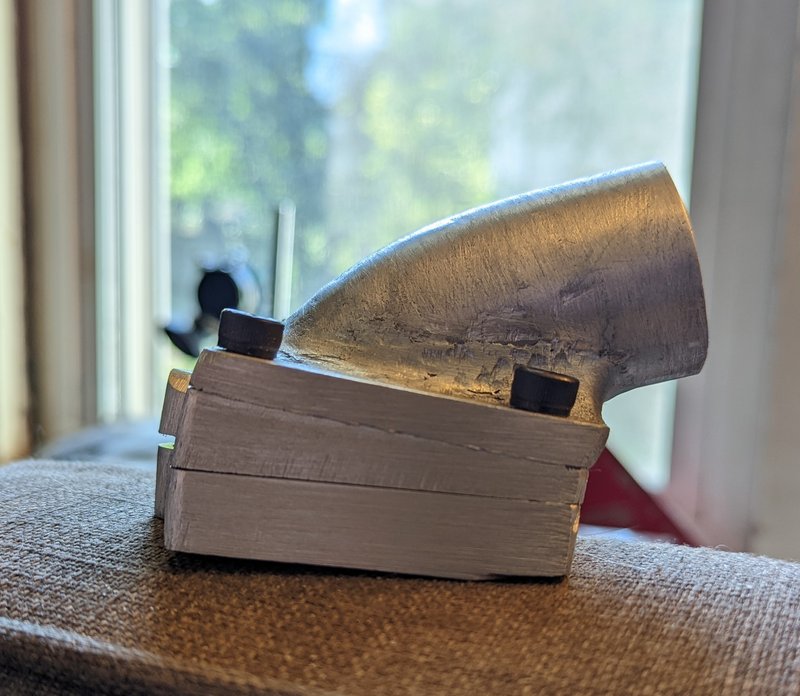 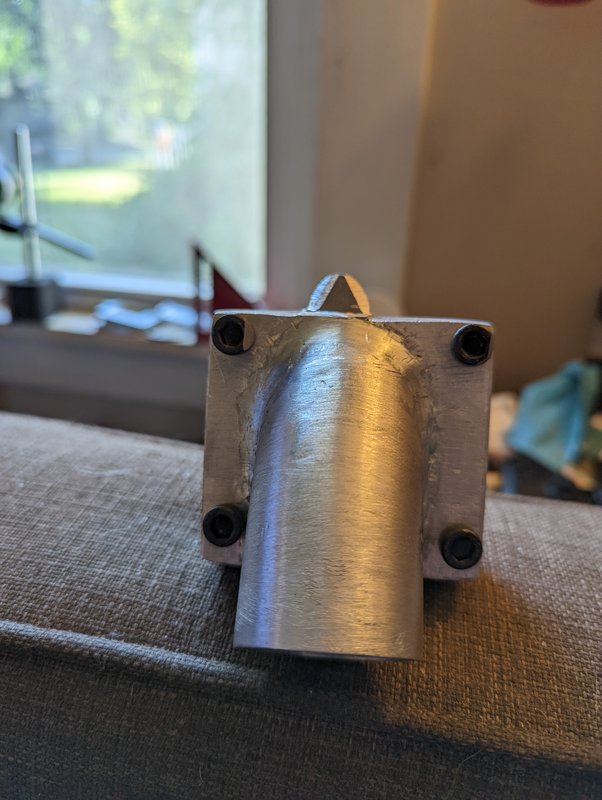 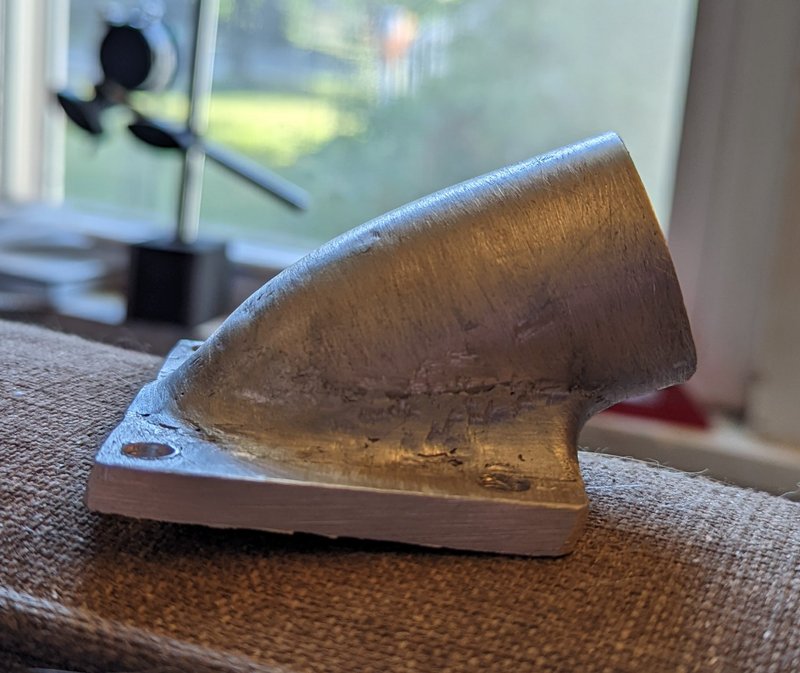 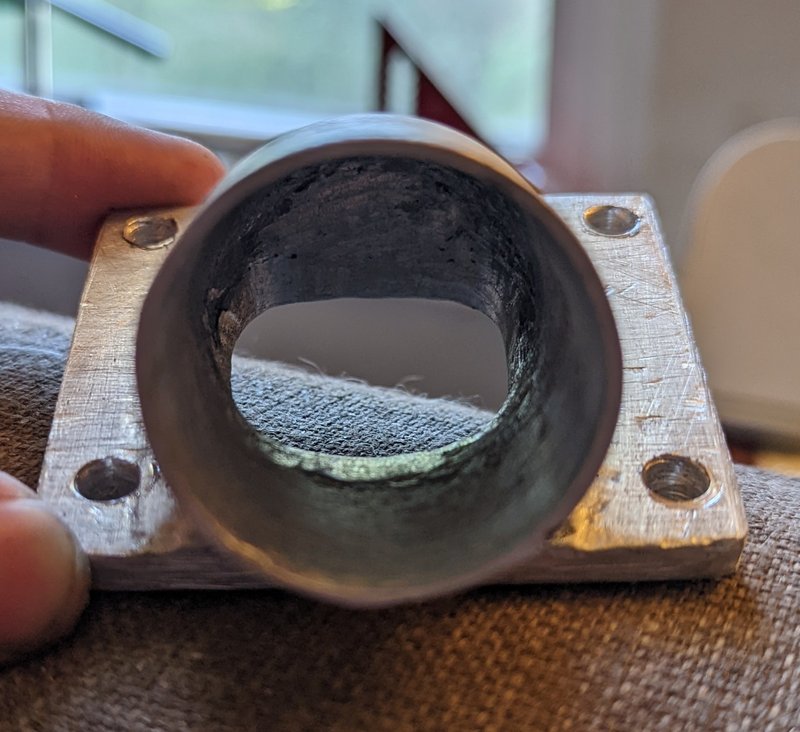 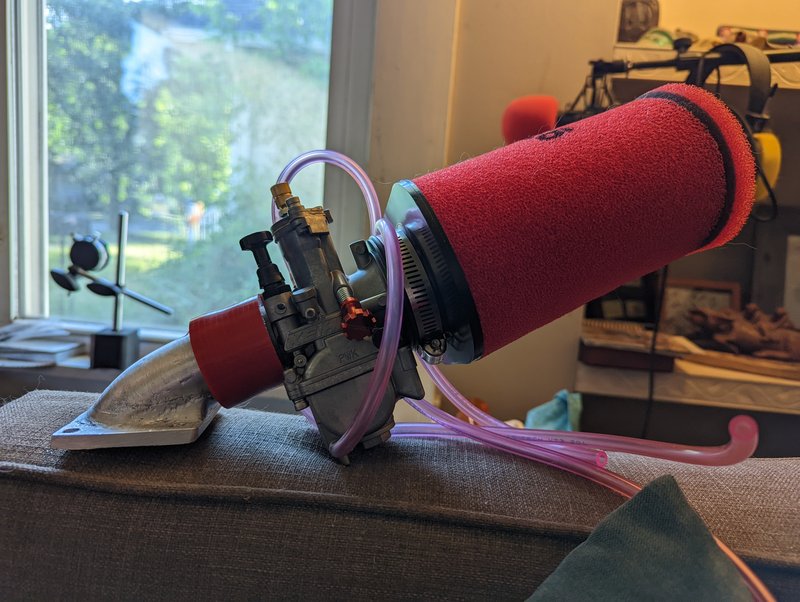 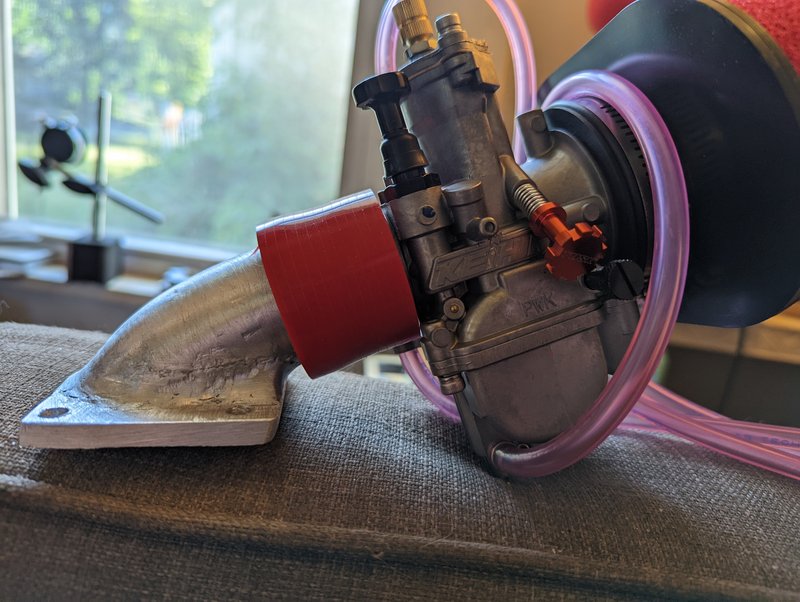 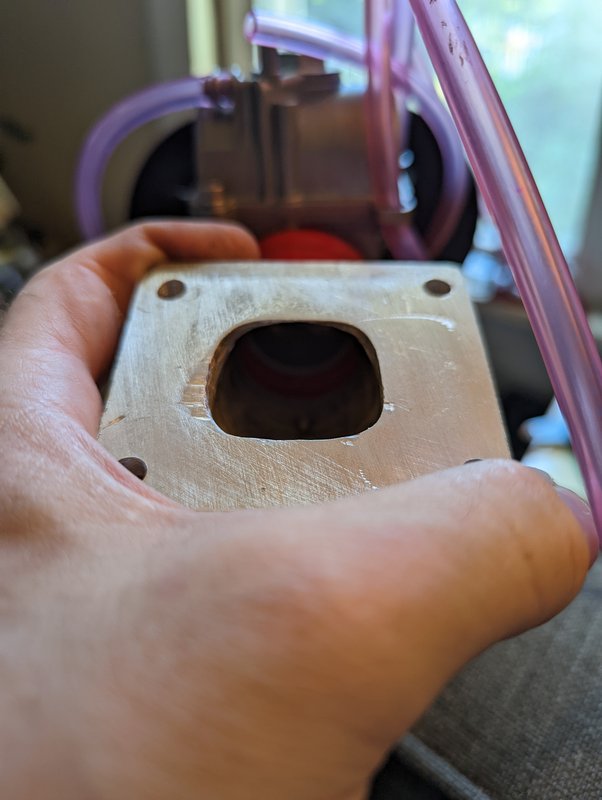 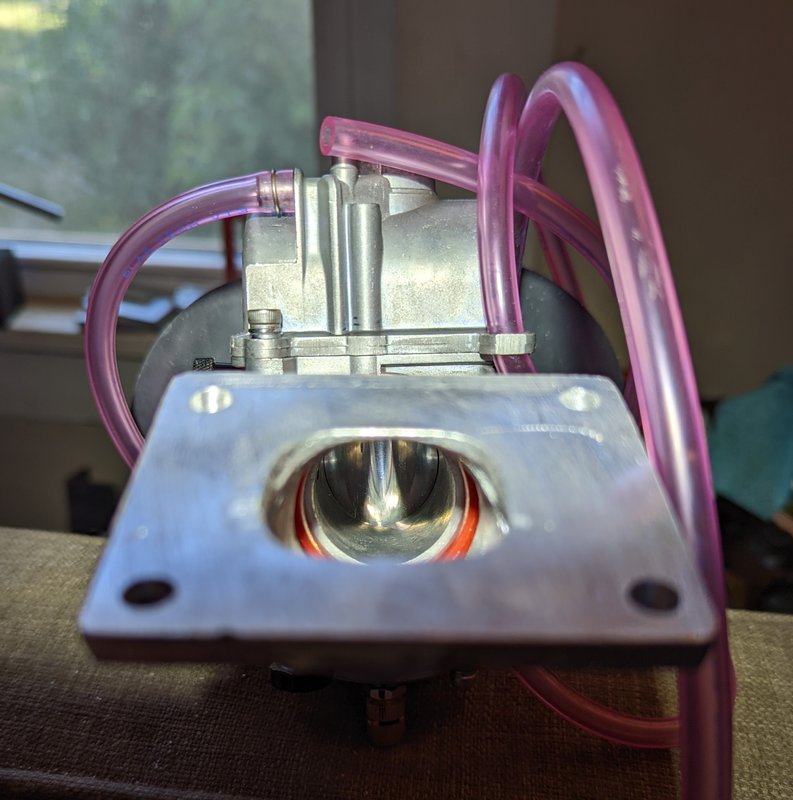 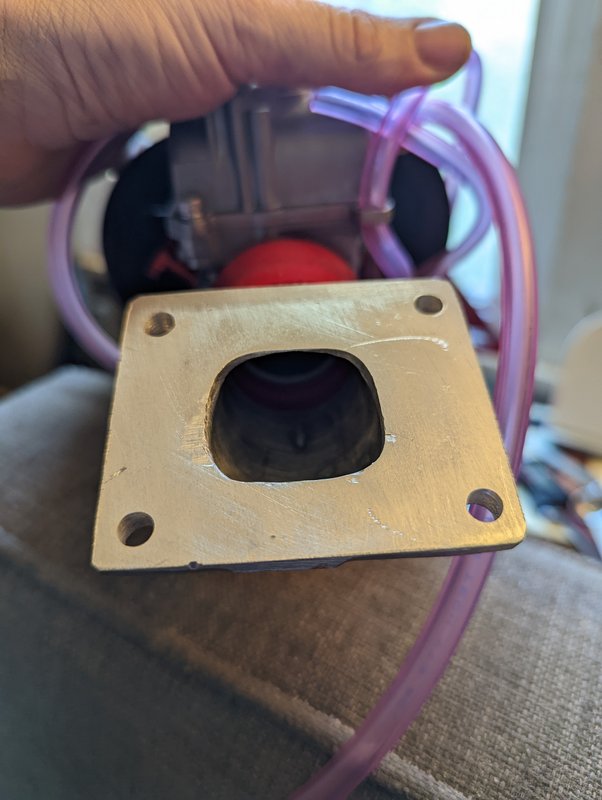 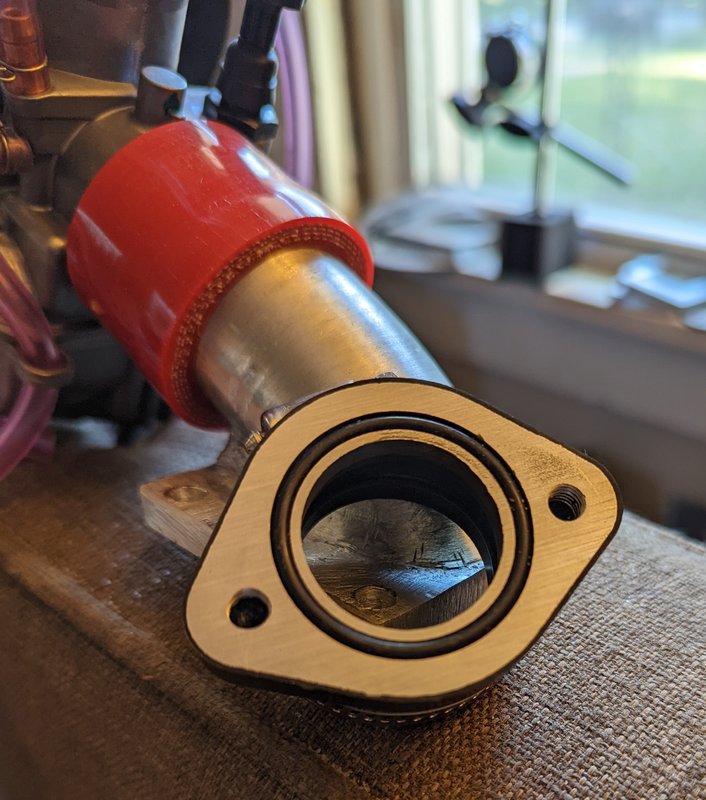 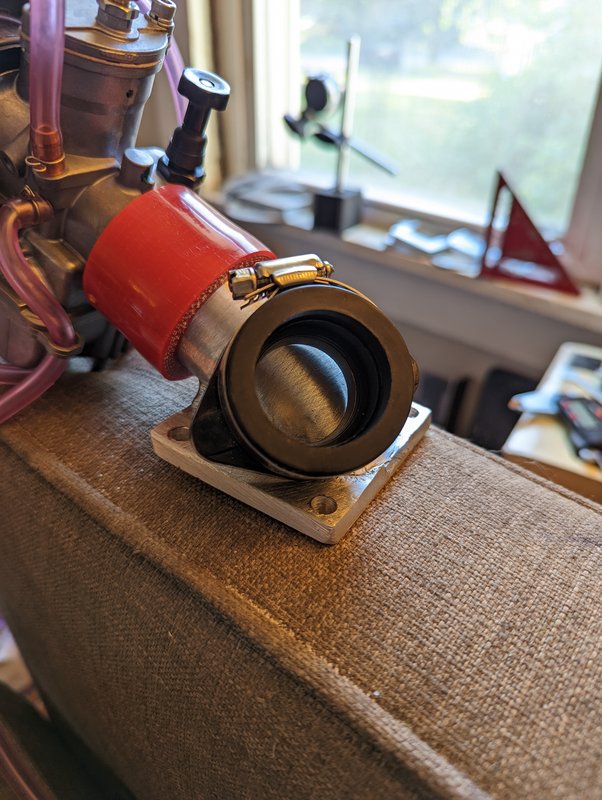 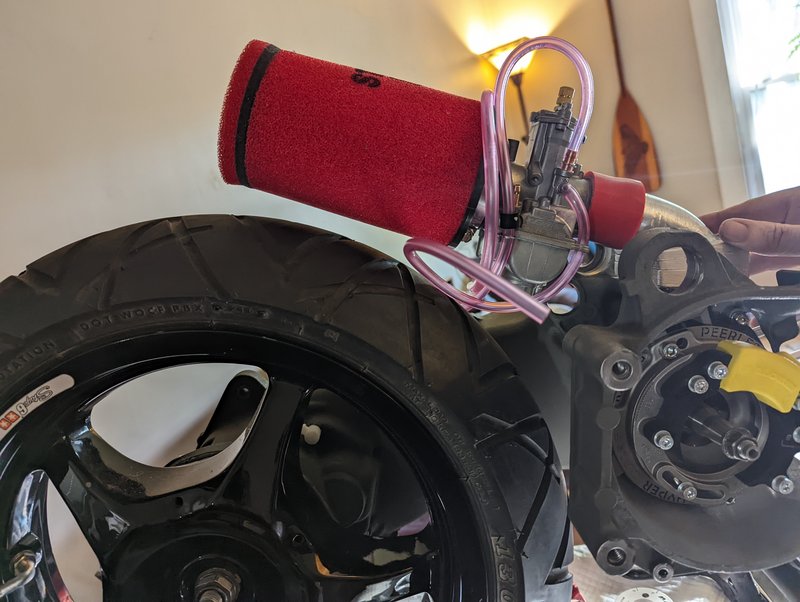 |
|
|
|
Post by fly on Jul 1, 2022 12:59:02 GMT -5
I'm going to chop back the manifold tube as far back as I can, and attach a flange. I think I can take off about 5/8" and still have enough room for a hex key to reach the mounting bolts.
I think leaving it longer would make for better bottom end, but I've already got a spacer setup. Shorter intake run should make better power higher up. It'll also keep the carb closer to the axis and all manner of kinetic forces will be minimized. 👍
I'm rethinking the plan to run viton between the two spacer pieces. My thinking is that the reed sits on top of that, so that seam will experience the full power of a return pulse on the reed valve. I think it will be better to use as thin a gasket as possible, or maybe not at all - just some 1211 or ultra grey.
|
|
|
|
Post by fly on Jul 10, 2022 0:03:03 GMT -5
The never ending intake that's in a perennial state of almost done... It's almost-er done. Since I can't leave anything well enough alone, I decided to modify a spade bit to cut a slot in the flange. I think it'll give great surface area for braze, and cut out a big chunk of the shear stress at the joint. Happy with the result. I've been inexplicably obsessive about this sub project. Lots of figuring out, wanting to change it, changing it, finalizing design etc. I have to say, I'm digging the hand-made look in the age of everything CNC, though. Getting there, I guess. Pretty soon I'll skim coat, fair, and paint it up. I'm thinking about brazing on some brass "canaries," I'll call them, before paint. Spent this much time, might add an "accent." 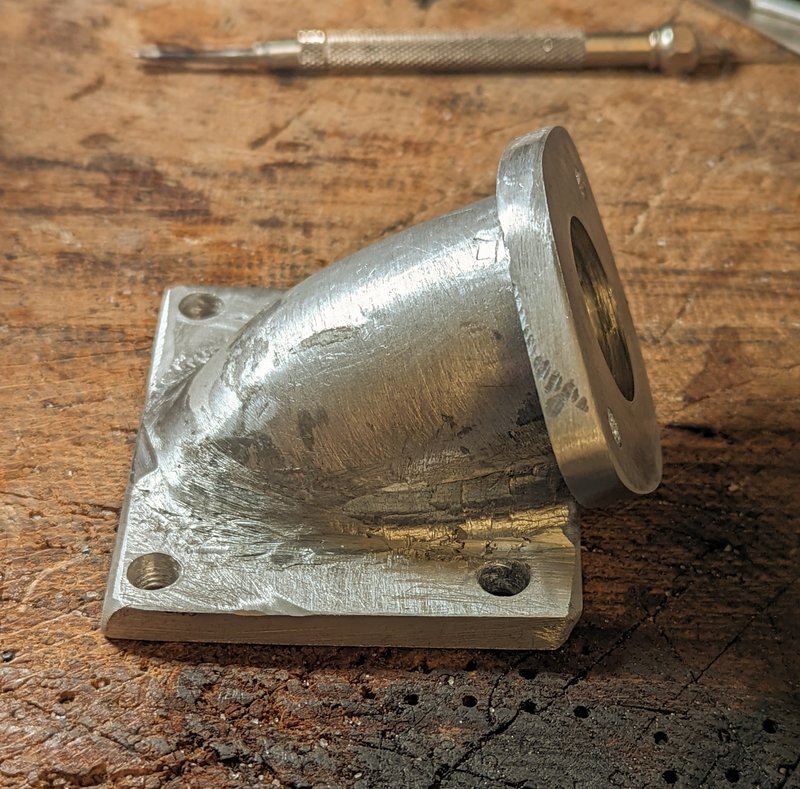 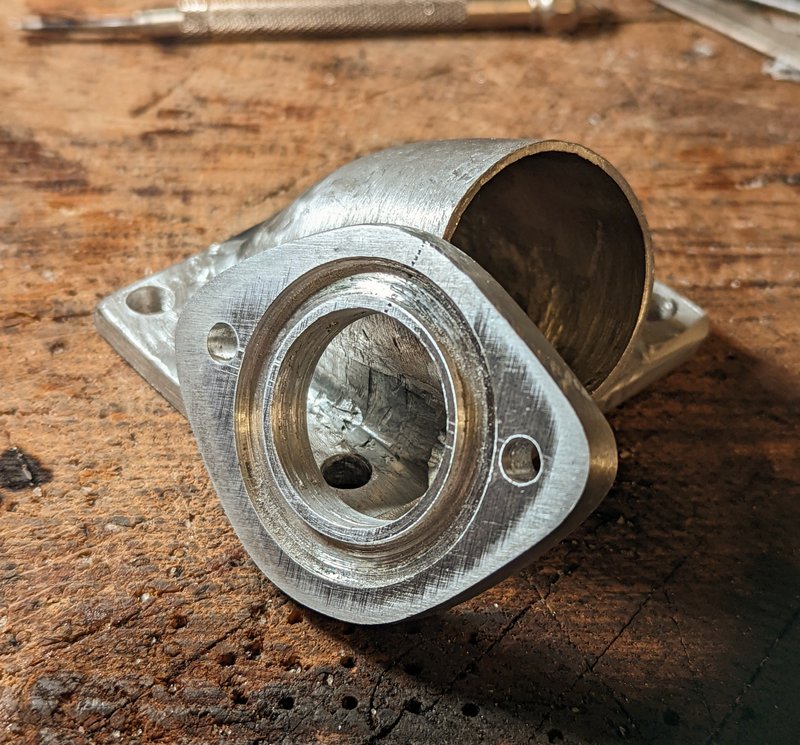 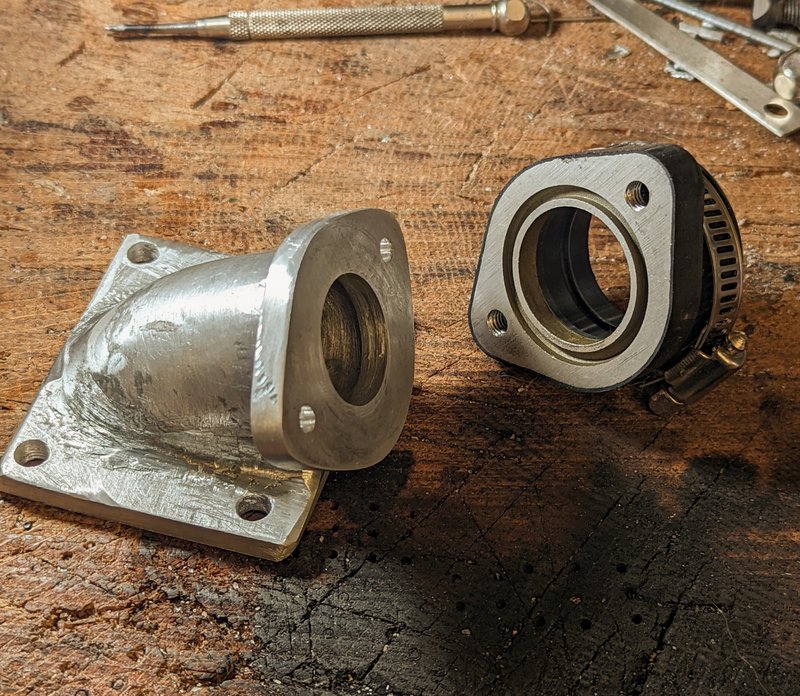 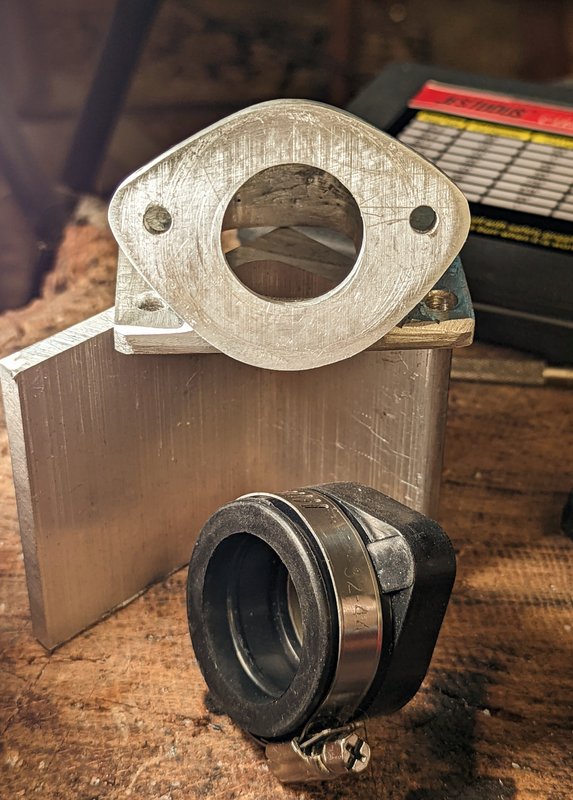 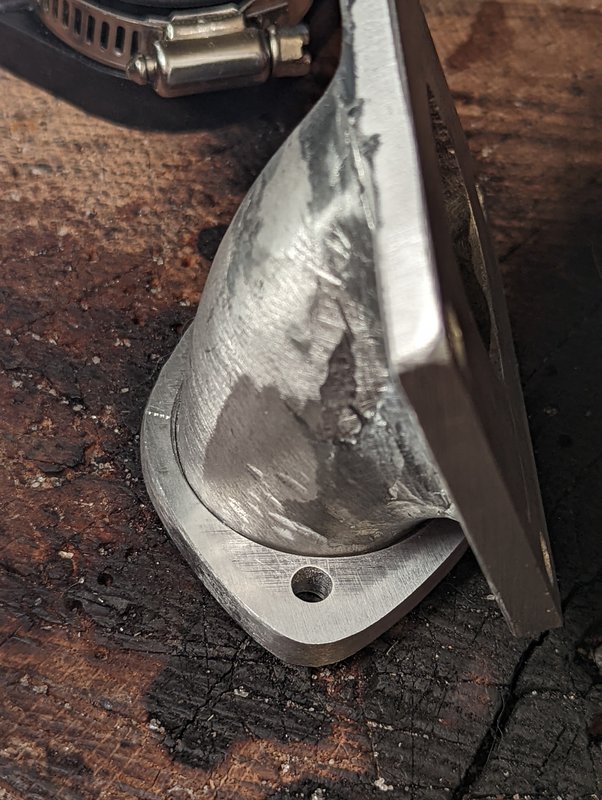 |
|
|
|
Post by fly on Jul 12, 2022 18:18:04 GMT -5
The new version of the 2013 (Furia Rossa) Malossi over range came in yesterday.
Anybody with the Minarelli version wants to compare notes, let me know. I'd love to establish the differences between old and new for myself and everyone else.
|
|
|
|
Post by fly on Jul 13, 2022 21:41:35 GMT -5
The new Malossi over range variator sliding sheave uses a sealed and *lubed* bushing instead of brass. That's pretty cool. My prob is the 16mm crank, the bushing supplied with it does not have a slot and hole like the new ones. The slot and hole is presumably meant to prevent oil from moving to the terminal end of the bushing and getting on the belt. so I will try and hunt down whether there is a new part number for a 16 mm bushing that fits. Or see if I must modify the one that came with the crank. It's potentially rad, but another hiccup. Nbd, though. Also looks like my crank bushing is 1-1.5mm longer. The spacer for the crank is smaller to reflect that. 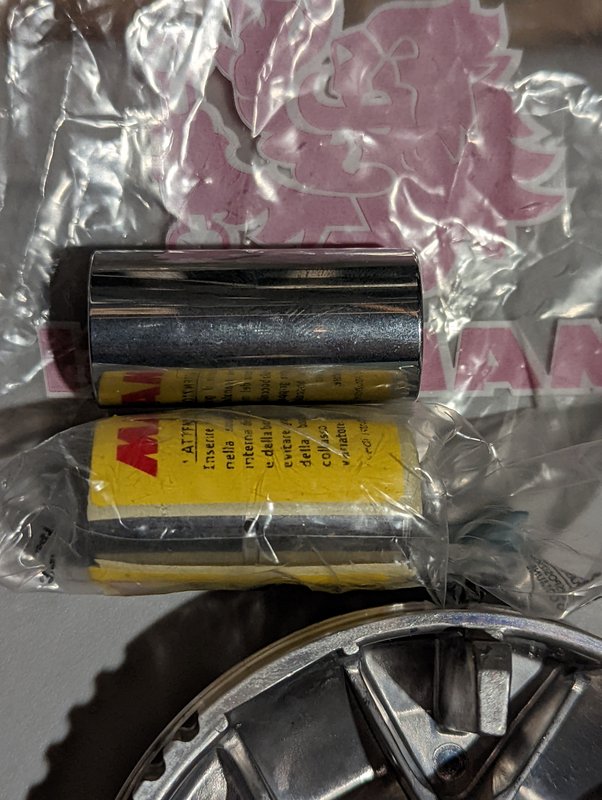 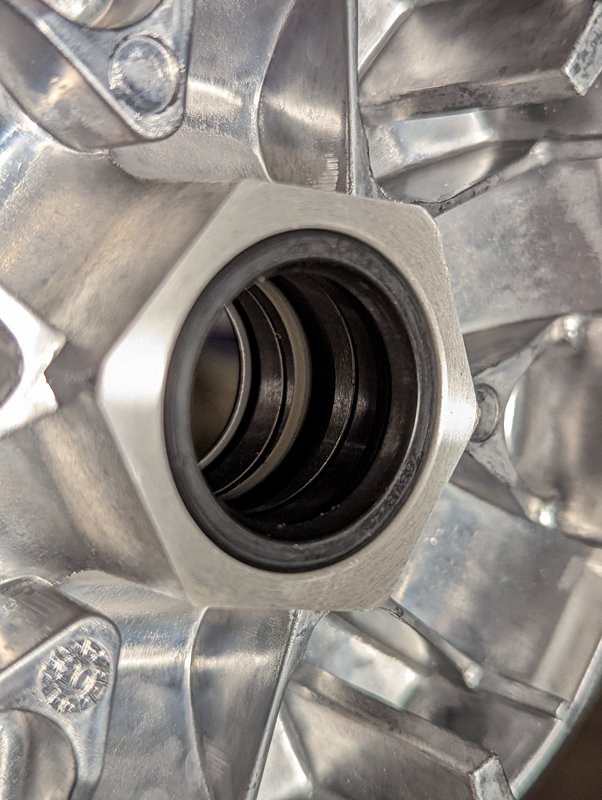 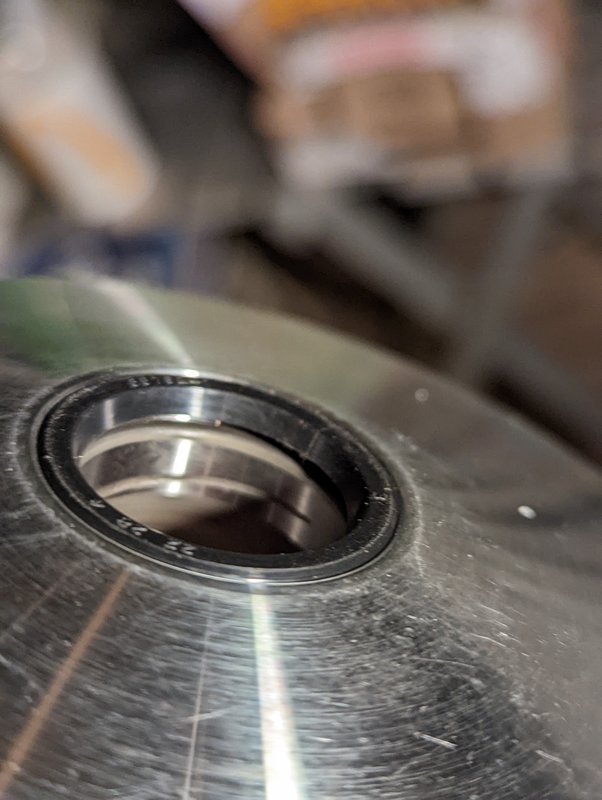 |
|
|
|
Post by 808ministroke on Jul 14, 2022 4:16:30 GMT -5
The new Malossi over range variator sliding sheave uses a sealed and *lubed* bushing instead of brass. That's pretty cool. My prob is the 16mm crank, the bushing supplied with it does not have a slot and hole like the new ones. The slot and hole is presumably meant to prevent oil from moving to the terminal end of the bushing and getting on the belt. so I will try and hunt down whether there is a new part number for a 16 mm bushing that fits. Or see if I must modify the one that came with the crank. It's potentially rad, but another hiccup. Nbd, though. Also looks like my crank bushing is 1-1.5mm longer. The spacer for the crank is smaller to reflect that.    I too find it hard to locate good good variators that can accept accept the larger diameter crank arms, Like on the MHR team crank which I'm assuming is probably the exact same size as your polini evo 16mm sounds right, Really surprised that they haven't come out with either a pushing that will allow the use of this sized crank I'd crank on other variators with just a thinner wall Doesn't seem like there's a lot of choice when it comes to these 16 mm crank arms which is which is sad because why why would you want a full on top and top of the line Set up while having to having to have to modify your own bushings and even your you're nuts on the roadside cause cause this also affects the the kind of inner rotor Ignition you can use you can use because a lot of them Do not have the larger threaded bolts bolt I believe my threads are M12 1.25 And I had to make my own to make A Jimmy rigged version off of some random car part 2 allowthe MVT Ignition 2 work 😲😮💨🤷🏻♂️ |
|
|
|
Post by fly on Jul 14, 2022 5:09:45 GMT -5
I too find it hard to locate good good variators that can accept accept the larger diameter crank arms, Like on the MHR team crank which I'm assuming is probably the exact same size as your polini evo 16mm sounds right, Really surprised that they haven't come out with either a pushing that will allow the use of this sized crank I'd crank on other variators with just a thinner wall Doesn't seem like there's a lot of choice when it comes to these 16 mm crank arms which is which is sad because why why would you want a full on top and top of the line Set up while having to having to have to modify your own bushings and even your you're nuts on the roadside cause cause this also affects the the kind of inner rotor Ignition you can use you can use because a lot of them Do not have the larger threaded bolts bolt I believe my threads are M12 1.25 And I had to make my own to make A Jimmy rigged version off of some random car part 2 allowthe MVT Ignition 2 work 😲😮💨🤷🏻♂️ Yeah. There's no cross drilled and slotted boss on the Malossi site. I do think it might be a good idea to cross drill it and slot it (the one that came with the crank). I'm not sure where, though. The 16mm boss is longer than on the new boss. I am thinking equidistant from the slot on the new one to the fixed face. 🤷 Who knows if I'll hear back from Malossi, never have before. Nobody stateside knows anything about this new one, the only new versions I've heard of being here are Piaggio which I think came out last year. |
|
|
|
Post by fly on Aug 5, 2022 8:36:09 GMT -5
I've been a bit waylaid with some (hopefully) minor health issues.
After much pestering of Malossi, they agreed today (the day they close for rest of August) to send me the boss I need. 🤘
There is a new product folks will need to buy to use the MHR Team 44/90 crank with the new MHR variator with the oil seals on a Minarelli, at least. It will be part 2019428, and they say it will be available in September.
They didn't mention anything about sending a ramp plate, so I'm assuming the hub is all you actually need.
Hoping to feel better soon. Low iron, doesn't look like any serious underlying cause. but believe me it will lay you the f out.
|
|