|
|
Post by fly on Mar 4, 2022 13:54:47 GMT -5
 One or more of those oughta do the trick, at the right price. Surely will flake abrasive, so much flushing will be done. |
|
|
|
Post by 190mech on Mar 4, 2022 20:11:51 GMT -5
 When clamping various parts,it is only as strong as the weakest part..likely the 'whatever alloy' crankcase..the 6061 spacer should be just fine..well machined parts do not(and should not) require gaskets,a smear of sealant should be enough.. Cutting Nikasil cylinder ports is a risky step as the coating laps into the port,thus removing the lap greatly increases flaking..Lots of folks do it daily,but the serious race engine builders strip all the Nikasil,cut the ports,then have it replated..$$$
|
|
|
|
Post by fly on Mar 4, 2022 21:08:38 GMT -5
I'm defo not trying to chip the nikasil. I'm hoping the files are fine enough. But that's why I'm using an abrasive file. I have *a lot* of time with a file in hand, I wouldn't do anything that didn't feel right, of course. I think I can further mitigate by using a modified skew cut with a bias into the Al.
I'm thinking about running an aluminum spacer. I'll look at it on the case after surfacing. Couldn't get to it tonight :/ You're right, of course. The Ti part is more about overkill and some sort of pseudo mechano-bling. Lol.
|
|
|
|
Post by fly on Mar 5, 2022 20:21:25 GMT -5
Got the cases milled down today. Went good. Had a hiccup on one of the early passes. Chipped the tip of the bit, spent the next 30 mins reprofiling it, but it worked again. Will share that blooper. Vid of the last pass: youtu.be/QTefwiROdy0Might want to watch at 2x speed or something. At the end I dial up the router so you can see got far down I had the power. The potentiomer gizmo worked great.
Pics:
Marked 2mm down
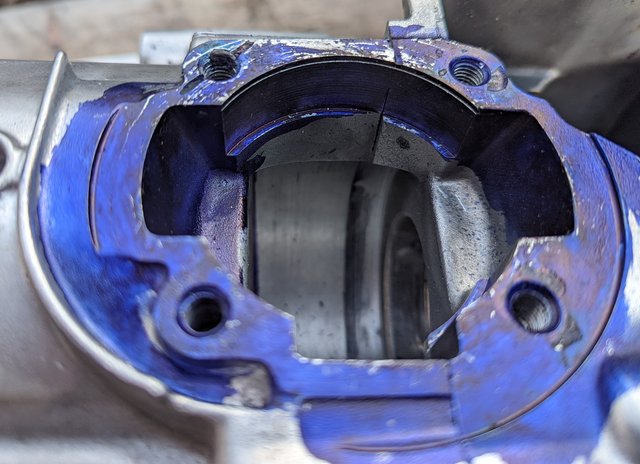 I wound up just zip tying some Al to the router sled because its arms were too short, hence bit chip. T-Rexed it. Used wax and oil, slide like glass. 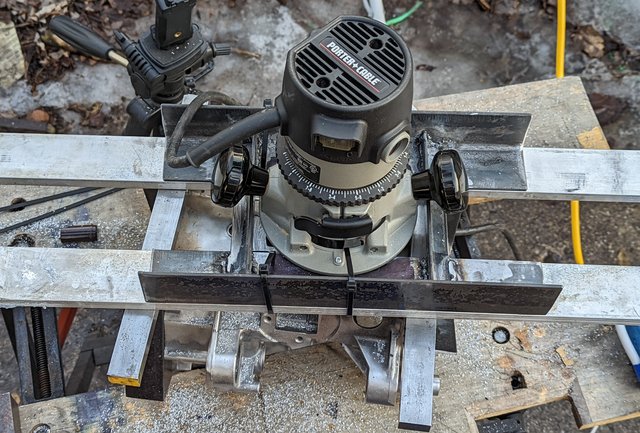 First and second pass, widening the footprint: 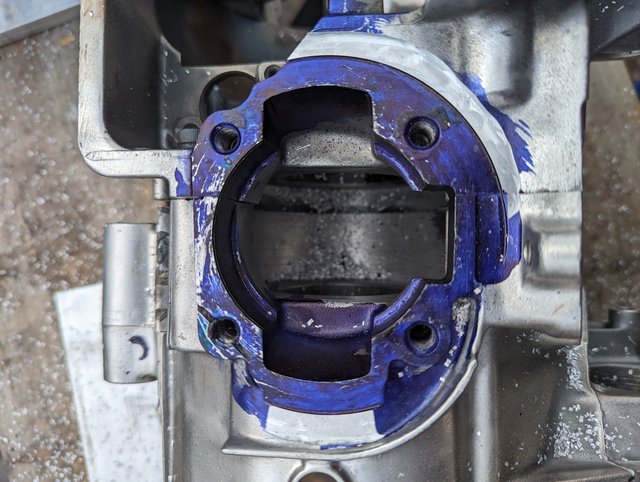 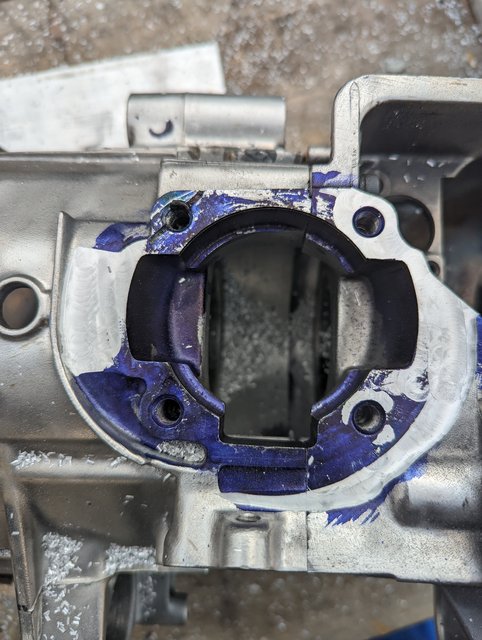 Finished: 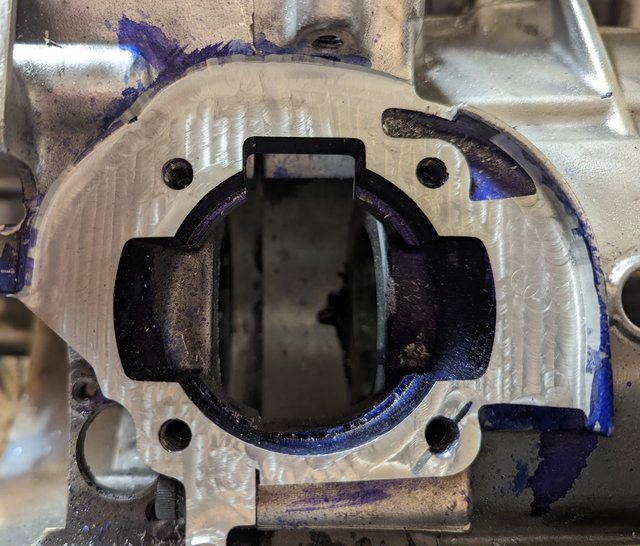 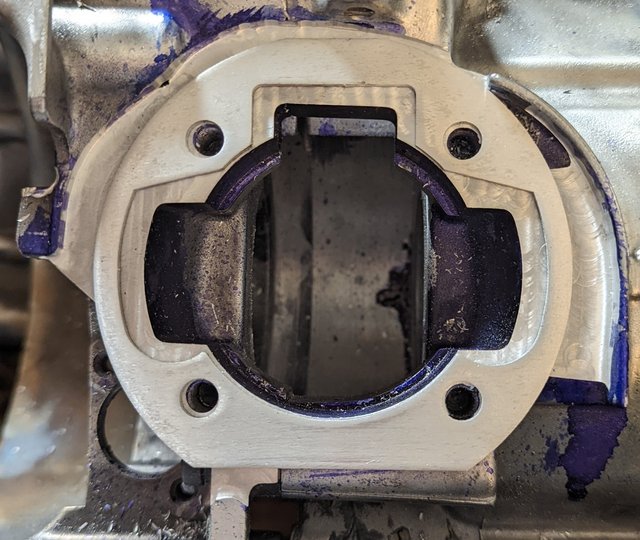 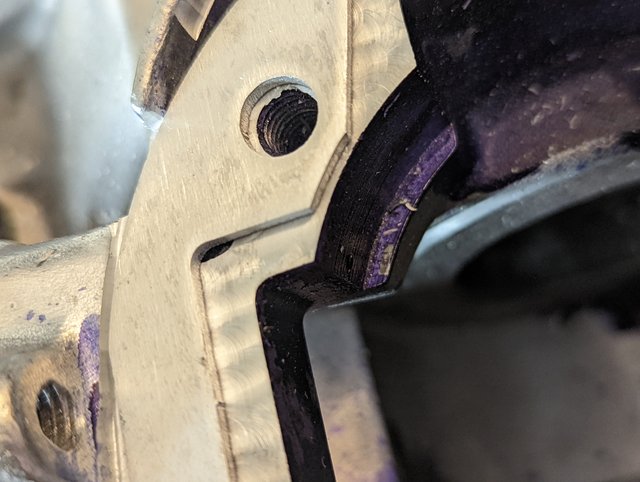 So the spacer is juuuuuust at the edge of that stupid recess by the boost port. I'll have to fill it with JB, no big deal. Wish I had done that before milling. 🤦 The brackets are already made, maybe I'll clean up my funkiness up at the top. Difficult seeing, so the arc really looks horrible. Swirl marks aside it's smooth as glass. My bit hit my depth mark perfectly all around the bore, so that's great everything squared up nicely. I need to stuff up behind the transfer on the stator side of the case and I can *finally* start port matching and flowing. But yeah, it worked just tits. So I'm jazzed. |
|
|
|
Post by fly on Mar 5, 2022 20:25:24 GMT -5
Oi, my delightful old slot of the stud hole. Will fill that flush and evaluate the threads, there's a helicoil in there, though. So it should still be stronger than stock.
If a mod/admin wants to embed those YouTube links that'd be cool.
|
|
|
|
Post by Lucass2T on Mar 6, 2022 5:52:55 GMT -5
Awesome work dude! Keep it up!
|
|
|
|
Post by aeroxbud on Mar 6, 2022 13:07:52 GMT -5
Nice work. Looks a bit crazy, but worked. 👌 You can edit the post and insert the videos by following this guide 49ccscoot.proboards.com/post/7985just copy the YouTube url, and paste into the 6th icon on top right of reply box. |
|
|
|
Post by fly on Mar 6, 2022 18:25:12 GMT -5
Nice work. Looks a bit crazy, but worked. 👌 You can edit the post and insert the videos by following this guide 49ccscoot.proboards.com/post/7985just copy the YouTube url, and paste into the 6th icon on top right of reply box. I'll meld in the sharp corners with a rotory tool. Will probably even out the top when I surface the JB fill of the divot, as well. Not an easy to see area with everything all mounted up, anyway.
I thinkkkk I'm going to try my JB reinforcement of the case seam and see how that experiment turns out. Regardless, I'm going to take some measurements and draw up a spacer so it's already done should I need it.
Anybody know of any compelling reason not to put the water pump in the battery box? Obviously, the battery won't be in there.
Here's another question: Is there any practical way to fill that divot with an Al brazing rod? I don't want to heat up the cases too much, but with some MAPP behind and on top I'm wondering if I can get it safely to ~800°F. It's just a lot of Al bleeding heat. I was thinking put it in the oven at 450 to preheat it and seeing if I can get the local area hot enough to fill it with braze. Otherwise it's more JB :/
I'm enjoying making these cases work, I'll say.
Also, cleaned up that port window, and hit a couple others as well that has some bigger casting artifacts than ideal. Much happier with this:
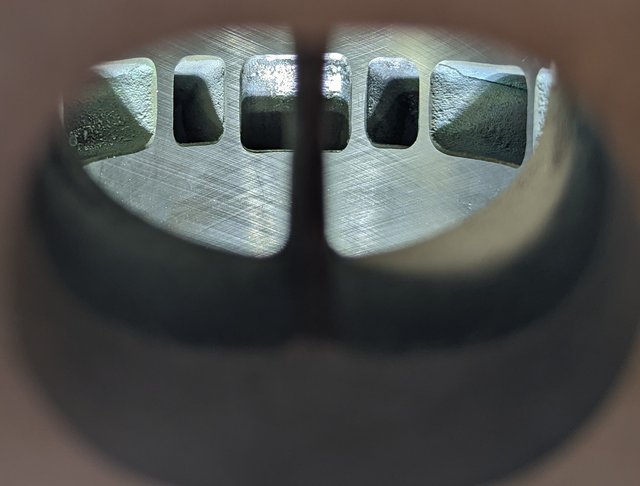 ETA: Will throw the crank in tonight with some slip fit bearings and see how the cylinder lines up. I've realized how easy it is to surface with the router, so I can probably make a spacer that's about dead on if I wanted to. Since the bit I have now is a regrind and I reordered a new one the moment I chipped the one I have, I may see how it behaves on titanium. Lol. I'm not really stuck on titanium, but I'm having fun exploring it. For years I've always talked about how overhyped it is. But it does have some interesting properties. That said, it may well be a wiser choice to just use aluminum given it will expand and contract with heat cycling at a more similar rate to the aluminum case and cylinder. But I'm still going to play with titanium, lol. Can't stop me! 😂 |
|
|
|
Post by fly on Mar 7, 2022 15:59:50 GMT -5
 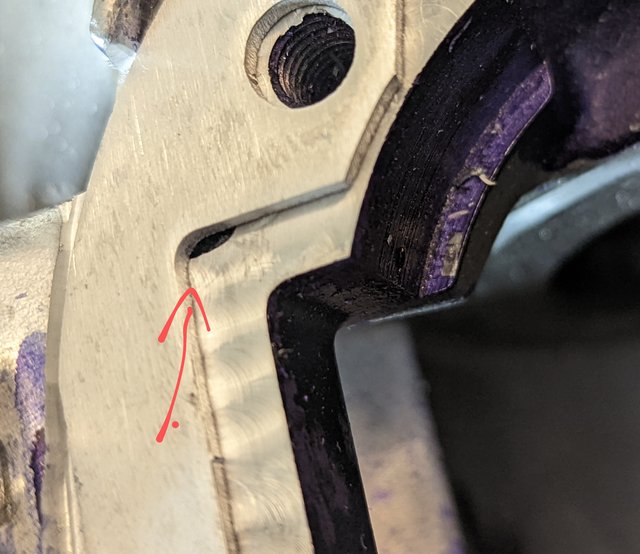 So again here is a further dilemma. What I'm going to do is drill and tap it, and then thread in threaded aluminum rod. I had forgotten about that idea. Then I will drill from the upper right into the side of the threaded rod to lock in place, on top of using Hot Lock thread locker. Hopefully I can get this done today, it will depend on what's available at the metal outlet and hardware store. |
|
|
|
Post by fly on Mar 7, 2022 21:41:55 GMT -5
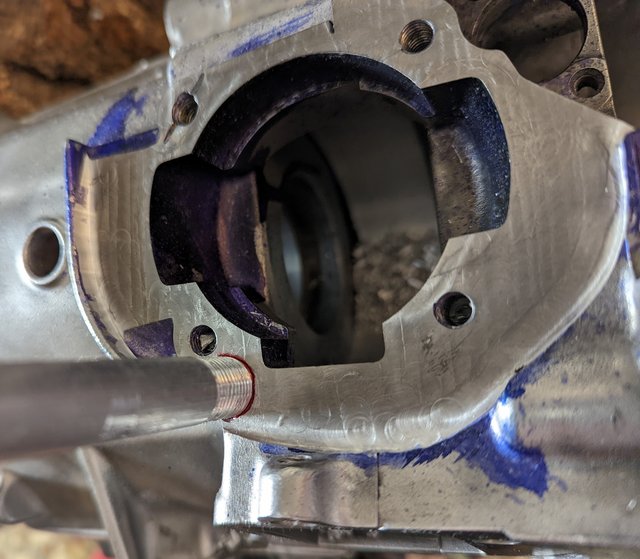 Went to the metal depot and got some 1/2" aluminum rod. Threaded it, drill and tapped the case. Threaded in the rod with Permatex 27200. Will cut it close and mount up the router again to cut it flush. I feel a lot better about this than filling it with JB. Mounted up the crank and cylinder last night. 2mm spacer + thickest base gasket was dead on at bdc at least. So accounting for the thinnest gasket and sealant, all I would need to do with the Ti spacer is reduce it by <0.89mm. But the fresh Al carbide bit gets here tomorrow, and I may take just the thinnest thin bit off because it cut a wee bit smoother fresh, and I've got some cleanup to do. I don't know, will see. Will go from there. If this all doesn't do it for surfacing the flange area I'm going to lose my mind. 😂😂😂 I haven't even gotten to port matching lololol, I thought the boring of the cylinder and crank was going to be the hardest part 😅 |
|
|
|
Post by fly on Mar 7, 2022 21:47:59 GMT -5
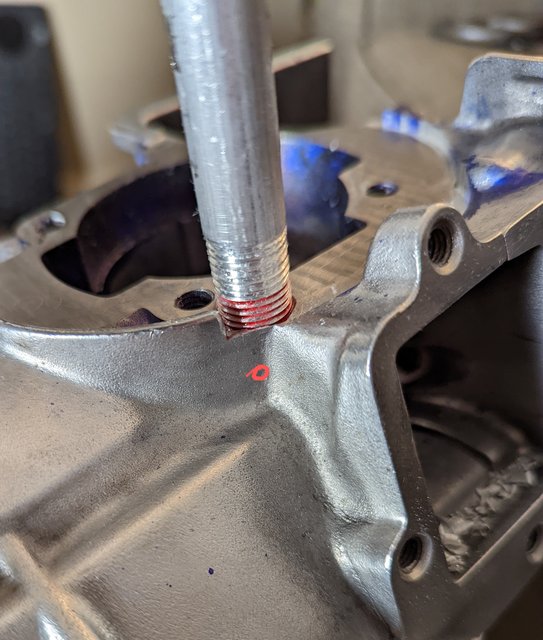 Forgot to mention, but importantly, I'm going to drill in a set screw right there at that little red dot, and then I will stake the set screw. |
|
|
|
Post by fly on Mar 8, 2022 20:05:21 GMT -5
|
|
|
|
Post by fly on Mar 13, 2022 16:27:25 GMT -5
Today I begin making a 6° spacer/converter for KX85 reeds. It's going to be a bit of a pain, I think. maybe not. about to see. plenty of Al to mess up and start over.
|
|
|
|
Post by fly on Mar 13, 2022 22:29:45 GMT -5
|
|
|
|
Post by 190mech on Mar 14, 2022 19:41:11 GMT -5
I too did a wedge setup a few years back trying to direct the mixture flow into the transfer ducting instead of it crashing into a spinning crankshaft as standard.. 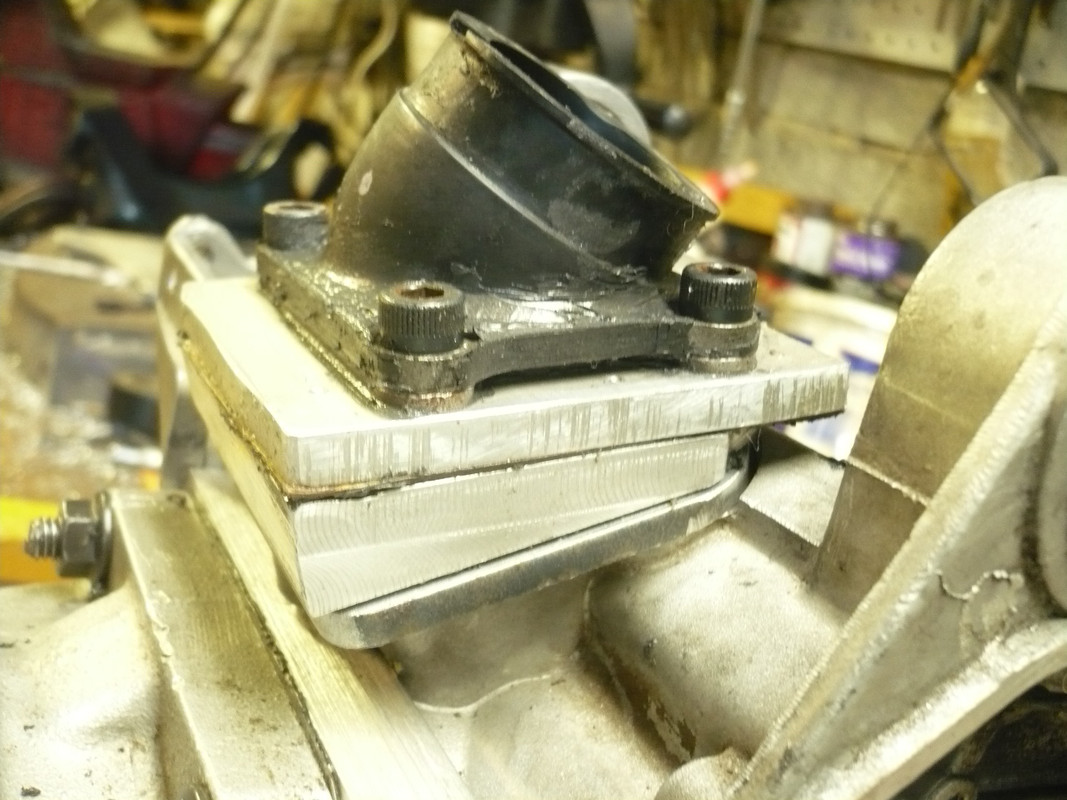 Also fabbed a deflector to further eliminate the crankshaft turbulence; 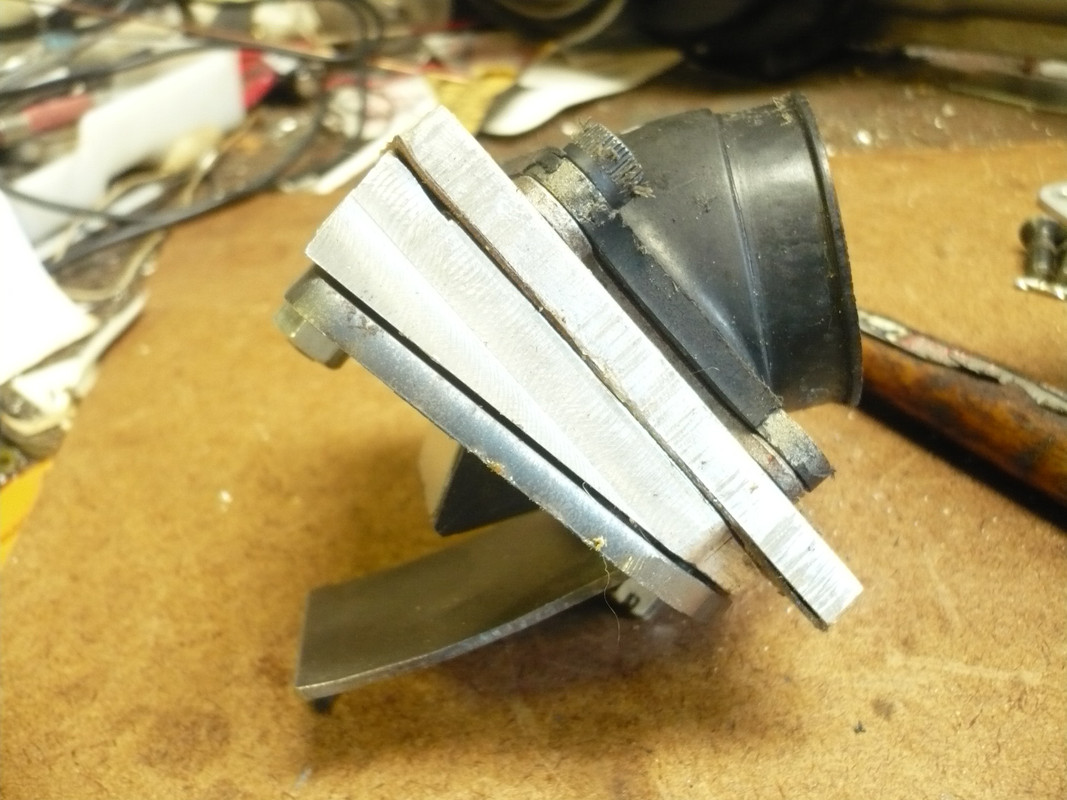 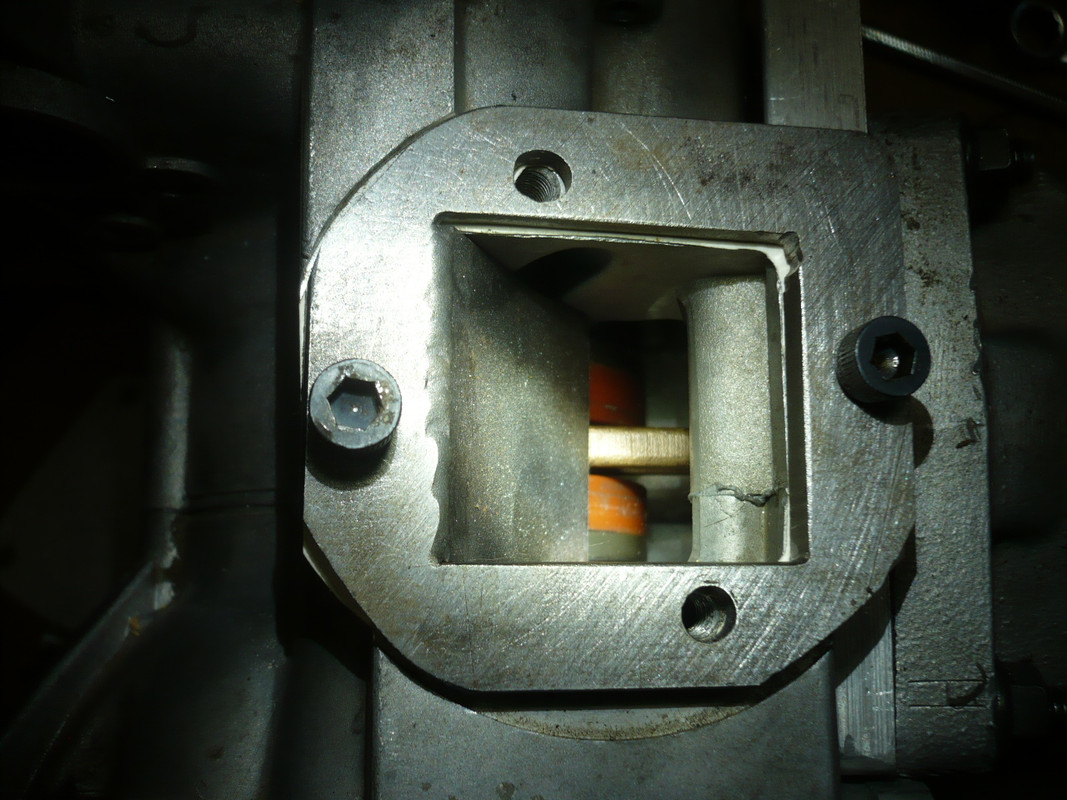 Hard to get the ideal straight shot the Japan MX bikes used; www.ebay.com/itm/125161833974?hash=item1d243a05f6:g:HQwAAOSwr-liEwi2 |
|