|
|
Post by 90GTVert on May 10, 2015 11:18:06 GMT -5
I worked on getting the cylinder ready to install this morning. Started out chamfering the ports with a small file. Then I moved on to checking piston ring end gaps. I was surprised to find a ring under minimum clearance (about 0.009" for a 54mm bore). I don't even remember the last time I had to file a ring on these because usually they're on or just over the spec for me. 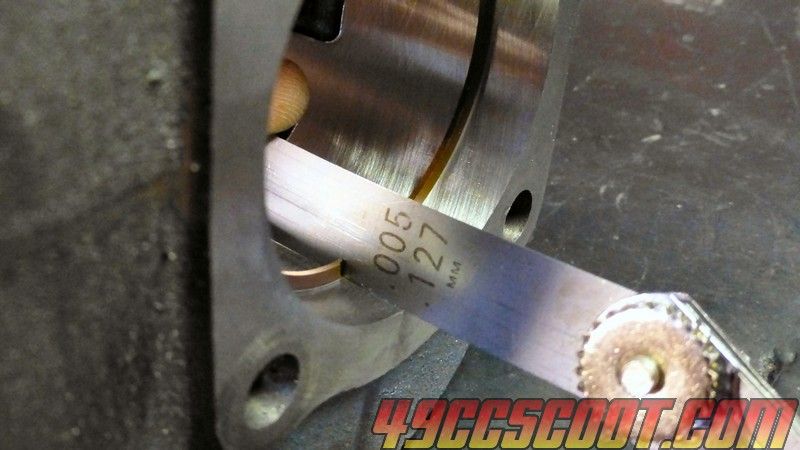 I used a small fine diamond file (Harbor Freight) because they're a bit finer than the standard steel files. If you have to file a ring remember to file from the outside of the ring in... cylinder wall side to center of the ring/bore side. File one side and check your clearance very frequently because material gets filed away quick. File as straight/square as you can so the ring ends still butt up squarely when complete. Make sure there are no rough edges, but only "kiss" the ring with a file very lightly if needed. You don't want a beveled or chamfered edge, just no rough leftovers.  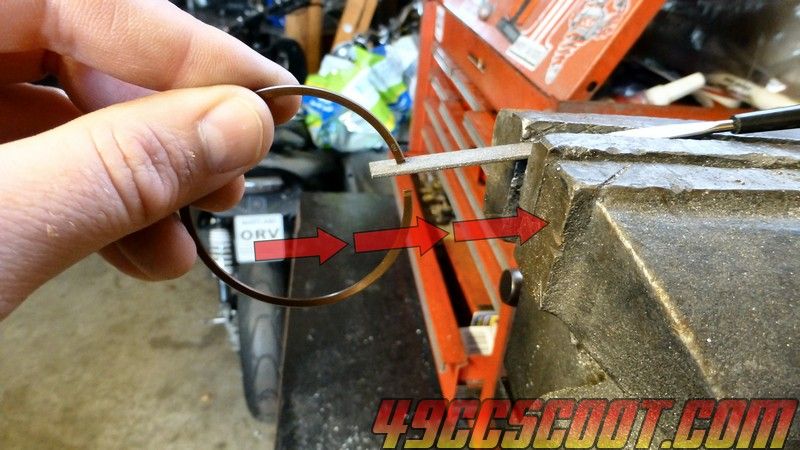 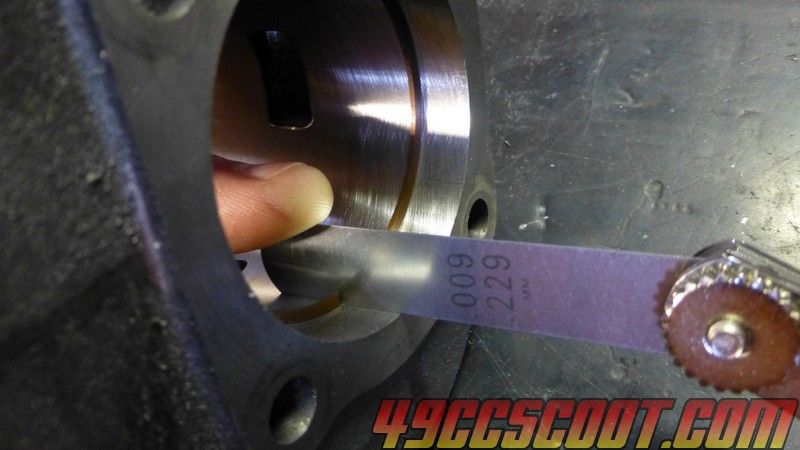 I moved on to knocking the sharp edges off around the piston. Doing this with a file makes me appreciate a rotary tool more. Not essential, but it doesn't take that long. (Left untouched, right filed) 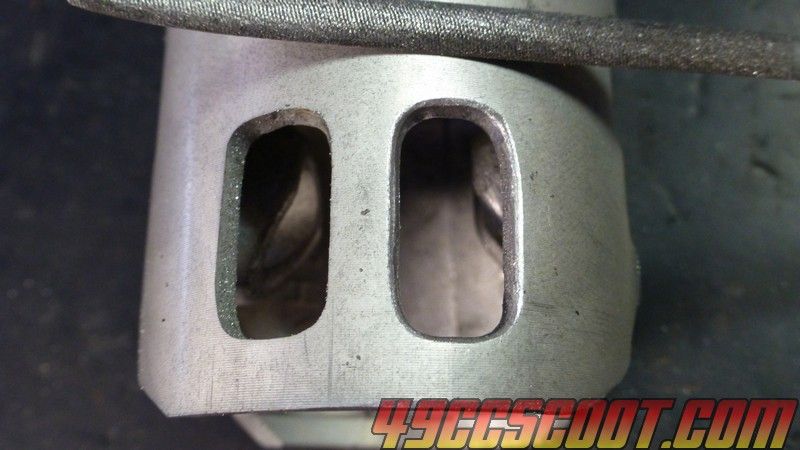 The piston is below deck and the head is recessed a bit. Looked like maybe it would be somewhere in the realm of reasonable, but I think on the wide side. I decided to try and seal it all and install the cylinder kit rather than dry runs checking squish. I put a thin coat of Ultra Grey RTV on the cylinder base and a very small amount on the cases and used the usual coppery spray in place of a head gasket. Installed it barely snug so the RTV can setup a little before it's fully compressed. 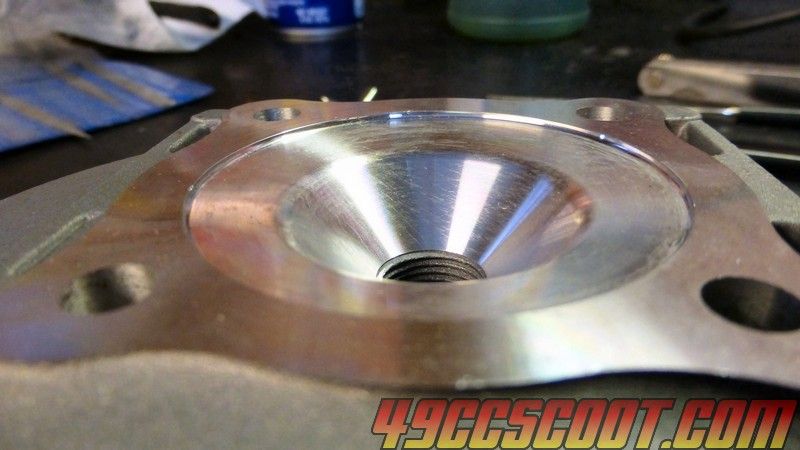 I haven't had any trouble with other heads, but this Hoca head is thick and the cylinder studs I'm using barely make it through the nuts all the way. 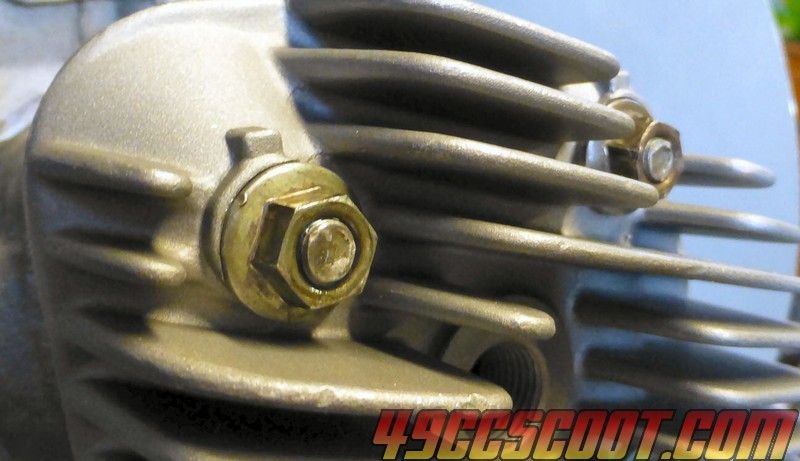 One stud that's in a trench wanted to go in too deep and the stud didn't come all the way up through the nut. I used a pair of needle nose vise grips to hold the stud still through the side of the cylinder while I installed the nut and that seemed to fix it. I know there are plenty of threads in the cases because it was all the way through into the trench and I didn't have to change where it sat vs the first install try by much at all so I should still have threads hanging out into the trench a little.  After it's had plenty of time to setup I'll torque the cylinder nuts and check squish and compression. |
|
|
|
Post by iwiketuddlz on May 10, 2015 12:10:21 GMT -5
Hey Brent where might I ask you got yourn sliders for the OR variator good sir? I want some them
|
|
|
|
Post by 90GTVert on May 10, 2015 12:15:16 GMT -5
7 and 10g from PFS and treatland.tv had the 8.5g. I haven't seen one site I use so far that has a full selection.
|
|
|
|
Post by iwiketuddlz on May 10, 2015 13:21:59 GMT -5
OK thanks,...man those are heavy, I currently run 6 gram rollers in My OR and it does perfect...but I have been wanting to try the sliders in The OR as well..
|
|
|
|
Post by 90GTVert on May 10, 2015 14:10:00 GMT -5
Both had lighter and G-Force had some 3-3.5s on sale.
|
|
|
|
Post by 90GTVert on May 10, 2015 15:11:55 GMT -5
I torqued the cylinder and checked squish and compression. 1.66mm was minimum squish clearance checking 4 spots. Compression is 185psi. I could use a head with a larger combustion chamber but less recess, because 185psi may be a little higher than I want and 1.66mm is more clearance than I'd like. If I don't have a suitable head I may leave it for now. Tighter squish would be nice in theory and I've tried to go with a little tighter clearances lately to keep more mixture volume in the center near the plug and increase mixture motion, but in reality I can't say I've noticed the difference in 0.7mm or 1.7mm of clearance if compression is the same. To be fair I haven't exactly tested with how much ignition advance or compression could be tolerated with certain clearances though and lot of people a lot smarter than me have already got it figured out. Hopefully I'll have a head that I can bolt on and drop clearance without raising compression, but my hip is not feeling great still so I don't know that I'll be cutting any more heads just for this setup ATM. Don't really wanna keep it hurting to where I can't ride or enjoy next weekend over minimal differences.
Can't say I'm impressed with the Hoca tall cylinder. If it had came with gaskets and they were used I'd be looking at prob 2mm of squish clearance with higher durations a little higher. It's got enough deck that a 48mm crank would prob work out alright in there, but then durations go up even more.
|
|
|
|
Post by iwiketuddlz on May 10, 2015 17:22:36 GMT -5
Thanks Brent I just ask Gforce.. and they told me they no longer sell sliders of any size or weight... Sigh my luck eh.. Treatland it is!
|
|
|
|
Post by 90GTVert on May 10, 2015 18:16:11 GMT -5
I went through the heads that I have and most are recessed chambers. From what I had I narrowed it down to 3 options. The current Hoca head, and older one that I opened up the combustion chamber in a little in the past, and a generic beat up head that's seen a circlip failure. 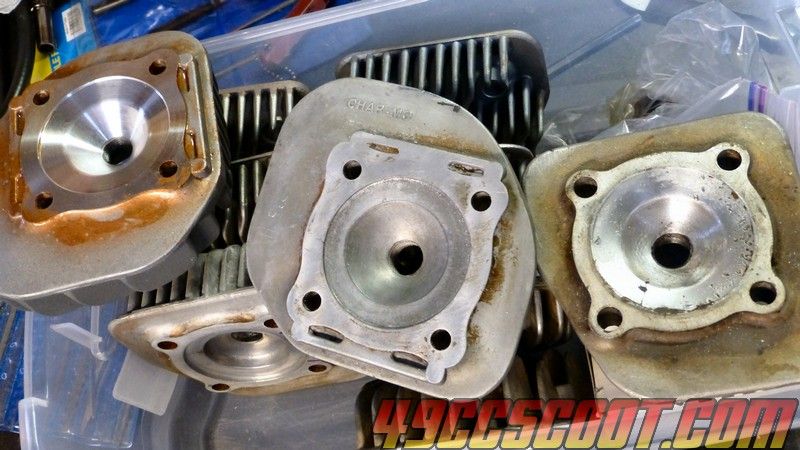 Here are the 2 Hoca heads side by side so it's easier to see that one is opened up a bit. 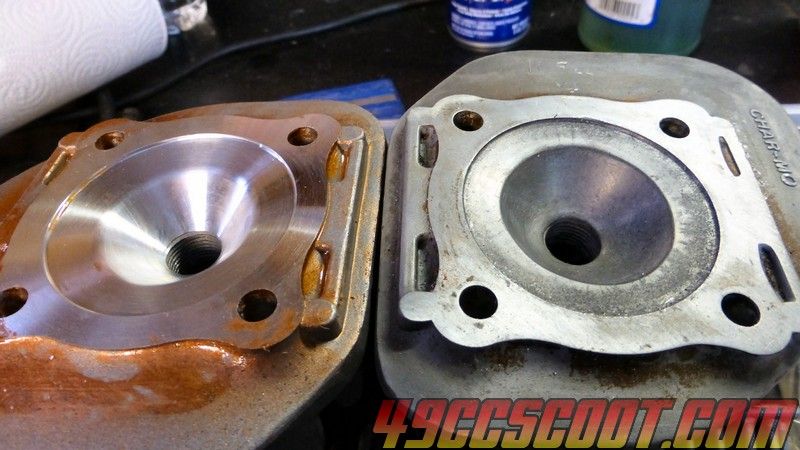 I decided to try this one first since it's not really recessed and I thought it should get squish close. The combustion chamber looked to small, but I wanted to try anyway. 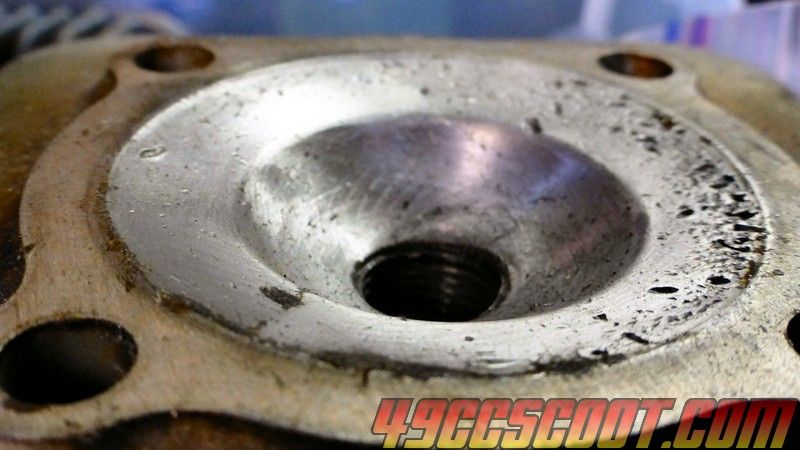 Just for comparison, here is the more typical head and how much of the studs are left vs what I showed with the Hoca eariler. 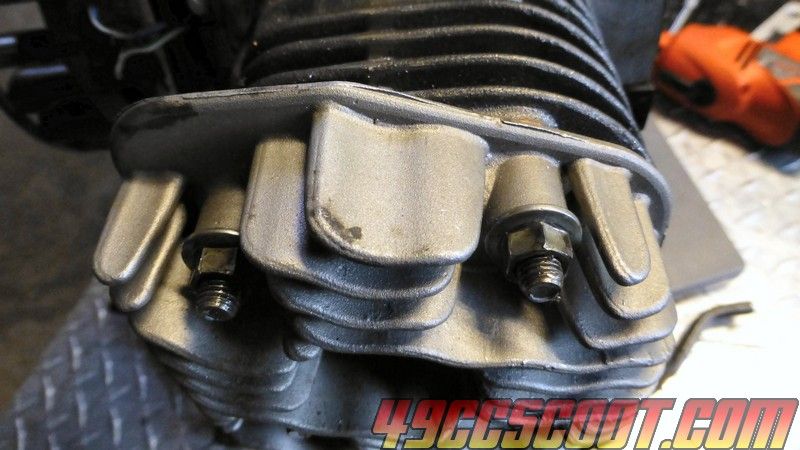 I measured 0.92mm minimum squish clearance, but compression was nutty at 232psi. Definitely not bolt on material. I moved on to the modified Hoca head. I guess I didn't write down the numbers for it, but I know squish was about the same as the stock Hoca head and compression was lower. So I had 3 heads that I didn't really want to use. I was tempted to call it done with the new Hoca head at 1.66mm and 185psi, but no that just wasn't good enough. I cut the already modded Hoca head down so pretty much all of the recess was gone. I was not feeling like sanding for 2 days so I started off with a sanding wheel on a grinder, then an orbital sander, and when it was close I switched over to sandpaper on glass to flatten it out. 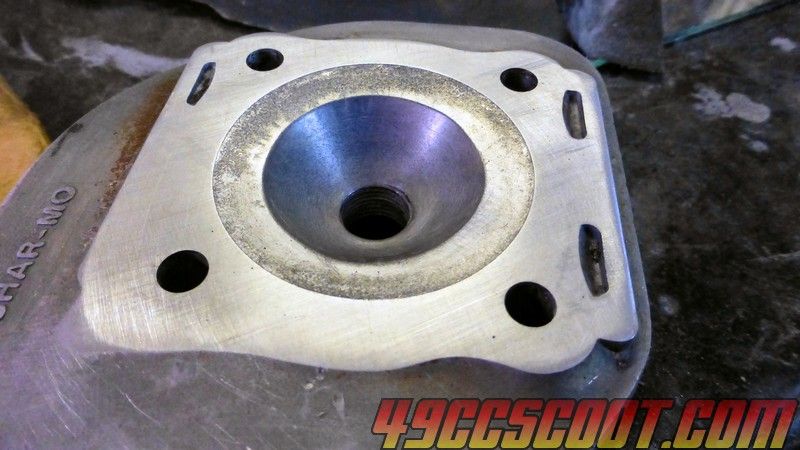 I stuck that on the engine and came up with 0.77mm of minimum squish clearance and 203psi. The squish was fine with me, but too much compression. I chucked the head in the drill, but turned it off immediately. The Hoca head has a lot of mass off center and my vise is in need of securing on one side ATM, so the whole vise and drill and head were hopping up and down on the work bench. Not cool. Once again I was wishing I didn't tear up the Foredom yesterday. I went with a pneumatic die grinder and a big stone to take most of the meat out of the chamber. 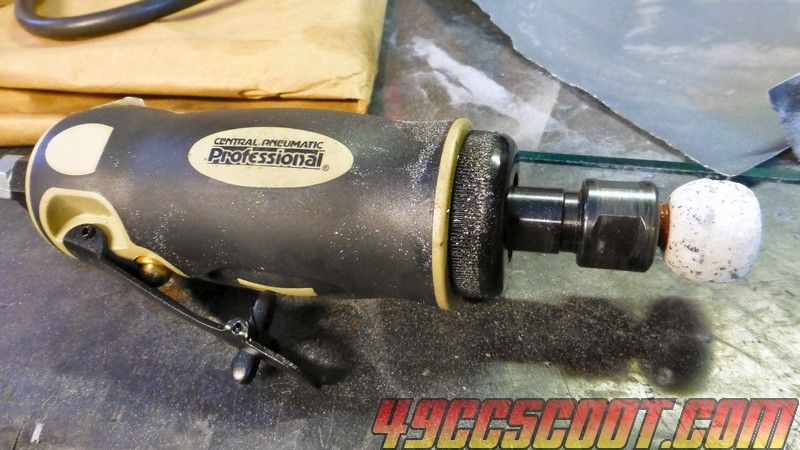 I took it to this point and thought I better check compression (didn't bother with all the math and volume checks to find compression ratios this time). It was at 181psi at this point. I figured that would prob put me somewhere acceptable by the time I smoothed it out a little more.  I switched over to a sandpaper roll to finish the job. 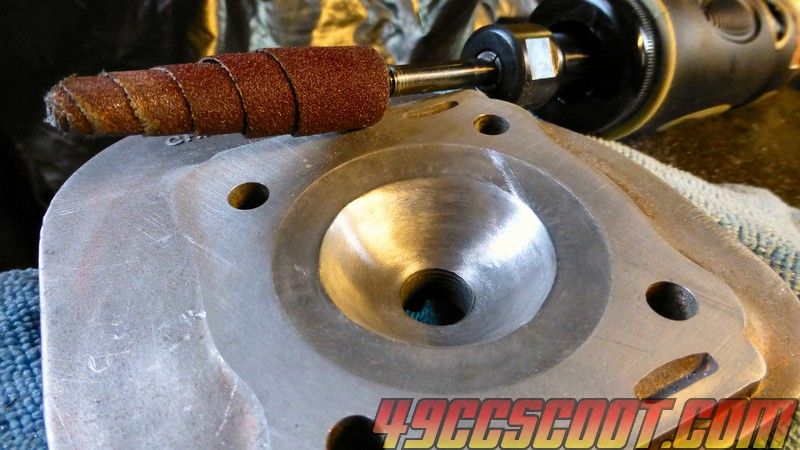 I copper sprayed it and torqued it on. Checked compression and it was 178psi. Rechecked and squish was the same at 0.77mm. Works for me. I have a feeling I may be backing off my ignition timing (slightly advanced ATM from running with the 160psi setup), but we shall see. |
|
|
|
Post by 90GTVert on May 10, 2015 21:53:02 GMT -5
It passed a pressure test tonight so hopefully the engine is basically done other than cleaning the CVT and installing the exhaust and shrouds.
|
|
|
|
Post by iwiketuddlz on May 11, 2015 4:32:08 GMT -5
Tell me how can compression be the same with almost 1mm difference?
|
|
|
|
Post by 190mech on May 11, 2015 5:18:13 GMT -5
Although Brent got his squish down to a better number,he was able to keep the cranking pressure with in spec by opening up the chamber bowl..Got it?
|
|
|
|
Post by 90GTVert on May 11, 2015 6:49:22 GMT -5
As John said, removing volume above the piston in the form of squish clearance but adding volume above the piston in the bowl of the combustion chamber.
Squish clearance itself has nothing to do with compression ratios or cranking compression. With no other changes increasing squish clearance will lower compression and decreasing it will raise compression, but those are effects of the volume change because there's more volume above the piston if you have wider clearances and less with tighter clearance. Compression is all about how much potential volume you cram into how small of a space and cares not what clearances there are.
|
|
|
|
Post by iwiketuddlz on May 11, 2015 7:02:30 GMT -5
Sweet thanks guys that cleared it right up for me...
Brandon
|
|
|
|
Post by Lucass2T on May 11, 2015 9:39:22 GMT -5
Brent, how about fabricating a modular head? Then you only have to swap combustion chambers. You can make like 5 or 6 different designs, add on o-ring groove in every insert. That would be easy for testing.
|
|
|
|
Post by 90GTVert on May 11, 2015 11:25:03 GMT -5
Interesting idea. I've never seen one in person because all the stuff with it costs more than my whole engines I think, and I would imagine that's beyond my abilities. I can cut stuff up and shape things with some small level of competence, but complete fabrication of a head, especially modular, I think I'd be lost on. Swapped the master cylinder today. I didn't even pay attention to the brake switch style when I ordered it so it was different. The old one is on the right, new one just has 2 male spade terminals so I chopped off the old switch and soldered on 2 small terminals. 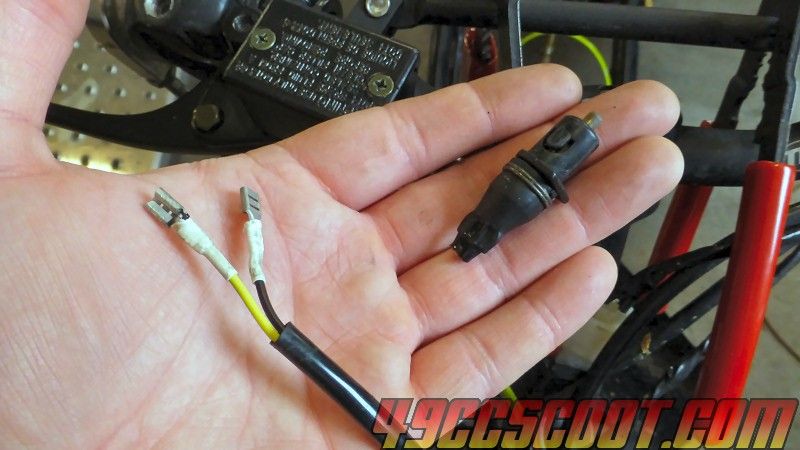 Used heat shrink over them just to make it less likely for any sort of accidental contact. 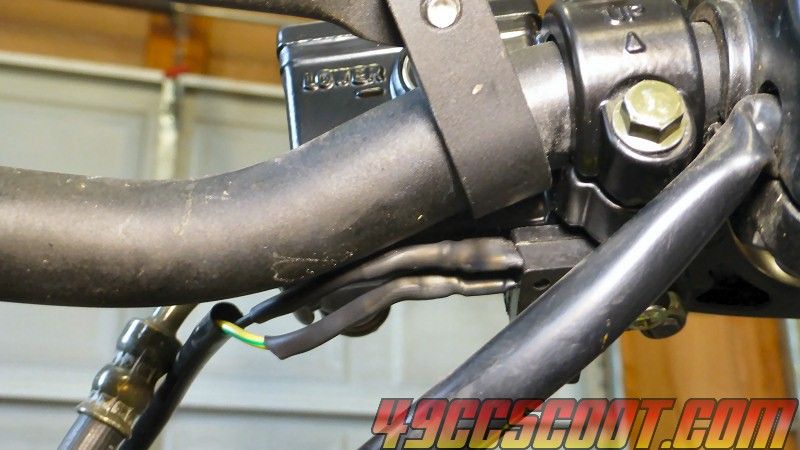 I still don't have a real firm brake lever, but it's definitely better and the brake light switch doesn't hang and stay on now. |
|


