|
|
Post by 90GTVert on Feb 24, 2012 23:33:02 GMT -5
Time for the next mod! A Malossi OverRange CVT. This one is sold by G-Force Powersports. It seems there are no good kits out there for large spline cranks, so G-Force put one together. 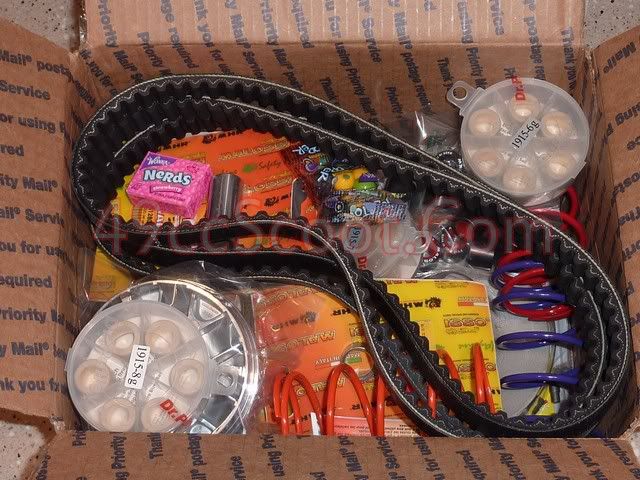 All of the goodies I ordered from G-Force Powersports. This is more than what's included in the overrange kit. Extra belts, different torque springs, and more roller weights. 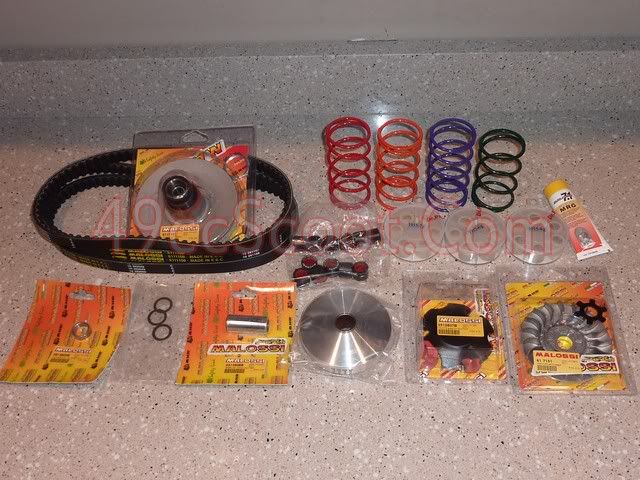 The overrange kit that I ordered, the "OEM large taper"kit on their site, includes : Malossi 6111108 Kevlar Belt (816 17.5 30). They do offer other belts to suit most applications, this is the proper belt for my scoot that normally uses a 788 17 28 drive belt. 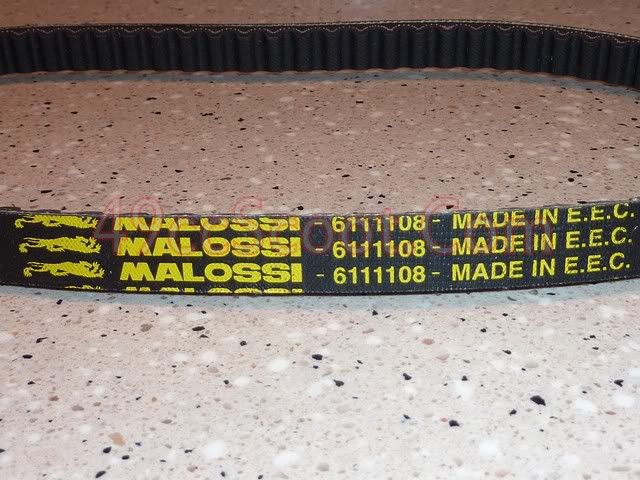 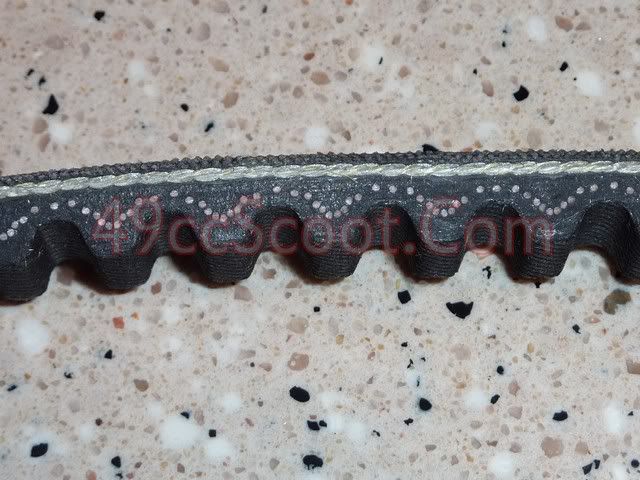 Malossi 61 7151 finned variator pulley. This is the fixed half of the variator, and the star washer that goes along with it for large spline cranks. 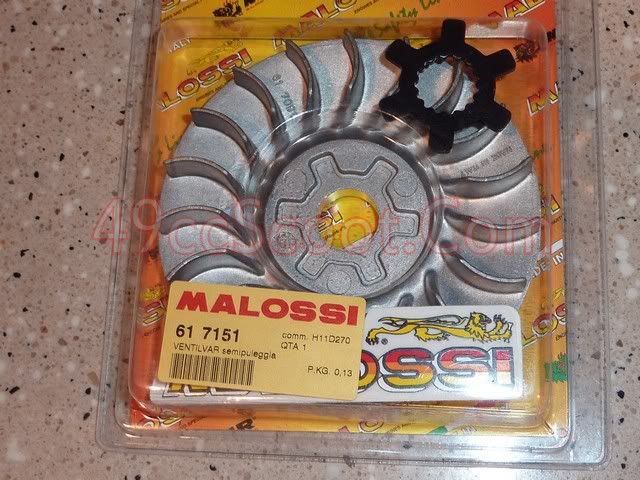 Mallosi OverRange variator. The only number I see on this is 12801, stamped inside of it. I believe this is Malossi part number 6112801B, but I'm not 100% sure of that. 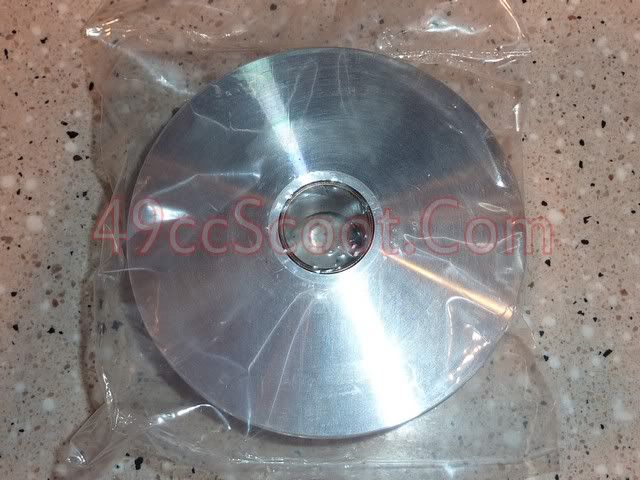 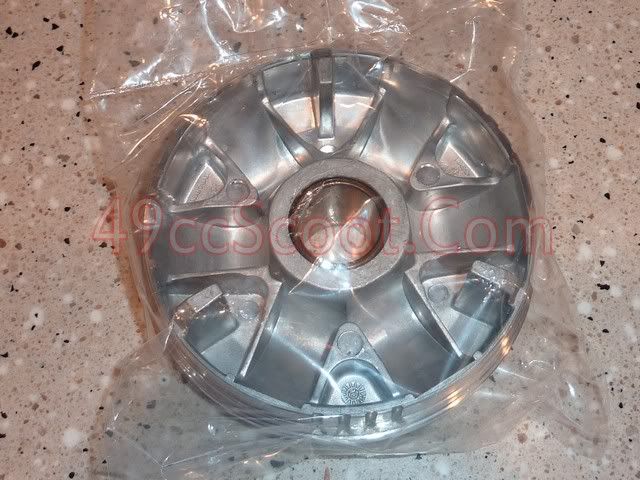 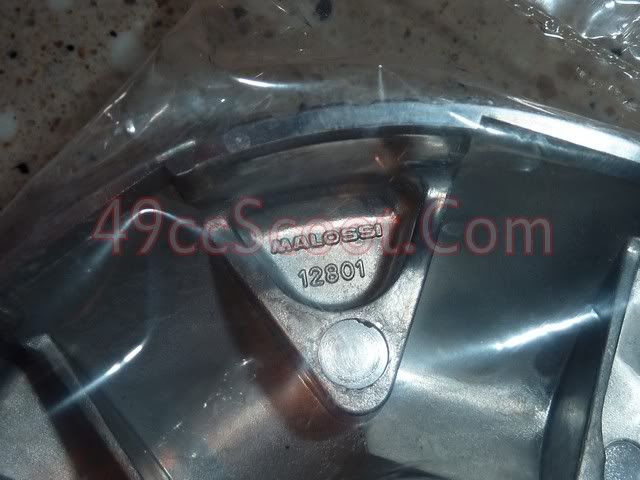 Malossi 2512807B variator ramp plate with bushings. 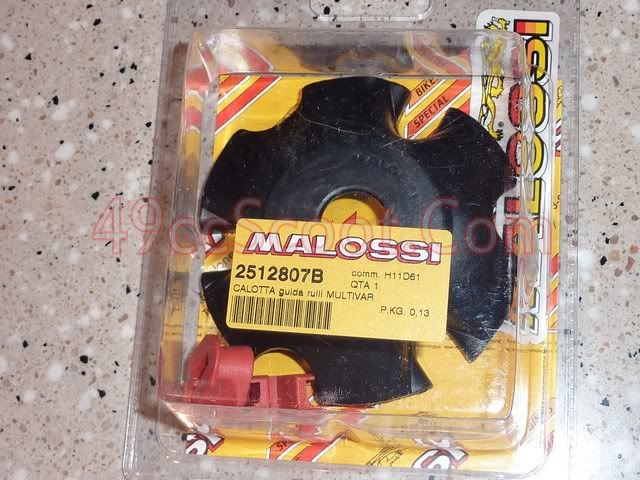 Malossi 2312806B Multivar drive boss. 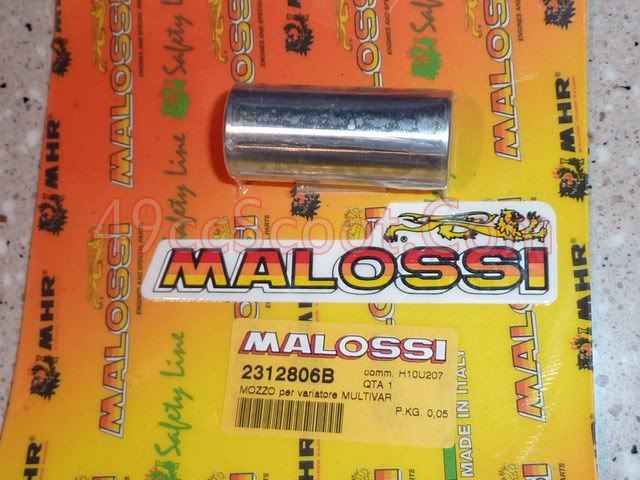 Malossi 0812805B Multivar rear bushing. 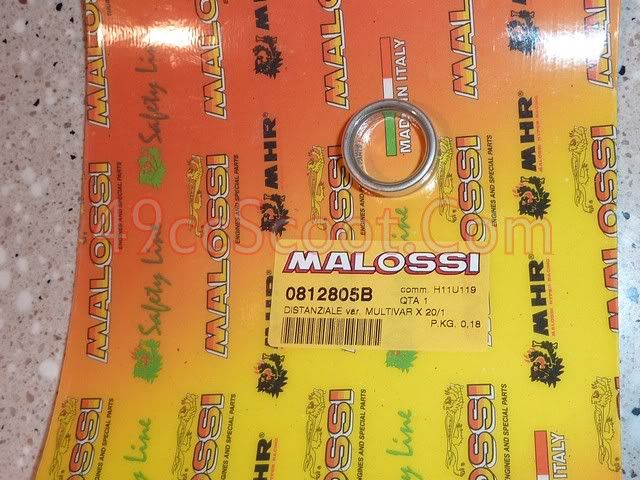 4 spacers for the drive boss. 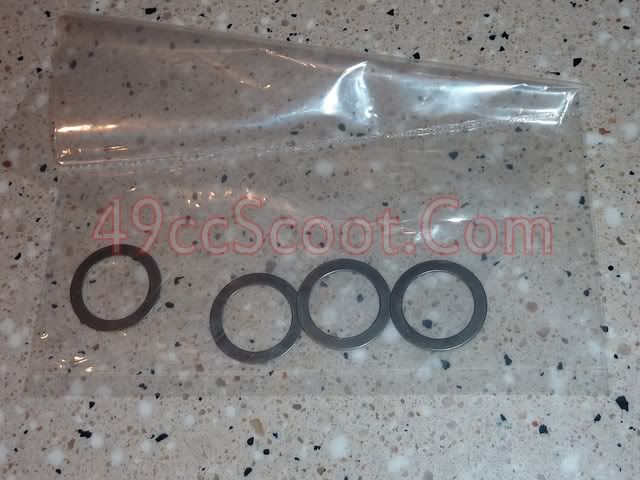 Malossi 19x15.5mm 3.8g and 3.5g roller weights. 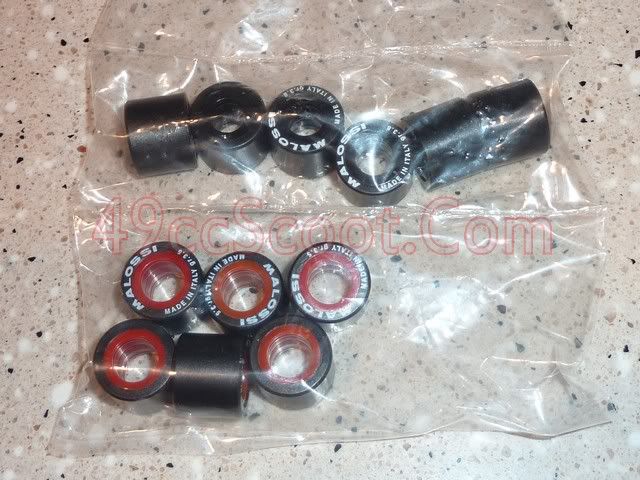 Malossi 6111121 OverRange rear pulley system. 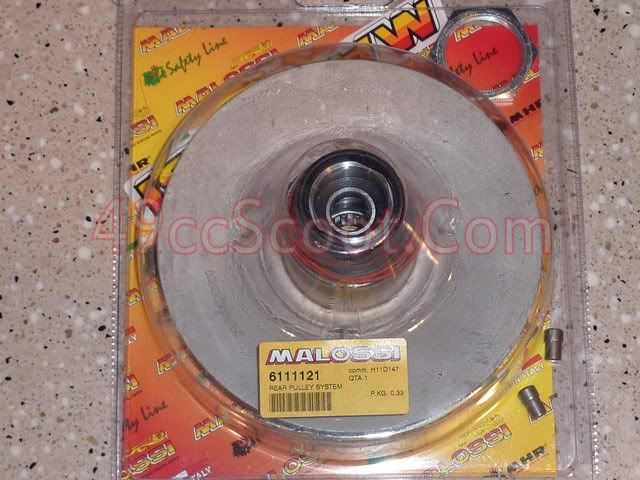 Malossi 7611882B grease. Malossi recommends this to lubricate the torque driver and a very thin coating on each roller weight. 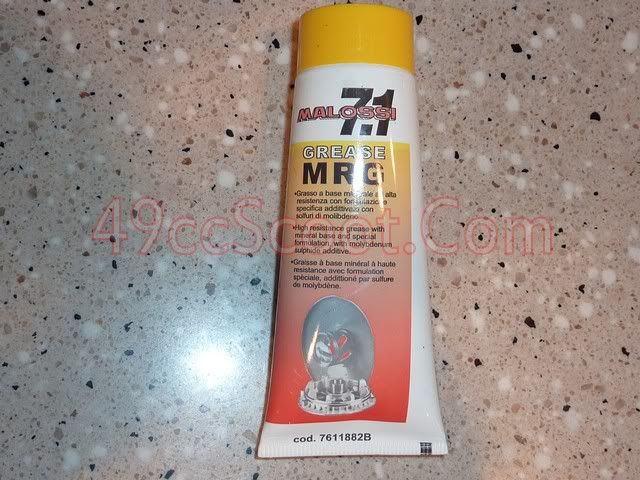 2000RPM torque spring. G-Force Powersports may let you choose a different spring rate if you speak with them. 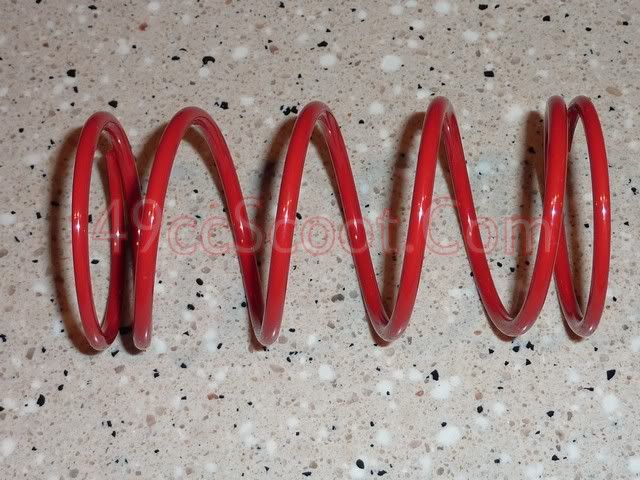 Part Description | Part Number | Kevlar Belt (816 17.5 30) | 6111108 | Multivar Variator* | 6112801B | Multivar Ramp Plate | 2512807B | Finned Variator Pulley | 61 7151 | Drive Boss | 2312806B | Rear Bushing | 0812805B | OverRange Rear Pulley | 6111121 | MRG Grease | 7611882B |
|
|
|
|
Post by 90GTVert on Feb 24, 2012 23:34:10 GMT -5
Comparison pics and info. Seems to me that just looking this stuff over might be helpful for ppl to get a better idea of how some of this stuff works. To keep things simple, I arranged all of the front pulley parts in this order in these pics. From left to right : Stock, Hoca, Malossi OR. Here are the three movable halves side by side. The Hoca variator shown in the center is a very common Malossi Multivar clone. They work very well as an affordable CVT upgrade and you can keep the electric starting system, unlike over range variators. The outside diameters are 95mm, 97mm, and 99.5mm. A larger front pulley can potentially create better high speed gearing, assuming the belt is capable of traveling to it's outer edges. 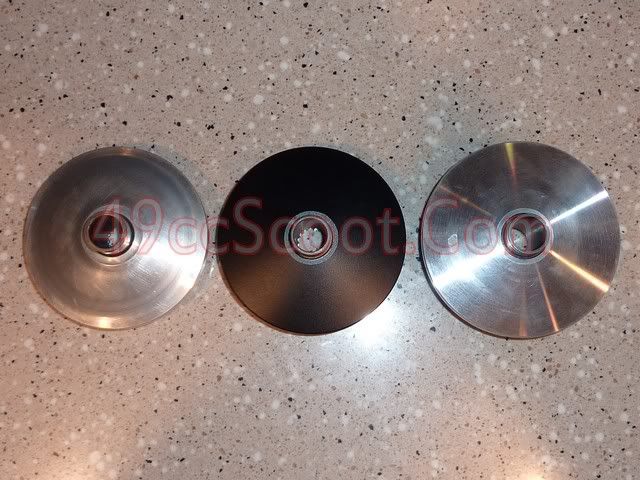 These pics show the assembled variator from the side as well as different angles of the ramp plates. It's easy to see the extra thickness of the over range variator. The additional size is the reason for needing to remove the electric starter components. Of course it has it's benefit, extended travel. Look at the longer guides that stick out the rear of the over range variator. They let the ramp plate and movable half move farther apart, without becoming separated. This is a key feature of the overrange variator. 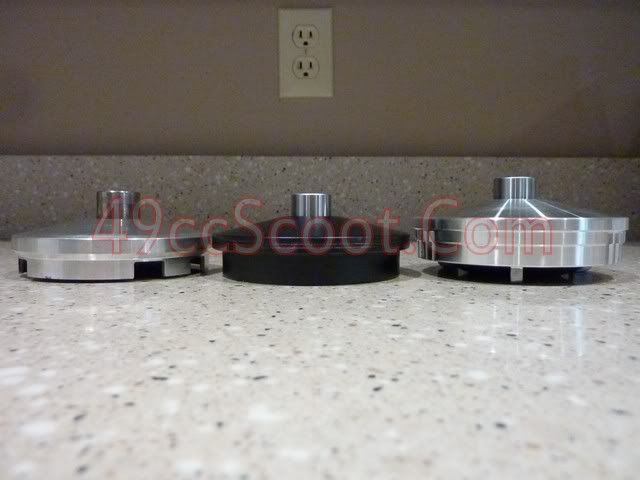 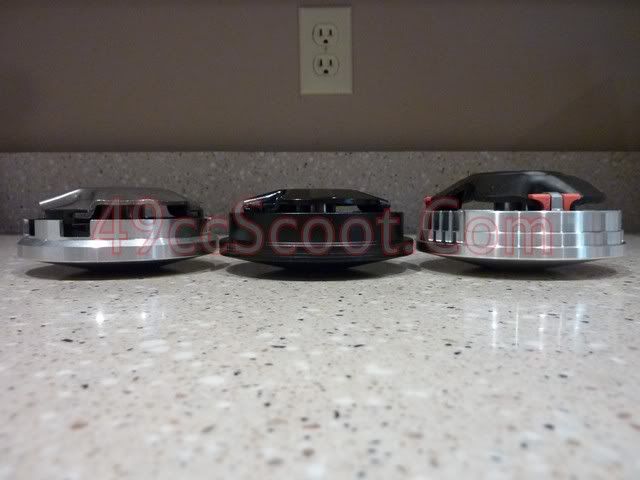 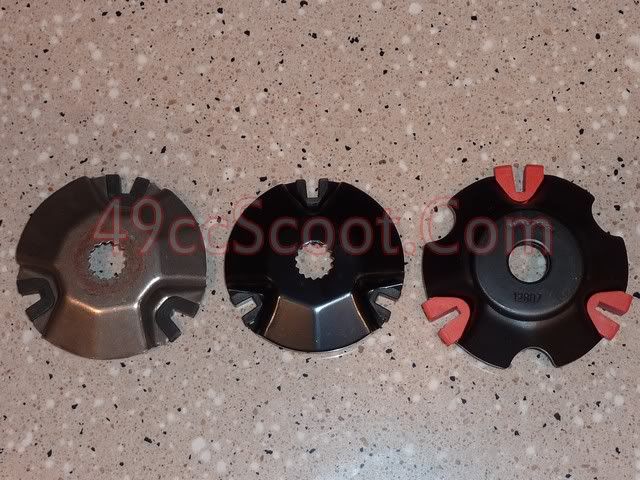 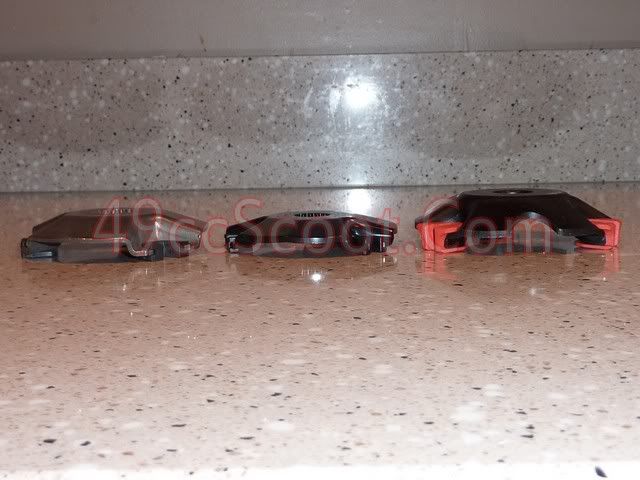 These pics show the back side of the movable halves. You can see that both aftermarket variators change up the layout of the 6 ramps that the rollers ride in. The stock piece lays them out as 3 sets of 2 ramps close together. Both the Hoca and the overrange space all of the ramps evenly. The aftermarket parts look like they would be better balanced and allow the rollers to apply a more even force to all areas. 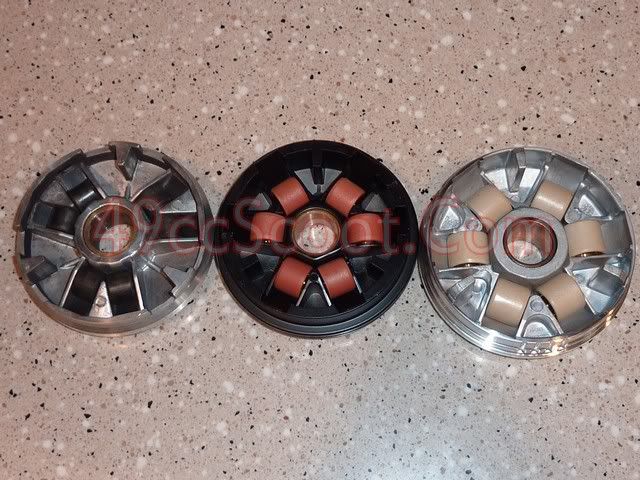 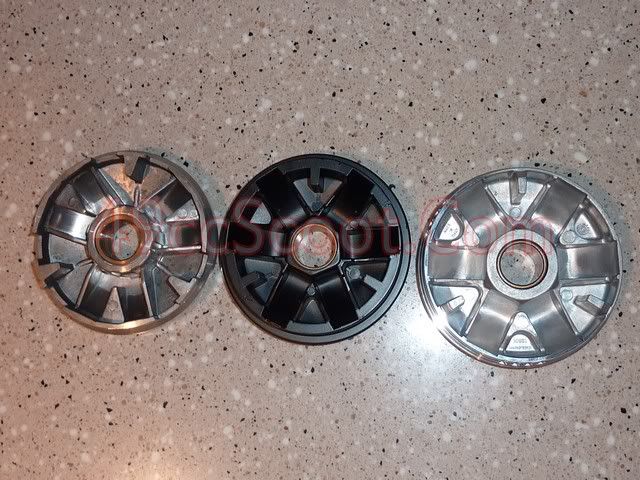 Here are some close-up pics of each. You should notice other changes to the ramp layouts, other than just spacing/positioning. They all use different angles and lengths within the ramps and ramp plates (shown earlier) to create different characteristics. The pics are ordered, stock, Hoca, Malossi. 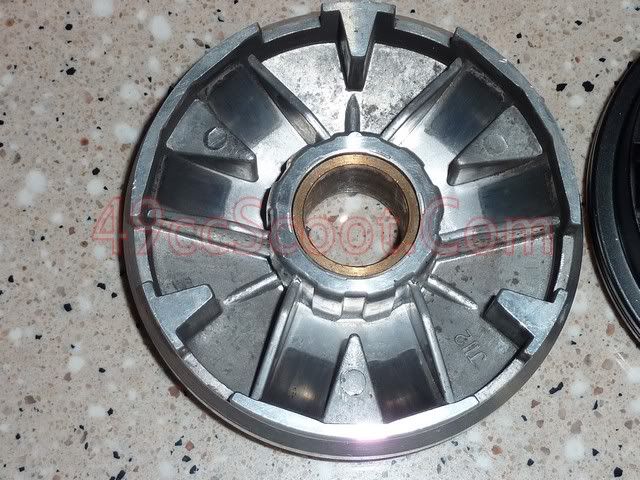 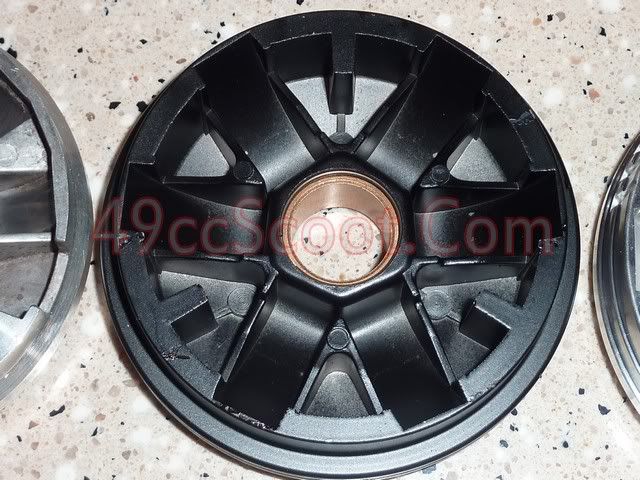 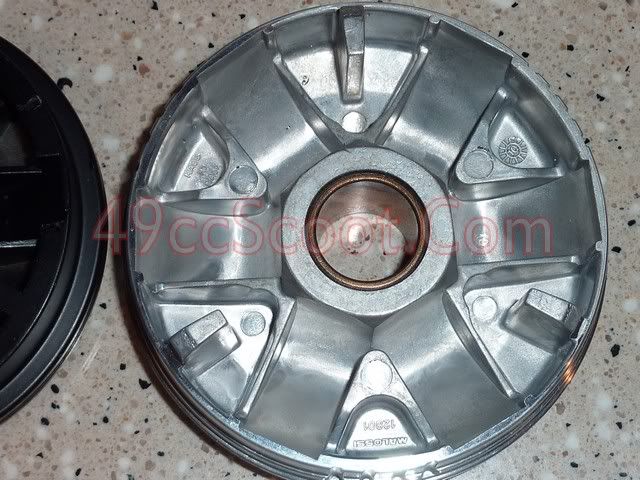 These pics show a crucial area of the ramps to get the most travel and speed out of a variator. The outermost end of the ramps. Look at the stock variator and how it ends the ramps short of reaching it's rear edge. Now look at the two aftermarket variators below it. They both continue the curve of the ramps all the way out to their edges to encourage max travel. 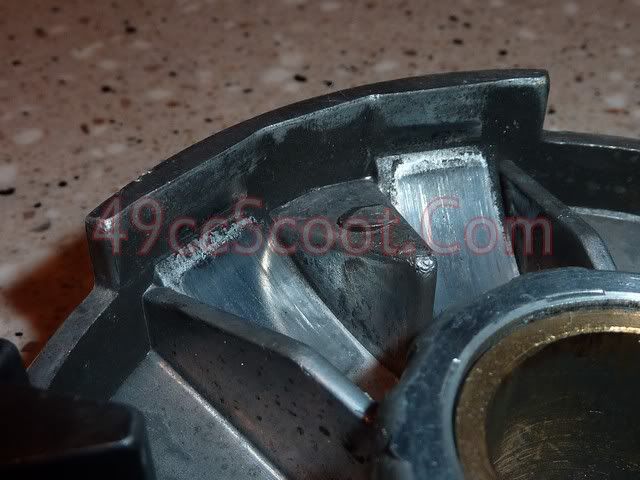 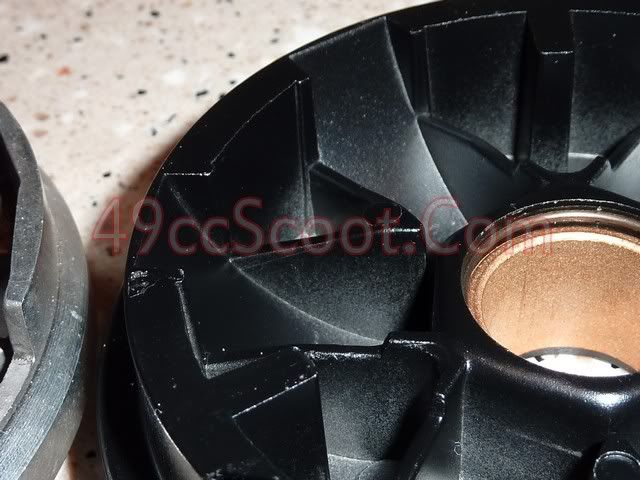 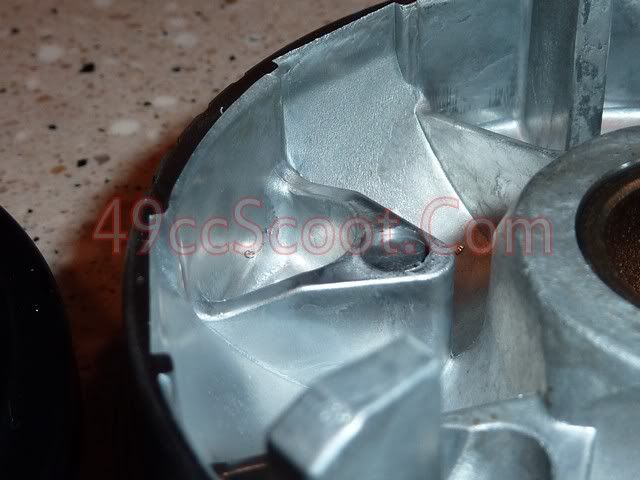 Here are more views of how the ramps are setup for more length in the aftermarket parts. 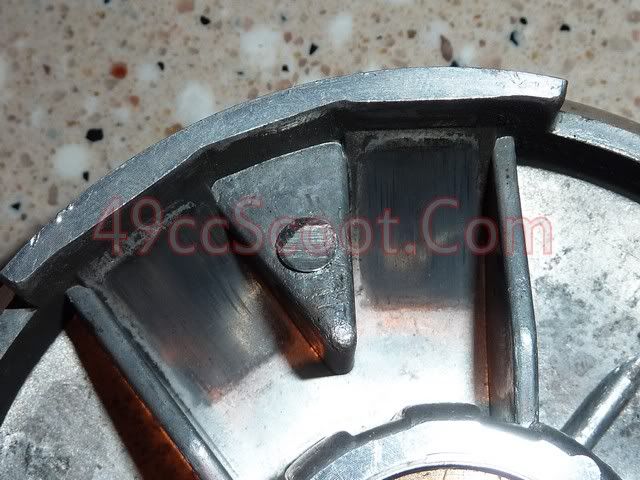 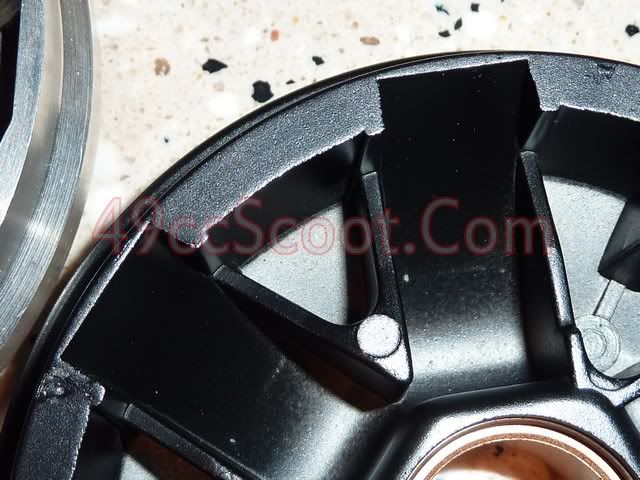 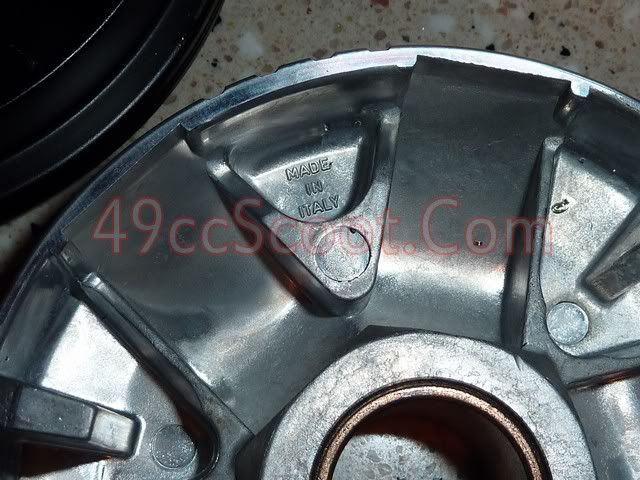 Here are a couple of views of the roller weights that each variator uses. The stock variator uses 15x12mm rollers. Hoca uses 16x13mm rollers. Malossi OR uses 19x15.5mm rollers. The larger rollers help enable the variator to have more travel. 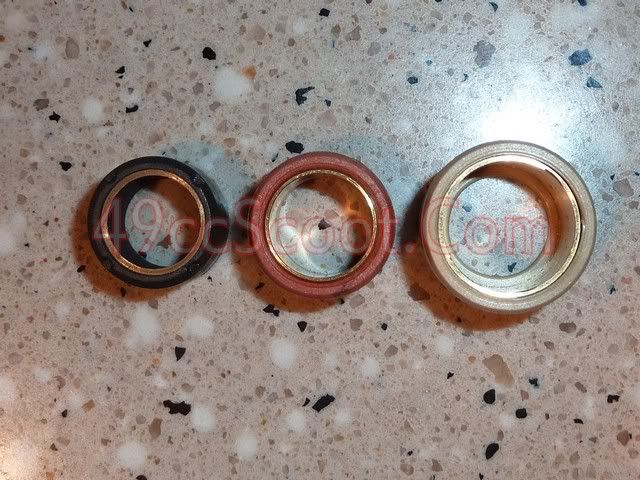 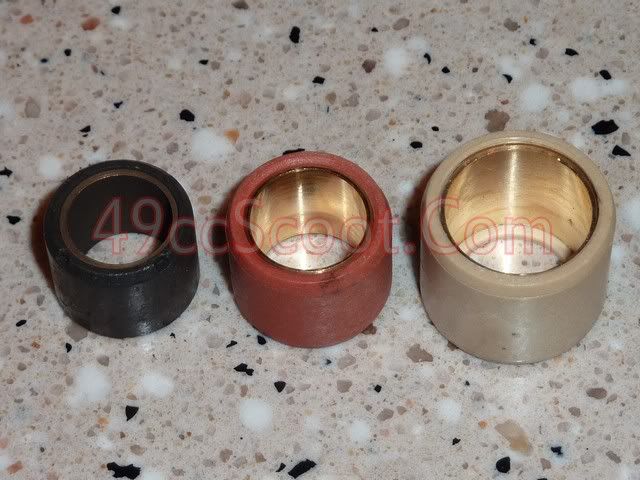 Here are the drive bosses for each variator. It's not hard to see a difference in length among the three. Stock measures just over 38mm long, the Hoca is 37mm, and the Malossi is 45mm. I almost always end up adding a spacer washer using the Hoca variator to give a bit more room for the belt to reach the center of the pulley. 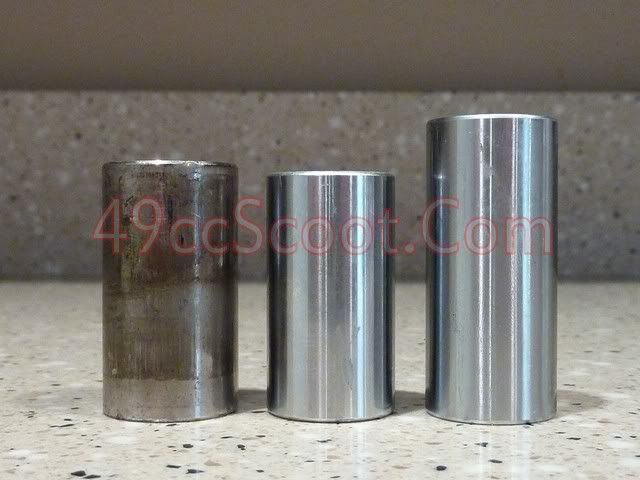 In this view of the drive bosses, you may notice a difference in outside diameter in the stock vs the aftermarket parts. Stock is 21mm OD and the others are 20mm OD. It's not much, but every little bit helps. The smaller the drive boss, the farther you can get the belt toward the center of the front pulley for a better "1st gear" as some of us call it. 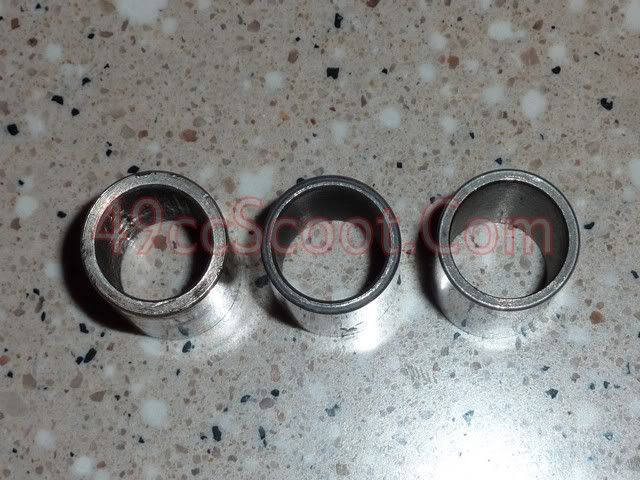 Now I'll move on to the fixed half of the front pulley. For these left to right is : stock, Stage6, Malossi OR. Stock has an OD of 95mm, the Stage 6 actually decreases from stock to 93mm, and the Malossi is 99.5mm. 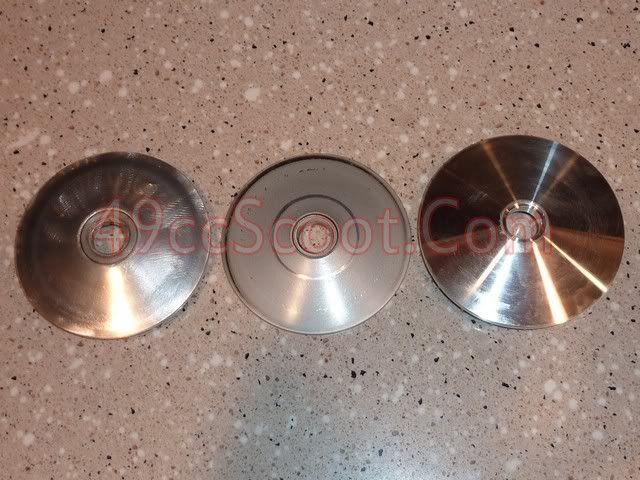 In the pic below, I've put the Stage6 drive face on top of a couple of pens to level it out for easier comparison, since it has no fan blades like the others. They all seem to have similar angles. The main difference I see is that the stocker has a much larger flat area in the center. The ones that keep their angle closer to the center usually perform better for initial takeoff when the belt is riding low in front. 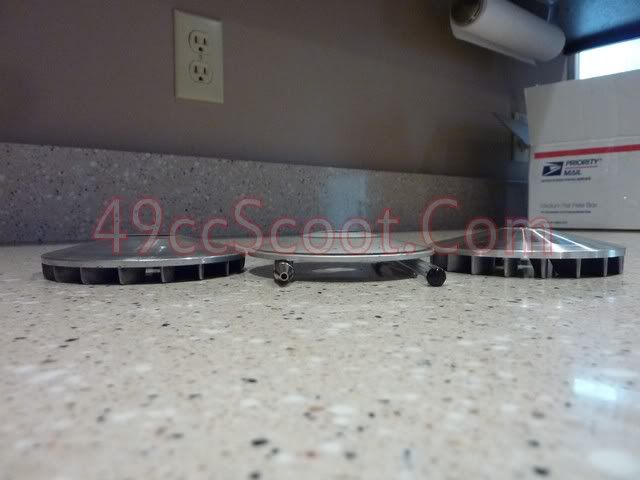 The front pulley should be covered pretty well, so let's look at the rear pulley / torque driver. Pictured on the left is stock and the right is the Malossi OR. I have Hoca rear pulleys around, but they measure out the same as the stock setup pretty much, only with a straight grooved torque driver like the Malossi instead of the stock dual-angle. If you aren't clear what this means, there are pics farther down. There's an obvious difference in outside diameter in stock and the OR here. Stock is 115mm and the over range is 128.5mm. While a larger front pulley allows for better high speed gearing, a larger rear pulley can provide better low speed gearing for stronger launches. This assumes the belt is able to reach it's outer limits. 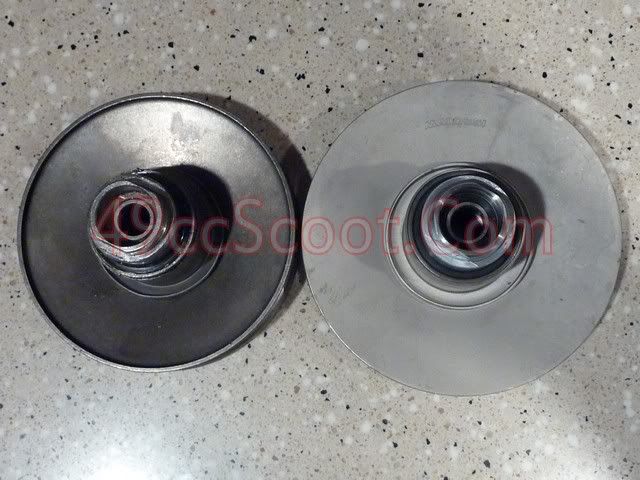 On top of just being larger overall, the over range pulley seems to be designed to make full use of it's diameter. In the top pic you can see that the stock pulley rounds out, where the Malossi pulley is flat all the way to it's edge. This should make for even more usable area. 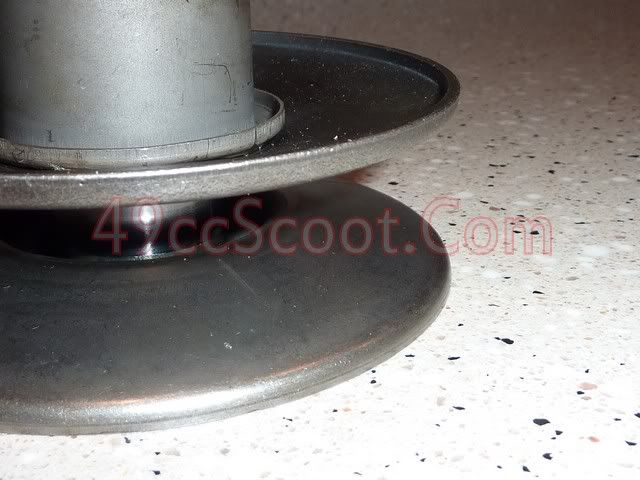 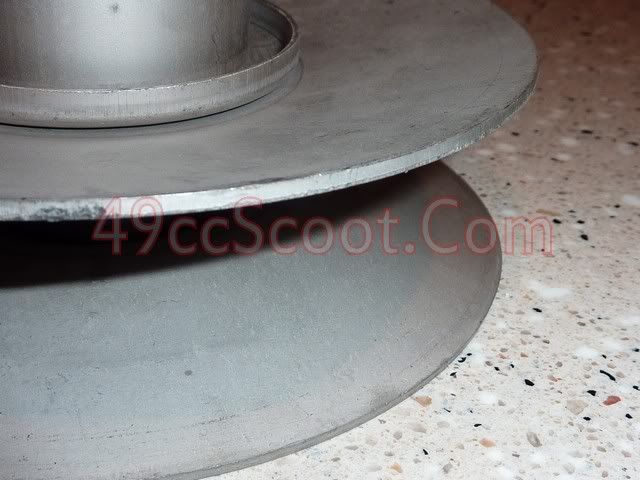 Here you can see both rear pulleys in their fully closed (top) and open (bottom) positions. The stock pulley leaves 15mm at it's outer edge when closed, while the OR pulley has 16mm of clearance there. When fully open, stock has 26.5mm between it's two halves at the outer edge, and the overrange has 30.5mm there. Stock moves a total of 11.5mm in it's full range. The over range moves 14.5mm. 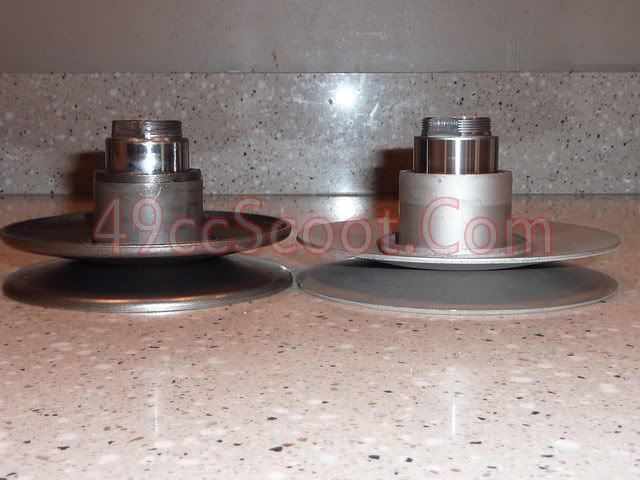 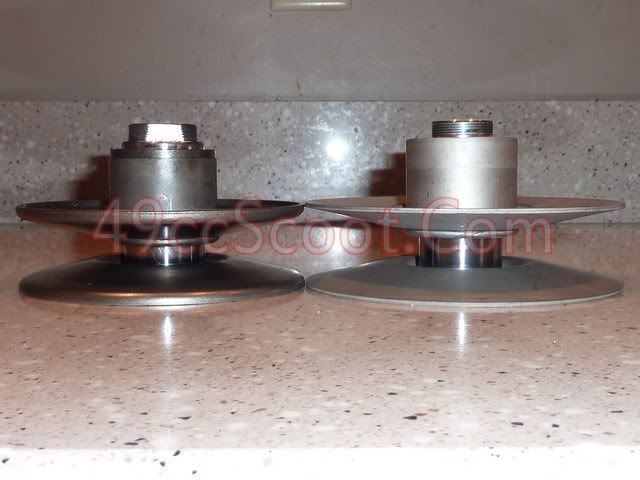 One thing to pay attention to if you get an over range torque driver is this cover, and specifically how it works with your torque spring. The Malossi uses a cover that's 1.5mm larger in diameter than stock (45mm compared to 43.5mm). This can cause some standard springs for the minarelli to bind. Ideally, the spring should be able to rotate relatively freely. Some companies, such as Kombat, offer springs specifically for the OR pulleys with a bit larger ID to fit better. Springs for the GY6 50cc / Honda Dio may also work with the OR pulley. 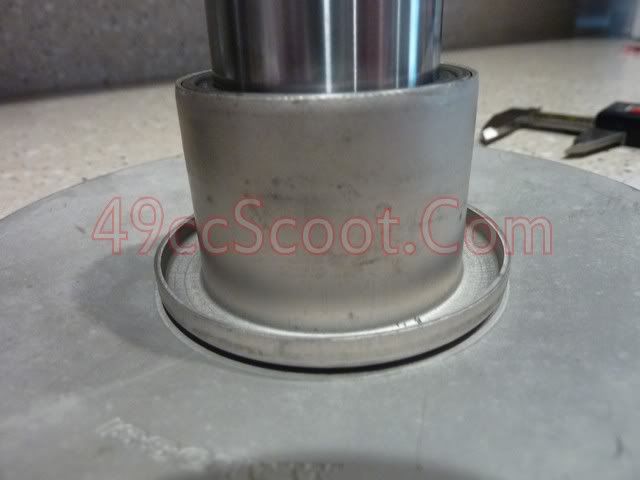 If you look under that torque driver cover / spring locating plate (which you will have to because the Malossi OR rear pulley comes without pins, grease, and o-rings installed), you'll see another difference. The stock torque driver (left) has a dual-angle groove or path. The Malossi, and most other performance torque drivers, has a single angle path. It uses 2 sets of these paths that are cut at different angles to fine tune your CVT. The straight paths allow for very linear performance. The dual-angle paths can be excellent for your average street scooter though. They start off at an angle that allows them to get the revs up easily, then transition to a different angle at speed to keep RPM lower for cruising. Great for streetability, not great for all out performance. 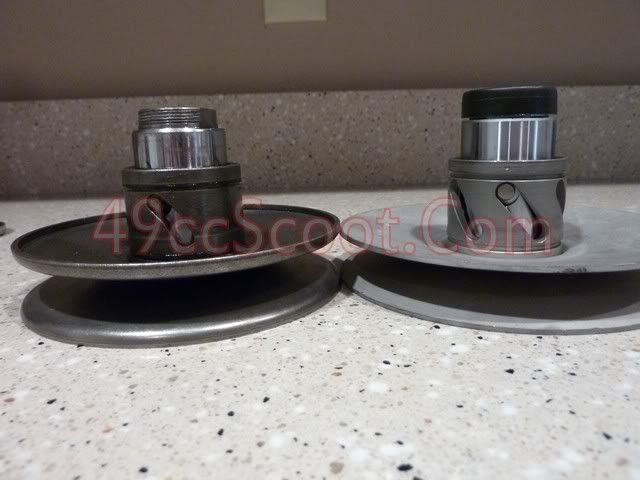 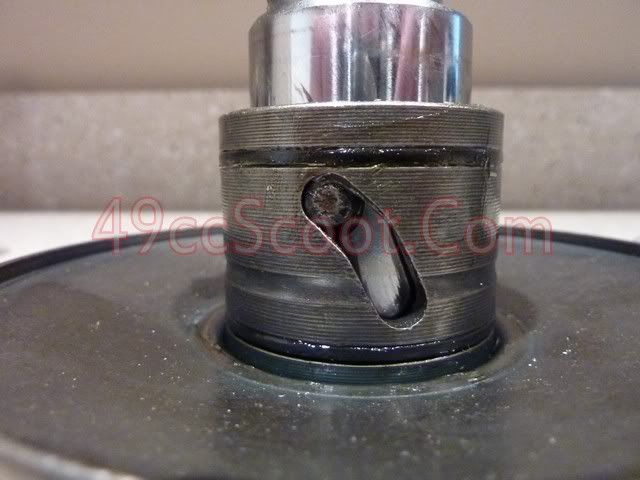 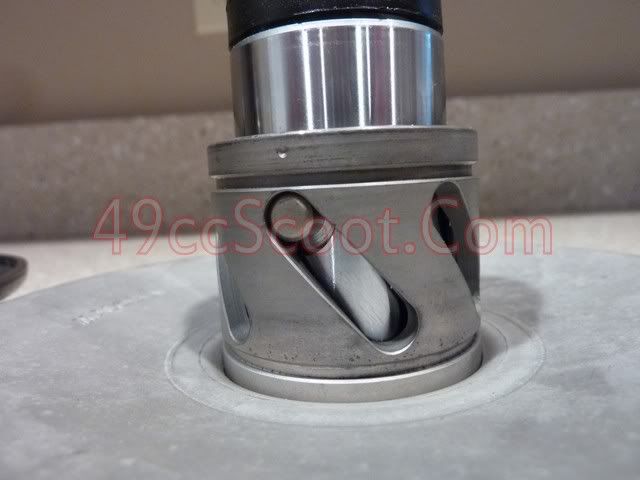 |
|
|
|
Post by 90GTVert on Feb 24, 2012 23:34:52 GMT -5
Most of the install of this kit is like working with any other CVT parts, so I'm mostly going to show what's a little different. I started on the install by removing the old CVT parts. If you still have electric start components, those need to go too. 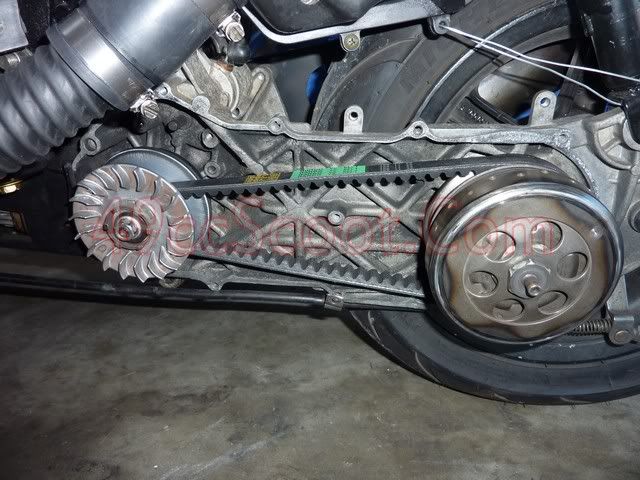 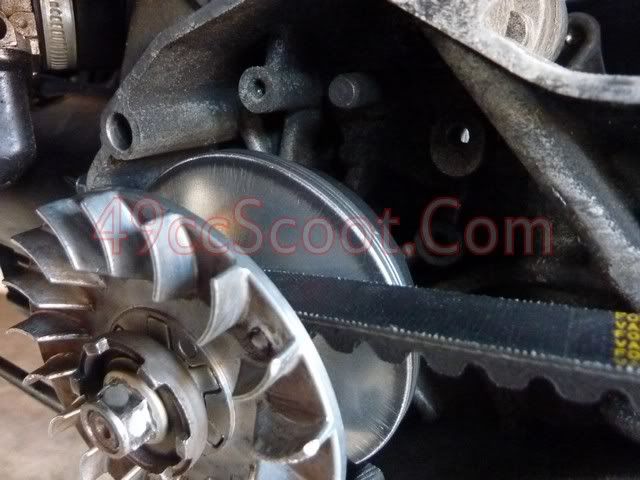 Once that was all gone, I needed to remove the starter boss so the larger variator would fit. I used a Dremel to cut through the boss and it came off easily afterward. 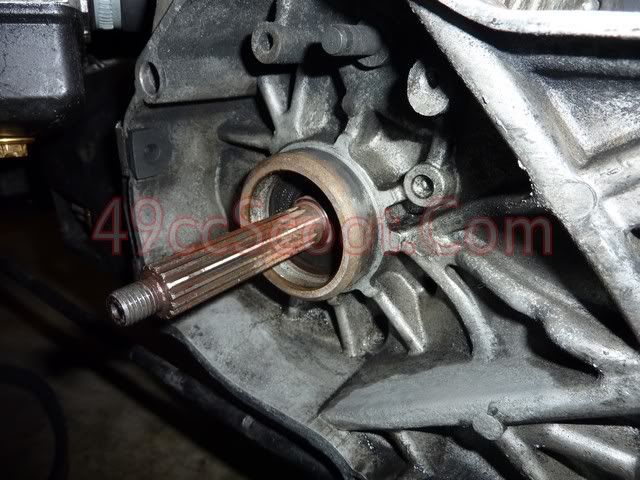 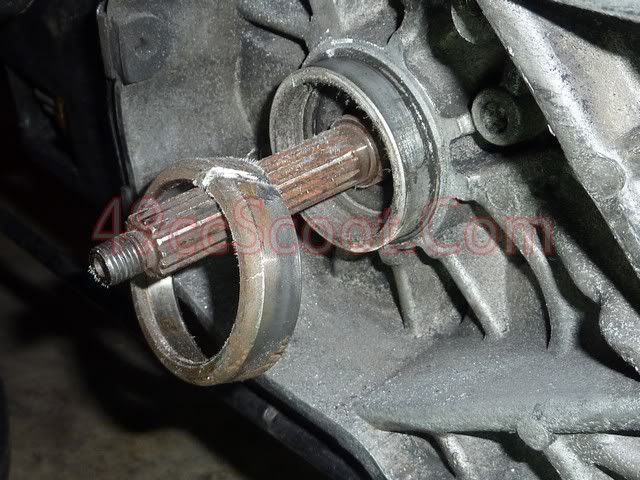 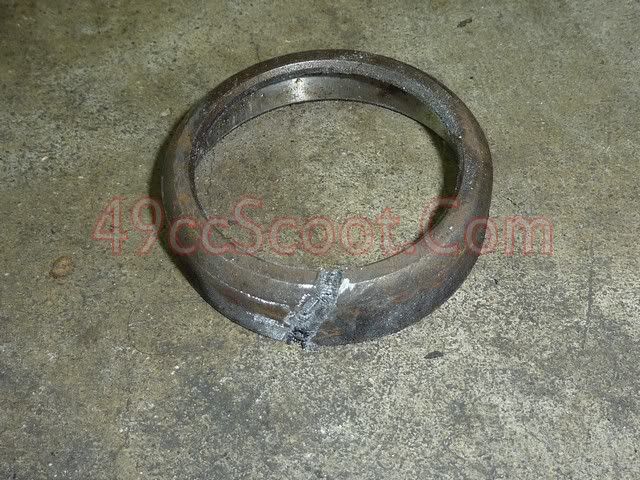 You'll need to replace the stock spacer that was behind the variator or starter clutch with the one included in the Malossi OR kit. 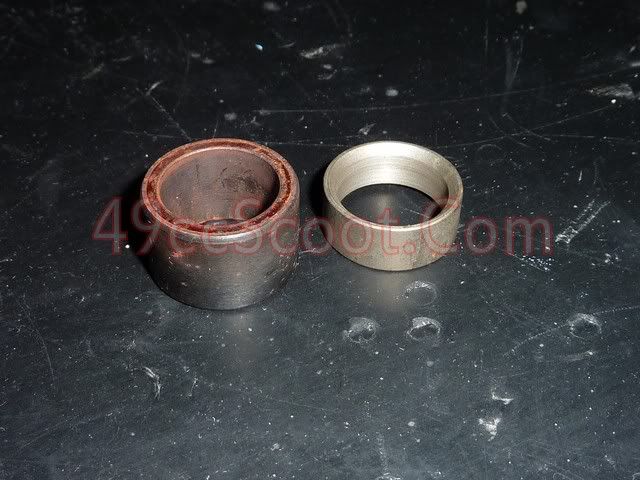 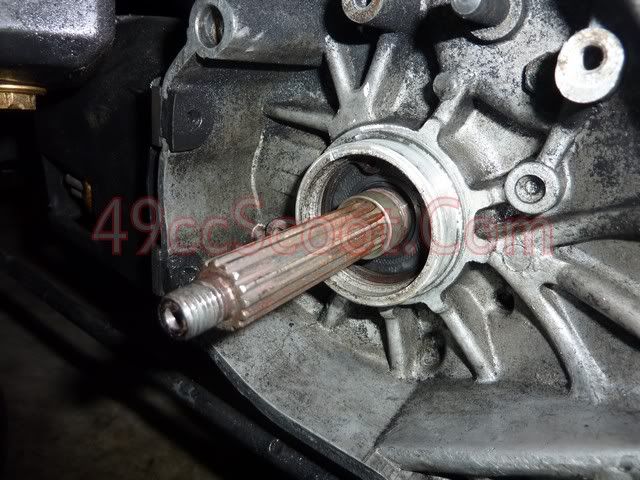 Once you get everything else set up, you may end up needing additional spacers to align the front and rear pulley. G-Force included 4 0.5mm spacers for this purpose. 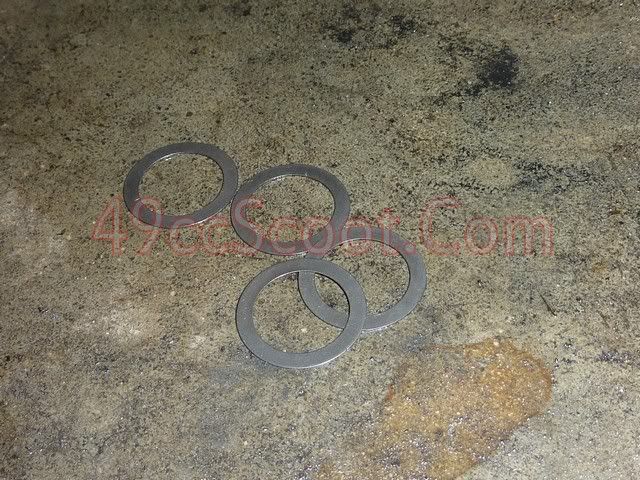 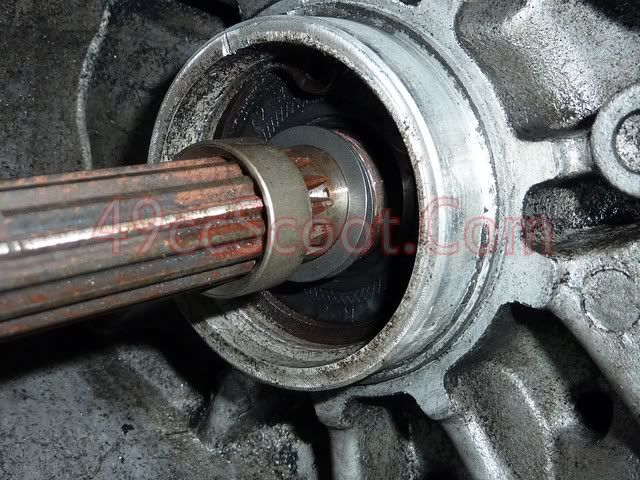 You'll have to choose a groove in the torque driver and assemble it all, along with your clutch and contra spring. Don't forget to put the orange o-rings supplied with the torque driver in place in their receivers and lube up the torque driver (I fill the slots and the smear a light coating around). The nut supplied with the Malossi requires a 34mm socket instead of the typical 38mm. The clutch looks small now, relative to the new rear pulley. 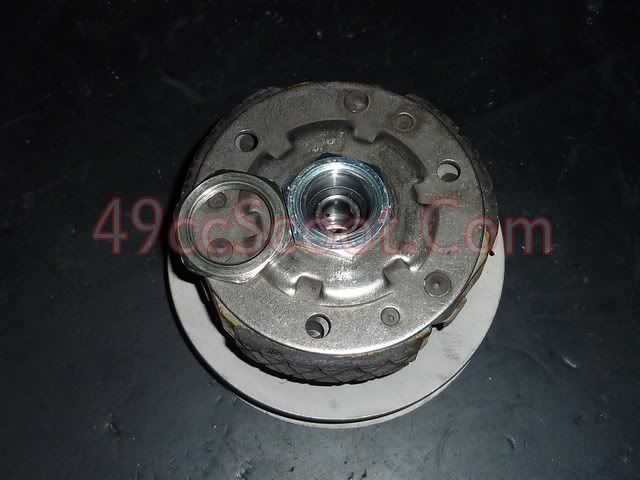 I found that I couldn't get the belt all the way to the center of the front pulley, riding on the drive boss, with the variator as it came. Close, but not quite. I used 1.5mm worth of spacers to get the right clearance, which essentially eliminated the groove in the variator fan. Make sure spacers that you use here are no larger than the drive boss. 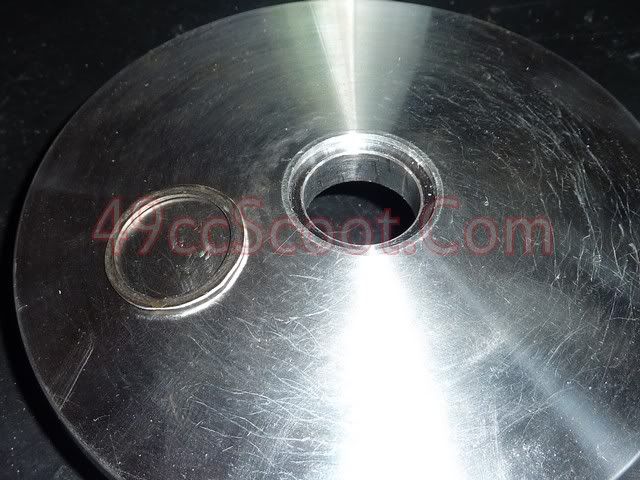 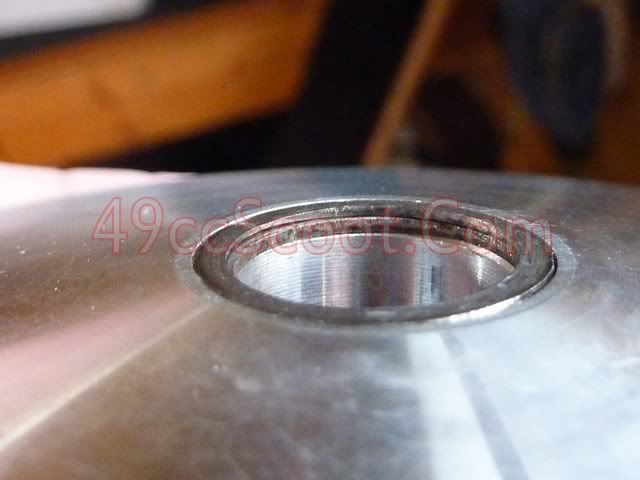 Finished assembly and marked the variator so I could see how far the belt traveled on test runs. 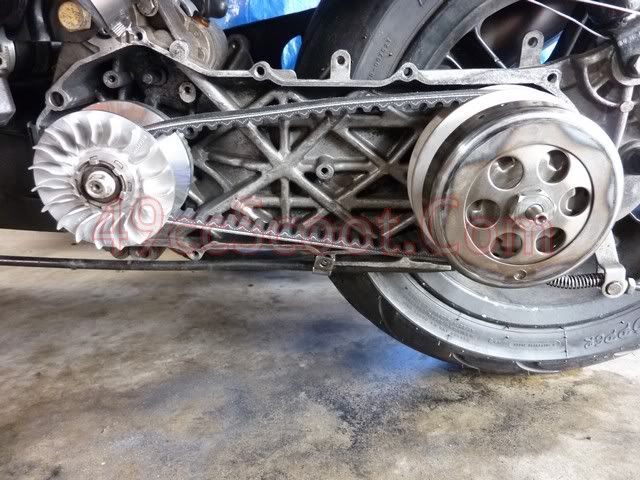 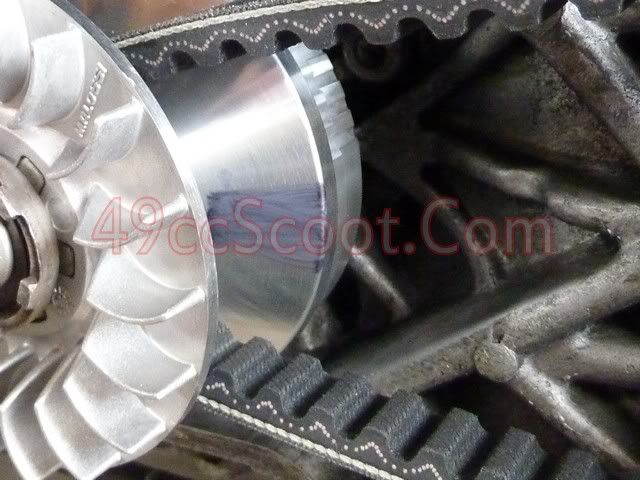 As you can see, not a lot of room for any larger pulleys in here. 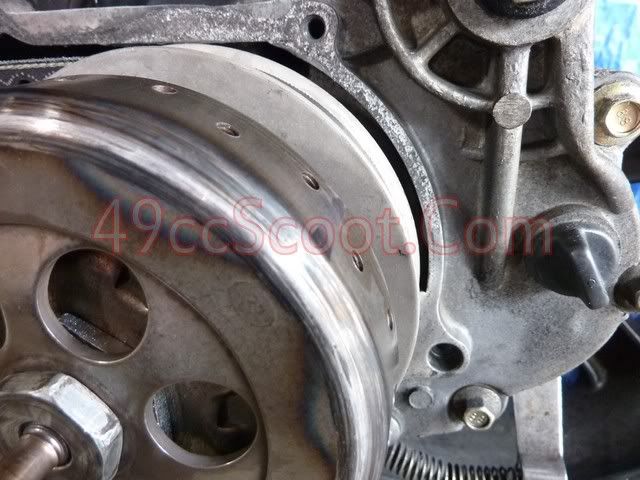 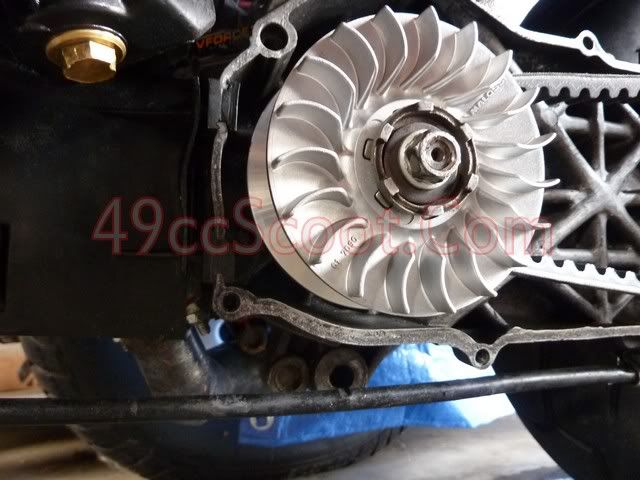 My initial guess was to go with the purple Maximum RPM 1,000 contra spring and a set of 5g roller weights. I changed nothing with the clutch from it's previous setup. The clutch worked well, just as before. The rest of the combo was way too rev happy. On an attempt at a first test run I saw the tach max out (15,000RPM) when I went WOT. Even 12,000RPM trying to just cruise back with little throttle applied. I included a vid, mostly because high revving 2Ts just sound good. Made no real power revving that high. Barely any belt travel there. 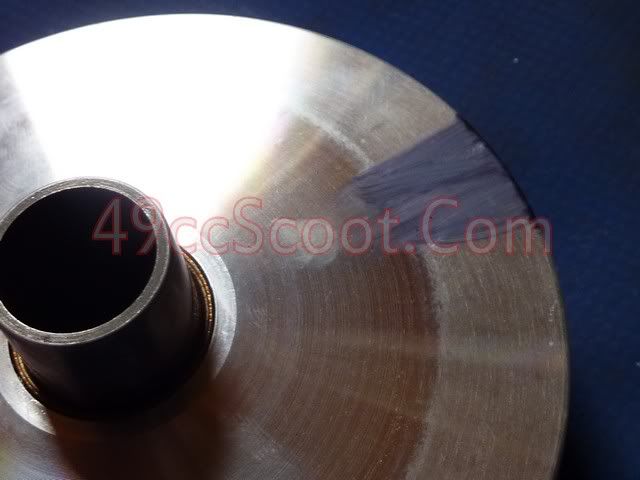 I swapped out the 5g weights for 8g weights and tried another test. It was better, but still revving out way too high. The 8g rollers were the lightest I had, so I swapped to a Naraku 1,000RPM contra spring for a GY6 50 that was softer than the 1,000RPM Maximum RPM spring. It fit well, and did the trick to get the revs down. Still using the 8g Dr Pulley roller weights, I got my first reasonably successful test run in. I was seeing a steady 10,500RPM or so on that pass. Pretty much where T1 likes to rev. It should handle a little more, but I think it's fairly close. Anything else will be fine tuning. I'm guessing 7.5 to 7.75g would do the trick if any change shows improvement. Below you can see the belt travel achieved. I was impressed for a quick run, not even maxing it out, with little setup time. I'm not sure if the lack of complete travel is normal for this system, related to my spacers added, or perhaps I just need to try and rev it out farther in "high gear". 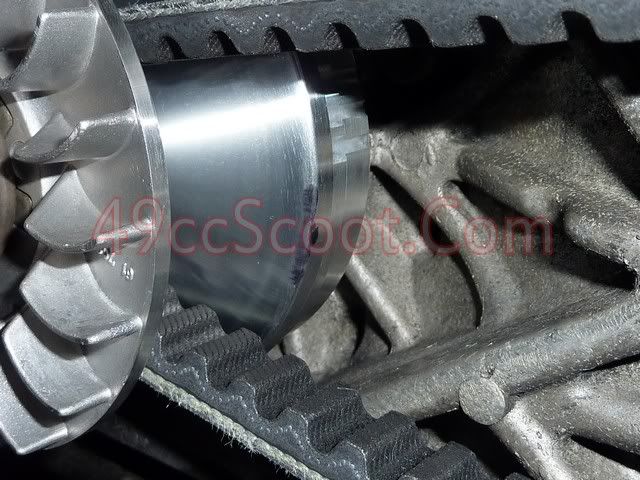 I have been impressed by this kit. It performs very well out of the box. My other performance variators are modded to really see their potential. I've spend a lot of time fiddling with this or that to even get the belt down on the drive boss up front without worrying about surpassing the limits of a normal variator's travel. I did add spacers here and there, but otherwise I just tuned it and it performed incredibly well... and there's still more left at least for top speed. I did 66MPH on the test run shown, sitting up. On a previous run with the old CVT I saw 60MPH in the same conditions. It would be nice, but I really don't expect my absolute top speed to go up that much. I'll find out sooner or later. Acceleration off the line is improved as well. That large rear pulley does it's job and gives you a deeper starting "gear". I wouldn't say any results are dramatic vs the last setup, but it was all modified and tuned aftermarket parts. Lots of time was spent on it to get it to work well. This just came out of the box and kicked ass pretty much. The biggest drawbacks of this kit to me are price, at around $400 non-sale price from G-ForcePowersports.Com, and the lack of electric start. I already had no e-start on T1 to remove some weight from the crankshaft, but I do like it on most of my more regularly ridden scoots. The Hoca trans parts I was using totaled up to under $200, but again they took a lot of additional time and effort to setup with good results and can't offer the increased "gear" range. I'm happy with it, and I'm looking forward to really seeing what it can dol |
|
|
|
Post by jmkjr72 on Feb 25, 2012 0:15:49 GMT -5
i know the stage 6 over sized varaitor is 105mm but i dont know if they make it for the large spline
but its nice to see the full deal it looks like with the adly case i would need about a 910 17 but they dont make anything in the 900 untill you get to 20 mm wide
maybe if i decide to go with a full over range ill have to give them a call and see what they can come up with
|
|
|
|
Post by 90GTVert on Feb 25, 2012 1:03:05 GMT -5
I searched and asked around about the Stage6 OR long before I got this kit. They don't make it for large spline.
It's definitely worth talking to G-Force. They're very helpful and it seems like they really know their stuff.
|
|
|
|
Post by stepthrutuner on Feb 25, 2012 1:31:58 GMT -5
:wtg: Oh, man that was sweet! That trans is set up right. Incredible performance for the passenger weight (that's a complement, Brent). :clap:
|
|
|
|
Post by 190mech on Feb 25, 2012 6:06:23 GMT -5
Looks like a top quality kit,heck you cant even hear it shifting up!
Bet the belt holds up a lot better too!! :thumb:
|
|
|
|
Post by 90GTVert on Feb 25, 2012 7:46:17 GMT -5
I hope the belt holds up well John. When I was really breaking them it was with my maxed out CVT setup. When I had no room left on the vari and was getting the best top speeds. I modded another Hoca vari and stock fan less aggressively and stopped having so much trouble. I think it'll be OK. That's prob the coolest part of the kit. Like I said above, I've been through spending time filing faces, and agonizing over how many washers I could use without having the vari separate too far and cause a failure, and even tried to do my own homebrew OR setup at one point. I got good results, but this got better results mostly just slapping it on. I added 2 spacers to clear the belt at rest/idle, otherwise it's just out of the box. Incredible performance for the passenger weight (that's a complement, Brent).  Ohhhh, callin' me fat are ya? haha I agree, it is quite quick considering I think I'm sneaking back up on 300lbs.  It'd prob be really quick with a normal person, half my size. |
|
|
|
Post by 90GTVert on Feb 25, 2012 10:13:59 GMT -5
I tried to make a top speed run today, but the weather isn't too cooperative and I've got some work to do I think. It's 30 degrees cooler today than yesterday, which doesn't really matter other than it killed my motivation. What does matter is a 15MPH wind with gusts over 30MPH. I got up to 68MPH about half tucked on a quick little stretch, and those crosswinds were not cool. Trying to take the turn coming up to my house at full speed the wind was pushing me at traffic while I was leaned. "OK, I've had enough." lol
The work I need to do is checking the carb. I think there's a float issue. I'm noticing some seeping around the carb and when I started it up it poured smoke. Had to start it with the throttle open to get more air in there and clear it out or it would die. Gotta fix it to keep it starting, but also wanna be sure it's not screwing up the tune at all. I need all the help I can get if I wanna beat my previous 72MPH.
|
|
|
|
Post by stepthrutuner on Feb 25, 2012 12:12:05 GMT -5
I feel quite sure you'll eclipse your old mark, though probably at the expense of the near perfect street missile setup you now have. Taking those spacers out might be a good place to start. Of course belt width (though probably not an option for you ATM) would be a big factor. Me suggesting trans mods to you is kind of like someone telling the late D. Earnhart how to work a car in the draft. Lol.
|
|
|
|
Post by 90GTVert on Feb 25, 2012 13:10:44 GMT -5
I think you're right. The spacers will need to go for max speed. I don't think it's gonna push that last bit to the edge of the variator otherwise. I'll prob pull 'em out before I actually try to top it out, and it'll prob still take off harder than it did before the OR. I just like the "free" feeling you get when the belt isn't binding in it's low gear all of the time. The clutch works like it should and take off improves for multiple reasons.
|
|
|
|
Post by 2strokd on Feb 26, 2012 10:04:14 GMT -5
As everything "seats" in, belt mostly you will gradually see more improvements. Check your rear pulley. Mine needed some work to open ALL the way with a bigger clutch 112, but much. Ive also noticed i am able to run a much lighter spring than i was used to running with other setups.
|
|
|
|
Post by jmkjr72 on Feb 26, 2012 10:34:14 GMT -5
yeah i know with the stage 6 stuff they came up with a new line of realy realy light contra springs for there overdrive set up
|
|
|
|
Post by 90GTVert on Feb 26, 2012 11:27:34 GMT -5
Yeah, before I ran the stiffest spring I had and 6g sliders. Now I've got a 1,000RPM contra and 8g rollers.
|
|
vvtr
Scoot Enthusiast
  
Posts: 243
|
Post by vvtr on Feb 26, 2012 11:56:01 GMT -5
very good  looks great as well. it's nice to see that someone is selling something that actually works lol! |
|


 It'd prob be really quick with a normal person, half my size.


