|
|
Post by 90GTVert on Aug 9, 2024 20:01:33 GMT -5
I wound up taking all of the panels off. I wanted to access the fuel tank and see how to run hoses. It turned into a whole thing. 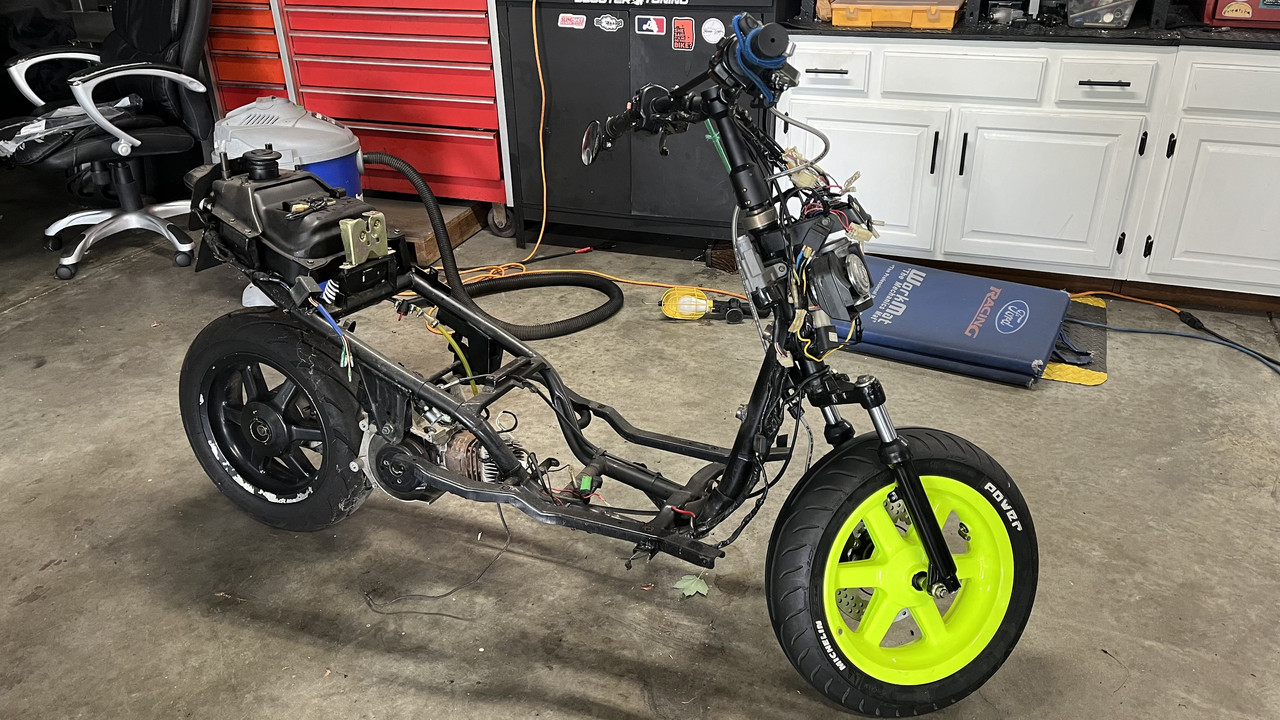 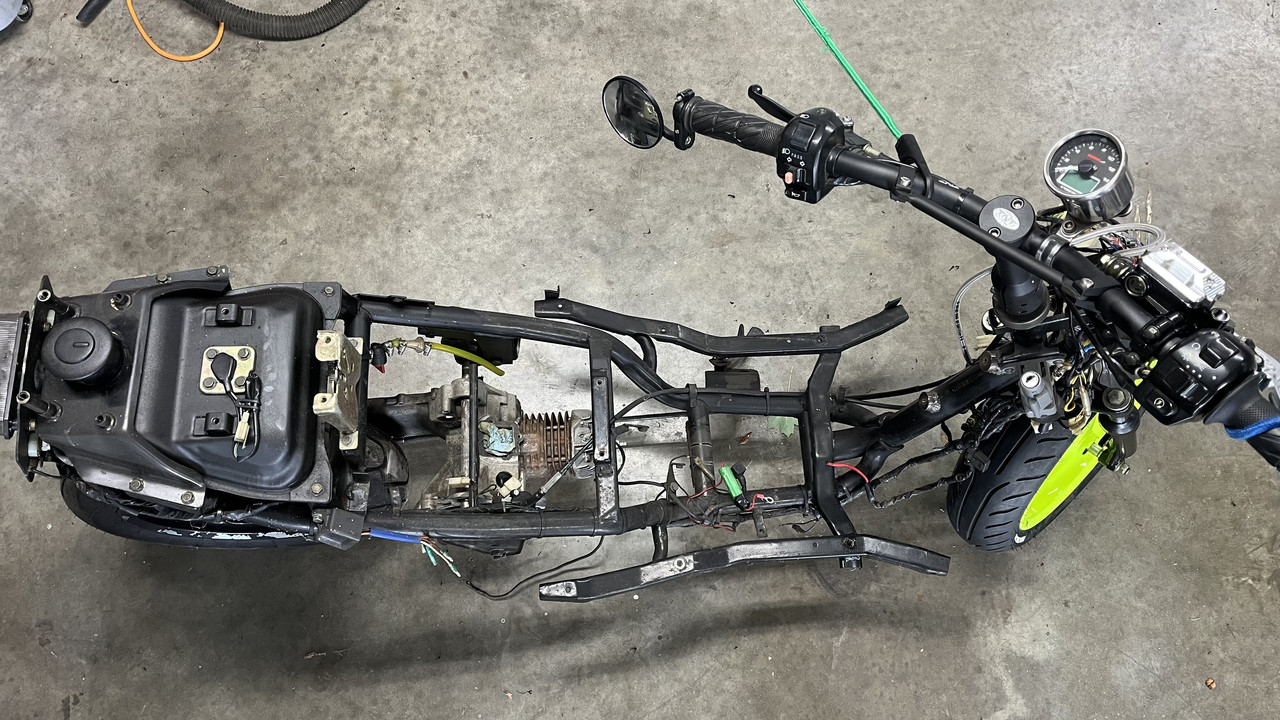 I pulled the fuel hose off of the tank and nothing came out. Walked away and a few minutes later there was a puddle of 11 year old fuel and oil in the floor. I guess the old mix clogged something up. 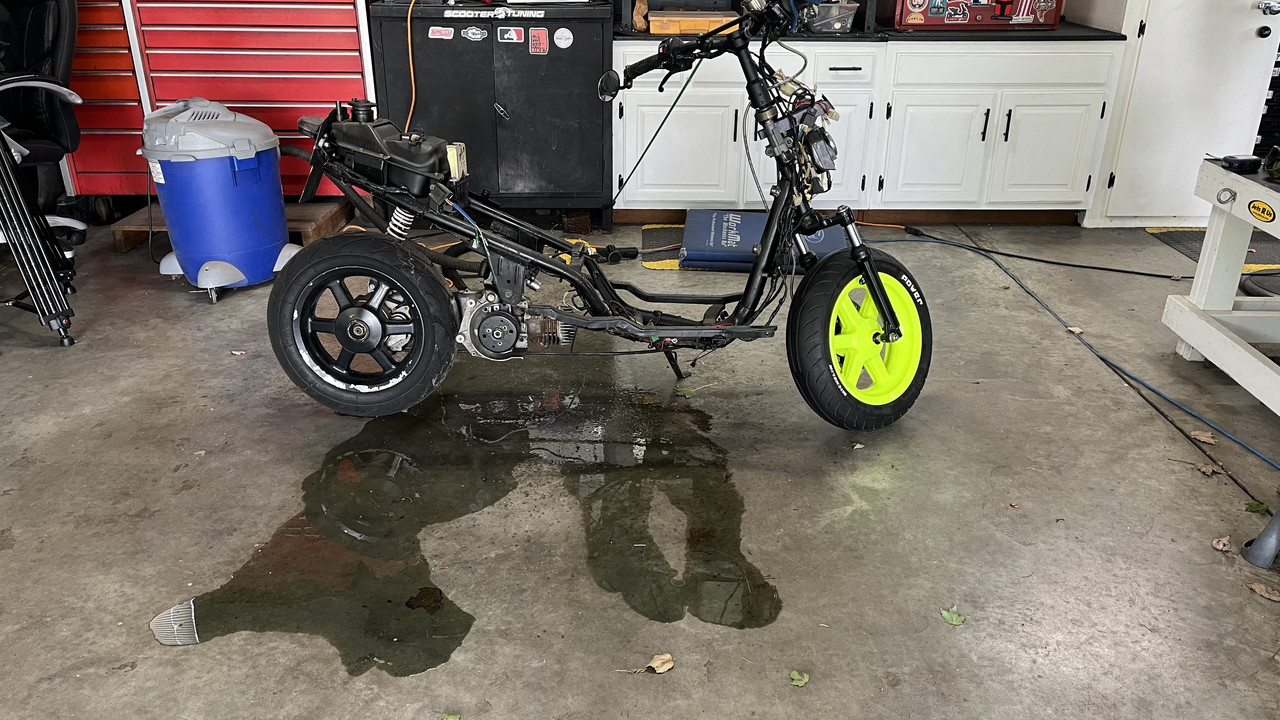 I cleaned that mess up, then figured I might as well wash the frame a bit. It was dusty and covered in dead spiders. Removed a "Green Light Trigger" as well. When I used to ride this thing around town, there were a couple of lights that would not switch till I got the big magnet to mount under the scoot. Later I learned that you can contact the town and they may be willing to adjust some sensors and that actually worked for me. These days I ride more in the daytime and it's not so much of a concern. This is what I did to bypass the petcock the first time I ever bypassed one. Didn't like it that way much now. 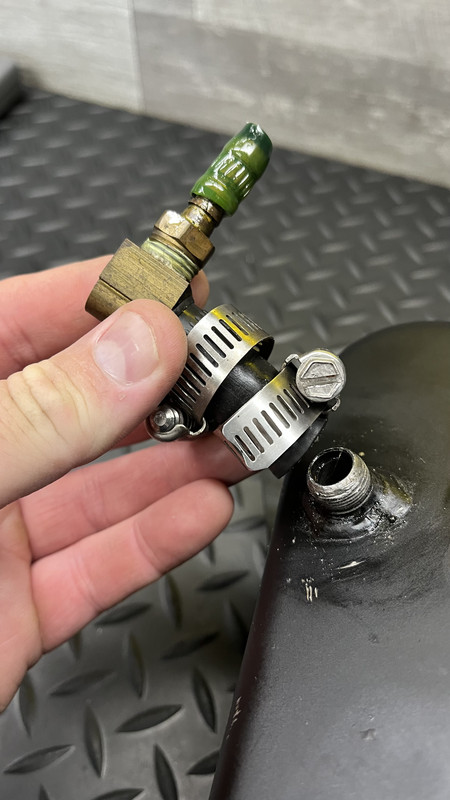 I had tried to run some sort of tap over it I guess, and it didn't work. 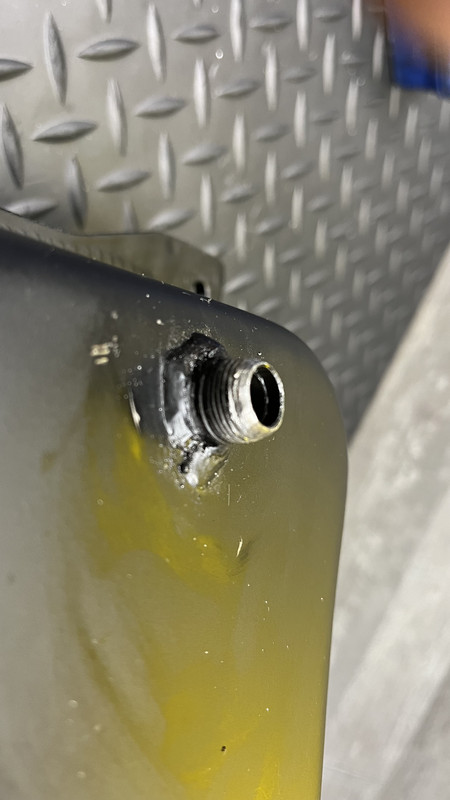 I tapped it on the inside to 1/8" NPT. I definitely didn't wash the tank out thoroughly and grind some of the bung area off because threads were better deeper in. That would be dangerous and silly. I'm sure I'll hear some shtuff whenever this winds up on YouTube because I used JB Weld on the pipe fitting. I left it off of the first few threads. The threads in the tank seemed a bit brittle so I thought it was good insurance. I got the fitting very tight so I don't know that it was needed. Oh, I also ran a 4.5mm drill through the fitting before it went in. It was maybe 3.5mm before. 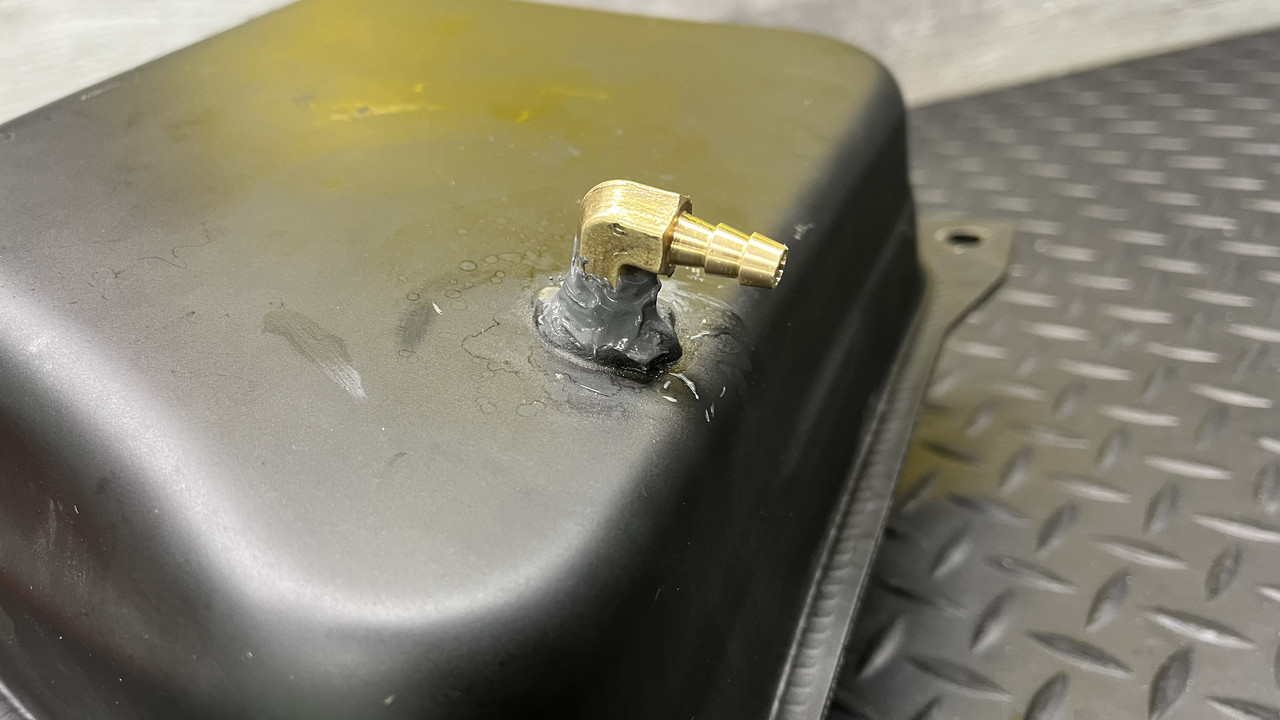 I got a couple of parts from ScooterTuning.Ca. I've tried to be cheap on this reiteration of T1, but I spent a good bit of time looking at Chinese gauges and none of them made me happy. It's hard to find reasonably sized gauges that will go to 14,000RPM and beyond. When I did, they aren't that well reviewed and it's not clear how you would get temperature input on the ones that did seem to have the option. Many mentioned not being that bright and I do like to film and see my gauges for RPM or other data so that's a problem. I could use the Koso tach, but I'd prefer to have one instrument cover more functions. I've used Trail Tech Vapors on 4 of my scoots now. They're really good gauges so I haven't strayed, but I just wanted to try something different if I was going to spend the money to have a quality multi-gauge unit, so I went with Stage6. It appears that it does fuel level and volts as well as speed, RPM and temp. I believe it has 2 temp inputs. Not sure yet if one can be an EGT or if it's limited in range for coolant and CHT. I at least want to have coolant temp, especially since I've never had radiators behind stuff before. 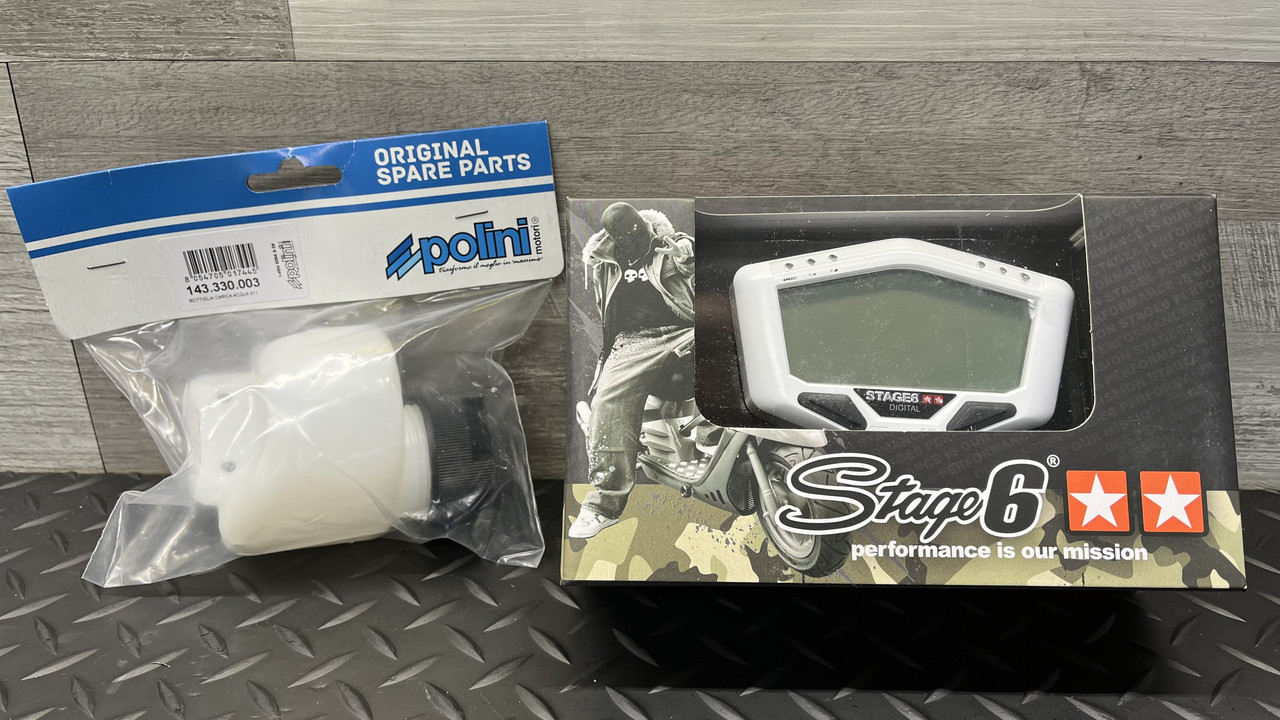 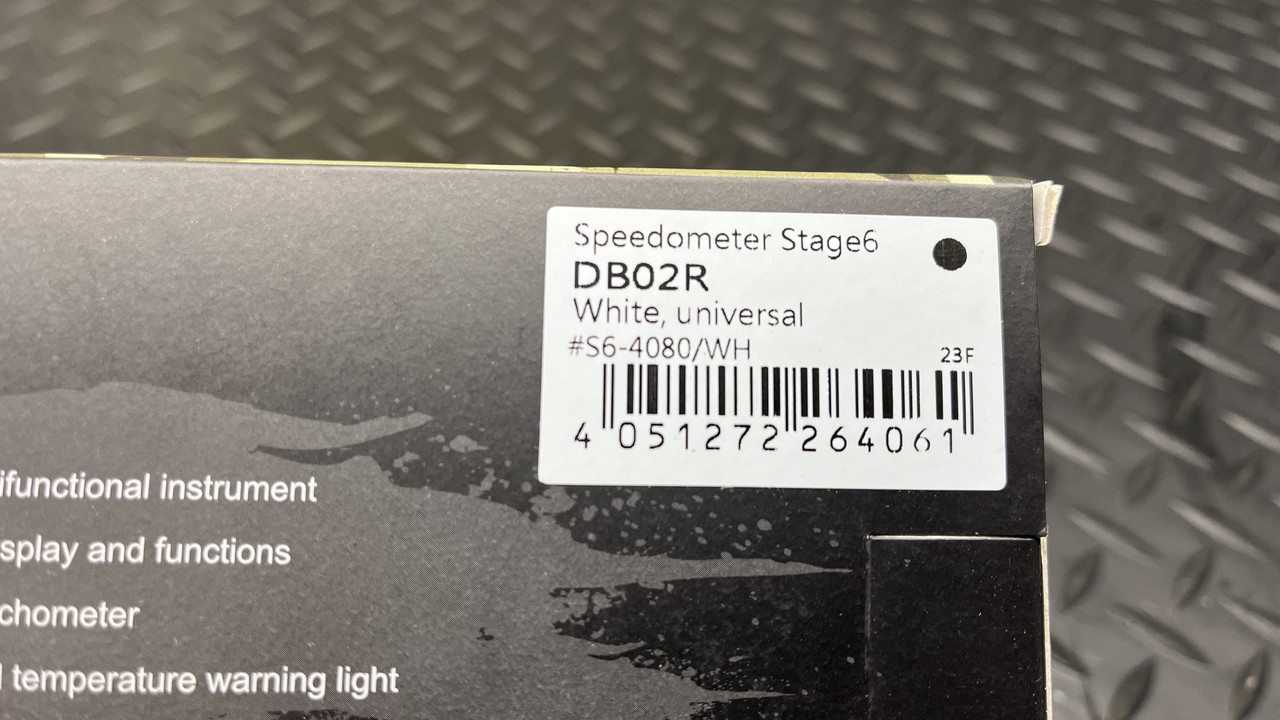 I made up a bracket for the expansion tank. 99% of the time, the tank is useless for me. I like having one though because if I see coolant pushing into the tank and/or it's pressurized, then I know that I've got sealing troubles. 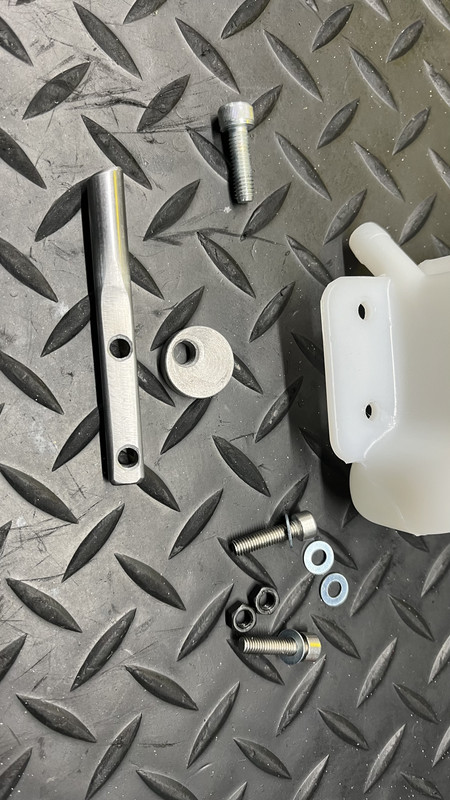 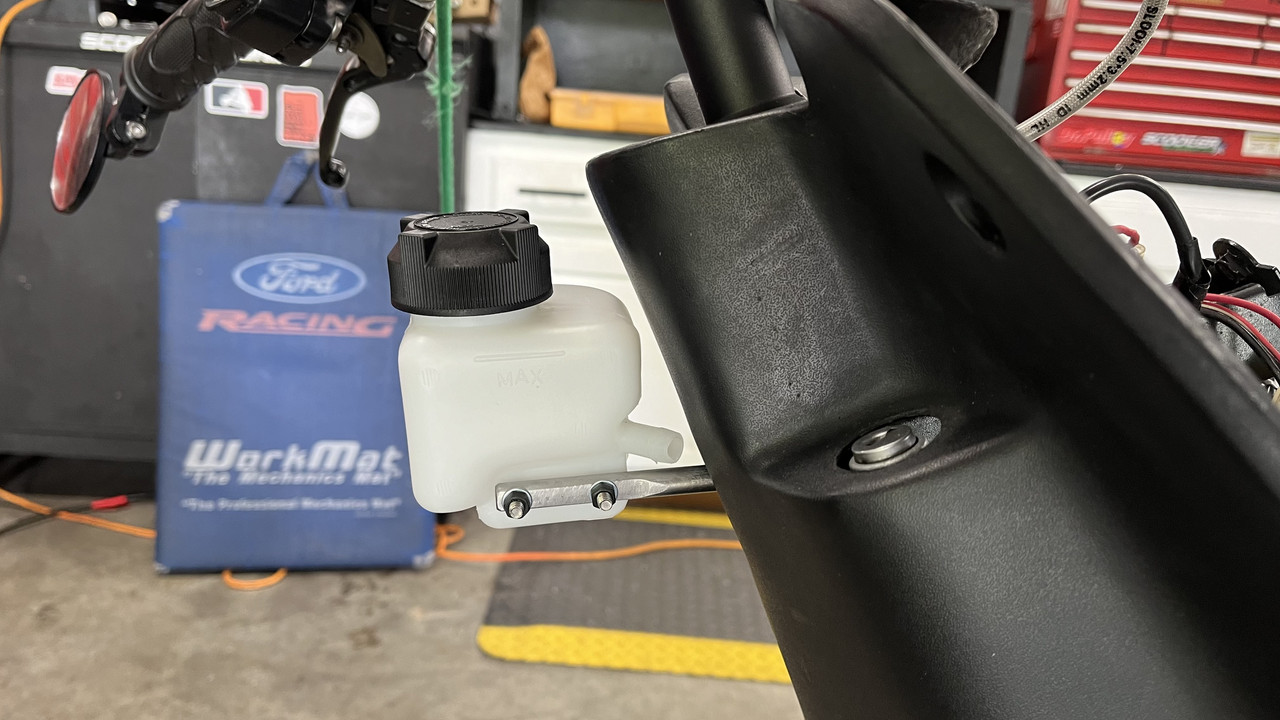 |
|
|
|
Post by aeroxbud on Aug 10, 2024 0:43:18 GMT -5
|
|
|
|
Post by 90GTVert on Aug 13, 2024 19:03:09 GMT -5
I checked the lean angle on the side stand and it was less than 6°. I was looking for more like 10-15°. I stuck some 1" square tube under each tire and then it was 11-12° and looked good to me, so I cut 1" out of the stand and it wound up at 11° and seemed much more stable on the stand. That was the max I could remove without redesigning the kickstand a bit. 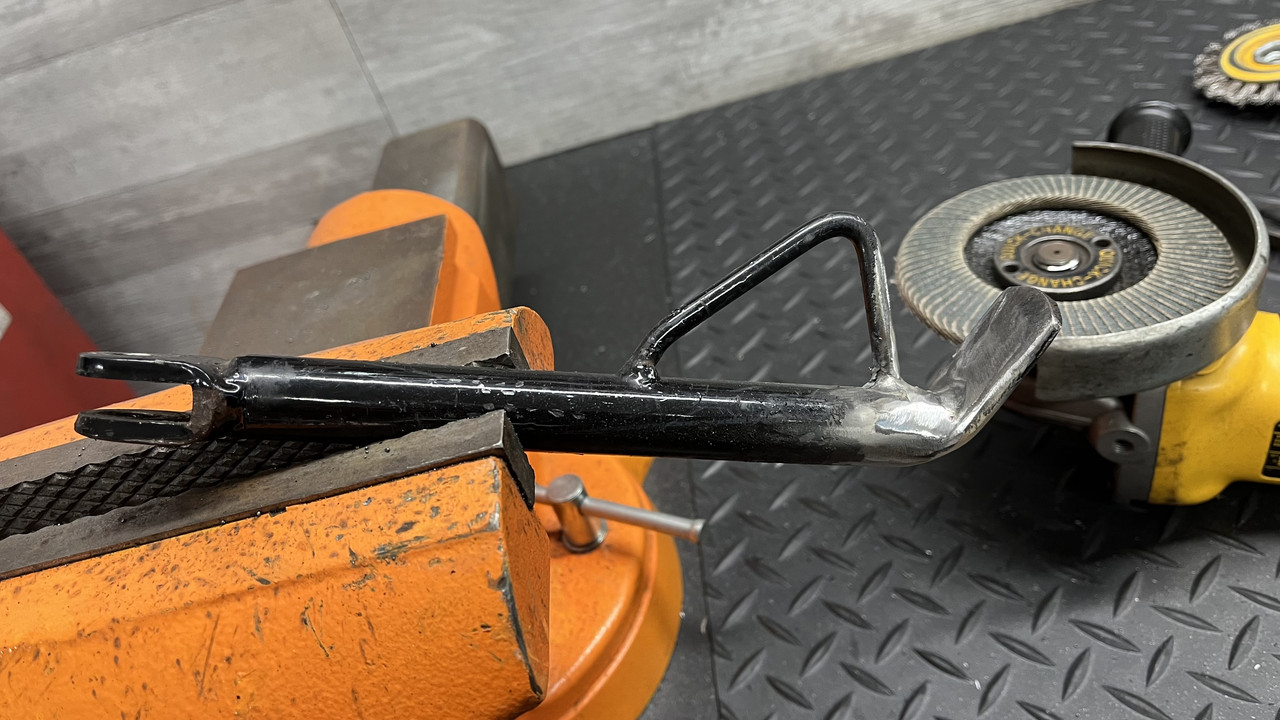 I pressure tested the fuel tank and my tapped and epoxied fitting to be 100% sure that it's good to go. It held briefly at 9psi, with no leaks around the fitting or anywhere (after tightening the fuel sender bolts a little more). Then it blew the PVC out of the rubber sleeve in my tester. I clamped it tighter for a re-check and pumped it up to 10psi to press my luck and it blew the glued PVC cap off of the PVC pipe. OK. We'll call that good. 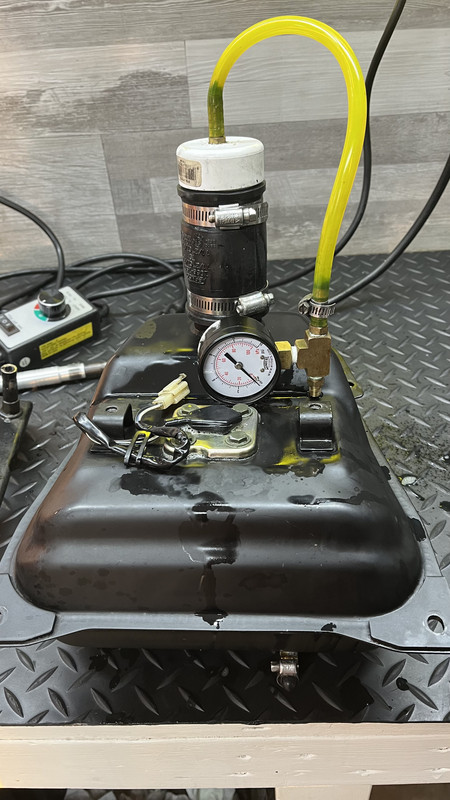 I wanted to mount the LED TRX 450 ATV tail/brake light quick and simple, so I welded a couple of washers to the existing rear bracket. 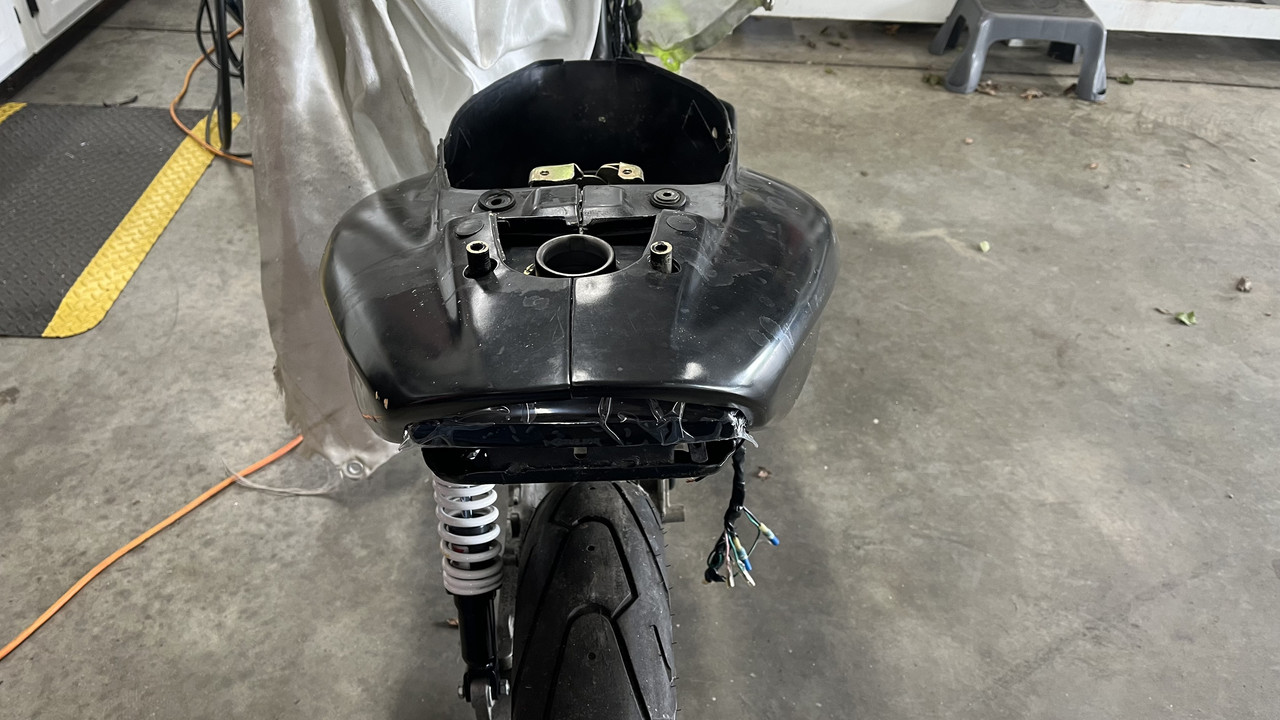 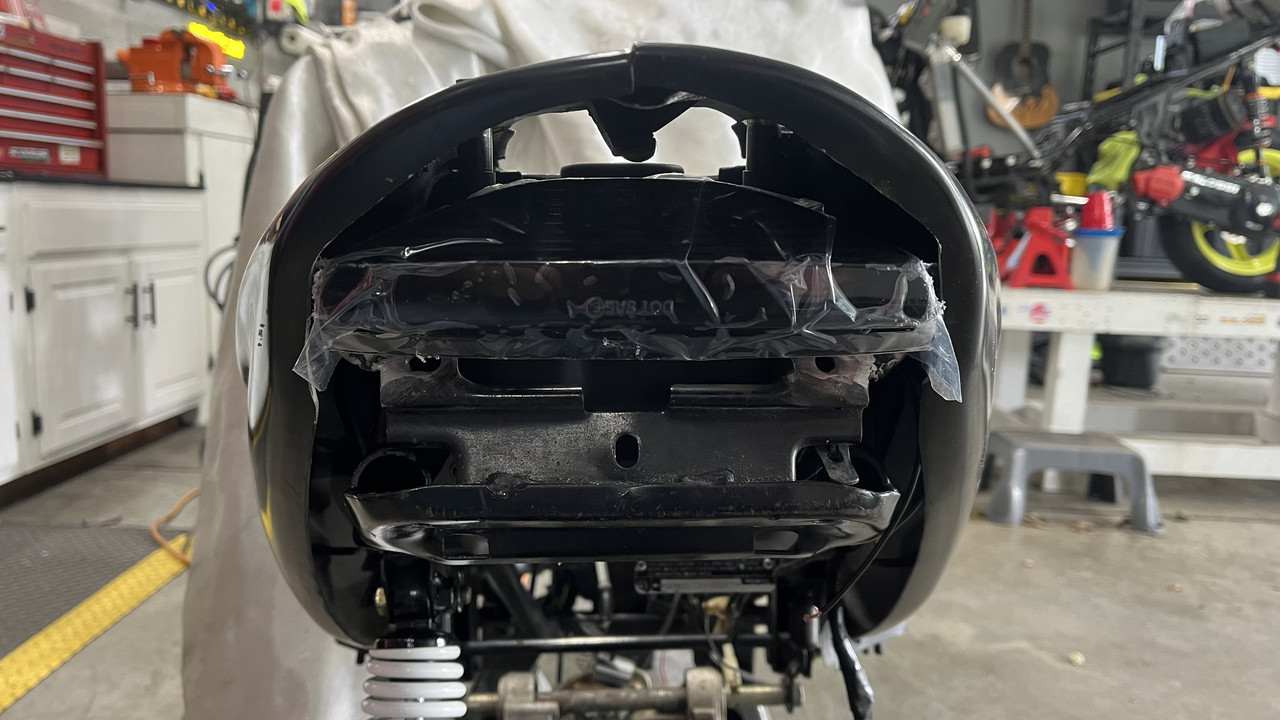 It looked fine standing or above it, but I hated it looking straight at it because of the gaps around it. I'm not sure how many people will be 2.5' eye level with it, but I wasn't happy with it at all. I thought maybe just use a simple plate like I had on it with the previous light, but I didn't like it that much either. 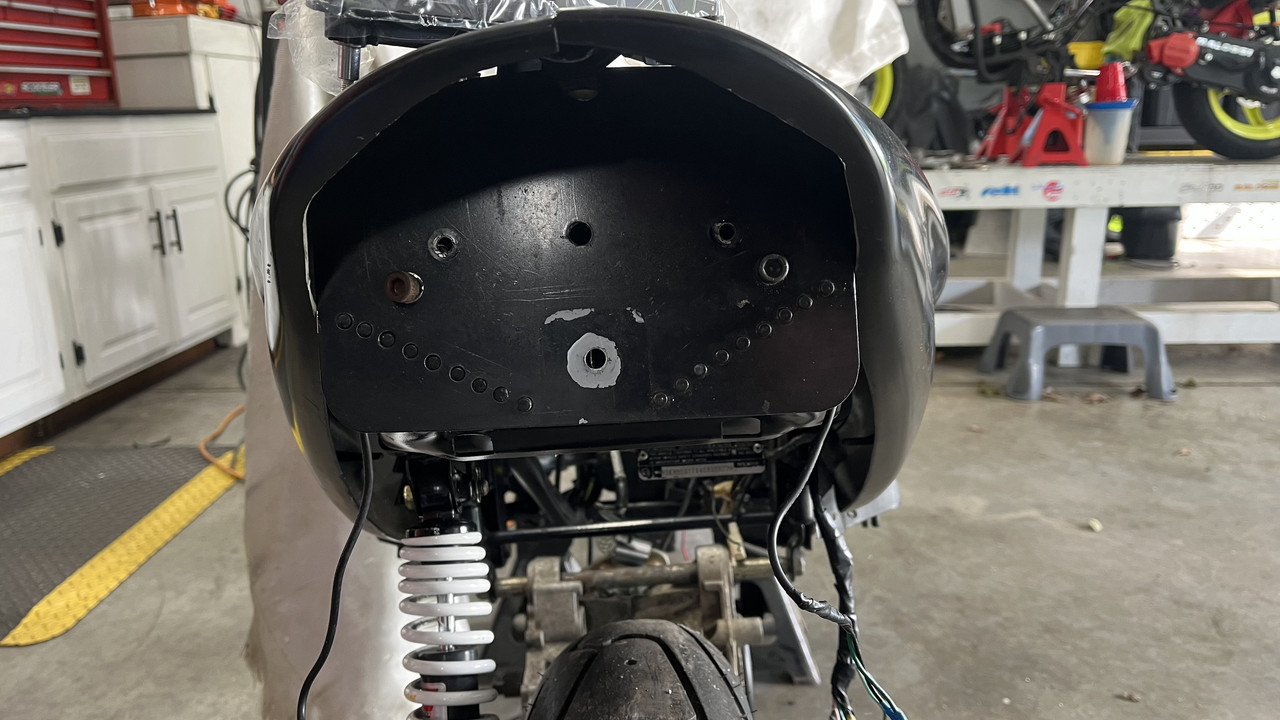 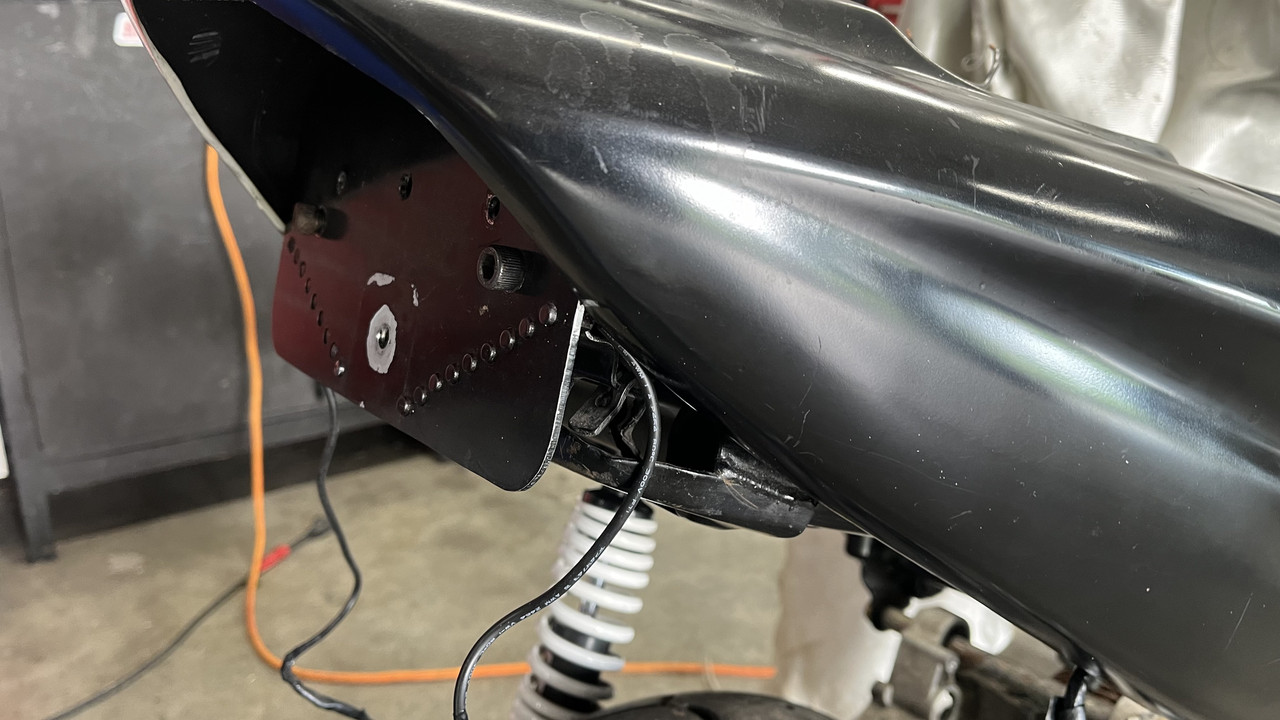 I really wanted something cleaner, that conformed to the frame better. I thought about getting a new mudguard and stock tail light and modifying that stuff because it would be easier... but parts are harder to find than when I last worked on this thing and I didn't want to spend much money either. I spent a long time hemming and hawing over the idea of an involved metal project. All I wanted was a simple clean light and rear assembly. Good sense was shunned and I dove into it, cutting the stock modified rear bracket off and making a whole new rear piece. 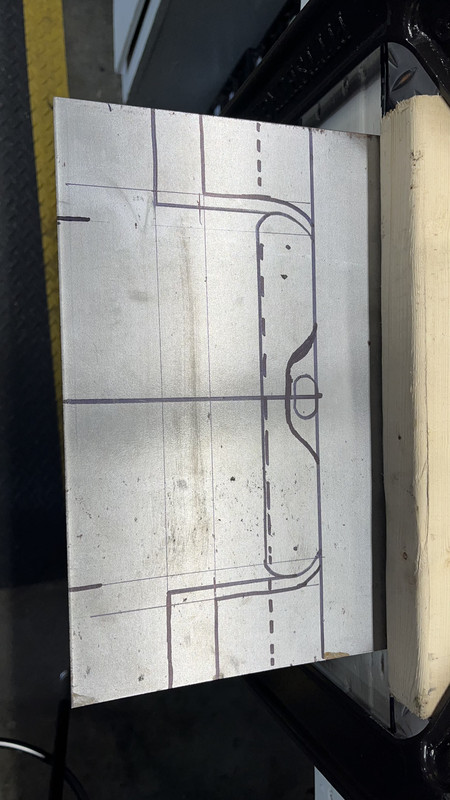 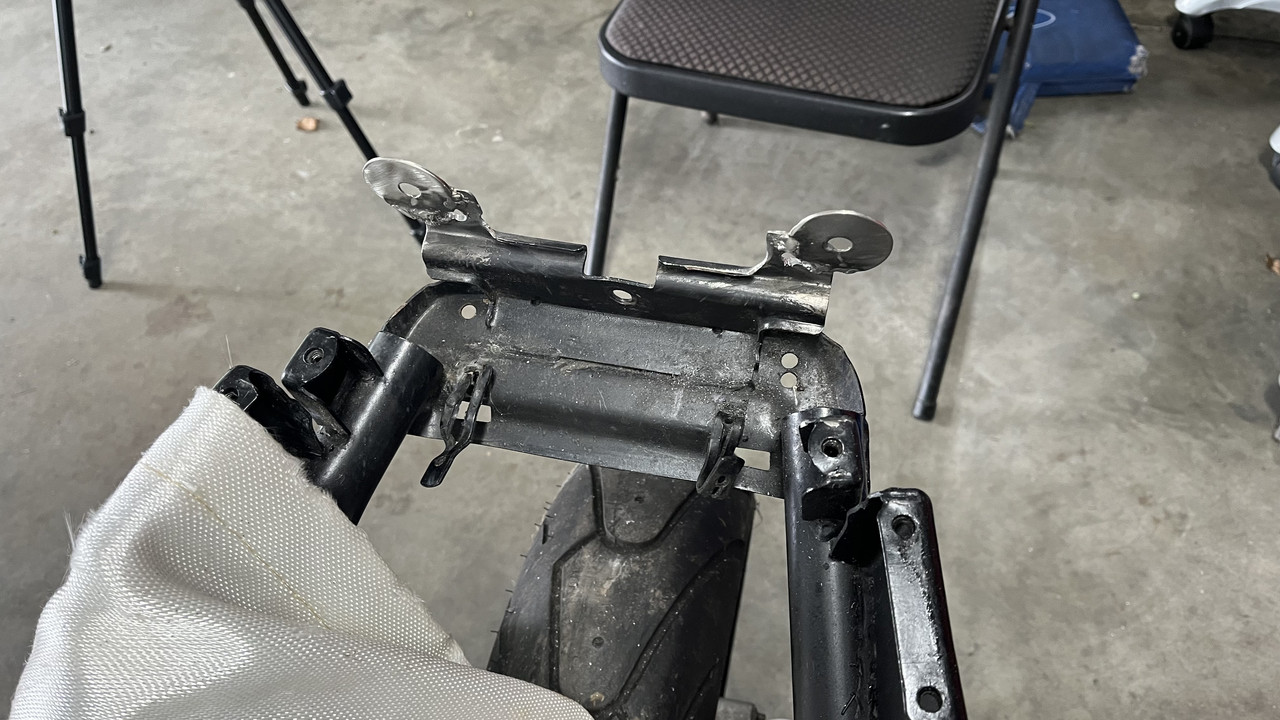 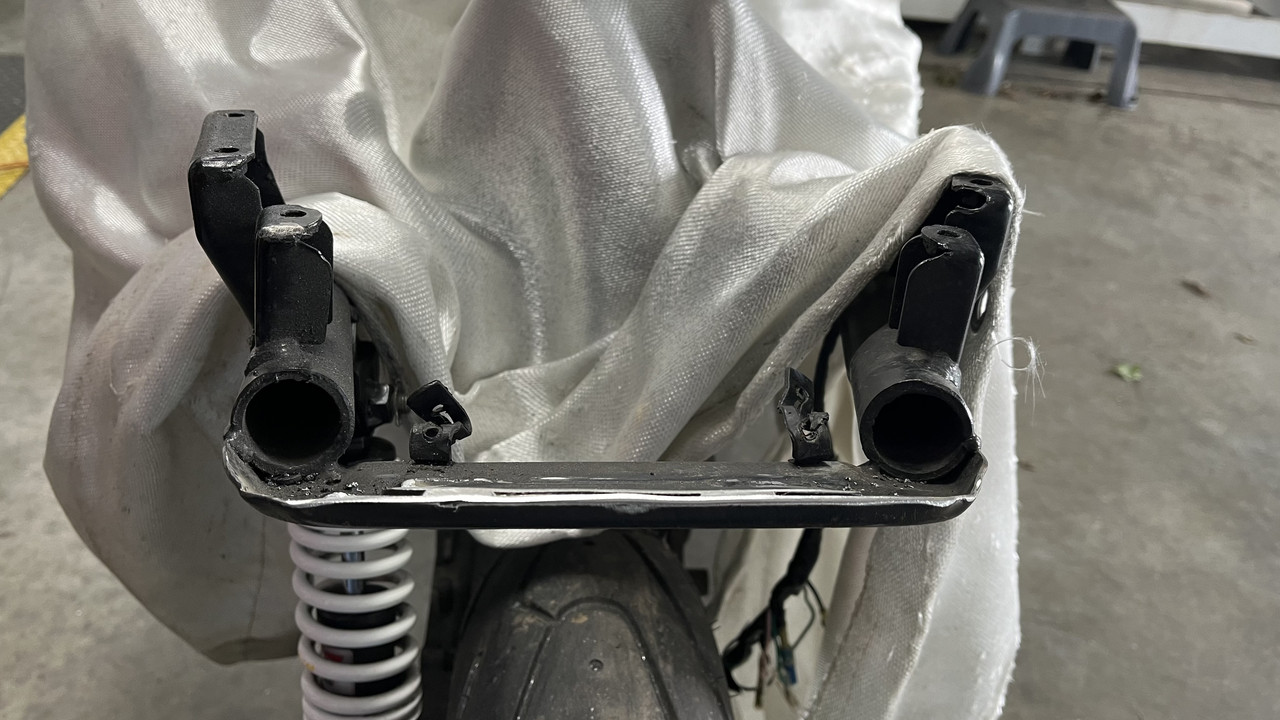 Tacked in place. 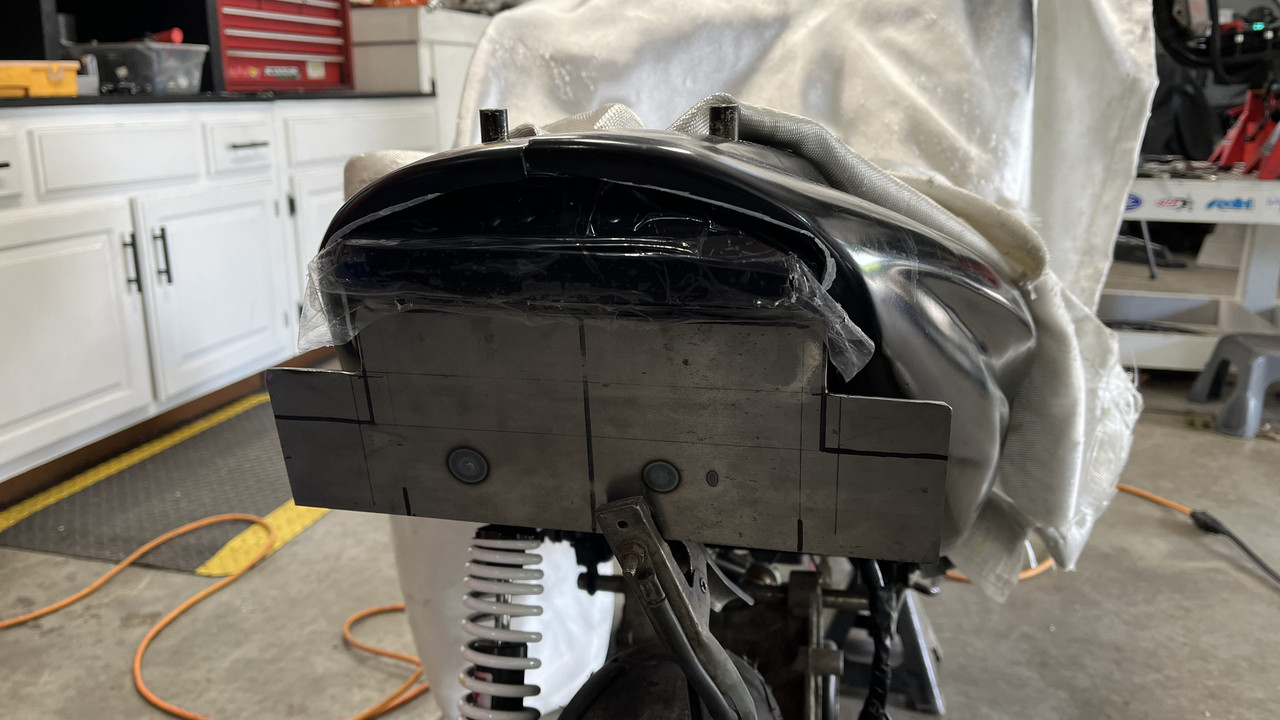 I made a bit of an error in the tabs that were supposed to bend over to cover the side of the frame. 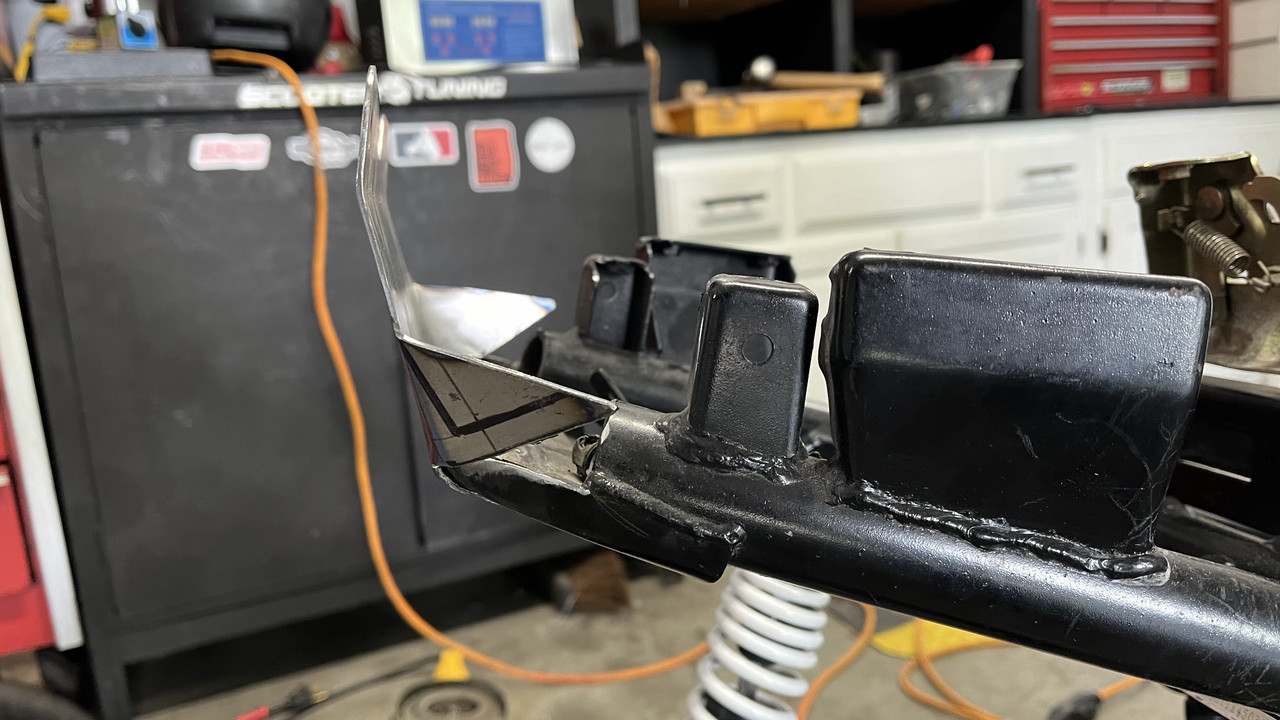 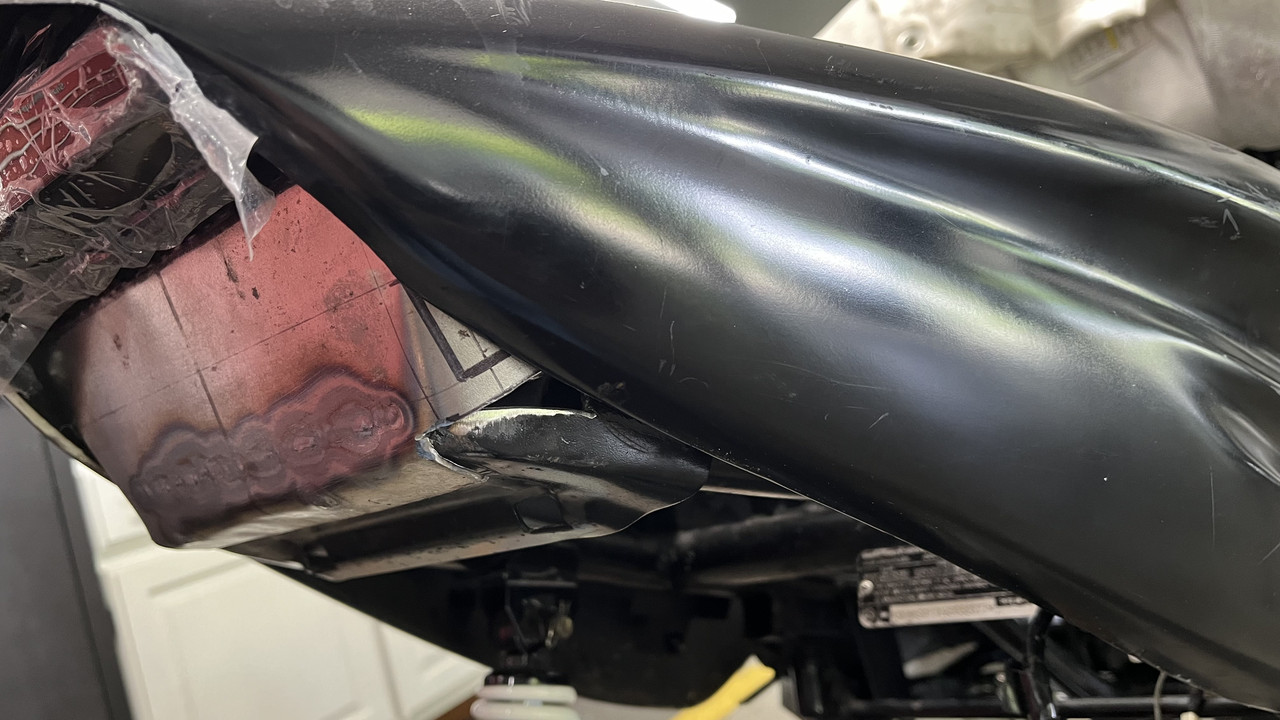 Wound up making a couple of triangular patch panels. 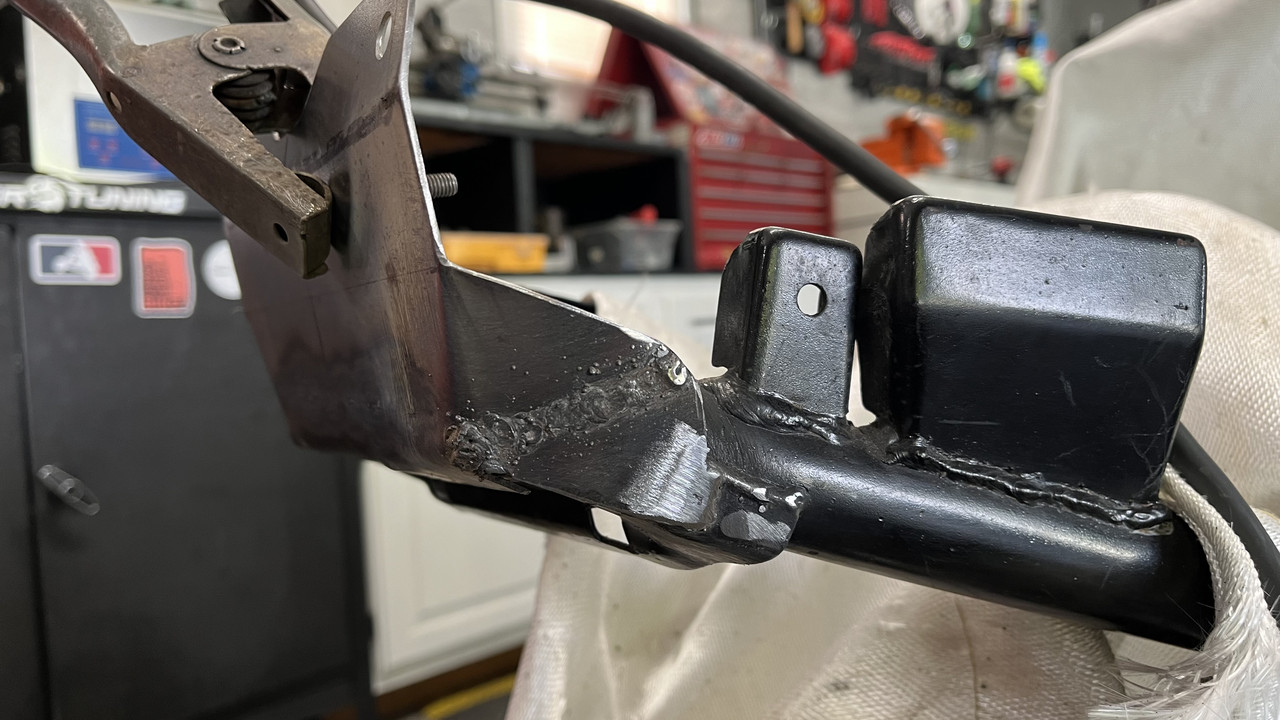 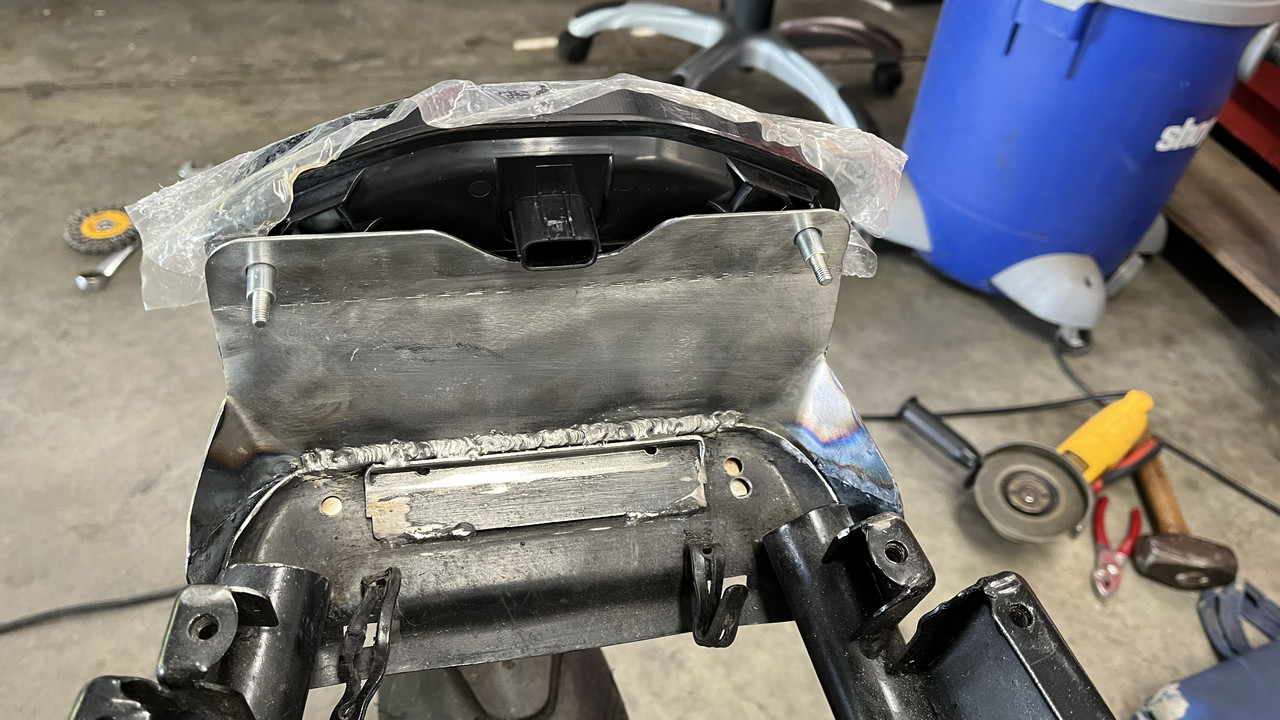 Looks decent with the light tucked in. Not exactly a masterpiece, but I think it's way better than the previous options. 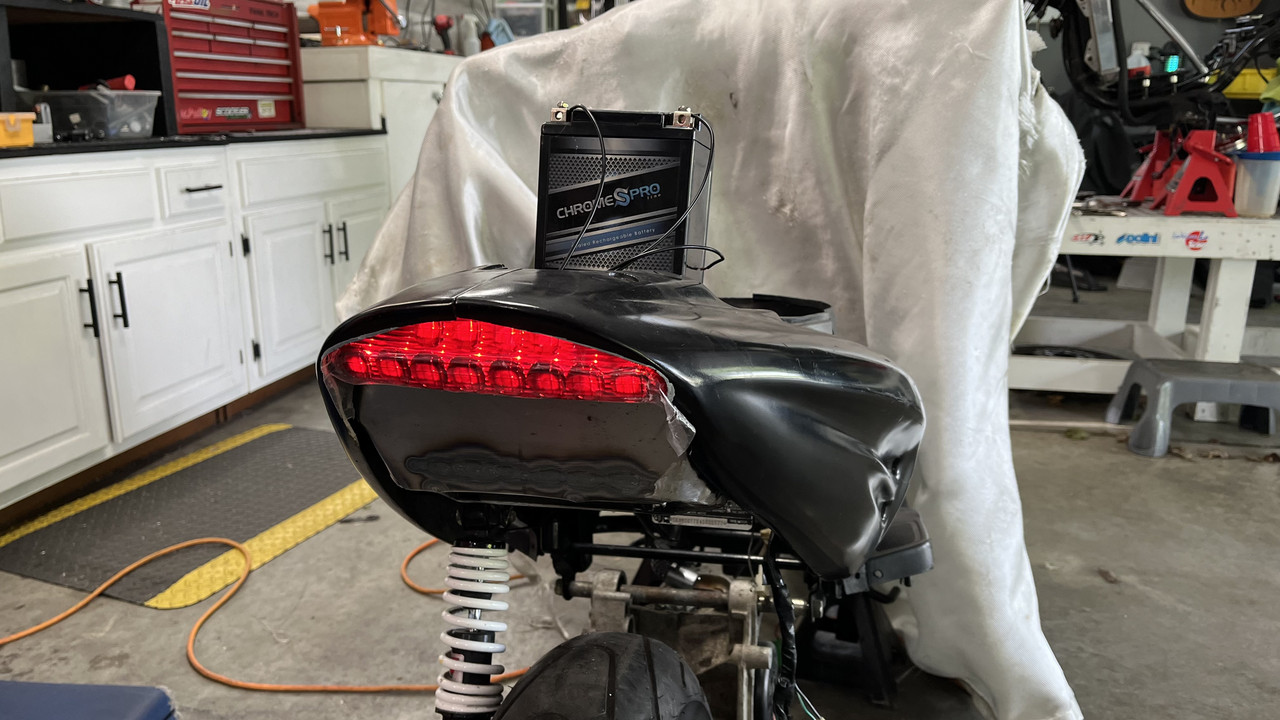 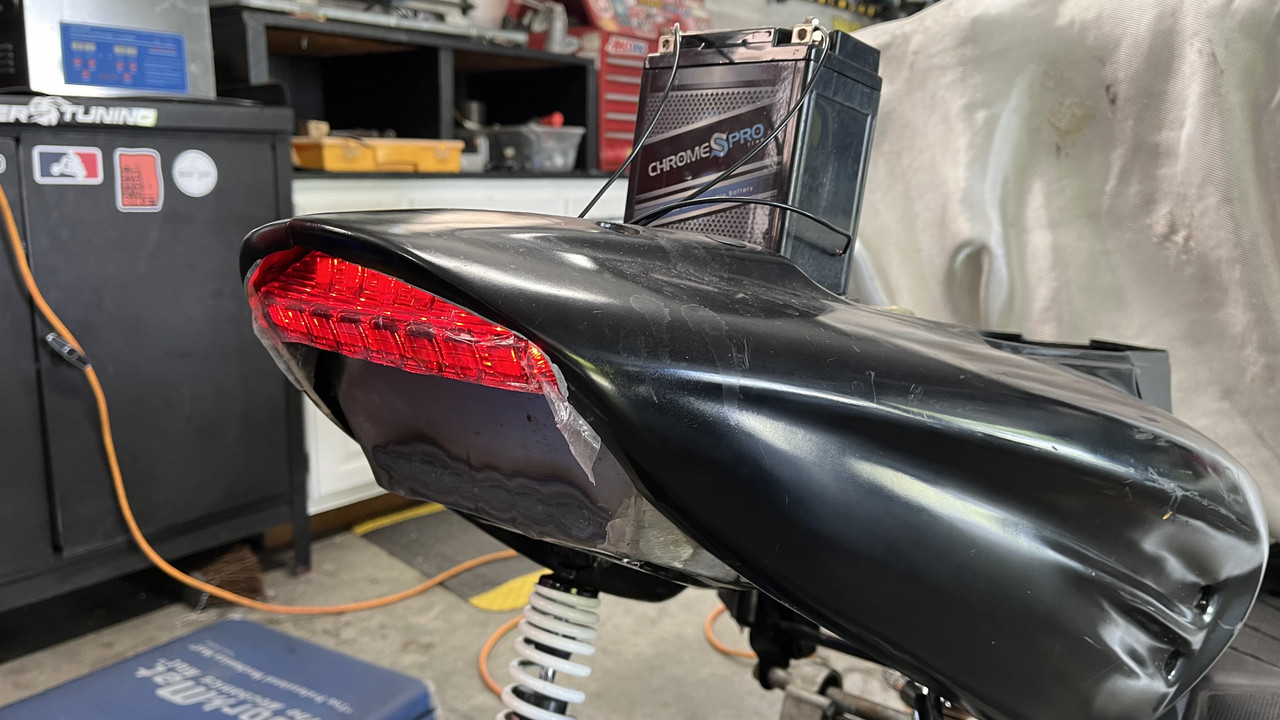
I still need to put the turn signals on and registration sticker plate. |
|
|
|
Post by 90GTVert on Aug 28, 2024 18:12:56 GMT -5
This is long overdue for an update. I pulled the wiring harness off of the scoot. -Stripped out what little was not needed and made some additions and revisions. -I switched the lighting over from stator to battery power. A little more power consumption since the lights won't dim or flicker at idle, but everything is LED. -Switched to an LED turn signal relay with ground. -Added all of the wiring for the water pump with a relay and put a relay in for the lights, both turning on with key on but I wanted to save the ignition switch from taking the load. I can turn the lights on and off with factory switches, but I didn't bother adding a switch for the pump to save some complexity. -Added wiring for a fuel level sender (deleted long ago). -Added wiring for the Stage6 gauge. 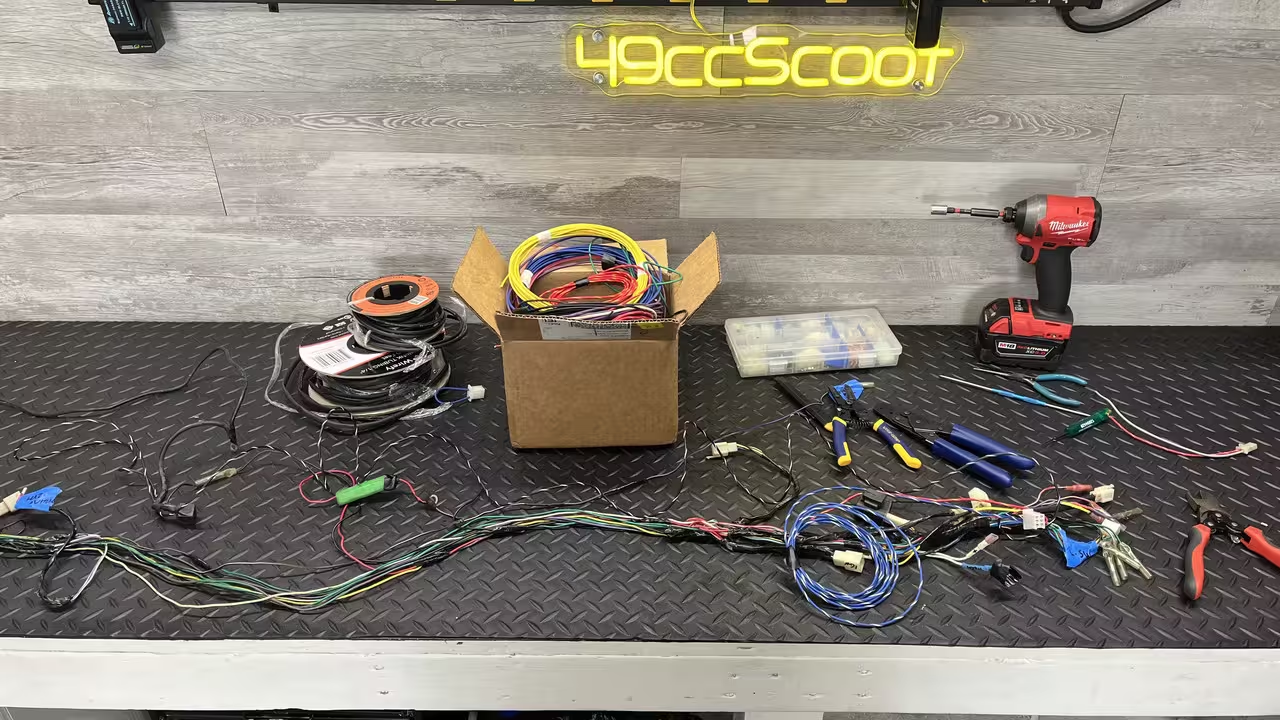 I was almost finished when my soldering iron crapped out. I decided to try a soldering gun instead and got one locally. Very happy with that decision. I've always had irons, but the gun heats up and makes a connection quickly instead of a long wait with an iron and it's not hot all of the time. 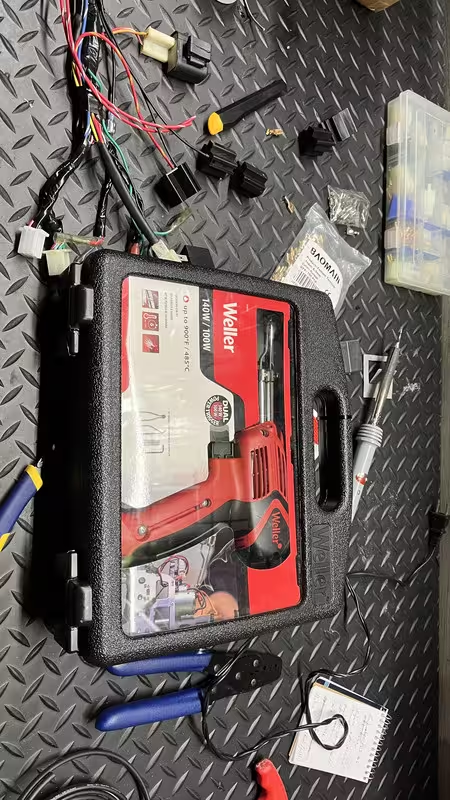 I checked the sender in my fuel tank and it would give me some odd readings. It should be 0-100 ohms, but it would get into the 90s and then start seemingly randomly going up to as much as 400 ohms. It was corroded and I wanted a new one, but that took some looking. I can no longer search "Vento Triton" and find the parts I want for most things. I wound up ordering THIS. It says it's for a YZ125, but it mostly matched up to what I was looking for. I bent the tabs that stop the arm so it would work in the full range of 0-100 ohms. 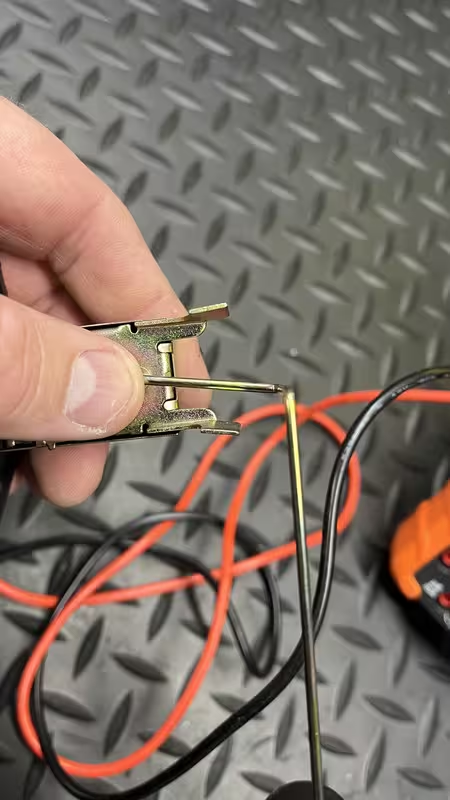 The arm needed to be bent to match the original. 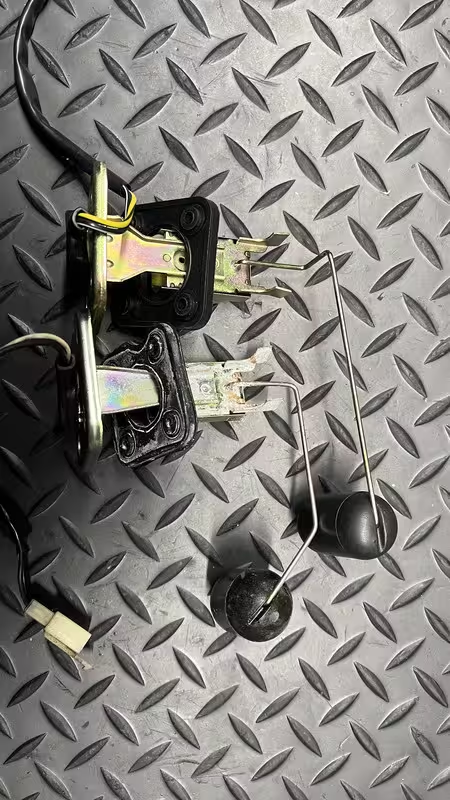 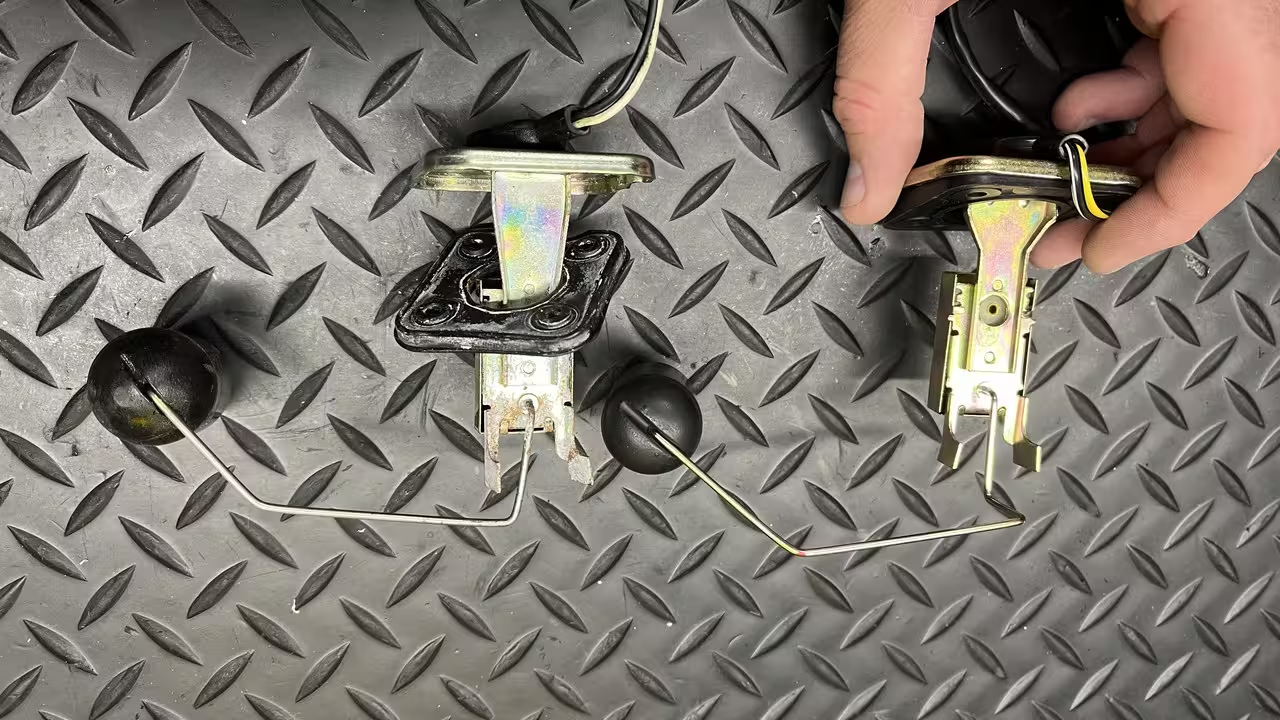 I had to grind the section near the top so it fit in the tank. 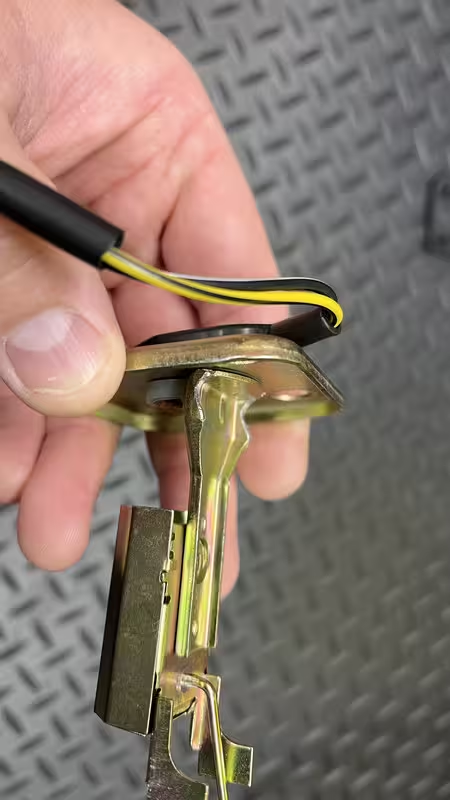
After being modified, it showed 3 to 99.X ohms while in the tank, so I'm happy with that. I installed the Stage6 speed sensor so it would work with the existing magnet on my wheel... or so I thought. I made up a little aluminum adapter on the mini-lathe so I could easily use their 10mm hole bracket with the M6 mounting point on my fork. 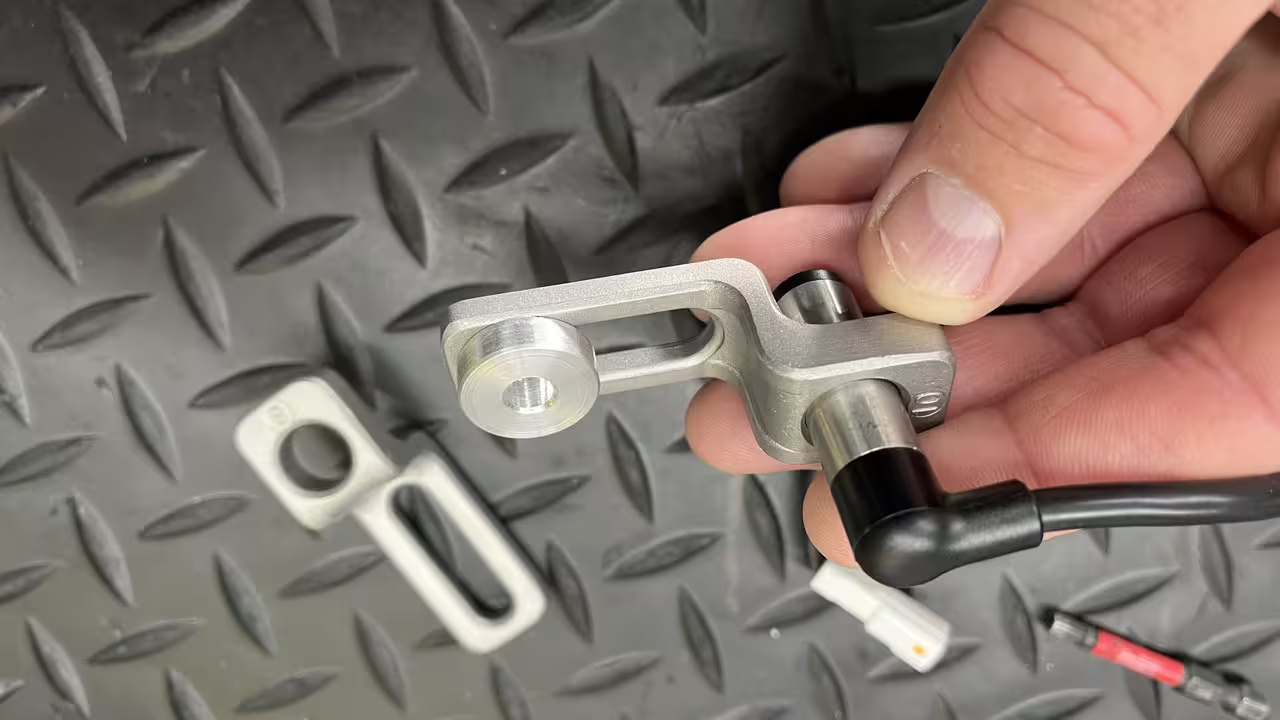 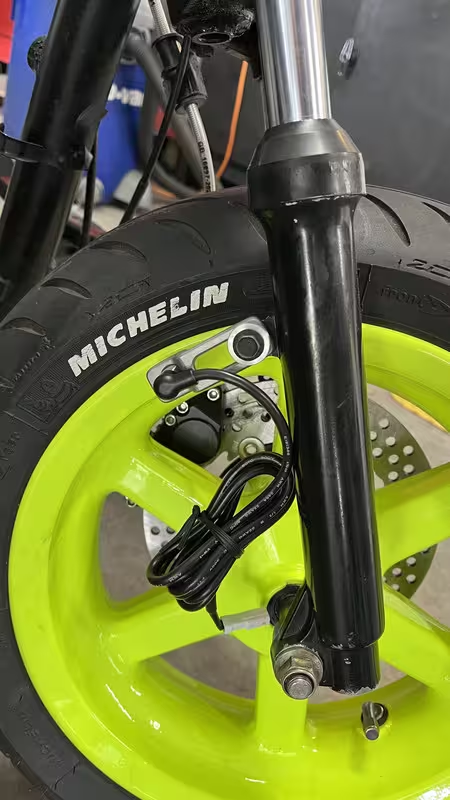 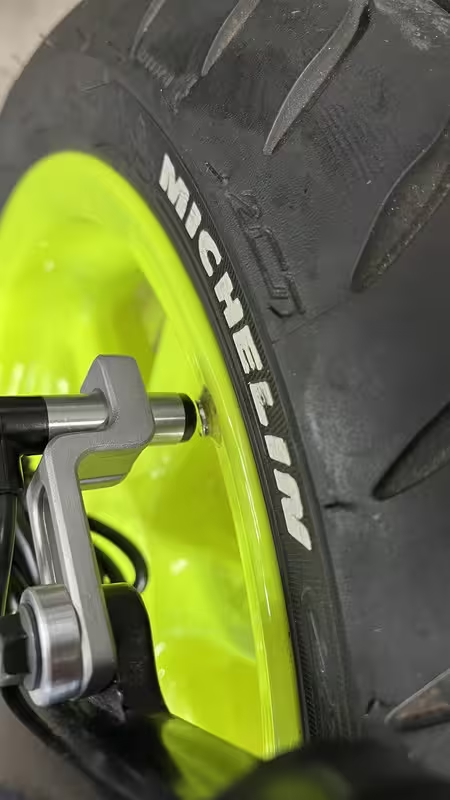
Gauge installed on the bars. There's a lot of play in the gauge thanks to the anti-vibe grommets included, but I hope it won't move around much when riding. 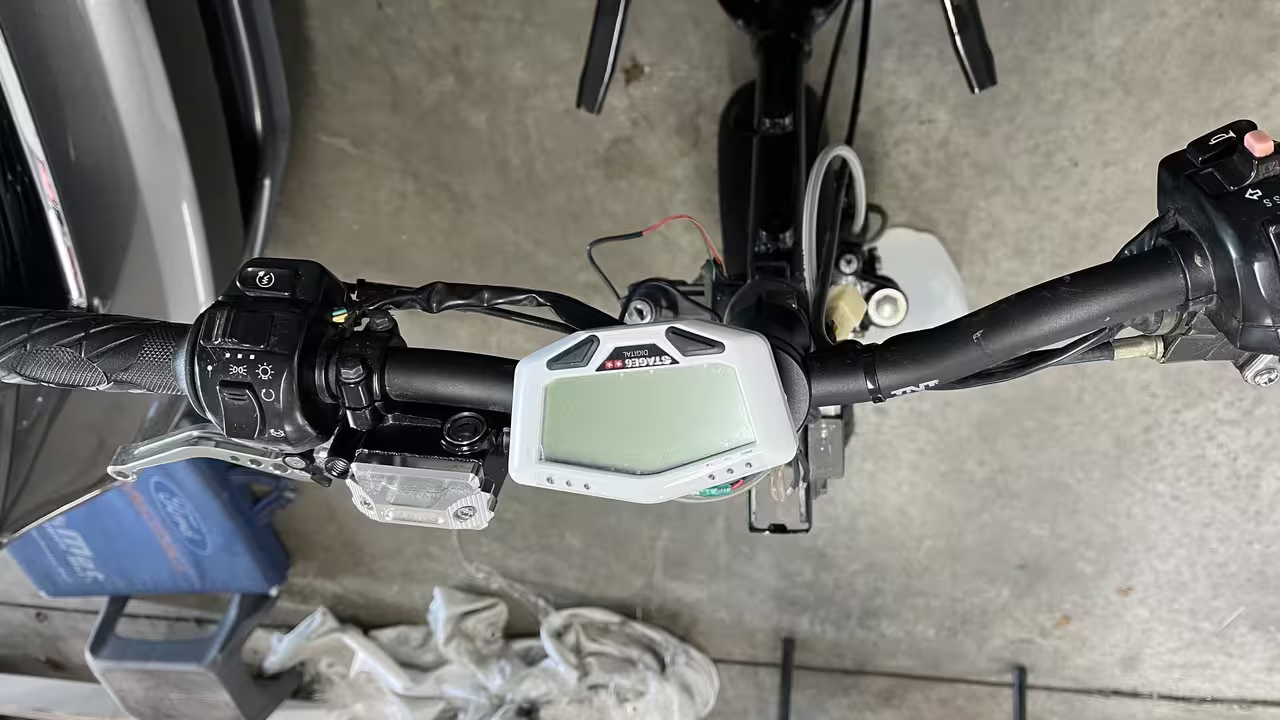 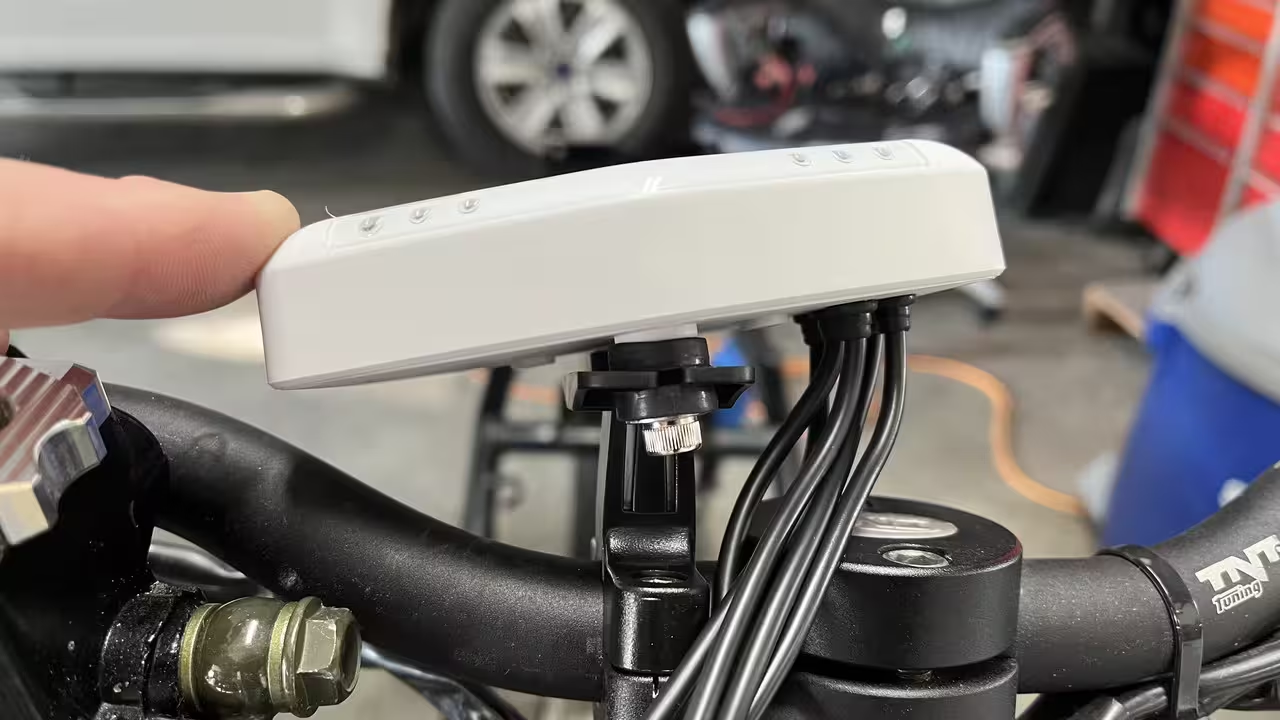 I wasn't getting a speed signal. Tried moving the sensor to basically touching all the way past 2mm out and changing alignment. Nothing. Wound up putting one of S6's supplied magnets on the wheel and it worked fine (at least while spinning the tire by hand). It may just be that they use a different pole or something, because when flipped one way the S6 magnet didn't work either. 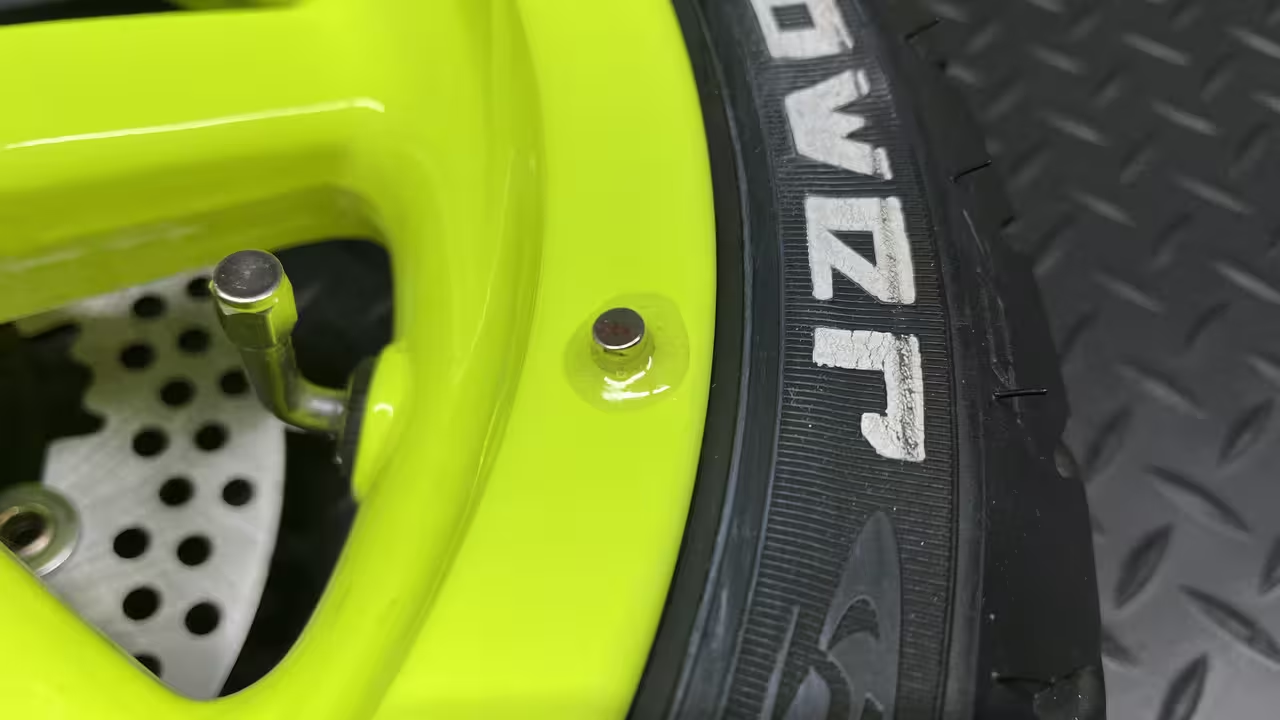
S6 includes these sensors. Unlike Trail Tech, I don't know that I can get much different stuff for it. For now, one is coolant temp at the head. The other is just open air ambient temp to make use of it. 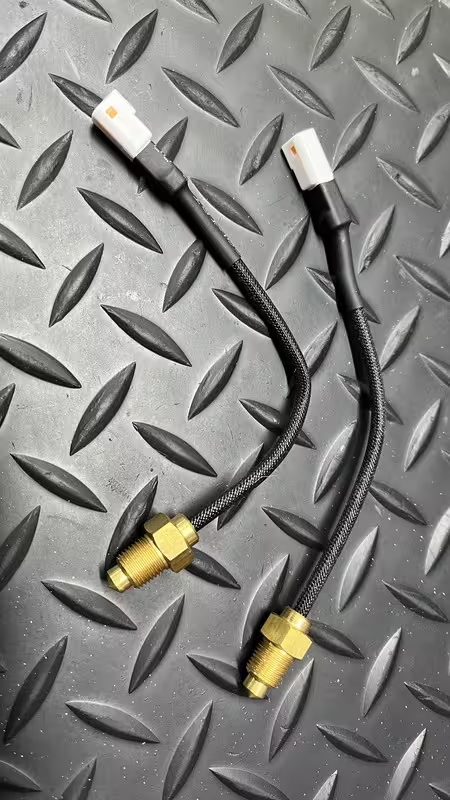 Just some wiring as I was getting it all in place. 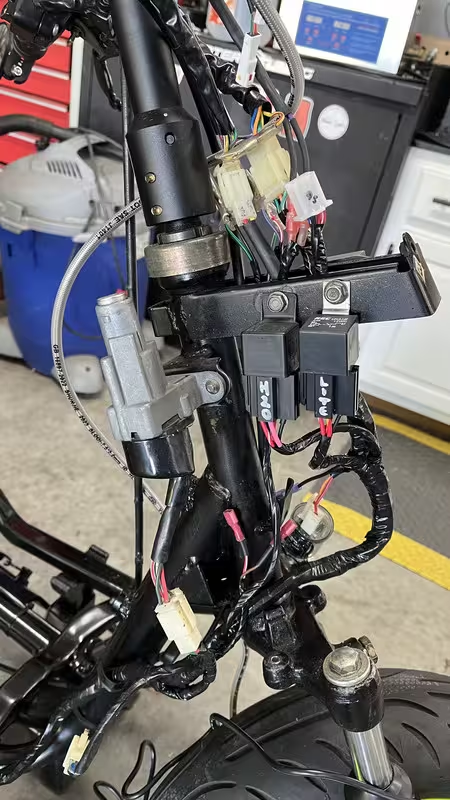
I put the 86cc up on the bench. It needed a lot of cleanup. 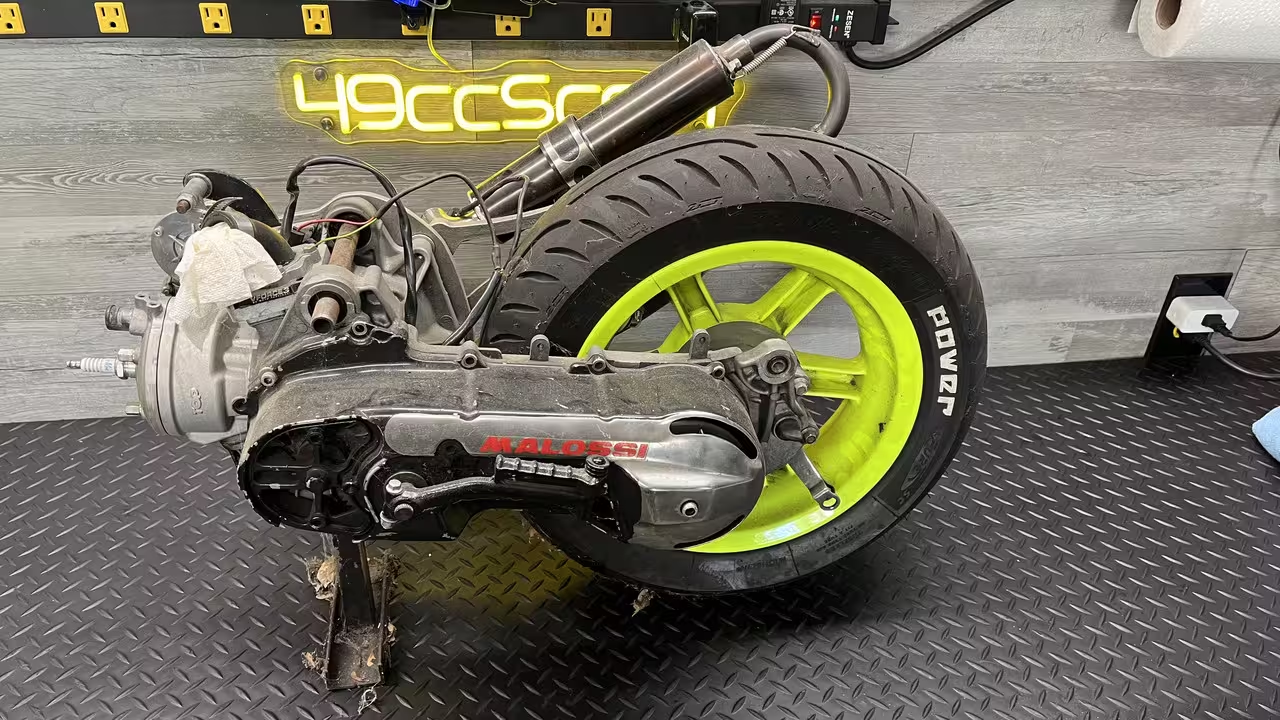 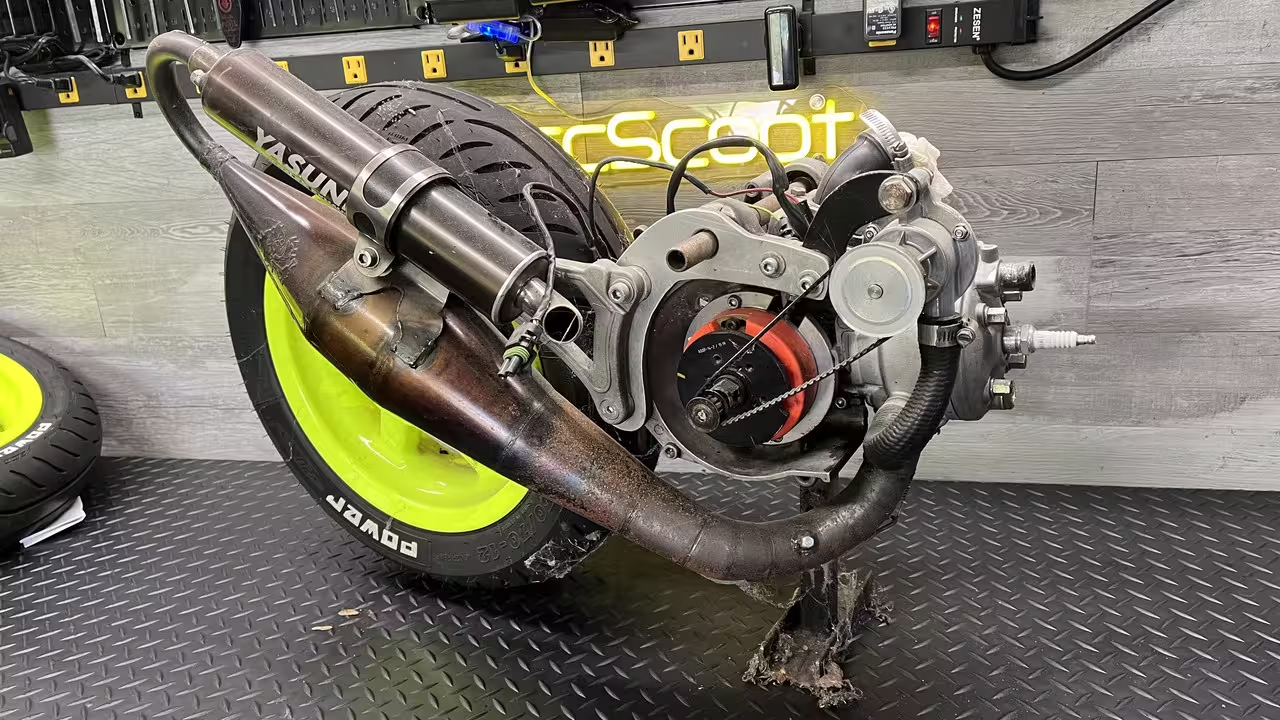 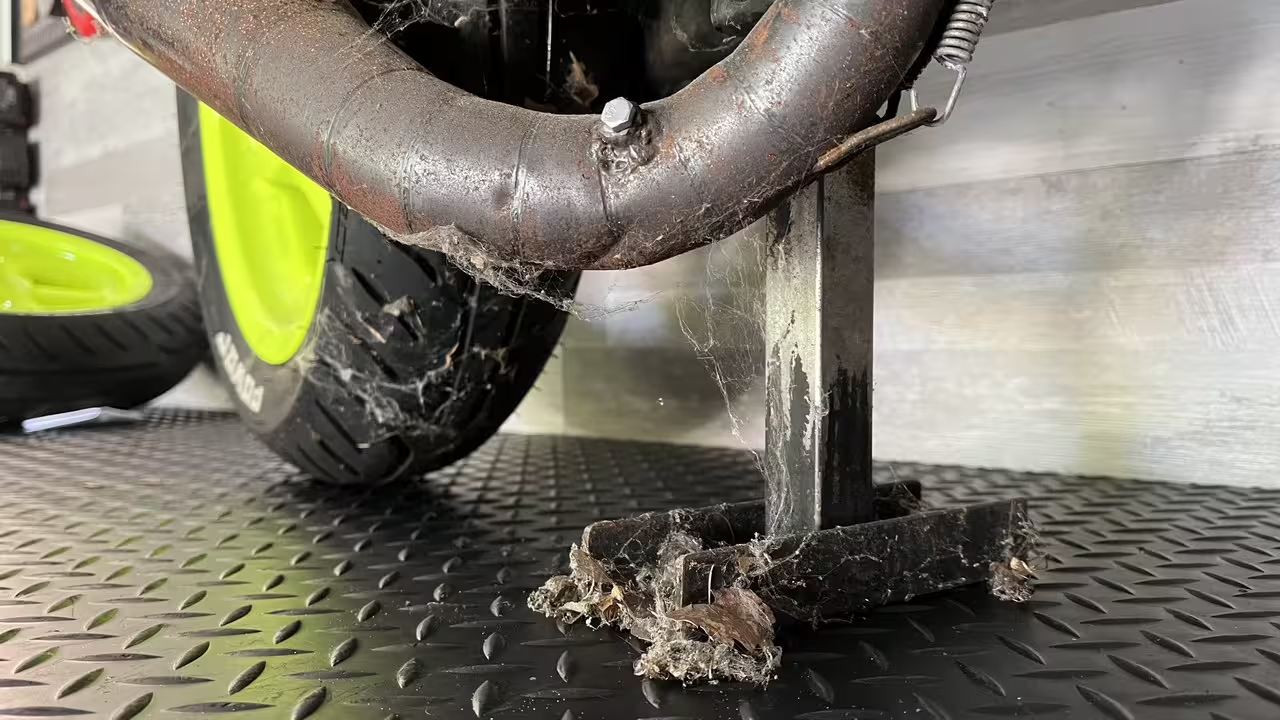 I took off the belt driven water pump and removed the brackets for that and the bracing that I made after cracking the cases, and the cracked part of the case came off. I just smoothed the area out a bit. Not really needed for this. 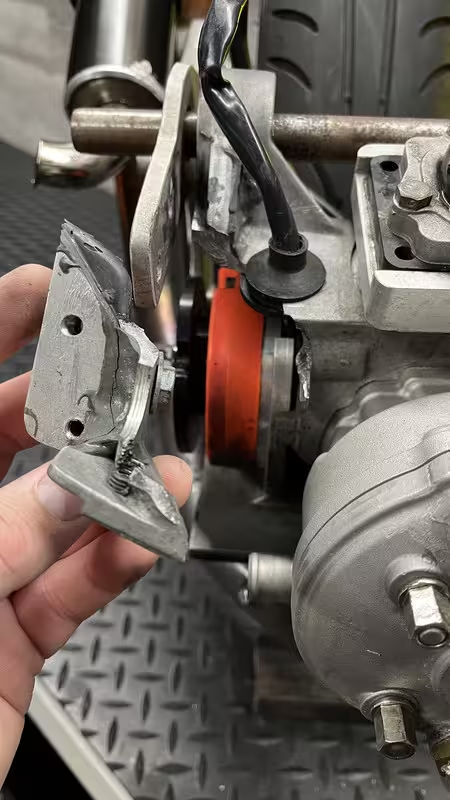 I cleaned the 25mm DellOrto carb and the CVT. Then I had to fix up the CVT cover. The support bearing for the drive shaft just falls out because the cover's race is worn. The aluminum bushing inside is worn out and not snug on the shaft either. If you don't know, I use a larger ID cover bearing and then use a bushing in that to go on the primary drive shaft. Piaggio's setup with a compensator ring is better, but I didn't know of it when I did this long ago. Maybe I'll switch over one day. 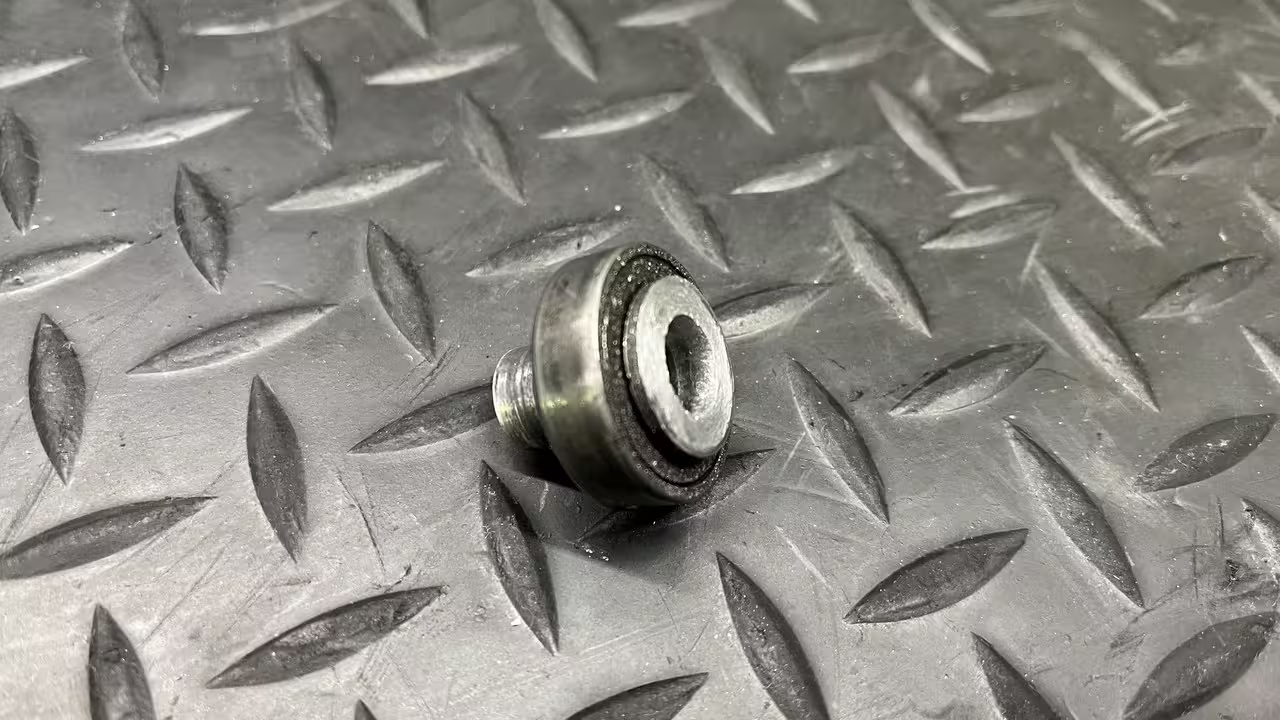
The race was around 0.0075" larger than the bearing OD with very quick measurements. Way off. I wound up shimming the bearing with a soda can to get a tight fit in the CVT cover. (The excess was cut off after the pic.) 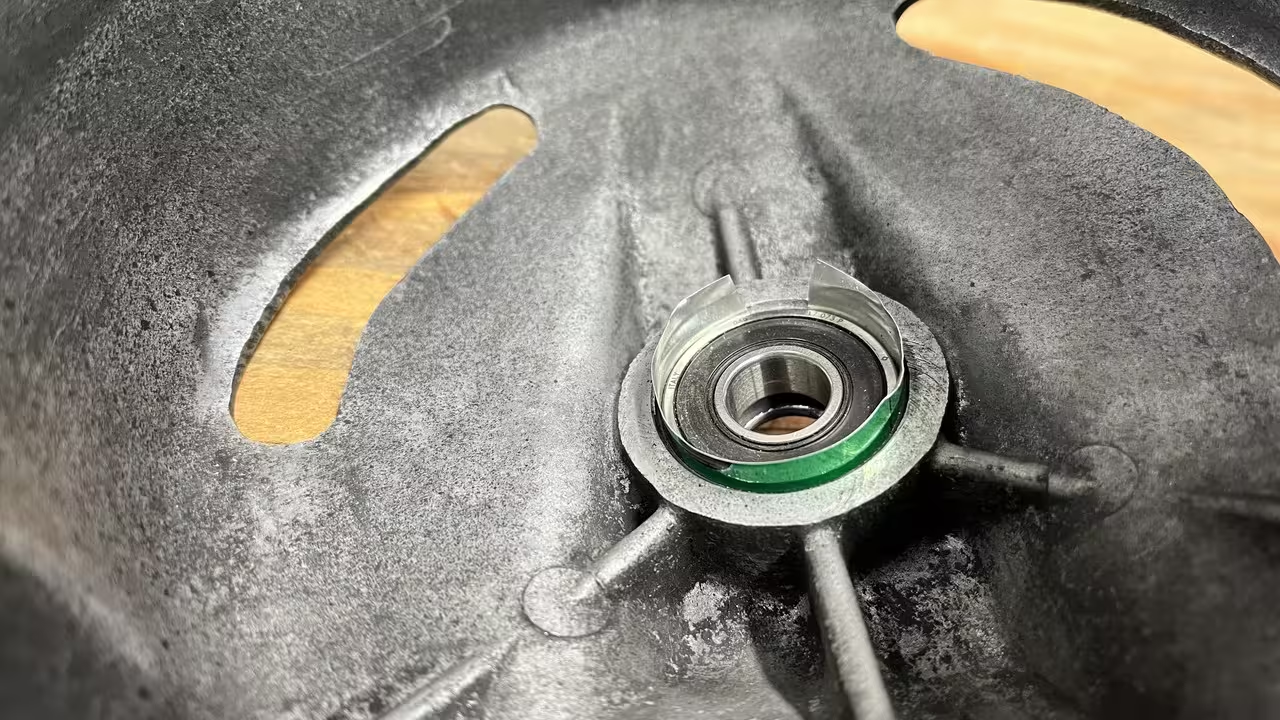 I made a new bushing. 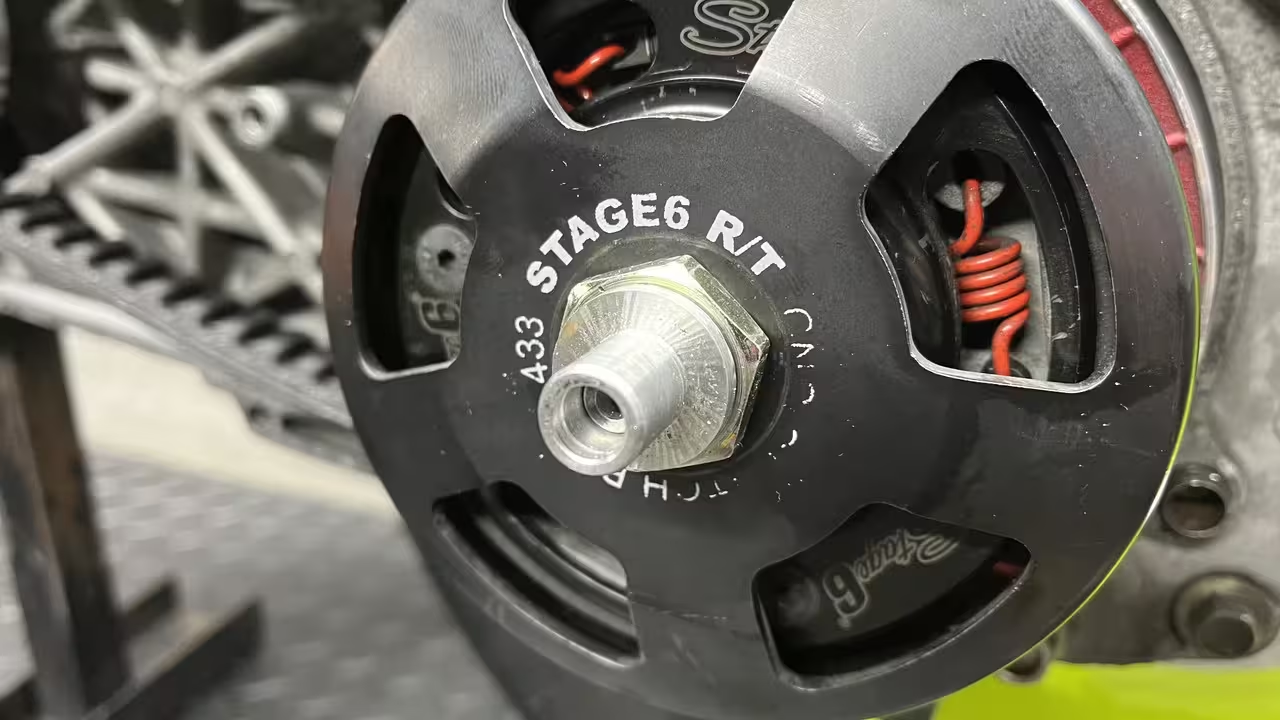 I replaced all of the kickstart stuff. The old one was slipping and loose. 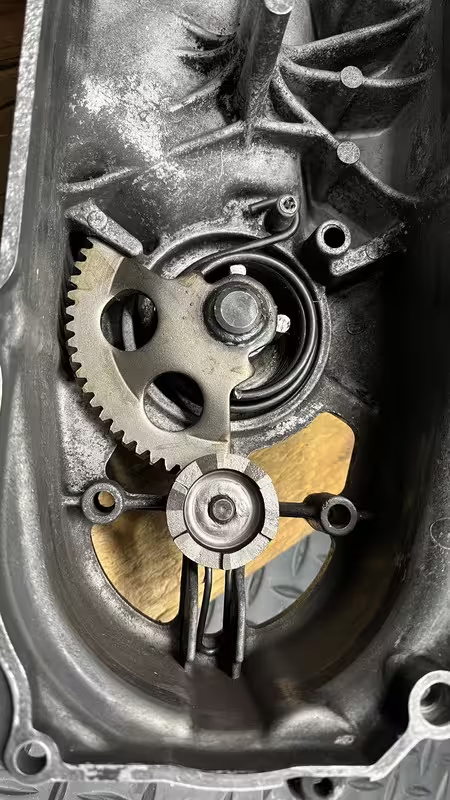 I cleaned the rust off of the exhaust and oiled it. Then I made a thick stainless steel clamp to replace the one on it that was broken. 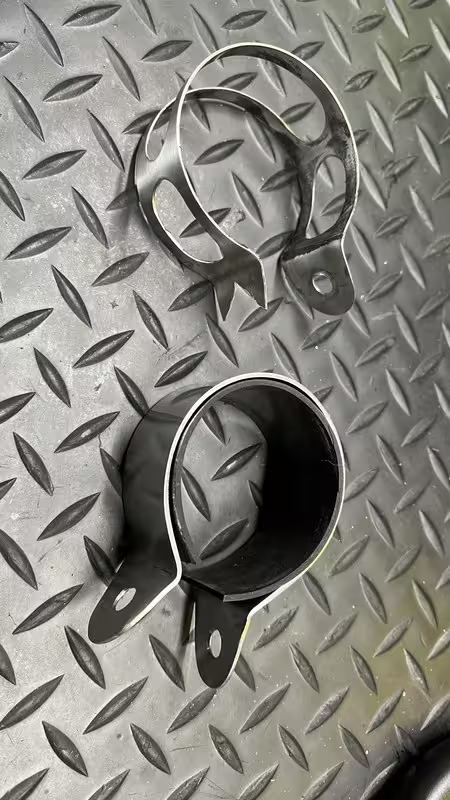 The Yasuni silencer (I made an adapter to put it on the MHR exhaust back when I used the 86cc in T2) was hitting the bracket, so I made up spacers to fix that. 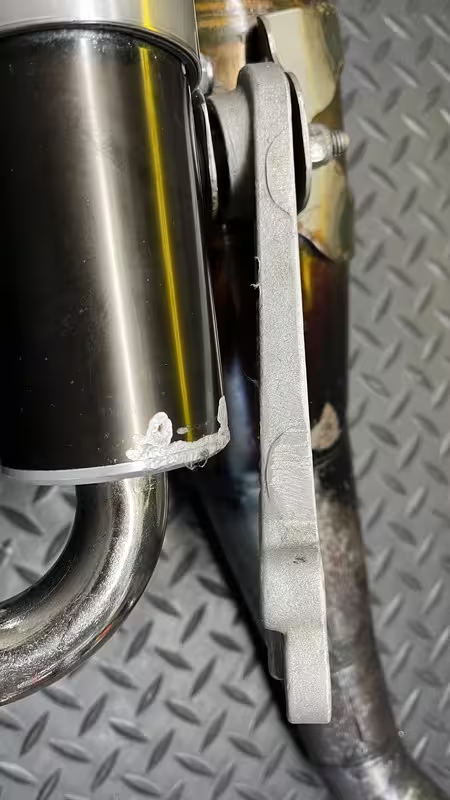 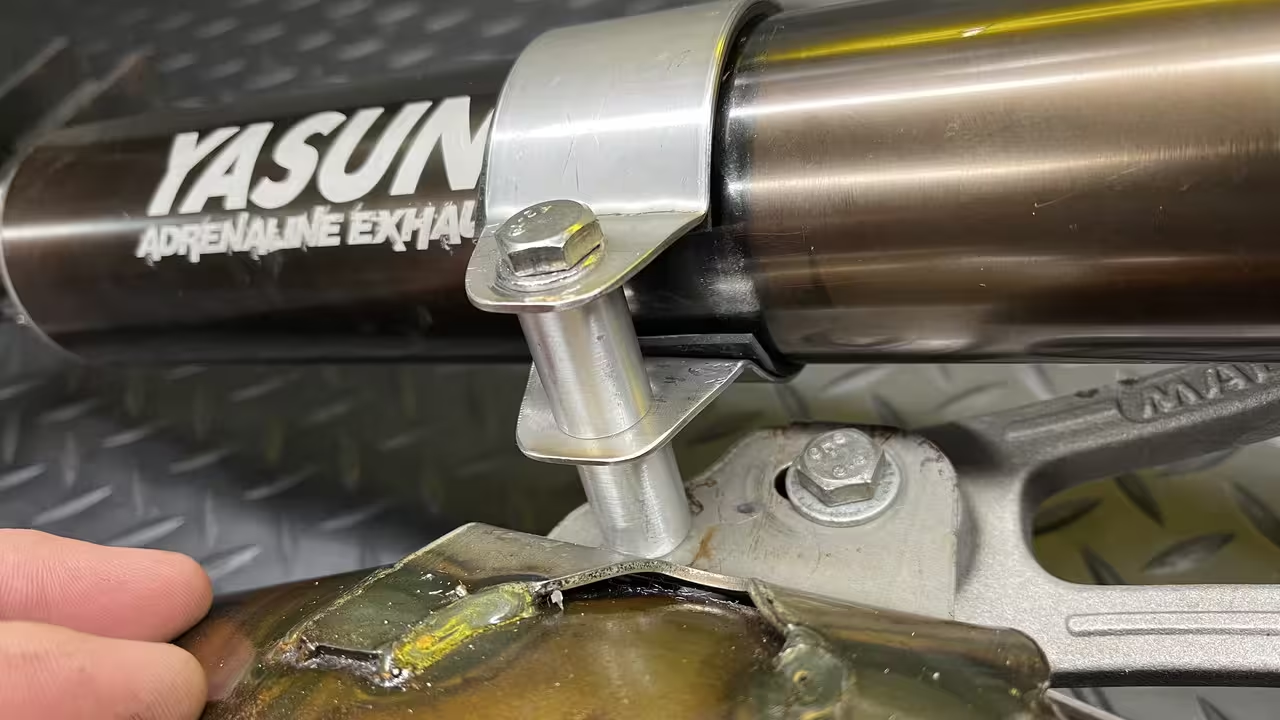 The engine is looking much better than it was. 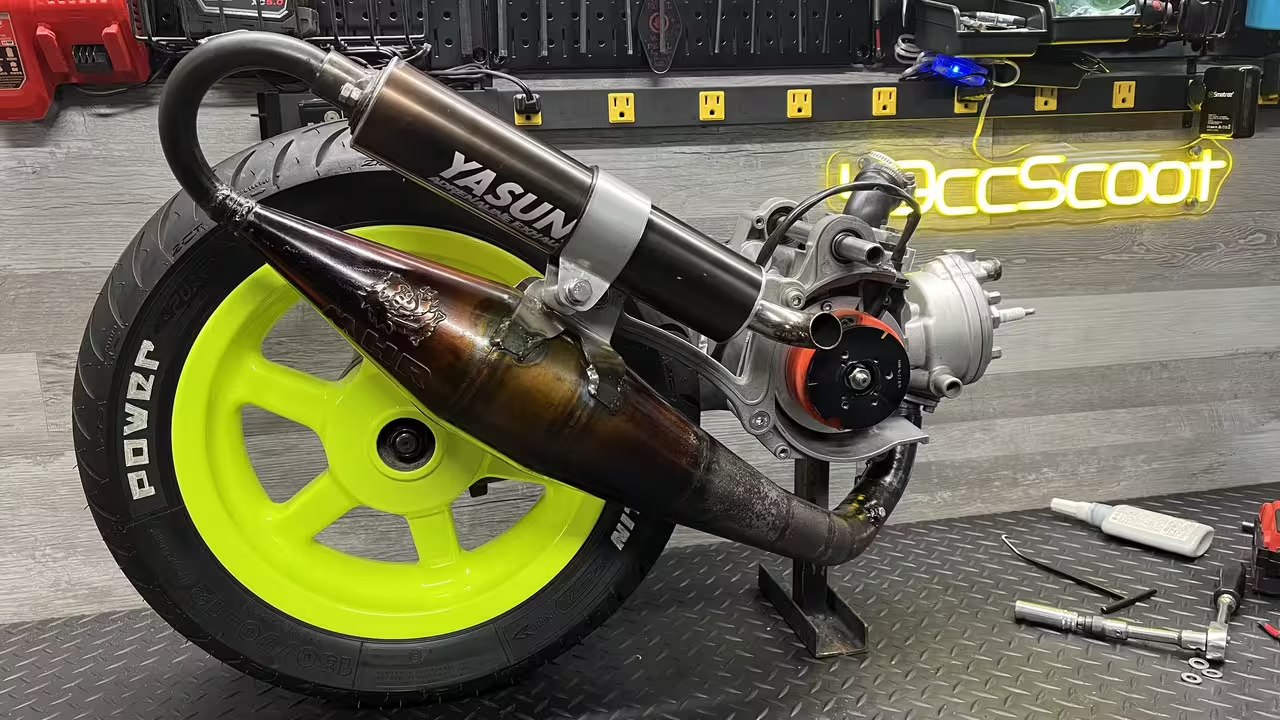 |
|
|
|
Post by oldgeek on Aug 28, 2024 22:13:16 GMT -5
That was a big update! Wondered where you have been, should have known.
|
|
|
|
Post by 90GTVert on Aug 28, 2024 23:21:38 GMT -5
Wondered where you have been, should have known. Yup. In the garage. Let me get you the rest of the way up to speed... I got the engine in. I've got concrete anchor nuts for the tire changer in the floor so I held the front of the scooter down with a ratchet strap on a ring bolted to one of those. 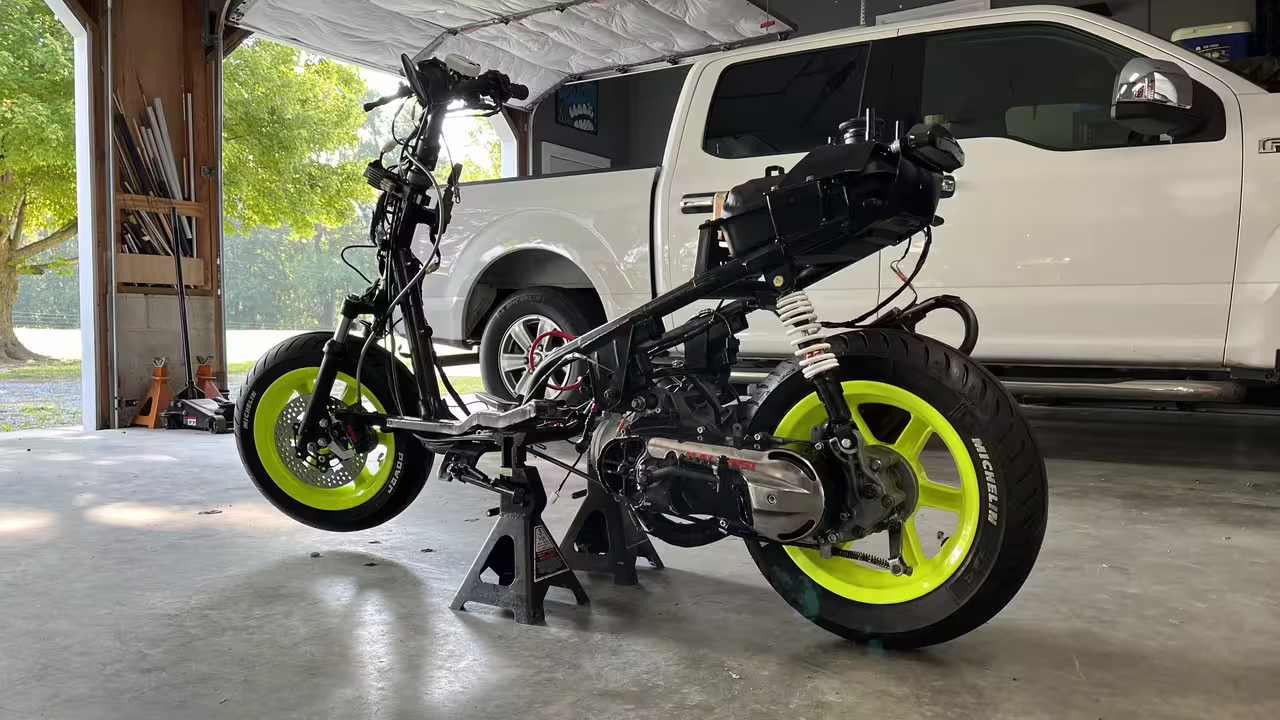 They're multiplying! 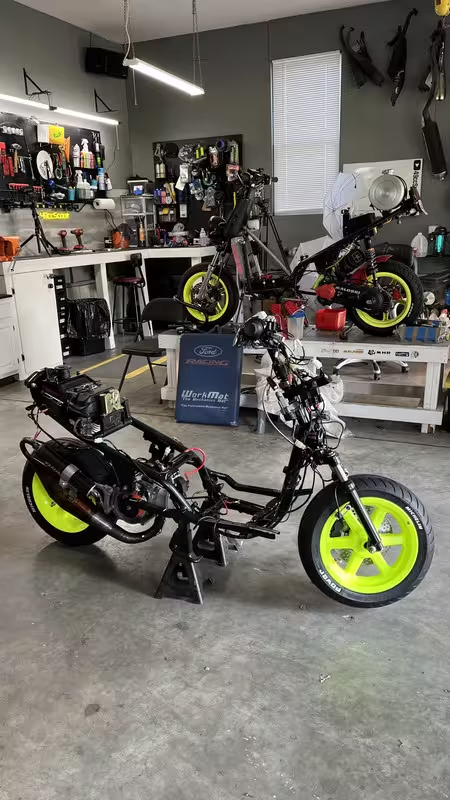 The floorboard (any many other panels) have broken off tabs and cracks and such. I was on Amazon looking for some mundane household stuff and THIS hot stapler/plastic welder popped up as a flash deal for under $20 (currently $25). I thought it looked worth that much to try. I didn't know anything about these till recently when a friend that does body work mentioned them. It comes with "staples" in various shapes. Stick the ends into the welder and the staple gets very hot. Push that into plastic and let it cool briefly. Then the welder is pulled back and the staple stays. It says the staple ends break off by hand, but I've had to cut them and usually grind them if I want them to sit flat. 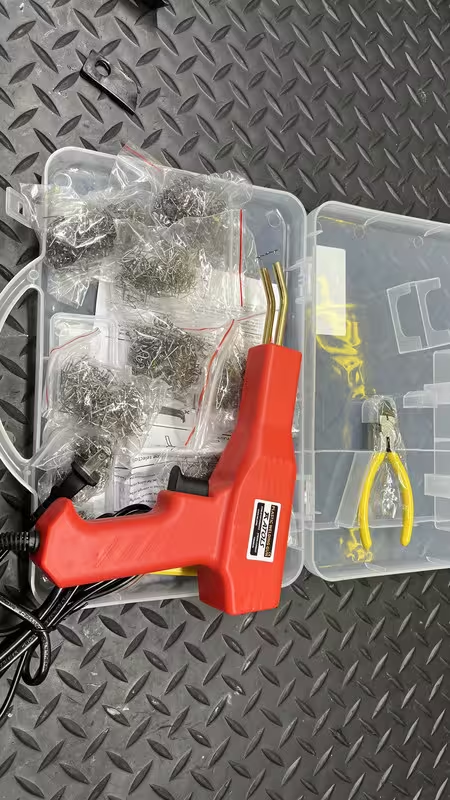 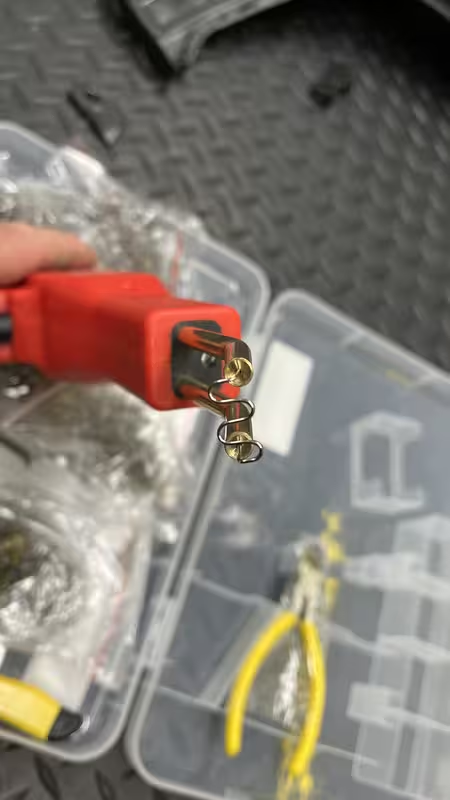 Here's some rough work as my first attempts at stapling and welding. What I'd call the welding part was done with a soldering gun and a large flat tip. Basically just smearing plastic around, using a zip tie as filler material. 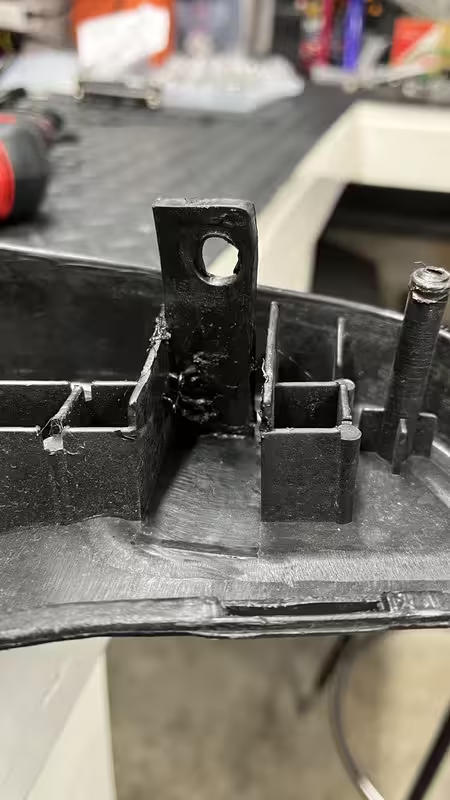 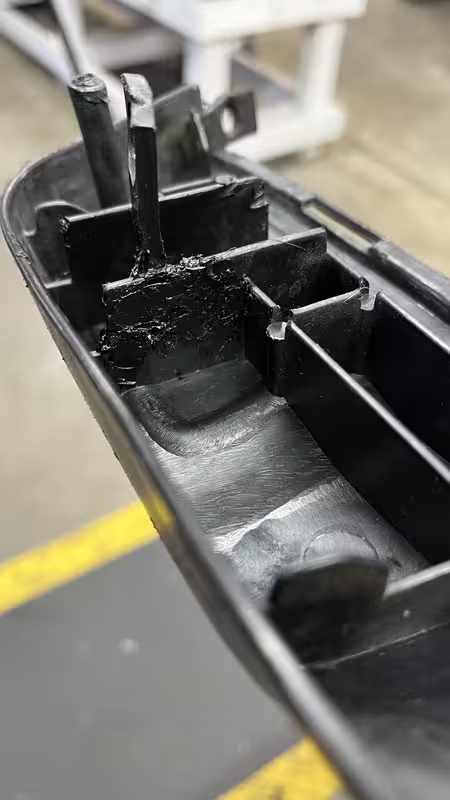 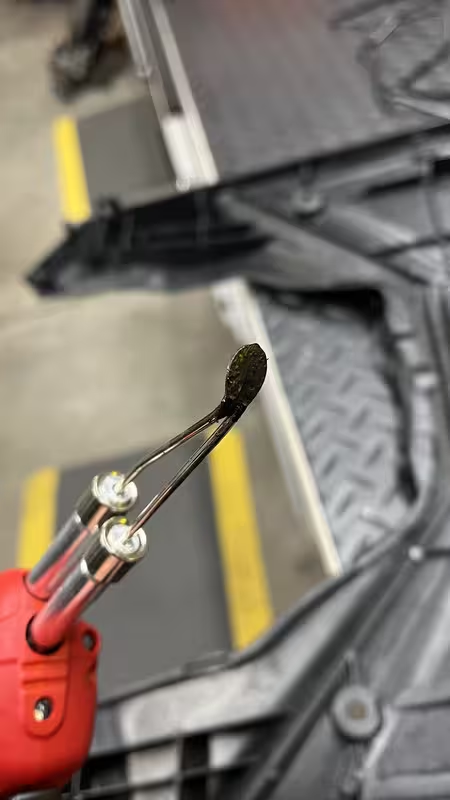 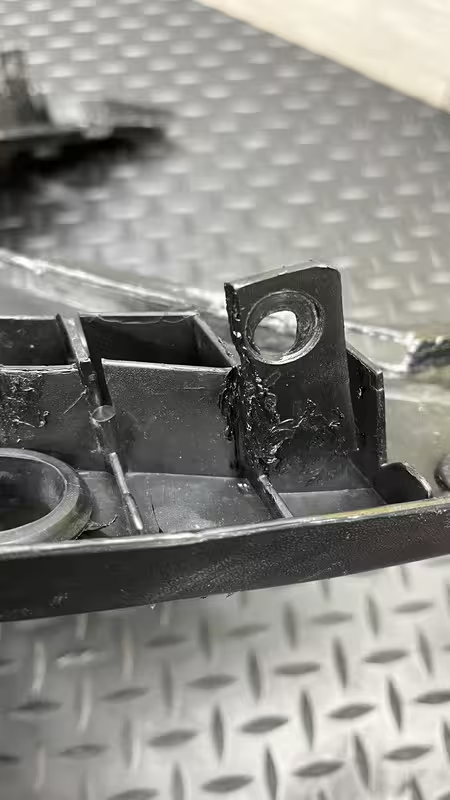 I needed some airflow to the radiators, so I cut a couple of holes in the leg shield. Not exactly huge, but I was trying to keep structural integrity while still letting some air head toward the radiators. They should catch a little from the exposed parts and gaps. 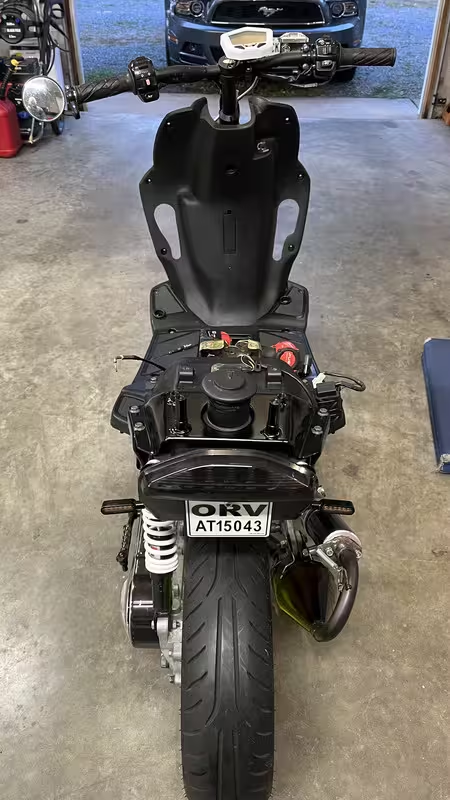
Hoses ran. It was really fun trying to get the 5/8" hose over 2 connections on the radiator that should have used 3/4". Almost went and bought 3/4" and reducers. The connections between the radiators are 1/2". 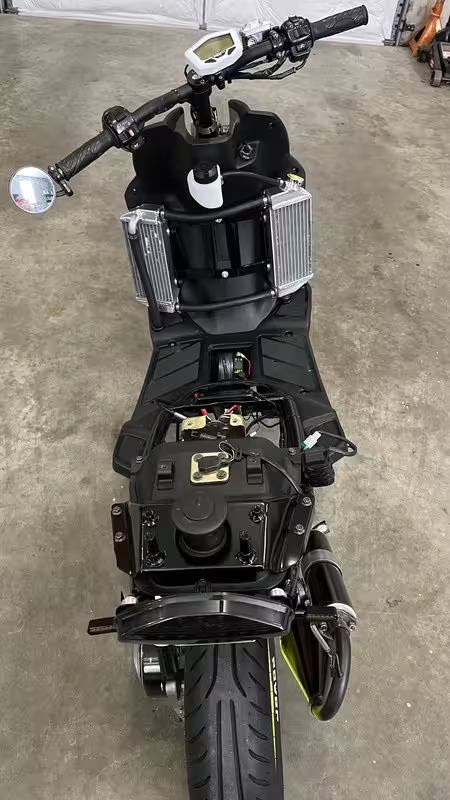 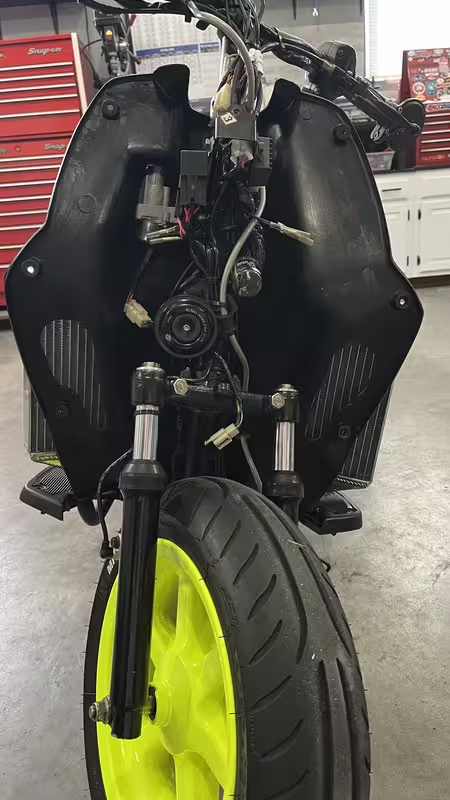
Carb installed. I fiddled with intake angle, but didn't like any of them. My airbox setup doesn't want to fit anywhere anyway, so for now I've ordered THIS thin air filter, said to arrive tomorrow. 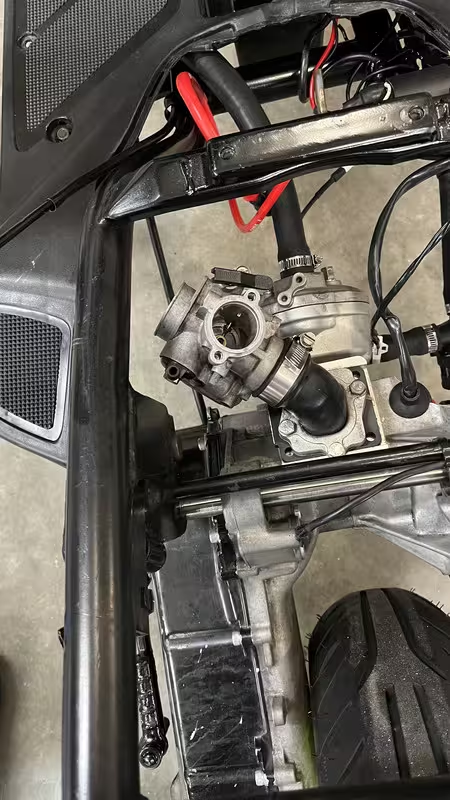 I figured I was going to use an old seat bucket from T2 that I cutout when using the same engine and carb on it. That bucket is badly cracked in multiple spots so I tried my hand and stapling and welding a second time. I'm not convinced that this won't all crack and break the first time it's used and obviously I haven't worried about sanding and finishing. After all of this, I realized that the seat bucket will push down on the carb cable some with what I have for it unless I remove a lot more... at which point I decided to use a stock uncut bucket that does the same thing. 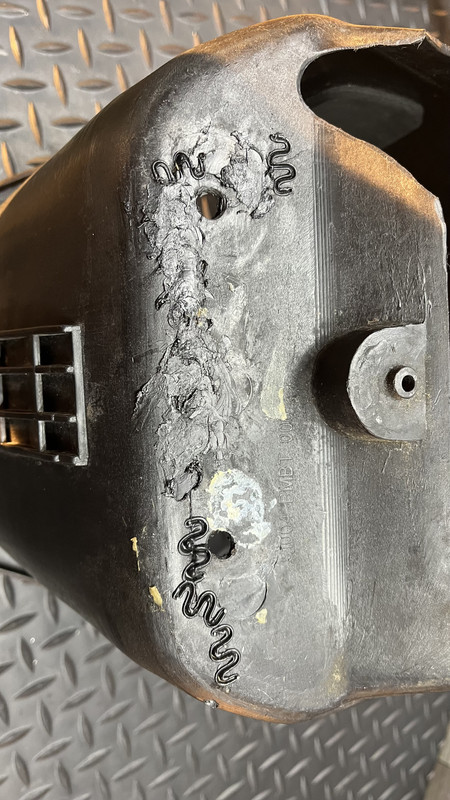 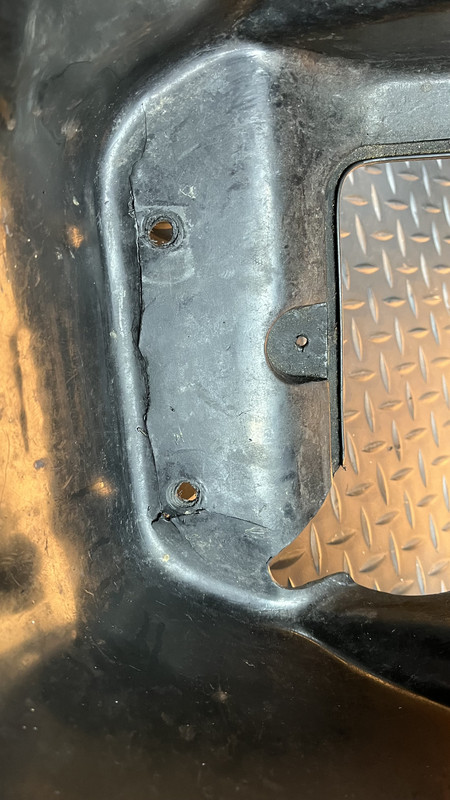 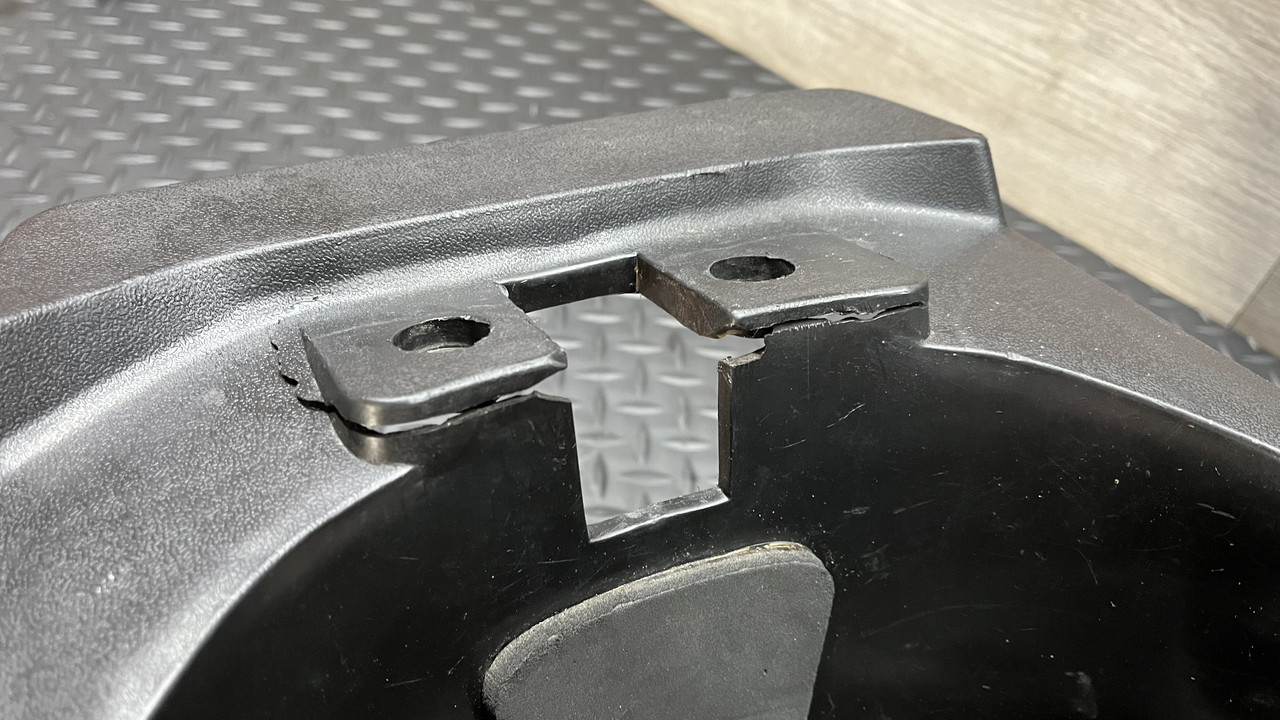 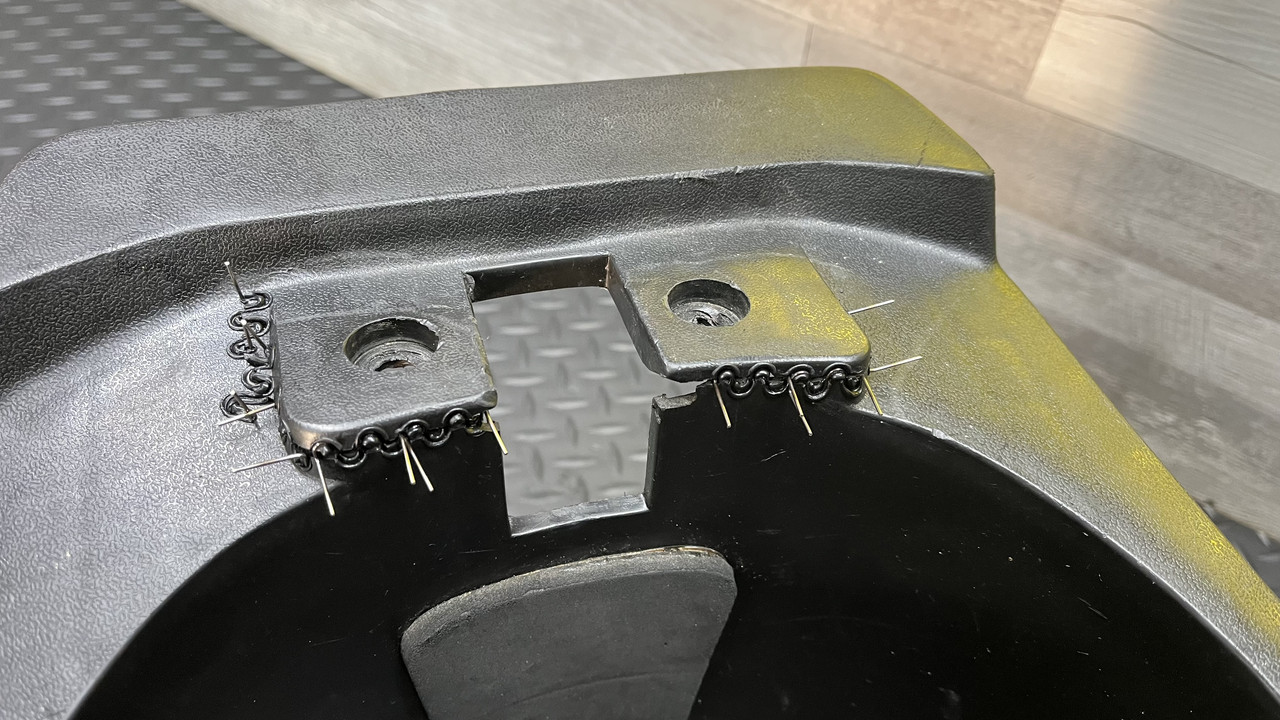 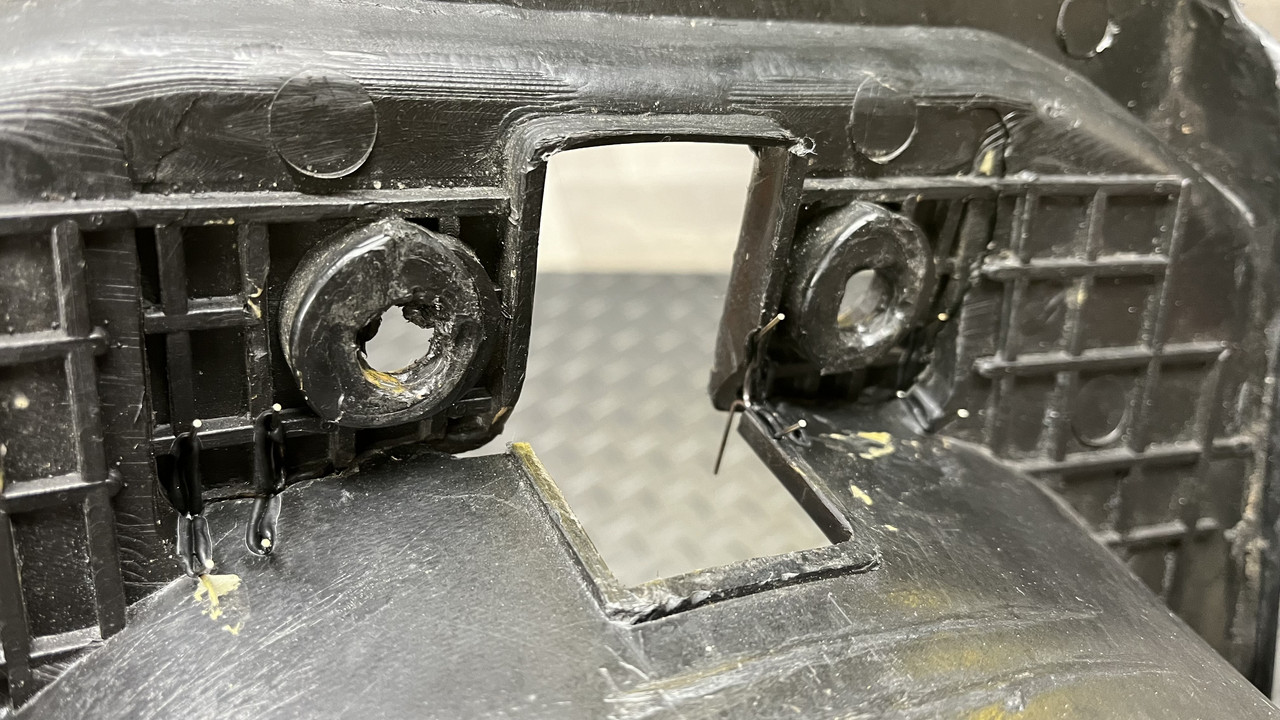 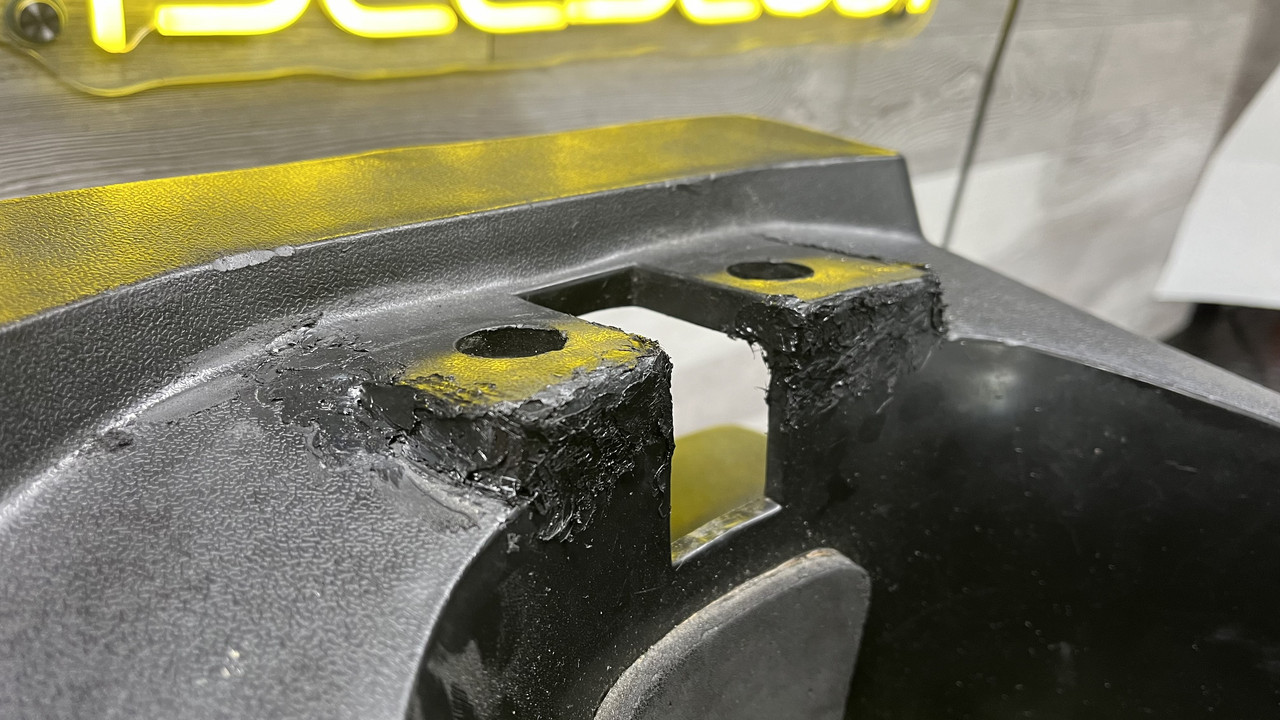 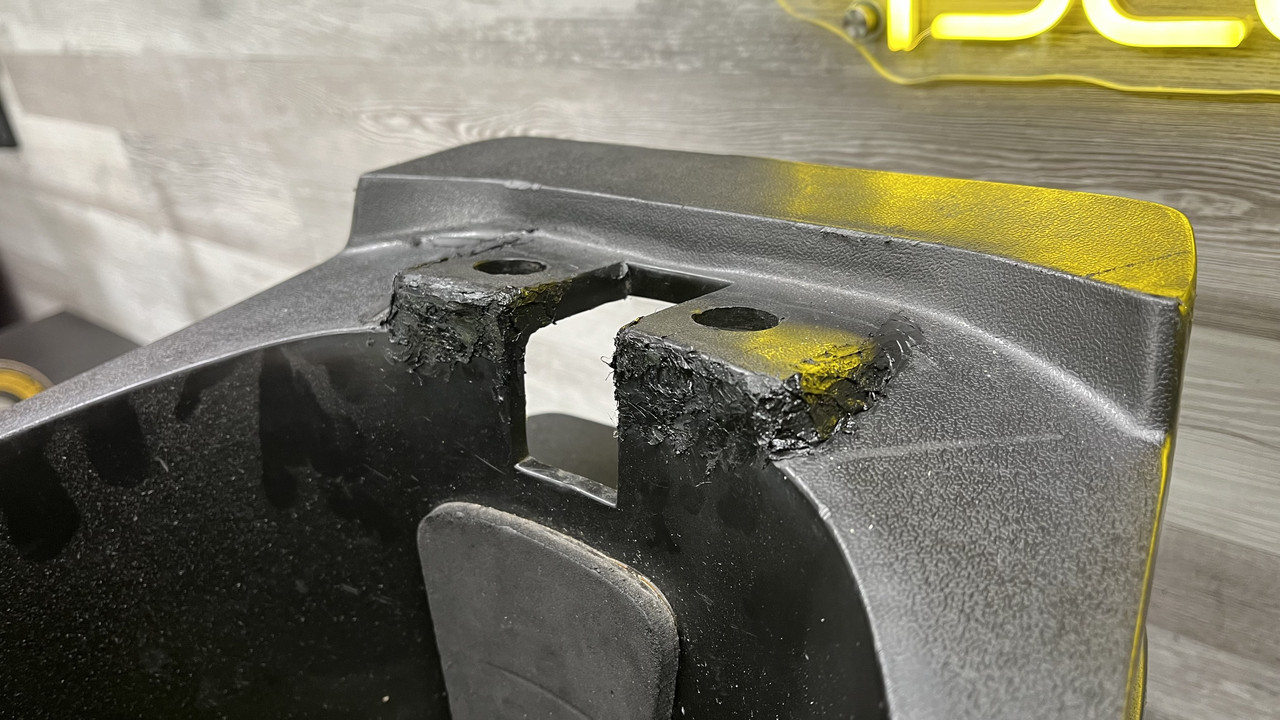
I saw some coolant puddled under the left side near the radiator area. Looked it over and wasn't sure where it came from. Cleaned it up and walked away. Came back to it a couple of hours later and there was no leak. I thought I must have just spilled coolant when filling and somehow it ran to that area. I ran fuel line and got fresh gas. Watched the fuel gauge as I filled and it's very slow to respond, but goes up 5-10% at a time as I filled it so it seems to work. I guess a fuel gauge really doesn't need even a 1 second refresh rate unless you've got a top fuel scooter or a thimble sized tank. i fired it up quite easily. Choke, kick a few times, running. Not bad for 2.5 years of dust collecting with absolutely no prep for storage. Sounds good, aside from no filter. I will miss an airbox. I like the quieter Yasuni silencer's sound. The bad news is that the leak came back. With some pressure in the system, I could see it though. There was a rough looking area on the weld on a connection of the left side radiator and that's where a pinhole leak was coming from. I have to say that overall these radiators are not the same quality as the ones on T2. Same brand, similar units... but quality has changed from ~6 years ago. I can see rough stuff inside of connections and there are sharp edges, the left radiator not only leaks but has a bunch of bent fins right out of the box. They used to come with caps, not plastic bags rubber banded over connections for shipping. 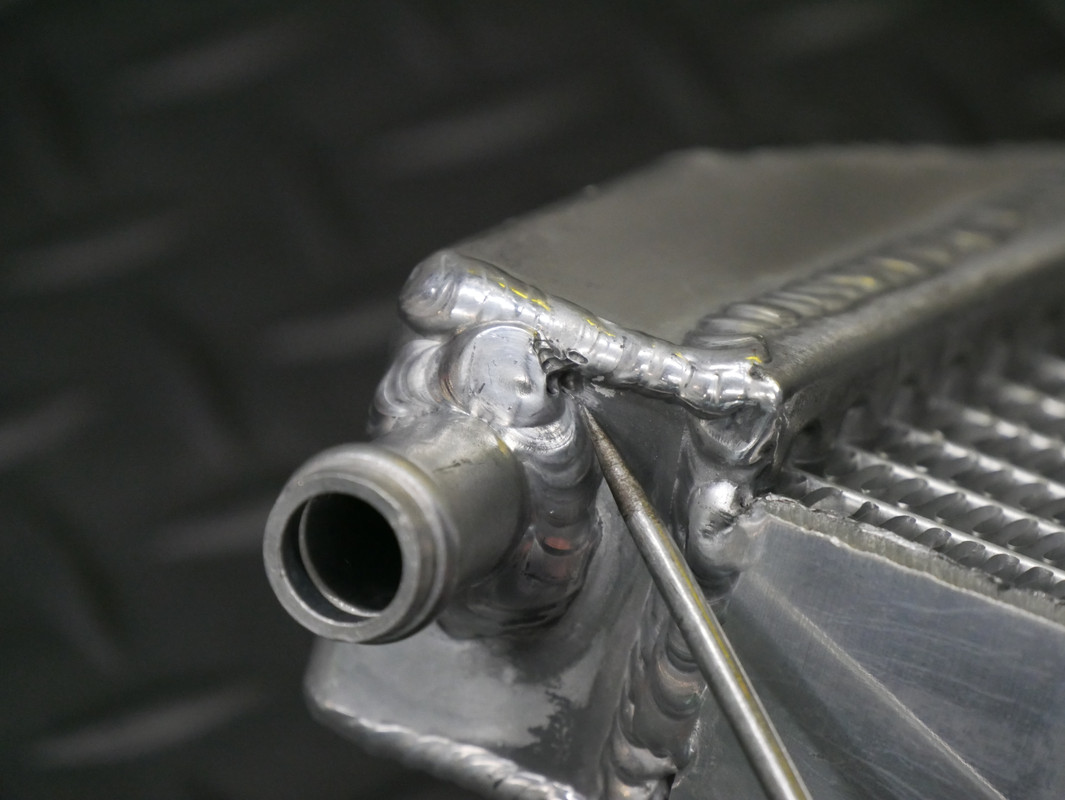 I was down; thinking now I have to wait and take it to a welder. I thought about JB Weld, but then remembered that I have something called Muggy Weld. I got it 10-15 years ago because I was going to put a brass fitting in an aluminum transmission pan in my Mustang and this stuff claims to join those dislike materials. Never actually used it in all of these years, but it is supposed to work on aluminum alone too. 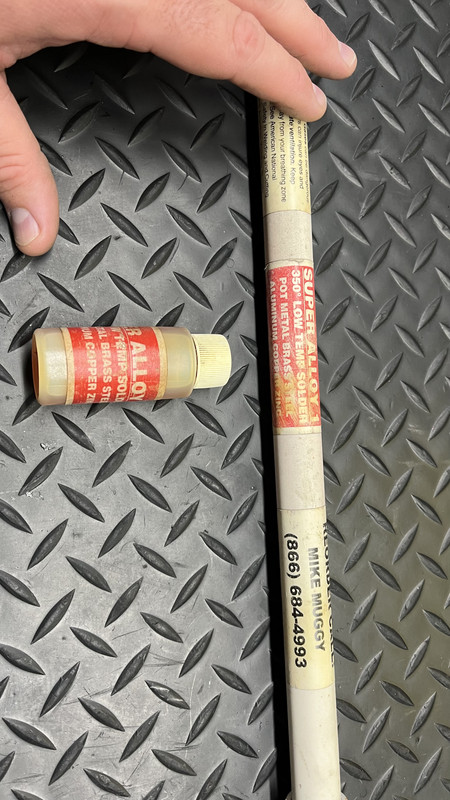 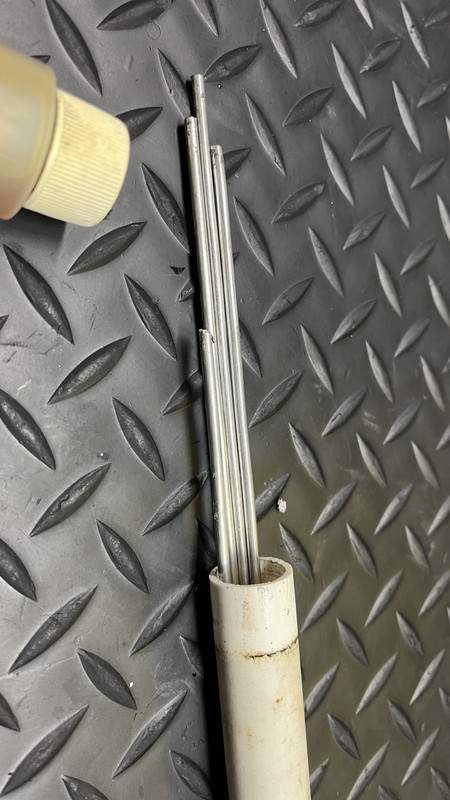 I dipped a rod in their flux and smeared some flux on the area to be "welded". Heated the area till the flux was brown. They say not to heat the flux directly, but I did because I had the radiator in wood blocks in the vise and didn't want to burn the wood or heat way away from the area. Once hot, the rod melted in. I did it a few times till I felt better about it. I'd guess someone that could TIG aluminum could just move the puddle around or maybe add a small amount of filler and have a better result, but if it works it works. 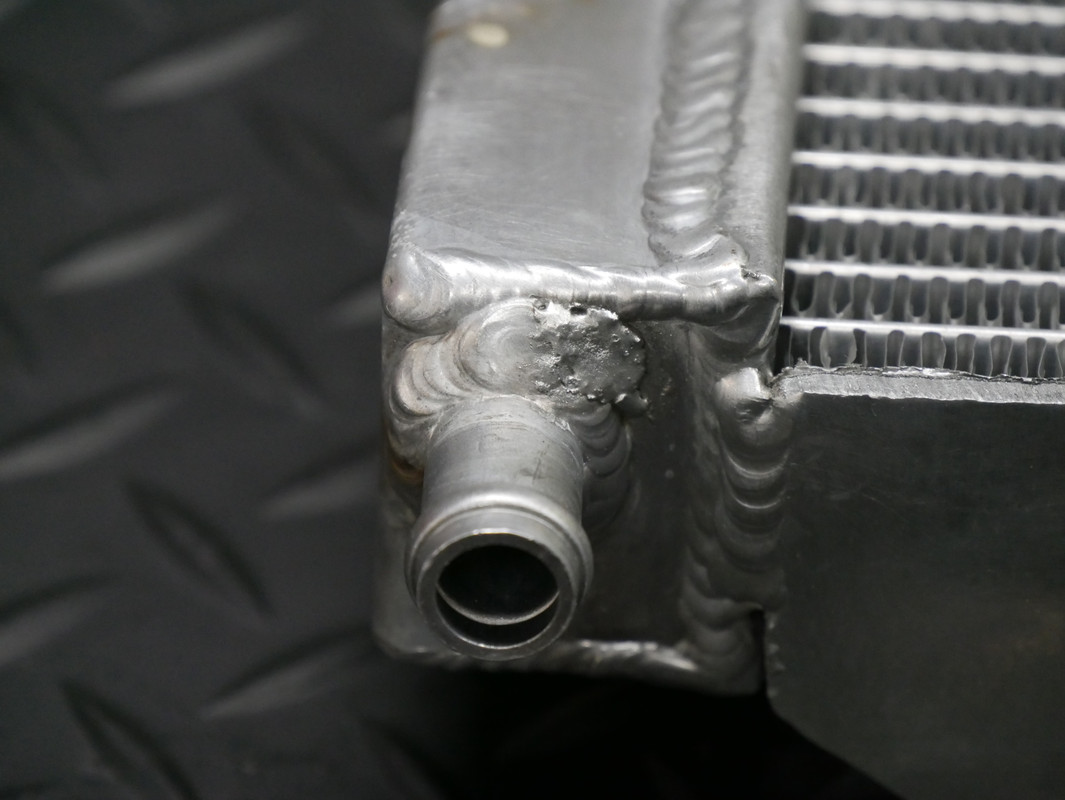 I setup a quick test rig. The caps didn't hold pressure really well, but I got 10psi or more in it and sprayed the area that I repaired and didn't see anything bubbling. Put the radiator back on and it didn't leak in a quick test fire. 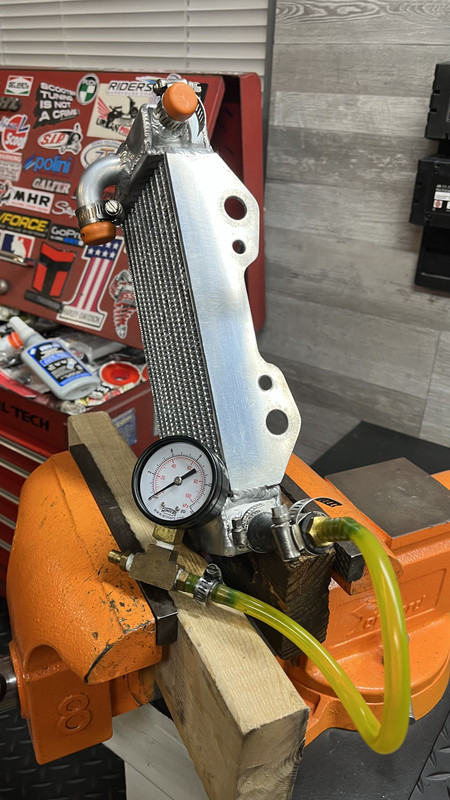
That's where I am now. |
|
|
|
Post by 90GTVert on Sept 3, 2024 23:04:37 GMT -5
I've been working on body panels, starting with a couple of the ABS parts. The piece under the seat was missing a tab to secure it to the floorboard so I made a tab out of a piece of another panel that was cut out. I hot stapled it in and then used a soldering gun to weld it back in with the help of a zip tie. 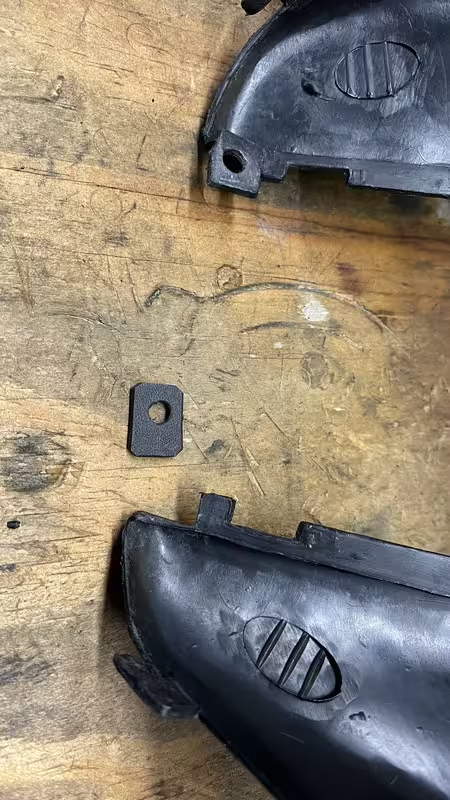 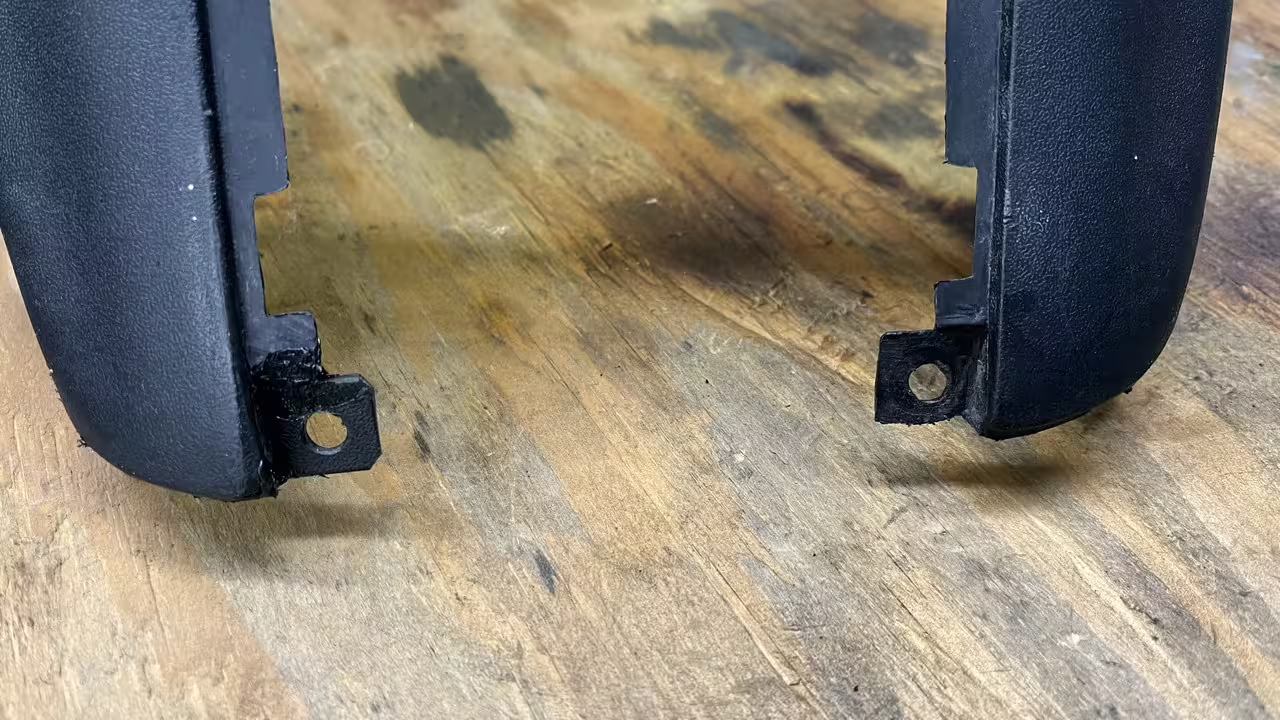 I can't remove the floorboard without having to unhook the radiators so it has to be repaired on the scoot. I couldn't reach to work on a missing tab in the back. I wound up making a metal L bracket style tab that I bolted to a piece of the floorboard. Maybe I'll fix it better whenever that panel is off next. 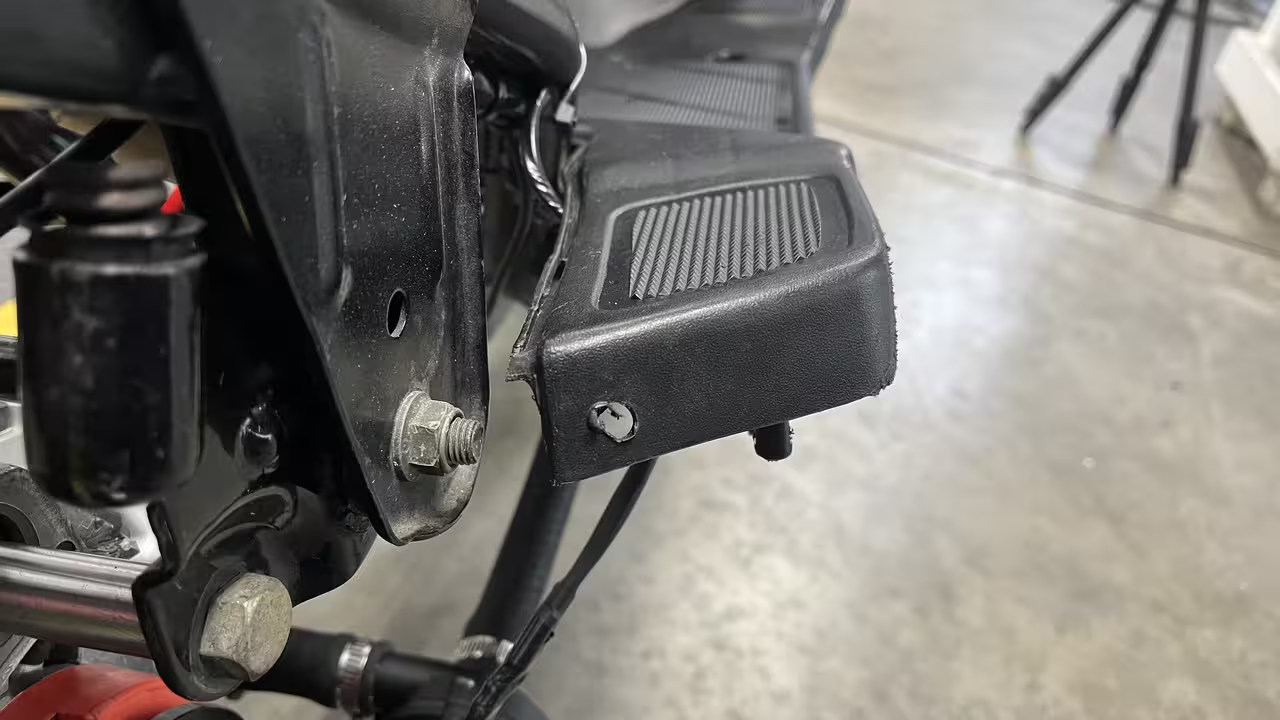 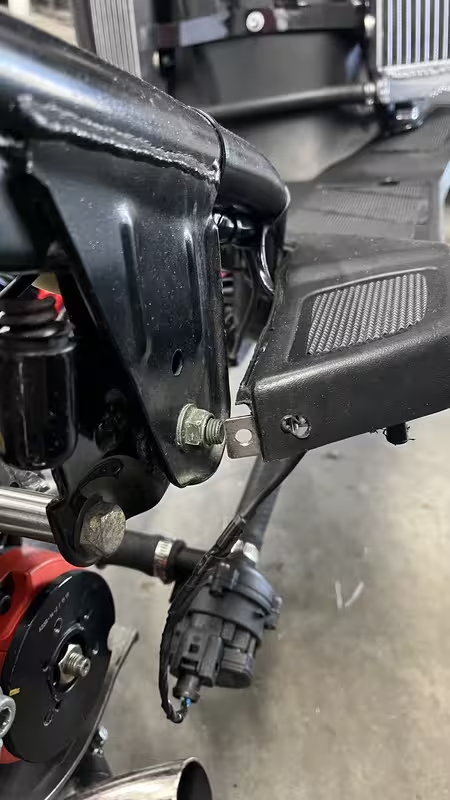
I wanted to join the 2 rear panels because they can go on as one piece easily enough and joining features are damaged and missing. I needed to repair some mounting tabs there too. Once again, ABS add-ons were hot stapled on for the tabs. 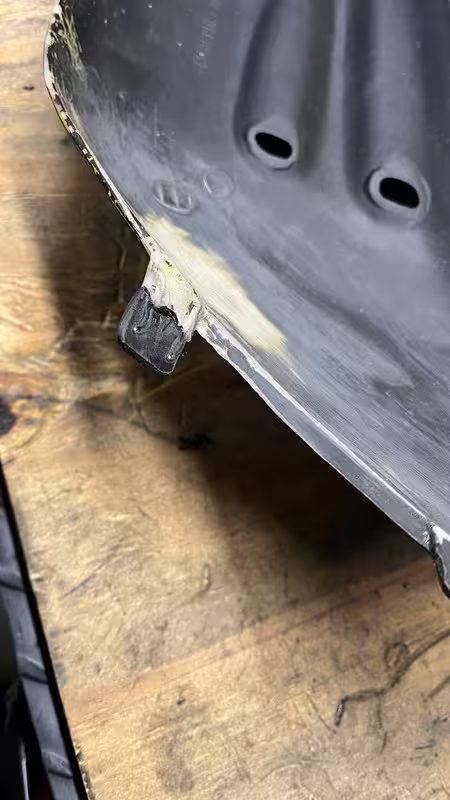 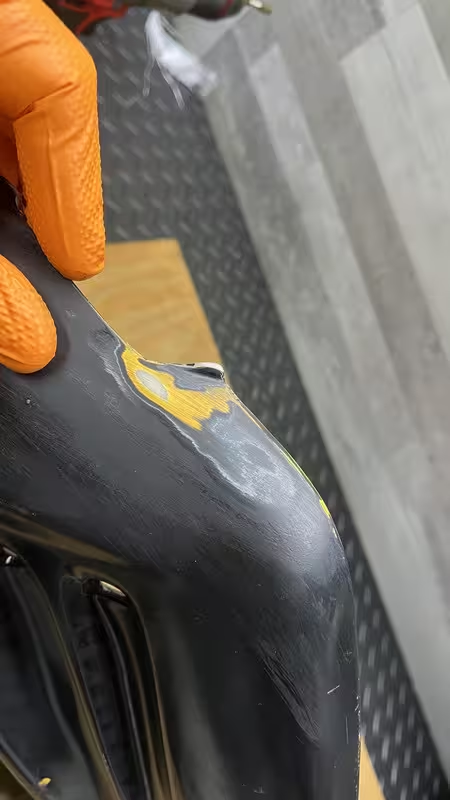 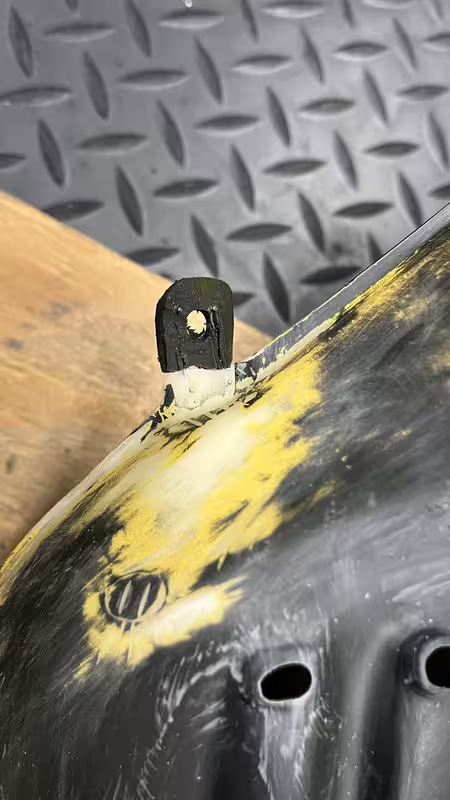 I hot stapled the 2 panels together in a couple of places on the top and multiple spots on the bottom. 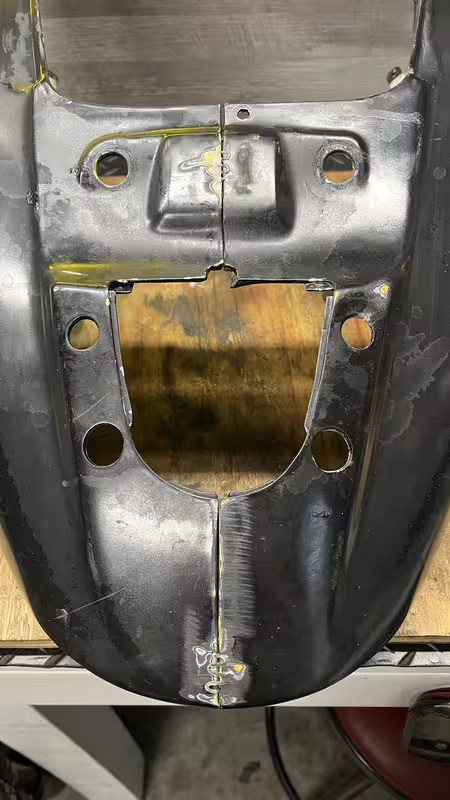 I put a couple of layers of fiberglass in to secure and reinforce the joined panels. 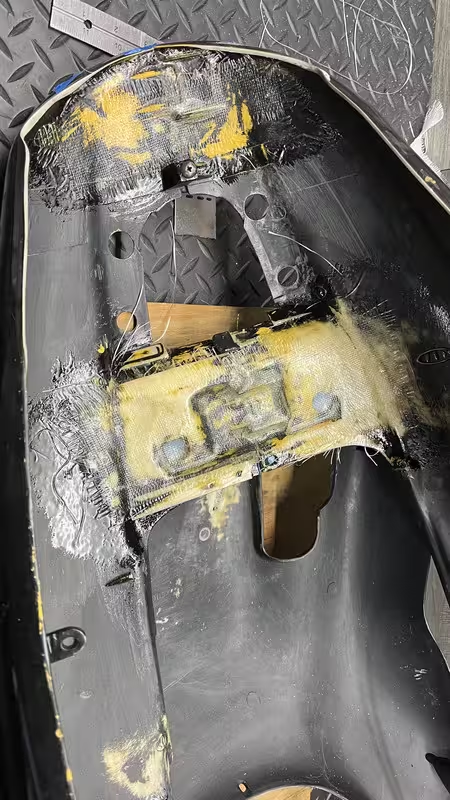 While I was at it, I put some resin over the repaired tabs to reinforce them a little. 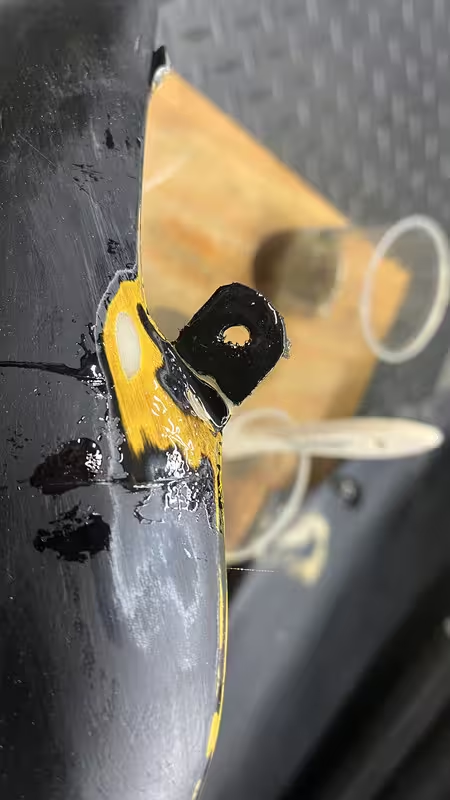 I planned to pick up a fuel filler surround panel for $6 plus shipping from PartsForChineseScooters. I went to order and the site is broken and won't allow me to get through the checkout process. Didn't see it anywhere else, so I had to make my own, starting with a cereal box template. 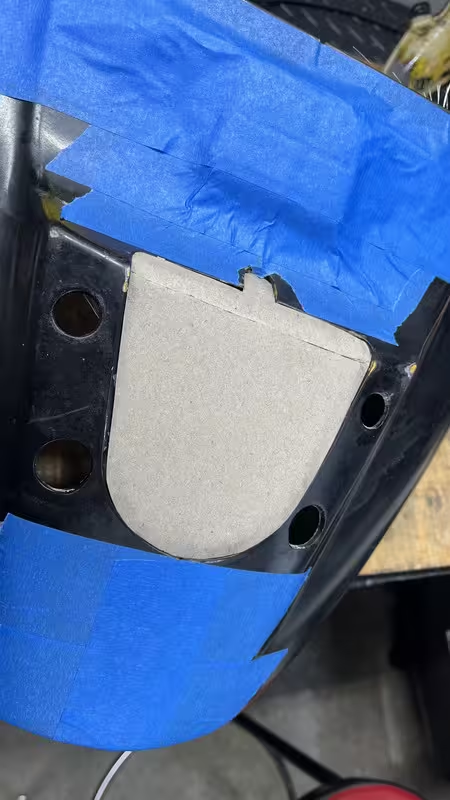 I hot glued some support to the template so it would hold it's shape. 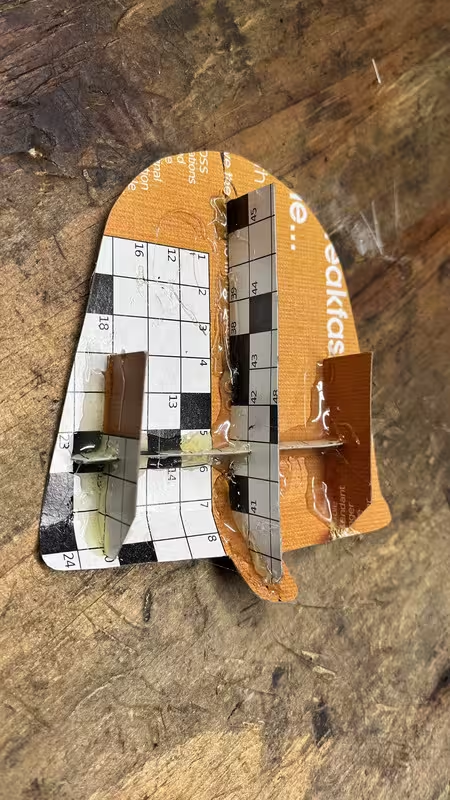 Then I picked up contact paper and wax paper. The contact paper was used to cover the template and wax paper was used to cover the work area and prevent sticking. 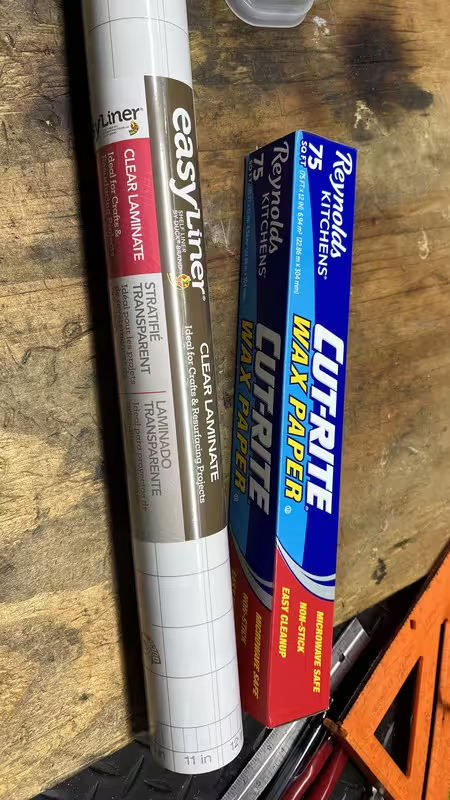 I made the piece larger and then cut it down once cured. 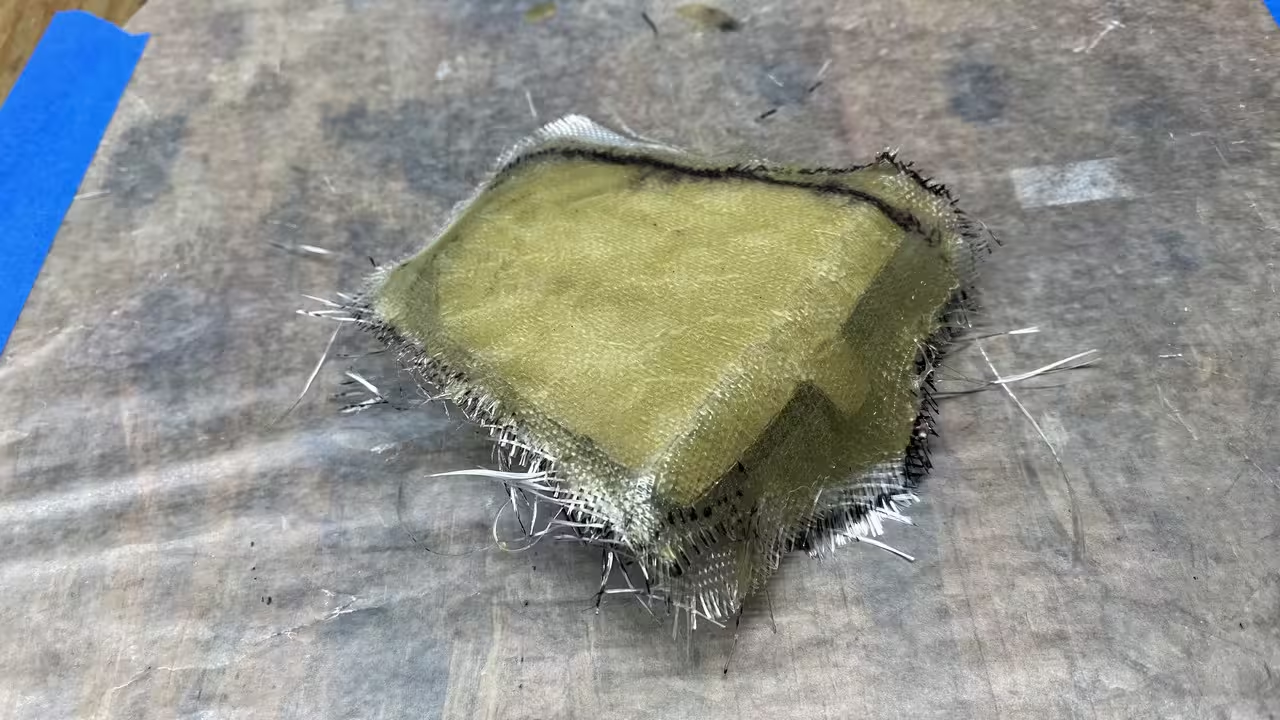 It's a bit wavy. You can see the light area where I had to heat and bend it for final fit. Seemed sturdy enough to work. 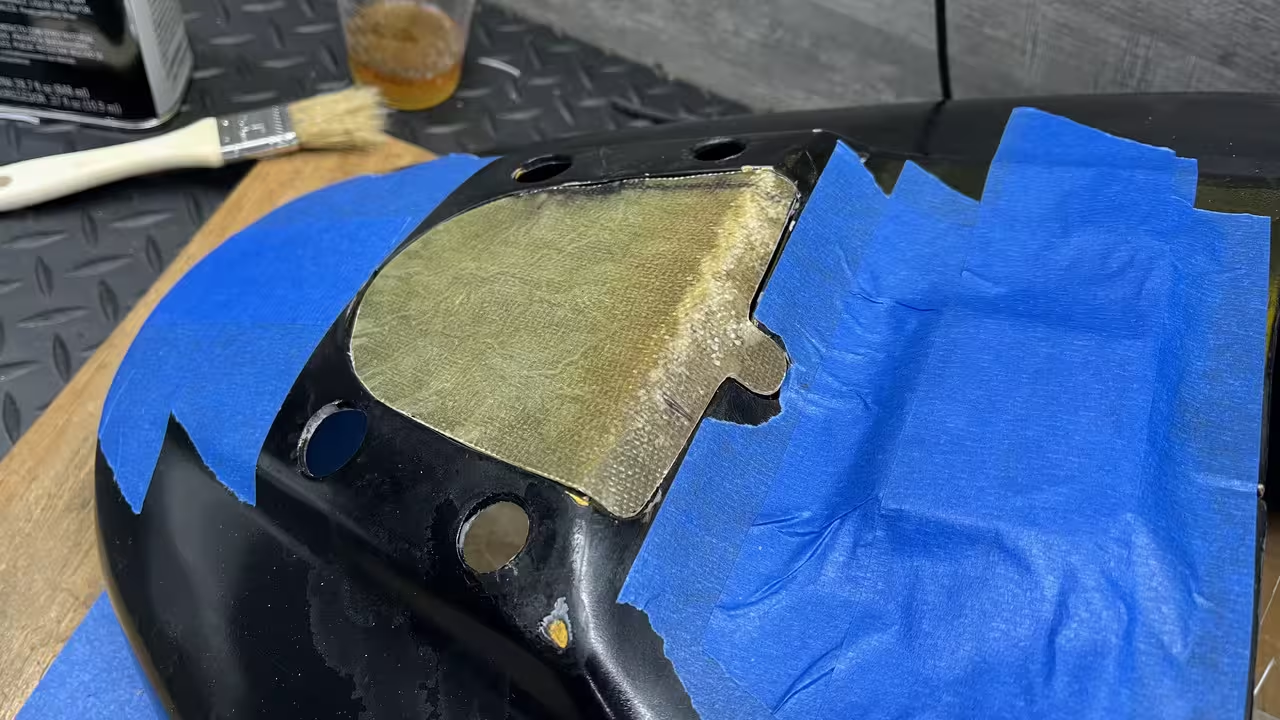 I glassed that in with a couple of coats in two segments. I had to screw the panel down to make it sturdy enough to stay and then I removed the screw and glassed over that area too. 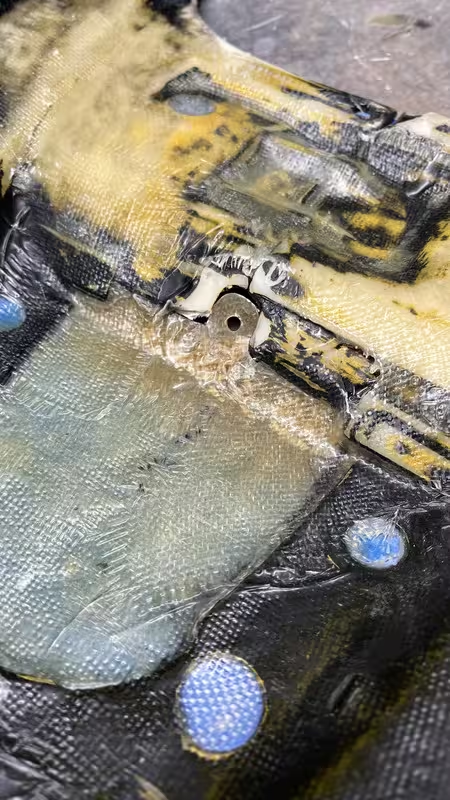 It needs some holes cut out and a lot of body work. 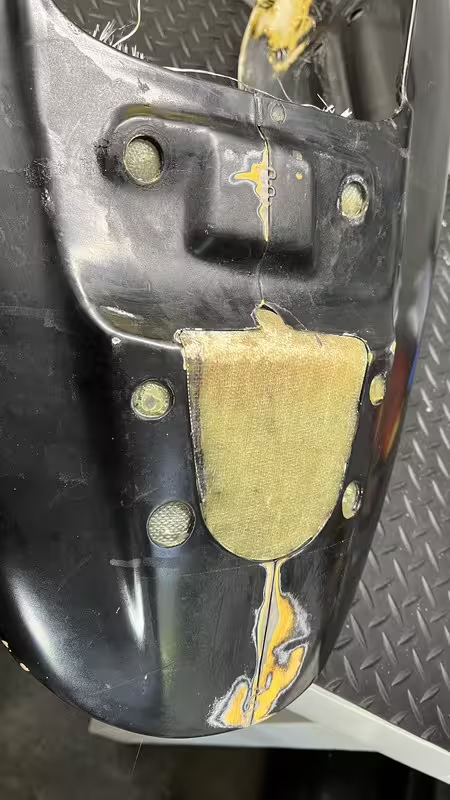 The belly pan had issues with all 4 pedestal mounts. The first two were cracked open. I made aluminum collars to squeeze them together and later glued the collars on with epoxy resin and filled the pedestals a little. 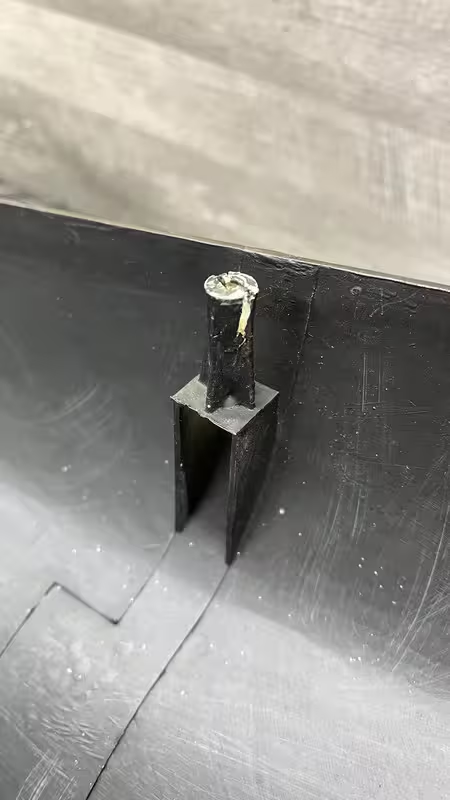 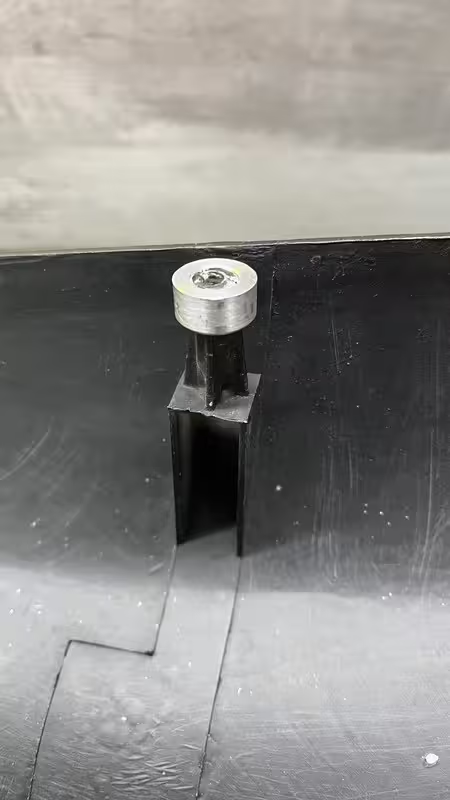 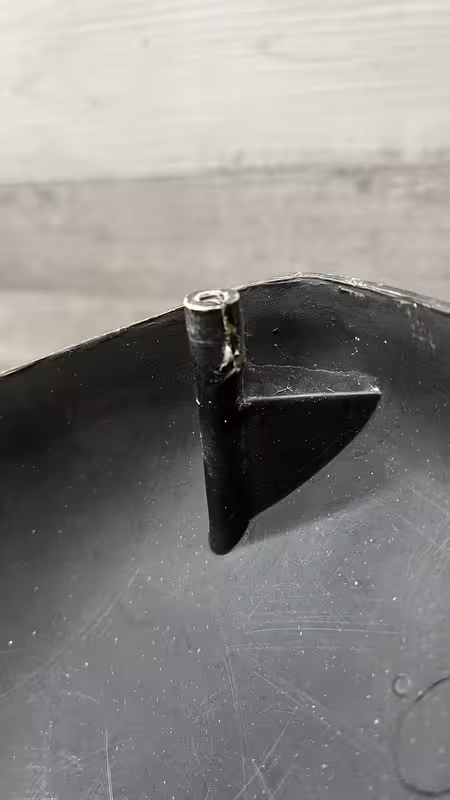 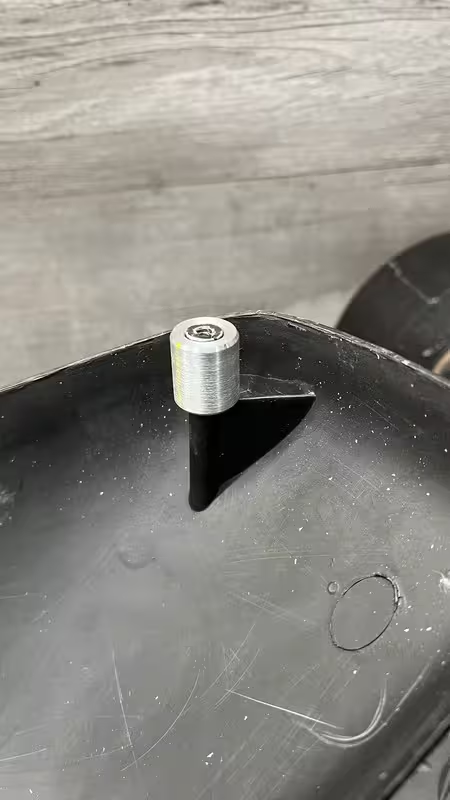 For this one, I made an extension out of a piece of scrap delrin that I had and hot stapled it on. Then I made a collar to cover the whole extension and some below to help join them. Again, resin was used to glue and fill. 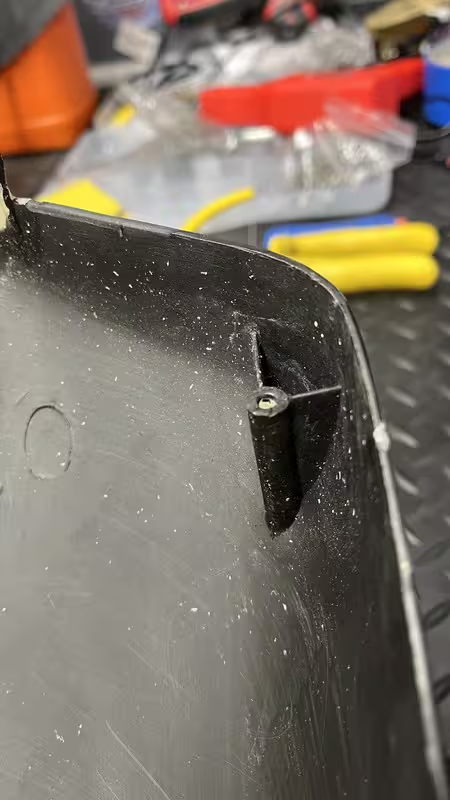 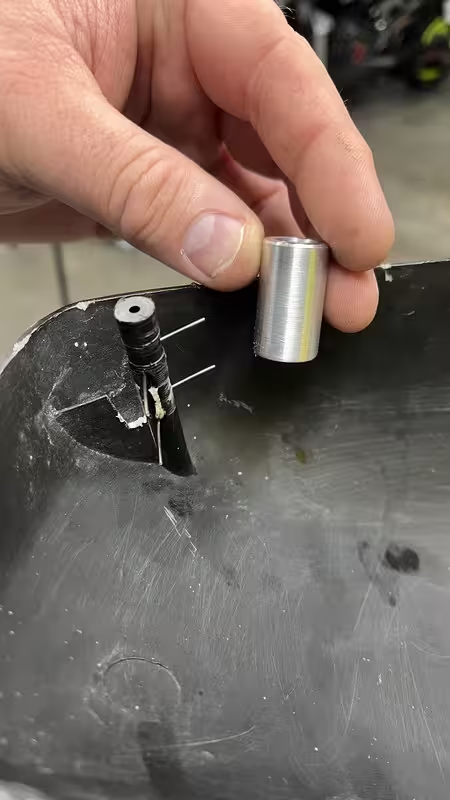 This one was a little more work. I made a steel bracket to bolt on, with a spacer to make sure the bolt didn't crush the existing pedestal. The bracket had an M6x1.0 bolt welded in to stick up. Then I made an aluminum part with M6 thread on one end and a bore to hold a piece of delrin that I also cut to fit. It was glued with resin as well. The last pic is before resin so the center wasn't driven in all of the way there. I initially wanted to do all pedestals M6x1.0, but I thought it best to limit torque on the fairing by sticking with screws. 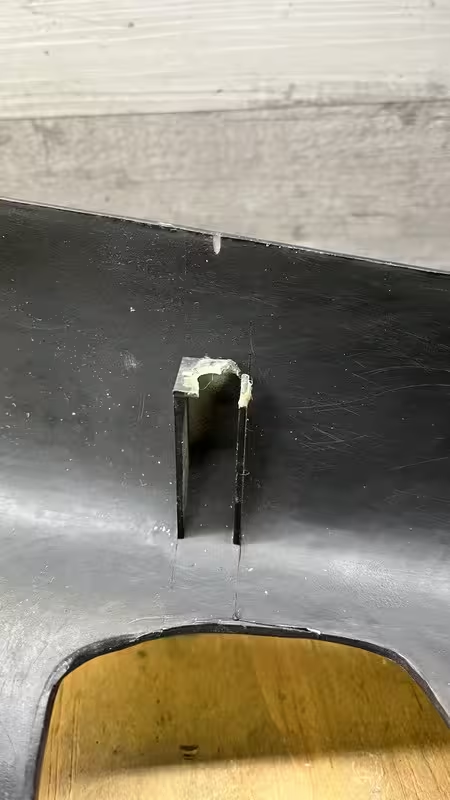 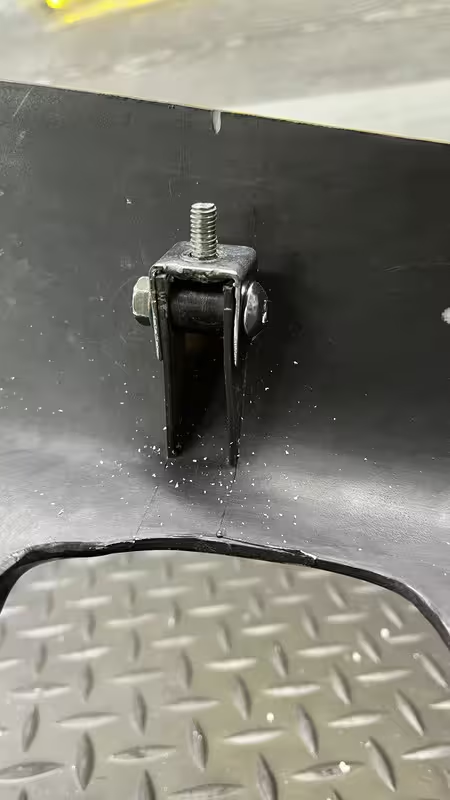 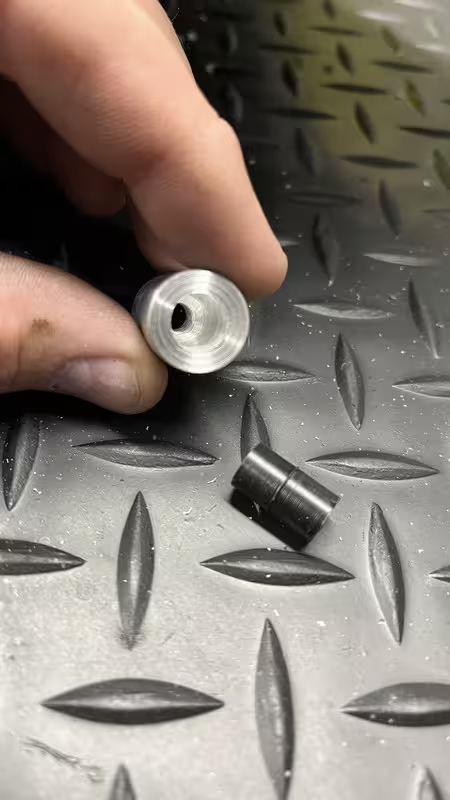 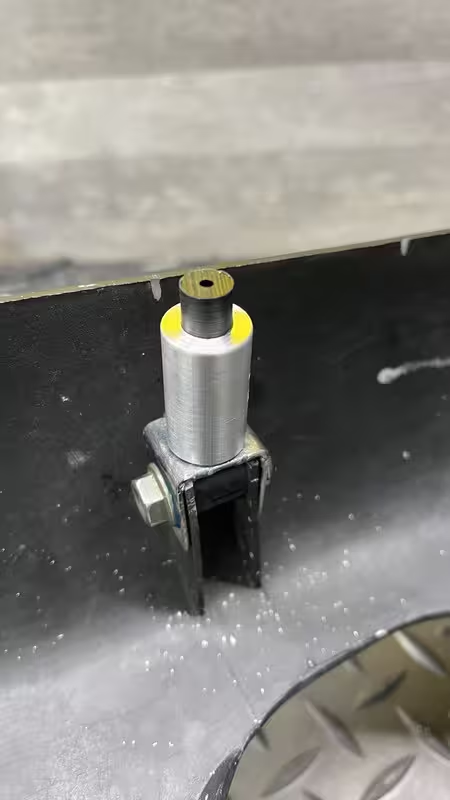 I had a couple of cracks to repair as well. 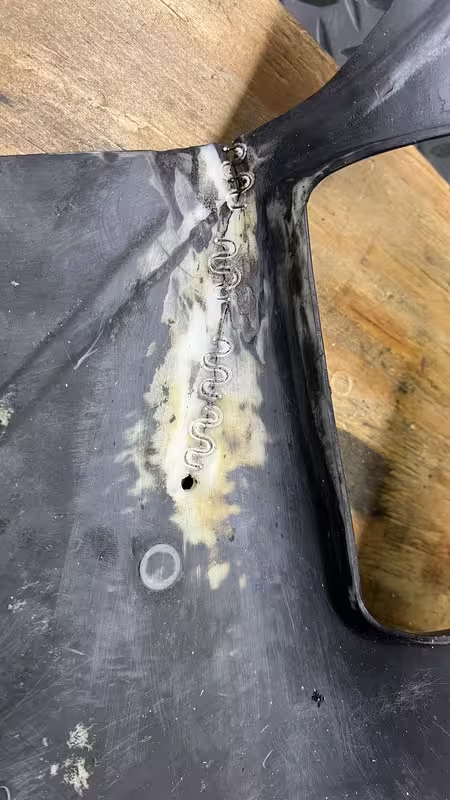 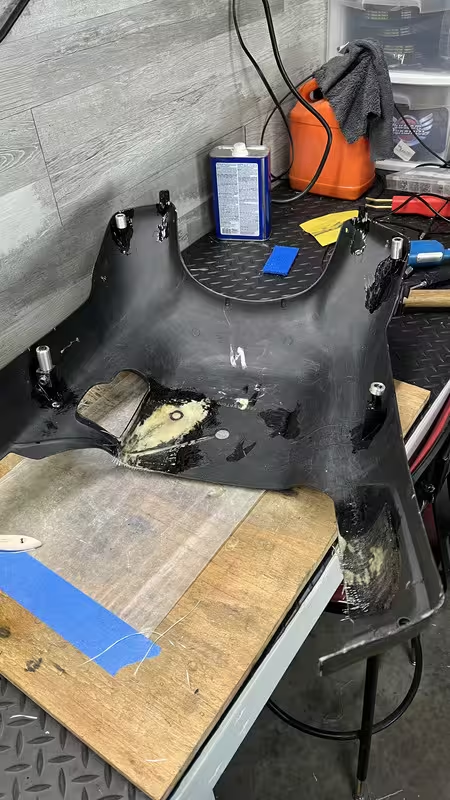 The front needed work too. I pulled out old turn signals that were embedded in the fairing and glassed over those spots. I heated a washer and melted it into the mount area, then blended with plastic welding and epoxy resined it. I added a couple of layers of fiberglass on the areas where I think I'll put turn signals, just for reinforcement. I also stapled and glued the triangular piece in because some tabs are broken and there's no need to remove it. 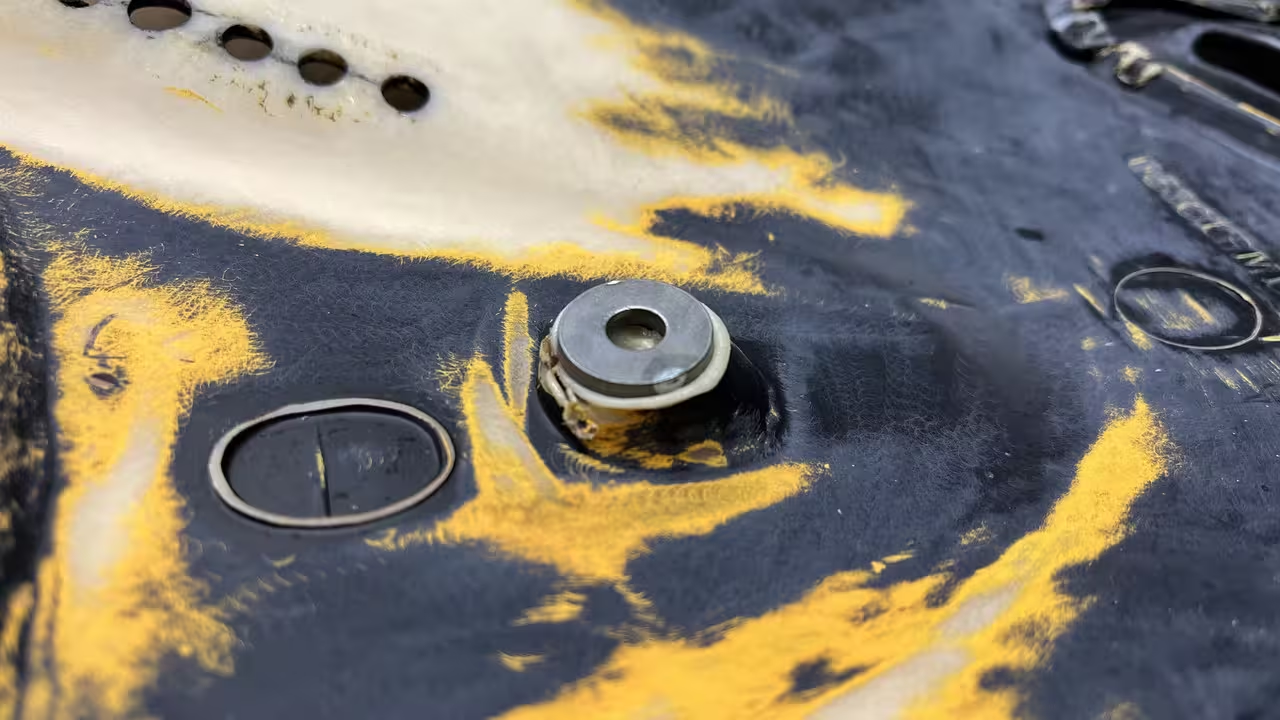 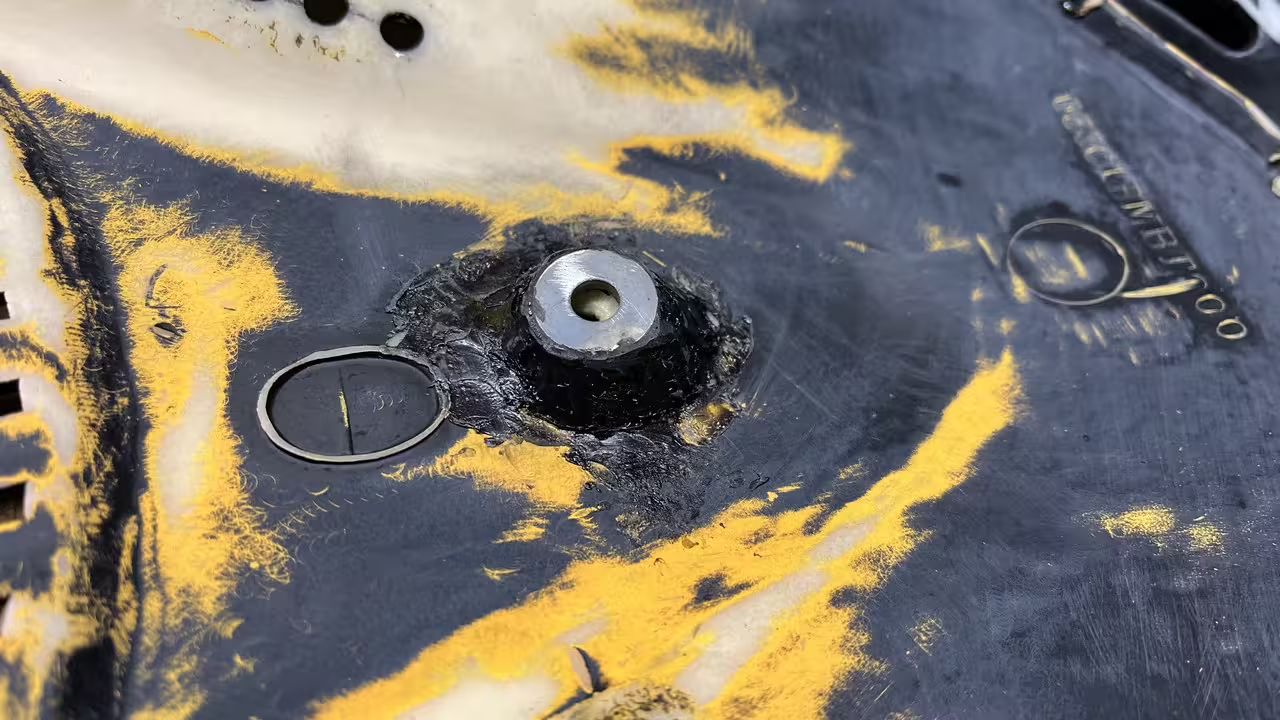 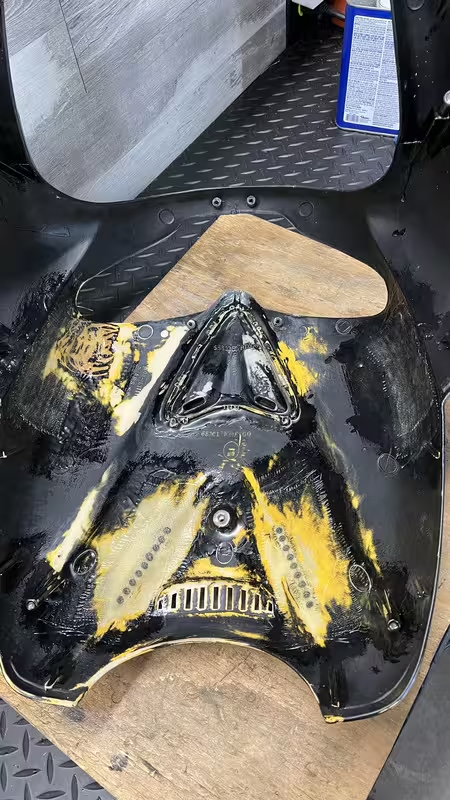 Now the body stuff should be done with fiberglass, but I need to cut some holes and do quite a bit of filler work and sanding. I'm at least pleased with the glass. I haven't had much experience with fiberglass so it was nice to have it go basically right. I put the pod filter on the carb and upjetted from 102 to 110 and lowered the needle clip a notch to richen it up a bit. 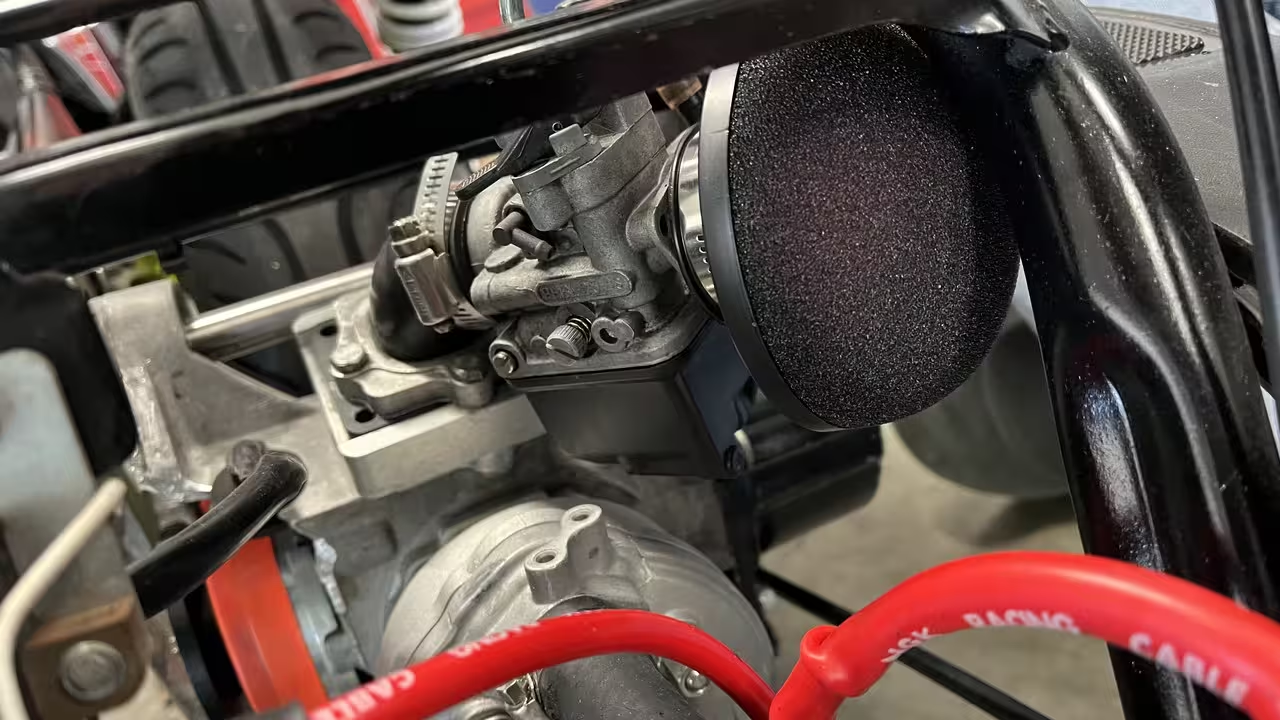 |
|
|
|
Post by aeroxbud on Sept 4, 2024 4:14:06 GMT -5
How many hours I've spent fixing scooter panels? Too many. It's very time consuming, but cheap with materials. And very rewarding once it's done. Nice job so far Brent. 👍 Have you thought about a colour yet? Something as stand out as the wheels perhaps?  |
|
|
|
Post by 90GTVert on Sept 4, 2024 9:01:33 GMT -5
How many hours I've spent fixing scooter panels? Too many. It's very time consuming, but cheap with materials. And very rewarding once it's done. Nice job so far Brent. 👍 Have you thought about a colour yet? Something as stand out as the wheels perhaps?  I was kinda shocked when I realized I didn’t have a source for new panels. Would have been way easier and not that much difference in cost probably. They gotta be out there somewhere, but not the spots I know or found. Prob going to be gloss black eventually. If I get the guy I’ve been building engines for to do the paint, I can have leftovers and I like gloss black. Wanted it that way long ago, but my spray can job didn’t cut it. Other thought was the grey you see on modern vehicles with no flake or silver at all. Doubt I’d get that lucky, but he’ll surely have black at some point. It’ll go back together either primer grey or as-is depending on timing. |
|
|
|
Post by 90GTVert on Sept 5, 2024 8:48:33 GMT -5
|
|
|
|
Post by 90GTVert on Sept 7, 2024 20:02:42 GMT -5
I primered the panels last night. Got up early and got them on in time to go to a friend’s house. I figured, might as well go full confidence and make the first ride 11 miles each way.    I found out quickly that I only had roughly 1/4 throttle working. Above or below it broke up. I made the trip over doing 40-50MPH. A storm came up on the way home and I got to 62MPH with a tailwind. Later, I went back to the tune that it had it in when it last ran. Down from a 110 MJ to a 102 and the needle clip moved from position 3 of 4 (from top) to 2 of 4. It runs a lot better, but it’s still off. Took it for another quick ride and I think I put 55 miles on it today.  I REALLY like the way it looks as-is, but primer isn’t going to hold up. I may have to see if I can get it done in a similar color but gloss and cleared. The ride sucks. It barely had a suspension being so low. I went over a series of bumps on a back road and it sounded like a fireworks display… bang bang bang bang. I still have the spring pieces that I cut off, so I think I’m going to try to cram those in and make it stiff to see if it still bottoms out. I think I just made it too low, but we’ll see. I’m also not used to small scoots anymore. It’s way different on t2 with the floorboard long gone and pegs lower. My knees are in the bars in standard riding position. Left radiator shakes around. Could be a bracket beef up is needed. I don’t think it would be that bad if it rode better. Everything kinda moves around from lack of suspension. |
|
|
|
Post by aeroxbud on Sept 8, 2024 3:28:46 GMT -5
It does look good in the Gray primer. Especially with the wheels to give it some pop.
|
|
Timmer
Scoot Enthusiast
  
Posts: 128
Location: Mechelen, Belgium
|
Post by Timmer on Sept 8, 2024 15:24:31 GMT -5
It does look good in the Gray primer. Especially with the wheels to give it some pop. motion seconded! i does look good! |
|
|
|
Post by 90GTVert on Sept 8, 2024 22:36:18 GMT -5
I'm hoping I may have fixed the harsh front suspension. It seemed like it needed to be stiffer to me. If I lift the front end, I can pull down on the shocks and extend them more. There should be enough pressure in there to extend them without weight on them.
I was going to cut 1/4" or so off of each spacer to lengthen the shocks slightly and then add spacers or the old cut out sections of springs to stiffen it up. I removed the wheel and then decided to try simple first. I had a spacer about 13/16" long around so I stuck that in one side. It felt pretty good to me so I made another to match. The ~2" spring leftovers were way too much to try to cram in there. No test ride yet, but it has to be better.
|
|
|
|
Post by 90GTVert on Sept 9, 2024 23:41:12 GMT -5
The spacers in the front forks did the trick! It still rides like a way lowered Chinese scooter... but the front suspension actually works. That is a welcome change and makes it so much more pleasant on all of the bumpy back roads around me.
It feels like the CVT slips to me, so I removed shimming to go from 1mm down to 0.5mm on the drive boss. That helped a little, but then I started thinking maybe I'm feeling the effects of poor carb tuning. I moved the needle clip leaner and it got more responsive. It still felt a little off at WOT and sort of bogged at 3/4. I started with a larger jet and that got worse so I went to a smaller jet and that made the bog go away and it started revving out to 14,000RPM. I then removed all of the shims and it went slower. I think with the best setup I had, it went as quick as it ever has or at least right on par with past quick times. 10.99 is the best I did in the 1/8 mile, and around 11 seconds 0-60MPH. For comparison, T2's bests are 9.66 in the 1/8 and 6.9 0-60.
Now I'm not sure if what I think is belt slip is just a lack of torque. The RC1 may have spoiled me into thinking all of these setups go hard. I also realized that part of what makes it seem worse at certain points is the sound of plastics vibrating. With multiple points bolted to the frame and panels joined to each other, there would have to be a good bit of isolating to stop that I think. It has me wondering if the plastics will even hold up.
The difference in T2's high frame vs T1's low stance changes wheelies a lot. It was easy enough to power wheelie T2 at low speeds when this engine was in it. T1 will get the wheel off the ground at times, but it has to be going very very slow and it's not coming up much. It would probably make more sense to have the RC1 in this... but T2 is way more stable at speed and wheelies are pretty fun. It's wild that a little more than 2" of lowering does that.
I need to swap the belt, put a shim back in and change the spark plug. Otherwise, I think a little cleanup would probably have it ready to play with if I decide to take it to OC BikeFest at some point.
Other notes...
It's running 140-150F coolant temp when I'm doing test runs in the 75-80 degree weather. T2 with it's more open setup usually stops around 140 and cools off quicker after. Nothing alarming so far though.
Charging is not ideal. It gets over 15V. I'm using the same reg/rec as it had for the stock stators instead of swapping to a Zuma unit like I did for the MVT on T2. I don't think the water pump is cutting out like it did on T2 at 15V+ for a bit. Same pump. I think T2 actually quit doing that as well when I replaced the pump last year, so maybe Bosch changed their safety voltage limit. I could add an electrical accessory just to keep voltage down. I use the headlight on T2, but it's higher wattage than this.
|
|


