|
|
Post by 90GTVert on Sept 18, 2016 13:50:41 GMT -5
It's revving normal for the speeds it's at. I'm only seeing high 6000s to 7000RPM, but that's about right for ~20MPH. Normally it cruises around 30-35MPH at 7800-8200RPM. It's slow to rev even on the stand. Didn't try maxing it out. I noticed that when I started and revved it, but just thought I forgot how under-powered the little stock 4T is.
|
|
Deleted
Deleted Member
Posts: 0
|
Post by Deleted on Sept 18, 2016 14:31:55 GMT -5
Well, God knows what mine is turning but, I know it is too high, even without a tach. I was running 5 gram sliders which worked really well and then tried 4.5 gram sliders which worked even better but, after seeing a few broken con rods and other engine damage on this site, I decided to order 6 gram sliders. It accelerates like a bat (for a 4t) but hits max rpm from 0 and holds that all the way to top end. At first, I thought it was great but then, I am thinking...hmmm...Chinese crank...Chinese connecting rods...so I am backing off a bit. I will add a tach later on.
Good luck sorting that out. Maybe it just missed you?
Bill
|
|
|
|
Post by Senna1Rossi on Feb 8, 2017 13:31:23 GMT -5
I've been tired of worrying about hitting these foot pegs on the ground on turns.  I picked these folding pegs up on eBay for I think around $10 months ago and finally decided to start installing them today.  I have no mounting hardware, other than what is shown above, so I used cardboard to make up some tabs that would work with these pegs. 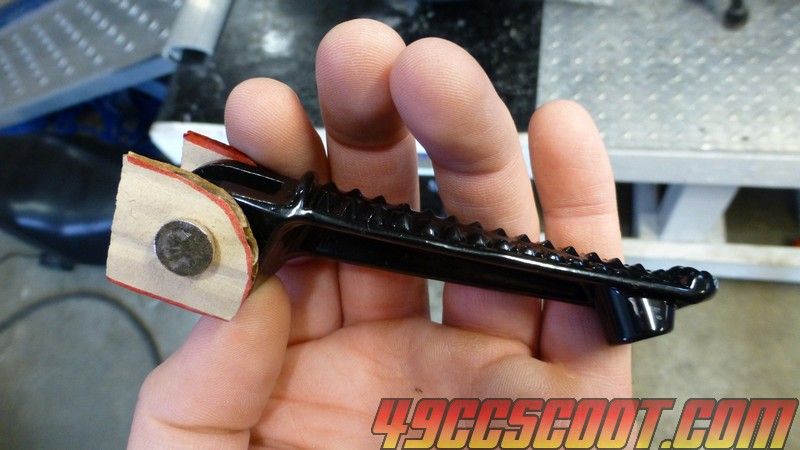 Then I cut 4 out of 1/8" steel. 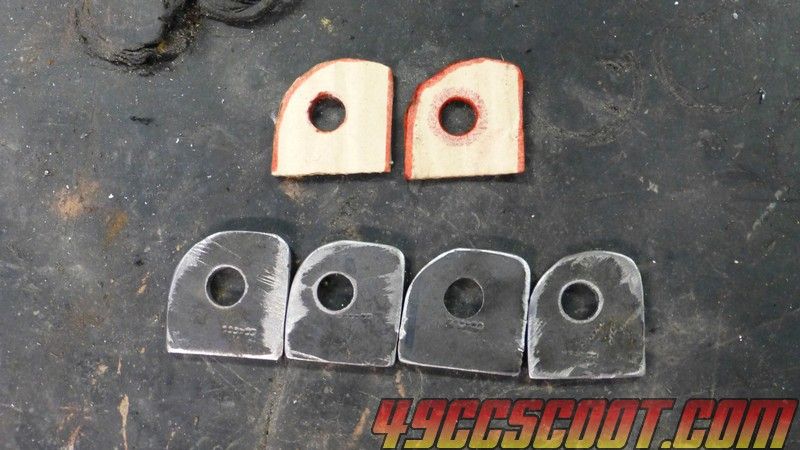 I cut two 1.125" x 1.125" squares out of 1/8" steel as well, to be used as a back plate. If positioned properly, the spring for the pegs should be able to rest on top of the plate. It's just wide and tall enough to work without much overhang. Not exactly pretty, but they'll work. 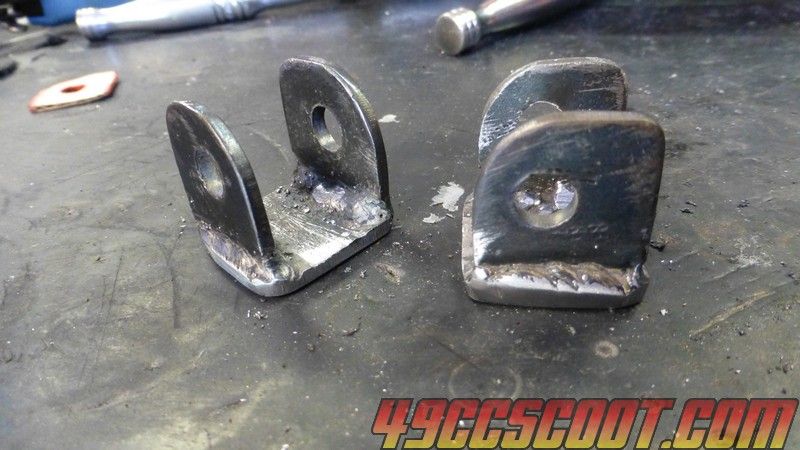 Assembled to be sure they functioned properly. 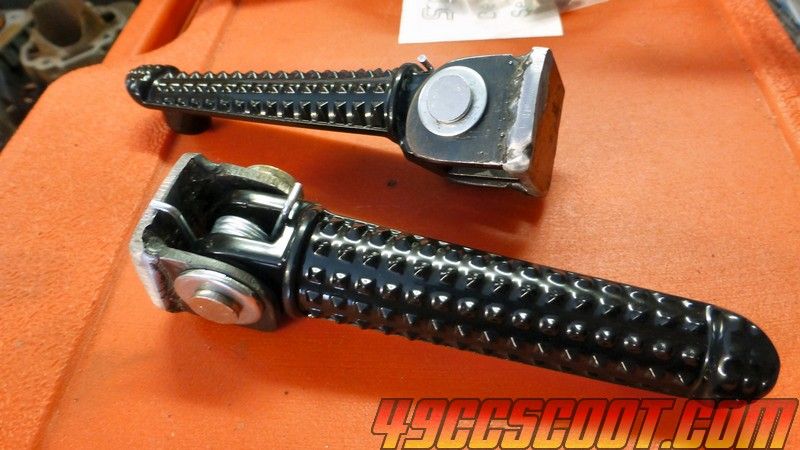 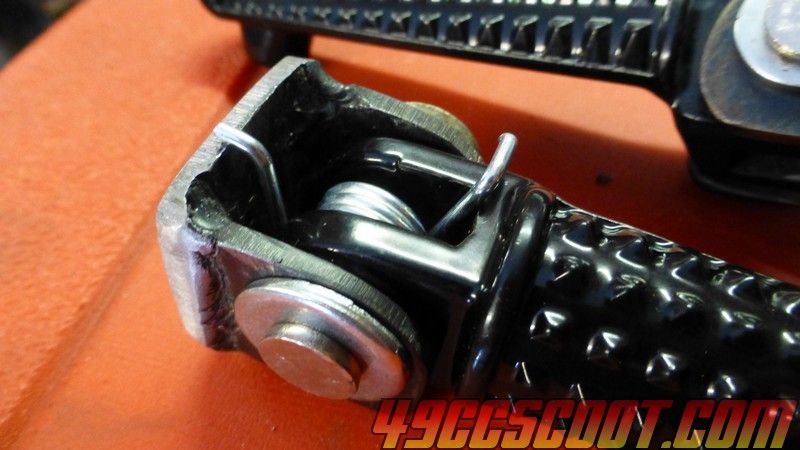 A little bit of disassembly. 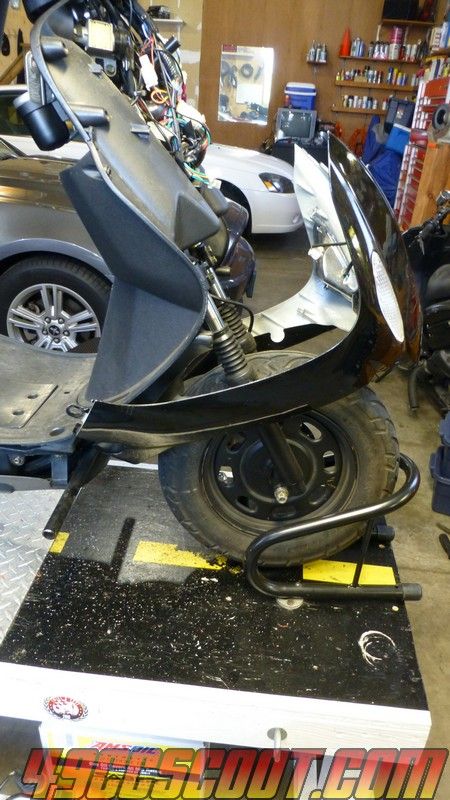 I chopped the old pegs off to the length I wanted. The new pegs will stick out about 1/2" more, but that shouldn't be a problem with folding pegs. I could have made them protrude the same amount as before, but I thought I'd give myself more room. 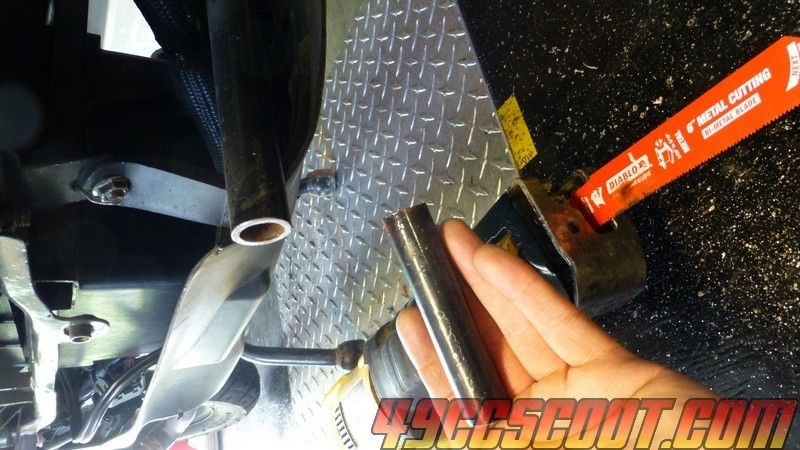 I got one welded in just a couple of spots. I'll have to take the peg out and weld all the way around the mount and I need to do the other side, but I had other things to take care of.  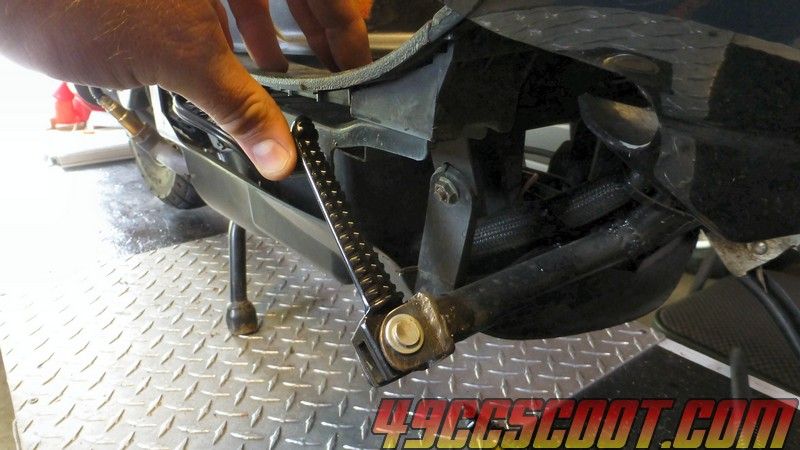
Ah, brilliant this!
|
|
|
|
Post by Senna1Rossi on Feb 8, 2017 13:32:06 GMT -5
Finished up the pegs today. I was wishing I just did them like this in the first place. Not fun trying to weld in spots where you have to use a mirror or crawl under the scoot just to check what you've done.  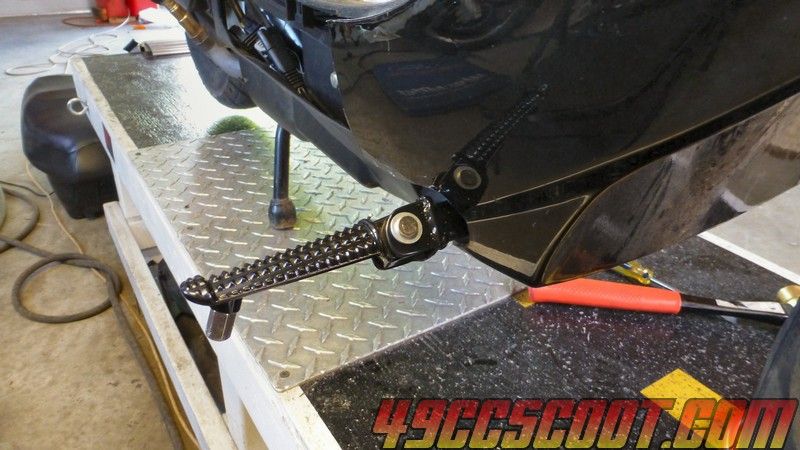 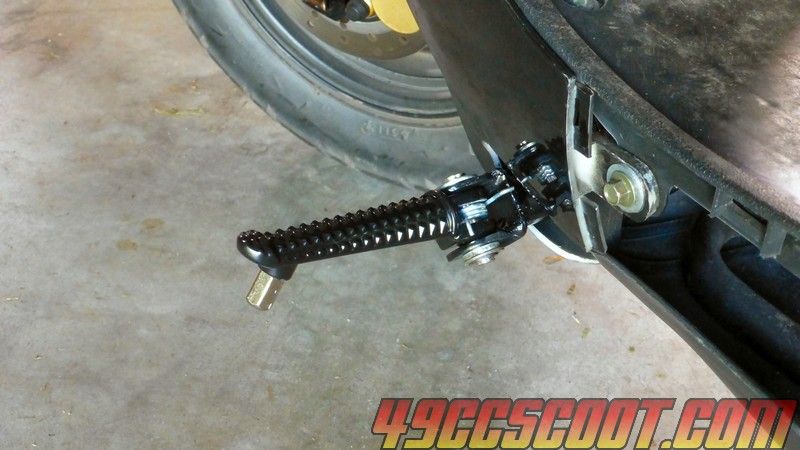 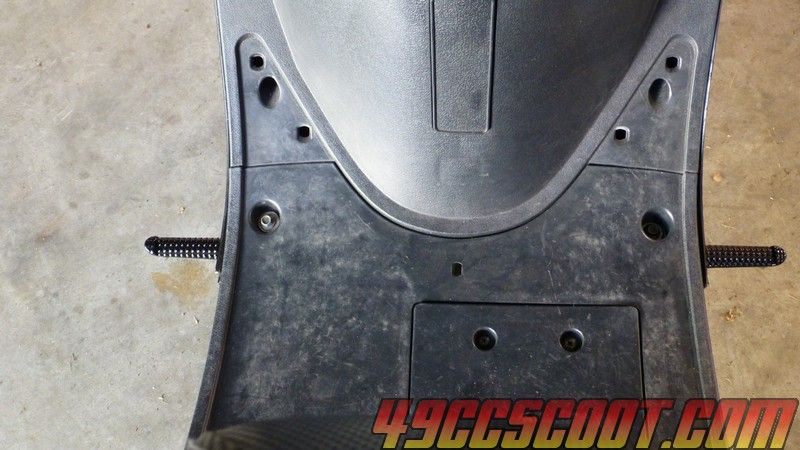 I also replaced the CHT sensor because it hasn't been working or working sporadically lately. Hopefully it's just the sensor.
Oh, even better!
|
|
|
|
Post by 90GTVert on Feb 23, 2017 22:17:16 GMT -5
I finally got back to this thing (last update in Sept 2016 it was VERY slow) on recent warm days. I cleaned the carb thoroughly including some time in an ultrasonic cleaner on a 60 degree day the other week. It keeps leaving puddles on the floor when it sits. I do leave the fuel shutoff on, but I still expect the carb to control fuel. The filter was soaked at the bottom and the two layers of foam were separating. I looked it up and air filters were ~$5 shipped so I ordered that. I also got a rebuild kit, just because I wanted a new o-ring for the bowl and a new float and float needle. The parts came in and today was 70F so I got the carb back together and set the float height and installed the air filter. I may be replacing the airbox soon too. It's fine, aside from the tube from the box to the carb. That is hardening and it's tough to install unless I heat it a little to make it more supple. The same thing happened to the airbox on my GY6 150. Crappy materials. I fired it up and adjusted the idle and revved it a bit once it warmed up. It seemed week even revving, so I assumed it was not fixed. I took it around the yard and it definitely felt better than I recalled from the last ride, but not good. I noticed that the wideband was reading pretty lean under load. I assumed it would need tuning anyway, but with it being 70 today and in the 70s another day or two and then back down to the 40s, I didn't really want to bother with a jetting process. Instead, I tried a trick that many of us have seen. I covered part of the airbox inlet with electrical tape to move the mixture toward rich.  That seemed to do the trick, so I took it down the road. It actually got up over 30MPH with the wideband showing 10-11:1 WOT. I pulled over and moved the tape to cover just a hair more of the inlet and the reading changed to 11-12:1 WOT. I rode it 6.5 miles and made it over 35MPH with a little tailwind.  I think a lot of the reason I initially thought it wasn't fixed is that I've pretty much only rode the GY6 150 and the 100cc 2T in the last year. The little stock 4T feels quite weak in comparison. I'm not a big fan of the electrical tape mod, but it'll do for the moment; till the weather is more stable or I know I'll be riding more. |
|
|
|
Post by 90GTVert on Feb 24, 2017 21:18:07 GMT -5
Since I tried to sell the Roketa 150 and realized it wasn't going to go for much, I've wanted to swap it's handlebar setup onto the TaoTao. 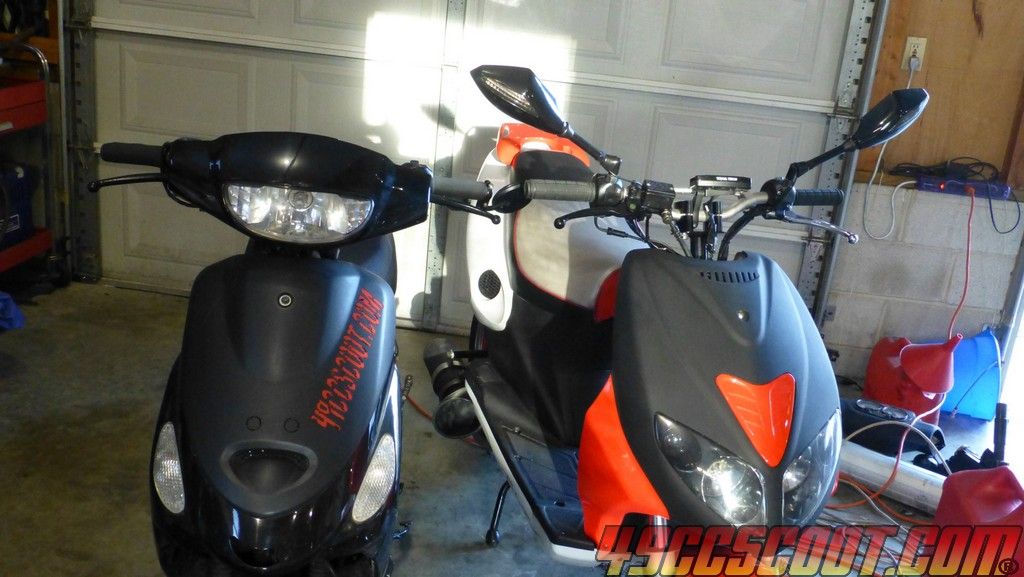   I like naked handlebars, plus it gets rid of the plastics that are falling apart on the TaoTao, as well as hopefully letting me keep the Vapor setup on the Roketa for something else. The first 2 pics below are the rear half of the hbar cover that has one section cracked and missing. The next two show the front half with a huge crack from one side to the center that's been patched with Gorilla Tape for a while now. The 2 after those show how much the Silverstar 55/60W H4 has melted the headlight housing as well as the hbar cover. It's a great bright headlight, so it was worth a little melting IMO. The last 2 are a couple of mounting points if bad shape on the front half of the cover. Long story short, these panels needed to go sooner or later.         The Roketa and the TaoTao have the same basic style of handlebar mounts. The Roketa's bar mount was too long and ran into the threads on the stem, not allowing it to sit low enough for the bolt to pass through. I ground about 1/8" off and then it fit fine.    While I was swapping things around, a screw stripped on the controls for the TaoTao. Luckily, I had M5 cap screws that took their place nicely so I shouldn't have to worry about that anymore.  They look too tall, but any lower and I won't be able to ride with my knees tucked in.    The bars aren't finished. I haven't hooked up any wiring and some will need to be sorted out for the change. I need to get a bar end mirror on there as well. I will have to figure out what I'm doing with the oil temp gauge that was mounted in the hbar cover. There doesn't appear to be any easy spot to panel mount it. If anyone knows a cheap but decent quality gauge pod and hbar mount (52mm gauge), that may be an option.  I also realized that I have a TTO temp gauge here. That may be a little easier to find a mount for. Downsides there being I'd need to buy a sensor and maybe an extension, though the extension from the Roketa should work if I remove that. Also it has no backlight, but I don't really pay much attention to oil temp anyway.  I also have no headlight or indicators for the TaoTao now. I ordered a 42W LED spot light like the one I use on T2. I wanted a good H4 housing to keep using the Silverstar, but most motorcycle housings are around 7" diameter and would look huge on the scooter. The LED spotlight is about 4.5". No idea where it's going to go. The Roketa is prob gonna be a real pain. The TaoTao's bars will fit, but I can't use the stock hbar cover and gauge with them as I planned. I'm not having any luck finding the right hbar for it. Please send me a link if anyone knows where to get 'em. It uses bars like a Vento Triton... but with a different mount style. I thought perhaps I had Triton bars around and I could cut and weld something that works, but no such luck. Welding mounts to the TaoTao bars to accommodate the Roketa's bar cover is also not an option. They're too low to work and I don't know that the bar bends will work either. I don't want to just put a stock speedo on naked stock bars as some do. I'd sooner keep the Vapor on it or buy a cheap Chinese universal gauge.  |
|
|
|
Post by 90GTVert on Apr 19, 2017 20:59:41 GMT -5
|
|
|
|
Post by spaz12 on Apr 19, 2017 22:04:21 GMT -5
That actually looks pretty good  |
|
|
|
Post by benji on Apr 19, 2017 22:16:13 GMT -5
I like it.
|
|
|
|
Post by 90GTVert on Apr 21, 2017 7:52:46 GMT -5
Well, that escalated quickly. 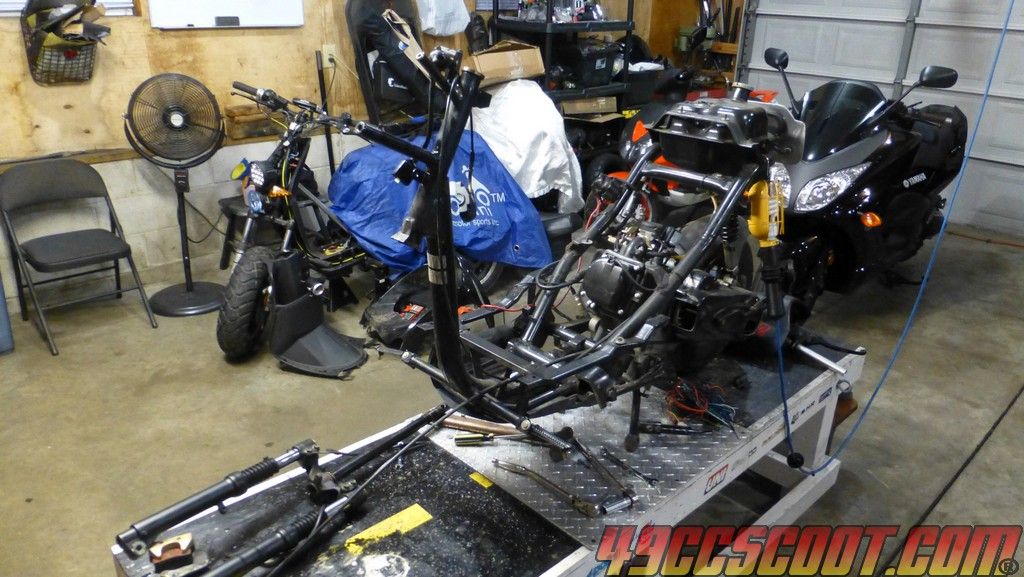 So I needed to wire the new headlight in and get the panels back on, but the wiring is a mess up front so I wanted to do something about that first. I took the harness out of the scoot so it was easier to work on.    I got rid of a couple of connectors that served no purpose, either from me removing something or perhaps the factory's effort to make a more "universal" harness. The one shown below has 9 wires, and it's only purpose on this scoot is to connect two of them with a loop. I got rid of all of those and soldered one looped wire into a junction where the other originated.  I don't go without fault in this mess either. Between the install of gauges and grip heaters, I used 2 relays and multiple tie-ins. The total load for both systems on relays is way under 40 amps and both use an ignition switched trigger and battery + to supply their accessories, so I went out this morning and picked up a 40A dual throw relay to replace the two single throw relays to consolidate more wiring and take up less space.  I will have to add some wires back in for different sensors and such, but I cut this much out of the harness. At least it's better than just adding on and adding on.  The wiring isn't finished, but when I was looking the scooter over I noticed some damage to the front brake hose.  The TaoTao is slow, but not slow enough that I want to have a surprise front brake failure one day. I'll have to see if I've got anything around that will work. While looking at that, I noticed how rusty the front steering bearing races were. I've noticed in the past, but the steering still felt smooth so I didn't pull the whole thing apart. It's this far apart, so I might as well. There was no grease at all... well, OK... I found 2 pin head sized dots of grease on the lower bearing. I used a wire brush and Scotchbrite pad to get rid of the worst of the rust. The top did at least have grease and wasn't all rusty. Both were stuffed with Mobil 1 synthetic grease and reinstalled.    I wanted to check the wheel bearings before the wheel and tire went back on. That went great as well. The bearings aren't noisy, but I can barely turn them. They'll be replaced before it goes back together. Not what I intended to get into, but obviously things that deserve attention. |
|
|
|
Post by 90GTVert on Apr 21, 2017 15:43:27 GMT -5
I lubed the cables while I was working on the TaoTao. I bought a new Motion Pro v3 luber that I came across when looking at TMAX stuff and got to try it for the first time. Liked it enough to make a how-to for it since I didn't see any others. I know you can get the traditional ones under $10 or use sandwich bags, but I think it was worth the sub-$20 for me because it's quick and easy. Here it is on amazon. amzn.to/2ouTW3x |
|
|
|
Post by 90GTVert on Apr 23, 2017 17:24:03 GMT -5
I did an oil change and swapped out the generic Chinese oil temp sender for a Trail Tech temp sender and mounted the TTO temp gauge on the top of the leg shield.    I got the wiring on the scoot all wrapped up with 1 less battery connection, 1 less relay, and quite a few less connectors. I removed the switch to turn the headlight on or off because the LED has only 1 setting so the high/low switch can work as an on/off switch. It's not great, but it is a definite improvement in wiring. There are so many connections in one small area that it would be difficult to make it clean.  I put a connector on the LED so it plugs into the stock connector.  I got everything installed and fired it up. All electronics seem to be working so at least I don't think I screwed anything up.  I cleaned the panels that I had off, and some of the frame, and the forks... so now the front of the scooter is very clean and the back is disgusting. In doing so, I've decided that these stock four-strokes are inhumane. I have to clean the TMAX and my helmet every time I ride that because of bugs. T2 is covered in bugs. The TaoTao hardly ever has bugs on it. The 2T and the big scoot kill bugs. The TaoTao must be leaving poor defenseless insects with broken wings and concussions. It just ain't right. I took the wheel bearings out. They were stubborn. I was using a slide-hammer puller and I beat the crap out of one side and it didn't budge. I ended up heating the wheel and it came out. I drove the second out with a punch.  Once the bearings were out, they moved. Not super free, but alright. I suspected from the start that there could be an issue with the spacer between the bearings, and the spacer showed damage on it's ends so I think that is indeed an issue. I need to start torquing these things instead of just using a ratchet and wrench.  |
|
|
|
Post by 90GTVert on May 11, 2017 18:41:10 GMT -5
I installed a new brake on the TaoTao today, because the old one wouldn't firm up with any amount of bleeding. It didn't seem like the master cylinder was working. I was ordering a brake for the 150cc Roketa and saw that the entire dual piston caliper with hose and master cylinder was only $40 shipped and the caliper looked like it should work on the TaoTao, so I couldn't resist. Here's the silver dual piston and the gold stock style single piston caliper.    The brackets had different bolt spacing to mount to the shock, but the spacing for the pins that the calipers ride on was the same on each bracket. The pins were different, so I swapped the pins for the dual piston onto the stock bracket. I did have to drill out one hole in the bracket because the dual piston used a D-shaped section that was larger than the threaded hole in the stock bracket. I didn't see any reason it had to be locked in with the D-shape, other than making the nut easier to tighten when installing the pin so I just drilled it larger instead of trying to reproduce the shape in the TaoTao's bracket.   The hose was too long to use on the TaoTao, so I had to swap that out. Otherwise, it all fit OK. I should note that the master cylinder could cause problems if you were using handlebar covers because the hose comes out of the bottom rather than the side and that may cause clearance trouble. It was a non-issue with naked bars.  I got a MityVac MV8000 vacuum bleeder a little over a week ago. I have heard good things about vacuum bleeders and I had 2 scooters with malfunctioning brakes, so I thought it would be worth a shot. I also need to bleed the brakes on the truck and haven't wanted to bug anyone to pump the pedal for me so this may help. Decided to try it on the TaoTao's new brake.   I thought it would be interesting since I had 2 of the same brake setups. I bled the Roketa's the usual way for me; pumping the lever then opening the bleeder to let air/fluid out and closing it while the lever is held, and repeating till the brake is firm. The TaoTao was done with the MityVac; attaching it to the bleeder, pumping it to create vacuum, and then opening the bleeder valve to draw air and fluid out, repeating till the brake is firm. The result? Both brakes feel identical, so I didn't achieve anything with the vacuum pump that I couldn't do with pumping the brake lever. I think it was a bit faster and less messy process with the pump though. I wrapped up the other things I had been messing with on the TaoTao as well and put it back together. Here it is with the naked bars, dual piston caliper, LED headlight, plus the new bearings and serviced bits of course. Oh, and I put on the new airbox to replace the hardened one that I used to test rubber softening methods. It runs, but I know it needs to be tuned. 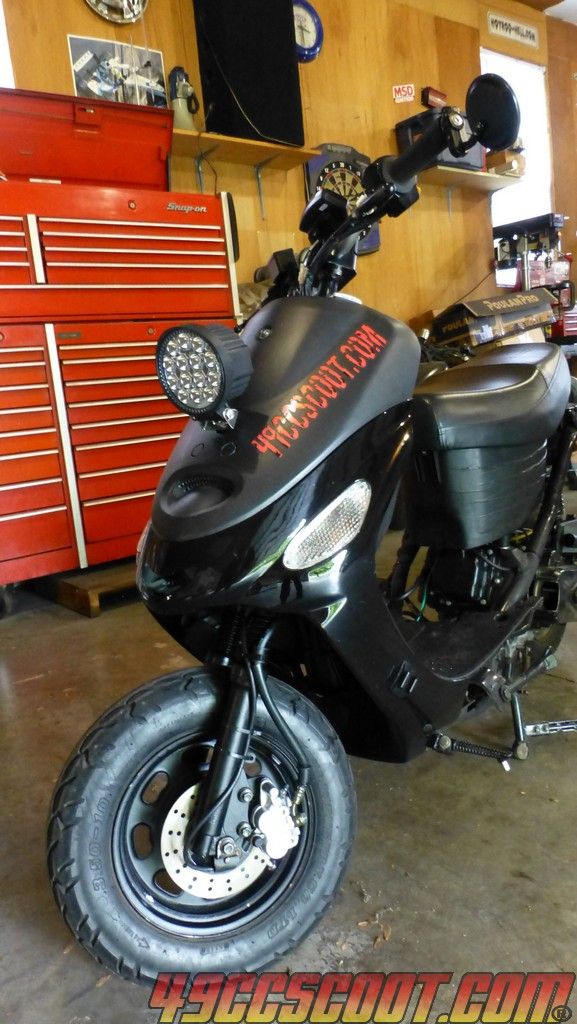 |
|
|
|
Post by 90GTVert on Jun 1, 2017 21:52:26 GMT -5
I got the TaoTao's carb in tune again today. The 85 main jet with the new airbox was makine it run 13.5-14.5:1 air/fuel ratio. I tried a 90 and that took it to 11-12:1. Moved to an 88 and it ran 12-13:1, so that's what I went with. I also adjusted the idle mixture and got it starting easily again. I rode it 25.0 miles. The first ride I've taken on this scoot for quite a while. The new front brake works well enough that I feel that wonderful sensation like the front and rear of the scooter are working toward meeting up whenever I use much brake. I forgot what that was like after riding the TMAX and the frame-braced T2. This thing feels so small, light, and flighty after riding the other scoots. It also feels incredibly slow. I feel like it can't be as quick to 30MPH as it should be. There was only about a 10MPH wind today, but that was enough that I saw that when I moved my foot off of the pegs going into the wind, my air/fuel ratio leaned a bit. It's an issue that has been ongoing with heavy winds. I'll try to make some sort of shield, but for now I tried to get a video of it. I've actually been trying for a while, but never got a good shot. Finally, the naked bars let me find a way to mount the GoPro. Looks like the frame rate of the video makes it harder to read than it should be, but it still may be of use if I ever do another update video.  |
|
|
|
Post by jhill15 on Jun 13, 2017 18:31:19 GMT -5
Not sure if this was asked, but do these wheels need balanced after installing the 90° valve stems?
Thanks man!
|
|