jonik
Scoot Member
 
Posts: 58
|
Post by jonik on Nov 3, 2013 14:09:55 GMT -5
Still the best pipe I've ever had  |
|
|
|
Post by waltinhawaii on Nov 11, 2013 0:14:36 GMT -5
Finally finished most of the welding today! 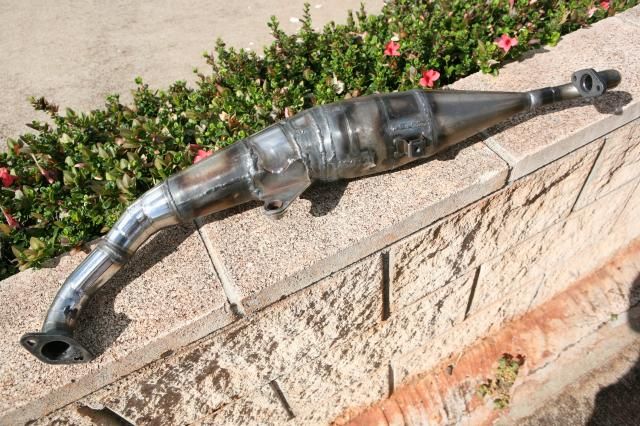 Most of the cones required some sort of adjustment. 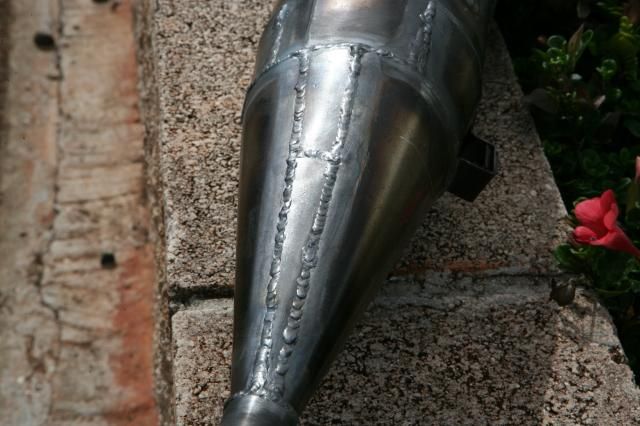 Probably should have just started from scratch as the welding really hurt my pride  Due to the lousy fit up between the parts, there were frequent large gaps between the sheetmetal, and TIG welding is very unforgiving of gaps. These gaps came from making all of the cuts by hand, but I don't have a way to make the cuts real straight. So, to fill the gaps, most of the welds had to be done 'colder' which gives the metal time to harden into the gaps and bridge them but gives the weld surface a gloppy look. This part was particularly difficult to do: 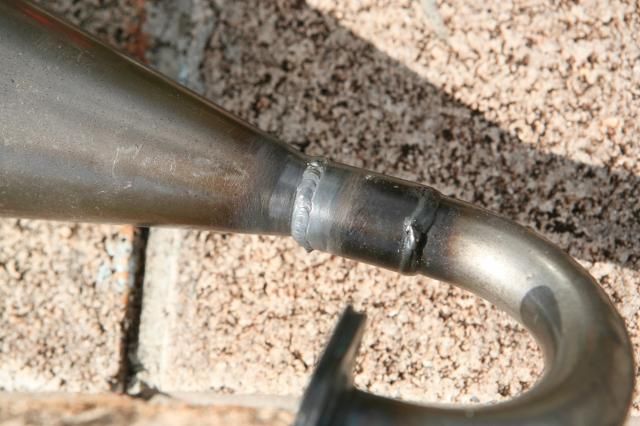 not the welding, but the 'collar' joining the cone to the tailpipe. It is not a straight collar; once I cut it off, I could see that the inside is actually tapered like the venturi of a carburetor; it came to a rather small constriction of about 14mm in stock form, which I guess works for a smaller cylinder, but I had to grind it out to make it into a larger passage in order to reduce backpressure for this size cylinder. My weld is on the left (TIG) and the factory weld is on the right (MIG), different processes. The MIG process is much, much faster and more cost effective for factory projection but generally seen as an inferior type of weld in critical usages as there is a higher probability of inclusions or voids inside the weld pass, although this is changing. today's MIG is very good as compared to a decade ago. This is how it sits now, viewed from the top: 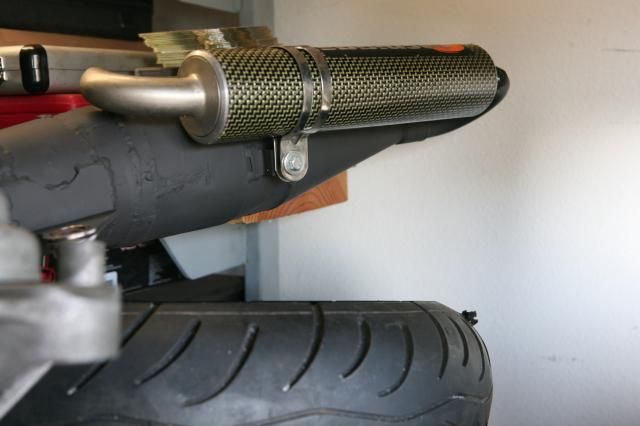 It looks like it is sticking out to the side too far; I may have to make a couple more cuts and reweld it closer to the rear tire after the center mount section to protect it in case the bike goes down on the lowside in a right turn. But until I get the engine back into the frame, I don't know how much I need to move it, so will just leave it like this for now. Next up: carb and intake work. I located a cheap used 28mm OKO carb, have to go pick it up. I have purchased a 26mm (new) knockoff from *bay but the quality doesn't look too good, so I probably won't use it. |
|
|
|
Post by 190mech on Nov 11, 2013 5:34:04 GMT -5
Nice looking pipe Walt!Welds look clean too..What is the ID of the tail pipe and muffler core?
|
|
|
|
Post by aeroxbud on Nov 11, 2013 7:23:54 GMT -5
Coming along nicely  |
|
|
|
Post by waltinhawaii on Nov 11, 2013 8:42:17 GMT -5
Thanks guys! Kinda rough, but hopefully will be fine. I didn't run a pressure test through it to test for pinhole leaks, but I did a visual inspection on the insides of almost all the welds and it looked fine. On a couple of the spots that looked iffy, I ran beads on the inside just to make sure there were no leaks. John, the collar insides were about 20mm. A little smaller than I wanted, but I think it'll do. Since the U pipe was about the same size, I figured it wouldn't do any good to make the collar any bigger. I didn't have any U shaped pipe that was a little bigger though. I could have made a pipe slightly bigger to what I wanted, but I had no way to make it into a smooth U shape, I don't have the bending mandrels. The muffler core is easily bigger than that, I didn't bother to measure it, just eyeballed it.
|
|
|
|
Post by 190mech on Nov 11, 2013 12:58:30 GMT -5
20mm oughta be OK..Ive used old lawn furniture,lawnmower handles,weight machines,etc out of the trash pile for fabbing smooth bend tail pipes,weld 2 ninety degree bends together and youve got a nice smooth tail pipe!!
Regards, "Rube"
|
|
|
|
Post by waltinhawaii on Nov 12, 2013 2:48:17 GMT -5
Yeah, should be ok but... after fabricating a bracket for it, the bracket fit just fine but I looked up one of John's pipe builds and his pipe was waaaaay closer to the rear wheel. It's heartbreaking to take a completed pipe apart, but it's in the wrong place, so: 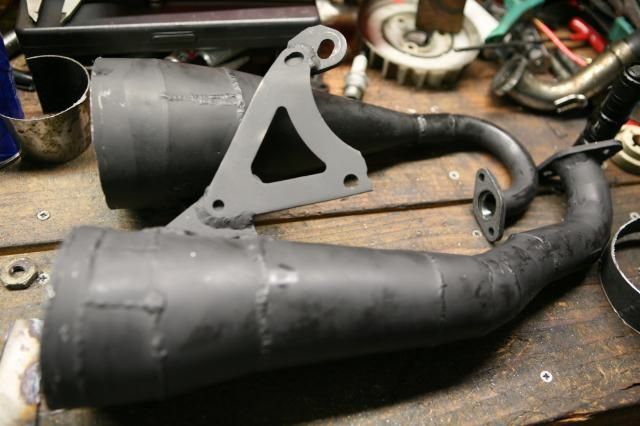 Giving things up gracefully is an art in itself. I never learned to do it. To make a pipe go in a different direction, the basic theory is to cut the pipe at HALF the angle you want it to bend. Then you rotate the pipe 180 degrees and weld it back together. On my pipe, I cannot rotate the pipe as I want the silencer section to be on top, not under the pipe; so I made 2 cuts and cut out a small collar on an angled bias, and now I can just rotate the collar instead of the whole pipe: 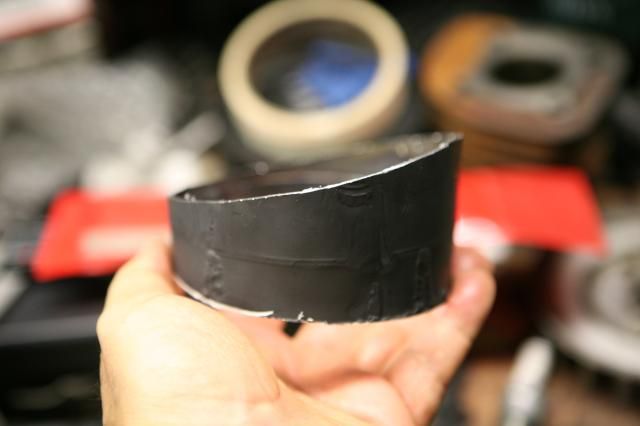 But it's getting late here so I have to knock off. I'll sand it tomorrow and hopefully be able to tack it back while in place and show you the way it will bend. Looking at the joints, though, I should have done this bend in 2 sections, not 1 as the joint is fairly acute. Making multiple collars would have made the bend more gentle but is a lot more work. The payoff is that gas travels inside the pipe with less turbulence around smoother bends. |
|
|
|
Post by waltinhawaii on Nov 13, 2013 2:17:34 GMT -5
All the pieces are tacked into place in about the way I want them: 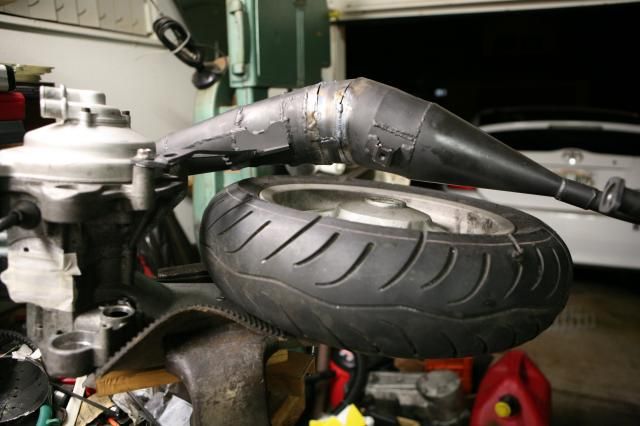 detail shot of the tacked portions; you can see I have left some pretty serious gaps between the pieces (the other side you can't see is even worse): 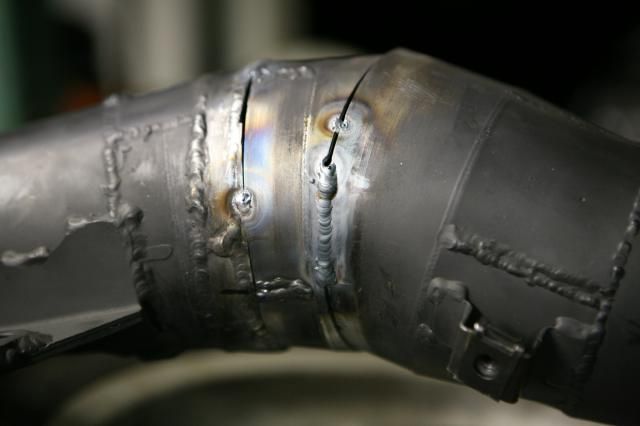 Welded up and the silencer attached. this is a shot to show the new clearance from the top: 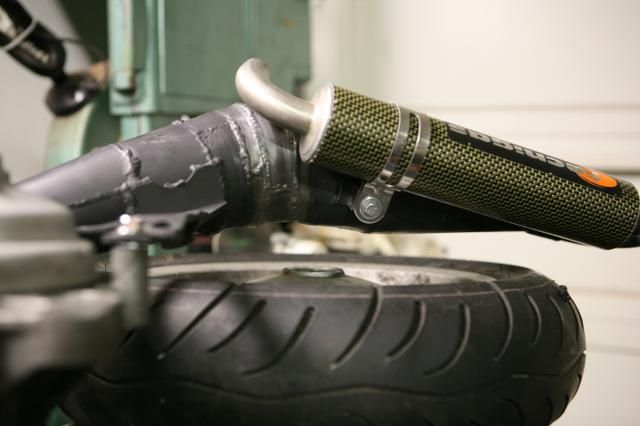 and clearance from the bottom: 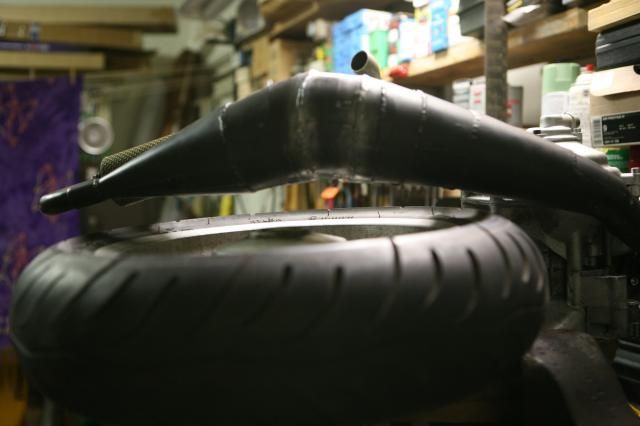 I'm still not completely happy with it, it has a sorta 'tented' shape in the middle. I should have made a bend nearer the part where it first comes close to the tire, then gone straight back from there and not put a bend in the middle at all. but, around that first part there is a large plate welded to it that is for the mount attachment, so I didn't want to put a bend in it right there, too complex. I re-used the mount section of the pipe complete with mount attached and didn't want to remove the mount. So, it'll have to do. |
|
|
|
Post by 190mech on Nov 13, 2013 5:25:45 GMT -5
The next one you build will fit like you want it!!  |
|
|
|
Post by aeroxbud on Nov 13, 2013 6:21:56 GMT -5
Don't be so hard on yourself. If pipe building was easy we would all be doing it! You have learnt so much building this pipe. If you build any more they should be a lot easier to do  |
|
|
|
Post by waltinhawaii on Nov 13, 2013 11:44:00 GMT -5
You guys got that right! next pipe will come in the mail I think  |
|
|
|
Post by ryan on Nov 13, 2013 22:21:00 GMT -5
cough xough...peace pipe???
|
|
|
|
Post by waltinhawaii on Nov 14, 2013 5:27:58 GMT -5
Hahahaha, probably right ryan! can anyone tell me if this thing will fit on my trans input shaft? www.partsforscooters.com/Clutch_pulley-gy6I know the clutch is a different size, but I'm looking at the torque driver. It's way bigger than the stock mina long item, in fact i don't think it will fit in my case, but I can cut them down to size in the lathe; they just have to fit on the shaft and be able to connect to the stock clutch pack. |
|
|
|
Post by ryan on Nov 14, 2013 6:32:30 GMT -5
just out of curiosity why do you want a gy6 clutch assembly? i have a whole TD clutch and bell here i believe if thats what your looking for.
also gy6 use a 107mm bell
|
|
|
|
Post by ryan on Nov 14, 2013 6:38:43 GMT -5
oh i see itw for a 125 so your looking for more OD like a overrange? dont waste your money buy a tgb rear pulley they are 124mm 4mm shy of malossi overrange and fit the minarelli belt and shaft etc
|
|