|
|
Post by moofus02 on Aug 27, 2013 14:28:01 GMT -5
Your sand drag buddy has something we aint got,,MONEY!!!  That's true he got the blue prints from gm he is using nascar heads and I don't remember what he said he had in that chunk of metal before he started whittling on it but the 15 year old price about gave me a heart attack lol. Even he said he couldn't afford to replace it today if he had to lol. Sent from my SPH-L720 using proboards |
|
|
|
Post by waltinhawaii on Aug 28, 2013 0:59:48 GMT -5
Not much time to work tonight. My small end needle bearing has not come in yet, so I figured I'd play with the porting just a little. the transfers are quite narrow... the walls are about .175" thick, although there is lots of variation in a casting this rough:  I juggled the numbers, but going to half that thickness looked too extreme, I doubt any gasket would thank me. So I settled on something fairly conservative, about .125" thickness. On goes the poor man's dykem, then layout the new border at .125": 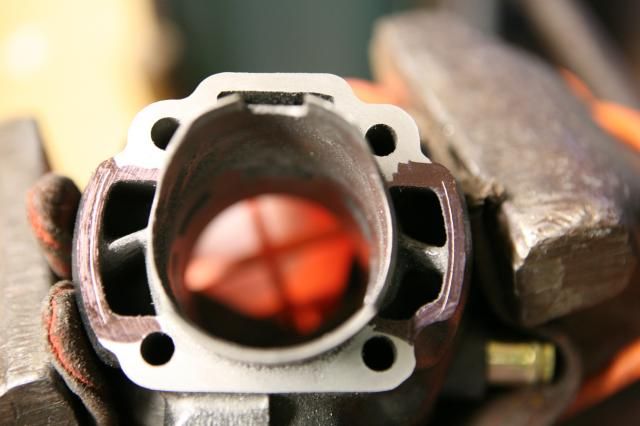 I just planned to clean up the transfers a bit and provide more room... yes, I know I'm not supposed to knife edge the 'dividing wedge' between the main and aux transfers. But, these passages are so small, and the wedges are rather fat; I know there will be disagreement here, as traditional wisdom says to leave the transfers alone... but I feel I need to take some off these wedges, there are a lot of big thick metal in these wedges and just not a lot of airspace. In something like the RSA transfers, there is so much volume they can shape the wedges any way they like; but in this poor cylinder, ease of production was the over riding concern and the transfer passages are tiny. I elect to thin the wedges just a little so there is a bit more volume in here. I found lots of big bumps and other stuff in here... wasn't able to finish, will have to pick up tomorrow. The left side has not been touched yet. Only the right side was messed with so far:  |
|
|
|
Post by 190mech on Aug 28, 2013 4:34:10 GMT -5
Lookin good Walt!I always try to cut as much of that 'oil pump divit' out of the right transfer as possible.Widening the openings toward the studs adds volume too.Hogging the outer walls out helps too.That all important inner radius is the big part missing on these cylinders!Here is a pic of one I was in the process of porting;  |
|
|
|
Post by 2strokd on Aug 28, 2013 9:08:55 GMT -5
Looking real good! That extra time really pays off in power if you get it all matched up well  I read about a scooter build like that. A guy made his own cases from a block of aluminum with great success. I have not the tools,(knowledge is learned for free) nor money for a block of aluminum. I think close to 20hp is obtainable out of a 80+cc Mina mill. L/Cooling just means you can push it harder and leaner depending on what the build is built for.? |
|
|
|
Post by waltinhawaii on Aug 28, 2013 11:19:35 GMT -5
Thanks guys. John, those transfers look great! About what I want to end up with. You're going closer to the edge than me, I drew my outsides at .125", you are definitely thinner (but not by much; think I'll go another 10 thou or so). I was wondering about moving the tunnels closer to the studs, but didn't want to change the direction of flow. I noticed you went lower, toward the exh, but not that much closer to the back of the cylinder (toward the intake)... probably worried about the same thing. Has anyone used any sort of viscous fluid (I thought of dye stained air or water?) to proof these things, to check the flow out of the port and possibly adjust the angle of departure right at the end? My transfers have really square exits into the cylinder, very rough. It will be a slow process to clean all that up and move the margins of the ports out.
Ryan, the liquid cooling was sorta something I wanted after reading John's build on his 103 and the difficulties he was running into with detonation after some heat soak. You guys have the benefit of really cool ambient temps; here in hawaii we run most of the time close to 90 degrees in the day, it will dip into the 70's at night, but even in winter you are looking at mid 80's during the day. I live on top a hill that is roughly 3 miles up, so there will be plenty of opportunity for knock if I don't do the LC.
|
|
|
|
Post by 2strokd on Aug 28, 2013 13:42:59 GMT -5
Thanks guys. John, those transfers look great! About what I want to end up with. You're going closer to the edge than me, I drew my outsides at .125", you are definitely thinner (but not by much; think I'll go another 10 thou or so). I was wondering about moving the tunnels closer to the studs, but didn't want to change the direction of flow. I noticed you went lower, toward the exh, but not that much closer to the back of the cylinder (toward the intake)... probably worried about the same thing. Has anyone used any sort of viscous fluid (I thought of dye stained air or water?) to proof these things, to check the flow out of the port and possibly adjust the angle of departure right at the end? My transfers have really square exits into the cylinder, very rough. It will be a slow process to clean all that up and move the margins of the ports out. Ryan, the liquid cooling was sorta something I wanted after reading John's build on his 103 and the difficulties he was running into with detonation after some heat soak. You guys have the benefit of really cool ambient temps; here in hawaii we run most of the time close to 90 degrees in the day, it will dip into the 70's at night, but even in winter you are looking at mid 80's during the day. I live on top a hill that is roughly 3 miles up, so there will be plenty of opportunity for knock if I don't do the LC. Its 2strokd, and good choice going L/C.. Good idea staining the flow, might work?.. Ive held my cylinders under the faucet and let the water pour directly into the trans tunnels as i watch the output flow into the cylinder. It gives a good idea as to how it will flow the mix. I can say ive noticed a big difference in flow direction, twist in flow, etc with very minor tunnel changes. Its a skill porting 2T,s extensively for sure! I dream to be good at it someday lol |
|
|
|
Post by 190mech on Aug 28, 2013 20:26:37 GMT -5
The 'A' transfers were moved toward the Ex to point it back toward the 'B' and 'C' transfers for hopefully better scavaging. There is a Yamaha SAE paper(1999-01-3333) which has some good transfer port info.(I tried to download it here for evertbody but the proboards has a tiny limit!) Port roof angles should be around 25('A' port),8('B' port),55('C' port)for a modern cylinder setup.. Yep,Ive used a water hose to see whats flowing where many times.. LC is the only way to go if you want serious HP!!  |
|
|
|
Post by waltinhawaii on Aug 29, 2013 1:46:30 GMT -5
Wow, grindin' away on the left side... this is gonna take awhile. A LOT of metal is coming out here! Here I've taken the outsides out to the same as the right side, .125" thickness. I think I will go down to near .110" and see what happens. The long carbide bit (round tip) still does not fit all the way to the bottom of the transfers, the passageway is too skinny. It will have to be opened up a bit more to have it free to the bottom and give it a nice gentle sweep into the cylinder. 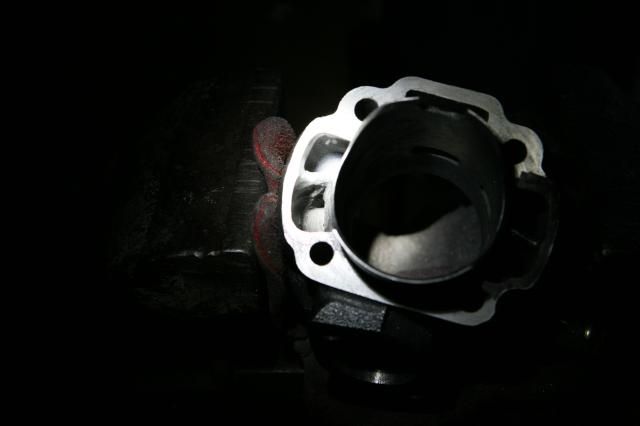 |
|
|
|
Post by waltinhawaii on Aug 30, 2013 0:08:16 GMT -5
This wedge divider between the main and aux transfers is THICK. It is nearly impossible to get into the corners of the wedge on the 'pinched' side... the wedge splits the upper and lower tunnels at an angle, so that the air stream is canted when it enters the cylinder, aimed at the back wall. So each side of the wedge has an 'easy' joint that is greater than 90 degrees, and a 'pinched' joint where the angle it joins to the wall is less than 90 degrees. The carbide tools are far too fat to fit in the 'pinched' corner. Also, the wedge gets thicker as you go farther into the tunnel. It's not just a piece of sheetmetal. But making progress, slowly... just about able to get to the bottom of the tunnel, you can see the metal is bright where I'm blending it into the arch to get into the cylinder (working on the left side today): 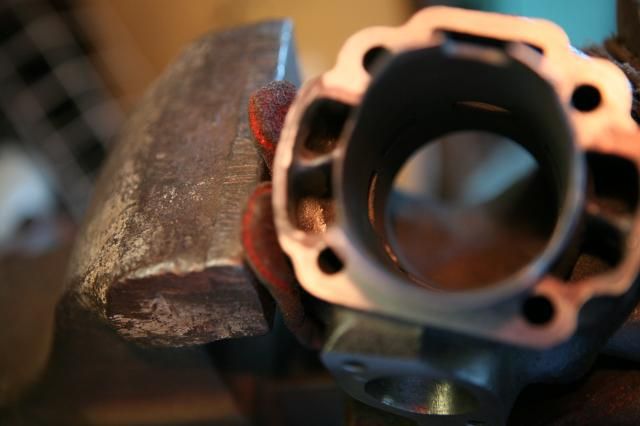 |
|
|
|
Post by waltinhawaii on Aug 30, 2013 22:28:03 GMT -5
Sorry for the crappy pics. It's always night by the time I can do any work on this thing... but today was a half day, so got to take some pics in the sun: 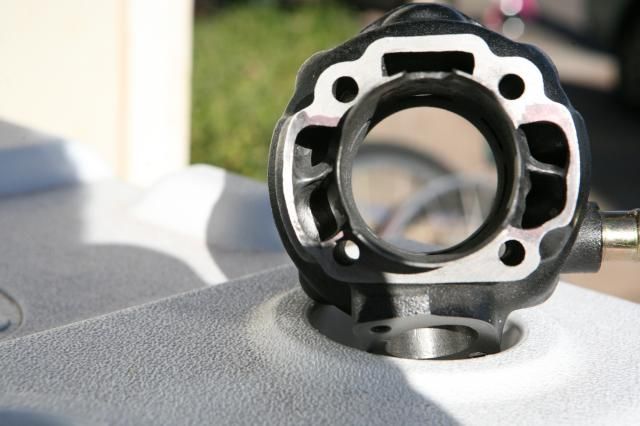 Left side is pretty close, right side has just started... |
|
|
|
Post by 190mech on Aug 31, 2013 5:07:31 GMT -5
Looking good!Hopefully the pin bearing will arrive soon so you can degree it,then finish it up!!
|
|
|
|
Post by waltinhawaii on Aug 31, 2013 13:02:13 GMT -5
Yeah, I been watching the mail but no wristpin bearing yet... I dyed the transfer ports where they came out into the cylinder, then put the piston into the cylinder and adjusted the height of the cylinder by putting a wooden block under the piston and shimmed the piston until it sat the same height as the transfers. Without the wristpin, I cannot set it inside the cases yet; but I used a scribe around the piston crown to give me the same height all around the cylinder. Right side: 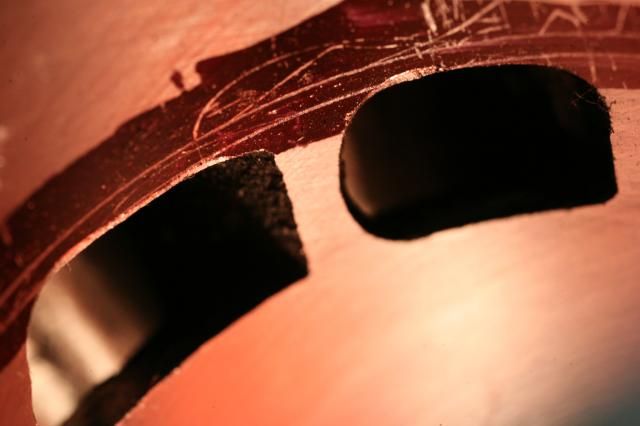 Left side: 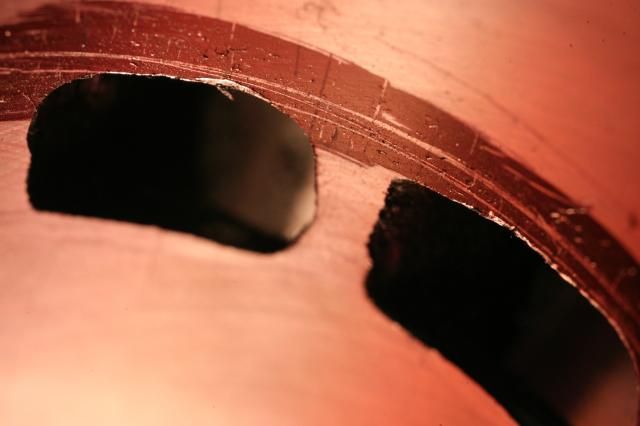 Hmm, the right side is pretty even, the aux seems to be a tad late. The left side... will need some work. Sigh. The main is very late and the aux seems to have a slight bulge that is early. I have not chamfered these yet, of course. The first line up high was due to my dimming eyesight, set with a flashlight shining into the chamfers from below and is way too advanced. The piston was reset with a slightly lower shimstack and the 2nd line, right on the money, was drawn. |
|
|
|
Post by waltinhawaii on Aug 31, 2013 13:26:48 GMT -5
setting the transfer opening time is vital to getting a pipe working properly. There has been talk about blowdown pressures, but that is purely a function of the differential in opening times between the exh and transfers. But making sure your transfers open at the same time will ensure your gas streams are even (the direction also matters a lot). I also need to do this same process with the sub exh ports and main exh; this is even more critical to power as uneven opening times on the exh side will kill the pulse strength coming from the expansion chamber. The main thing to take away from all this is that you need about $2 in supplies (a sharpie pen, a scratch awl and a small wooden block and some shims aka scrap from your garage) to do this process. It makes a huge difference in power, mostly under the power peak, yet I don't see many tuners doing it, they just depend on what the manufacturer gives them and hope it is in the ballpark. It might be... or not. Either way, there is no black magic involved (yet) and you don't have to sacrifice anything except a bit of your time. In my transfers I found quite large globs which had to be smoothed out. You can see the ports themselves are fairly irregular, I thought they were different sized from left to right. DON'T guess. Measure them with calipers if you adjust sizes to get them the same. Try not to change the direction of flow unless you are doing it deliberately. Old tech has the transfers firing toward the back wall, away from the exh to stop short circuiting. Newer designs aim the transfers away from the exh port, but not as high as before, aimed somewhere on the back 2/3 of the piston crown, and not nearly as angled up toward the cyl head as before. This is using inertial stall. Combined with flatter piston crowns, the streams coming from left and right collide, and nearly stop. It takes immense energy to get the gas moving again, and they are depending on this stall to keep the cylinder full as increasing pressure pushes the gas up slowly, within the timing limits imposed by exh port size and crank movement. This is where pipe design has truly changed the game (and where I left off studying 2 stroke development). Looking forward to building my first pipe in decades.... but I don't have a slip roller  They don't cost that much, but.... I chickenedd out and bought a technigas (used) real cheap.... for a honda based machine. I only needed the cones and header, will fabricate everything else I need. |
|
|
|
Post by waltinhawaii on Aug 31, 2013 13:54:00 GMT -5
Okay, evened out the left side ports... 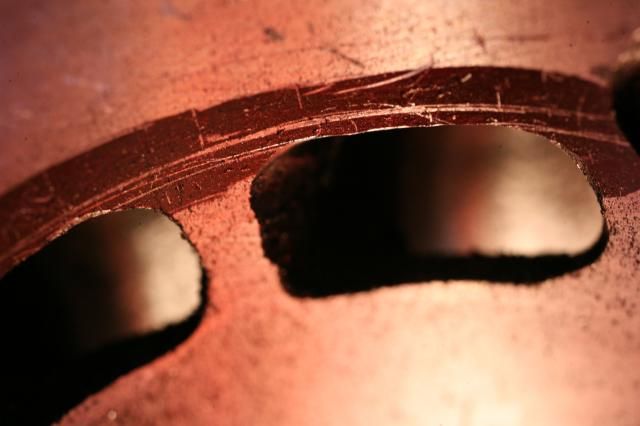 I won't bother with the exh subs/main yet, as this will probably have to be adjusted anyway when I get the timing specs, so may as well do that same time. |
|
|
|
Post by waltinhawaii on Aug 31, 2013 15:37:05 GMT -5
hmm, the edge of that main was pretty rough... smoothed it out a bit: 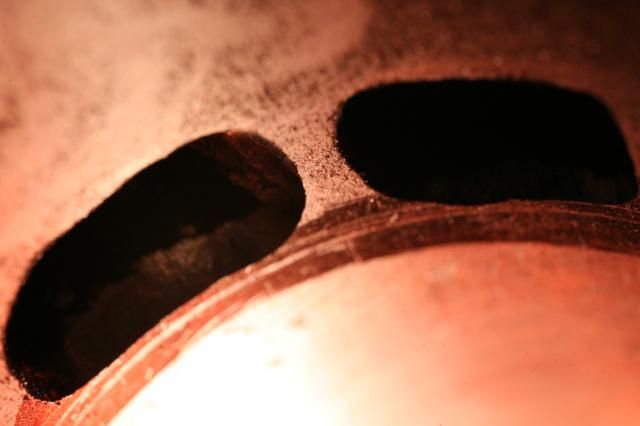 Note that this is the same 2 ports in the previous pic, but turned upside down for easier access. The porting tool only spins one way, and does not like to cut on the left side of the spindle, it bounces more; so I usually turn the cylinder to use the right side of the tool. You can up the speed of the tool and hope the bouncing/resonance goes away (and it probably will) but at those kinds of cutting speeds, any little slip or bounce will result in a large cut that you cannot undo. |
|