|
|
Post by 190mech on Aug 31, 2013 16:23:53 GMT -5
Thanks Walt for the detailed write up on how important port work is!Many young tuners are what we call "credit card racers",they keep buying parts in hope of getting more power when they could get just as much from stock carefully prepared stuff!!  John |
|
|
|
Post by waltinhawaii on Aug 31, 2013 17:17:16 GMT -5
Just sharing a couple tricks, when I was younger I wish there had been a site like this one. The mentality back then was to hide the insides of your engine no matter what. Even the speed shops were reluctant to tell you anything, and aside from what they had to show during tech inspection prior to a race, everything was a closely guarded secret. I can understand the profit motive, but it always rankled me. Yeah, nice to win in a race. But I always thought racing was a test of skill AND mechanical prep. That's why I never got into straight line stuff; it wasn't as much of a test (in my humble opinion) as scraping your knees in the corners.
My wristpin cage came in a few minutes ago! Will post some pics in a few...
I don't have a degree wheel and I'm too cheap to buy the summit racing one. I printed the one off this website's resources section and trying to find something suitably stiff (ha, that's what she said) to make the wheel out of.
|
|
|
|
Post by waltinhawaii on Aug 31, 2013 18:03:30 GMT -5
The new wristpin, sitting on the new crank (43.5mm) 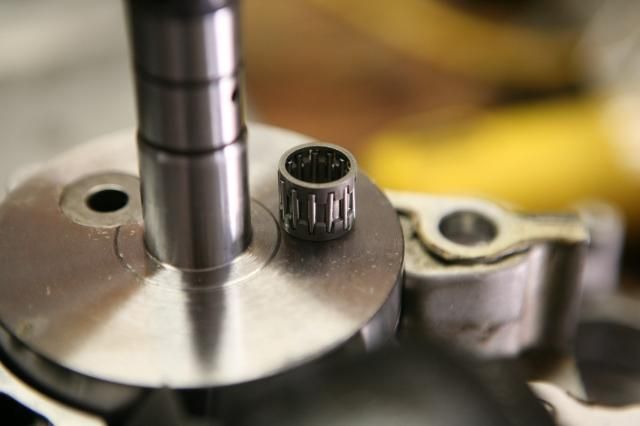 Crank to case clearance looks excellent. No binding. 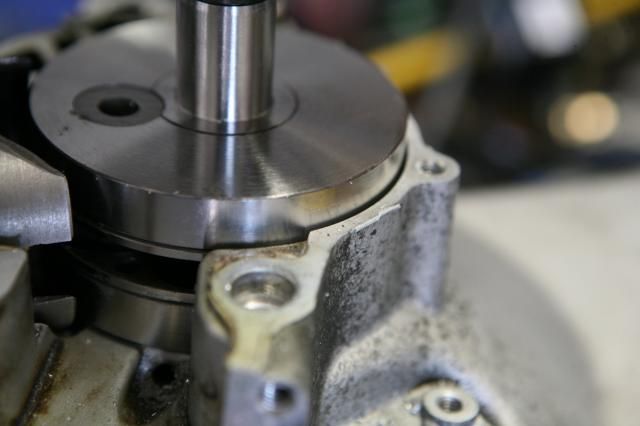 Trial fit of cylinder (first time!) onto case. had to fabricate a couple of spacers to hold the cylinder in place using the original short studs. 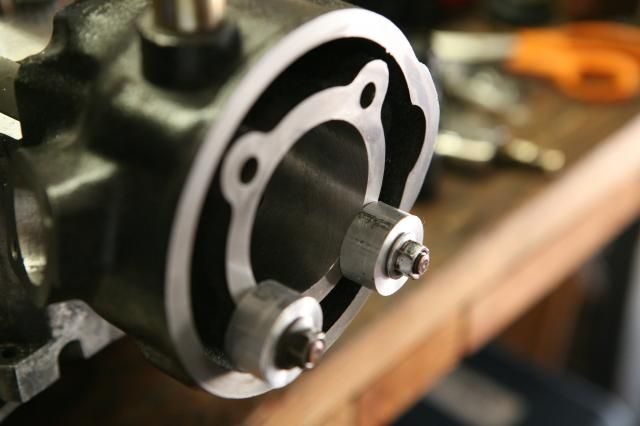 At this point, I tried to go through 360 degree revolution and found that I had not installed the piston. Oh. It goes on BEFORE you put the cylinder on?? the stud spacers I had made are a little too fat, and the piston hit the studs just before TDC. Had to take them off and grind off a bit of one corner so they would allow the piston to come all the way up: Here the piston is at TDC with no base gasket, the distance to the deck is about .25 mm under being even. 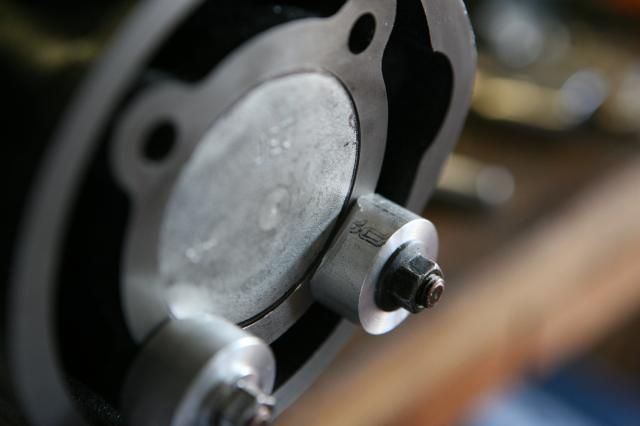 |
|
|
|
Post by 190mech on Aug 31, 2013 19:17:20 GMT -5
Yeah,2 stroke tuning was a "black art" years ago!Since then many top tuners have opened up 'pandoras box' to show us the hard earned tricks they worked many years to to get their machines to the winners circle year after year!Its still a bit of a chore to dig up the million little details of the stupid simple 2T engine and even then a slightly wrong detail will result in loss of top power or even engine failure,,Gotta love it!!!
|
|
|
|
Post by waltinhawaii on Aug 31, 2013 20:29:57 GMT -5
OK, found a plastic 3 ring binder from my son's school (I explained the important contribution he was making to the cause and that his teacher would agree it was important to social studies) and cut out a big circle from it, then glued on the degree wheel printed off this site. With "0" at TDC, the exh port opens at 89 degrees, then the transfers open at 114 degrees... so assuming my math is correct, that's
exhaust duration: 182 degrees
transfer duration: 132 degrees
Appears my transfers are right on (this is not stock, I did move them very slightly higher to smooth them out and get them even with each other), but I need a touch more on the exhaust, I want to try for something in the low 190's.
|
|
|
|
Post by waltinhawaii on Aug 31, 2013 20:48:49 GMT -5
"But dad, my folder has a big hole in it" "son, no one gets out alive" 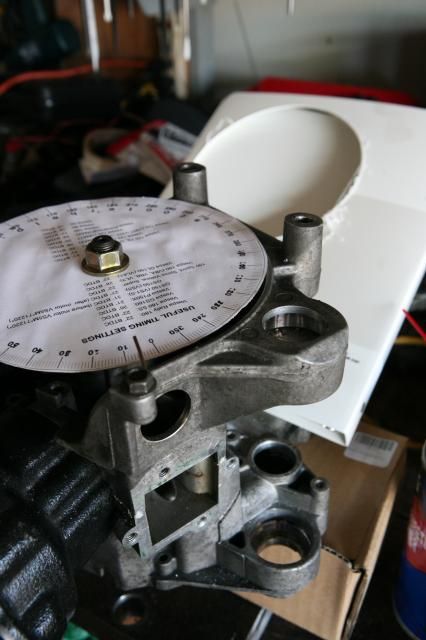 |
|
|
|
Post by waltinhawaii on Aug 31, 2013 22:46:14 GMT -5
BDC doesn't look good: 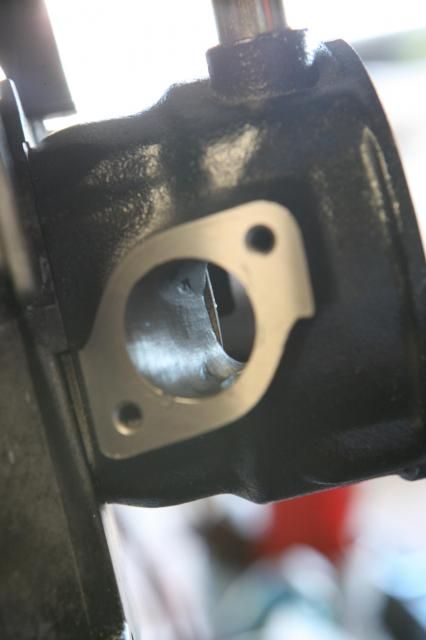 Keep in mind this is with no base gasket. With a base gasket, the transfer times will be rather high. But at BDC the piston doesn't quite clear the exh port. So, my choices are to add a base gasket and see how the really high transfer times do; or run it like this with just silicon or something similar on the bottom. From the inside it doesn't look too bad, but you can tell the transfers are the same as the exh, the piston doesn't quite clear at BDC: 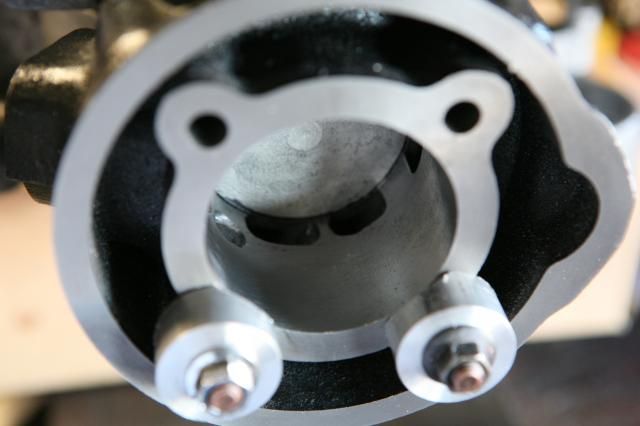 |
|
|
|
Post by 190mech on Sept 1, 2013 2:03:50 GMT -5
The piston 'should' be even with the transfers at BDC to aid in piston crown cooling as the fresh mixture streams from the transfer ports,but I dont see an easy solution here!
|
|
|
|
Post by PIG on Sept 1, 2013 3:14:37 GMT -5
Thanks Walt for the detailed write up on how important port work is!Many young tuners are what we call "credit card racers",they keep buying parts in hope of getting more power when they could get just as much from stock carefully prepared stuff!!  John Hahahaha! Thats probably the best post I've read since I got into scoot tuning! I'm a credit card racer lol. |
|
|
|
Post by 190mech on Sept 1, 2013 4:45:44 GMT -5
"Credit card racers" is a common term used in all forms of motorsports,it was "check book racers" before that!!
|
|
|
|
Post by 190mech on Sept 1, 2013 5:44:36 GMT -5
Walt, I have an idea,kinda a long way around the block,but,saw this trick on KiwiBiker,shim jug up to where Transfers are even with the top of the piston at BDC,check timing,adjust piston to 130-132 degrees duration,lightly scribe bore at top of piston,fab up a snug fitting sleeve(they used a piece of PVC),slide sleeve from top of bore to match the scribed line,with jug upside down,carefully apply Devcon F to the Transfers till they are level,(note;they did 1 port at the time with the jug canted to the proper exit angle),and now you have a smooth exit at the proper angle and timing... John I dug around over at Kiwi and found the pics;    |
|
|
|
Post by moofus02 on Sept 1, 2013 8:55:16 GMT -5
So much to learn. This thread is a wealth of knowledge so much to learn Thanks to all those that have contributed
Sent from my SPH-L720 using proboards
|
|
|
|
Post by waltinhawaii on Sept 1, 2013 12:35:33 GMT -5
Thanks for the suggestion, John! That's a neat way around it. Call me old, but I have never trusted the epoxy glues in fired environments. I know they work, as many engines do run fine with them; but its kinda like seeing antigravity for the first time; ya just don't believe it's true. I'm still mulling it over, it's a pretty significant problem.
|
|
|
|
Post by waltinhawaii on Sept 1, 2013 13:38:34 GMT -5
OK, there were some questions on how I got the transfer and exh port duration times just by measuring the opening of the port time only. If you plan to do this a lot, you should get one of these: 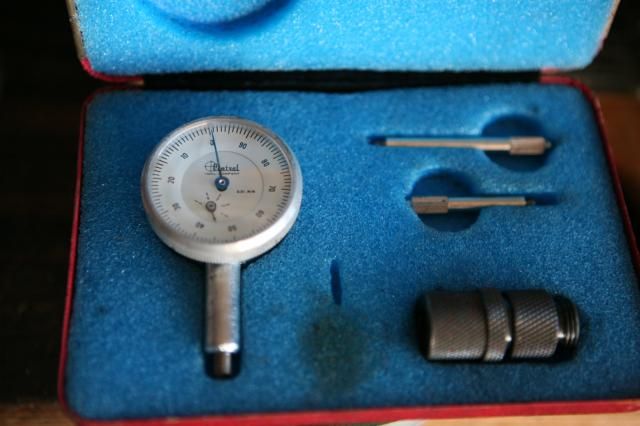 This is a dial gauge, you screw in one of the feelers on the upper right, then you take the holder (black thing in the right lower) and screw the holder into the spark plug hole in the head. The gauge can then be inserted into the holder, there is an O ring on the inside of the holder that will hold the gauge snugly. Then you rotate the engine by hand slowly until the piston comes up and it will reach the feeler and start to make the needle move, then when it reaches top dead center it will reverse and start to go down again. The gauge will feel the piston as it comes up and the dial will move to show you how high it is getting; when the piston reverses direction, the needle will stop and move the other way. This is what you want; you stop the engine rotation just as the needle reverses direction, so you know where TDC is. This gauge is very accurate and can place TDC within a few minutes of angle. You can also calculate the position of TDC without the gauge by using a piston stop, kinda like the fat spacers I have bolted to the studs in my pictures above. The piston stop hits the top of the piston and the flywheel or crank comes to a very abrupt stop as the piston cannot go any farther. where the piston stops is arbitrary and depends on your piston stop. It does not show you where TDC is, exactly. But you can calculate it. The key is that your engine, any 2 stroke engine, is symmetrical. If you begin at TDC, top dead center, the piston goes down and UNcovers the exhaust port about halfway down, roughly at 90 degrees. When it reaches BDC, bottom dead center, it is at 180 degrees, or half of one full rotation. Then it starts to go up the other side and roughly halfway up, it COVERS the exh port, near 270 degrees. The port is UNcovered at 1/4 of a rotation, then COVERED at 3/4 of a rotation. The two actions are opposite, but if you ignore WHAT they are doing and only concern yourself with WHERE they are happening, you will see it's really the same action, just with opposite signs in front of them (a + on one and a - on the other). You will also see that they occur at EXACTLY the same point, just on the other side of the crank cycle. So, if you think of a circle with a line through it, top to bottom, sorta like a ghostbusters sign, the circle represents your complete cycle, one crank rotation through 360 degrees. The top where the line meets the circle is TDC, the bottom is BDC. Beginning with clockwise movement at TDC; about 1/4 way around your circle on the right you have exh port open at near 90 degrees. and exh port closing on the other side at 270. You will notice you can fold the image along the line and the two events, open and close, will be mirror images of each other across the line. No matter what you do to the ports, make then open earlier or later, this symmetry always holds true; the events always remain symmetrical around the centerline. This is why disc induction was invented, it allow the intake period to NOT be symmetrical. For reed engines like ours, if you can find the axis of symmetry, you don't need to know where TDC or BDC is, you just need to measure where the port opens in order to find TDC. That is what a piston stop does. You check where it stops when turning the crank one way; then you turn the crank all the way around the other way and note where it stops on THAT side. Now you have 2 numbers and these will give you the location of your axis of symmetry. doing it is not hard, you don't need math; you can simply place the engine at or near TDC with the degree wheel near 0 and use your piston stop to get your 2 numbers. They should be an equal number of degrees away from 0... but keep in mind they are approaching 0 from one direction on one side and on the other, 360 (not 0). It is the DIFFERENCE that matters, that is the distance to the zero or 360 mark. For our purposes, this does not matter because we don't need extreme accuracy. In fact, even though I have these tools, I didn't bother to use them. I just eyeballed it, which is what most of you can do. What you are after is PORT DURATION. So, you don't have to calculate and you don't have to set the wheel at TDC with a high degree of precision. Just bolt the damn thing on near TDC, close as you can get it. You rotate the crank until you see the piston uncover the exh port; make a little mark on your wheel at some convenient point, you can just draw a little tick mark on your crankcase with a marker; I made a little wire pointer and cranked it into a hole, but a sharpie mark anywhere on the case next to the wheel would be just as good; 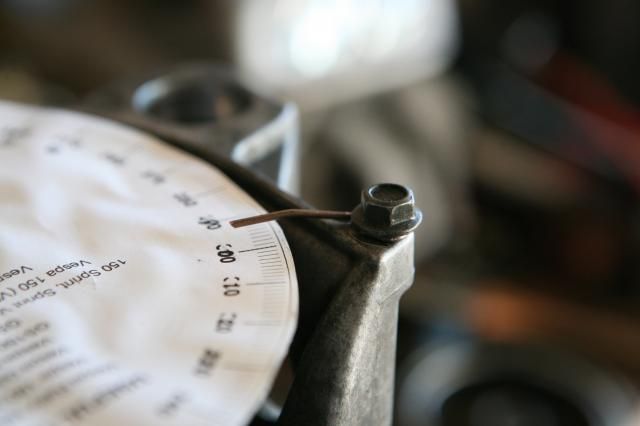 This doesn't have to be at zero or any particular number, just remember where the port begins to open and mark it. You continue rotating until the piston comes up and CLOSES the port again; you stop and make a 2nd mark on your wheel. Now, just count how many degrees are between your 2 marks and you have your port duration. Simple. |
|
|
|
Post by waltinhawaii on Sept 1, 2013 14:15:36 GMT -5
Degree wheels are laid out in all kinds of ways. Some, like the one on our site that I used, count as you go in a clockwise direction. So, using our wheel, I had to rotate COUNTERclockwise to have the numbers increase instead of decrease. My transfers opened at 114 degrees. What I want is the duration time. So, 180 - 114 = 66. This is for half a rotation, up to the 180 degree line, but since they are symmetrical; 66 * 2 = 132, the degrees of port duration.
|
|