|
|
Post by 90GTVert on Jan 11, 2010 22:35:47 GMT -5
I have that exact tool. Haven't got to try installing a crank with it yet.
|
|
|
|
Post by 2strokd on Jan 12, 2010 8:45:38 GMT -5
Hey, thats cool J  . Better safe than sorry. Just means more practice ;D. Did the bearings get messed up? |
|
|
|
Post by Enviromoto on Jan 12, 2010 10:23:18 GMT -5
Well I dont think so but the crank and bearing was installed in the small half and after I got done trying to get the two halves together it had a little side to side play in it. So instead of putting it together with a big maybe I just pulled it all apart to be sure.
|
|
|
|
Post by shiftless on Jan 12, 2010 11:10:54 GMT -5
|
|
|
|
Post by Enviromoto on Jan 21, 2010 13:51:54 GMT -5
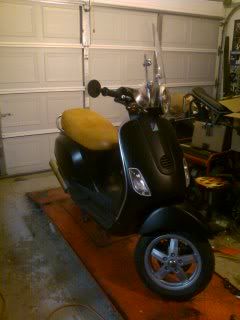
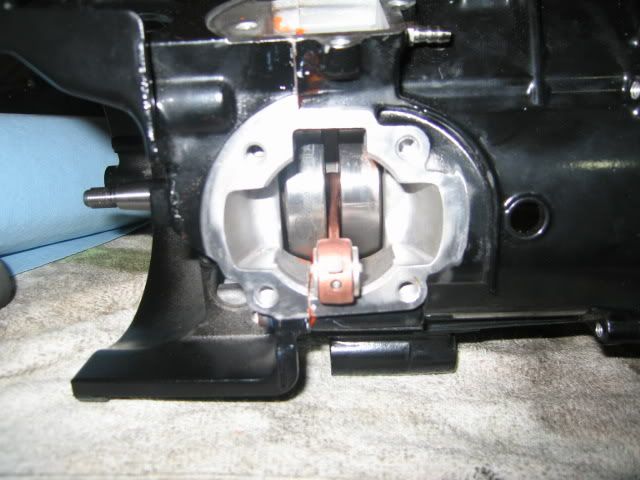
First I apologize for my absence. Ive been waiting on parts and finishing up a customers Vespa LX 150. Just a simple disassemble, reassemble but with fresh paint you take your time and get it right. The customer is a pin striper and she is going over the satin black with red and creme pinstripe and possibly new whitewall tires. Sorry for the crappy cell phone picture but you get the jist.  However I did get my new bearings in and Im still having a bear of a time. Step 1. Heated oven to 250 and heated both carters for 20 mins. Step 2. Removed bearing from freezer and installed it into the small carter (the right way this time) and all appears to be well. Step 3. Tried to install bearing into large carter and it acted like it didnt want to go. So I quickly removed the bearing and started over. Step 4. Turned oven up to 350 and put large carter in the oven for 30 mins. Hot little sucker when I tried to put the cold (not frozen anymore) bearing in the carter but still didnt seem like it wanted to go in so I aborted. Success! I got the bearing in with no problem just needed a little more time in the oven at 350 25 mins and froze the bearing overnight and it fell right in. The Tusk crank installer worked like a charm and everything went right together as it should. Glad to get over this little hump in the road and on to assembly of the rest of the engine tomorrow and quite possibly get everything put together by Monday if things go ok. Fingers crossed, knocks on wood.  |
|
|
|
Post by 90GTVert on Jan 21, 2010 16:19:41 GMT -5
Good work and thanks again for the install details!
|
|
|
|
Post by Enviromoto on Jan 21, 2010 19:02:47 GMT -5
No problem lots more to come. I would have done a writeup on how to put the cases together but since it was giving me a hard time and took both hands I didnt want to reach for a camera. Im sure you understand  |
|
|
|
Post by 90GTVert on Jan 21, 2010 19:09:53 GMT -5
Definitely. Taking enough pics for a howto slows you to a halt.
|
|
|
|
Post by 2strokd on Jan 21, 2010 20:14:52 GMT -5
Very nice Doc!
Black case is sweet! What is the fitting in the big case half?
Below the intake....
lol, ive asked this on three forums..
Pete-n-Repete were on a boat, Pete fell off........lol
|
|
|
|
Post by shiftless on Jan 21, 2010 22:22:05 GMT -5
Busy man lately eh ? Good job on the Wasp Your engine is lookin killer Like 2t I'm curious about the fitting  |
|
|
|
Post by Enviromoto on Jan 22, 2010 0:04:49 GMT -5
The fitting is to run my mikuni vacuum fuel pump. The intake manifold dosent have enough power to run it for this motor so I drilled and tapped the case.
Test fitment on the top end is done. Any easy ways to install the hanger mount?
|
|
|
|
Post by shiftless on Jan 22, 2010 0:41:50 GMT -5
Thought it had sumthin to do with the low tank Just slide the mount through 1 side put both circlips on & work it till its through the other side... get it close to where it needs to be... hang the engine, then set the clips ez  |
|
|
|
Post by Enviromoto on Jan 22, 2010 19:59:01 GMT -5
Your right it was super easy. I had to hammer the damn thing out so I figured it would be a bear to install.
|
|
|
|
Post by Enviromoto on Jan 24, 2010 22:57:14 GMT -5
|
|
|
|
Post by 90GTVert on Jan 25, 2010 8:26:39 GMT -5
Lookin great man! You need an artic camo silencer or something out back too. ;D
|
|